- VMware
- 02 September 2022 at 11:50 UTC
-


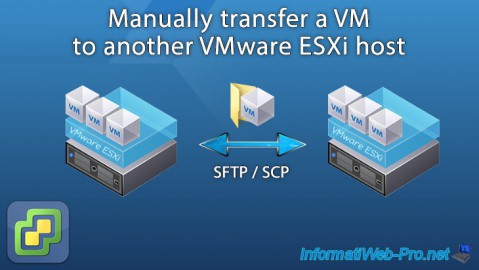
To transfer a virtual machine from one VMware ESXi server to another, you have several options :
- export it in OVF format from its web interface to import it on the other VMware ESXi server.
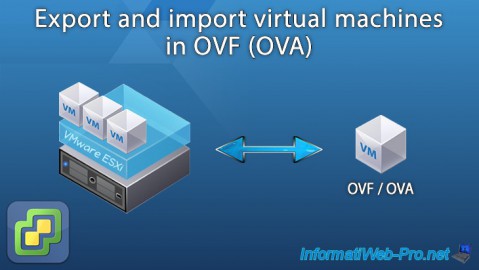
To do this, refer to our "VMware ESXi 7.0 / 6.7 - Export and import VMs" tutorial. - transfer it using the SCP or SFTP protocol using third-party software (as you will see in this tutorial)
- move it from one VMware ESXi server to another IF they are connected to the same VMware vCenter Server
- Enable SSH protocol on VMware ESXi hosts
- Connect to the source VMware ESXi server
- Connect to the destination VMware ESXi server
- Copy a virtual machine from one VMware ESXi server to another
- Register the virtual machine on the destination server
- Start the transferred virtual machine
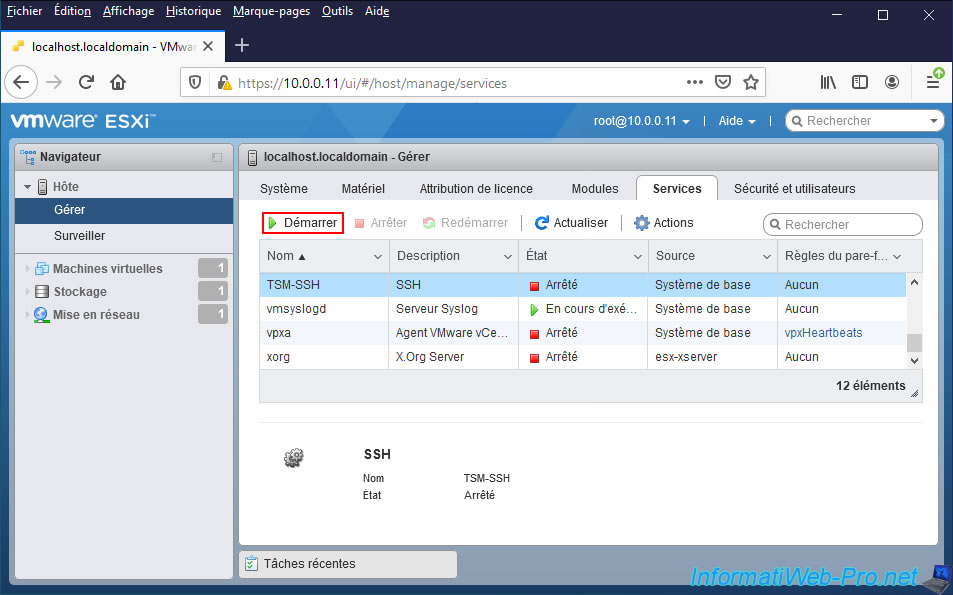
1. Enable SSH protocol on VMware ESXi hosts
To begin, you will need to enable the "TSM-SSH" service on the source and destination VMware ESXi server.
To do this, in the web interface of your VMware ESXi server, go to : Host -> Manage -> Services.
2. Connect to the source VMware ESXi server
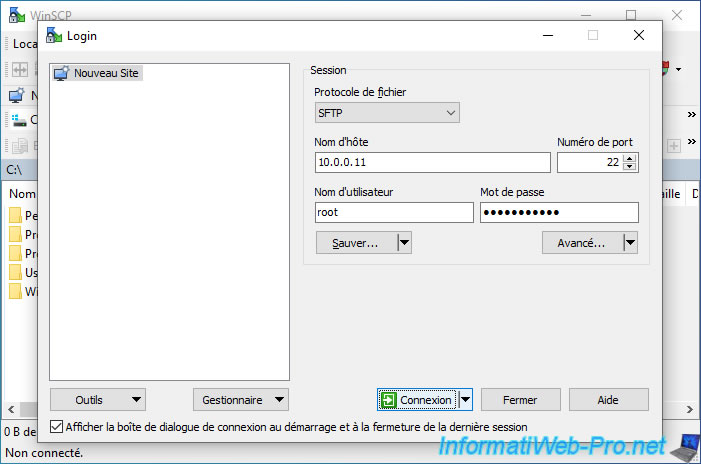
To transfer your virtual machine from one VMware ESXi server to another, you will need third-party software that supports SCP or SFTP.
This is the case with "WinSCP". In addition, this software is known and free.
Once WinSCP is installed, launch it and connect to the source VMware ESXi server.
To do this, specify :
- File protocol : SFTP
- Host name : 10.0.0.11 (IP address or domain name of the source VMware ESXi hypervisor)
- Port number : 22 (i.e. the default SSH port)
- user name : root
- Password : his password
Then, click on Login.
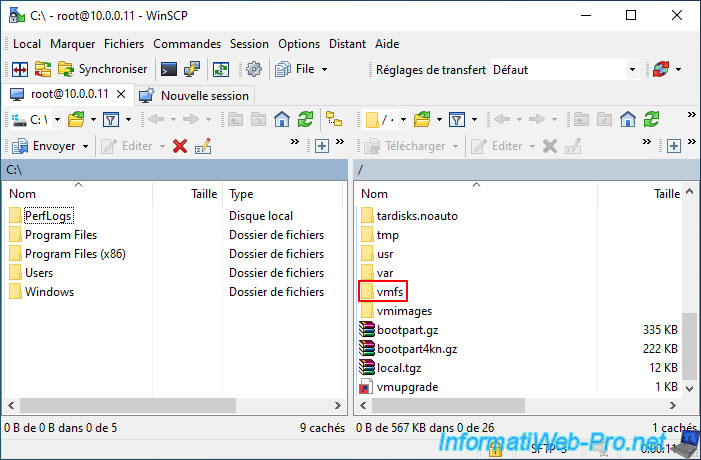
By default, WinSCP displays :
- on the left : the root of the "C" partition of your local computer
- on the right : the root of the remote server to which you connected
To find your virtual machine, you must first go to the "/vmfs/volumes" folder which contains the different datastores of your VMware ESXi server.
In our case, our virtual machine is in our "datastore1" database.
Note that the "datastore1" folder is a shortcut to one of the folders located just above and whose names are identifiers (UUID).
The easiest way is to double-click on the name of the datastore where your virtual machine is located.
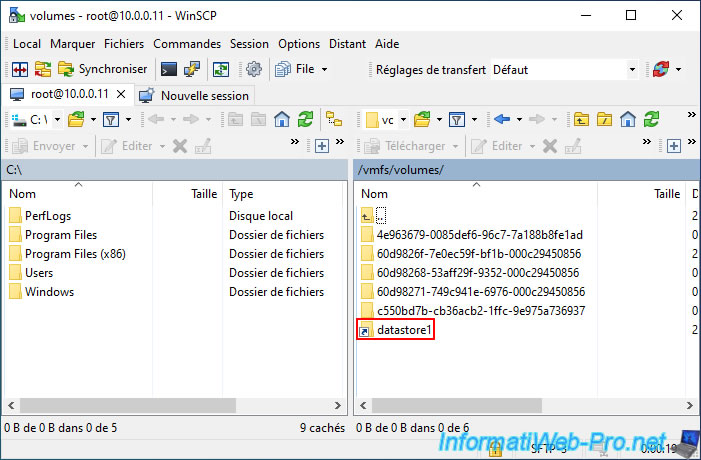
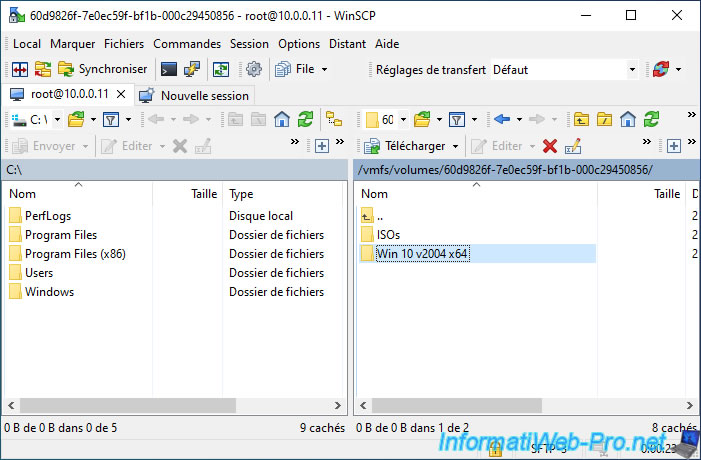
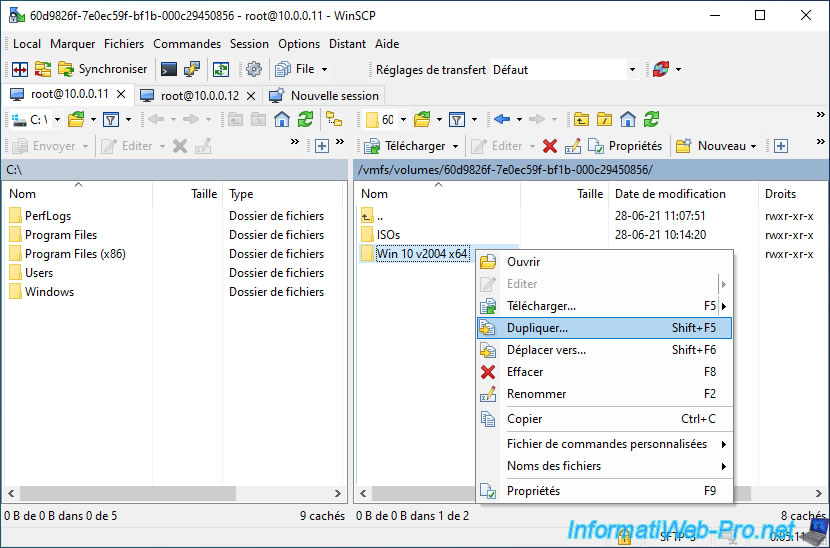
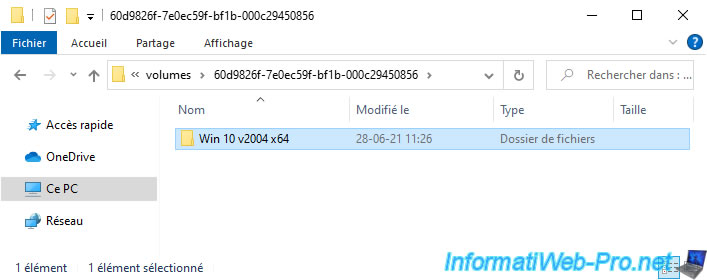
In our case, we end up in the "60d9826f-7e0ec59f-bf1b-000c29450856" folder which corresponds to our "datastore1" datastore.
The virtual machine we want to transfer in our case is : Win 10 v2004 x64.
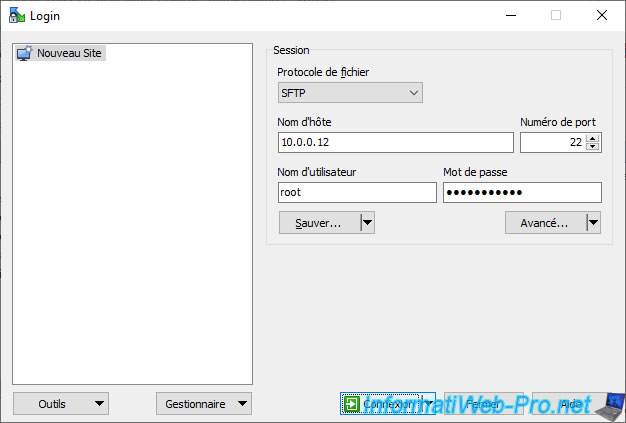
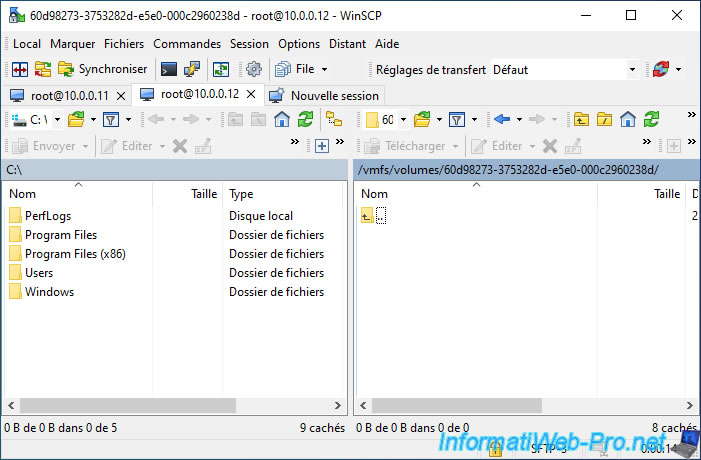
3. Connect to the destination VMware ESXi server
To be able to transfer your virtual machine without any problem, you will also need to connect to the destination VMware ESXi server.
To do this, click on the "New Session" (renamed "New Tab" in recent versions of WinSCP) tab and a new connection window will appear.
In this window, enter almost the same information, except :
- Host name : IP address or domain name of the destination VMware ESXi server
- Password : password of the account used on this second VMware ESXi server.
Then, click on Login.
Now, you have 2 tabs where you are logged in as root.
The 1st tab for the source server and the 2nd tab for the destination one.
Again, go to "/vmfs/volumes" to find the datastores present on the destination server.
Then, go into the folder corresponding to the datastore on the destination server where you want to store this virtual machine.
In our case, it's again the "datastore1" datastore.
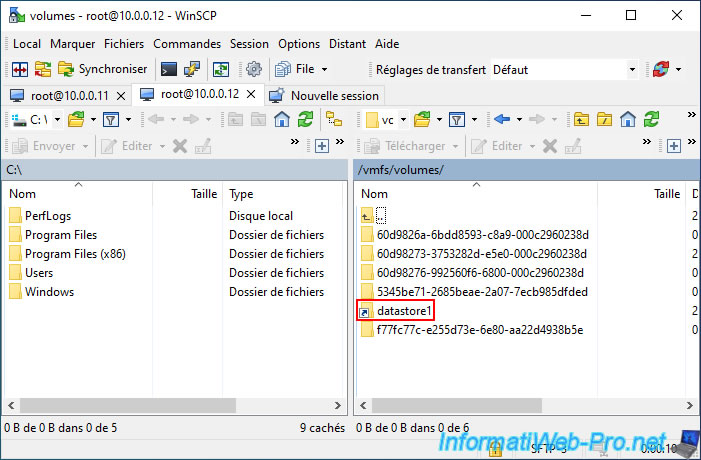
As you can see, in our case, the "datastore1" datastore of our destination server is empty at the moment.
4. Copy a virtual machine from one VMware ESXi server to another
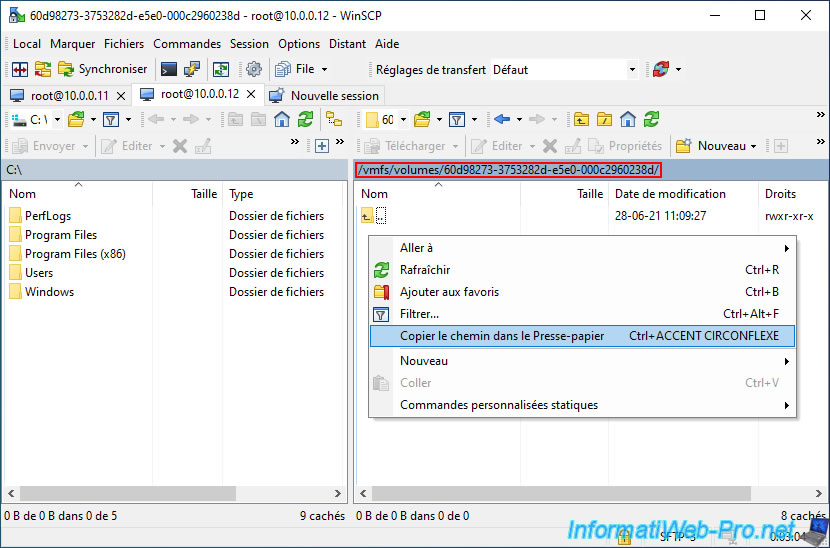
Before copying the desired virtual machine, first copy the path of the remote server datastore to the Windows clipboard.
To do this, when you are in the datastore folder of the remote server (as in the image below), right-click in the empty space on the right side and click on "Copy Path to Clipboard".
Then, go to the 1st tab (which concerns your source VMware ESXi server) and right click "Duplicate" on the folder of the virtual machine to transfer.
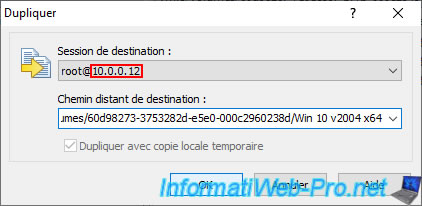
In the "Duplicate" window that appears, select the destination server from the "Destination session" list.
Then, adapt the destination path by indicating :
- the path to the datastore on the remote server. Since this path is currently in the Windows clipboard, you just need to right click "Paste" in the box or use the keyboard shortcut "CTRL + V".
- followed by the name of the virtual machine. Preferably, keep the same name since this name is also present in the name of the different files that compose it.
Which gives in our case : /vmfs/volumes/60d98273-3753282d-e5e0-000c2960238d/Win 10 v2004 x64
Then, click OK.
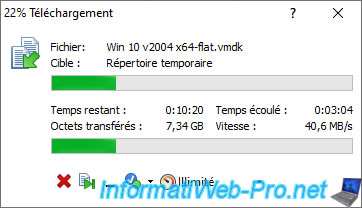
Warning : by default, WinSCP will download the desired folder on your computer in a subfolder of the "%temp%" folder of Windows.
Then, WinSCP will send this copy back to the destination server.
This can take a long time and depends on : the size of your virtual machine (and especially its virtual hard disks), the speed of your local network, as well as the performance of your computer and the VMware ESXi server.
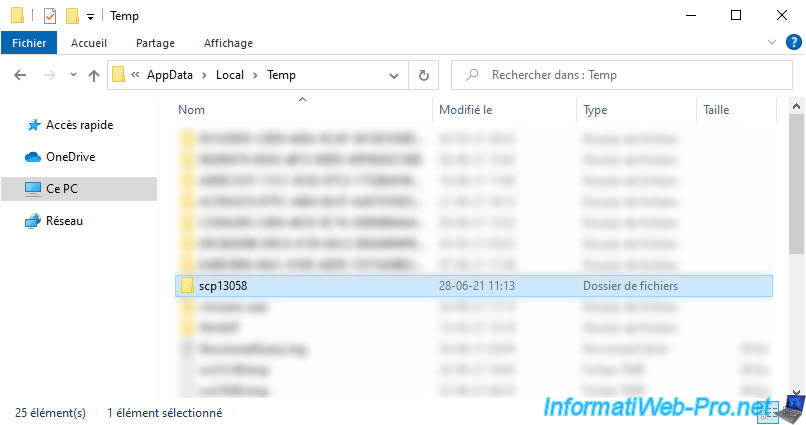
For those who are curious, open Windows File Explorer and type "%temp%" in the address bar.
In this folder, you will find a folder whose name begins with "scp".
If you open this folder, you will find a "vmfs" folder in our case.
In other words, WinSCP keeps the tree structure of the folder copied from its root.
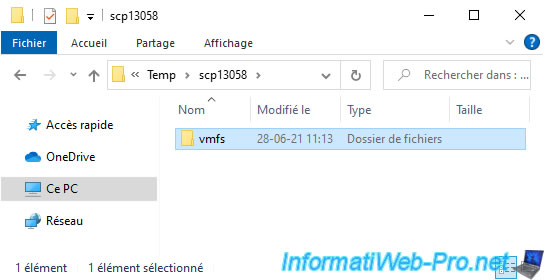
What is really copied is therefore the sub-folder corresponding to the desired virtual machine (in our case : Win 10 v2004 x64) which is located in the "/vmfs/volumes/xxxxx-xxxxx-...." folder of the source server.
Once the download to this Windows temporary folder is complete, WinSCP will transfer this temporary copy from your computer to the destination server.
Again, this can take time and depends in particular on the size of this VM, as well as the performance of your network and the destination server.
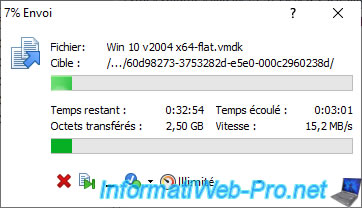
Once the upload is complete, you will see that a copy of your virtual machine is now on your destination server.
![]()
And as expected, the content was copied correctly.
![]()
5. Register the virtual machine on the destination server
Although the virtual machine is in the datastore of the destination server, it doesn't automatically appear in the list of your virtual machines.
Indeed, for that, you must register it on your server. Or add it to inventory, as it was called with VMware ESXi 5.
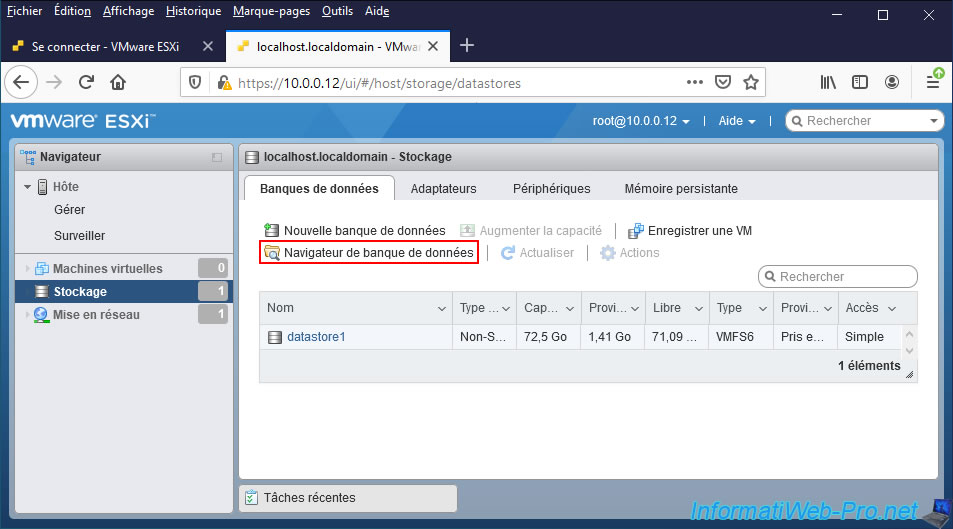
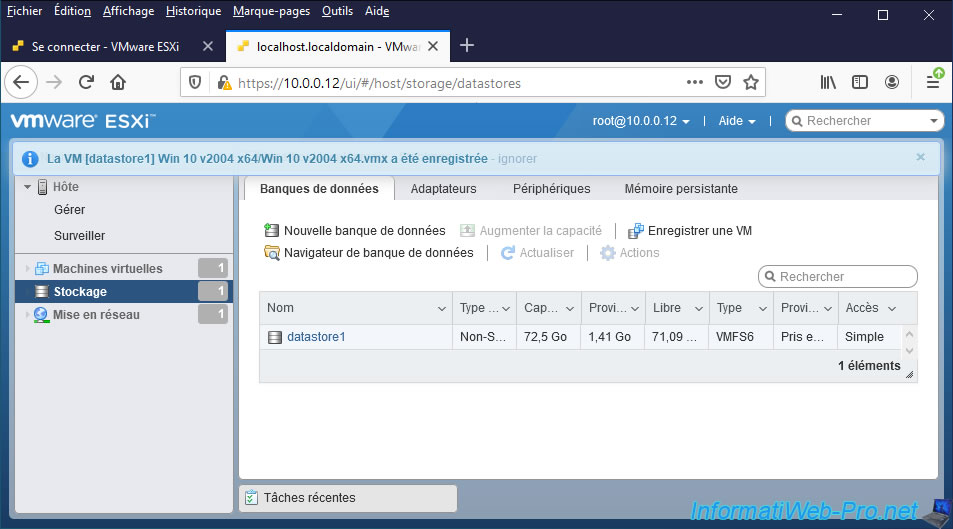
There are 2 possibilities for this, but in our case, we will go through the datastore browser accessible in the "Storage" section.
Go to the datastore where you transferred your virtual machine, then double-click on the virtual machine's folder.
In the folder of your virtual machine, you will find its configuration file in ".vmx" format.
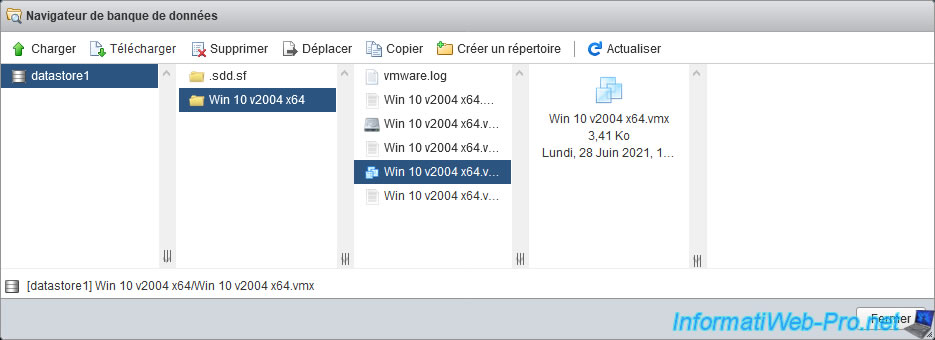
Right click "Register VM" on it, then close that datastore browser.
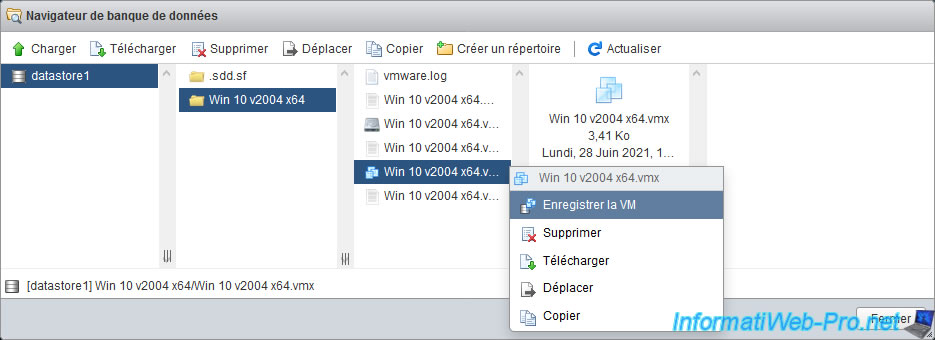
The " VM [datastore name] [VM name]/[vm configuration file name].vmx successfully registered" message appears.
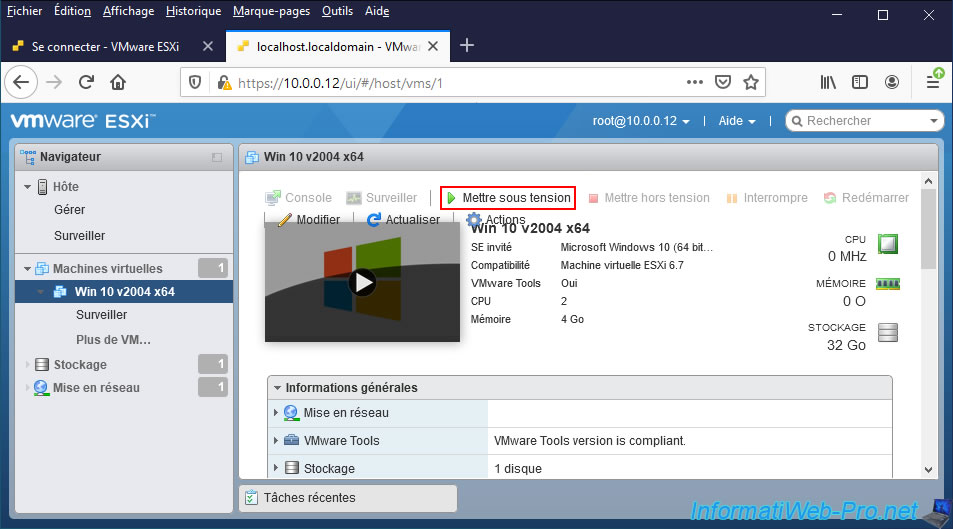
6. Start the transferred virtual machine
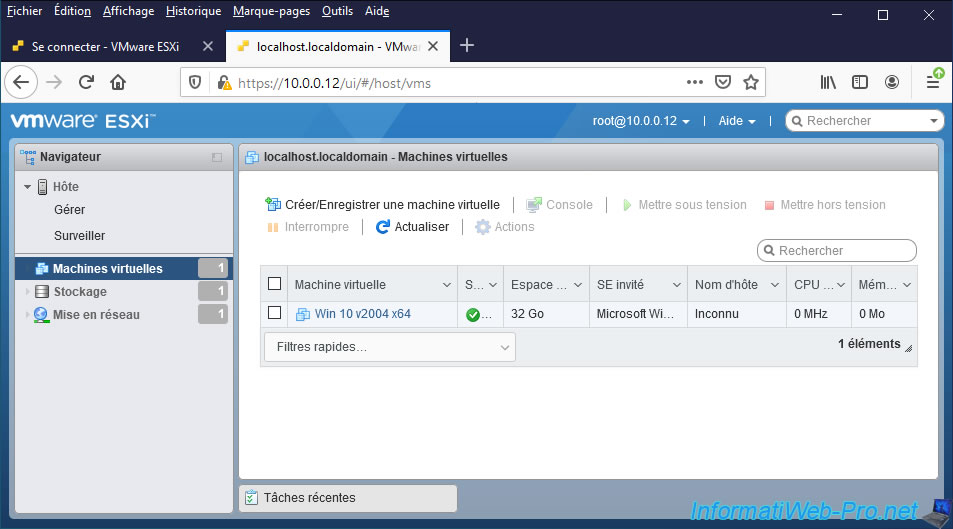
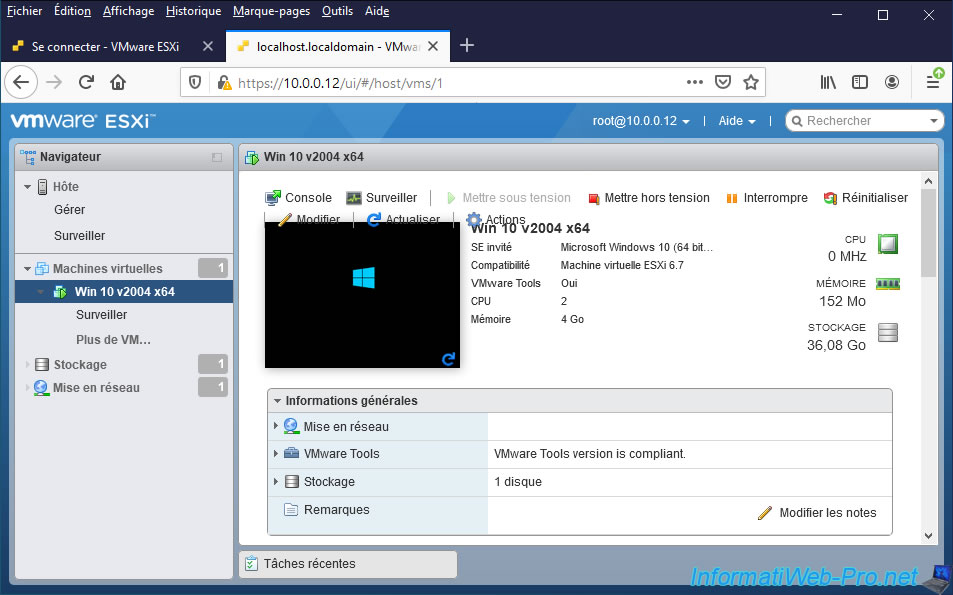
Now, this virtual machine appears on your destination VMware ESXi server.
Warning : before starting this one, IF the 2 VMware ESXi servers are on the same network, make sure not to simultaneously launch this same virtual machine on the source server and the destination server.
Indeed, you might encounter conflicts of IP addresses, NETBIOS names, ...
If you are sure that this will not be a problem in your case, then you can start it by clicking on : Power on.
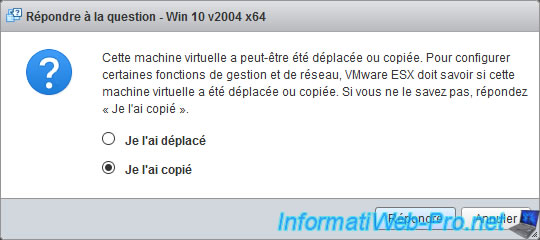
When it starts for the first time, your VMware ESXi hypervisor will ask you if you have copied or moved this virtual machine.
To avoid problems, it's recommended to select "I Copied It".
However, if you know what you are doing and the MAC address set on this virtual machine's network adapter is important, select "I Moved It". Otherwise, it may change.
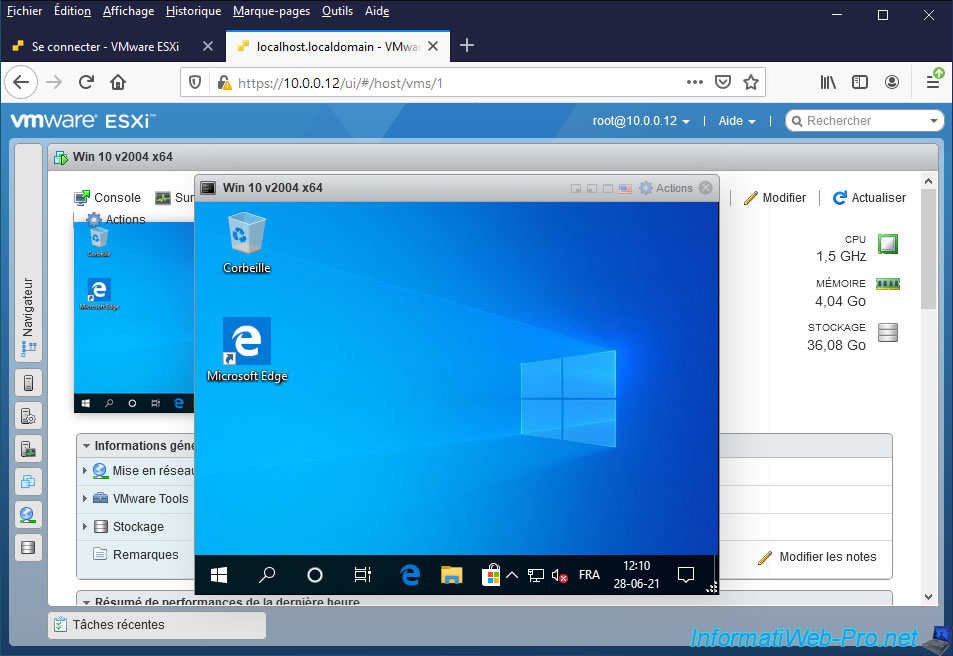
As expected, the manually copied virtual machine starts.
And it works without any problem.
Share this tutorial
To see also
-
VMware 11/4/2022
VMware ESXi 6.7 - Convert a Hyper-V virtual machine to a VMware VM
-
VMware 10/14/2022
VMware ESXi 6.7 - Virtualize a physical computer (P2V)
-
VMware 8/19/2022
VMware ESXi 7.0 / 6.7 - Export and import VMs
-
VMware 8/24/2022
VMware ESXi 7.0 / 6.7 - Export and import VMs via VMware OVF Tool
You must be logged in to post a comment