- VMware
- 24 August 2022 at 08:13 UTC
-


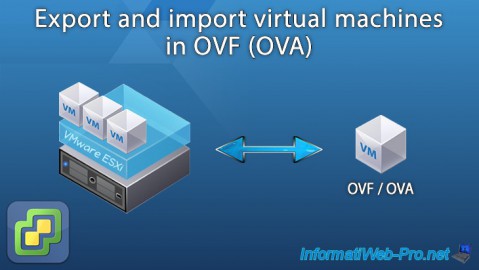
Although you can import and export virtual machines from and to a VMware ESXi hypervisor from its web interface, you can also do it from the command line using the VMware OVF Tool (ovftool).
- Using VMware OVF Tool (ovftool)
- Export a virtual machine in OVF format from a VMware ESXi hypervisor using VMware OVF Tool
- Import a virtual machine in OVF format on a VMware ESXi hypervisor using VMware OVF Tool
- Export a virtual machine in OVA format from a VMware ESXi hypervisor using VMware OVF Tool
- Import a virtual machine in OVA format on a VMware ESXi hypervisor using VMware OVF Tool
1. Using VMware OVF Tool (ovftool)
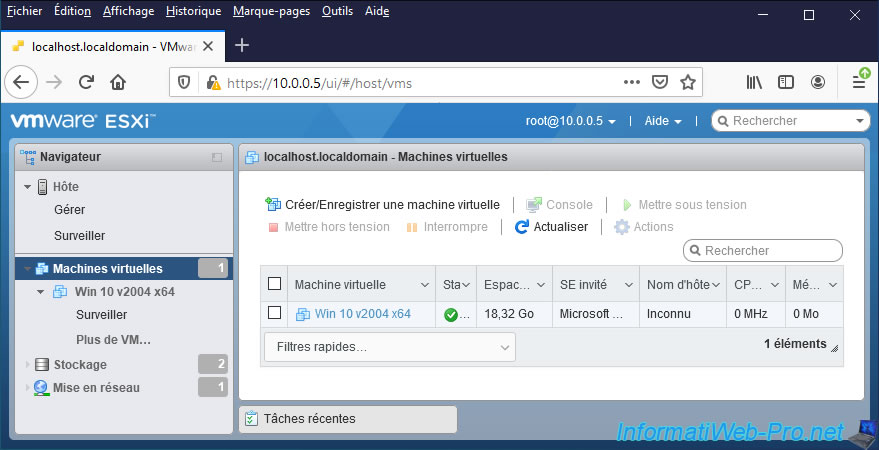
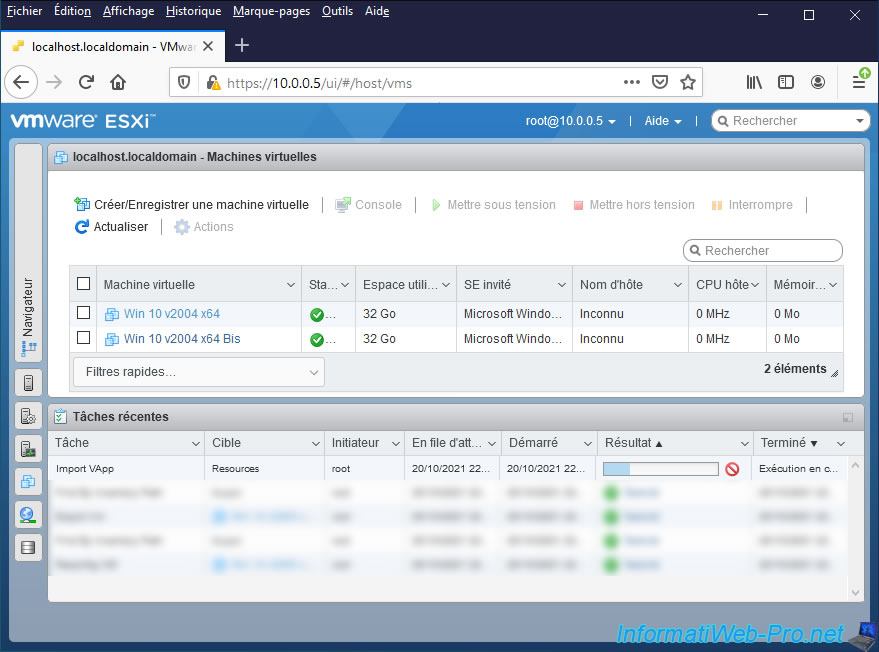
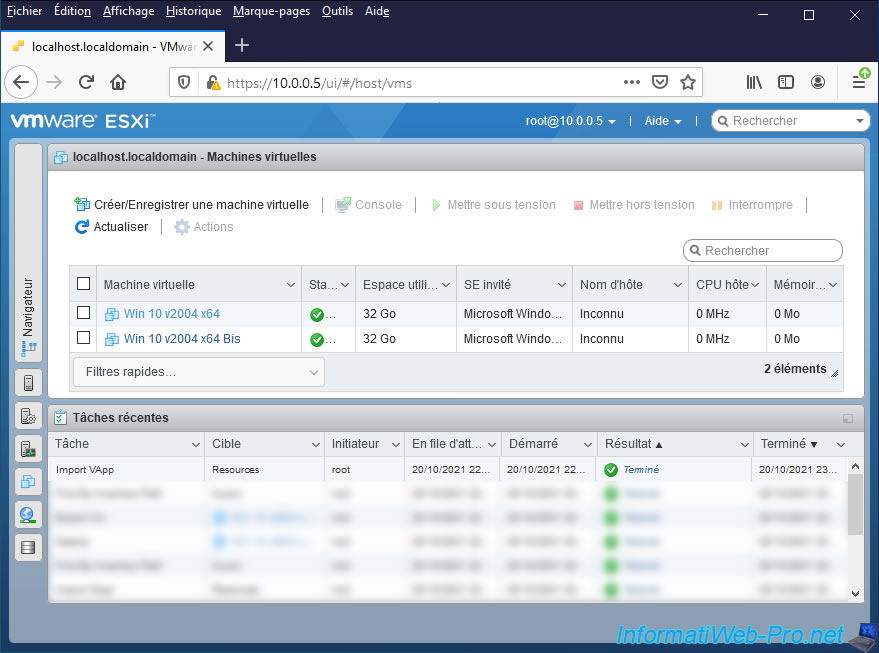
In our case, we have a "Win 10 v2004 x64" virtual machine on our VMware ESXi hypervisor.
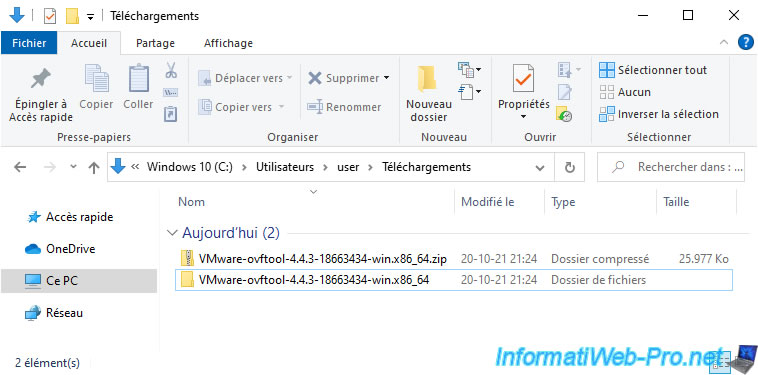
To do this, download the zip version of this tool : VMware OVF Tool (ovftool).
Once the zip file has downloaded, unzip it.
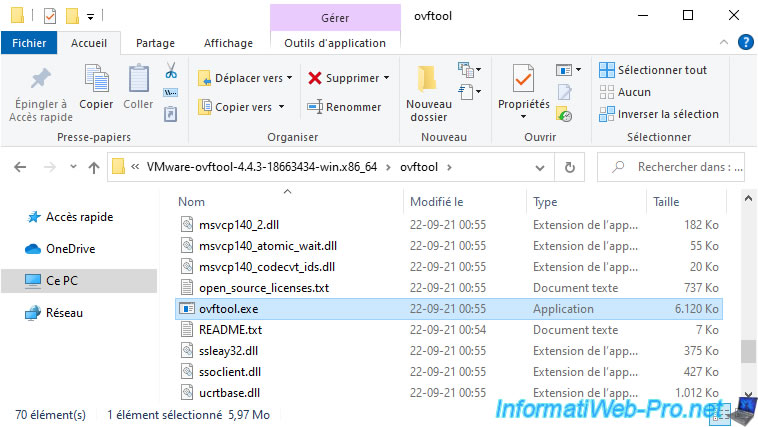
Go into the folder that appears, then in the "ovftool" subfolder.
In this subfolder, you will find the "ovftool.exe" program.
To use this tool, open a command prompt (cmd.exe) and navigate to the folder where this "ovftool.exe" file is located :
Batch
cd C:\Users\user\Downloads\VMware-ovftool-4.4.3-18663434-win.x86_64\ovftool
Then, to get the list of virtual machines present on your VMware ESXi hypervisor, type the command below.
Parameters used :
- --noSSLVerify : allows you to disable the verification of the validity of the SSL certificate used on your VMware ESXi hypervisor.
- vi://10.0.0.5/ : allows you to connect to your VMware ESXi hypervisor using its IP address or domain name.
Note that if you are using its IP address, the previous parameter "--noSSLVerify" will be required.
Batch
ovftool.exe --noSSLVerify "vi://10.0.0.5/"
Log in as root :
Plain Text
Enter login information for source vi://10.0.0.5/
Username:
Once authenticated, this will be displayed.
As you can see, in our case, VMware OVF Tool tells us that a "Win 10 v2004 x64" virtual machine is present on our VMware ESXi hypervisor.
Plain Text
Enter login information for source vi://10.0.0.5/
Username: root
Password: ***********
Error: Found wrong kind of object (ResourcePool). Possible completions are:
  Win 10 v2004 x64
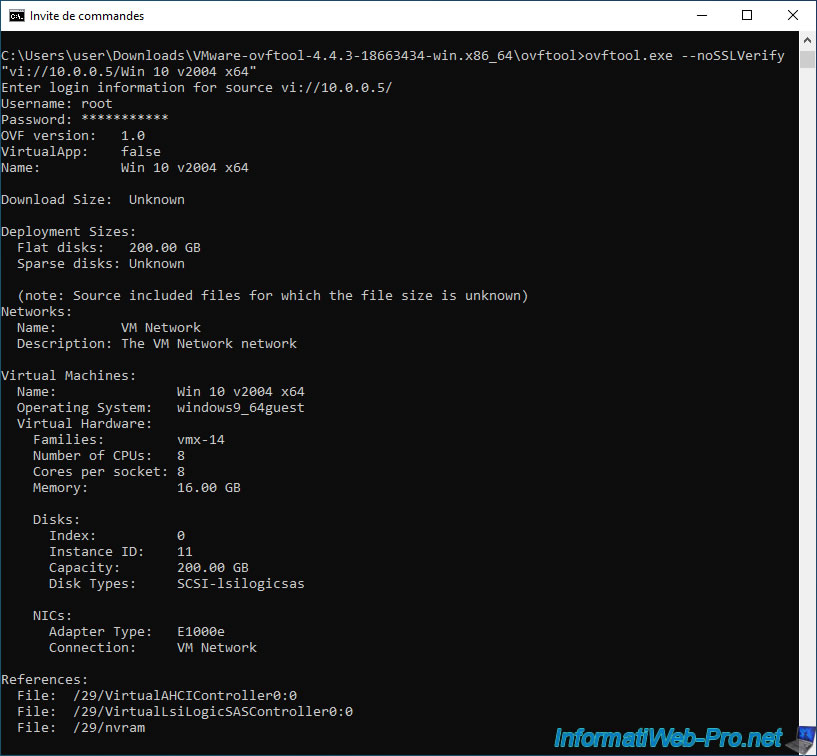
To obtain information about this virtual machine, all you have to do is add its name at the end of the "vi://.../" parameter.
Batch
ovftool.exe --noSSLVerify "vi://10.0.0.5/Win 10 v2004 x64"
Which will look like this :
Plain Text
...
OVF version:   1.0
VirtualApp:    false
Name:          Win 10 v2004 x64

...

Virtual Machines:
  Name:               Win 10 v2004 x64
  Operating System:   windows9_64guest
  Virtual Hardware:
    Families:         vmx-14
    Number of CPUs:   8
    Cores per socket: 8
    Memory:           16.00 GB

...
2. Export a virtual machine in OVF format from a VMware ESXi hypervisor using VMware OVF Tool
To export a virtual machine from your VMware ESXi hypervisor using VMware OVF Tool, you must know the address of your VMware ESXi hypervisor and the name of the virtual machine to export.
In our case :
- the IP address of our VMware ESXi hypervisor is : 10.0.0.5.
- the name of the virtual machine to export is : Win 10 v2004 x64.
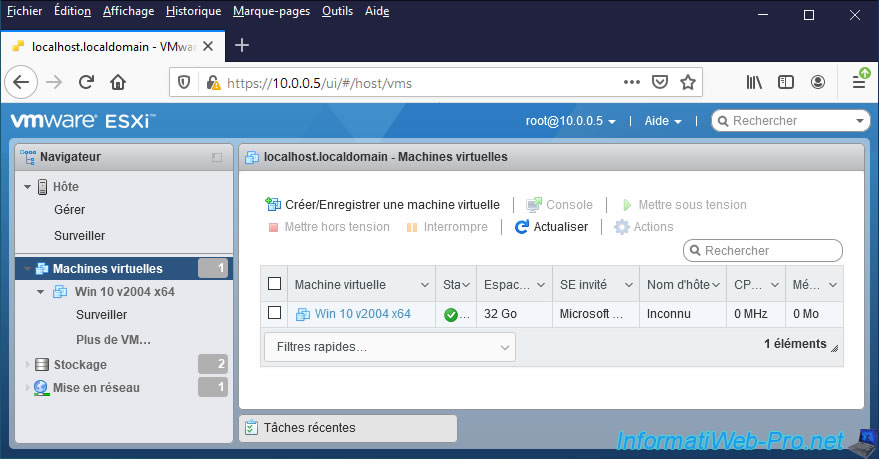
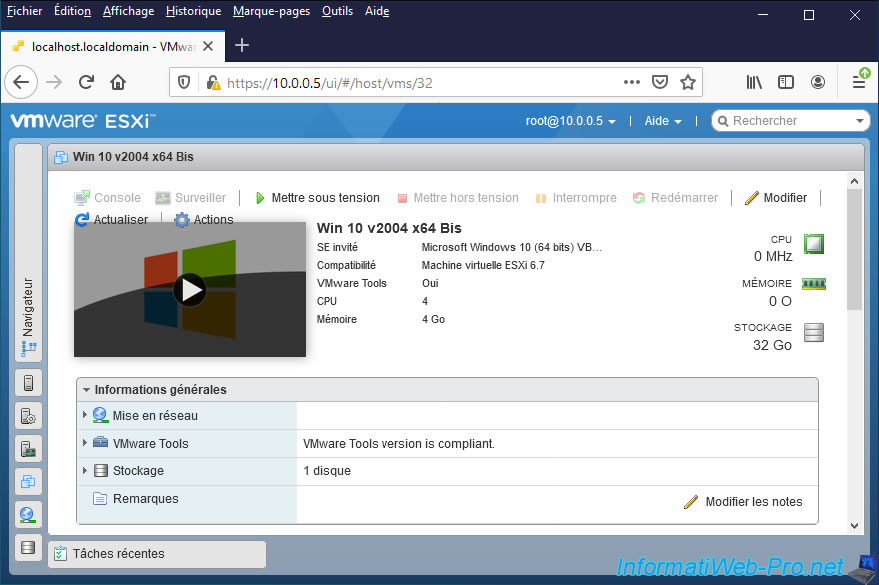
Here is the virtual machine that we are going to export.
In the command prompt, type the command below.
Parameters used :
- --noSSLVerify : disables the verification of the SSL certificate of the VMware ESXi server
- "vi://10.0.0.5/Win 10 v2004 x64" : allows you to connect to the server whose IP address is "10.0.0.5" and target the "Win 10 v2004 x64" virtual machine located there.
- "C:\Users\user\Downloads\Win 10 v2004 x64.ovf" : indicates where and under what name the virtual machine will be exported in OVF format on the hard disk.
Batch
ovftool.exe --noSSLVerify "vi://10.0.0.5/Win 10 v2004 x64" "C:\Users\user\Downloads\Win 10 v2004 x64.ovf"
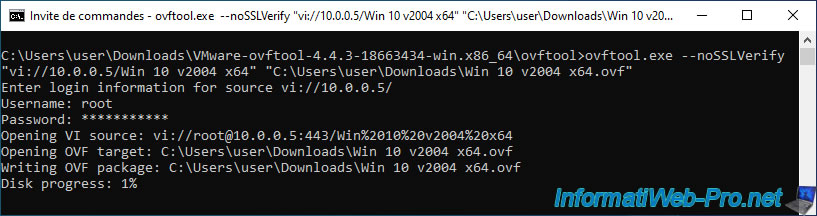
Log in as "root" as before :
Plain Text
Enter login information for source vi://10.0.0.5/
Username:
Once logged in as root, this will be displayed :
Plain Text
Enter login information for source vi://10.0.0.5/
Username: root
Password: ***********
Opening VI source: vi://root@10.0.0.5:443/Win%2010%20v2004%20x64
Opening OVF target: C:\Users\user\Downloads\Win 10 v2004 x64.ovf
Writing OVF package: C:\Users\user\Downloads\Win 10 v2004 x64.ovf
Disk progress: 10%
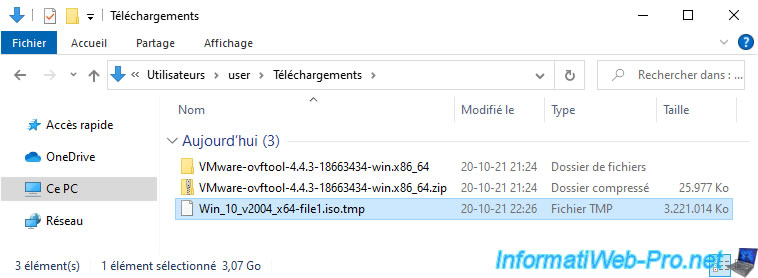
On your hard drive, you will see that a ".tmp" file is being created.
In our case, an iso file was in the virtual CD/DVD drive of this virtual machine.
This file is therefore also exported from our VMware ESXi hypervisor.
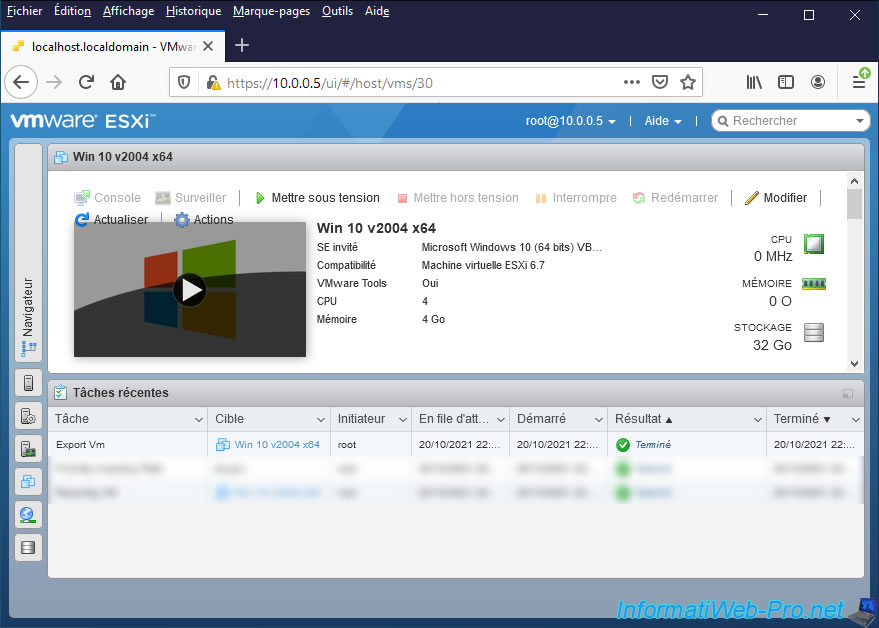
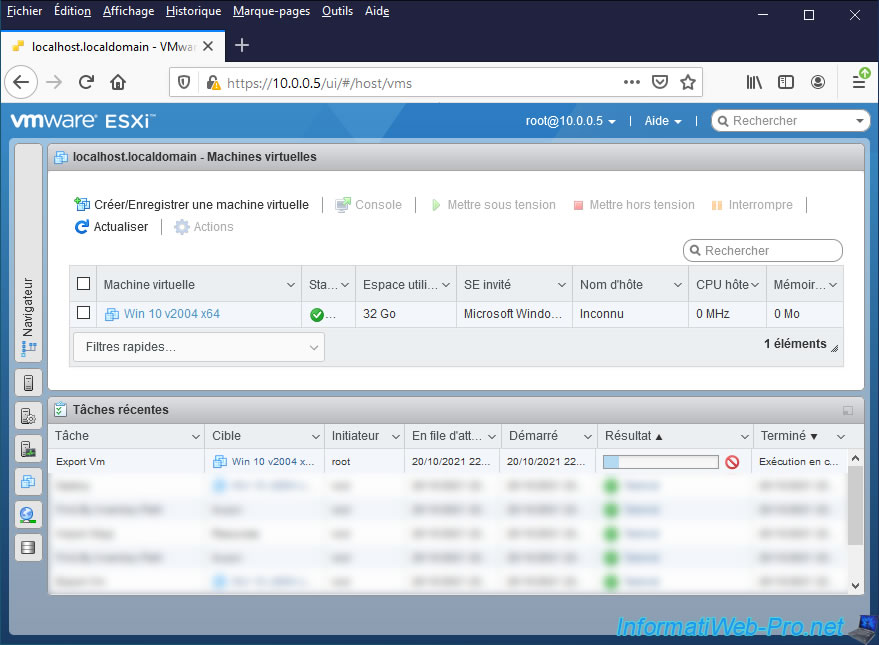
If you open the "Recent tasks" panel of your VMware ESXi hypervisor, you will see that an "Export Vm" task is running for the virtual machine you are exporting to your computer via VMware OVF Tool.

Once the virtual machine export is complete, this message will appear in the command prompt :
Plain Text
Transfer Completed
Completed successfully
![]()
In the recent tasks of your VMware ESXi hypervisor, you will see that the "Export Vm" task is complete.
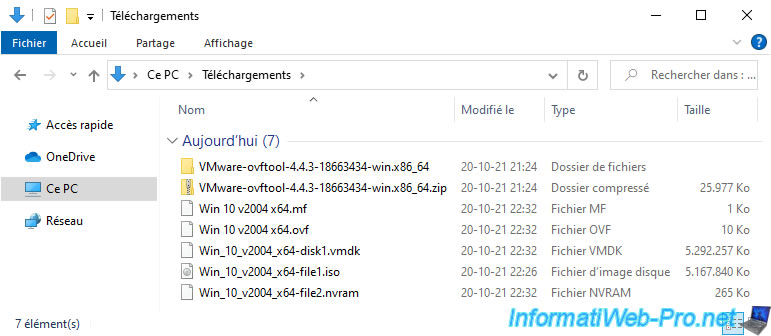
On your hard drive, you will see that the exported virtual machine is composed of :
- an ".mf" file : a manifest file used to check the presence and integrity of the other files exported for it.
- an ".ovf" file : the configuration file of the virtual machine in OVF format.
- one or more ".vmdk" files : its virtual hard disk(s).
- an ".nvram" file : the file containing the current BIOS / EFI firmware configuration of this one.
3. Import a virtual machine in OVF format on a VMware ESXi hypervisor using VMware OVF Tool
To import a virtual machine in OVF format to your VMware ESXi hypervisor, use the command below.
Parameters used :
- --noSSLVerify : allows you to not check the validity of your VMware ESXi server certificate.
This is useful if you are still using the self-signed SSL certificate installed by default on this server. - -ds="RAID Vol" : used to specify in which datastore of your VMware ESXi hypervisor you want to store the virtual machine to import.
- -n="Win 10 v2004 x64 Bis" : allows you to specify under which name it should be added on your VMware ESXi hypervisor.
- "C:\Users\user\Downloads\Win 10 v2004 x64.ovf" : allows you to specify the full path of the configuration file in OVF format of the virtual machine that you want to import.
- vi://10.0.0.5/ : lets you specify which VMware ESXi server you want to connect to by specifying its IP address or domain name using the "vi://..." protocol.
Batch
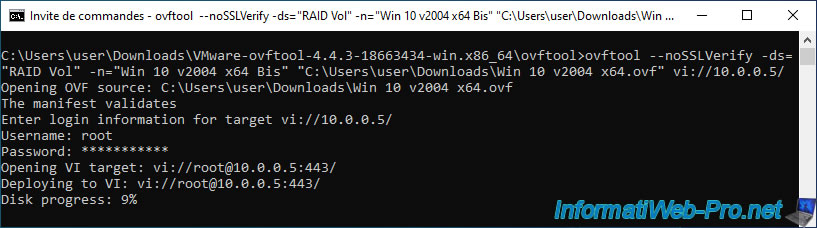
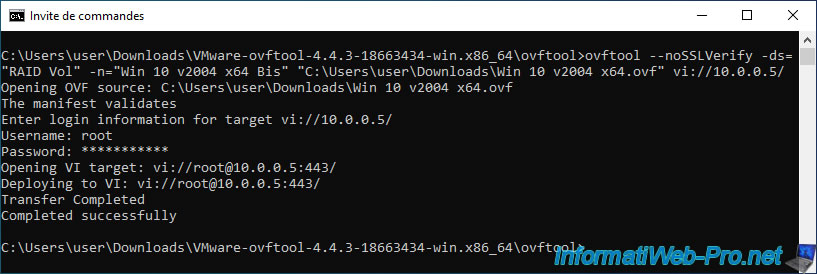
ovftool --noSSLVerify -ds="RAID Vol" -n="Win 10 v2004 x64 Bis" "C:\Users\user\Downloads\Win 10 v2004 x64.ovf" vi://10.0.0.5/
If a ".mf" manifest file is present in the same folder as the OVF configuration file ".ovf" that you specified in the above command, VMware OVF Tool will check the integrity of the files of the virtual machine before import it.
Hence the appearance of the "The manifest validates" message.
Then, authenticate yourself (as before) and this will appear :
Plain Text
Opening OVF source: C:\Users\user\Downloads\Win 10 v2004 x64.ovf
The manifest validates
Enter login information for target vi://10.0.0.5/
Username: root
Password: ***********
Opening VI target: vi://root@10.0.0.5:443/
Deploying to VI: vi://root@10.0.0.5:443/
Disk progress: 9%
While importing your virtual machine, you will see an "Import VApp" task appear in the recent tasks of your VMware ESXi hypervisor.
Once the import is complete, this will be displayed :
Plain Text
Transfer Completed
Completed successfully
In the web interface of your VMware ESXi hypervisor, you will see that the "Import VApp" task is complete.
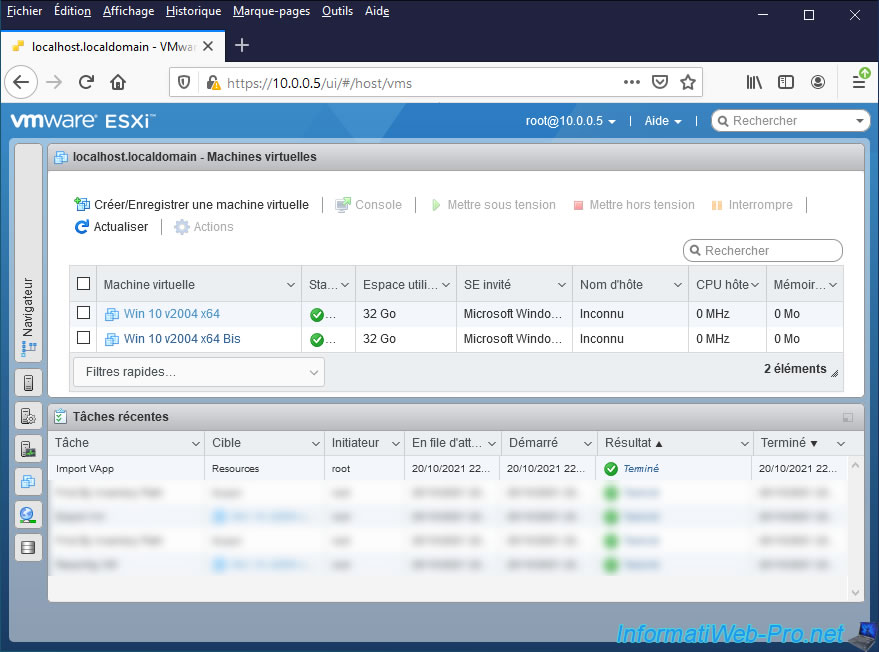
The virtual machine has been imported.

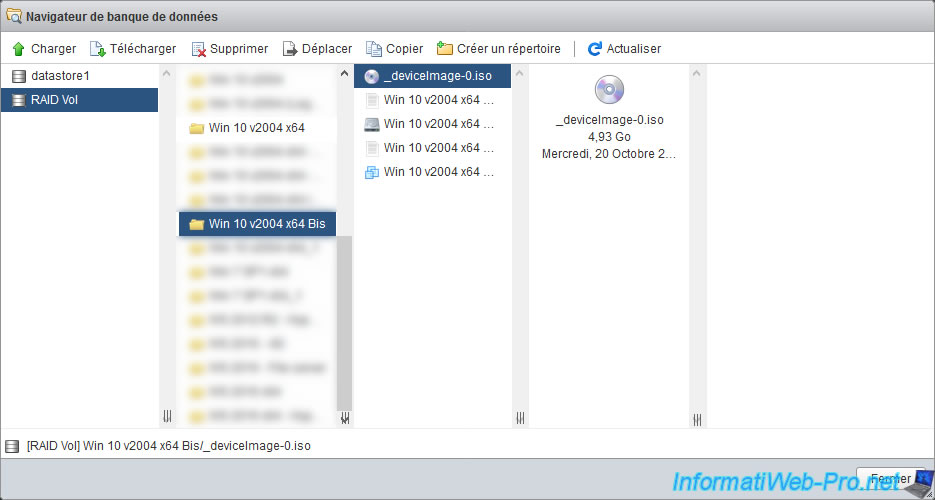
In our case, an ISO file was linked to this virtual machine.
It was therefore reimported with the virtual machine and stored in the folder of this virtual machine.
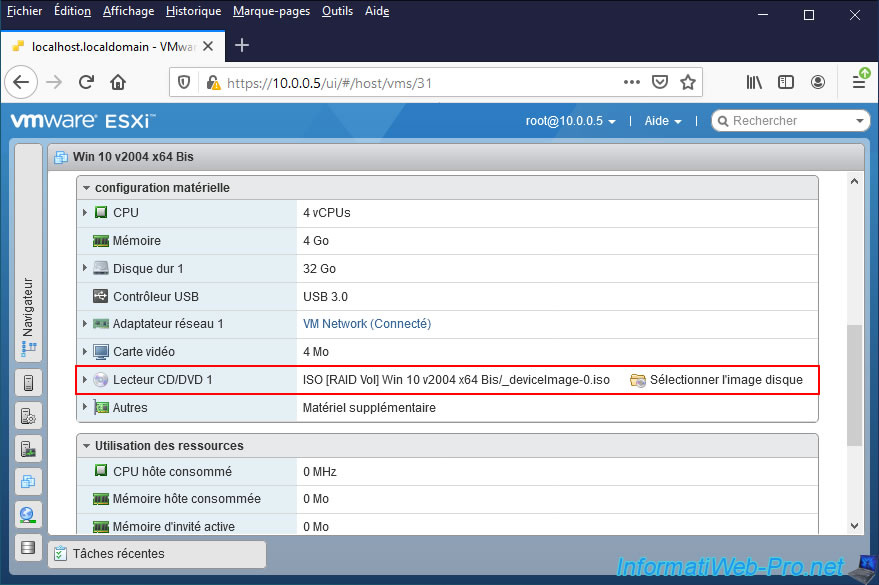
To check this, you can also use the datastore browser.
4. Export a virtual machine in OVA format from a VMware ESXi hypervisor using VMware OVF Tool
Thanks to VMware OVF Tool, you will also be able to export and import virtual machines using the OVA format instead of OVF.
The technique to use remains the same, except that you will need to use the file extension ".ova" instead of ".ovf" in the commands explained previously.
To summarize, to export the virtual machine in OVA format, use this command :
Batch
ovftool.exe --noSSLVerify "vi://10.0.0.5/Win 10 v2004 x64" "C:\Users\user\Downloads\Win 10 v2004 x64.ova"
Which will display this in the command prompt :
Plain Text
Enter login information for source vi://10.0.0.5/
Username: root
Password: ***********
Opening VI source: vi://root@10.0.0.5:443/Win%2010%20v2004%20x64
Opening OVA target: C:\Users\user\Downloads\Win 10 v2004 x64.ova
Writing OVA package: C:\Users\user\Downloads\Win 10 v2004 x64.ova
Disk progress: 10%
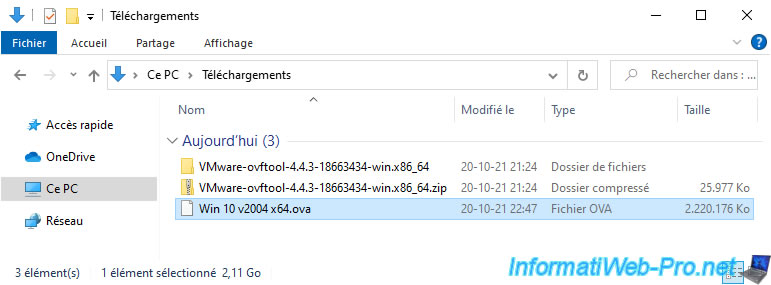
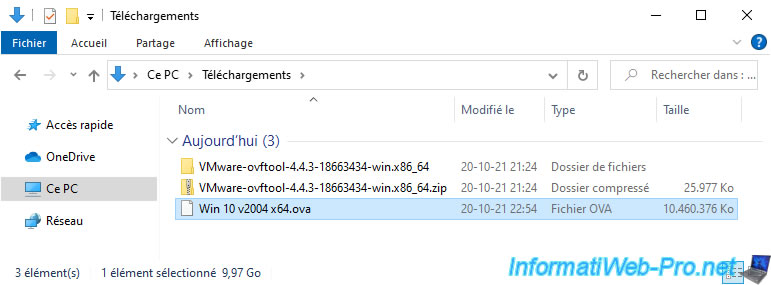
If you open file explorer on your computer, you will see that only one ".ova" file is being created.
Indeed, in OVA format, everything is contained in the same file.
On your VMware ESXi hypervisor, the task that will appear remains the same : Export Vm.
Once the virtual machine has been exported in OVA format from your VMware ESXi hypervisor, this will be displayed :
Plain Text
Transfer Completed
Completed successfully
In the web interface of your VMware ESXi hypervisor, you will see that the "Export Vm" task is complete.

On your hard disk, you will find a single ".ova" file (which will be larger or smaller depending on the current size of the hard disk(s) of the exported virtual machine).
5. Import a virtual machine in OVA format on a VMware ESXi hypervisor using VMware OVF Tool
To import the virtual machine from the OVA format, the principle is the same as for the OVF format, except that the source file will be an ".ova" file instead of ".ovf".
Which gives this command :
Batch
ovftool --noSSLVerify -ds="RAID Vol" -n="Win 10 v2004 x64 Bis" "C:\Users\user\Downloads\Win 10 v2004 x64.ova" vi://10.0.0.5/
Once this command is executed, authenticate and this will be displayed :
Plain Text
Opening OVA source: C:\Users\user\Downloads\Win 10 v2004 x64.ova
The manifest validates
Enter login information for target vi://10.0.0.5/
Username: root
Password: ***********
Opening VI target: vi://root@10.0.0.5:443/
Deploying to VI: vi://root@10.0.0.5:443/
Disk progress: 97%
Once the import is complete, this will show in the command prompt :
Plain Text
Transfer Completed
Completed successfully
On your VMware ESXi hypervisor, you will see that the "Import VApp" task will be completed.
As before, the virtual machine appears on your VMware ESXi hypervisor.
And the file linked to it will also be imported and stored in its folder (if applicable).

Share this tutorial
To see also
-
VMware 11/4/2022
VMware ESXi 6.7 - Convert a Hyper-V virtual machine to a VMware VM
-
VMware 10/14/2022
VMware ESXi 6.7 - Virtualize a physical computer (P2V)
-
VMware 8/19/2022
VMware ESXi 7.0 / 6.7 - Export and import VMs
-

VMware 9/7/2022
VMware ESXi 7.0 / 6.7 - Export and import VMs with VMware Workstation Pro
You must be logged in to post a comment