- VMware
- VMware ESXi
- 11 November 2012 at 20:16 UTC
-

- 1/2

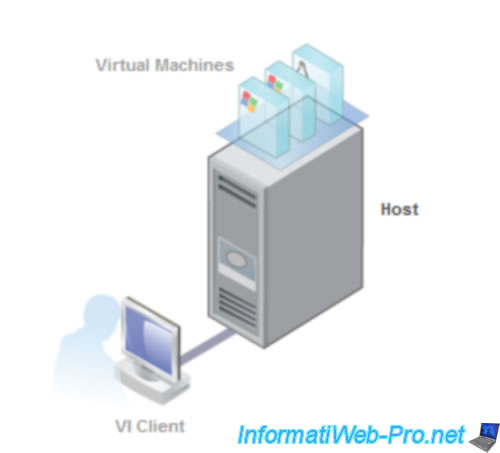
ESXi is the hypervisor VMWare server side, ideal to become familiar with virtualization. It differs from other virtualization tools VMWare, since it does not run over the operating system. It contains its own OS (developed on a Redhat kernel) dedicated to virtualization. This means that you will need at least 2 computer ie a client and a server. Production server will have a very powerful material (differs depending on the number of clients may connect) and the client will be a normal pc or minimum (of course with a network connection (low need Internet) to be able to connect to the ESXi server).
VMware ESXi 5.0 End of Support
VMware ESXi 5.0 (which is part of the VMware vSphere 5.0 solution) is no longer supported by VMware since August 2016.
We therefore advise you to upgrade to a more recent version, such as : VMware ESXi 6.7.
To configure a VMware ESXi 6.7 hypervisor, refer to our tutorial : VMware ESXi 6.7 - Install VMware ESXi and create your first VM.
For this tutorial, I used the latest version of ESXi and the latest version of the client that is version 5.0 for both.
Here is an overview of how ESXi to give you an idea of what it is :
If you have not installed it, see the installation of ESXi 5.0 tutorial.
- Register the ESXi server
- Create a virtual machine (vm) on the ESXi server
- Upload the installation CD/DVD (in ".iso" format) to the server
- Virtual machine installation
- Shutdown the server
1. Register the ESXi server
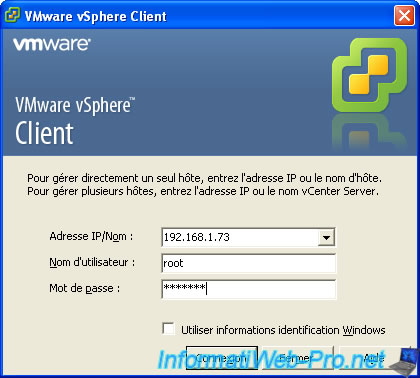
To configure ESXi, you need to connect to your server by the VMWare client you installed. Enter the IP address of your server, the user (for example : root) and password.
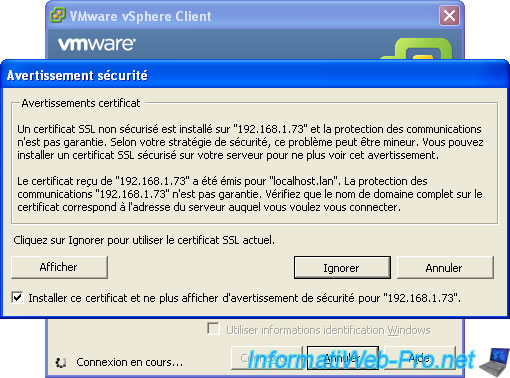
VMWare client notifies you that the connection is not certified which is normal because the certificate has not been verified by Symantec SSL or another company that you confirm that the site is authentic and there is no risk of access it.
Check the box and press "Ignore".
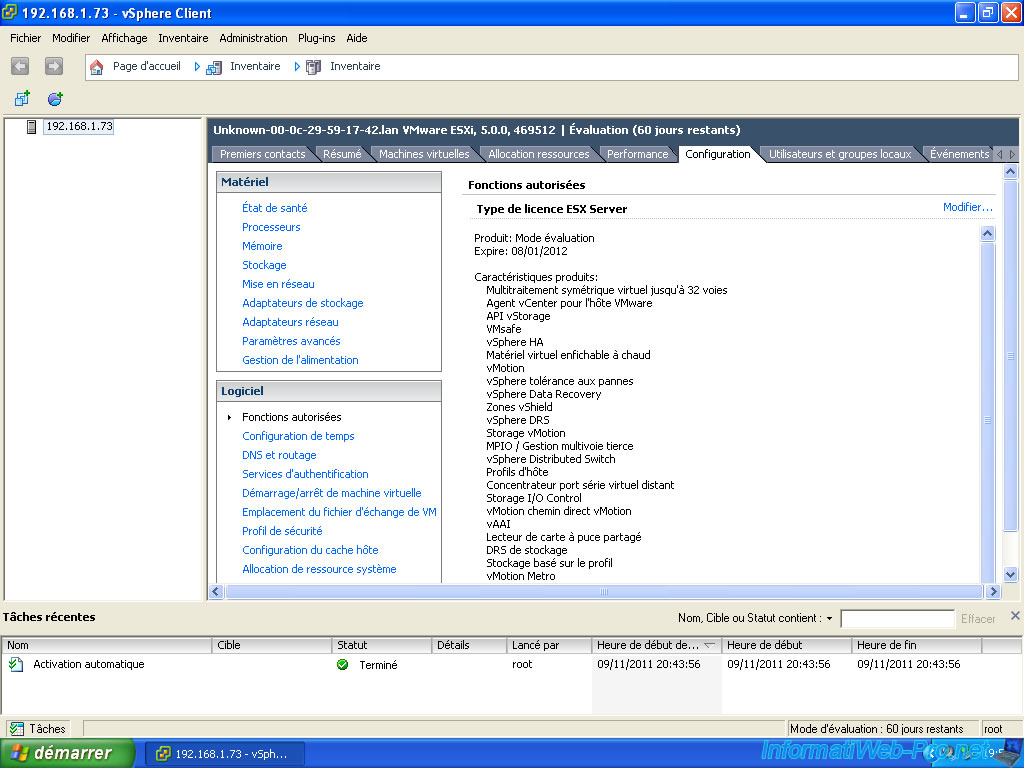
The client notifies you that your server is trial version, then you will need to purchase a VMware vSphere license to continue using it. For now click OK.

To register your server, go to the "Settings" tab and click on allowed functions in the software menu. Then click "Edit".
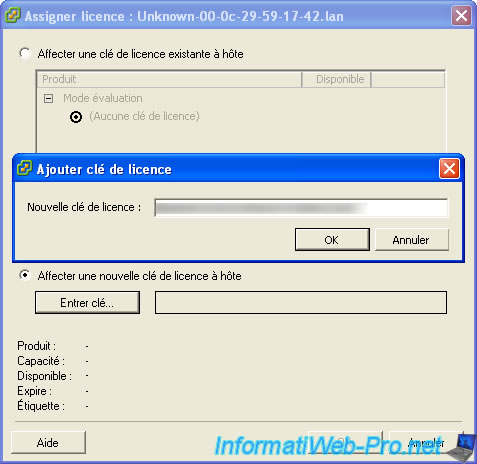
Copy / Paste the serial number into the box and click OK.
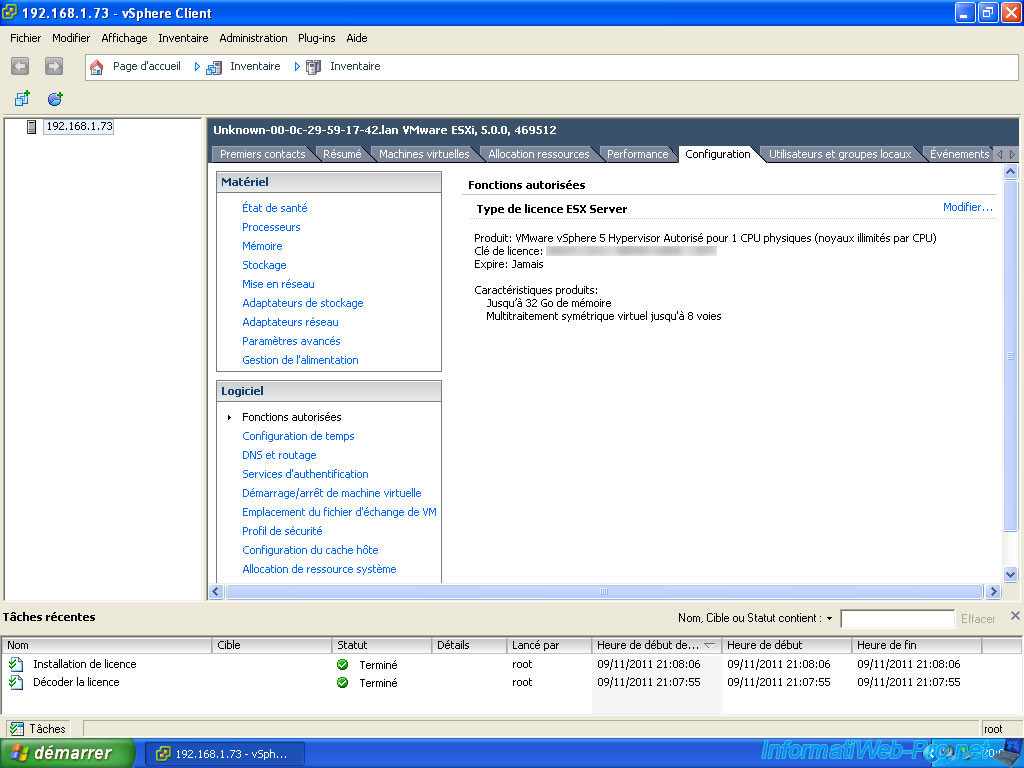
Your server is now registered.
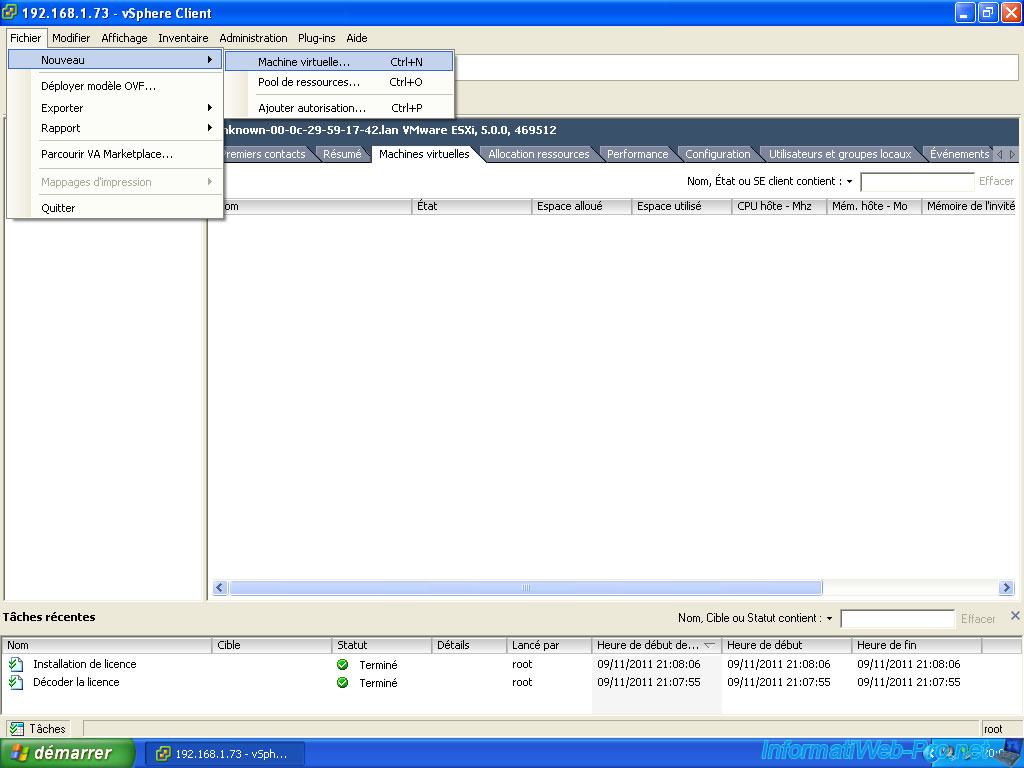
2. Create a virtual machine (vm) on the ESXi server
Now we will use the server by creating a virtual machine that will turn into reality on the server and not the client. This is why it's the server that must have good performance and not the client
To create a virtual machine, go to File -> New -> Virtual Machine.
Choose typical.

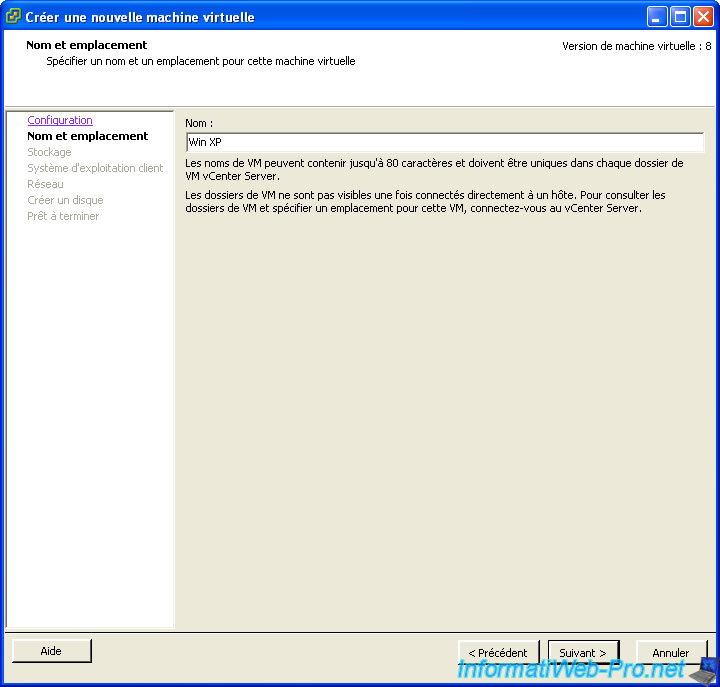
Enter a name for your virtual machine.
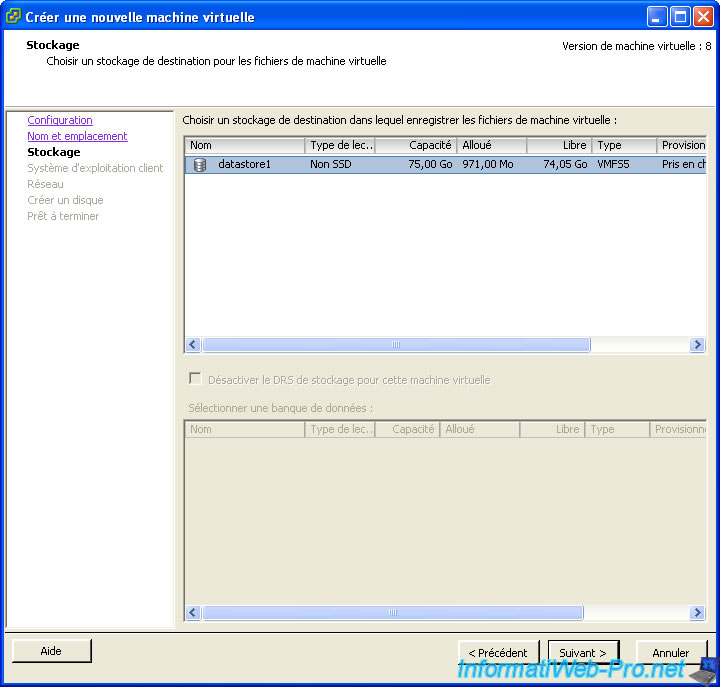
Select the datastore where you want to create the virtual machine. A datastore is a kind of folder where VMWare stores files that you create such as virtual machines, hard drives, ... You can later add files from the client as the installation CD as an OS. For example : Windows XP (ISO format is a CD image).
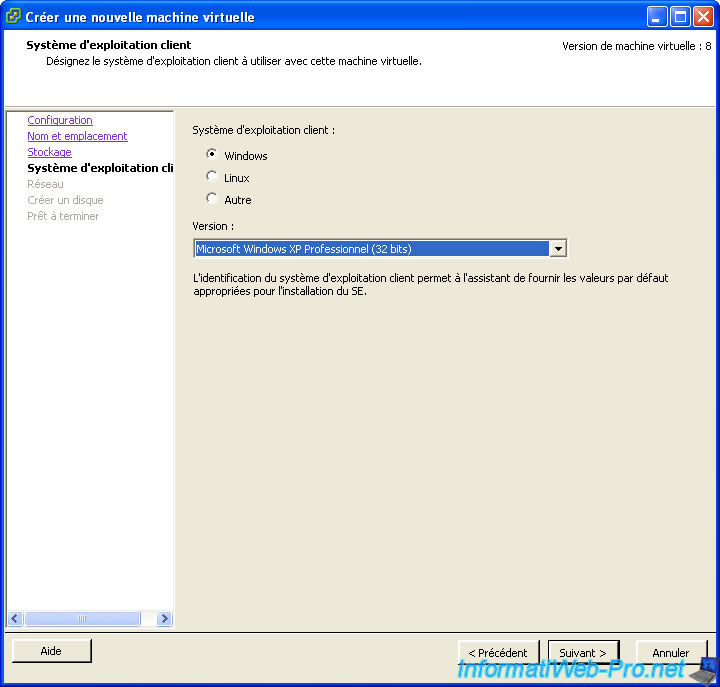
Select the OS (operating system) type that you want to install in the virtual machine. Here, we select Windows because we will install Windows XP which is very popular and therefore known.
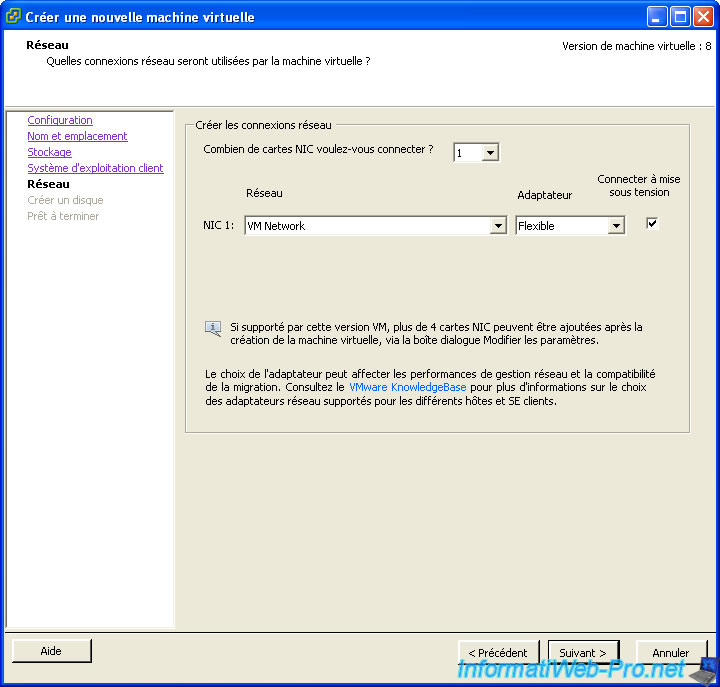
We will leave the default configuration of the network card.
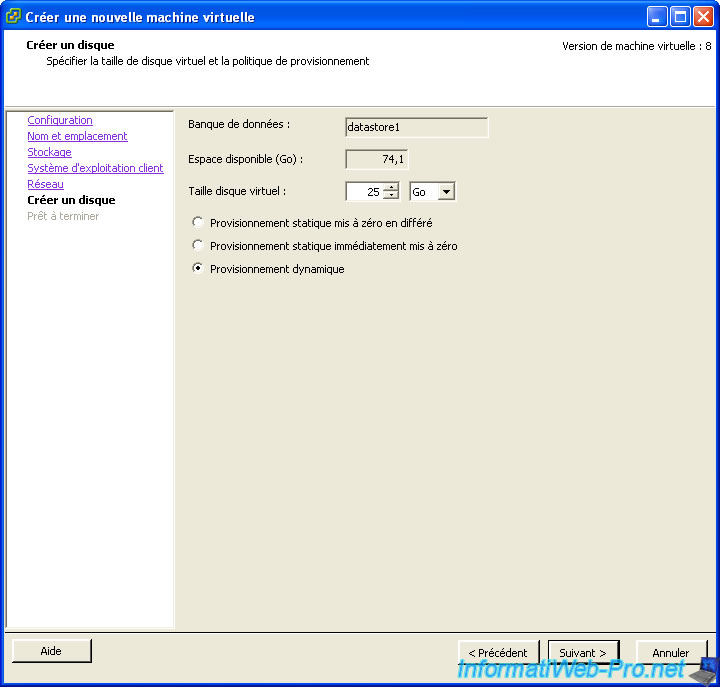
Specify size virtual hard disk. We checked "dynamic provisioning means that the file containing the disk will take the size of its contents and therefore will grow as and when the data is put into the virtual machine, but this file can not exceed 25 GB. In the static provisioning, the file containing the hard drive will all the time 25 GB which avoids fragmentation but be so careful not to create too VHD not take any disk space on the server.
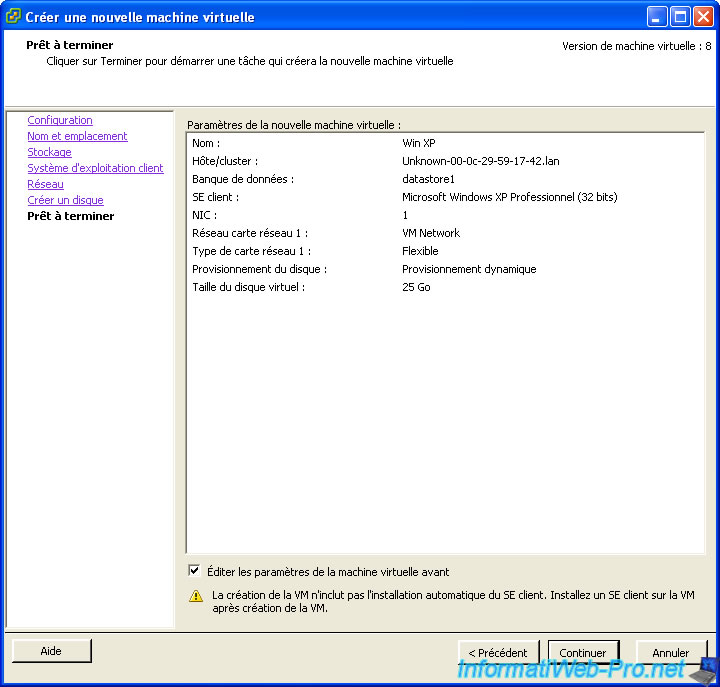
VMWare provides a summary of the settings you just made. Check the box and press "Continue".
Share this tutorial
To see also
-
VMware 9/30/2022
VMware ESXi 6.7 - Put the server in maintenance mode
-
VMware 8/24/2022
VMware ESXi 7.0 / 6.7 - Export and import VMs via VMware OVF Tool
-
VMware 8/5/2022
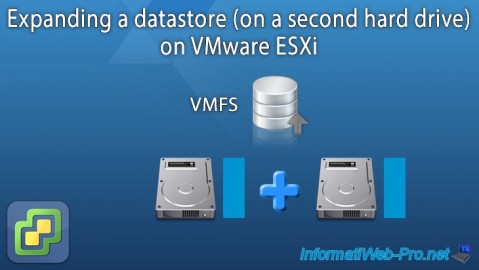
VMware ESXi 7.0 / 6.7 - Extend a datastore (on a second hard drive)
-
VMware 8/31/2022
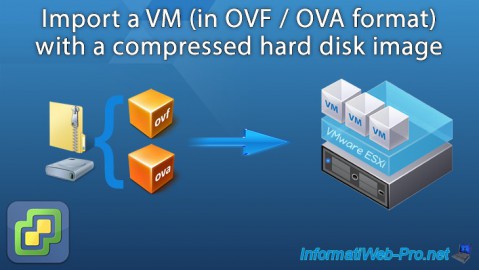
VMware ESXi 7.0 / 6.7 - Import a VM (OVF / OVA) with a compressed hard disk
You must be logged in to post a comment