Install the web interface of a certificate authority (CA) on Windows Server 2016
- Windows Server
- 06 October 2023 at 08:40 UTC
-

- 2/4
3. Create a certificate template to secure access to your CA's web interface
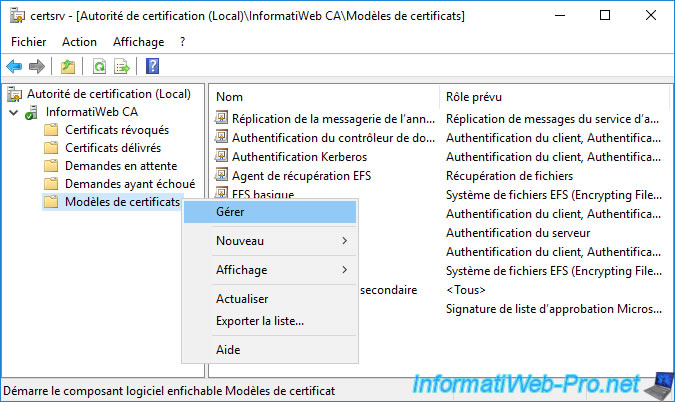
To get started, open the "Certification Authority" console and right-click "Manage" on "Certificate Templates".
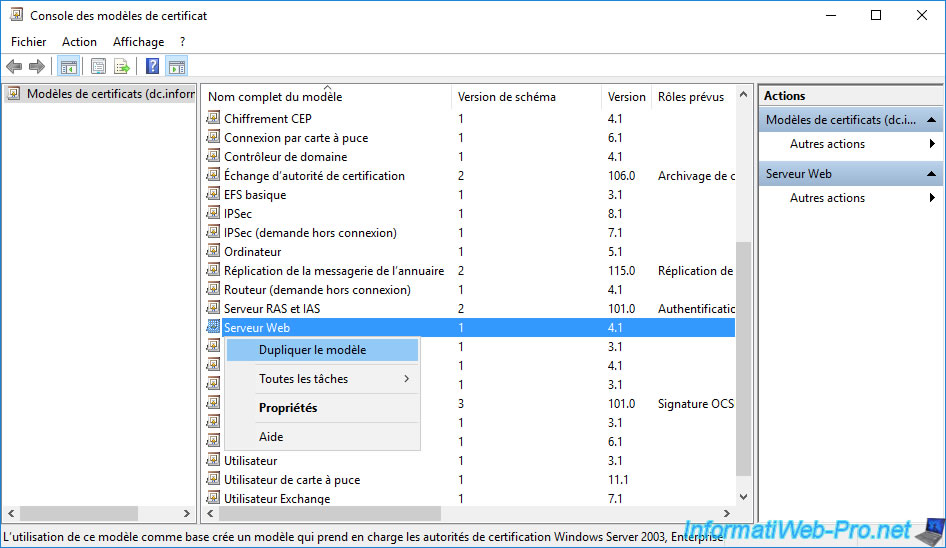
Then, right-click "Duplicate Template" on the "Web Server" certificate template.
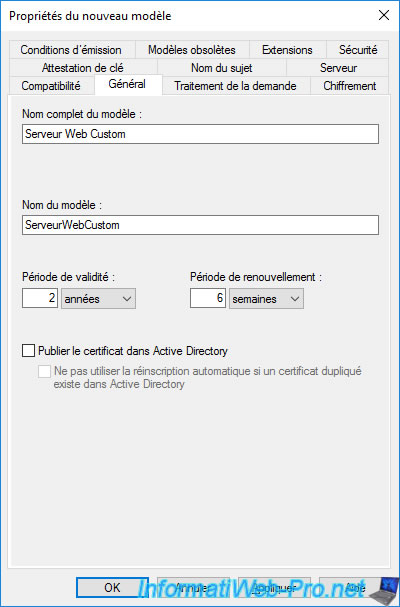
Change the full template name to "Custom Web Server" (for example).
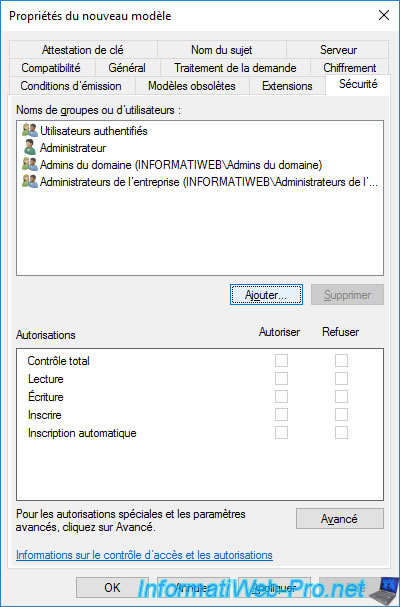
In the "Security" tab, you can see that domain administrators (which includes the "Administrator" account) have the permissions :
- Read : allows you to see the certificate template
- Enroll : allows you to enroll (issue) certificates using this certificate template
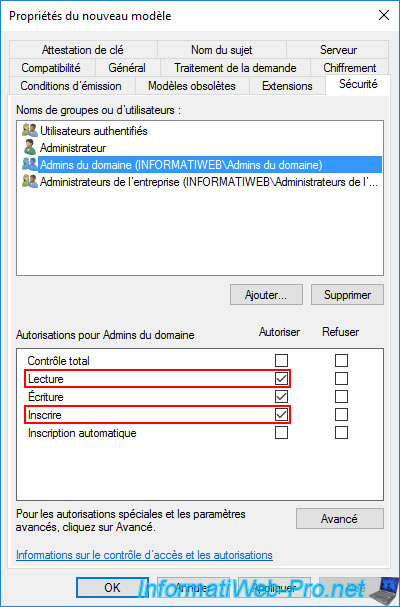
To be able to enroll certificates remotely (from another computer or server via the mmc console), you must also allow the desired computer or server to enroll certificates.
To do this, click on Add.
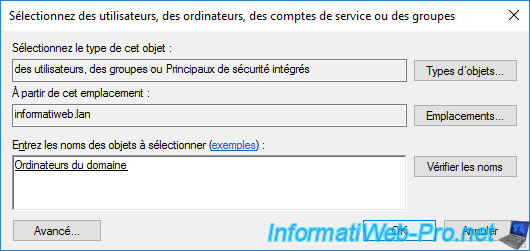
In our case, we will simply allow all computers in the domain by adding the "Domain Computers" group.
Warning : if you have installed your certificate authority on the same server as your domain controller (which is strongly discouraged, but possible in the case of a lab), you will have to add your "CA" server in this "Security" tab ".
Indeed, a domain controller is in the "Domain Controllers" group and not "Domain Computers".
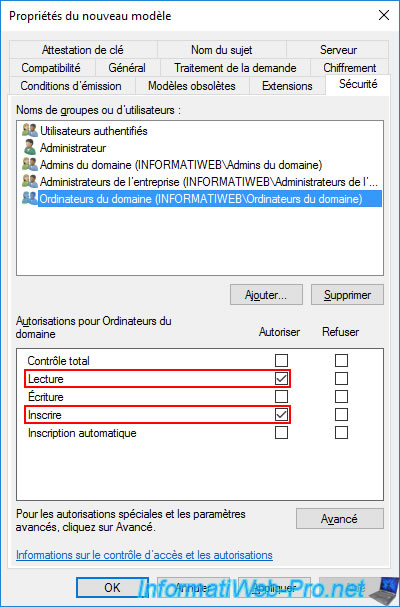
Grant "Read" and "Enroll" permissions to this "Domain Computers" group.
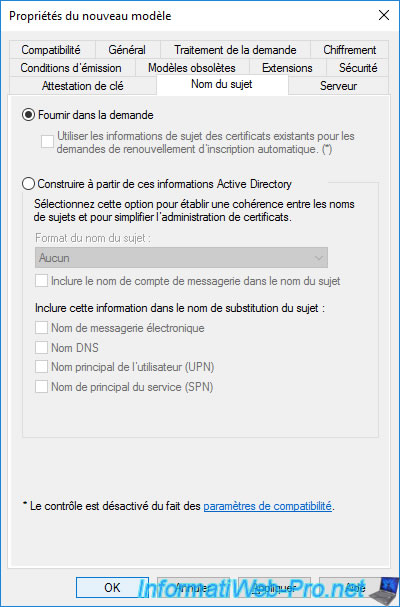
In the "Subject Name" tab, leave the "Supply in the request" option selected.
This will notably allow you to generate certificates by submitting a custom certificate signing request generated from IIS Manager later.
The newly created certificate template appears.
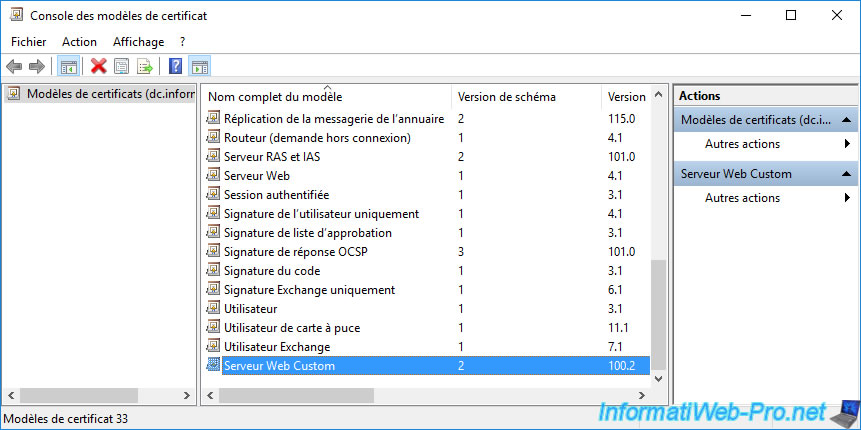
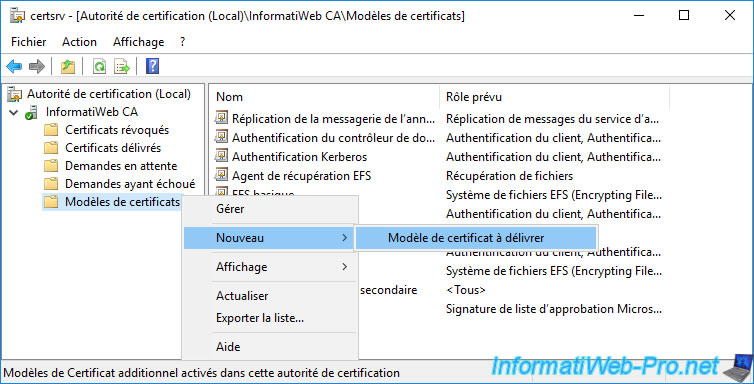
To make this new certificate template available for certificate enrollment, you must first add it to the certificate templates to be issued.
To do this, right-click "New -> Certificate Template to Issue" on "Certificate Templates".
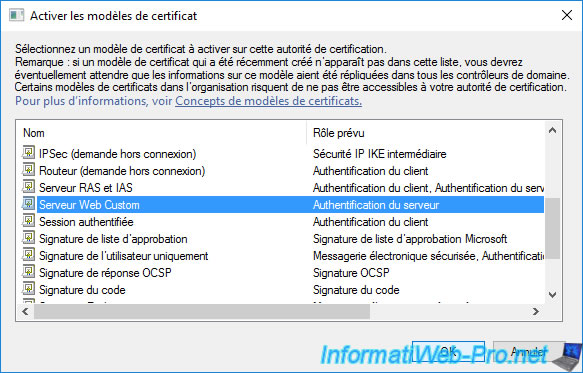
Select the newly created certificate template and click OK.
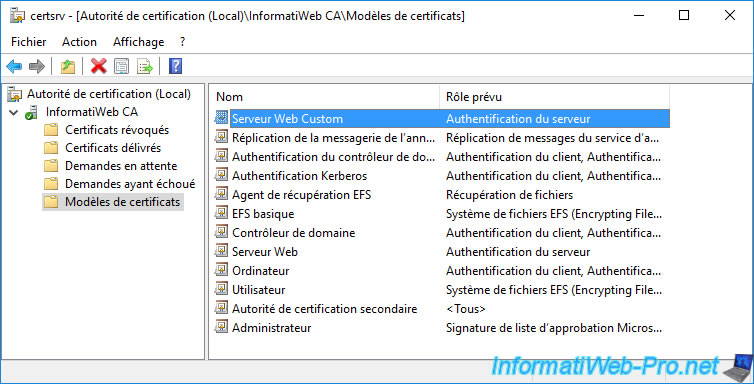
The newly created certificate template appears in the list.
4. Request a certificate to secure your certificate authority's web interface
As you have seen previously, it's not possible to request certificates via the web interface of your certification authority as long as it doesn't use the HTTPS protocol.
However, to use this secure protocol, you need a valid certificate.
You will therefore have to request it in another way (via the mmc console, for example).
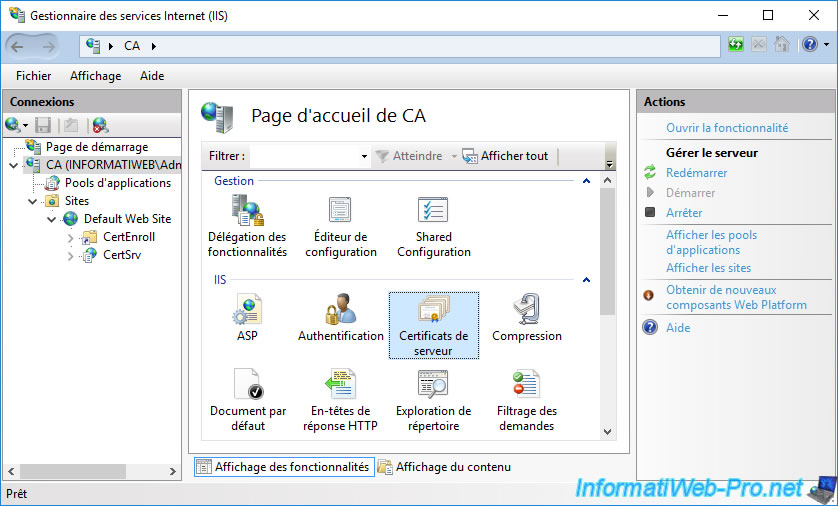
To begin, in IIS Manager, select your web server and double-click : Server Certificates.
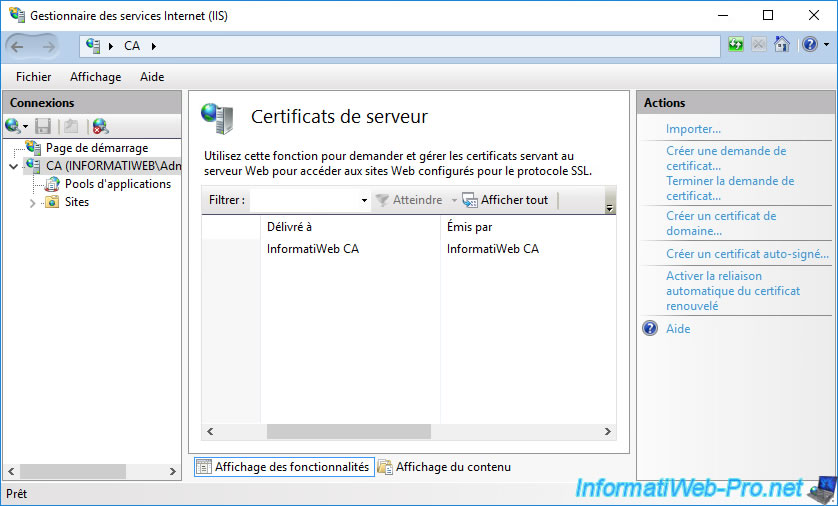
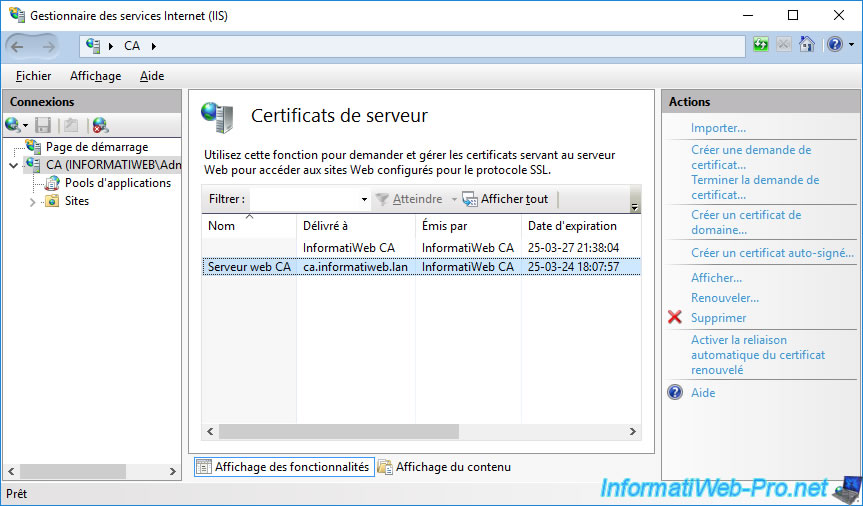
As you can see, by default, only one certificate is present (if you have installed the web interface on the server where your CA is installed).
However, you can't use this certificate to secure the web interface of your certification authority, because the certificate template used does not correspond to the intended use. Moreover, this one is not valid for the domain name of your server that you indicated in the URL to access the web interface of your certification authority.
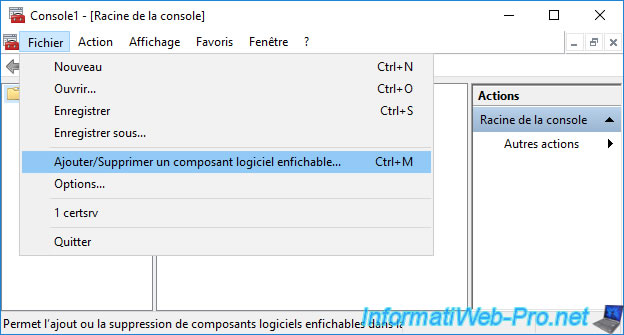
Open a "mmc" console and go to : File -> Add/Remove Snap-in.
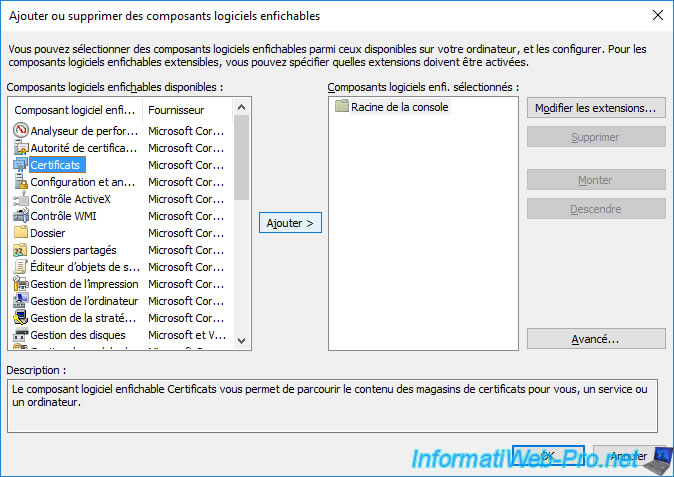
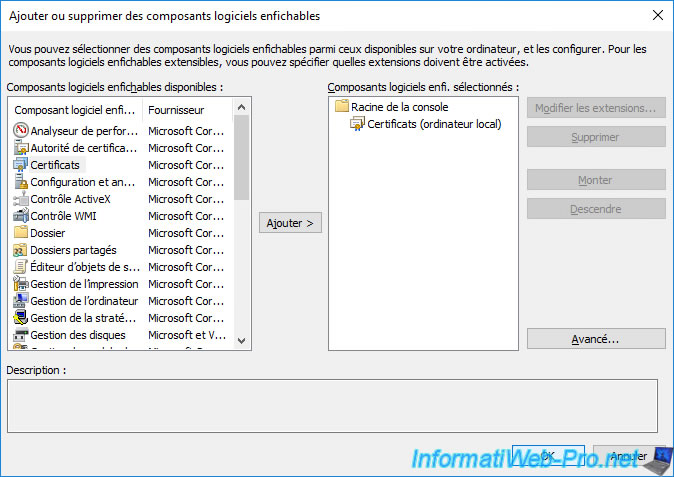
Select the "Certificates" component and click : Add.
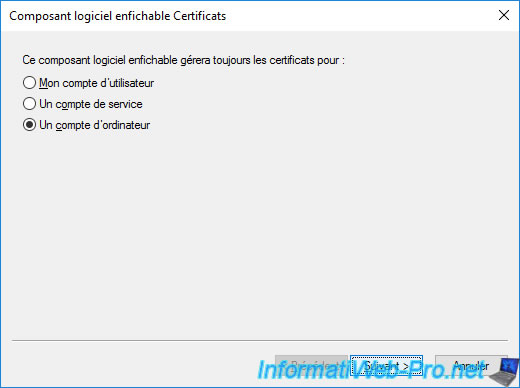
Select "Computer account" as this will be a certificate for your server.
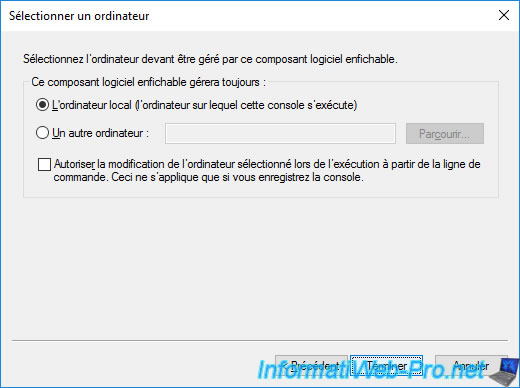
Leave the "Local computer..." option selected.
Click OK.
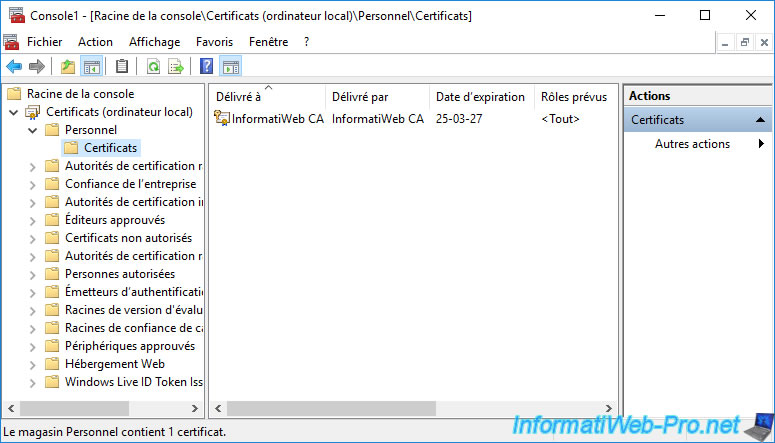
As you can see, your CA certificate (along with its associated private key) appears again in the "Personal" certificate store.
Double click on this certificate to display it.
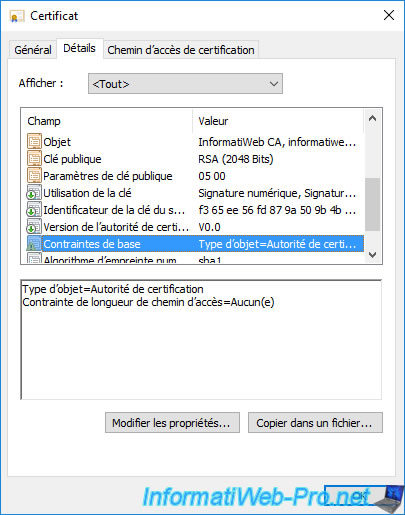
If you go to the "Details" tab and select the "Basic Constraints" field, you will see that the object type is : Certification Authority.
In addition, if you select the "Subject" field of this certificate, you will see that the common name (CN) of this certificate corresponds to the name of your certification authority.
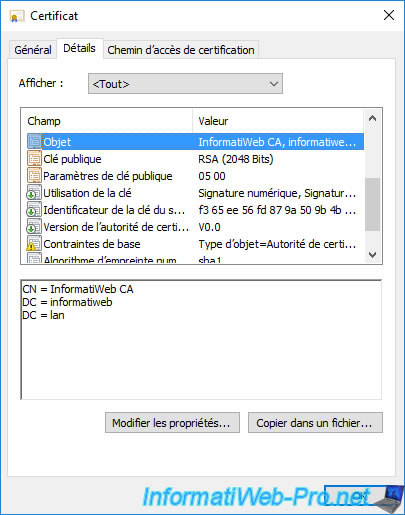
The purpose of the previous screenshots is to show you why you can't use the certificate currently present in your "Personal" certificate store to secure access to the web interface of your certification authority.
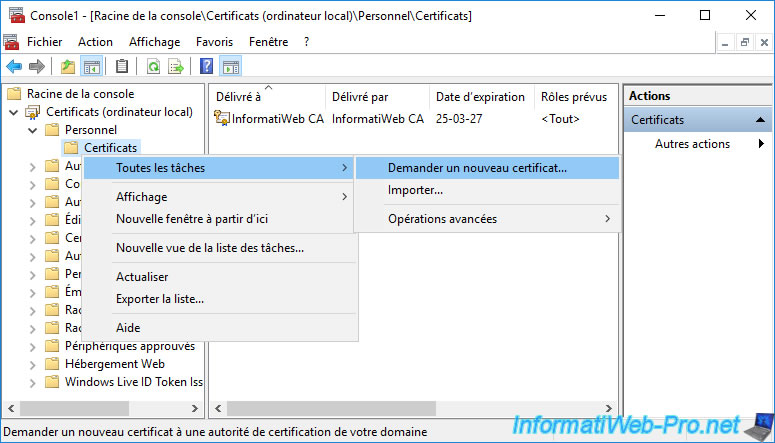
Right-click on the "Personal -> Certificates" folder and click : All Tasks -> Request New Certificate.
Click on "Next" twice to obtain the list of certificate templates for which you have the right to enroll certificates.
For the certificate template created previously to appear, it's necessary that :
- authenticated users have a "Read" permission
- the user you are logged in with (or a group they are part of) has "Read" and "Enroll" permissions
- the computer where you opened the "mmc" console must also have "Read" and "Enroll" permissions
Note that these permissions must be set in the "Security" tab of the certificate template created earlier.
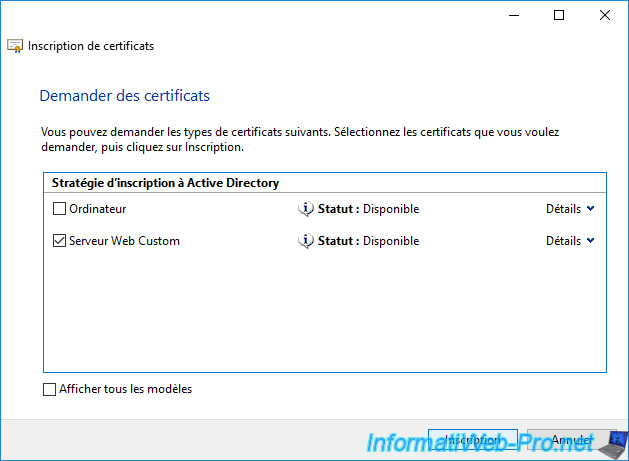
If you followed the previous steps correctly, the custom certificate template should appear (as on the image below).
Select this certificate template and click the link "More information is required to enroll for this certificate. Click here to configure settings." attach.
Note that this link appears because we selected the "Supply in the request" option in the "Subject Name" tab of the certificate template created earlier.
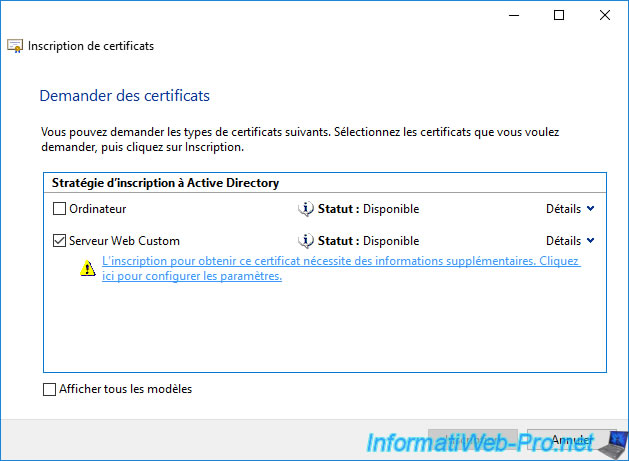
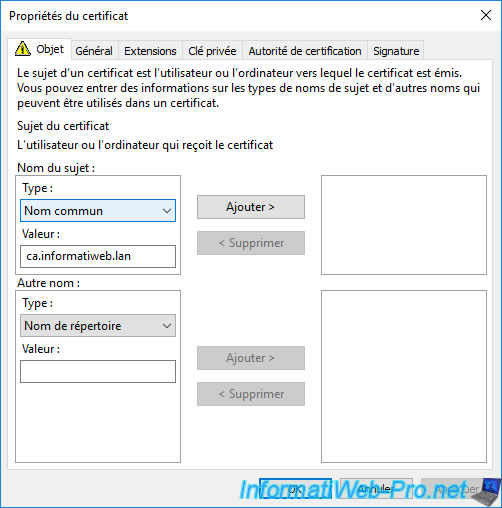
Once you have clicked on the link displayed above, a "Certificate Properties" window will appear.
The only important and mandatory information to be able to enroll a certificate that will be valid for the web interface of your certification authority is the common name.
This common name must correspond to the domain name of the server where the web interface of your certification authority is installed.
In our case : ca.informatiweb.lan.
To do this, select "Common name" for the subject type and enter the desired domain name (in our case : ca.informatiweb.lan) as the value.
Then, click on the "Add" button (in the center).
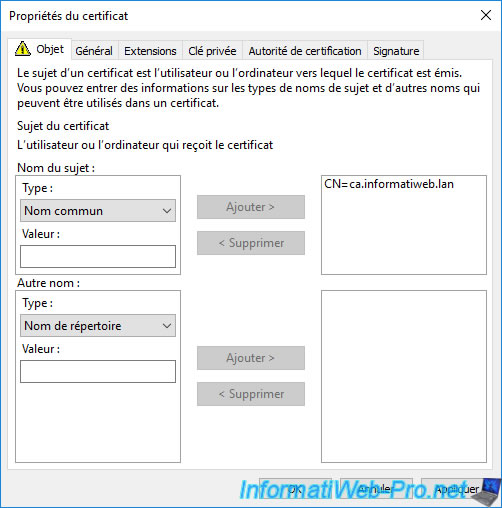
The common name (CN) appears on the right.
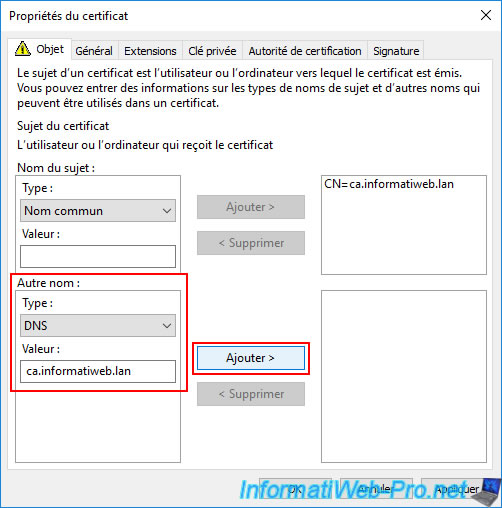
Warning : with recent versions of modern web browsers (Mozilla Firefox, Google Chrome, Microsoft Edge, ...), your server's domain name must now be specified as both the "Common Name" (CN) AND as an alternative DNS name.
Ideally, your server's domain name (DNS) should be listed first in the list of alternative DNS names.
Otherwise, these modern browsers will consider your certificate invalid.
To do this, in the "Other name" section, select "Type: DNS" and enter your server's domain name (DNS) as the value.
Then, click the "Add" button (located right next to this field).
Sources :
- Support for commonName matching in Certificates - Chrome Platform Status.
- 1400293 - Firefox does not accept remote server's certificate if self-signed root cert installed via update-ca-trust - Red Hat Bugzilla – Bug 1400293.
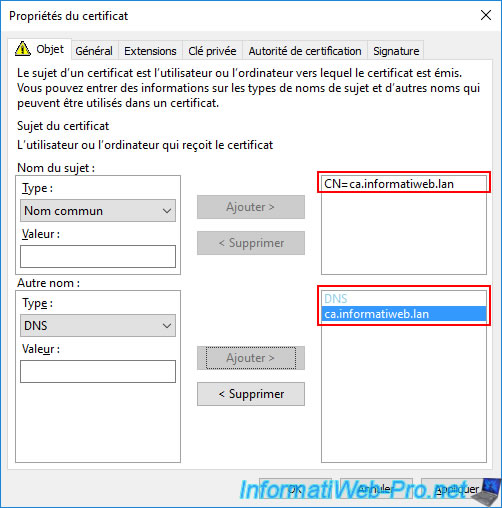
Now, your server's domain name (DNS) appears as both the common name (CN) and as an alternative name of type "DNS".
This certificate will therefore be considered valid, even with recent versions of your web browsers.
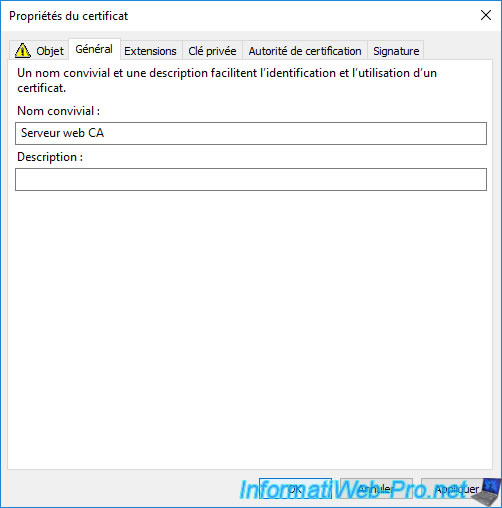
To make it easier to find your certificates in the future, as well as in the "Server Certificates" section of IIS Manager, you can add a friendly name in the "General" tab.
This value will be purely indicative for you. So, you can specify whatever you want.
However, it will also be visible on the client side if someone looks at the information in your certificate.
Once you have provided the desired information, click OK.
Then, in the "Certificate Enrollment" window, the link will be gone.
Click on : Enroll.
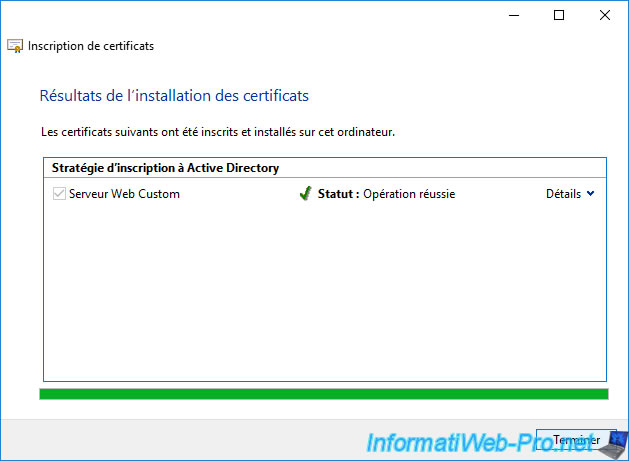
Wait while the certificate is enrolled (which is quite fast).
Once the certificate enrollment is complete, the "Succeeded" status will appear.
Click Finish.
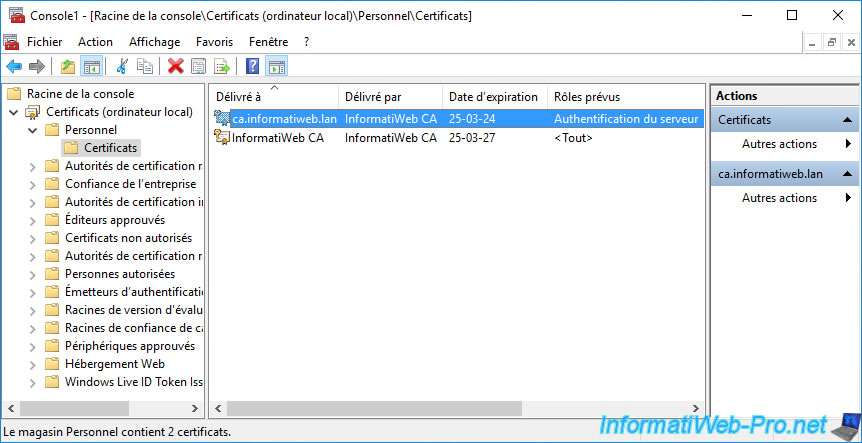
The new requested certificate appears.
As you can see, this certificate :
- was issued to : domain name of the server where the web interface of your certification authority is installed
- was issued by : name of your certification authority
- is provided for server authentication.
If you double-click on this new certificate, you will find the same information, as well as the fact that you also have the private key associated with this certificate.
Indeed, it's thanks to this private key that your web server will be able to encrypt its response.
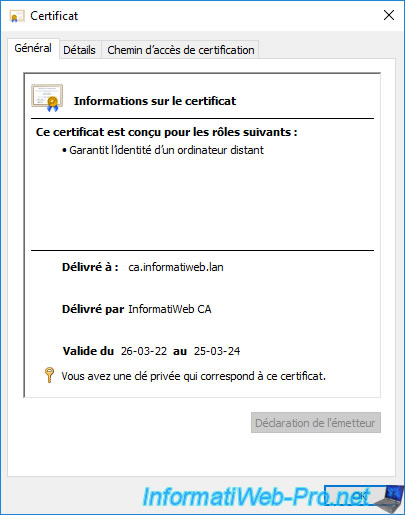
In the "Details" tab, if you select the "Subject" field, you will see that the common name (CN) corresponds to the domain name of the server where the web interface of your certification authority is installed.
That is, the domain name specified as the common name when enrolling this certificate.
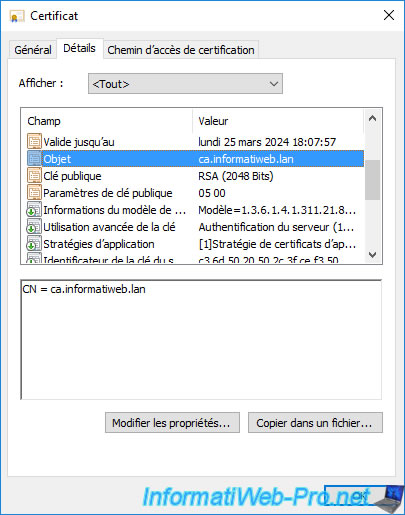
If you select the "Application Policies" field, you will see that this certificate is intended for server authentication.
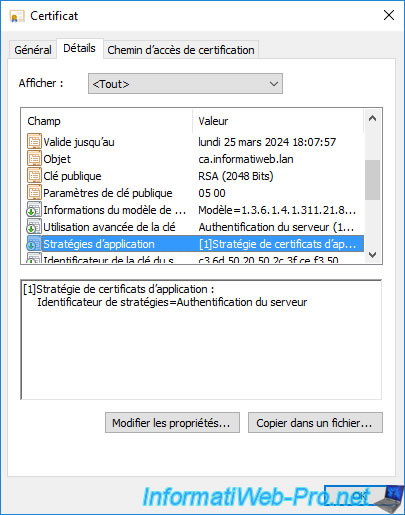
For your certificate to be considered valid by modern web browsers, make sure that your server's domain name (DNS) also appears as the "DNS Name" in the "Subject Alternative Name" field of your certificate.
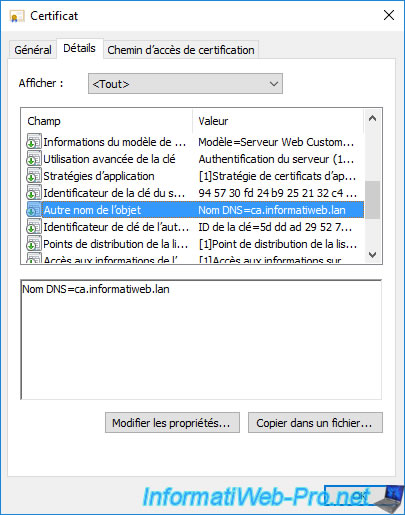
At the very bottom, you will find the "Friendly name" field (if you have previously defined it during certificate enrollment).
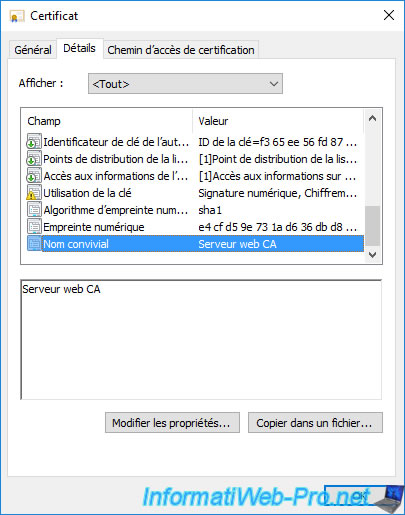
If you refresh the "Server Certificates" section (by pressing F5, for example) of IIS Manager, you will see that the new certificate will appear.
Share this tutorial
To see also
-
Articles 1/26/2024
SafeNet Authentication Client (SAC) - Installation and overview
-
Articles 9/8/2023
What is encryption and how does it work ?
-
Windows Server 12/29/2023
WS 2016 - AD CS - Backup and restore a certificate authority (CA)
-

Windows Server 1/19/2024
WS 2016 - AD CS - Buy smart cards and log in via them

No comment