Deploy a multi-site PKI infrastructure on Windows Server 2016
- Windows Server
- 22 December 2023 at 11:41 UTC
-

- 5/5

15. Use by default the authority present on your Active Directory site
Currently, your client PCs and your servers trust the certificates issued by your various certification authorities.
Depending on your rights to the different certificate templates for your CAs, you may be able to obtain certificates from any subordinate CA in your organization.
Nevertheless, for performance and ease of management reasons, we recommend that you use the certification authority present on your Active Directory site.
In other words, to use the secondary certificate authority in Brussels to issue certificates to servers, computers and users in Brussels. And use that of Paris, for what is in Paris.
In this way, you will avoid using the WAN links unnecessarily and in the event of compromise of the private key of the certification authority located in Paris (for example), only what is in Paris will be affected.
For this to be possible, there are 2 prerequisites :
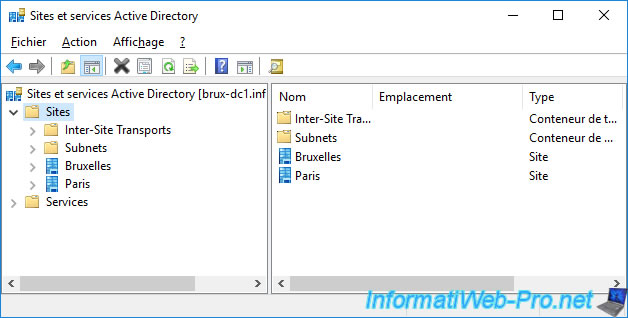
- information about Active Directory sites must have been configured through the "Active Directory Sites and Services" console.
- the "msPKI-Site-Name" attribute must be configured for your various sub-CAs (as you will see below).
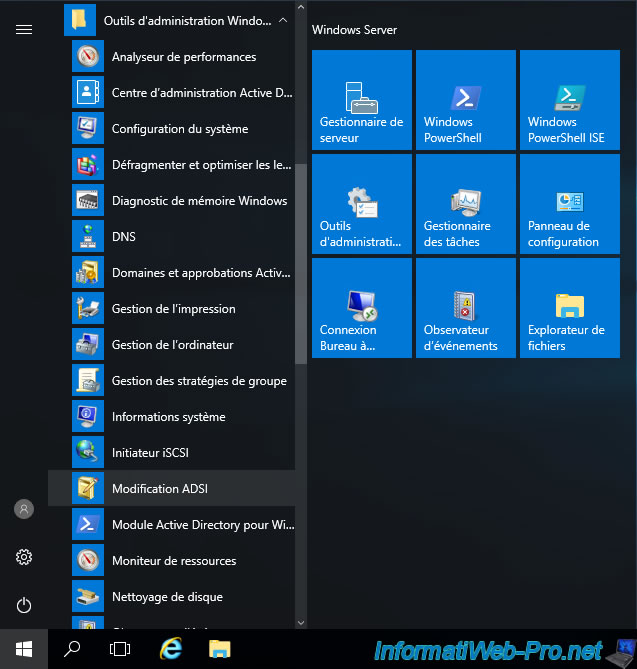
To begin, open the "ADSI Edit" console on one of your Active Directory domain controllers.
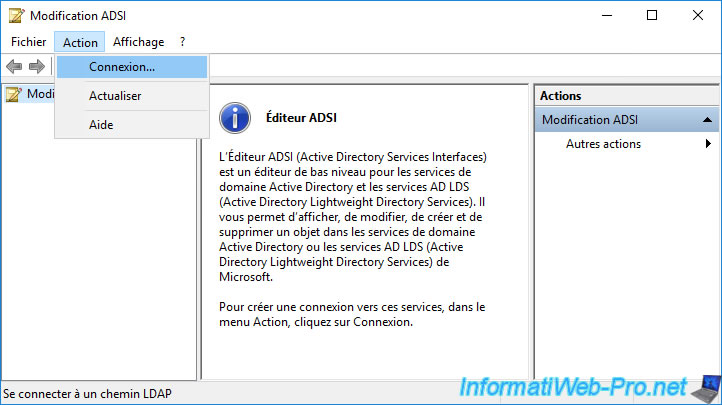
In the "ADSI Edit" console that appears, click on : Action -> Connect to.
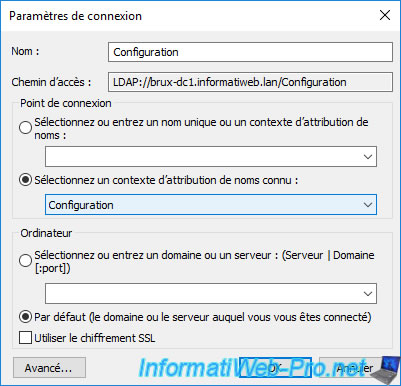
Select the "Configuration" well known naming context and click OK.
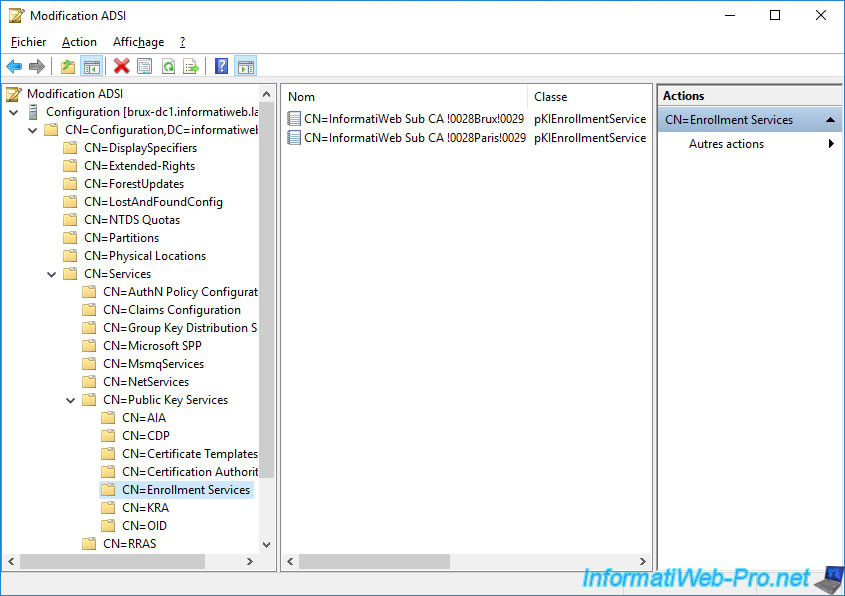
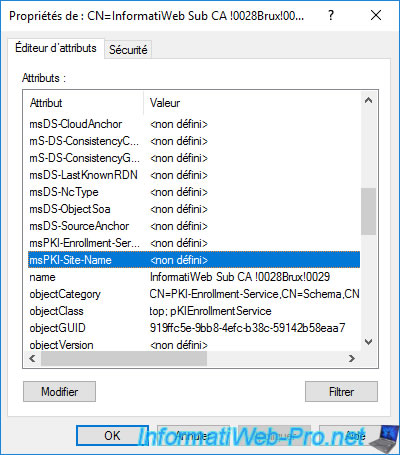
Go to the "CN=Configuration,... -> CN=Services -> CN=Public Key Services -> CN=Enrollment Services" folder and you will see 2 objects appear.
You will easily notice that their names match the names of your subordinate CAs.
If you double click on one of these and look for the "msPKI-Site-Name" attribute, you will see that its value is currently not set.
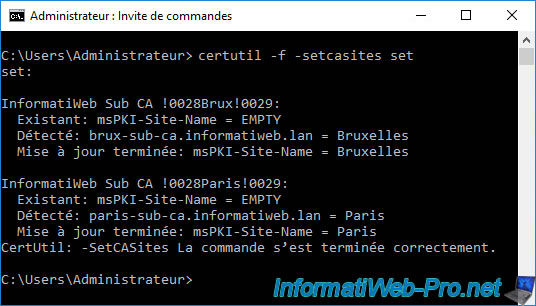
To automatically set the value of this "msPKI-Site-Name" attribute for your different sub-certificates, you must run the command :
Batch
certutil -f -setcasites set
As you can see, this command automatically manages to detect that :
- our secondary certification authority "InformatiWeb Sub CA (Brux)" whose domain name is "brux-sub-ca.informatiweb.lan" is located on our Active Directory site in Brussels
- our secondary certification authority "InformatiWeb Sub CA (Paris)" whose domain name is "paris-sub-ca.informatiweb.lan" is located on our Active Directory site in Paris
Source : AD DS Site Awareness for AD CS and PKI Clients.
Once the above command has been executed, double click on one of your CAs (in the "ADSI Edit" console) and you will see that its "msPKI-Site-Name" attribute value has now been set.
In our case, the value of this "msPKI-Site-Name" attribute for our "InformatiWeb Sub CA (Brux)" authority is : Brussels.

The value of this "msPKI-Site-Name" attribute for our "InformatiWeb Sub CA (Paris)" authority is : Paris.

Note that the values for this "msPKI-Site-Name" attribute correspond to the names of your Active Directory sites.
Warning : as usual with a multi-site Active Directory infrastructure, you will have to force the replication of data created on an Active Directory site to your other Active Directory sites so that this data is also known on these other Active Directory sites.
In our case, we executed the command on our "brux-dc1" domain controller (which is located on the Brussels site).
In Brussels, the "msPKI-Site-Name" attributes of our certification authorities are therefore correctly configured.
But in Paris, the value of these attributes is always "<not set>".
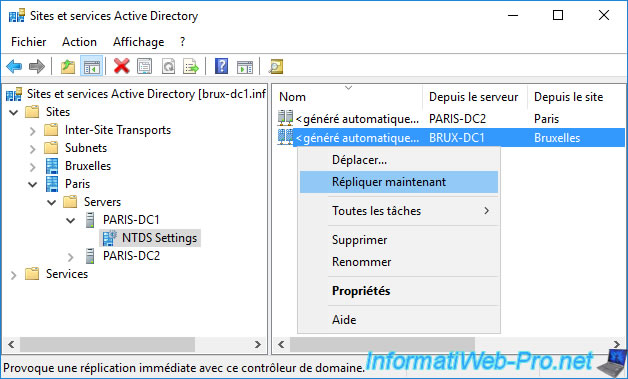
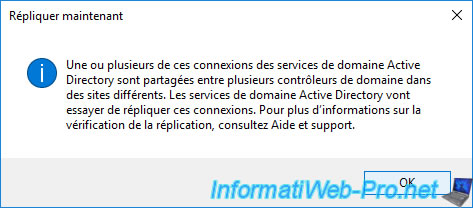
In the "Active Directory Sites and Services" console of our "brux-dc1" domain controller, we select the "NTDS Settings" node of our remote domain controller "paris-dc1" located in Paris, then we right-click "Replicate Now" on the connection object regarding our "brux-dc1" domain controller.
Thus, this will replicate the data created in Brussels to our Active Directory site in Paris.
Click OK and wait up to 1 minute. The time data replication takes place.
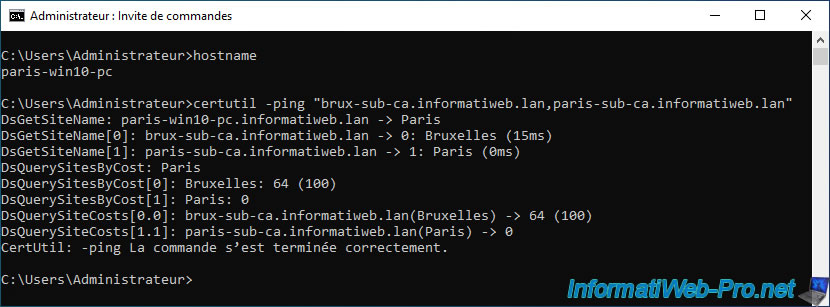
Now that this "msPKI-Site-Name" attribute is correctly configured for all our secondary CAs on our different Active Directory sites, we can predict which secondary CA will be contacted by our client PCs.
To do this, simply run the following command indicating the domain name of your secondary certification authorities separated by commas.
Batch
certutil -ping "brux-sub-ca.informatiweb.lan,paris-sub-ca.informatiweb.lan"
On our client PC "brux-win10-pc" located in Brussels, we can see that the "cost" to Brussels (brux-sub-ca.informatiweb.lan) is 0.
On the other hand, it's 64 towards Paris (paris-sub-ca.informatiweb.lan).
Plain Text
DsGetSiteName: brux-win10-pc.informatiweb.lan -> Bruxelles
DsGetSiteName[0]: brux-sub-ca.informatiweb.lan -> 0: Bruxelles (109ms)
DsGetSiteName[1]: paris-sub-ca.informatiweb.lan -> 1: Paris (109ms)
DsQuerySitesByCost: Bruxelles
DsQuerySitesByCost[0]: Bruxelles: 0
DsQuerySitesByCost[1]: Paris: 64 (100)
DsQuerySitesCosts[0.0]: brux-sub-ca.informatiweb.lan(Bruxelles) -> 0
DsQuerySitesCosts[0.0]: paris-sub-ca.informatiweb.lan(Paris) -> 64 (100)
Certutil: -ping command completed successfully.

On our client PC "paris-win10-pc" located in Paris, we can see the opposite result.
Indeed, it's the "cost" to Paris (paris-sub-ca.informatiweb.lan) which is 0.
On the other hand, it's 64 towards Brussels (brux-sub-ca.informatiweb.lan).
This is completely normal, because a WAN link will always be slower (= higher cost) than a LAN link (= much lower cost).
Note that this is possible only thanks to the prior configuration of the "msPKI-Site-Name" attribute presented previously.
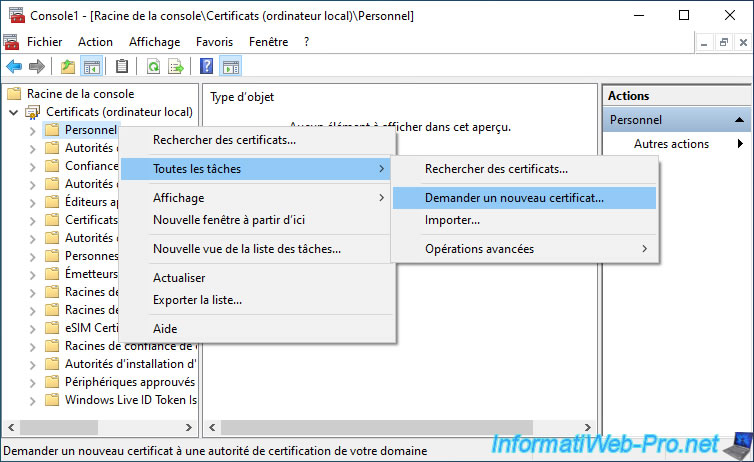
16. Request a certificate from the mmc console
16.1. Request a certificate from the Brussels site
To begin, we will request a certificate via the "mmc" console from our "brux-win10-pc" client pc located on the Brussels site.
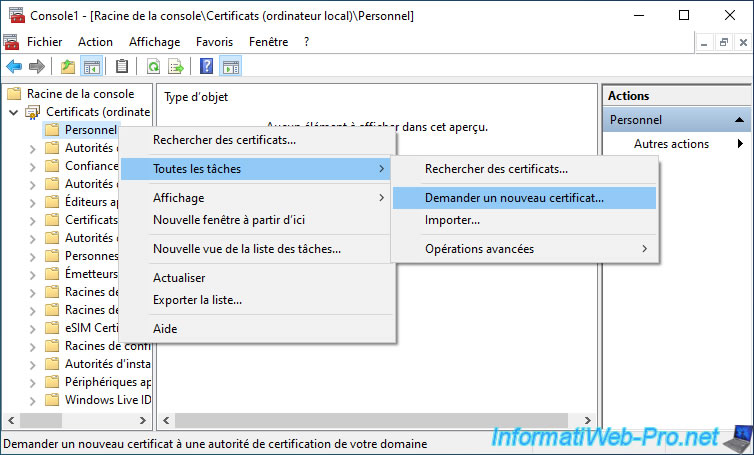
The chosen certificate template doesn't matter.
The only important thing in this example is that we have the right to enroll it from our 2 certification authorities if we wish.
This means that the certification authority will be chosen according to the physical site where you are and according to the value of the "msPKI-Site-Name" attribute defined for your different certification authorities.
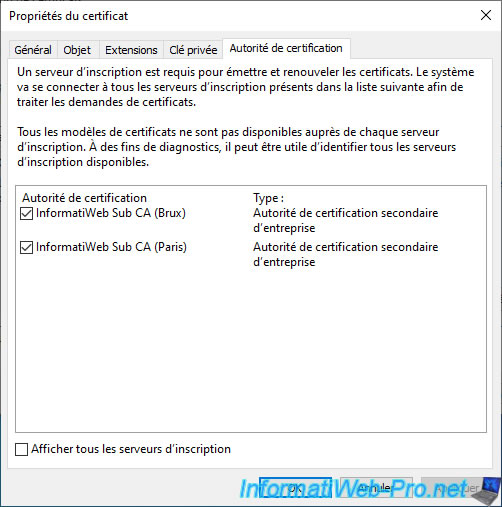
Click on "Details", then on : Properties.

In the "Certification Authorities" tab, you will see that the 2 secondary certification authorities are present.
However, the first is that of Brussels, because we are connected to a client PC located in Brussels.
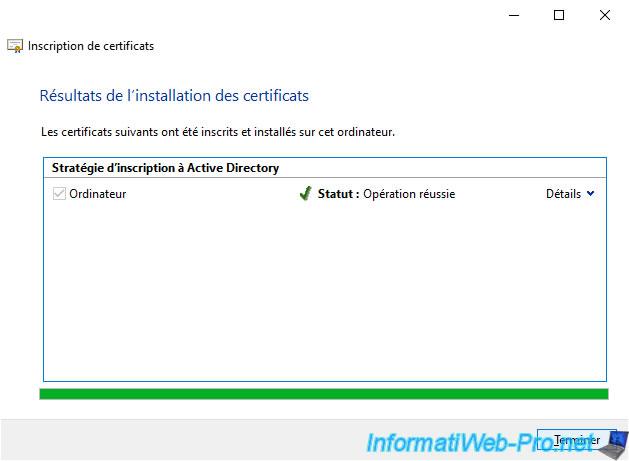
Click on : Enroll.
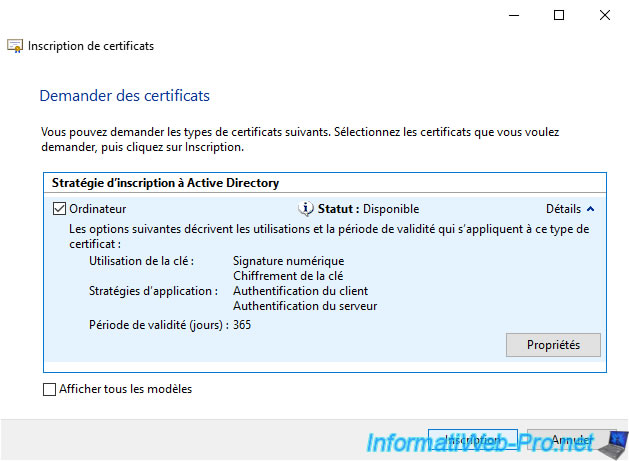
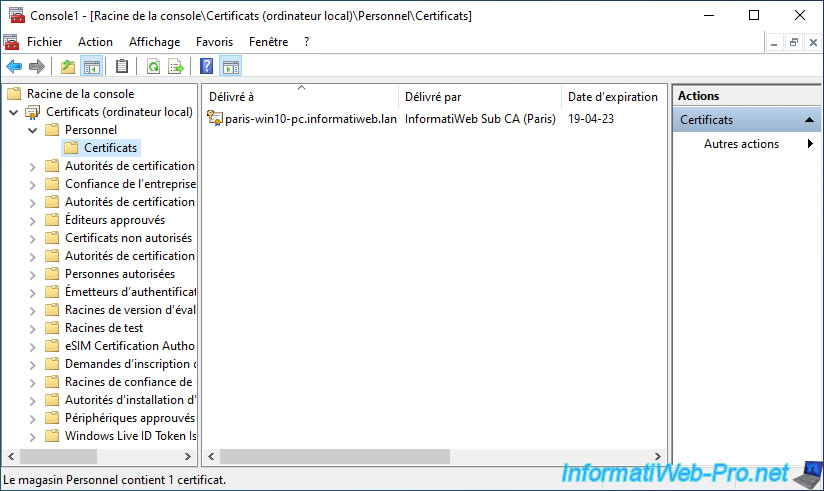
The certificate has been enrolled.
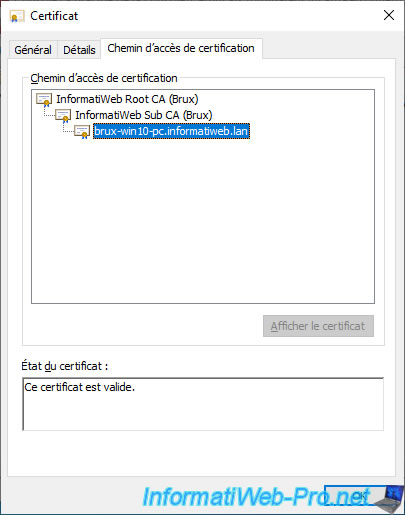
In our "Personal" certificate store, we can see that the certificate for our "brux-win10-pc" client PC was issued by our "InformatiWeb Sub CA (Brux)" secondary certificate authority also located in Brussels.

The certification path therefore contains :
- the certificate of your root certification authority (which is in our case in Brussels)
- the certificate of your secondary certification authority (in our case, that of Brussels in this case)
- the certificate issued to this client PC located in Brussels
16.2. Request a certificate from the Paris site
Now, we will request a certificate based on the same certificate template from a client PC located at the remote site (in Paris).
We again choose the "Computer" certificate template and we click again on "Details", then on : Properties.
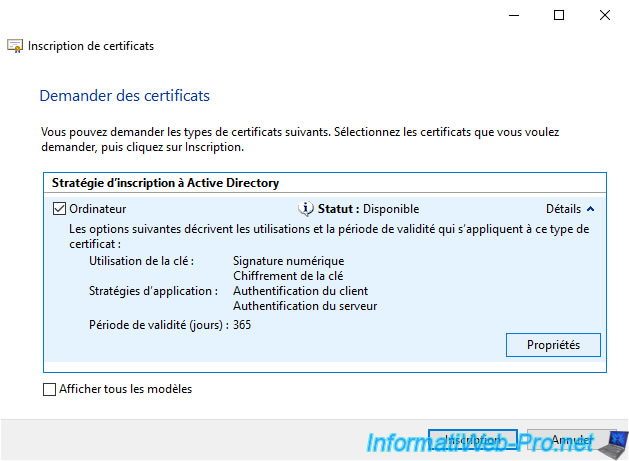
In the "Certificate Authority" tab, you can see that the order in which your secondary enteprise CAs are displayed has changed and it's now the one in Paris that is displayed first.

Initiate certificate enrollment.

As you can see, this time, the certificate issued to our client PC located in Paris was issued by our Paris CA.
This time, the certification path therefore includes:
- the certificate of your root certification authority (which is in our case in Brussels)
- the certificate of your secondary certification authority (in this case, that of Paris)
- the certificate issued to this client PC located in Paris

Share this tutorial
To see also
-

Articles 1/26/2024
SafeNet Authentication Client (SAC) - Installation and overview
-

Articles 9/8/2023
What is encryption and how does it work ?
-
Windows Server 12/29/2023
WS 2016 - AD CS - Backup and restore a certificate authority (CA)
-

Windows Server 1/19/2024
WS 2016 - AD CS - Buy smart cards and log in via them
No comment