- Windows Server
- WinRM
- 10 November 2018 at 12:36 UTC
-

- 1/3
With Windows Server 2012 and 2012 R2, you can manage multiple servers from a single location (in this case : the server manager).
That said, for this to be possible, it's recommended to link them to the same Active Directory domain.
Then, you will need to configure your remote servers to allow remote management.
- Autoriser la gestion à distance d'un serveur
- Allow server management from the "Computer Management" console
- Allow remote desktop
- Add servers in the server manager
- Install roles and/or features on a remote server
- Create a server group
- Manage your servers remotely
1. Autoriser la gestion à distance d'un serveur
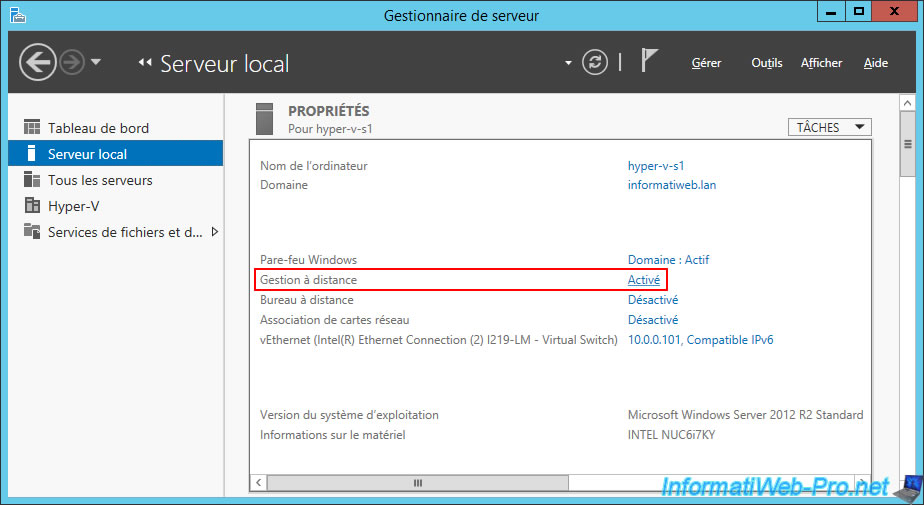
To allow remote management of a server, open the Server Manager on the server you are managing remotely and click "Local Server".
Then, check that the status of "Remote management" is "Enabled".
If it doesn't, click "Disabled".
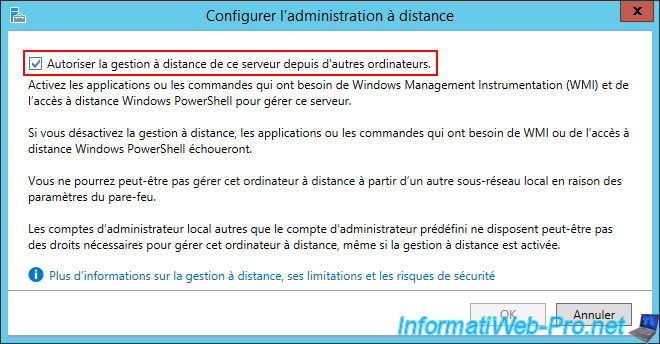
Check the "Enable remote management of this server from other computers" box, and then click OK.
2. Allow server management from the "Computer Management" console
2.1. Allow computer management
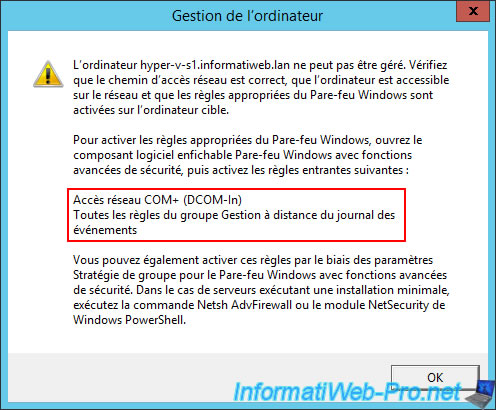
To manage your remote server from the Windows "Computer Management" console, you will need to enable rules in the remote server's Windows Firewall :
- COM+ Network Access (DCOM-In)
- all rules in the Remote Event Log Management group
Otherwise, the "computer [remote server name] cannot be connected" error will be displayed.
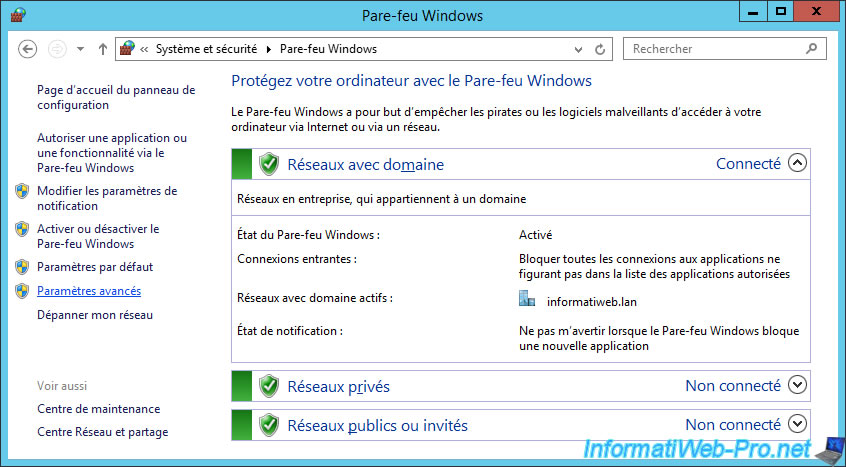
To allow these rules, go to Control Panel -> System and Security -> Windows Firewall -> Advanced settings.
In the "Inbound Rules" section, enable the "COM+ Network Access (DCOM-In)" rule.
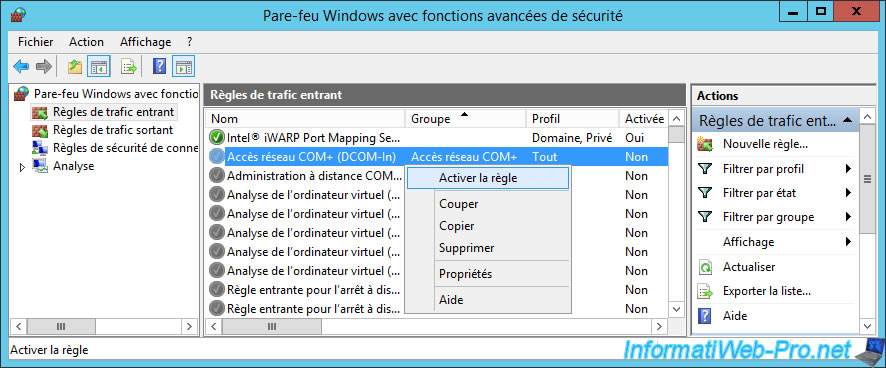
And the rules of the "Remote Event Log Management" group :
- Remote Event Log Management (NP-In)
- Remote Event Log Management (RPC)
- Remote Event Log Management (RPC-EPMAP)
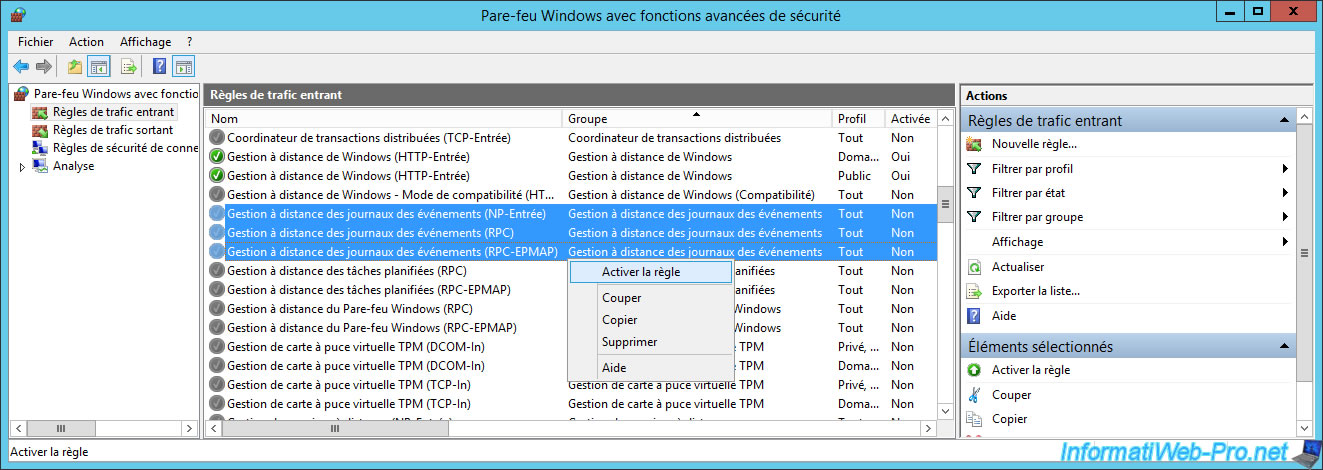
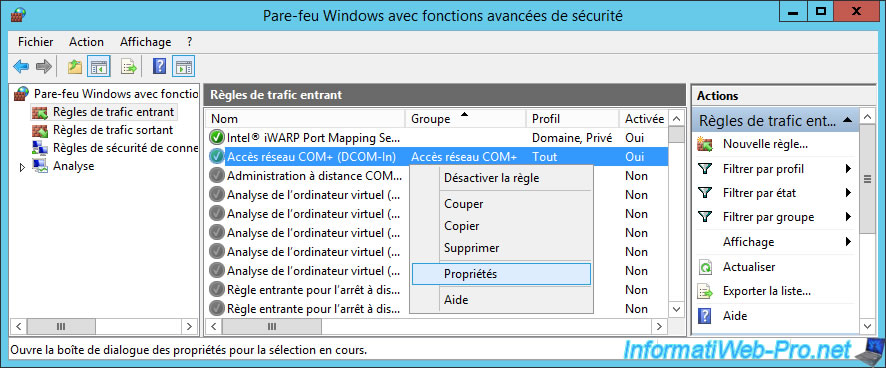
To better secure these rules (created by Windows), right-click "Properties" on them (one by one).
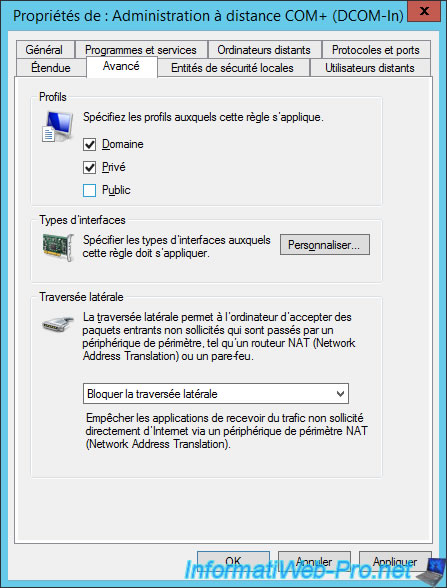
In the "Advanced" tab, uncheck the "Public" box.
2.2. Allow remote disk management
As noted at the end of the "Troubleshooting Disk Management" article from Microsoft, in order to manage the disks of the remote server, you will need to enable the Windows VDS service and allow it in the server's firewall (remote AND source).
This VDS service is called : Virtual Disk.
Right-click "Properties" on this service.
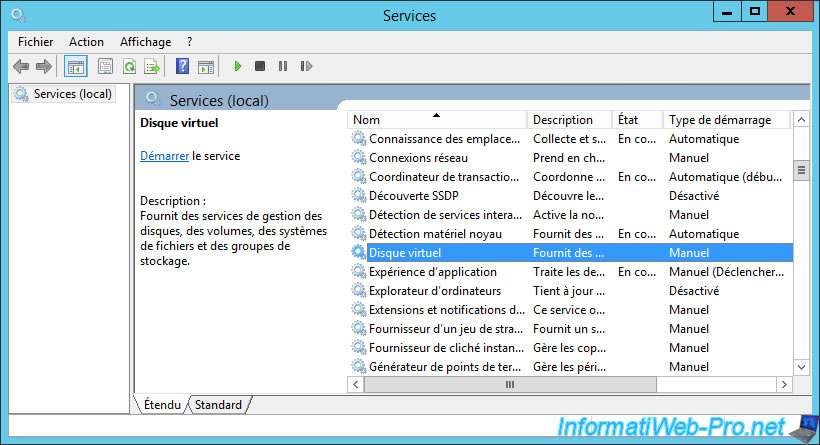
As you can see, the real name of this service is "vds".
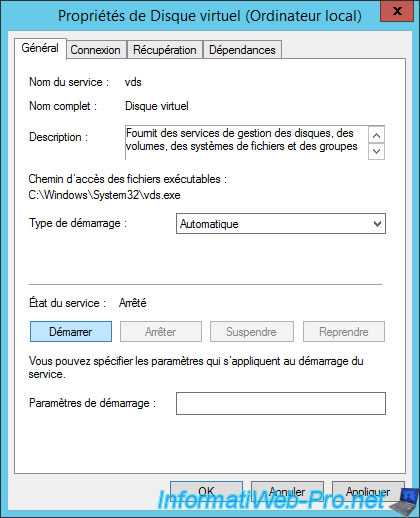
Choose "Automatic" as the startup type, then click "Start".
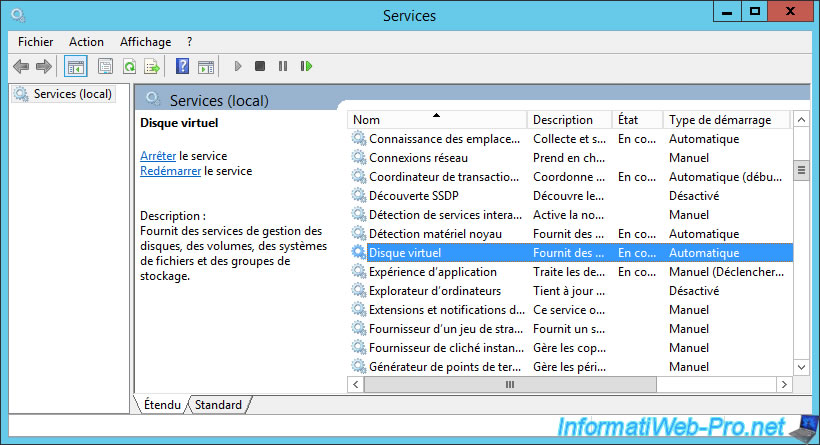
Now, the "Virtual Disk" service is running.
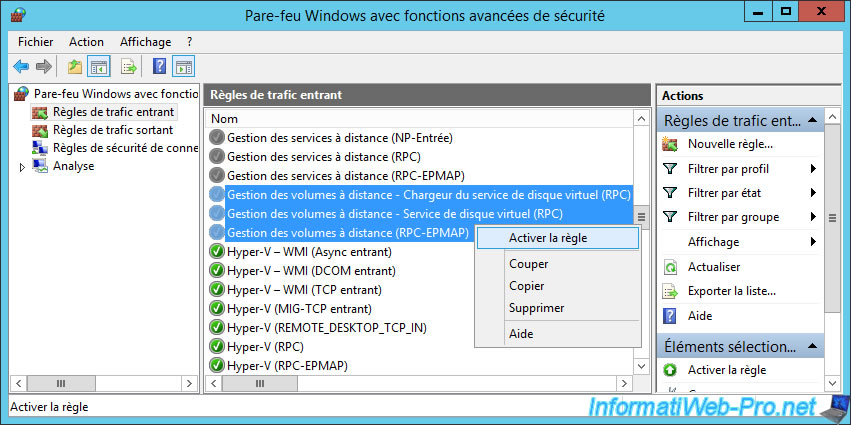
To be able to access the VDS service remotely (from the "Disk Management" option in Windows), you will need to enable these rules :
- Remote Volume Management - Virtual Disk Service (RPC) : which corresponds to the "vds.exe" process
- Remote Volume Management - Virtual Disk Service Loader (RPC) : which corresponds to the "vdsldr.exe" process
- Remote Volume Management (RPC-EPMAP)
Important : you must allow these rules on the remote server, but ALSO on the source server (where you will launch the "Disk Management" console).
3. Allow remote desktop
In some cases, you may want to go directly to the remote server to perform some manipulations.
For this, the remote desktop remains a convenient feature (at least in a local or an enterprise network).
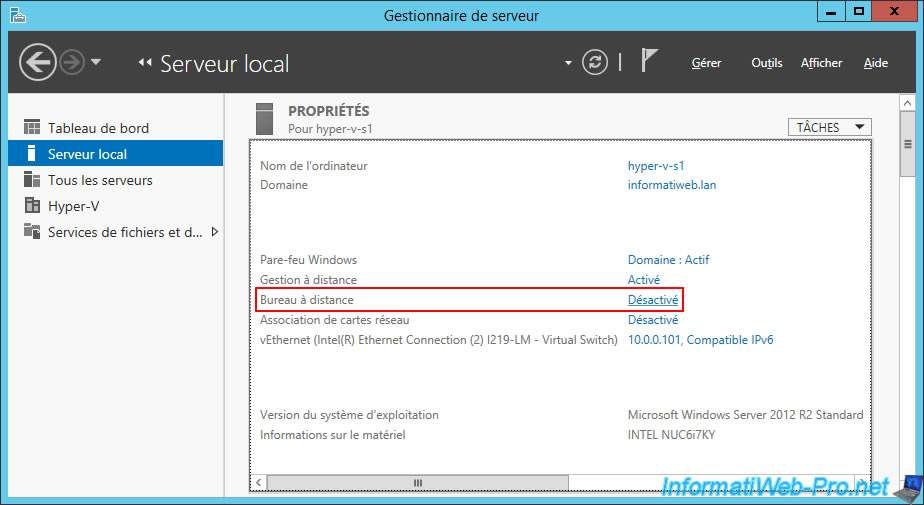
To enable the Remote Desktop on Windows Server, open the Server Manager and click on "Local Server".
Then, next to "Remote Desktop," click "Disabled".
Select : Allow remote connections to this computer.
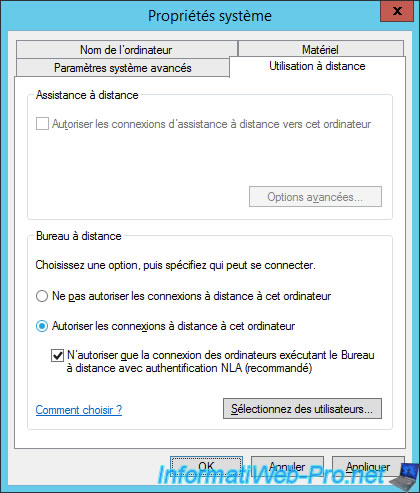
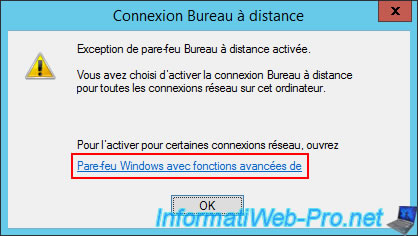
As indicated by Windows, by default, the remote desktop will be allowed from any computer (if the remote user knows the correct username/password combination, of course).
Click on the "Windows Firewall with Advanced Security" link.
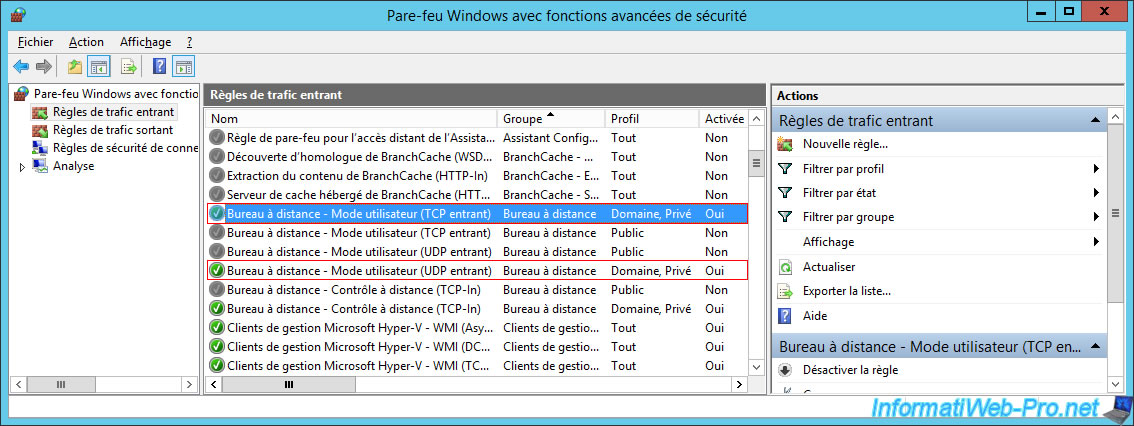
Locate these rules :
- Remote Desktop - User Mode (TCP-In)
- Remote Desktop - User Mode (UDP-In)
Right-click "Properties" on these rules (one by one).
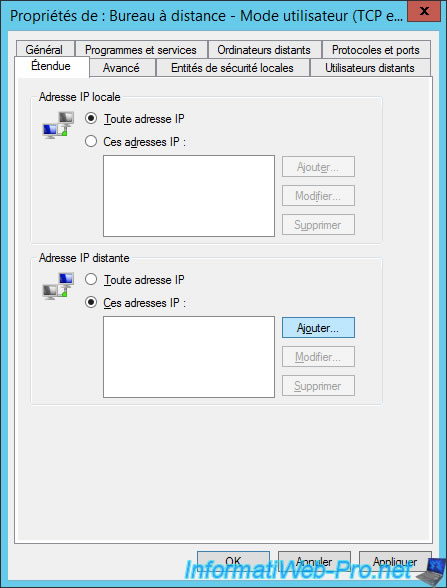
Since we will always access it from the same server (which has a static IP address), we will only allow this server to manage our servers via the remote desktop.
For this, on the server to manage remotely, we go to the "Scope" tab of the rules mentioned above, then we choose "Remote IP address : these IP addresses".
Then, we click on Add.
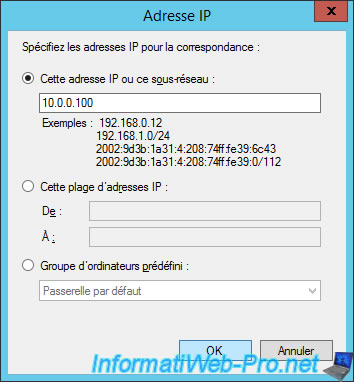
We indicate the address of our server in the 1st box, then we click OK.
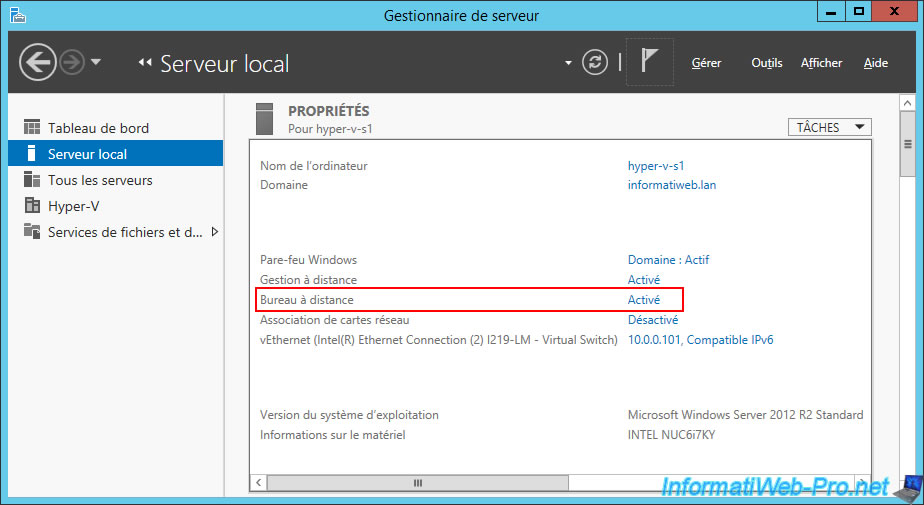
Now, the remote desktop is enabled.
Note : press F5 if the status has not changed.
Share this tutorial
To see also
-
Windows Server 11/9/2017
Windows Server - Remote Server Administration Tools (RSAT)
-
Windows Server 3/7/2021
Windows Server - Remote Server Administration Tools (RSAT) for Win 10 v1809 and later
-
Windows Server 11/23/2018
WS 2012 / 2012 R2 - Manage multiple Core servers remotely (Workgroup)
-
Windows Server 12/1/2018
WS 2012 / 2012 R2 - Manage multiple servers remotely (securely)

You must be logged in to post a comment