- Windows Server
- WinRM
- 01 December 2018 at 13:21 UTC
-

Previously, we explained how to remotely manage servers running Windows Server 2012 with graphical interface or without (whether in a domain or a workgroup).
However, WinRM was running in unsafe mode because when you enable it, it uses the HTTP protocol by default.
If your servers are joined to your Active Directory domain, here's how to secure Windows Server 2012 remote management with the HTTPS version of WinRM.
- Configuration used
- Creating the certificate template
- Generate the certificate automatically via GPO
- Enable HTTPS version of WinRM
- Add the server in the server manager
1. Configuration used
In this tutorial, we will use :
- an Active Directory server and a certification authority with the AD name and with this IP address : 10.0.0.101
- un serveur en mode Core nommé IW-SERVER et possédant l'adresse IP : 10.0.0.102
- a Core server named IW-SERVER with this IP address : 10.0.0.102
- a Windows Server 2012 server with a GUI named WS2012-CLIENT and this IP address : 10.0.0.103
Note that these 3 servers are joined to the Active Directory to facilitate the deployment of WinRM in secure version (HTTPS).
If you need help to join your Windows Server 2012 Core server to your Active Directory domain, refer to the "Join your Core Server to a domain" step of our "Windows Server 2012 - Install, configure, and use Windows Server 2012 in Core mode" tutorial.
2. Creating the certificate template
To use the HTTPS protocol with WinRM, you will obviously need to generate a adapted certificate for the remote server.
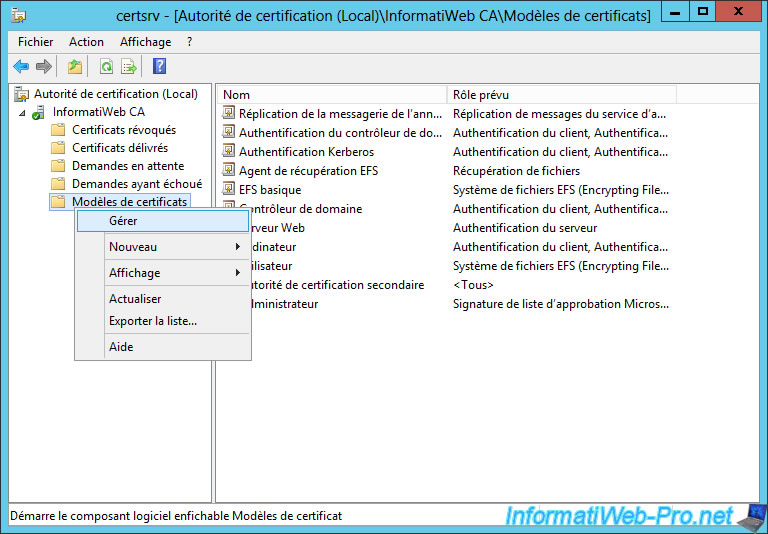
On the server where you installed your certification authority (CA), right-click "Manage" on "Certificate Templates".
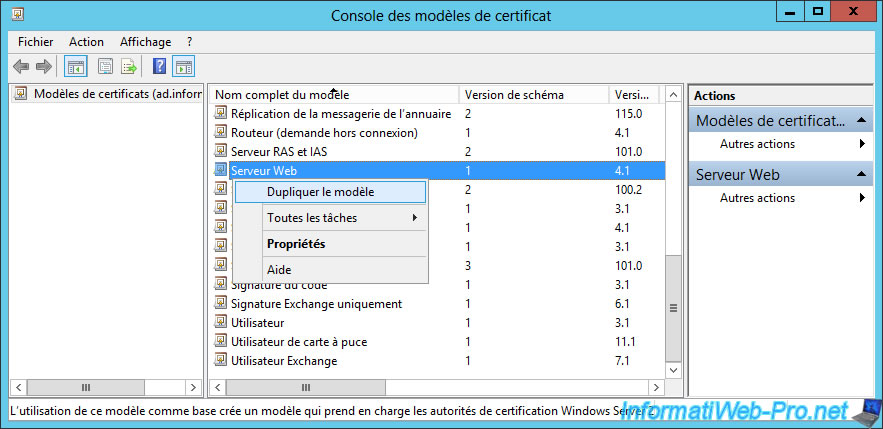
According to the official documentation of Microsoft, we will base ourselves on the "Web Server" certificate template.
Right-click on this template and click : Duplicate Template.
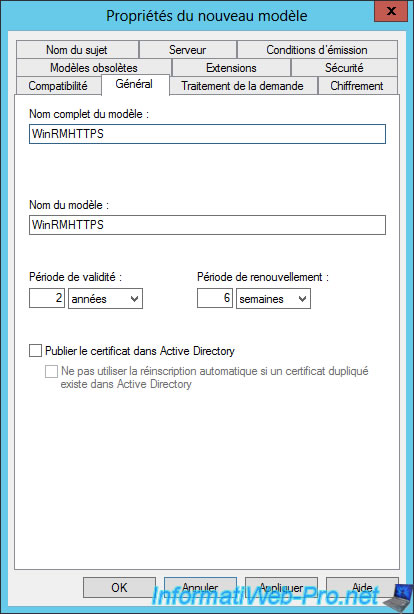
Specify "WinRMHTTPS" (without any space) for the full name of the certificate template.
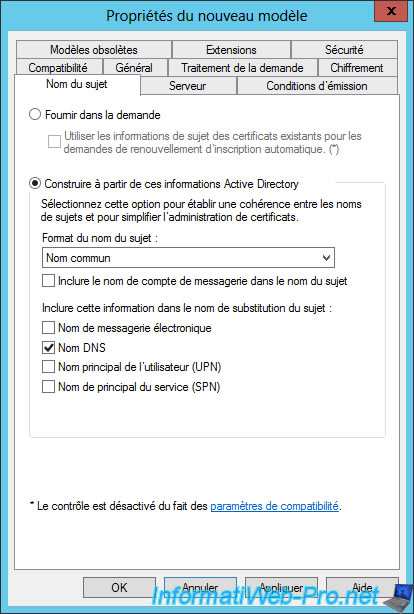
In the "Subject Name" tab, choose :
- Build from this Active Directory information
- Subject name format : Common name
Then, check only the "DNS name" box for the alternate subject name information.
In the "Security" tab, click "Add".
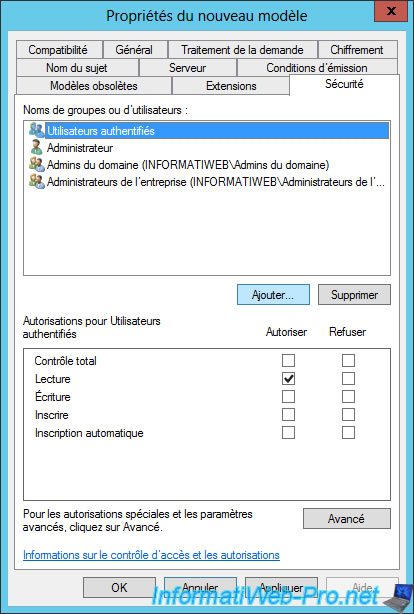
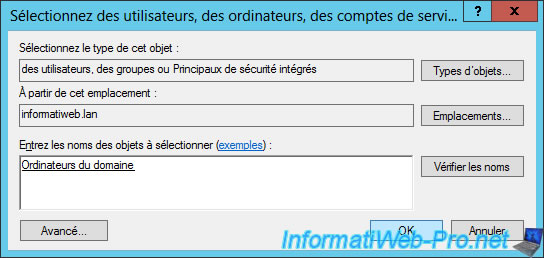
Add the "Domain Computers" group.
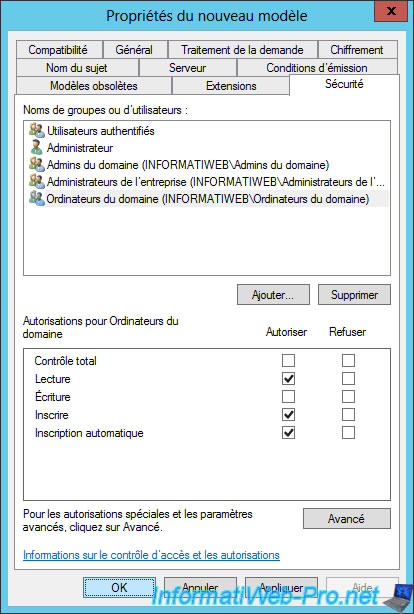
Select the group you just added and check the "Allow" boxes for these options :
- Read
- Enroll
- Autoenroll
Then, click OK.
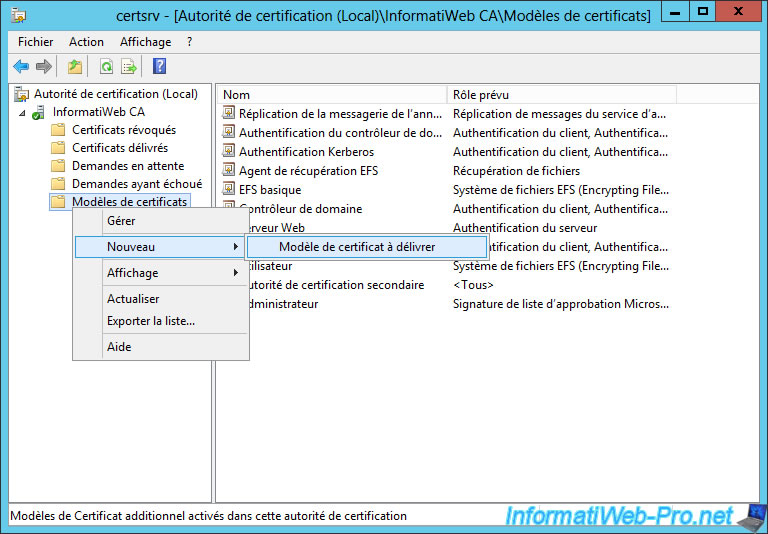
Finally, return to the "certsrv" window and right-click "New -> Certificate Template to Issue" on "Certificate Templates".
Select "WinRMHTTPS" and click OK to enable this new certificate template.
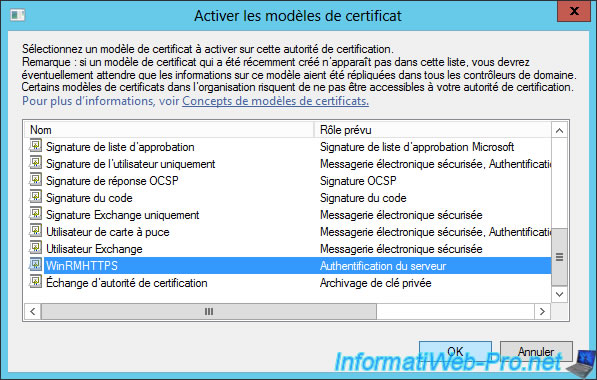
3. Generate the certificate automatically via GPO
Rather than manually requesting the certificate from the web interface of our CA or via the mmc console of a GUI server, we will do this automatically by using the GPOs.
For this tutorial, we will change the "Default Domain Policy", but you are free to create a new GPO and link it to the desired organizational unit.
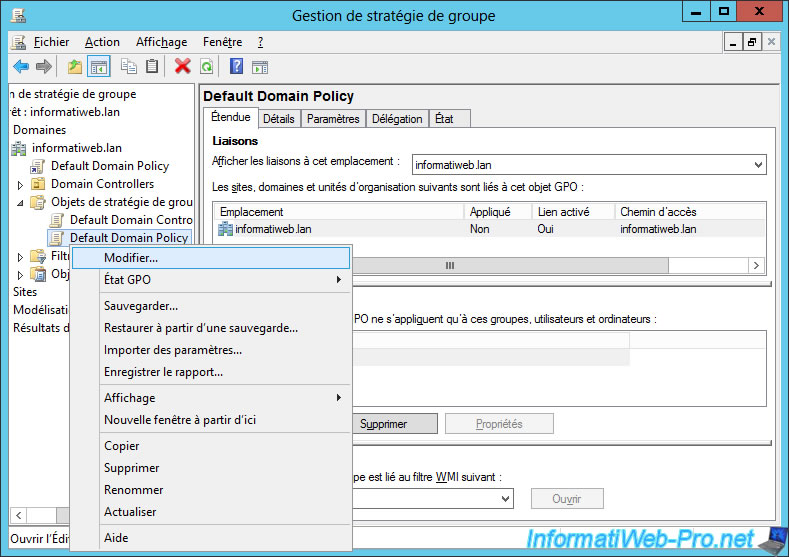
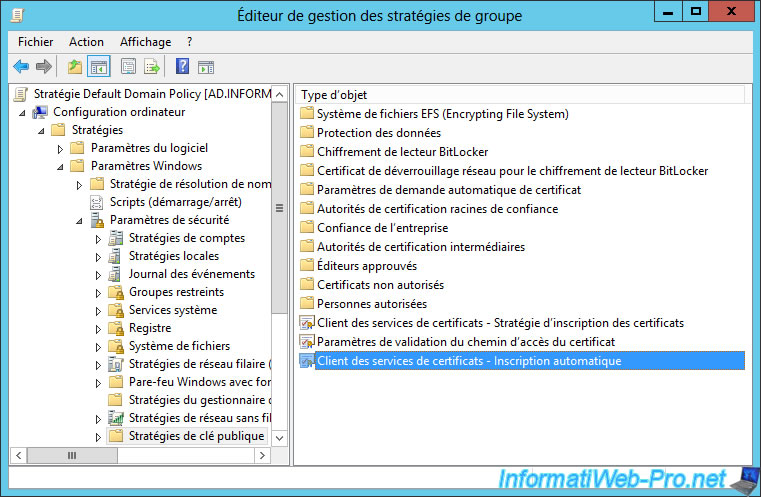
In the Group Policy Management Editor that appears, go to : Computer Configuration -> Policies -> Windows Settings -> Security Settings -> Public Key Policies.
Then, double-click on the "Certificate Services Client - Auto-Enrollment" policy.
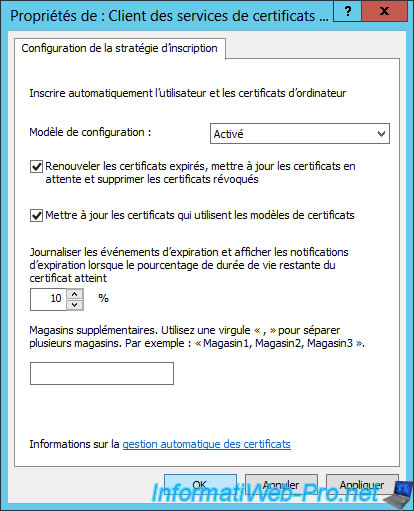
Activate the configuration template and check these boxes :
- Renew expired certificates, update pending certificates, and remove revoked certificates
- Update certificates that use certificate templates
The next time servers that are linked to your Active Directory domain are restarted, they will automatically receive a certificate with their name.
Nevertheless, to force this request by the Core server, simply run this command :
Batch
gpupdate /force

On your Certificate Authority, you will see that a new certificate has been issued to your Core server and is based on the "WinRMHTTPS" certificate template.
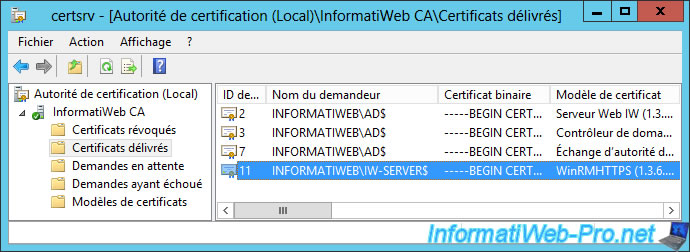
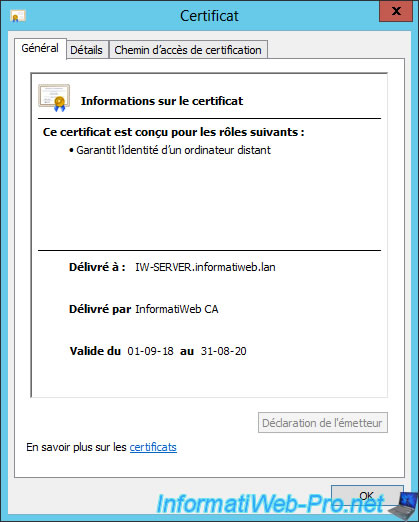
If you double click on it, you will see that this one :
- is intended for the following purpose : Ensures the identity of a remote computer
- was issued to : FQDN name of our Core server
- was issued by our certification authority
- is currently valid because the current date is in the range displayed by Windows Server
IMPORTANT : in order for the certificate issued to your Core server to be considered valid by it, the certificate of your authority must be one of these trusted authorities.
For this, the easiest way is to export the certificate of your authority in the ".cer" format, then to distribute it automatically via the group policies.
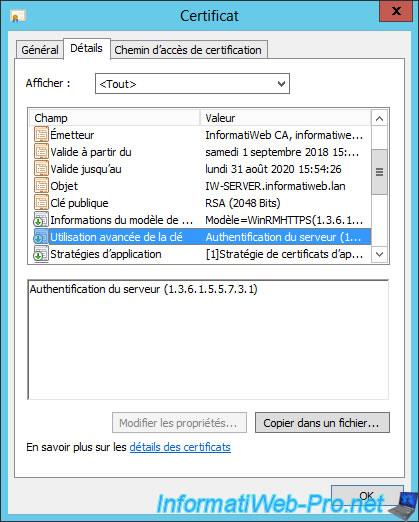
In the "Details" tab of this certificate, you will also see that it is intended for server authentication.
What is required by Microsoft for its use by WinRM.
After running the "gpupdate /force" command on your Core server, open a powershell console by typing : start powershell.
Then, use this command to view the personal certificates that your Core server has.
PowerShell
Get-ChildItem -Recurse cert:\LocalMachine\My | more
As you can see, our Core server does have a certificate with its name.

4. Enable HTTPS version of WinRM
To enable WinRM in HTTPS version, use this command :
Batch
winrm quickconfig -transport:https
Then, answer "y" to the "Make these changes [y/n]" question.
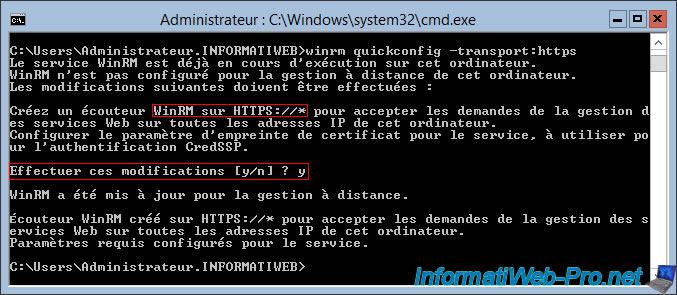
Now, if you list the listeners used by WinRM, you will see that the HTTPS protocol is displayed.
Batch
winrm enumerate winrm/config/listener
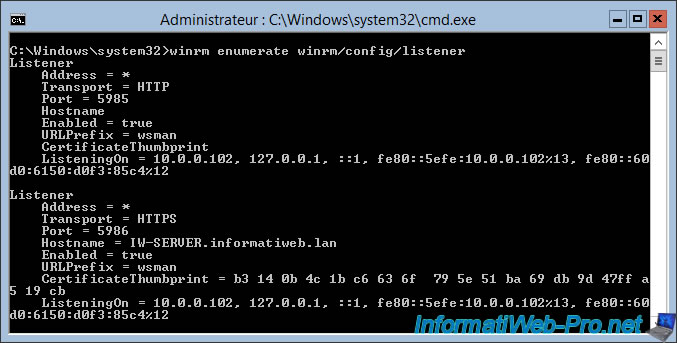
Be sure to open port 5986 (which is the default port used by HTTPS version of WinRM) on your Core server.
Note : there is no default rule for the HTTPS version of WinRM. So, you have to create it like this.
Batch
netsh advfirewall firewall add rule name="WinRM HTTPS" dir=in action=allow protocol=TCP localport=5986
5. Add the server in the server manager
Now that your Core Server is fully configured for the WinRM HTTPS support, all you have to do is to add it to the Server Manager.
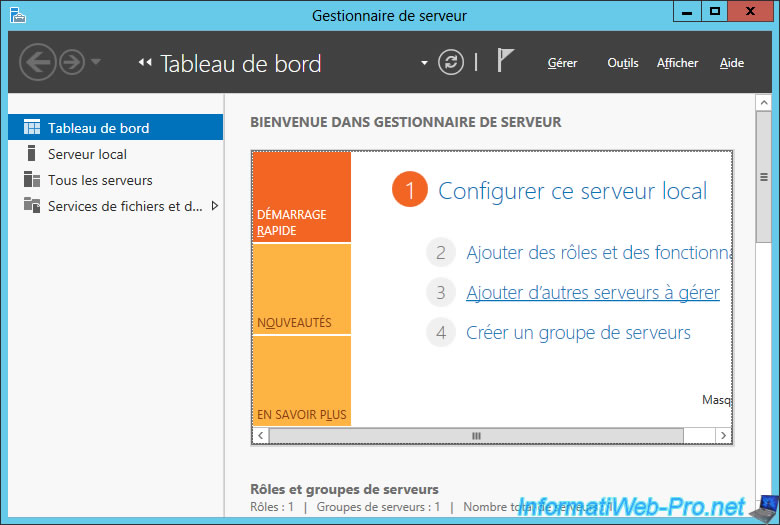
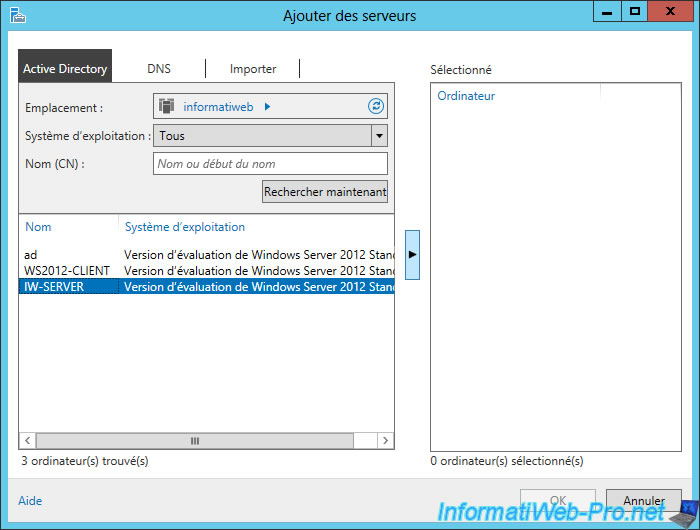
In the "Active Directory" tab, click "Find Now".
Then, select your Core server and click on the arrow in the middle of the window.
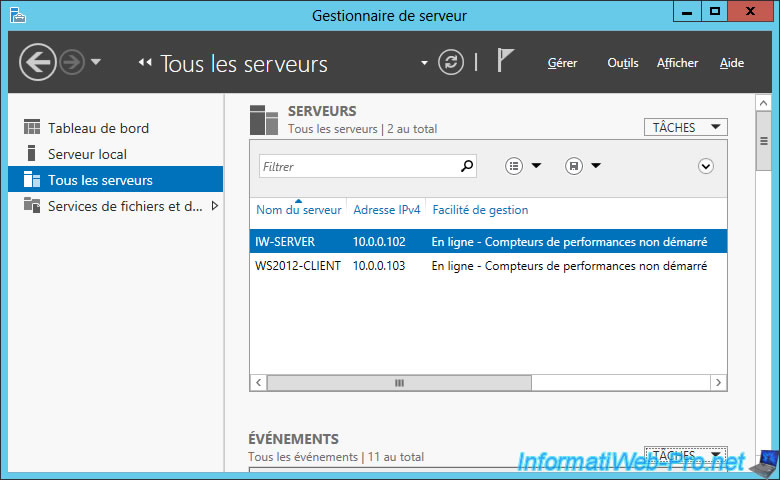
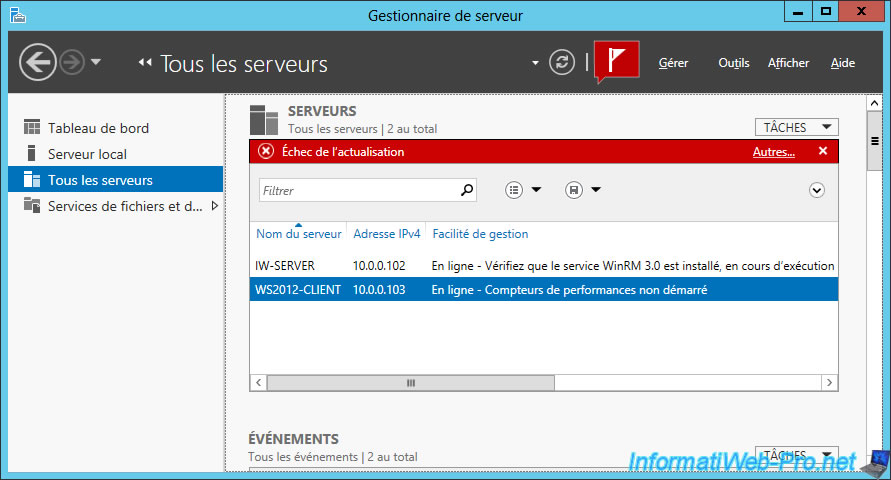
In the "All Servers" section of the Server Manager, your Core Server will appear "Online" and its IP address will also appear.
Note that the error message "Online - Verify WinRM 3.0 service is installed, running, and required firewall ports are open" may be displayed in 2 cases :
- when you try to manage 2008 R2 servers from a 2012 server.
In this case, install the .NET Framework 4 and Windows Management Framework 3.0 on the remote server. - or when you try to disable the WinRM HTTP protocol because you have enabled the HTTPS protocol for it.
In this case, use the "winrm quickconfig" command on the remote server.
For the rest of the configuration to manage a server under Windows Server remotely, refer to one of these tutorials :
- to manage a remote GUI server : Windows Server 2012 / 2012 R2 - Manage multiple servers with a graphical interface (GUI) remotely
- to manage a remote Core server : Windows Server 2012 / 2012 R2 - Manage multiple Core servers remotely with WinRM
Share this tutorial
To see also
-
Windows Server 3/7/2021
Windows Server - Remote Server Administration Tools (RSAT) for Win 10 v1809 and later
-
Windows Server 11/16/2018
WS 2012 / 2012 R2 - Manage multiple Core servers remotely
-
Windows Server 11/23/2018
WS 2012 / 2012 R2 - Manage multiple Core servers remotely (Workgroup)
-
Windows Server 11/10/2018
WS 2012 / 2012 R2 - Manage multiple servers with a GUI remotely

You must be logged in to post a comment