Create a file server failover cluster on Windows Server 2012 / 2012 R2
- Windows Server
- Clusters
- 07 July 2019 at 11:20 UTC
-

- 4/5
7. Managing cluster disks
Although our iSCSI virtual disks and partitions created on these disks have names, the Failover Cluster Manager will not display them.
To simplify your life, don't hesitate to rename them.
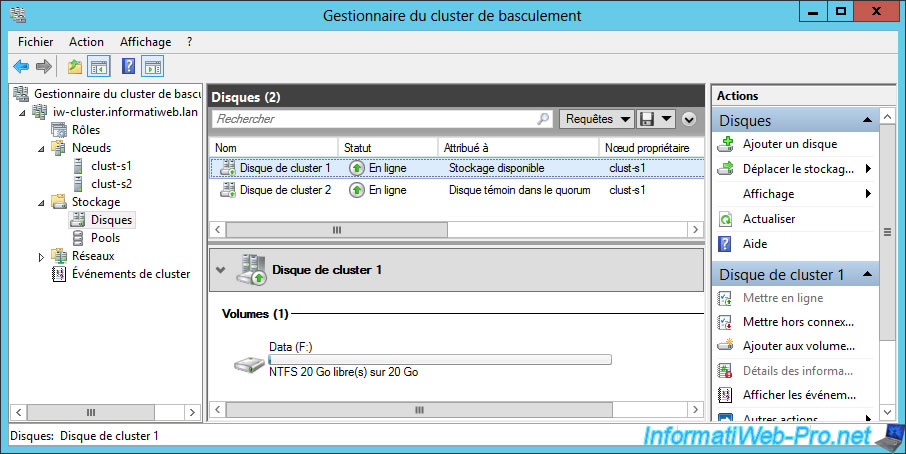
To do this, right-click "Properties" on each cluster disk.
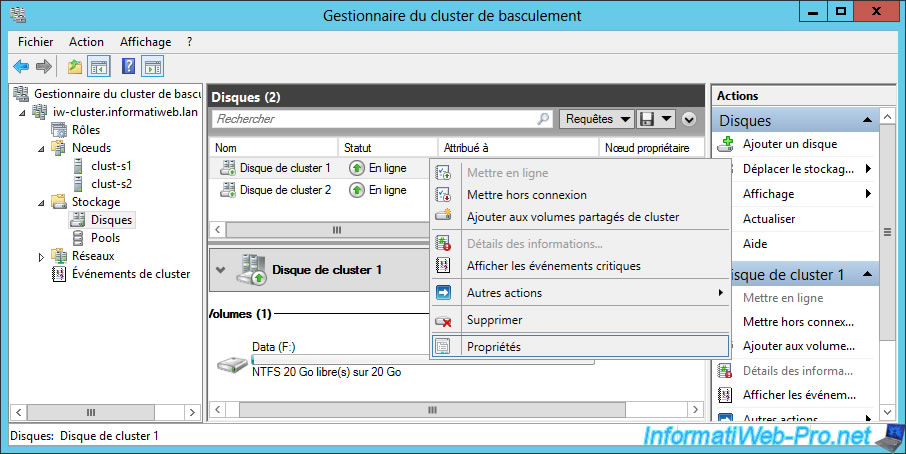
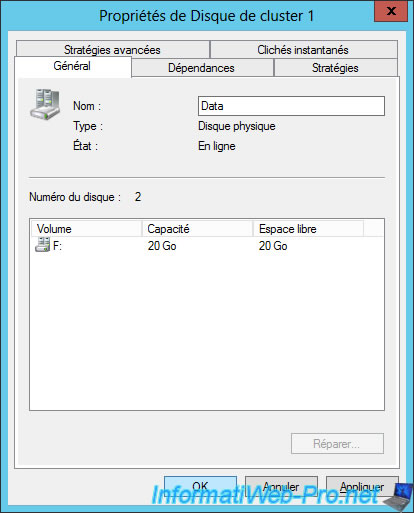
Change their names at the top and click OK.
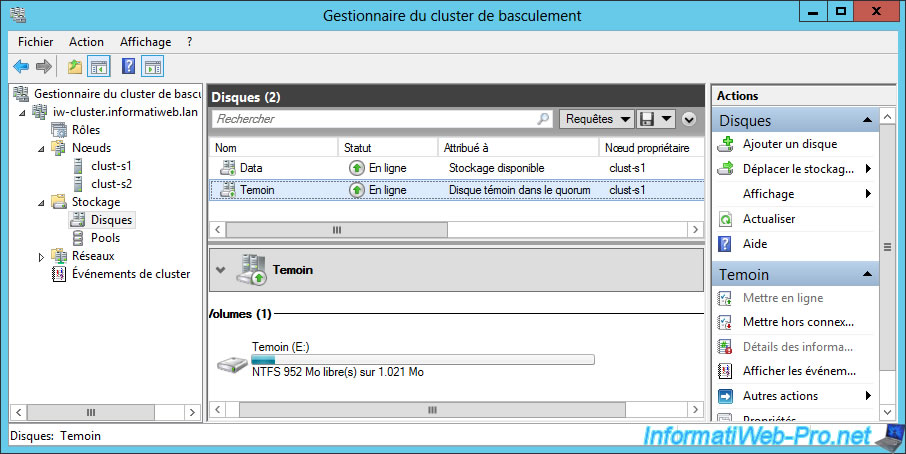
Now, we see directly which disk is assigned to what.
Besides, you also see that the witness disk was automatically assigned to : Disk Witness in Quorum.
8. Cluster network management
Same for the networks available on the servers of the cluster.
Feel free to rename them by right-clicking "Properties" on them.
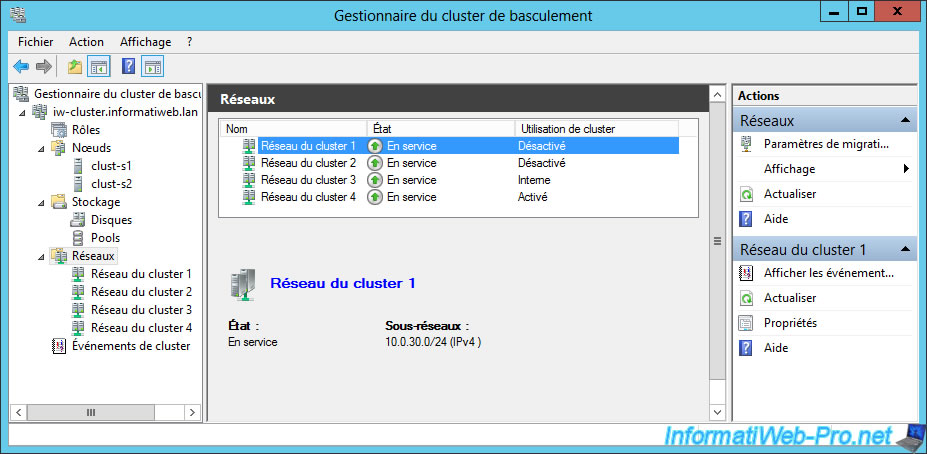
As mentioned before, we have 4 network cards on the servers of our cluster :
- LAN : the network adapter connected to the local network of the company whose network ID is 10.0.0.0/24
- Heartbeat : the network adapter that allows cluster servers to communicate with each other, and to let them know if the other servers in the cluster are online and whose network ID is 10.0.10.0/24
- iSCSI 1 and iSCSI 2 : network adapters for communicating with iSCSI servers only and with theses network IDs : 10.0.20.0/24 and 10.0.30.0/24
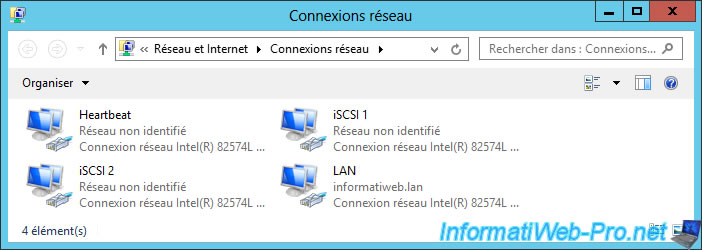
For the Heartbeat NIC, you will only need to allow cluster network communication on this network.
This also means that the heartbeat will pass on this network and will allow the cluster servers to know if the others are still available or are currently down.
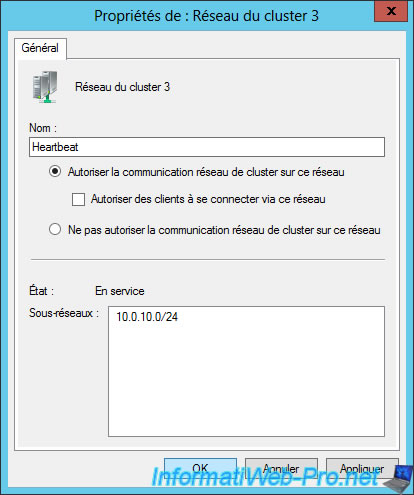
For iSCSI 1 and iSCSI 2 network adapters, don't allow cluster network communication on this network.
Indeed, these 2 network cards should only be used for iSCSI traffic. Which allows to benefit from the best possible performances.
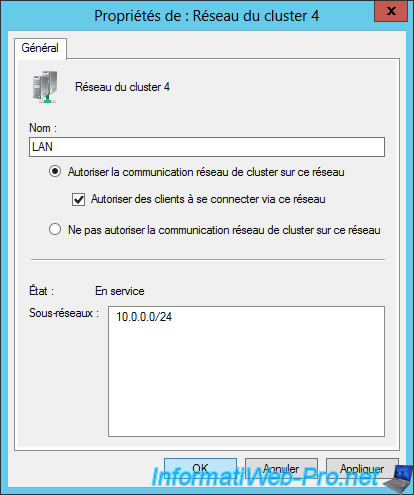
For the network adapter connected to the LAN of the company named LAN, you will need to :
- allow cluster network communication on this network
- allow clients to connect through this network
This means that the heartbeat will also be able to pass on the local network (if the Heartbeat network doesn't work any more) to allow the servers of the cluster to continue to know if the other servers of the cluster are still available or are currently down.
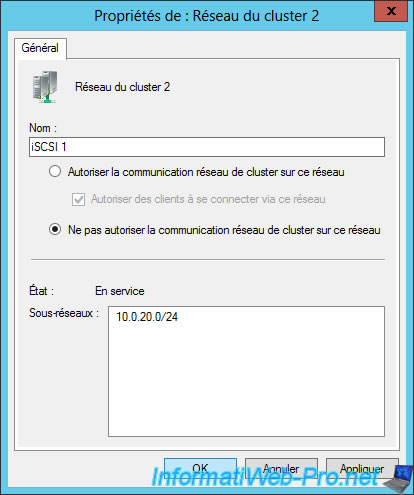
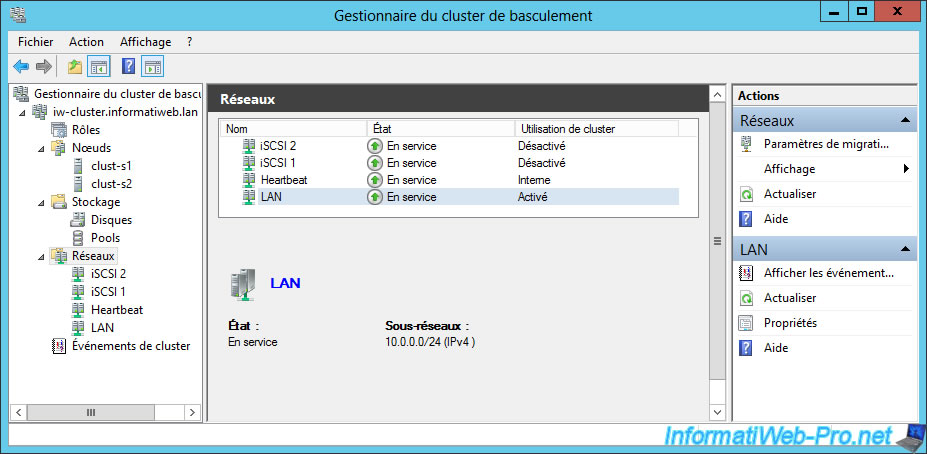
Once you have successfully renamed and configured your different networks, you should get this (under Windows Server 2012) :
- iSCSI 1 and iSCSI 2 : Cluster usage : Disabled
- Heartbeat : Cluster usage : Internal
- LAN : Cluster usage : Enabled
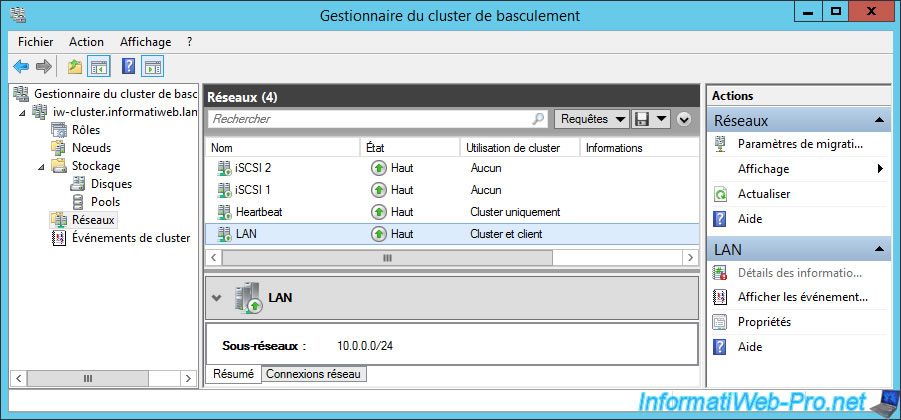
On Windows Server 2012 R2, the displayed result will be slightly different :
- iSCSI 1 and iSCSI 2 : Cluster usage : None
- Heartbeat : Cluster usage : Cluster only
- LAN : Cluster usage : Cluster and client
9. Remote cluster management
Because a server in a cluster might fail at any time, you probably will not manage your cluster from one of these servers, but rather from outside the cluster.
This way, you will connect to the cluster (not directly to one of the servers in the cluster) and manage it remotely in a completely transparent way.
Indeed, it's Windows Server that will make the necessary to connect seamlessly to an available server in your cluster.
In short, to manage this cluster remotely (from the local network of the company), you will first have to install the associated administration tools.
For that :
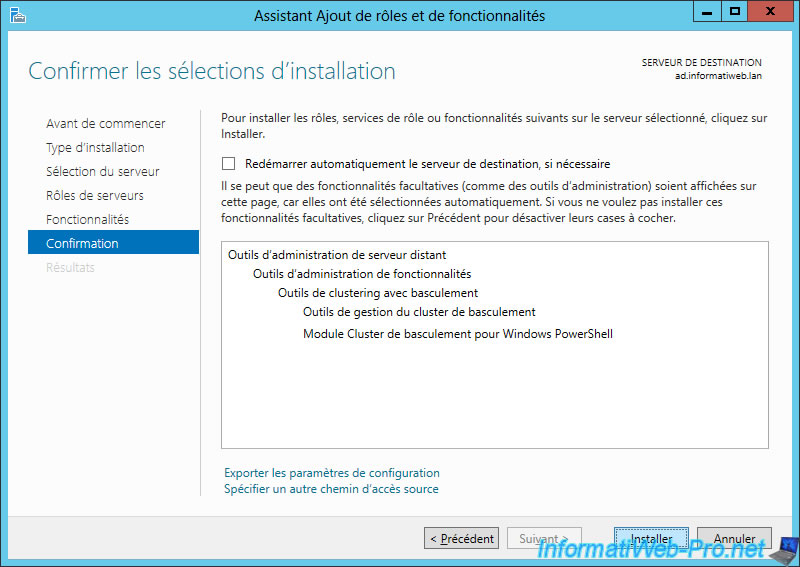
- on a Windows Server server of your enterprise : Open the Add Roles and Features Wizard and install the Failover Clustering Tools
- OR on a client PC running Windows, install the appropriate RSAT tools, then enable the Failover Clustering Tools if needed
In both cases, you will find the "Failover Clustering Tools" in : Remote Server Administration Tools -> Feature Administration Tools.
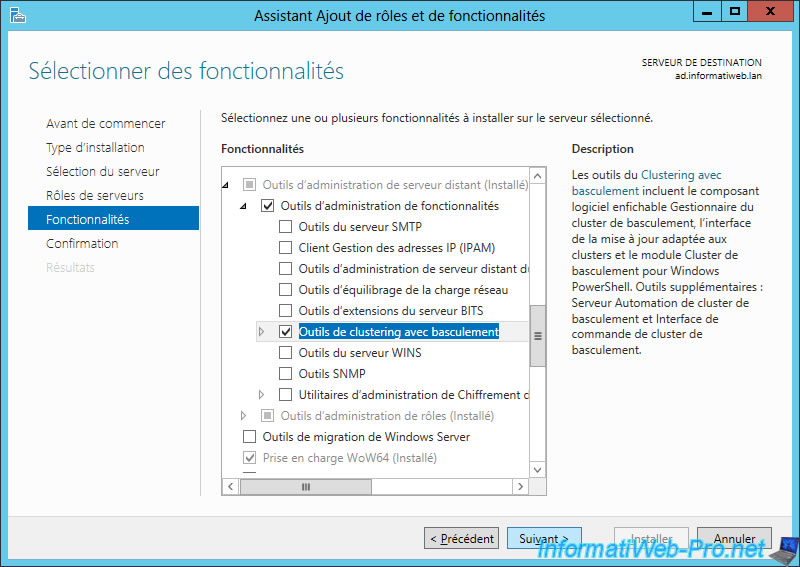
Click Install.
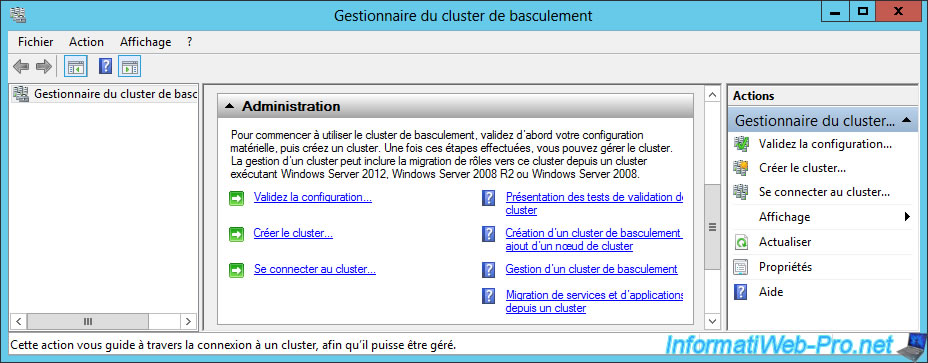
Next, open the Failover Cluster Manager and click "Connect to Cluster" (in the "Actions" menu on the right).
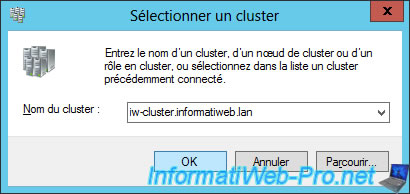
Enter the full name of your cluster : iw-cluster.informatiweb.lan
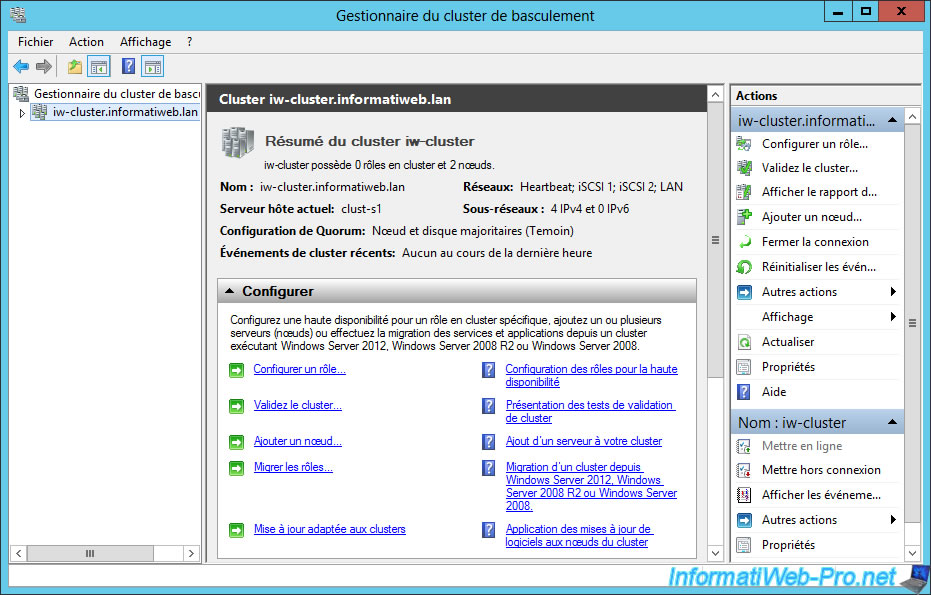
You now have access to managing your cluster from outside of the cluster.
10. Clusterize a role
Creating a cluster, it's good, but using it is better.
Indeed, for the moment, we have a cluster, but it doesn't provide any services.
For your cluster to be useful, you need to add a role to it. For example : a file server.
But, you will quickly see that adding a role to a cluster will also imply that the associated role is installed locally on each server of the cluster.
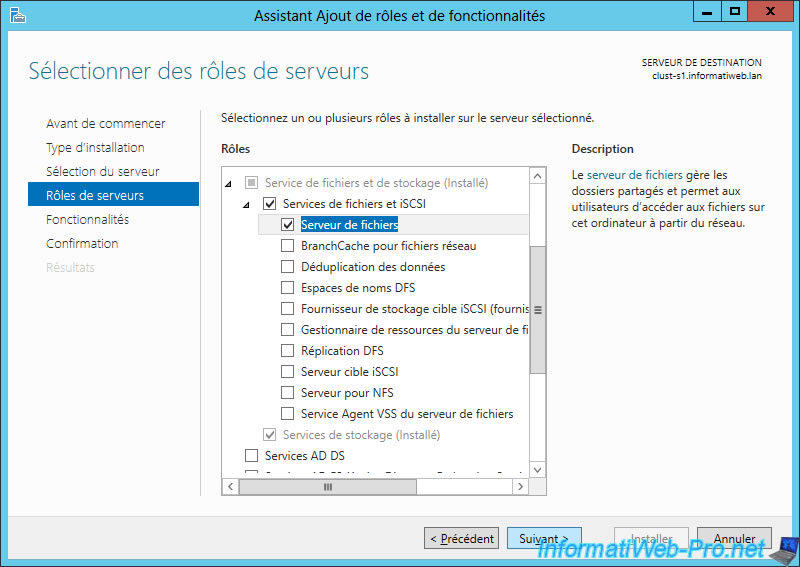
Install the "File Server" role (located in "File and Storage Services -> File and iSCSI Services") on each server of your cluster.
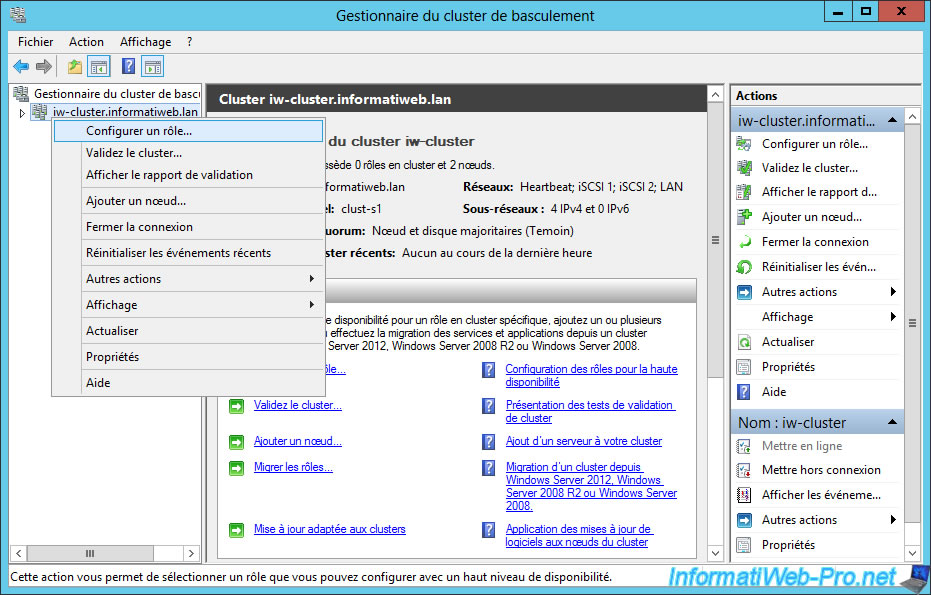
Then, right click on your cluster and click on "Configure Role".
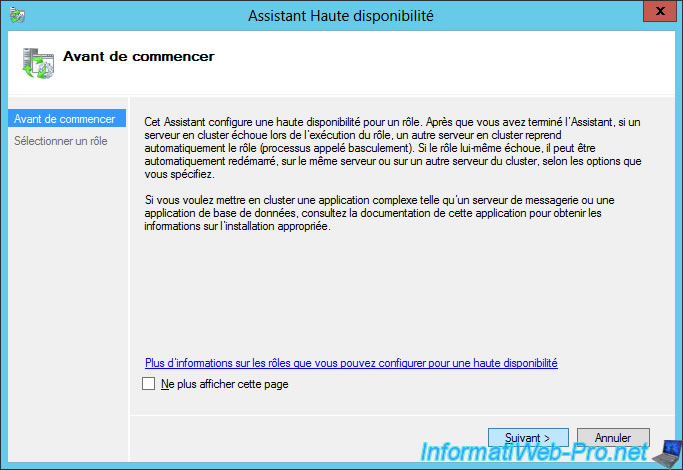
The High Availability wizard is displayed.
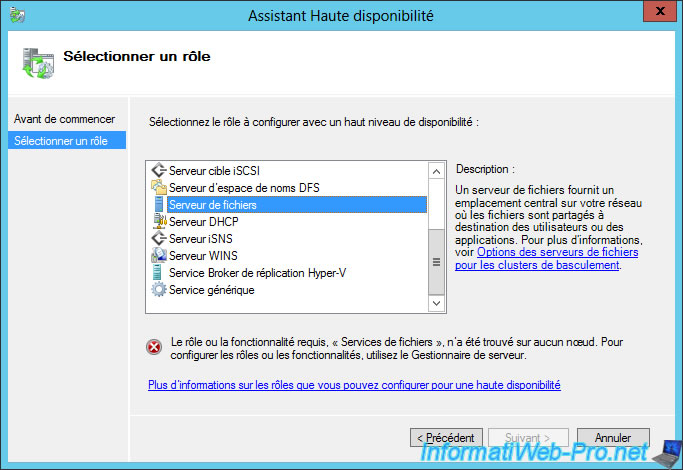
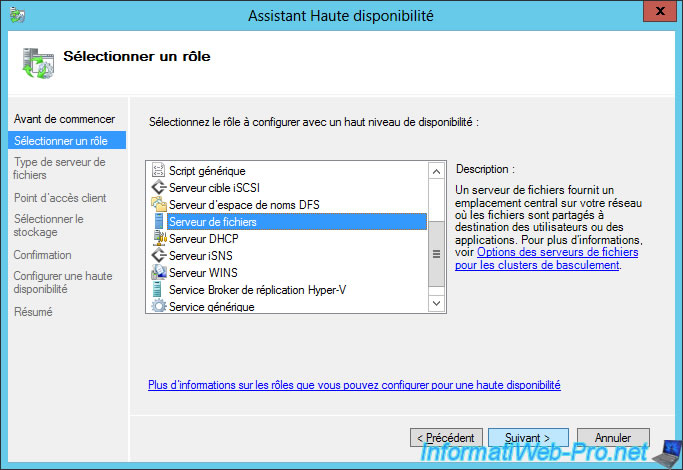
Select the "File Server" role and click Next.
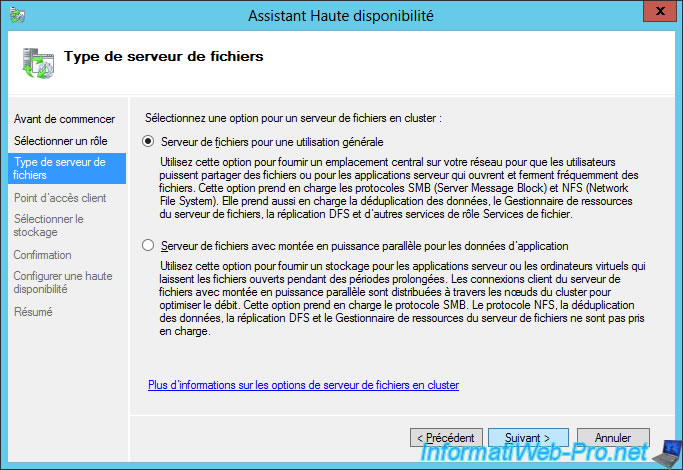
Select "File Server for general use".
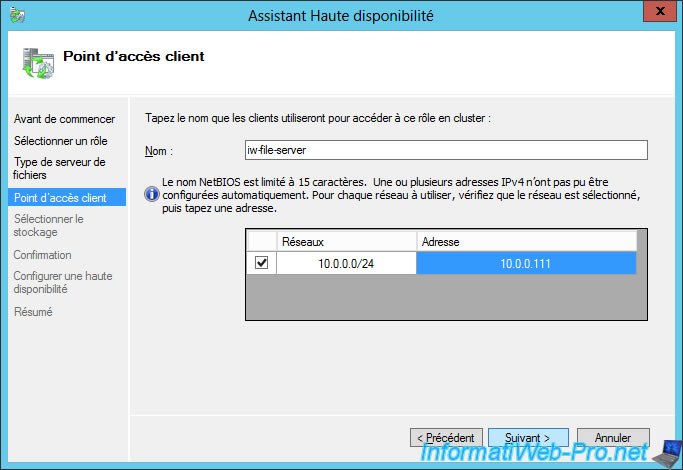
Provide a name and an IP address for your "File Server" cluster.
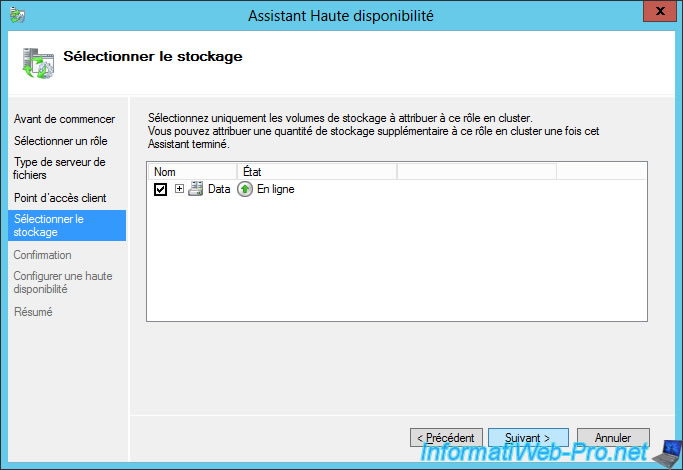
Select the iSCSI virtual disk to assign to this cluster role.
The High Availability wizard displays a summary of the configuration.
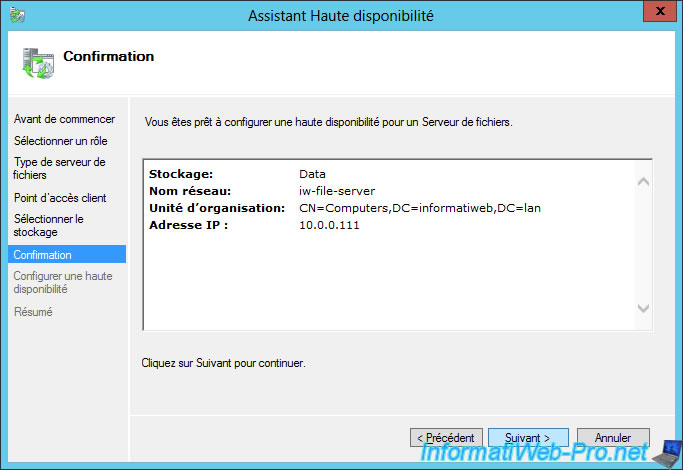
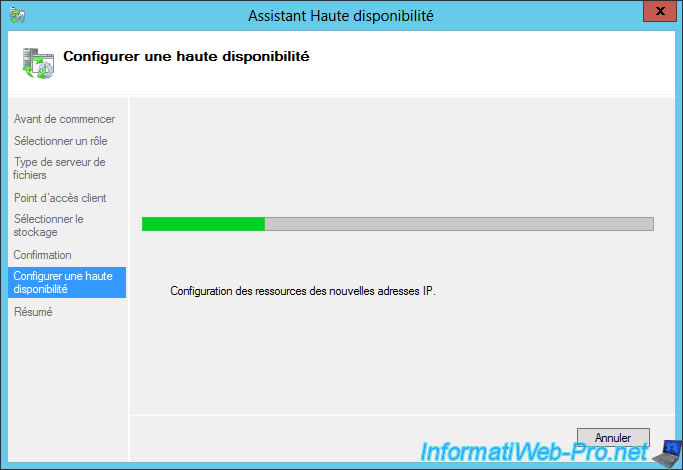
Wait while configuring the cluster role.
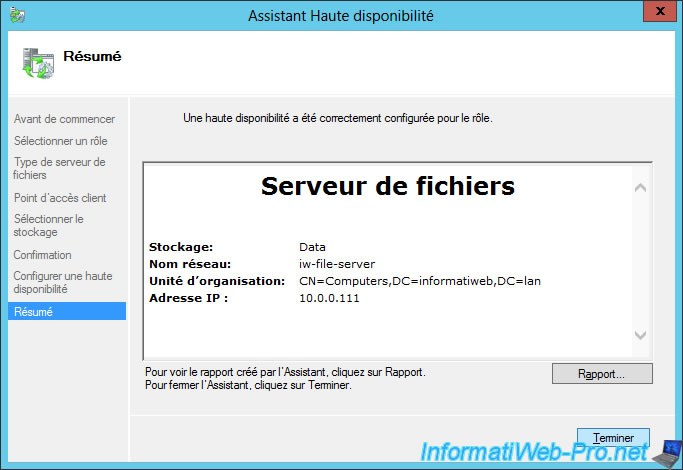
The high availability of the "File Server" role has been configured.
Now, our cluster has 1 clustered role with 2 nodes (2 servers).
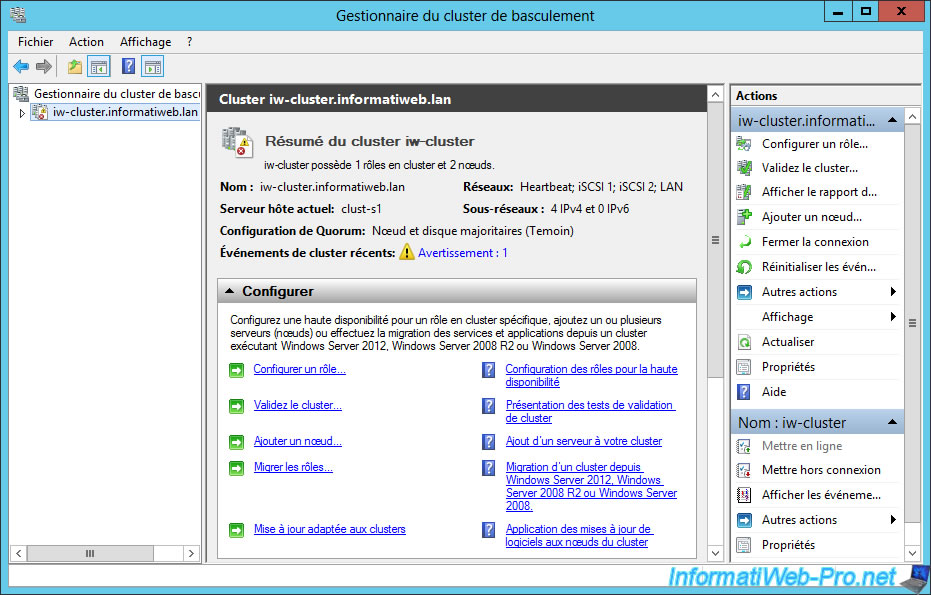
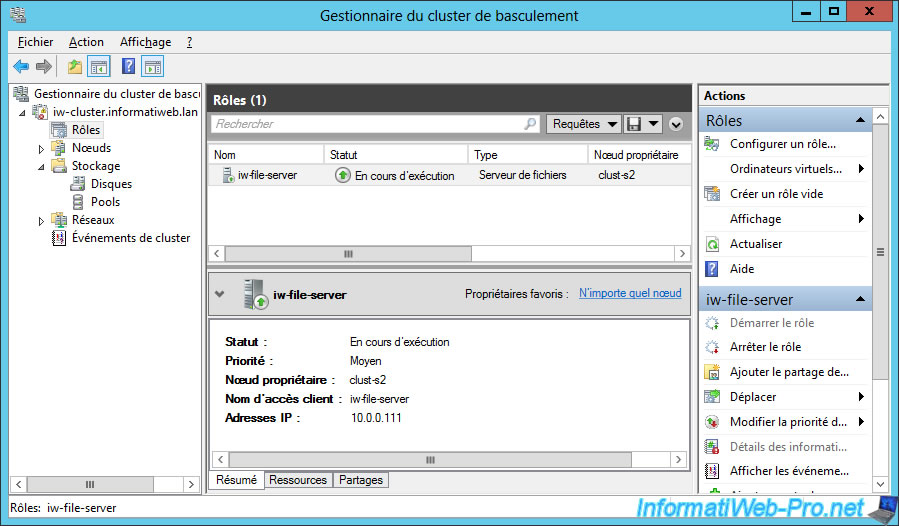
In the "Roles" section, you will see that our cluster "iw-file-server" appears as a file server and is currently hosted by server 2 (clust-s2).
In addition, in the "Summary" tab at the bottom, you will see that this role can be accessed using the "iw-file-server" name (or its FQDN : iw-file-server.informatiweb.lan) or its address IP: 10.0.0.111.
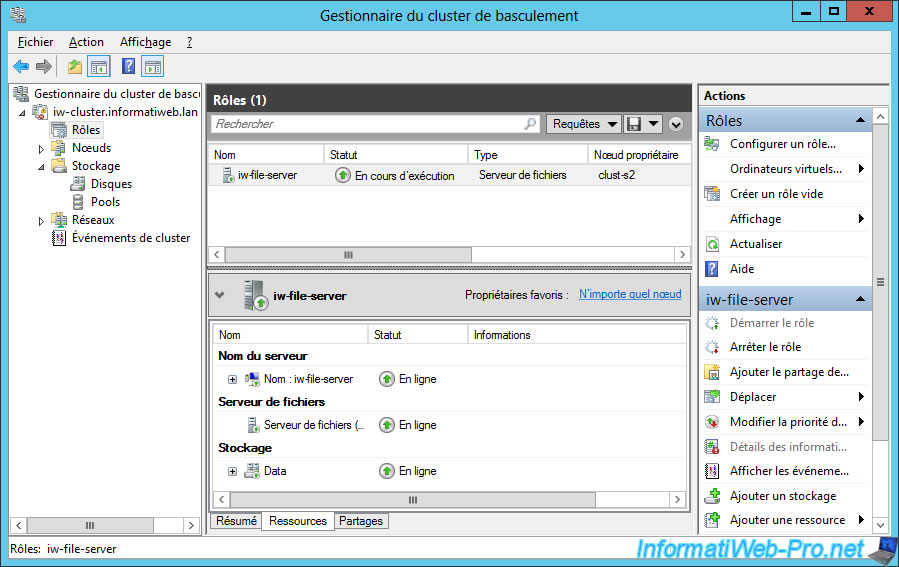
At the bottom, you will also see what resources this role has.
Which means that this role depends on this or that resource.
In our case, this clustered role depends on :
- a computer name
- the "File Server" role
- the "Data" virtual disk for the storage
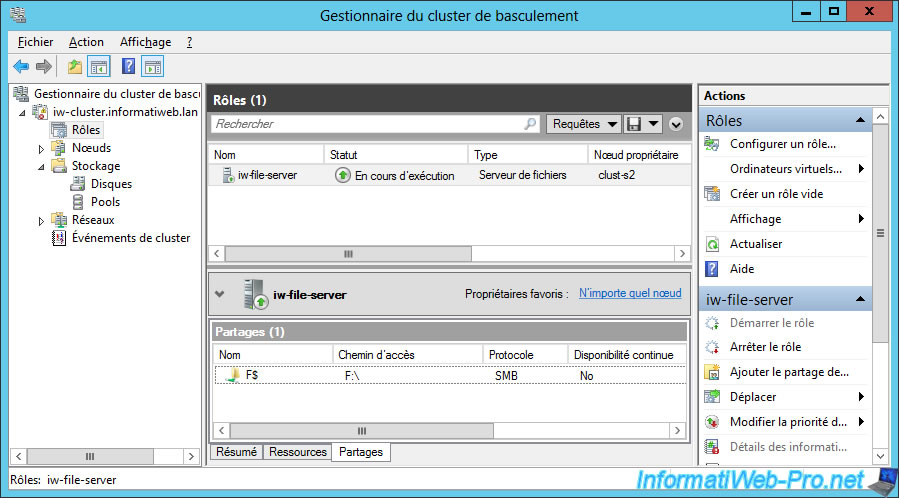
Currently, this role only offers a hidden network share : F$.
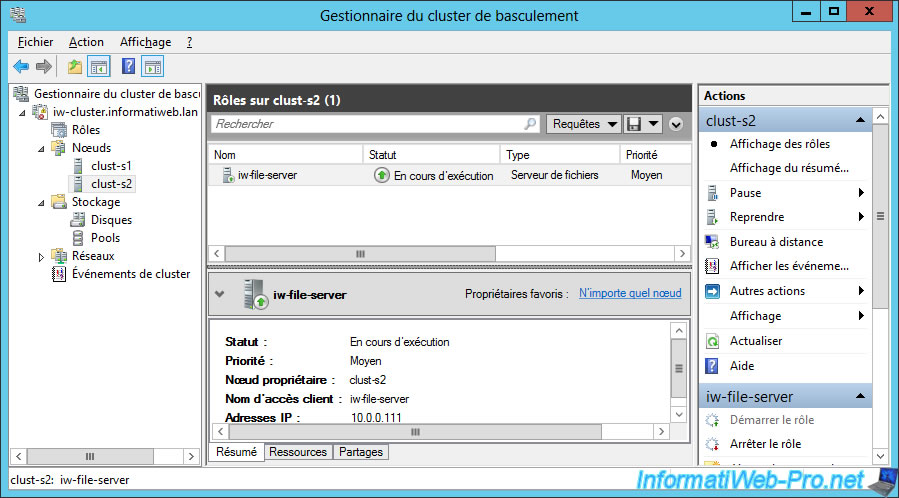
If you look at the server 2 informations, you will see that it actually hosts our clustered role : iw-file-server.
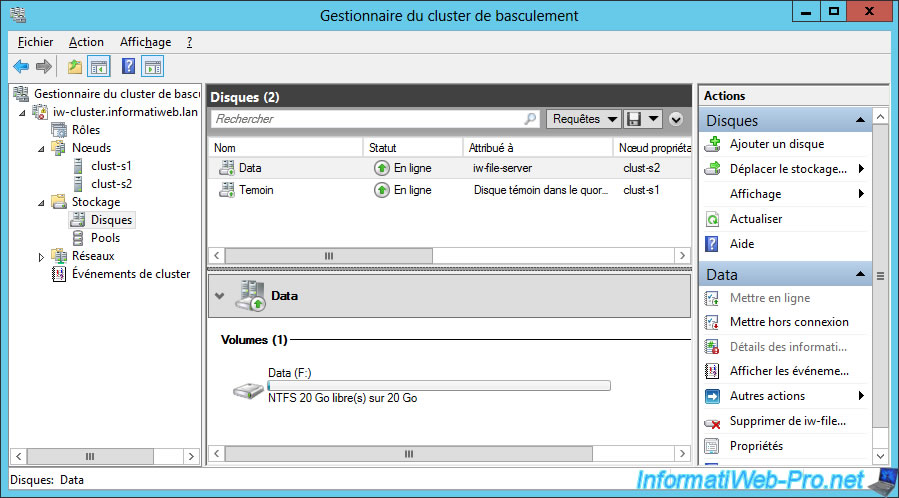
If you view the different disks associated with your cluster, you will see that :
- the Data disk is assigned to the "iw-file-server" clustered role and is currently used by the server 2 (clust-s2)
- the Witness disk is still used as a witness disk in the quorum
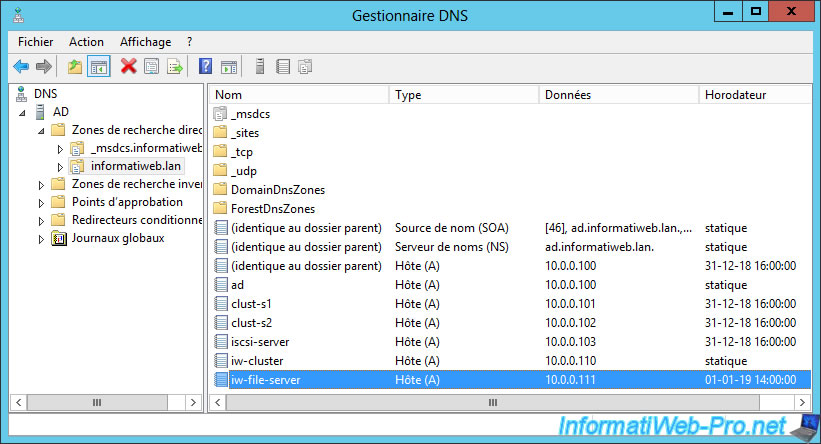
Note that clustering this "File Server" role has also resulted in the creation of a DNS record associated with the information specified when clustering this role :
- name : iw-file-server
- IP adress : 10.0.0.111
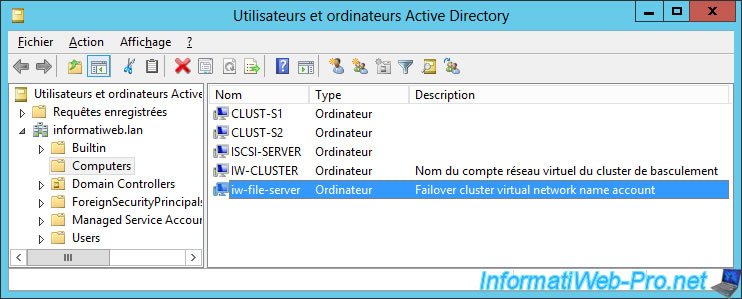
An additional computer account has also been created on your Active Directory server.
Share this tutorial
To see also
-

Microsoft 11/29/2019
Hyper-V (WS 2012 R2 / WS 2016) - Create a failover cluster
-
Microsoft 12/6/2019
Hyper-V (WS 2012 R2 / WS 2016) - Disaster recovery (DR) with the Hyper-V cluster
-
Windows Server 7/19/2019
WS 2012 / 2012 R2 - Configure the quorum of a failover cluster
-
Windows Server 7/26/2019
WS 2012 R2 - How the dynamic witness of failover cluster works

No comment