- Windows Server
- WS2003
- 14 December 2011 at 19:52 UTC
-

- 1/2
Required configuration :
- Active Directory
As this tutorial will discuss shared issues and rights, we will use a concrete example that could end up in business because the servers are often used in the professional world (and business schools) to manage the rights of each user or group user. Most often to prevent employees install anything or make improper handling without knowing it.
The example is as follows and is composed of 3 users :
- The secretary who do not know it, most of the time, not many computers (simply because it isn't working).
- The owner of the company that wants to have access to all files and folders (including those of the employees).
- The computer will have a total control over the server since it is he who makes the maintenance, either periodically or when the server kidding or the boss asks him to perform a particular task.
In summary, the rights that we will assign to the tutorial will be :
- For the secretary : Read Only and only has access to his file.
- For the boss : Access Read & Change to 3 files (secretary, boss and computer).
- For the computer : Full Control knew the 3 folders.
- Creation of 3 users
- Creating folders and shares
- Add shared folders in Active Directory
- Connect a network drive for each shared folder for easy access from the client under "Windows XP"
1. Creation of 3 users
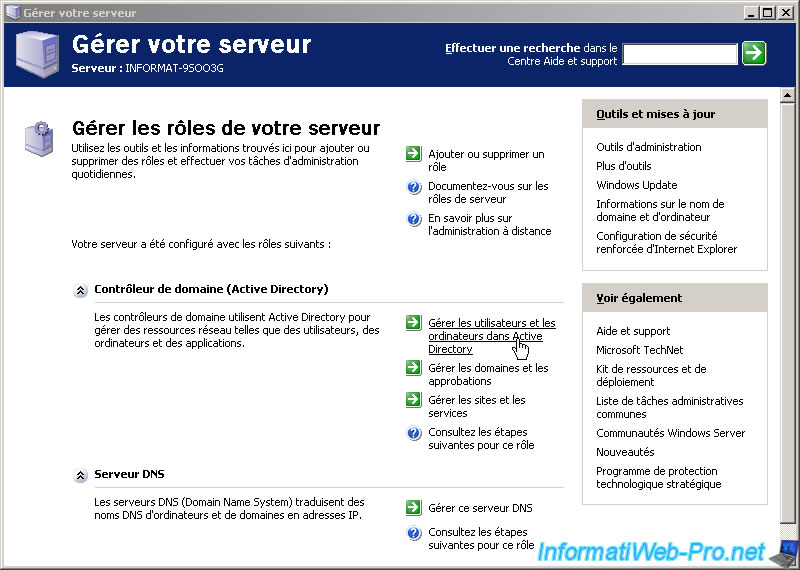
To begin, open the "Manage Your Server" and click "Manage users and computers in Active Directory".
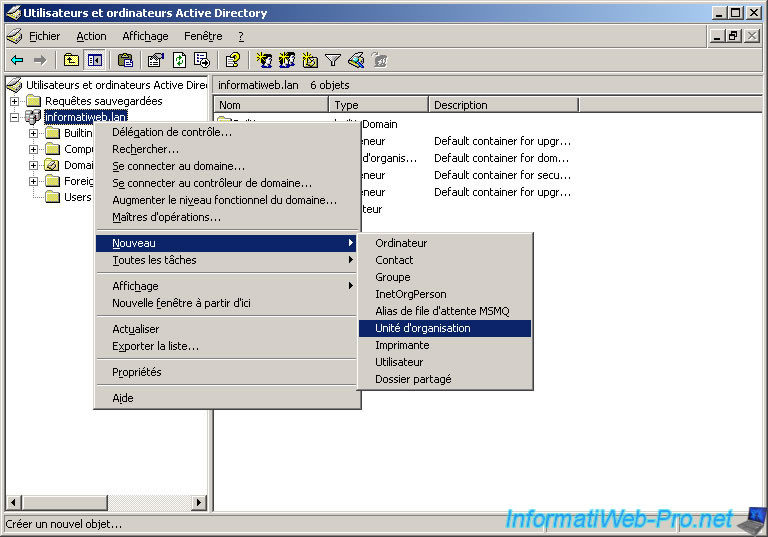
Right click on your domain and click on "New -> Organizational Unit".
It isnt' mandatory to create one but it allows to navigate when you have a big server. This is comparable to a folder where files would be created.
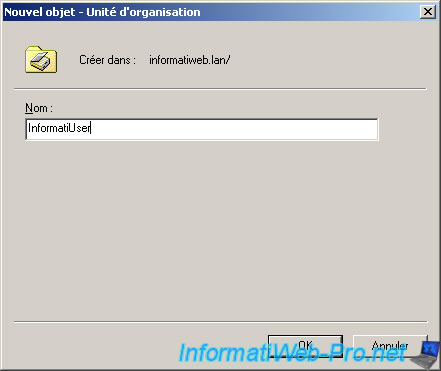
It is called "InformatiUser" because we will place our 3 users that will be created but you can give it any name.
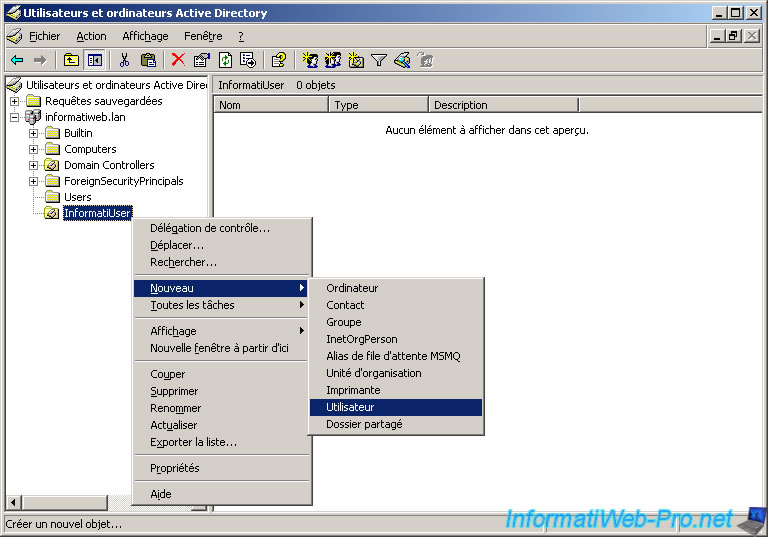
We will now create our 3 users named above.
For this, we make a right click on the Organisation Unit "InformatiUser" that we just created and click on "New -> User".
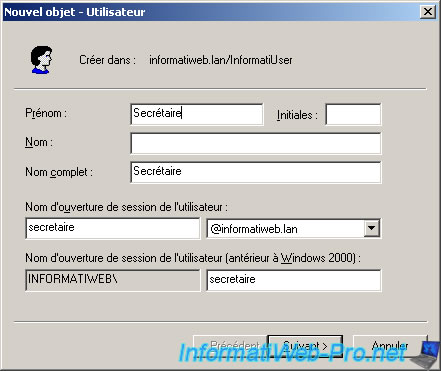
For the tutorial we will put the same name (ie, secretary, boss, computer) for the first name and the user name.
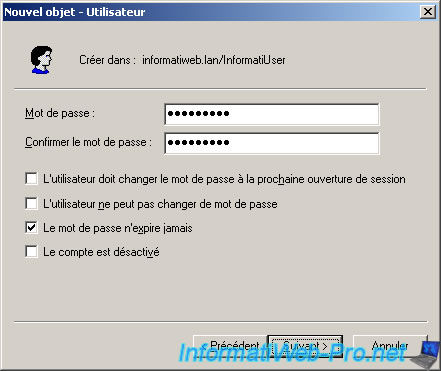
Enter a password complying with safety rules :
- Minimum length of 8 characters.
- Complexity : Uppercase / Lowercase.
Special characters are not mandatory for the password is accepted, but it's still recommended to use them.
- Numbers.
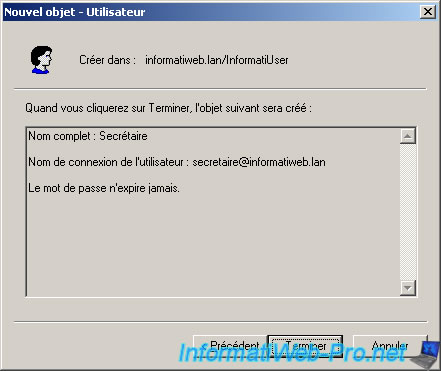
The wizard displays a summary of the configuration of the user. Click "Finish" and repeat the same thing for the other 2 users : boss and computer scientist (informaticien in French).
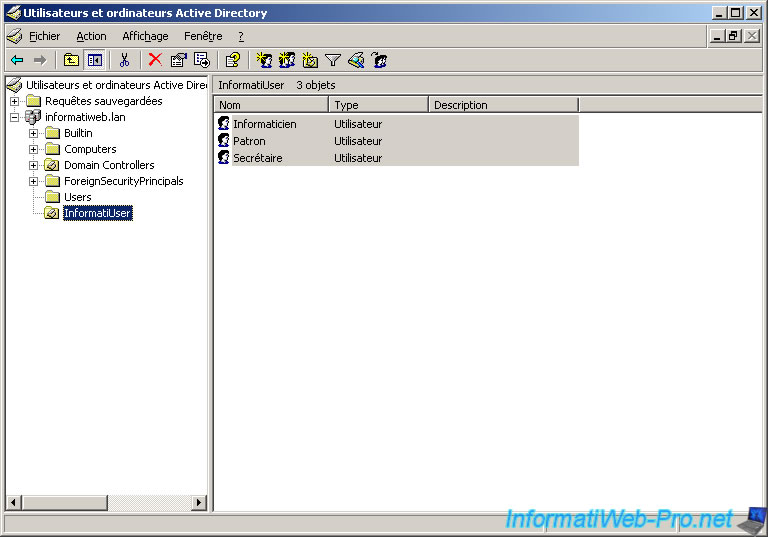
Once the 3 users created will be displayed in the right list.
2. Creating folders and shares
Create 3 folders where you want but avoid the desktop, "my documents" folder and user directories located in "C:\Documents and Settings" and the Windows folder because the permissions of these files may sometimes refuse the access as Windows XP when you set a password for your user session and click sue "go private". Because this action changes the NTFS directory permissions of the user concerned and blocks access to other users. It's because of this that we must avoid to shared folders in the user directory for the shared folders will perhaps one day be denied access to because of that.
Regarding the "Windows" folder is for the simple reason that it's a system folder and should be avoided to share files that are in Windows.
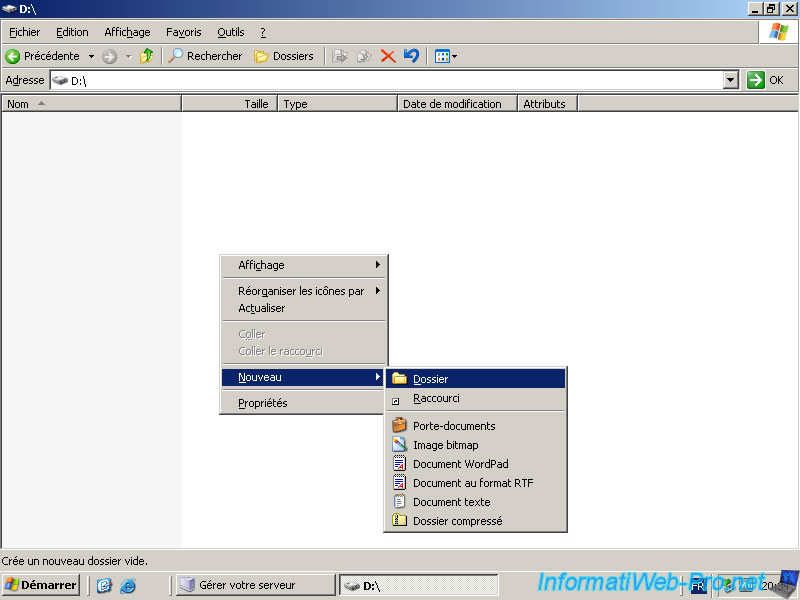
Once created folders you get this :
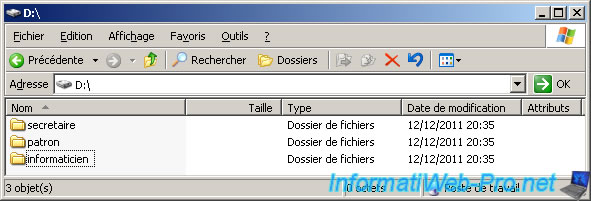
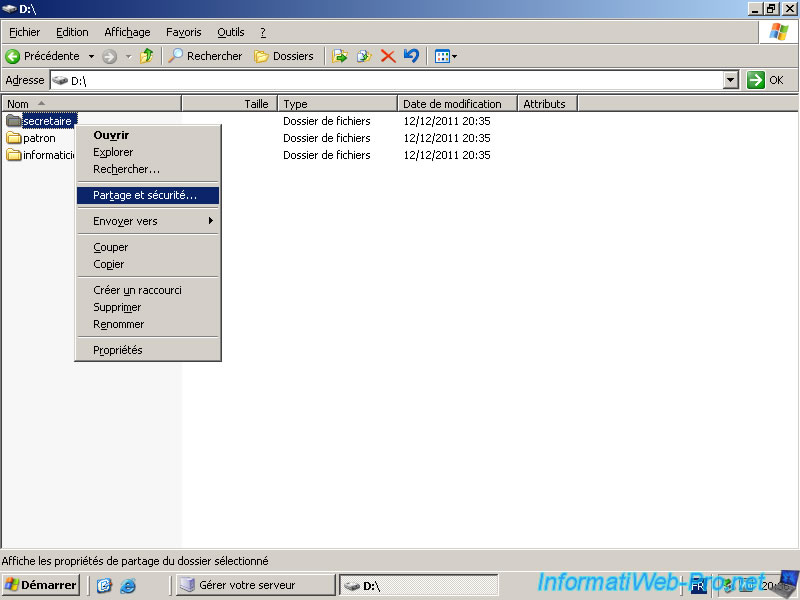
We'll start by sharing the secretary file by right clicking the file and clicking on "Sharing and Security ...".
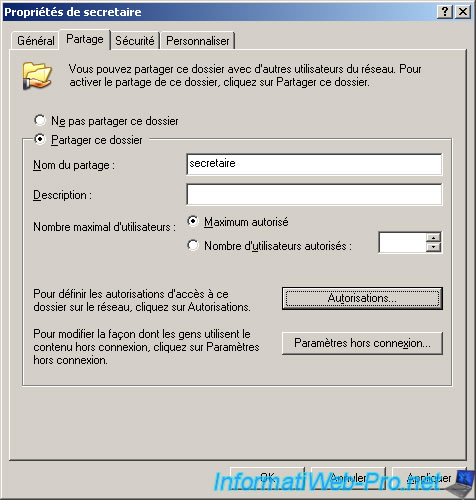
To facilitate the tutorial, we will leave the default share name. Click "Allow" to set the share access rights.
Small difference compared to a conventional OS as "Windows XP", which corresponds to the server "Windows Server 2003" edition is that we will put the rights in the "Security" tab which is much more complete than the "Sharing" tab.
So we will configure the share access rights ("Sharing" tab) Full Control for users who have at least one right (read, modify, ...). Then, we configure the NTFS permissions ("security" tab) with the rights mentioned at the beginning of this tutorial "Shared Folders and rights".
Note : It's essential that the partition is formatted as NTFS for NTFS rights are available. Having said all new hard drives can be formatted in NTFS and FAT32. At least at the base because there may be utilities to do so.
First start by removing the group "Everyone" because it is a security flaw, and if you don't remove it, the rights may be incorrect because the group "Everyone" includes all including those that have just been created.
Once removed, we will add 3 users, one by one, by clicking "Add."
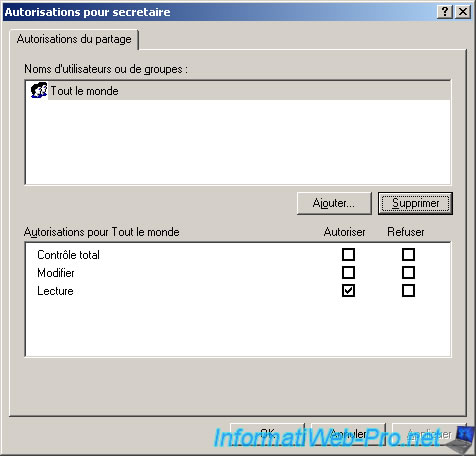
To add users write the beginning of the username or group and click "Check Names" for the full name automatically write.
Repeat the same operation for the other 2 users.
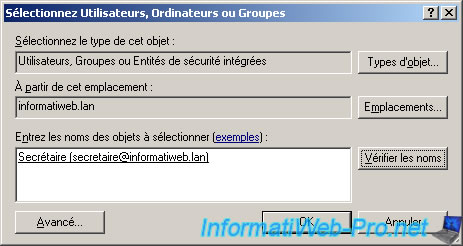
Once users are added, check the 3 boxes allow for 3 users.
Note : you must select a user to change the checkboxes is concerned.
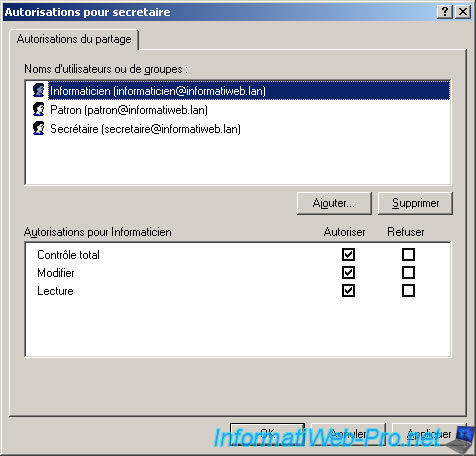
Once done, click "OK" to exit the window and return to this window.
It's important to click the "Apply" button before setting the "Security" tab because if you don't do it, you will get a message "Error : This resource was not shared" and you will have to configure this shared folder and the "security" tab.
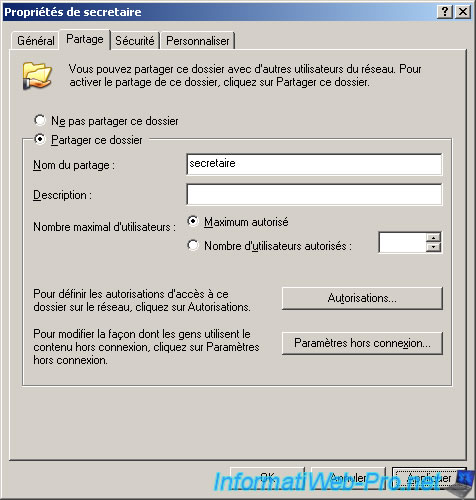
We will now configure the NTFS permissions ("Security" tab) with the rights mentioned at the beginning of the tutorial.
To begin, we will first remove the existing rights that are actually inherited from parent directories. To do this, click the "Advanced Settings" button.
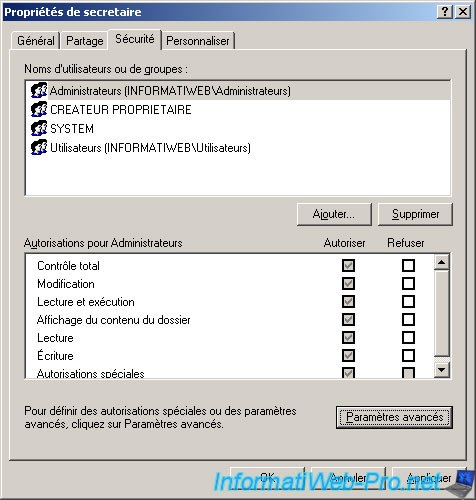
To remove these legacies NTFS permissions to a folder simply uncheck "Allow inheritable permissions from parent to propagate ...".
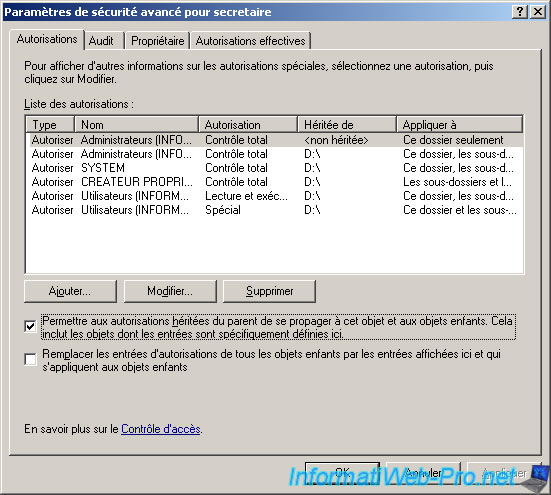
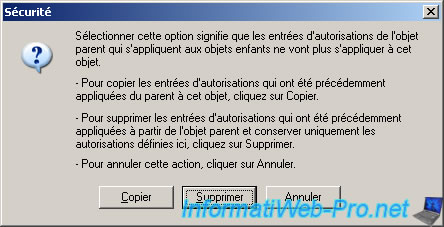
When this legacy is removed, he asks us if we want to copy the rights from the parent folder so that they are independent of the NTFS permissions of the parent folder or delete them for the current folder.
Click "Remove".
If you still have a line like me, also delete the. These are the permissions for the "Administrators" group which also contains the "Administrator" account with which you are connected to the server.
Note that the group has an "s" at the end, what differentiates from the user "Administrator".
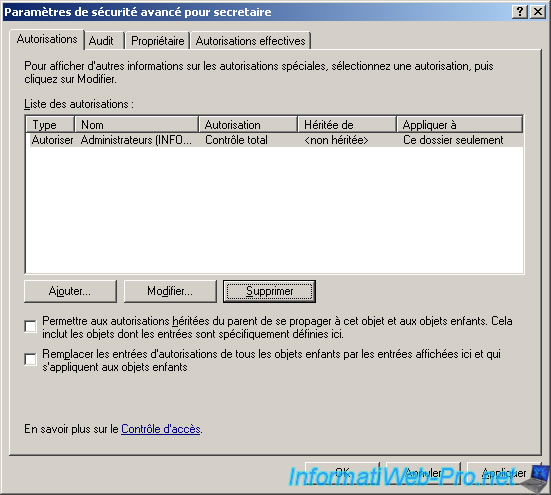
Once the last line deleted, the list is finally empty. Click "OK" to exit this window.
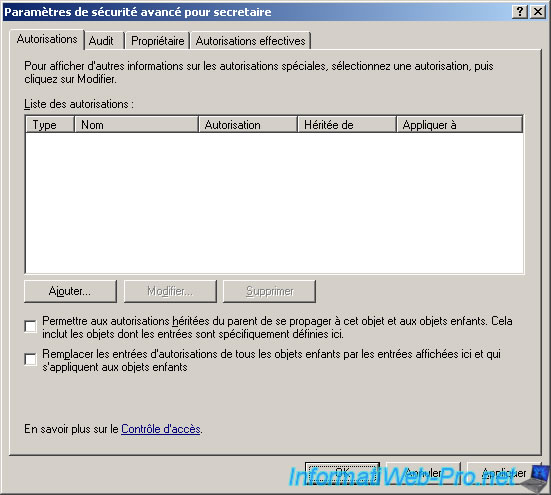
The waiter displays a message warning us that all rights are denied to all users, which makes sense because no rights = rights denied but don't panic, we will configure them in the next window.
Click "Yes" to continue.

Start by adding 3 users who have at least a right to that share as follows : the Secretary, the boss and the computer scientist (informaticien in French) by pressing the "Add" button.
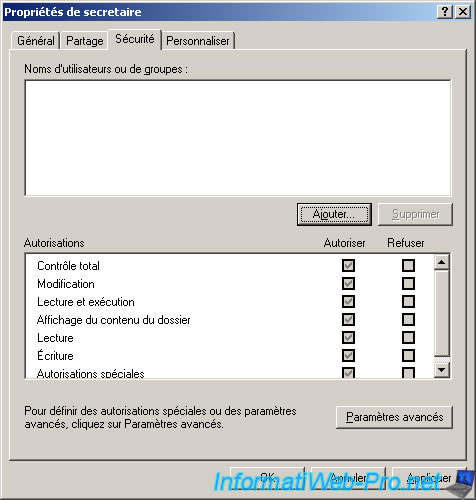
The computer scientist (informaticien in French) has all the rights to this share so check the "Full Control" box and other "Allow" checkbox will check automatically.
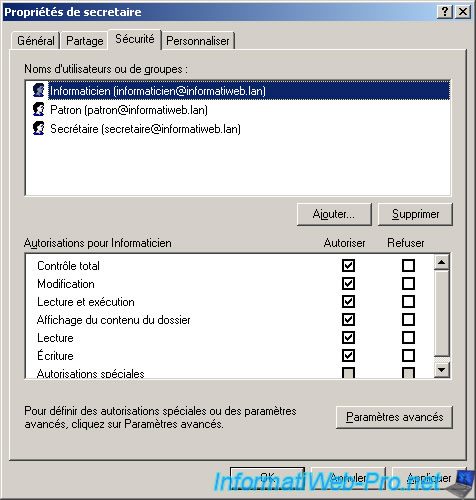
Then, for the rights of the boss is slightly more complicated.
Reminder : The boss has read and modify rights, but not delete so we will have to allow rights "Read" and "Change / Write" and deny the rights of "delete".
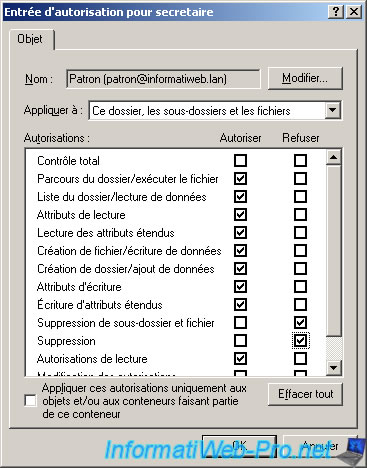
To do this, first check the boxes as shown in the image and then click to set the delete rights that are found only in the advanced settings.
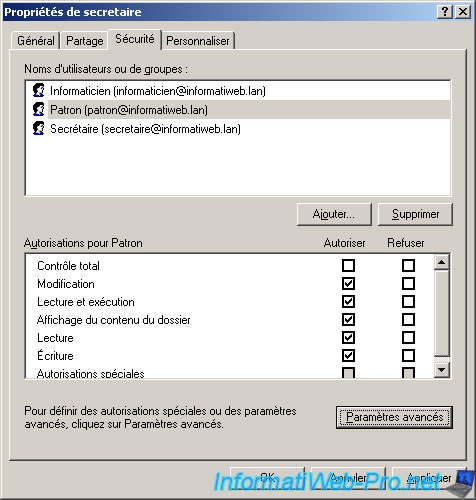
Select the "Boss" line and click the "Edit ..." button.
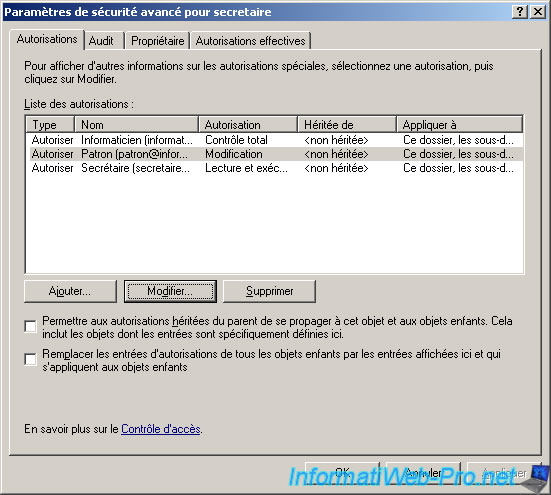
Seeing the number of spaces in the settings you will understand why I made you return to the simplified version to almost all rights.
In this window, select the "Deny" checkboxes for 2 delete rights namely : "Delete subfolders and files" and "Delete".
Then press "OK" to return to the previous window.
Note : Refuse removal also prevents the user to rename files and folders to these rights. This is a special case of NTFS permissions.
You see an additional line was created. These rights "Deny" type and the authorization is named "Special" because she was not ticked the boxes fit a basic right as "Read, Update, ...".
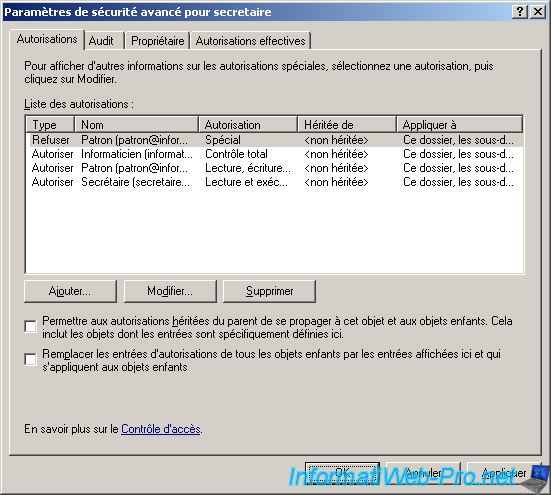
He warns us that "Deny" rights take precedence over those "Allow". This applies to all rights NTFS whether on a Windows Server or Windows Classic.
Click "Yes".

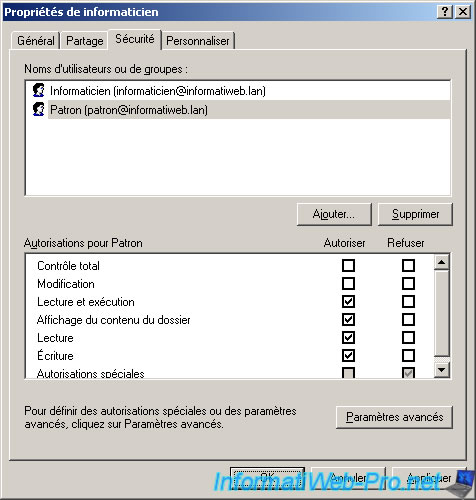
And finally, for the Secretary check only human the "Read" box as in the picture. And finally click "OK".
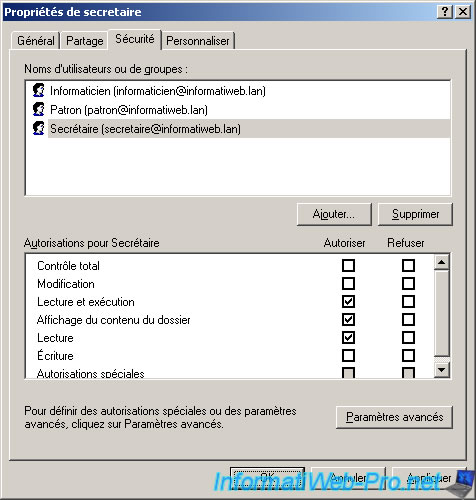
Once the rights set for the "secretary" folder, repeat the same procedure in accordance with the following rights :
- Check "Full Control" for the computer scientist (informaticient in French) and the boss who have at least one right on the folder of the boss. The Secretary only has access to his folder it's useless to add it to the list as "no rights" = "rights denied" as said above.
Then, click OK and apply on the remaining window and go to the "Security" tab.
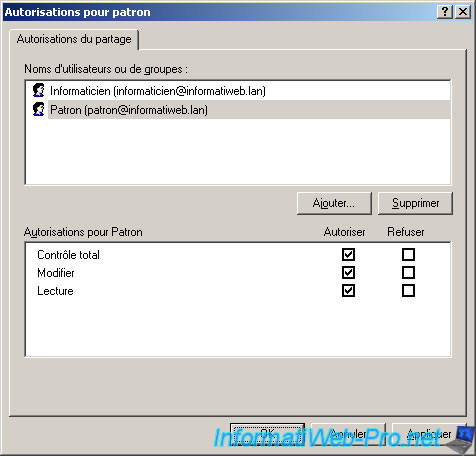
Then, in the NTFS permissions, select "Full Control" for the computer scientist (informaticien in French).
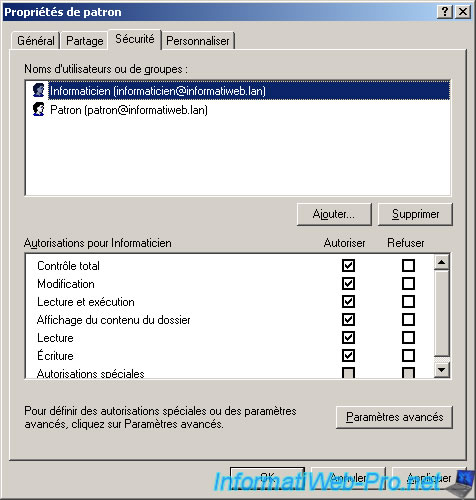
And the rights of "reading" and "modification" to the boss. Don't forget to refuse the two rights "suppression" in advanced for the boss as explained above parameters. Once the rights "delete" refused, you see the "Deny" box on line "Special Permission" with a "v" gray like the picture below.
Click "OK".
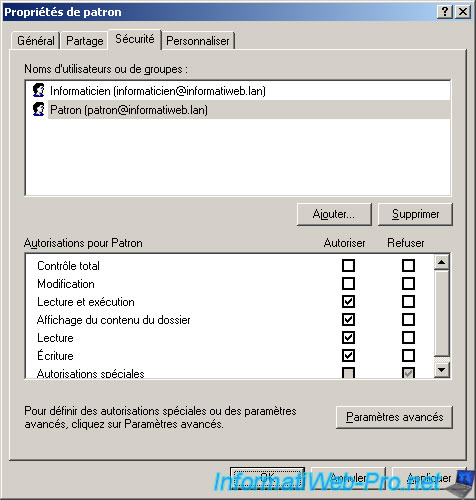
And finally we will configure the rights of the third and last shared namely "Computer scientist (informaticien in French)" folder.
- Check "Full Control" for the computer scientist (informaticien in French) and the boss who have at least one right on the folder of the computer scientist. The secretary only has access to his folder, it's useless to add it to the list as "not rights" = "rights denied" as said above.
Click "OK" and "Apply" on the remaining window and go to "Security" tab.
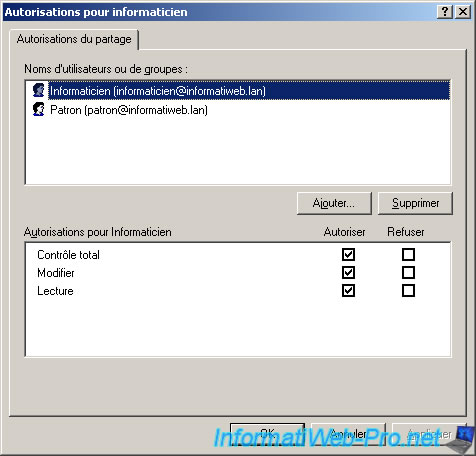
In the "Security" tab, allow full control for the computer scientist (informaticien in French). As well as read and modifications rights for the boss. Don't forget to refuse the two rights "suppression" in advanced parameters for the boss as explained above.
Share this tutorial
To see also
-

Windows Server 11/12/2011
Windows Server 2003 - Create an Active Directory
-

Windows Server 4/28/2012
WS 2003 - Créer un serveur DHCP
-
Windows Server 11/12/2011
WS 2003 - Installation
-
Windows Server 4/28/2012
WS 2003 - NAT and network routing

You must be logged in to post a comment