Manage desktop PCs on Windows MultiPoint Server 2012 thanks to the MultiPoint Connector
- Windows Server
- 03 February 2018 at 13:34 UTC
-

- 2/2

2. Enable user monitoring
By default, MultiPoint Dashboard only monitors standard users (not administrators).
However, you should also know that the account created during the installation of Windows has the administrator rights by default. This means that this account will not be monitored by MultiPoint Dashboard as long as it's considered an Administrator by Windows 7 or 8.
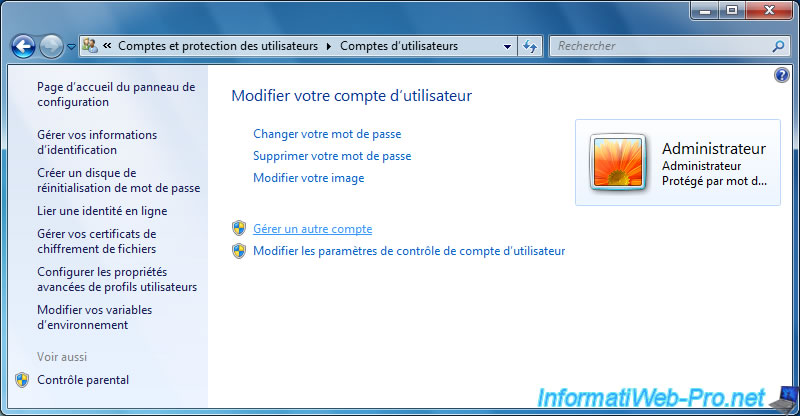
To change the account type for this user, open the control panel and go to : User Accounts and Family Safety -> User Accounts.
Then, click on : Manage another account.
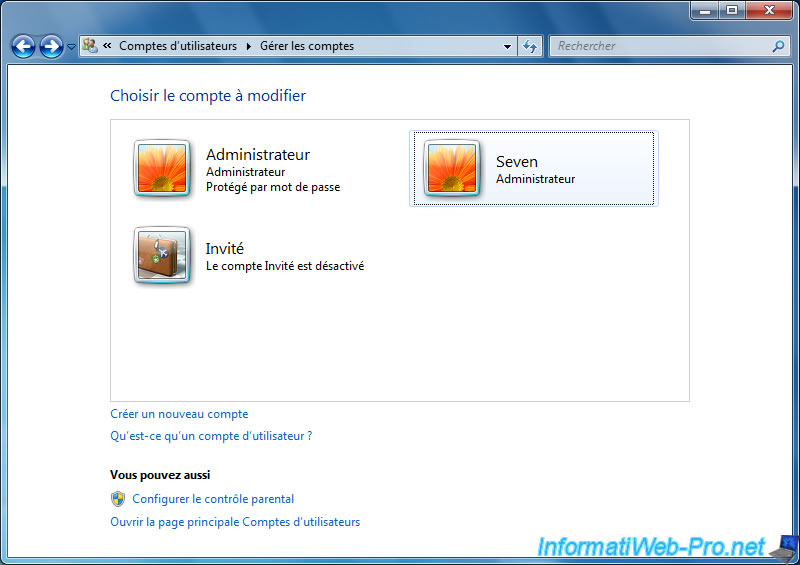
Select the user account that you created when installing Windows.
In our case, it's the "Seven" account which is also administrator under Windows 7.
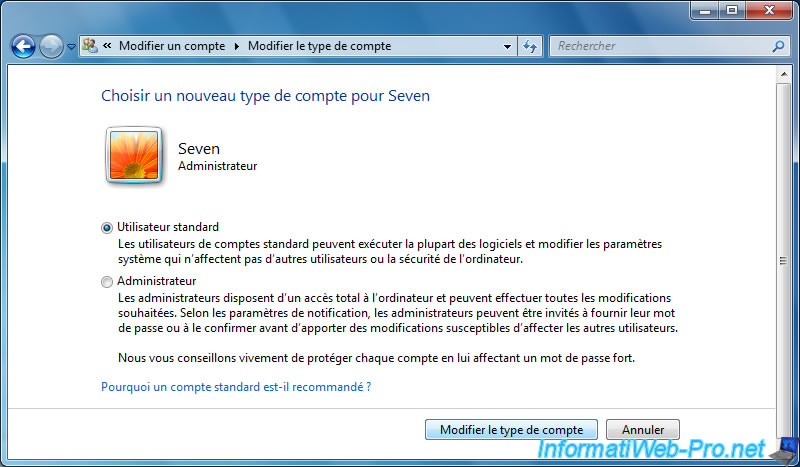
Click : Change your account type.

Select "Standard user" and click on "Change Account Type".
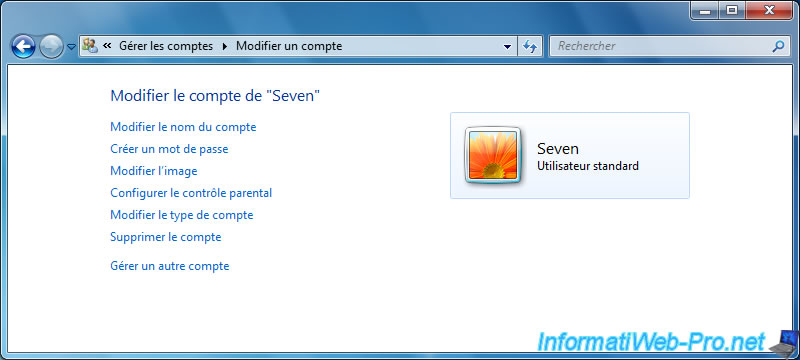
Now, this account is considered a standard user by Windows 7 and MultiPoint Dashboard will be able to monitor this user.
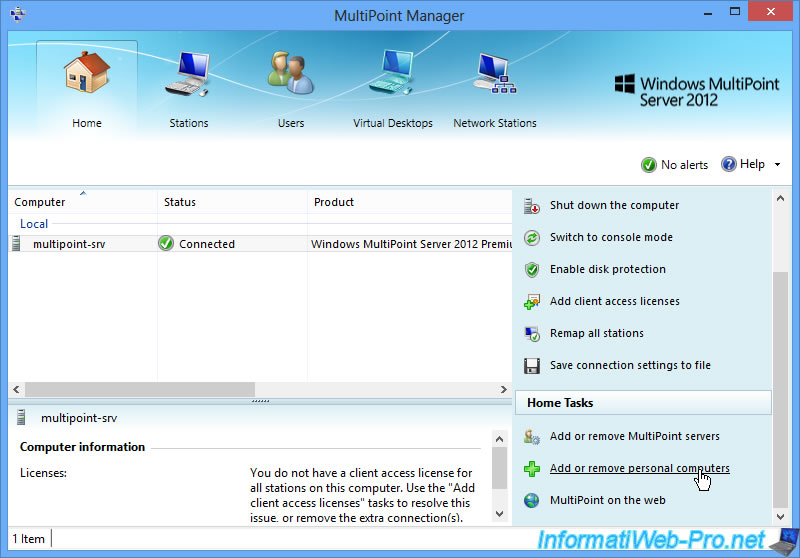
3. Manage personal computers from MultiPoint Manager and MultiPoint Dashboard
Now that the MultiPoint Connector is installed on the client PC, this personal computer can be managed by the administrator with the MultiPoint Manager and the MultiPoint Dashboard.
But for that, you must first add it in MultiPoint Manager.
In the MultiPoint Manager, go to the "Home" tab and click on "Add or remove personal computers".
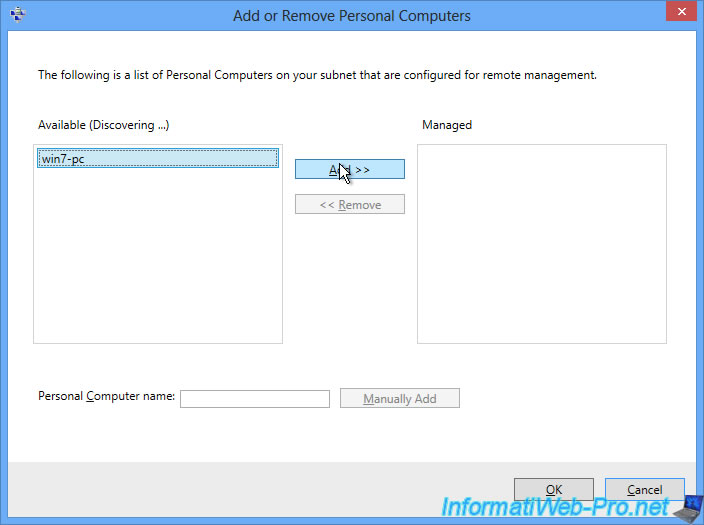
The MultiPoint Manager will automatically detect your personal computer.
Select it and click Add.
Then, click OK.
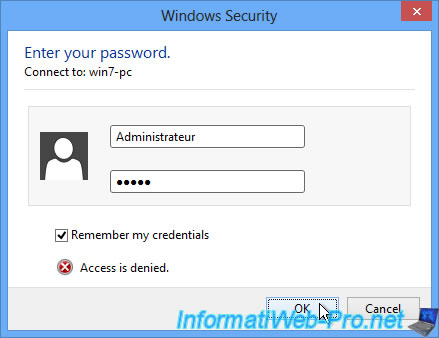
Enter the Administrator account credentials for this personal computer to manage it from MultiPoint Manager.
If all goes well, the personal computer will be displayed in the list and the status will be "Connected".
As you can see, personal computers can use any edition of Windows. As long as it's Windows 7 or 8.
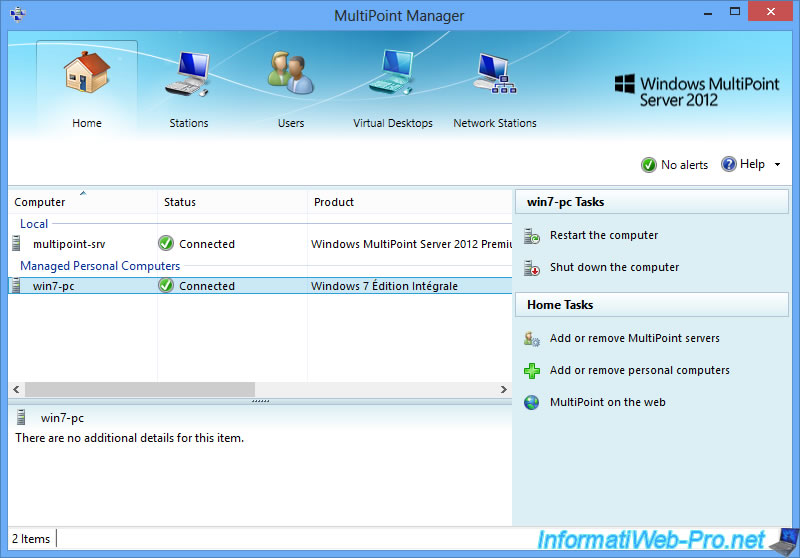
In the "Stations" tab, you will see that this personal computer is also recognized as a user station.
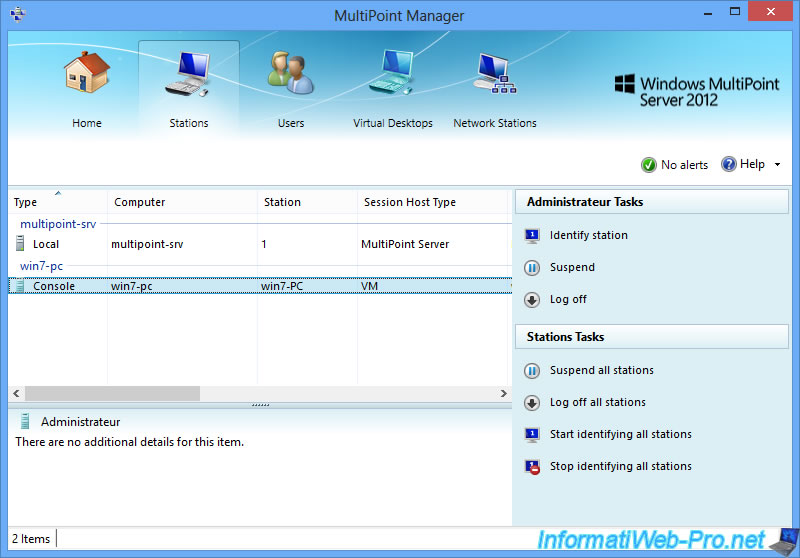
And thanks to MultiPoint Manager, you can easily manage the users of this personal computer remotely.
However, we don't recommend changing the user created when installing Windows, from MultiPoint Manager, as it may disappear from the MultiPoint Manager.
It's for this reason that we have changed his rights directly from the personal computer.
For new users, this will not be a problem.
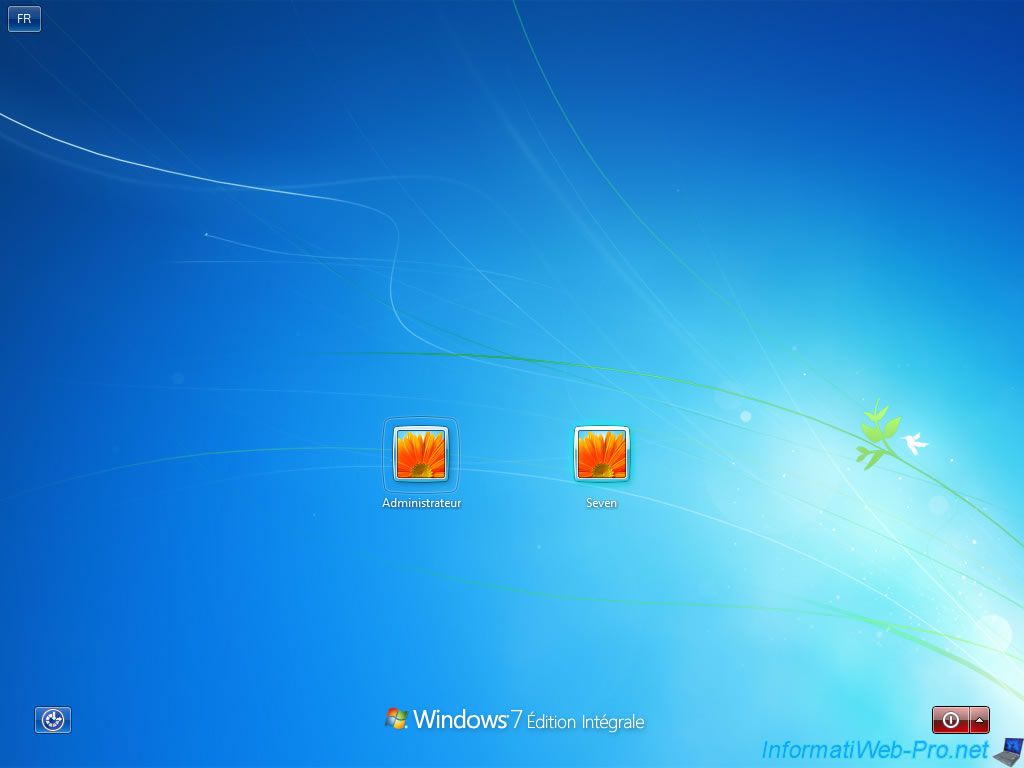
On the personal computer, we connect with the standard user.
In our case : Seven.
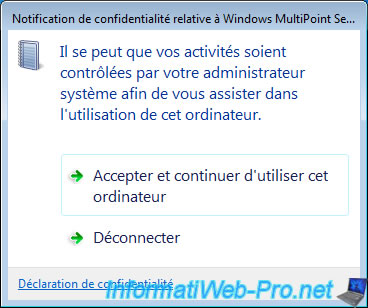
As expected, the notification about the monitoring of this station by the Windows MultiPoint Server 2012 server administrator is displayed because it's a standard user and not an administrator.
Click "Accept and continue using this computer".
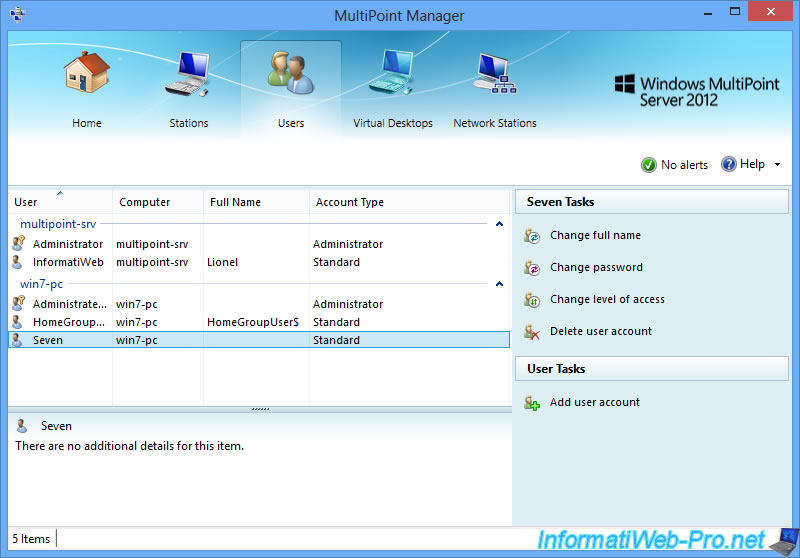
In the MultiPoint Manager, you will see that the user "Seven" is currently connected on the win7-pc machine.
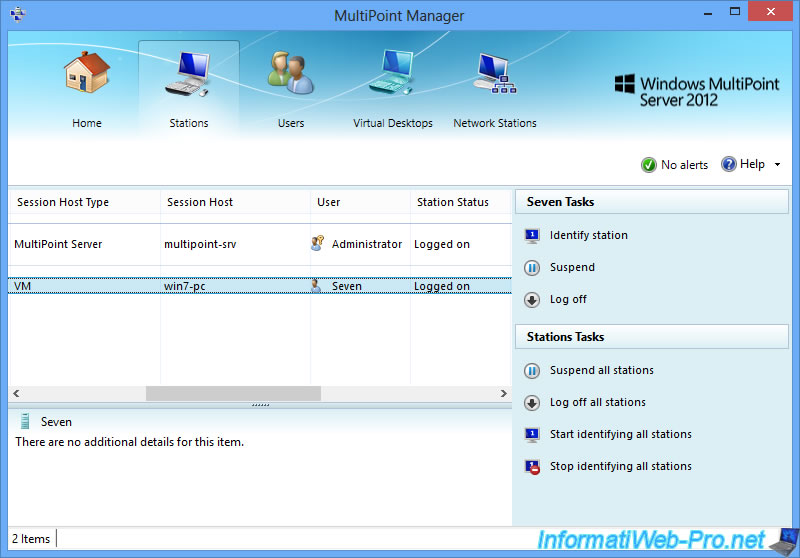
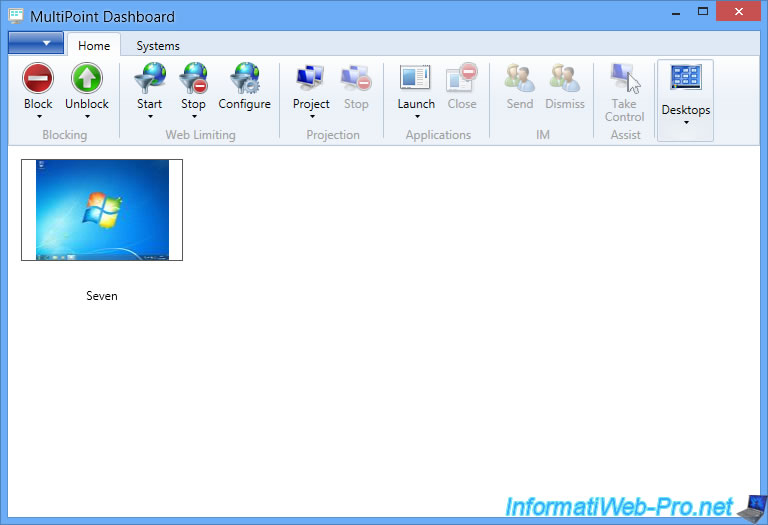
And you can monitor its activity from the MultiPoint Dashboard.
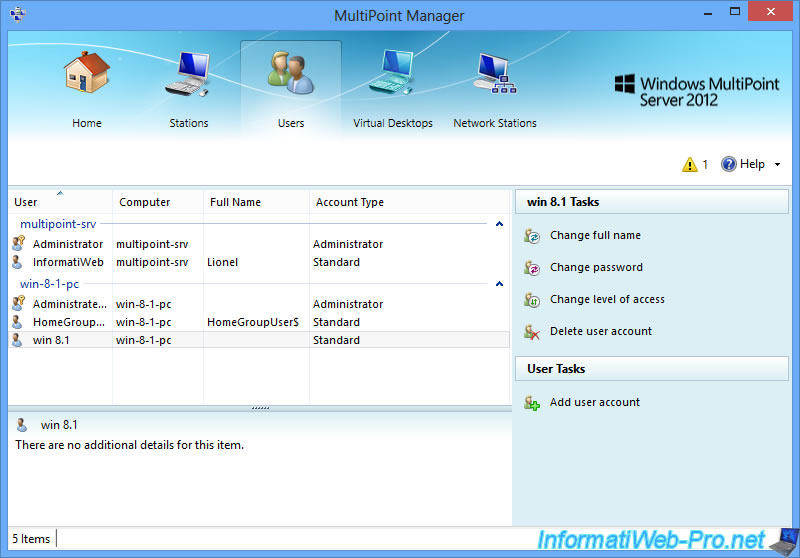
4. Testing a Windows 8 client
As mentioned at the beginning of the tutorial, the MultiPoint Connector is also compatible with Windows 8.
In addition, the procedure and the prerequisites are exactly the same.
Once the connector is installed and the personal computer added in MultiPoint Manager, you will be able to manage the users of this personal computer from the MultiPoint Manager.
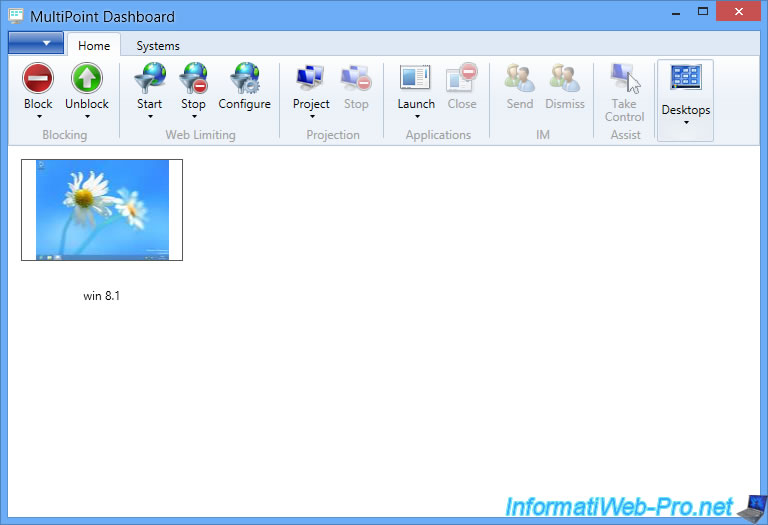
And monitor the activity of your users from MultiPoint Dashboard.
Share this tutorial
To see also
-
Windows Server 2/12/2018
WMS 2012 - Enable the Disk Protection
-
Windows Server 1/17/2018
WMS 2012 - Install, configure and how works MultiPoint 2012
-
Windows Server 3/24/2018
WMS 2012 - Join virtual desktops to an AD
-

Windows Server 2/21/2018
WMS 2012 - Joining an AD and use roaming profiles
No comment