Join a WMS 2012 server to an Active Directory and use roaming profiles on Windows MultiPoint Server 2012
- Windows Server
- 21 February 2018 at 13:16 UTC
-

- 2/4

4. Creating users in the Active Directory
As said before, users will need to be created on the Active Directory server.
However, to set the appropriate rights to your users, you will also need to create some groups and use some group policies (GPOs) to automate the rest.

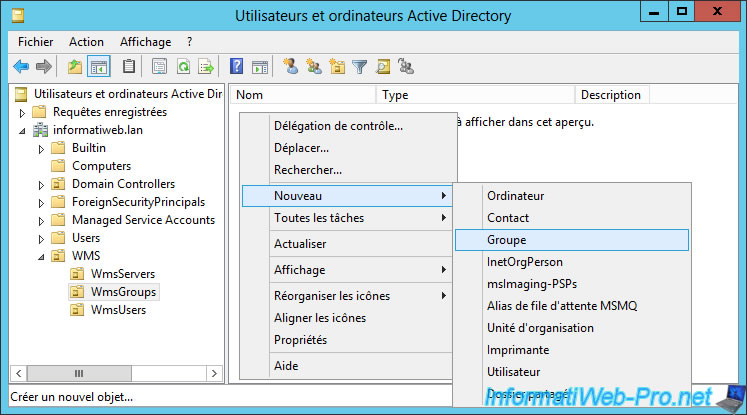
To begin, create a new organizational unit (a folder).
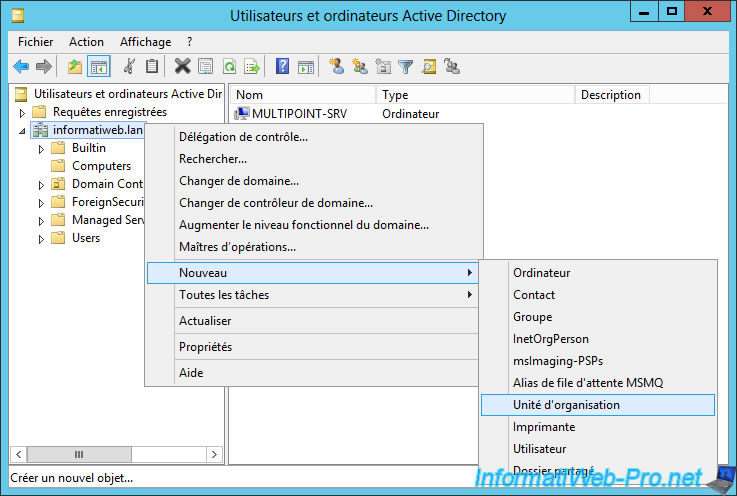
Type "WMS" for Windows MultiPoint Server.

Then, in this "folder", create 3 new folders :
- WmsServers
- WmsGroups
- WmsUsers
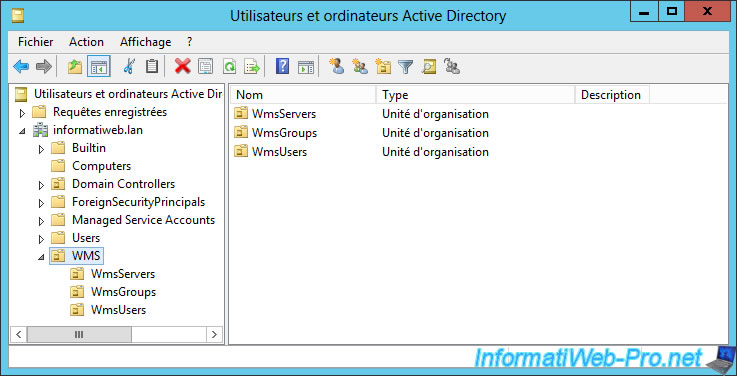
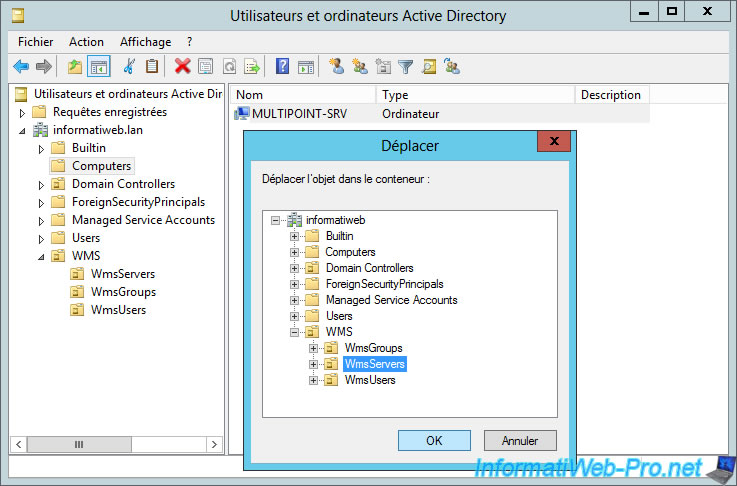
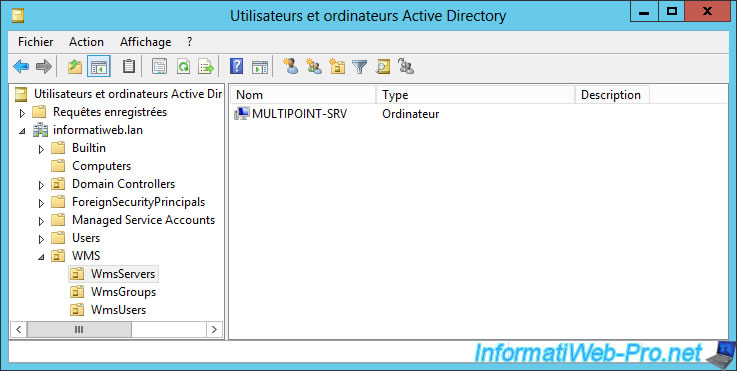
Once the folders are created, move the "MULTIPOINT-SRV" computer account to the "WMS\WmsServers" folder.
Since there are 3 types of users on Windows MultiPoint Server 2012, we will create 3 new groups in our Active Directory.
Note : create these groups in the WmsGroups folder.
To create these groups, choose each time :
- group scope : local domain
- group type : security
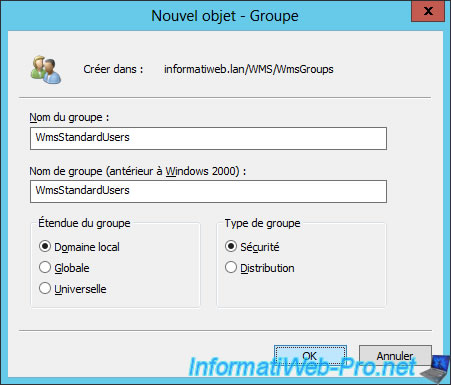
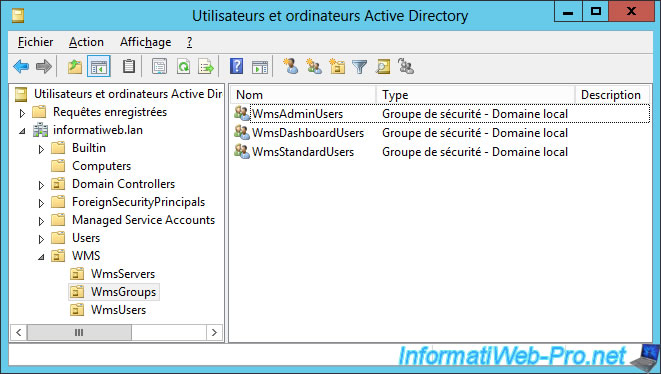
In our case, we created these 3 groups :
- WmsAdminUsers
- WmsDashboardUsers
- WmsStandardUsers
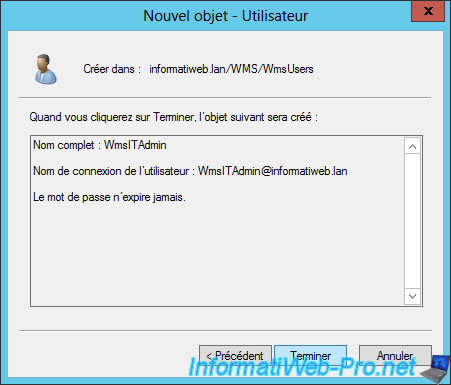
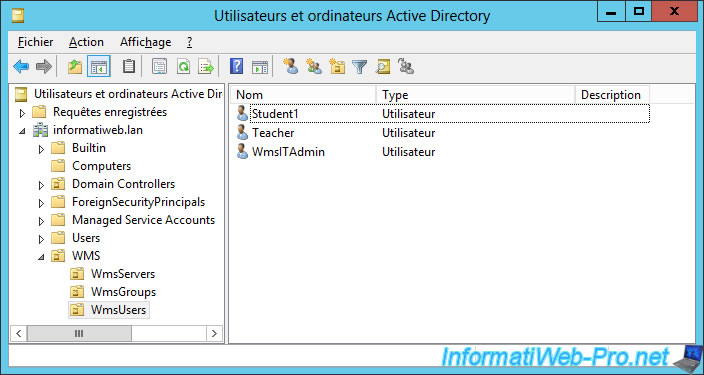
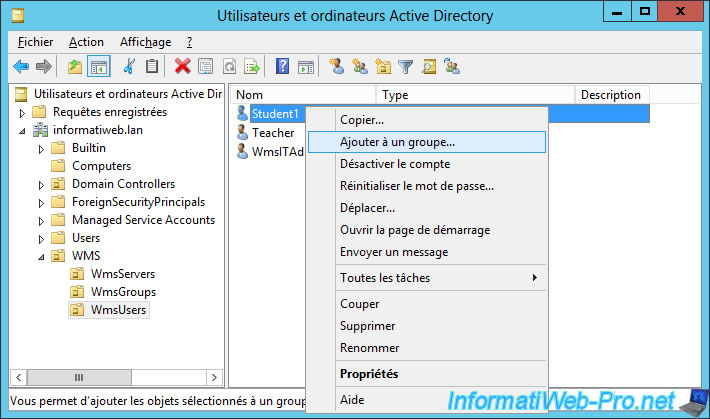
Then, create 3 users in the WmsUsers folder to test different types of accounts.
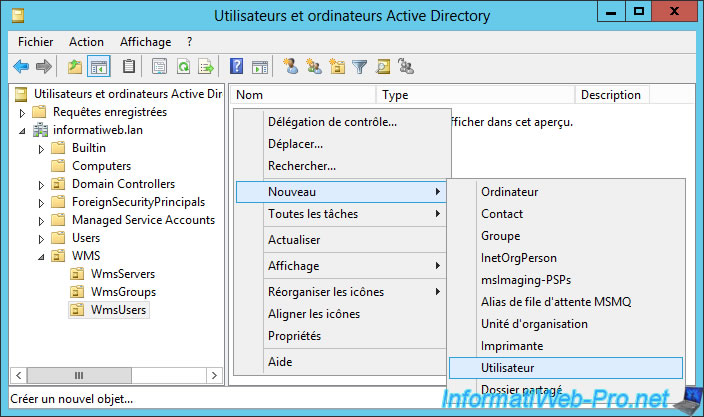
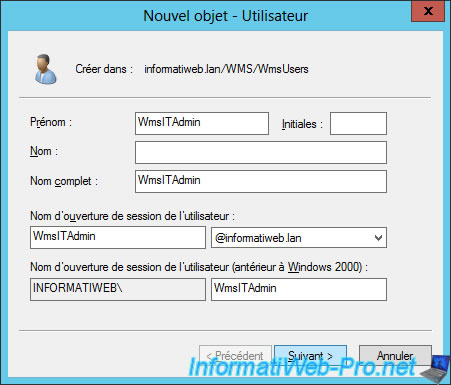
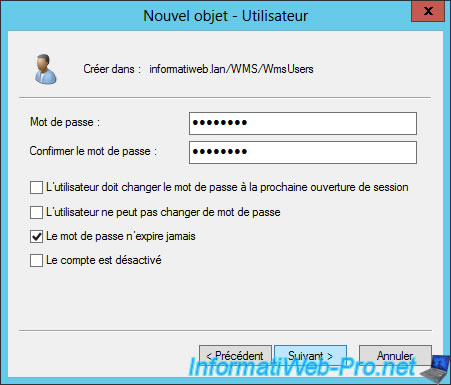
In our case, we created these 3 users :
- Student1 who will be a standard user because he will be a student
- Teacher who will be a dashoard type user, because it will be a teacher
- WmsITAdmin which will be a administrator type user, because it will be an IT Manager managing the MultiPoint server
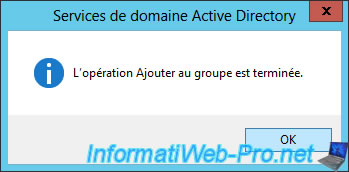
To make it easier to manage users and their rights, group policies will be applied directly to the 3 new groups created previously and not to the users created at the moment.
This means that we will move our users in the group corresponding to the rights they must have on the MultiPoint server.
In summary :
- the Student1 user will be a member of the WmsStandardUsers group
- the Teacher user will be a member of the WmsDashboardUsers group
- the WmsITAdmin user will be a member of the WmsAdminUsers group

5. Set users rights through GPOs
As previously explained, the different types of accounts receive rights according to the groups in which they are located.
So, we just need to put our 3 Active Directory groups in the right groups present in Windows MultiPoint Server 2012 so that our users receive the right rights.
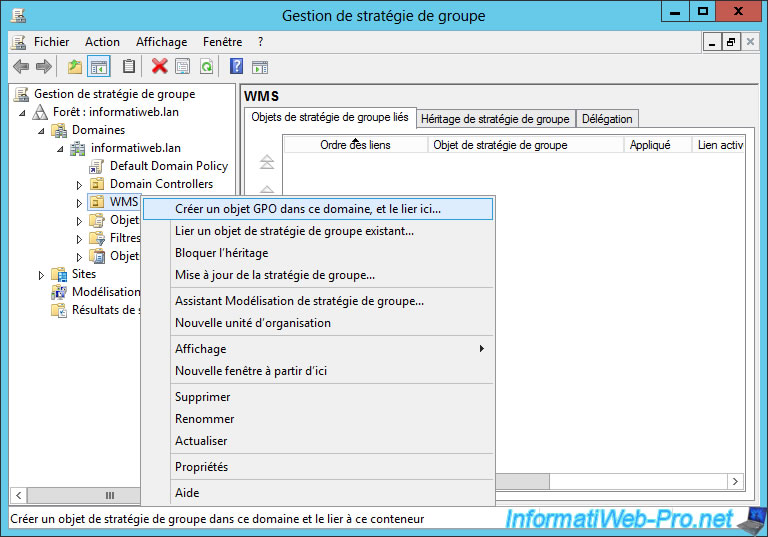
For this we need group strategies (GPO).
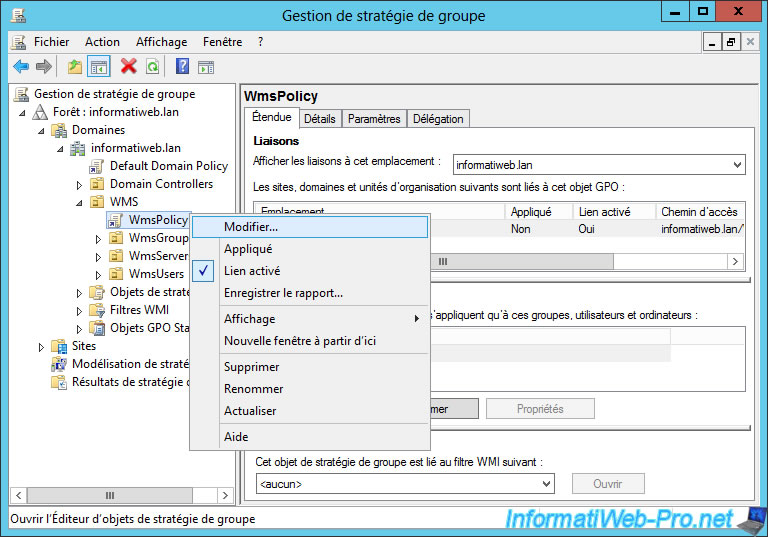
Launch the "Group Policy Management" program and right click "Create a GPO object in this domain, and link it here" on the "WMS" folder.
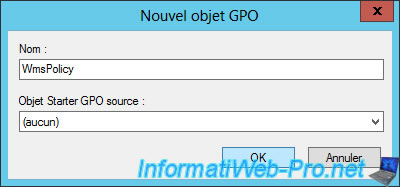
Type "WmsPolicy" for the GPO's name.
Then, right-click "Edit" on the GPO you just created.
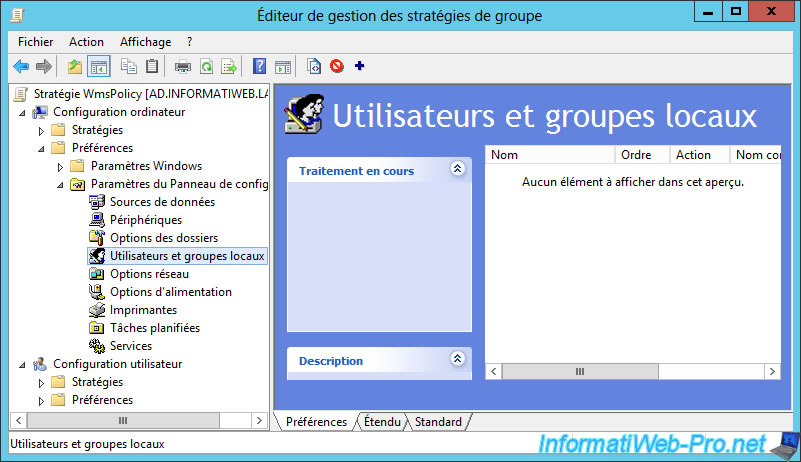
In the "Group Policy Management Editor" window that appears, go to : Computer Configuration -> Preferences -> Control Panel Settings -> Local Users and Groups.
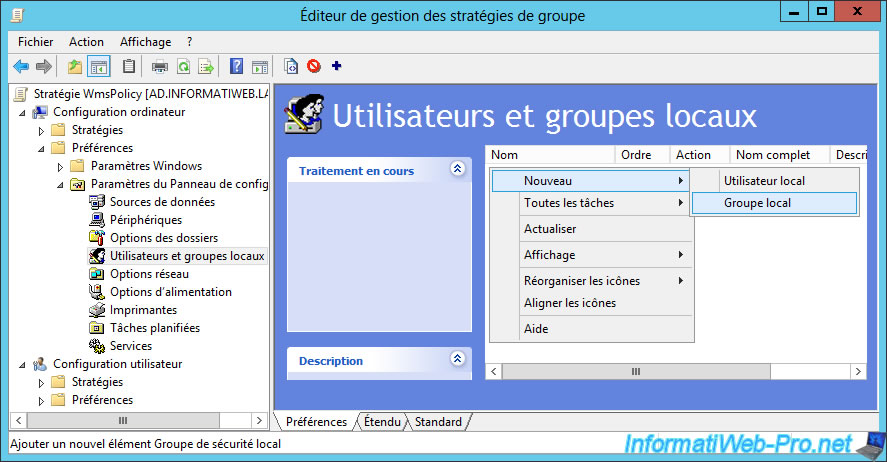
Right click "New -> Local Group" on the right side.
5.1. Rights management for standard users
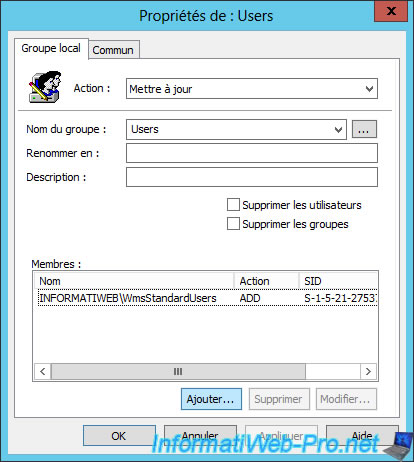
To begin, select "Action : Update" and specify "Users" for the group name.
This is the name of the group we want to edit on the MultiPoint server.
Then, click on the "Add" button.
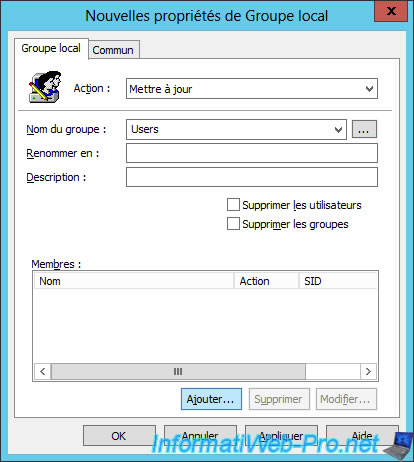
Select our "WmsStandardUsers" group by clicking on the "..." button and choose the "Add to this group" action.
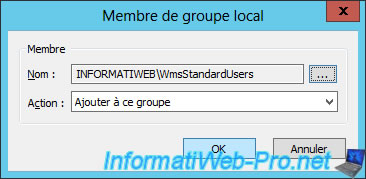
Now, users who will be members of our WmsStandardUsers group will have the same rights as standard users under Windows MultiPoint Server.
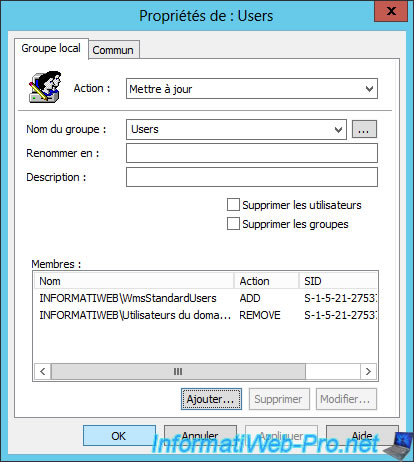
However, after testing this solution, we noticed that Windows Server also added the "Domain Users" default group to the "Users" group of Windows MultiPoint Server.
To avoid future bugs, we have added an extra rule so that it's not added to the Users group.
To do this, click on the "Add" button again.
Select the "Domain Users" group and choose the "Remove from this group" action.
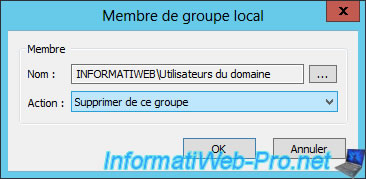
Finally, click OK.
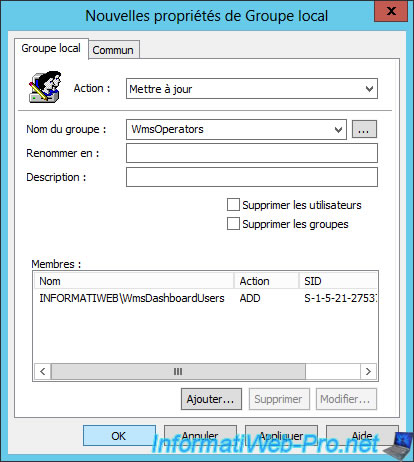
5.2. Rights management for dashboard users
For "MultiPoint Dashboard user" users, just add our WmsDashboardUsers group to the WmsOperators group of Windows MultiPoint Server 2012.
5.3. Rights management for administrator users
For administrators of the MultiPoint 2012 server, you will need to add our WmsAdminUsers group to the Administrators group of the MultiPoint server.
But also prevent the automatic addition of the "Domain Admins" group in the "Administrators" group.
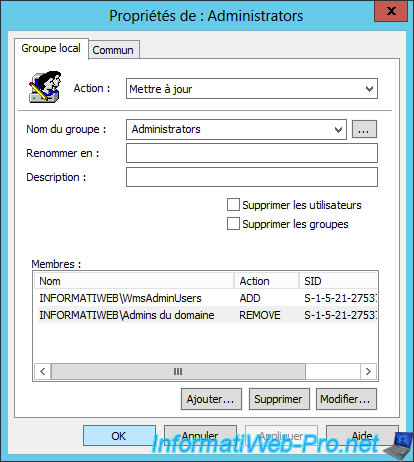
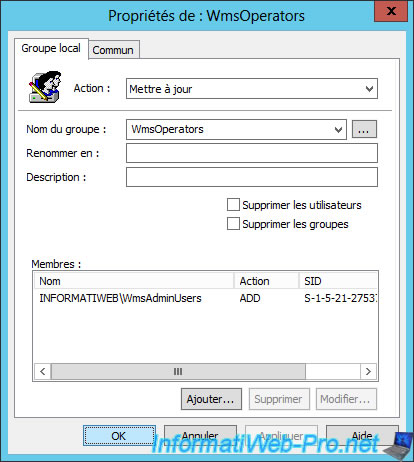
As previously explained, MultiPoint administrators are also members of the WmsOperators group.
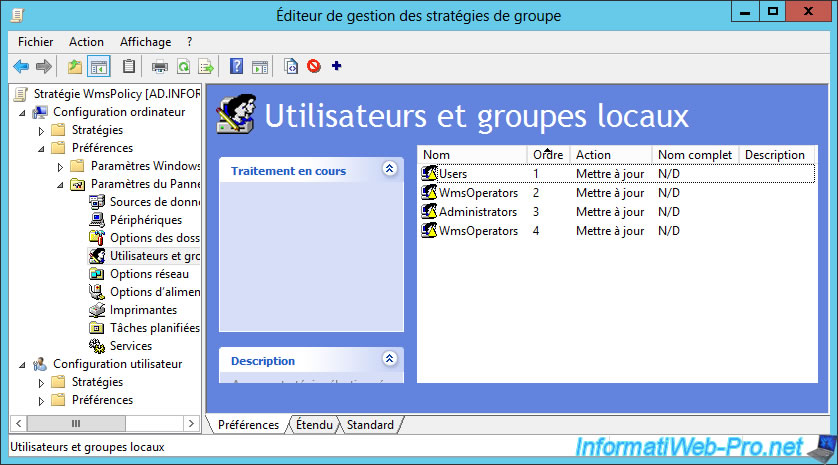
Finally, you should get this.
Share this tutorial
To see also
-
Windows Server 2/12/2018
WMS 2012 - Enable the Disk Protection
-
Windows Server 1/17/2018
WMS 2012 - Install, configure and how works MultiPoint 2012
-

Windows Server 3/24/2018
WMS 2012 - Join virtual desktops to an AD
-

Windows Server 2/3/2018
WMS 2012 - Manage desktop computers with the MultiPoint Connector
No comment