- Windows Server
- DNS
- 15 January 2013 at 16:37 UTC
-

- 1/3
The DNS server is used to match a domain name (and its subdomains) with its corresponding IP address.
For example, when you type "google.com" in the address bar of your browser, it sends a request to the DNS server (specified either in the settings of your network connection, or those in the browser if you have modified) requesting the IP address corresponding to the domain. Questioned if the DNS server has information about this area, it will respond by sending the IP address corresponding to the domain name requested (173.194.67.100 in this case). Otherwise, he will ask a root DNS server (which must be configured on the DNS server) to obtain information and send them to you.
A DNS server can also do the reverse, ie to match an IP address with a domain name. This technique is used, for example, by the utility "NSLOOKUP" which we use to the end of the tutorial.
Windows Server 2008 End of Support
Extended support for Windows Server 2008 by Microsoft ended on January 14, 2020.
However, here is how to configure a DNS server on Windows Server 2012 / 2012 R2 : WS 2012 / 2012 R2 - Create a DNS server and delegate subdomains
- Configuring Static IP
- Role installation "DNS Server"
- Configuring the DNS server (to support Internet)
- Configuring the DNS server (for LAN)
- SOA and NS
- Creating records
- nslookup utility
- Configuring Clients
1. Configuring Static IP
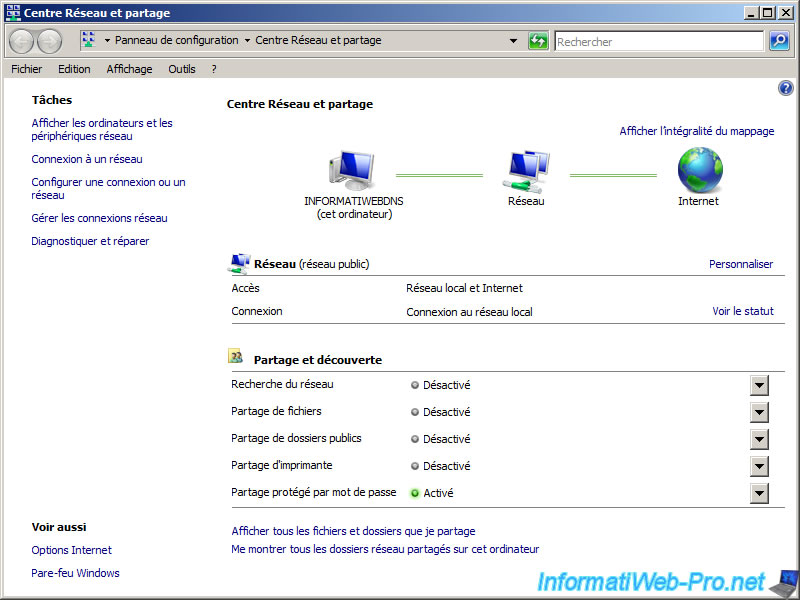
First, we will define a static IP address on our server (if you do not already have). To do this, click the network icon -> Network and Sharing Center.

Click on "Manage network connections".
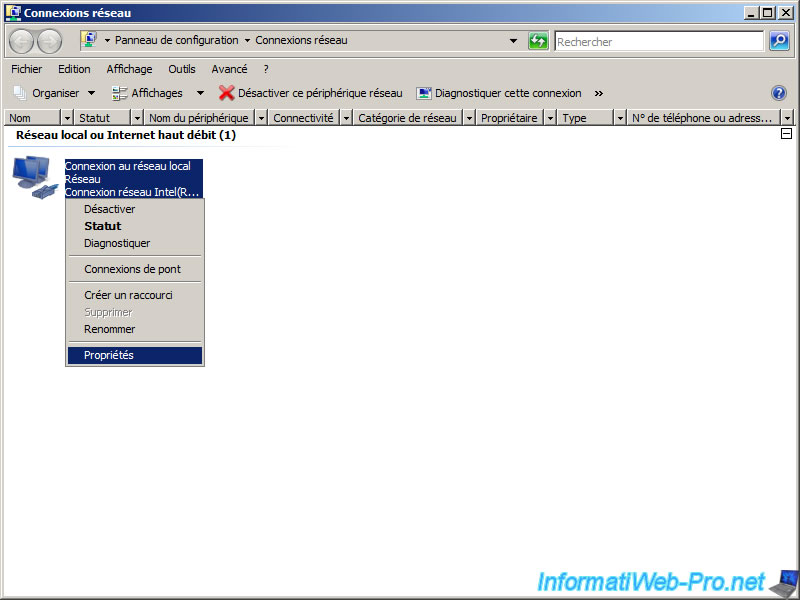
Go to the properties of your "Local Area Connection".
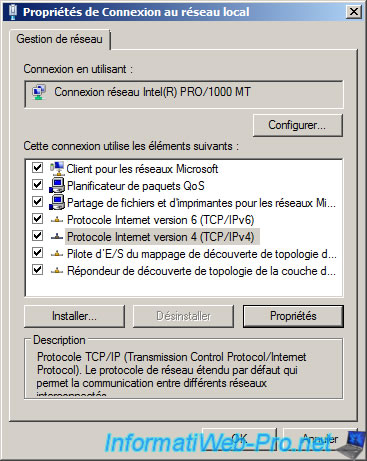
Select "Internet Protocol Version 4 (TCP/IPv4)" and click "Properties".
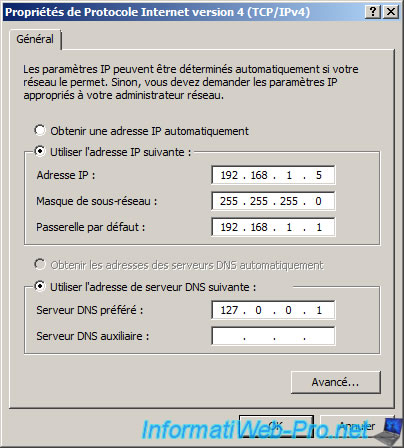
Select "Use the following IP address" and enter the necessary information.
If you do not know how to fill these boxes, read our tutorial "Define a private static IP address".
2. Role installation "DNS Server"
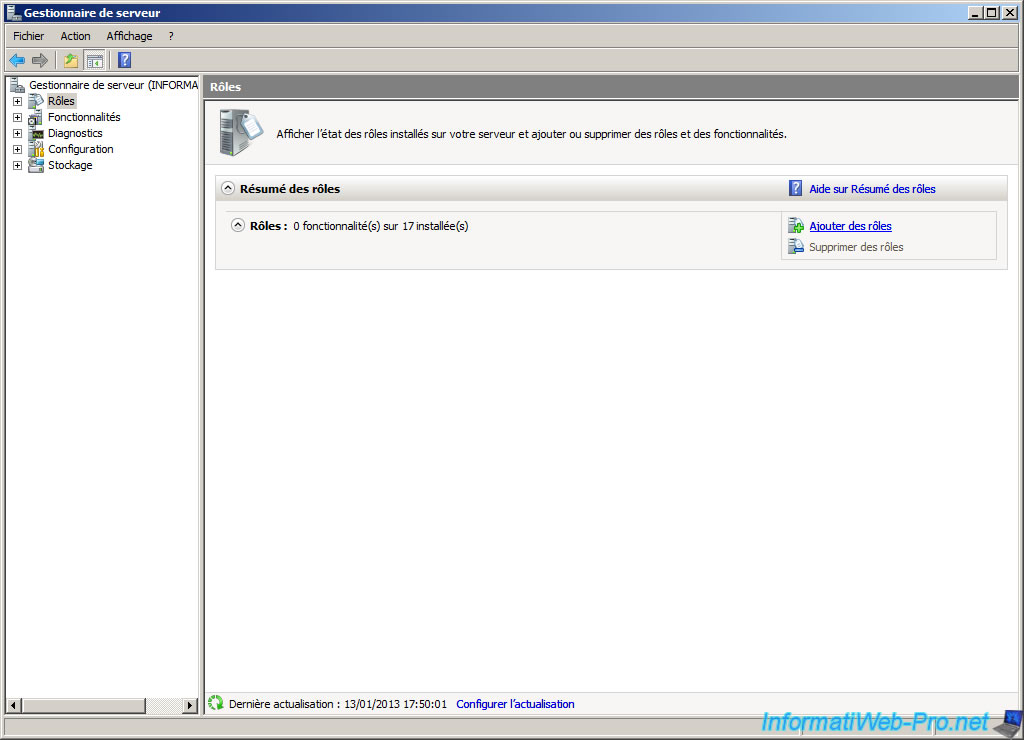
Open the Server Manager and click on "Add Roles".
Note : If you have already configured an Active directory on your server, this role is already installed.
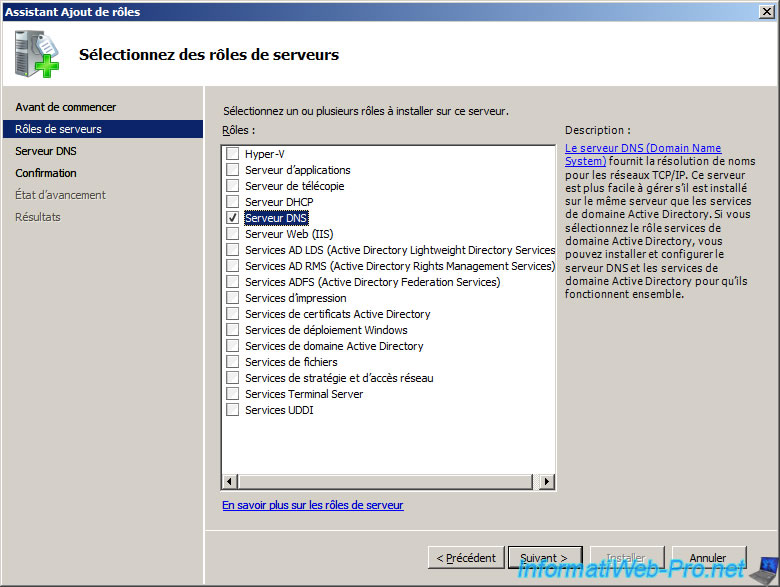
Select "DNS Server" and click "Next".
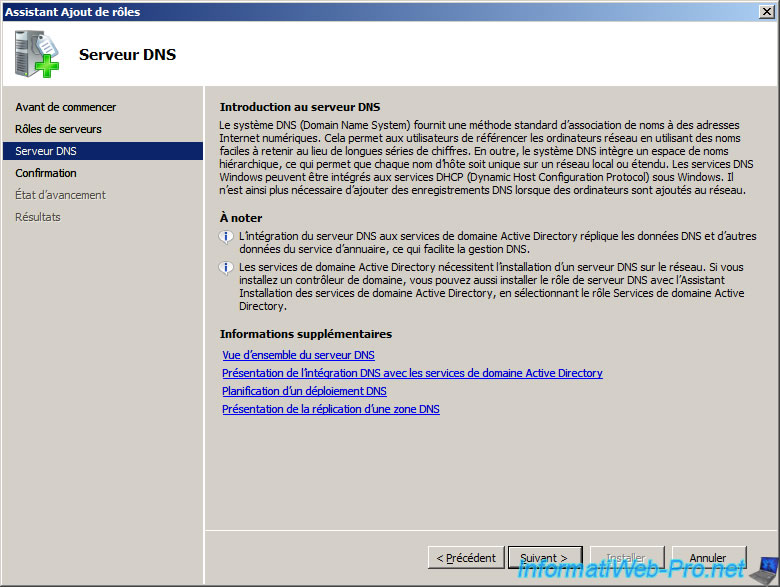
The wizard displays a description of the DNS server.
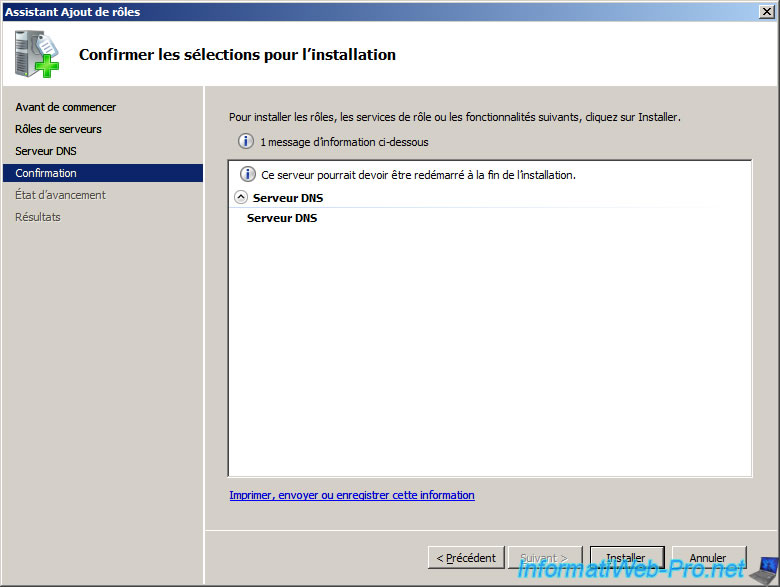
Click "Install".
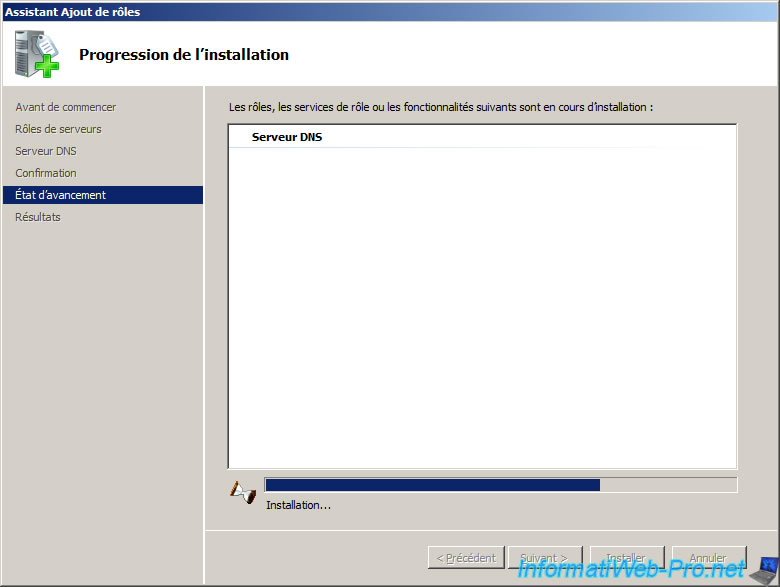
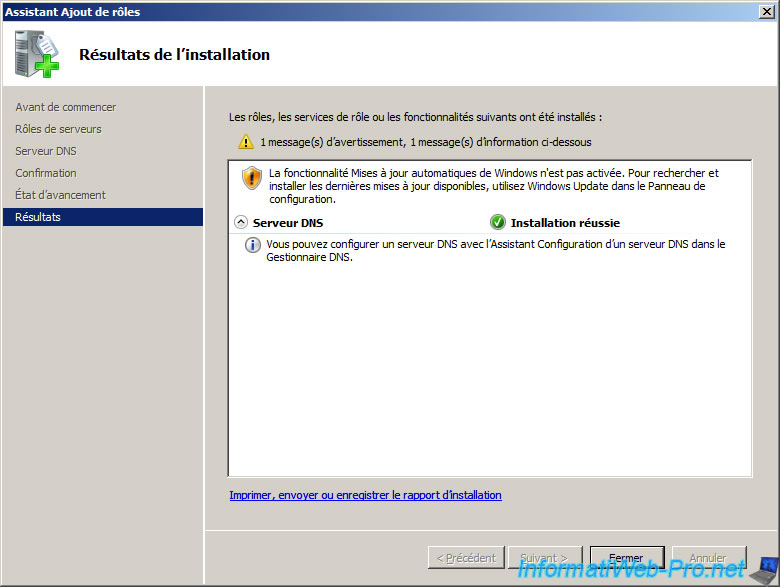
3. Configuring the DNS server (to support Internet)
First we will configure our DNS server to respond to all requests, even if they relate to matters that are not configured on our DNS server. This is done by the root servers.
Go to the Start Menu -> Administrative Tools -> DNS.
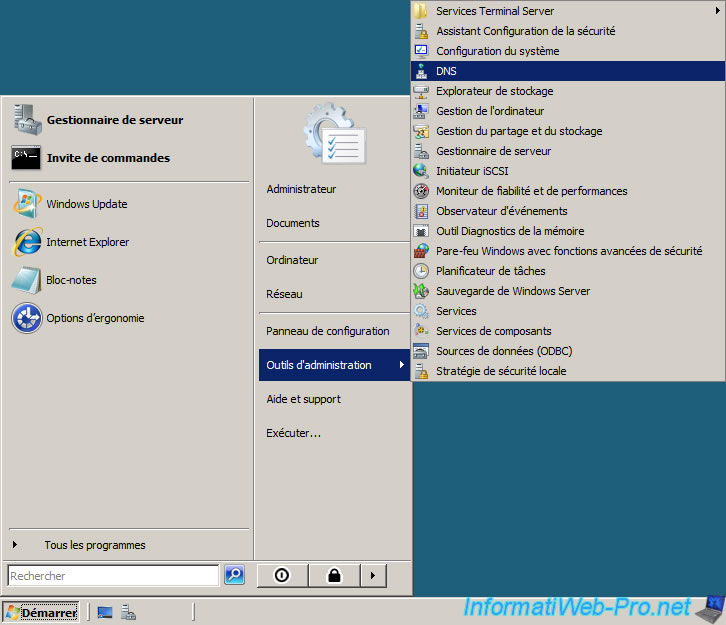
Right-click your DNS server and click "Properties".
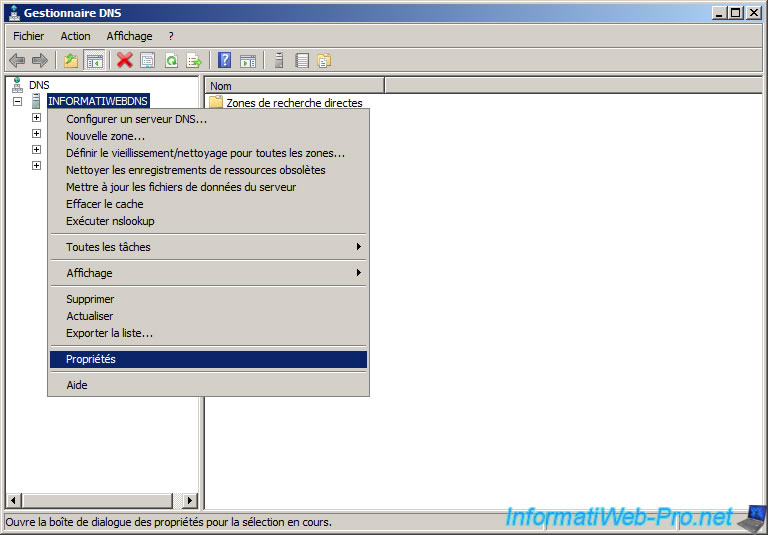
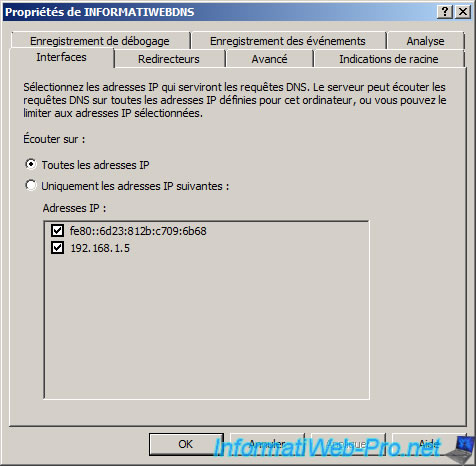
By default, your listening on all IP address (and therefore all network cards in IPv4 and IPv6) DNS server. If you want it only listen on certain IP addresses, select "Only the following IP address".
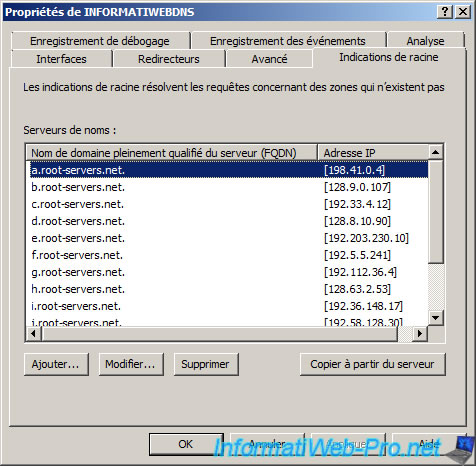
As mentioned previously, for our server to respond to all requests, we need to configure the root servers. Windows Server 2008, they are already configured.
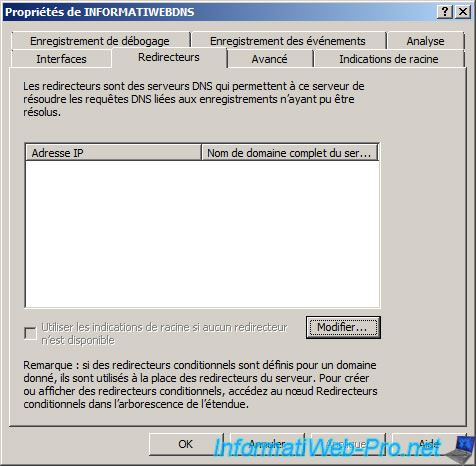
If our server can not resolve some domains (or domain registrations), we will have to redirect the request to another DNS server. In our tutorial, we will redirect the request to the public Google's DNS server.
Click on "Edit".
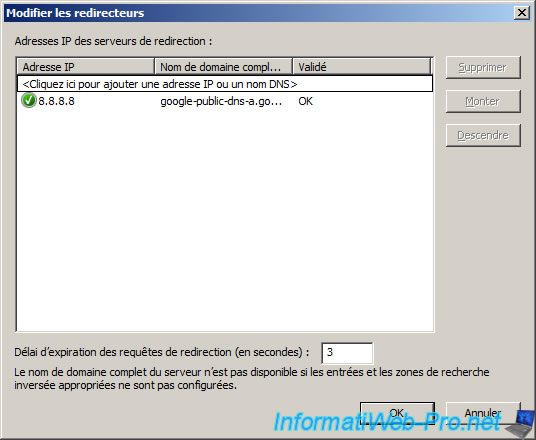
Then simply add the desired typing their IP addresses DNS servers.
IP addresses of the DNS servers are Google :
- 8.8.8.8
- 8.8.4.4
Once you have specified an IP address, your server will try to resolve the domain name corresponding to the specified IP address.
However, this DNS resolution can only be done if the reverse lookup zone is configured correctly on the remote DNS server.
If the specified DNS server is accessible via the DNS protocol (port 53 UDP), a green "V" should appear in front of it.
If not, check the configuration of the added DNS server and check if port 53 UDP is open on this remote DNS server.
Share this tutorial
To see also
-
Articles 5/1/2018
Why deploy DNSSEC on your DNS server ?
-
Windows Server 4/15/2018
WS 2012 / 2012 R2 - Create a DNS server and delegate subdomains
-

Windows Server 4/25/2018
WS 2012 / 2012 R2 - Create a secondary DNS server
-

Windows Server 5/11/2018
WS 2012 / 2012 R2 - Sign your DNS zones with DNSSEC


You must be logged in to post a comment