Create a DNS server on Windows Server 2008
- Windows Server
- DNS
- 15 January 2013 at 16:37 UTC
-

- 3/3
5. SOA and NS
When you create a zone, it is important to have two records :
- SOA (Start of Authority) : allows you to set the properties in your area.
- The (Name Server) NS : Sets the servers that are authoritative for the zone. Root server, secondary server, ...
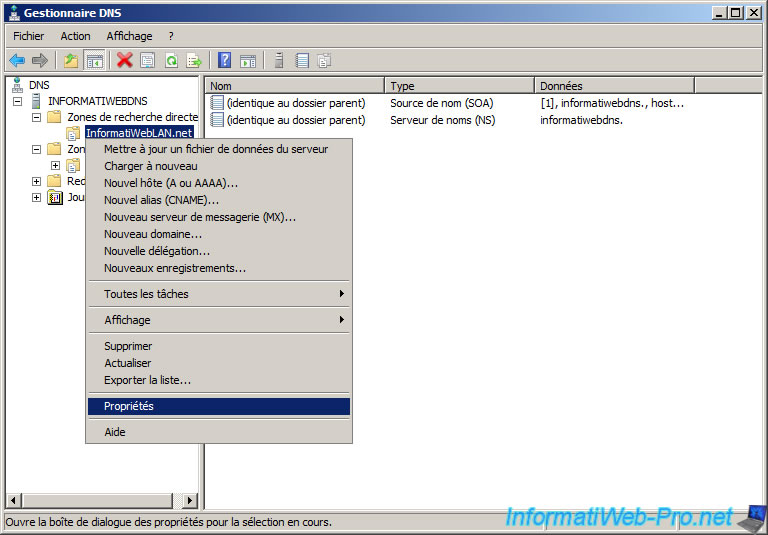
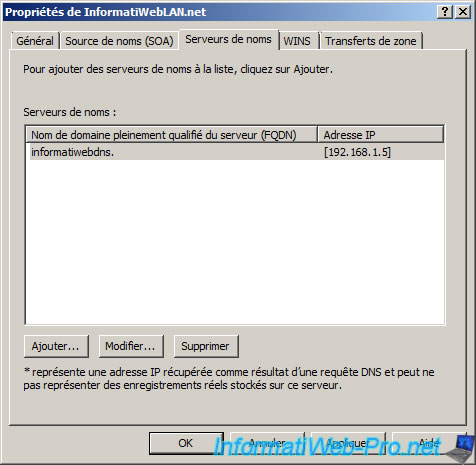
Right click on your forward lookup zone and click "Properties".
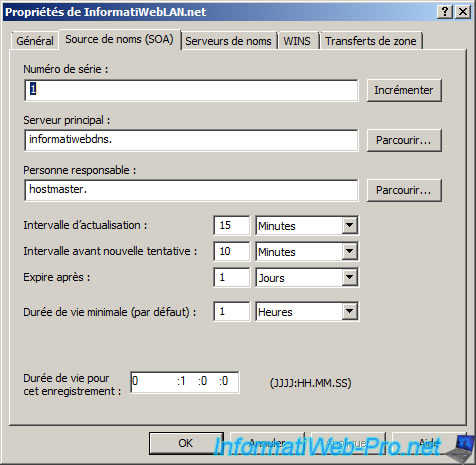
Warning : Do not modify the SOA serial number as it is incremented with each change. So if the serial number is different on the secondary server, the master DNS file will be sent to the secondary server.
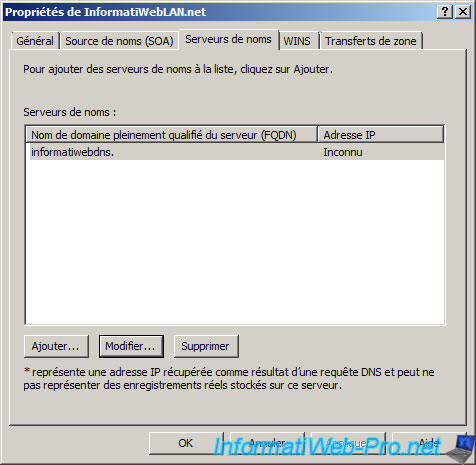
Then the name server (NS) which is based on the NetBIOS name of your server. As you can see from this picture the IP address corresponding to the server name specified is unknown. To specify it, select the server name, and click edit.
Then type the IP address in the list.
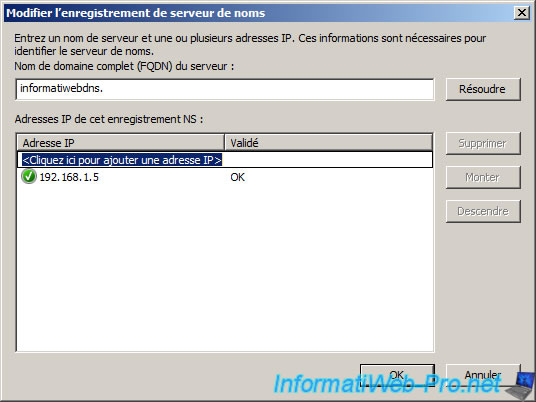
Our name server is now configured.
6. Creating records
We'll finally be able to create our records. First, there are different types of records:
- A host (A or AAAA) : allows you to point a name to an IP address
- An alias (CNAME) : allows you to point a name to another name. *
- A mail server (MX) : allows you to point a name on the IP address of a server where a mail server.
* For example, when a paid web hosting you buy with a domain name :
- The "my-domain.com" record is a "A" or "AAAA" that points to the IP address of the Web server where Apache (Linux) or IIS (Windows) is located.
- The "sub-domain.my domain.com" record is a "CNAME" record pointing to the "A" record "my-domain.com".
For information Google indexes so 2 times your site, it is not good for SEO. So you need to make a URL rewriting to redirect your domain to your subdomain "www".
Start with "A" record or "AAAA". To do this, right-click your forward lookup zone click and click "New Host (A or AAAA)."
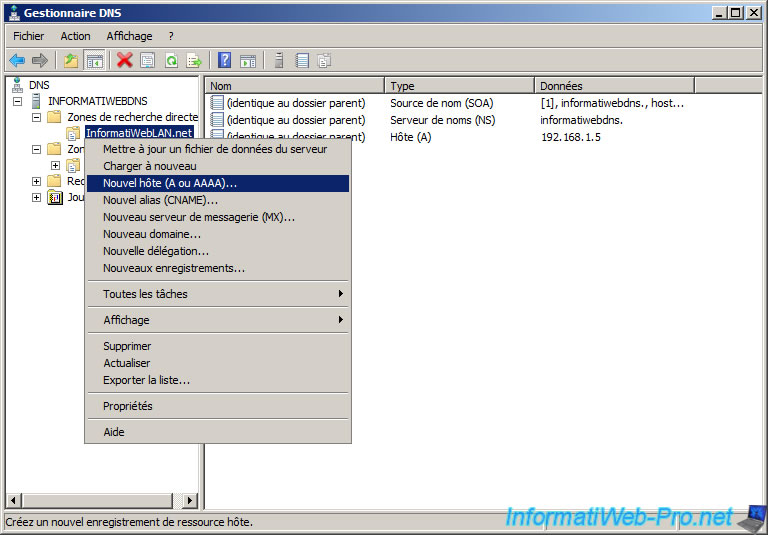
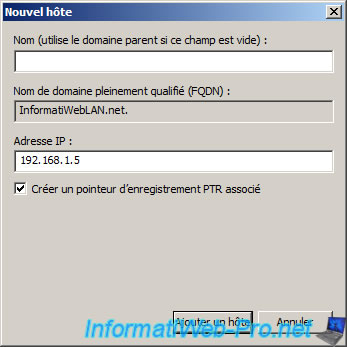
We will first point the root domain to the IP address of our server (in our case). You can very well to point to the IP address of another computer if you wish.
Exceptionally, so we'll leave the first box blank. Then, specify the IP address on which to point the domain and select "Create associated pointer PTR record" to create the corresponding record in the reverse lookup zone (IP to FQDN).
Then we'll create an alias "www" pointing to the root domain. To do this, click this time on "New Alias (CNAME)".
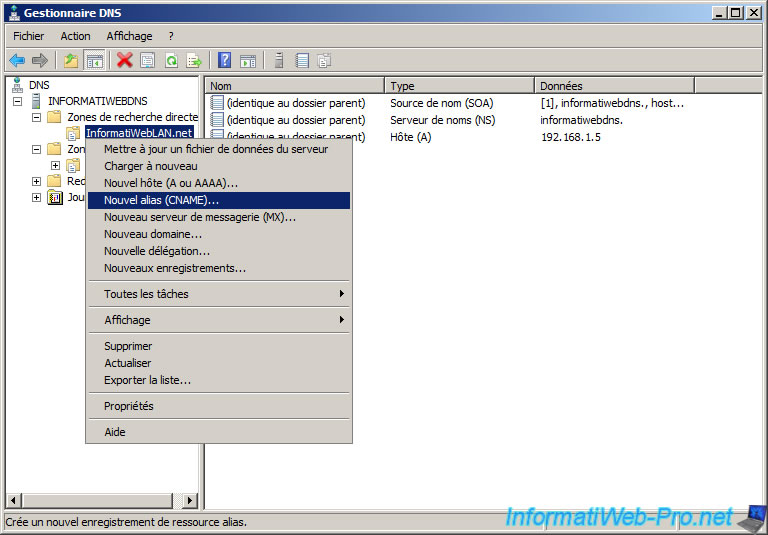
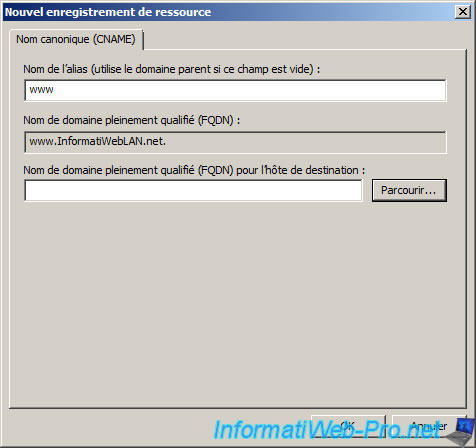
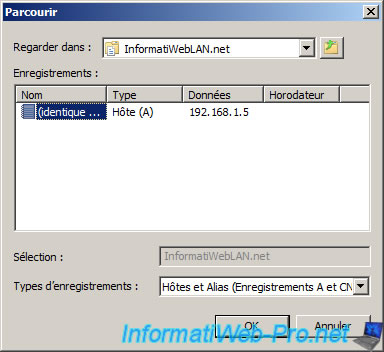
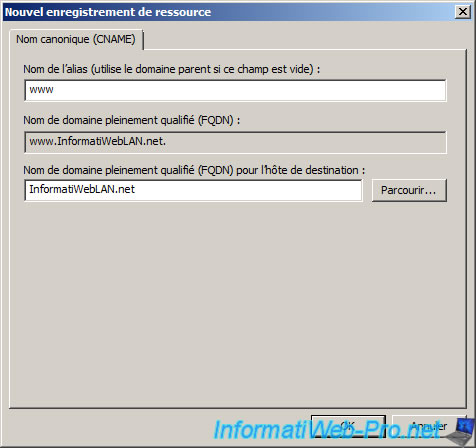
Indicated the name of the alias to create. In our case "www", which will give the subdomain "www.InformatiWebLAN.net". Then click "Browse" to select the record on which to point this alias.
In this picture you can see that there is no name in the "A" record. This is because it points directly to the area and not a subdomain. It is therefore appropriate "identical to the domain ...".
For this tutorial, we installed a Web server using WAMP to avoid wasting time on the Web server configuration because it is not the purpose of this tutorial.
Here is a summary of our configuration :
- Our Windows Server with the Web server (via WAMP) with the IP address "192.168.1.5" address.
- Another computer on the same network which is installed a Web server that hosts the local version of our website that has the IP "192.168.1.4" address.
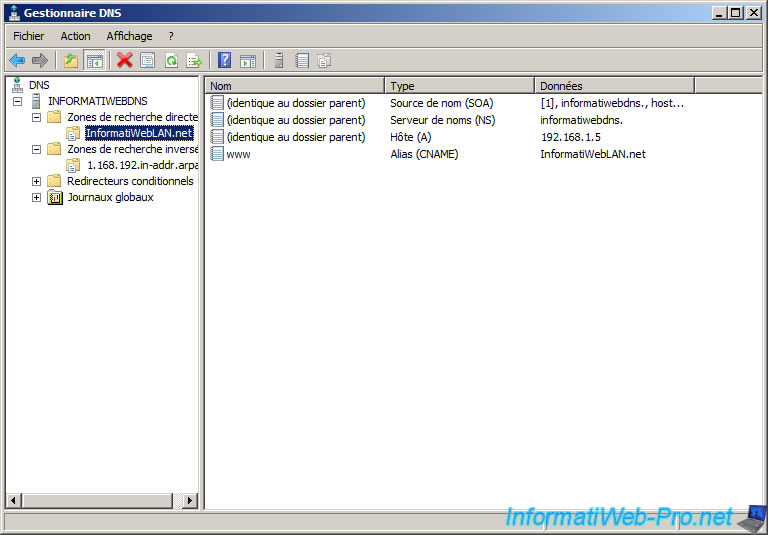
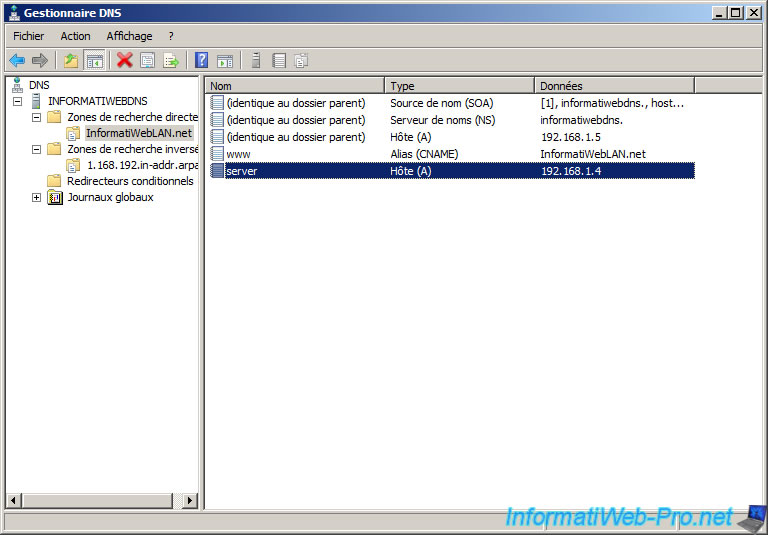
For now here is the configuration of the forward lookup zone.
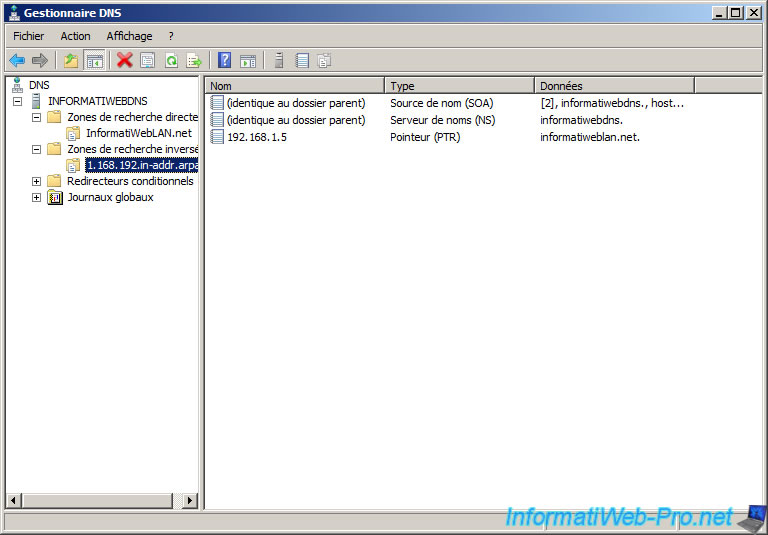
And the configuration of the reverse lookup zone.
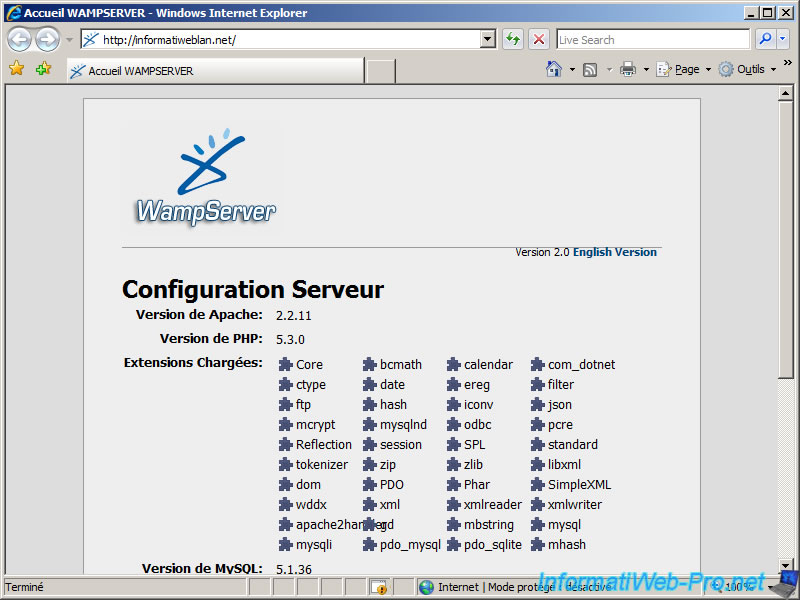
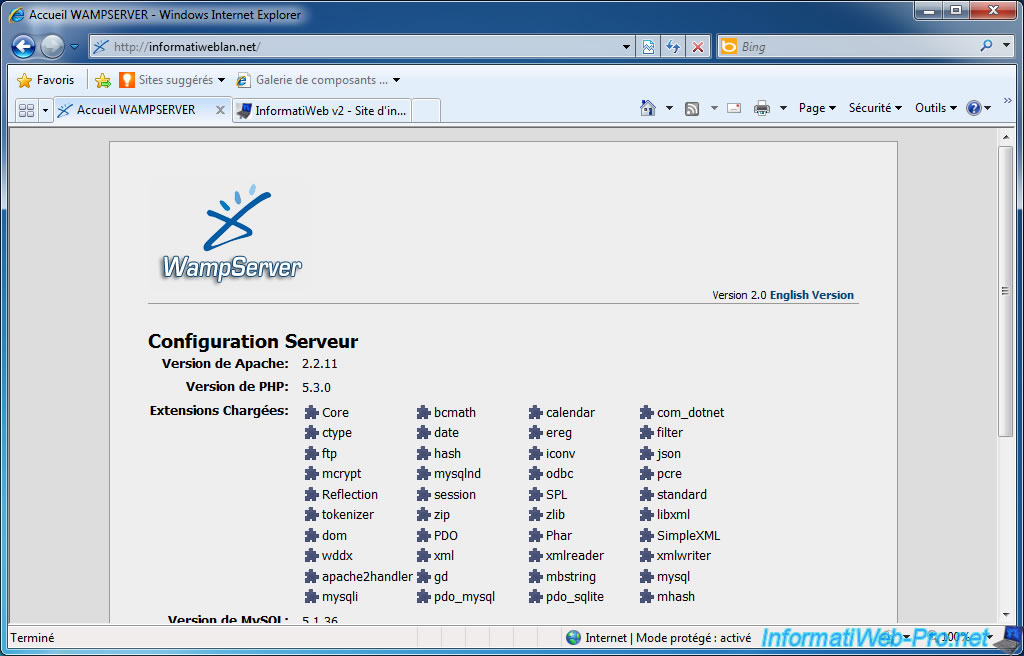
We can access our WAMP server by typing "informatiweblan.net" or subdomain "www.informatiweblan.net" in our web browser.
We will then add an "A" record pointing to the IP address of the second computer (IP 192.168.1.4) for our local network where the web server hosting the local version of our website.
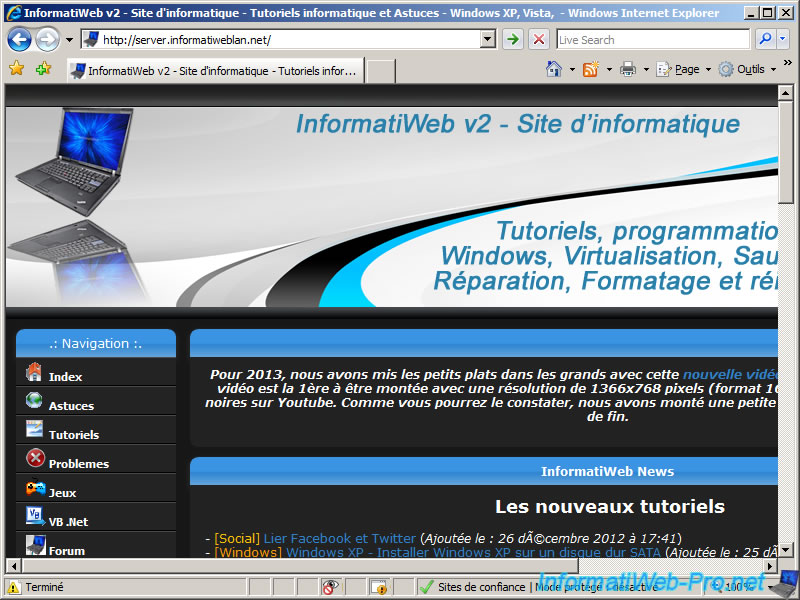
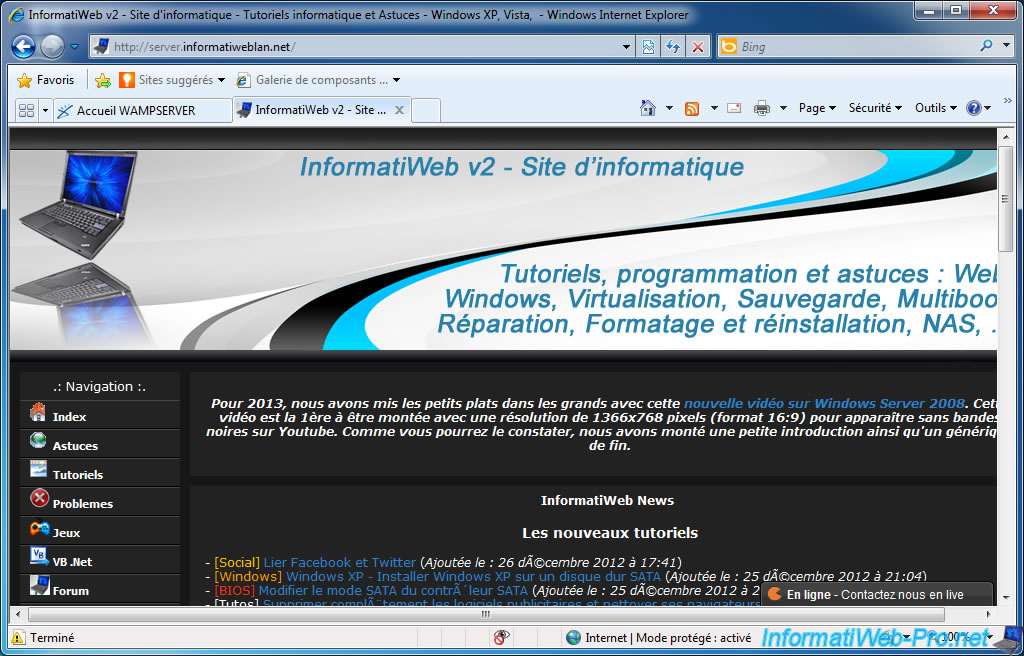
We can access the local version of the website by typing the subdomain "server.informatiweblan.net" in our web browser.
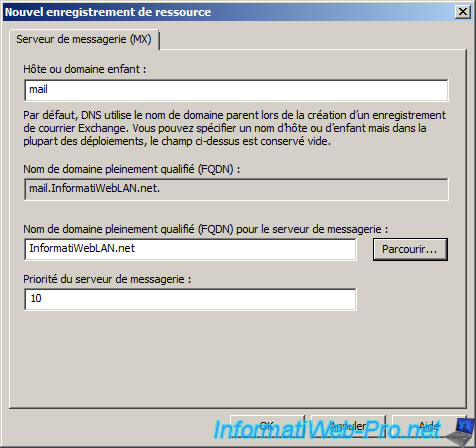
If you have a mail server, you can create a record "MX" that will allow mail clients such as the famous "Thunderbird" Mozilla automatically find your mail server on your local network.
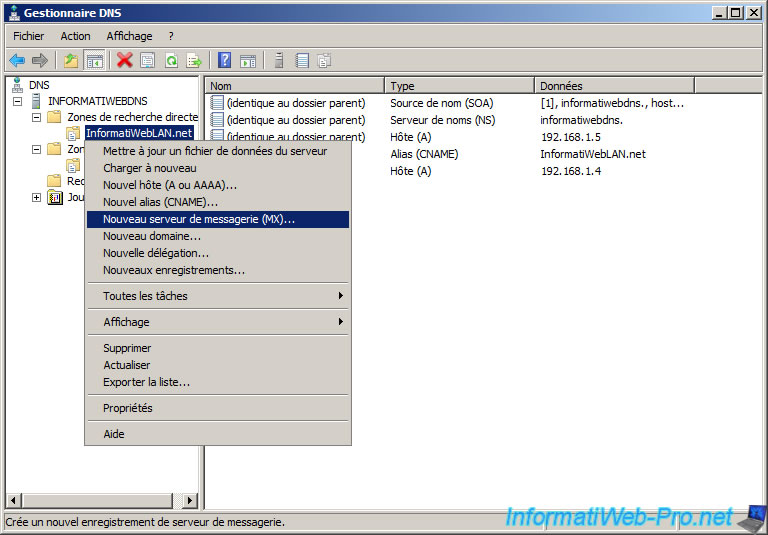
As a general rule, we call this subdomain "mail", "imap", "smtp", "pop", ... but feel free to edit it. Then select the name which should point to this record. The "MX" record behaves much like the CNAME unless it is restricted to servers.
7. nslookup utility
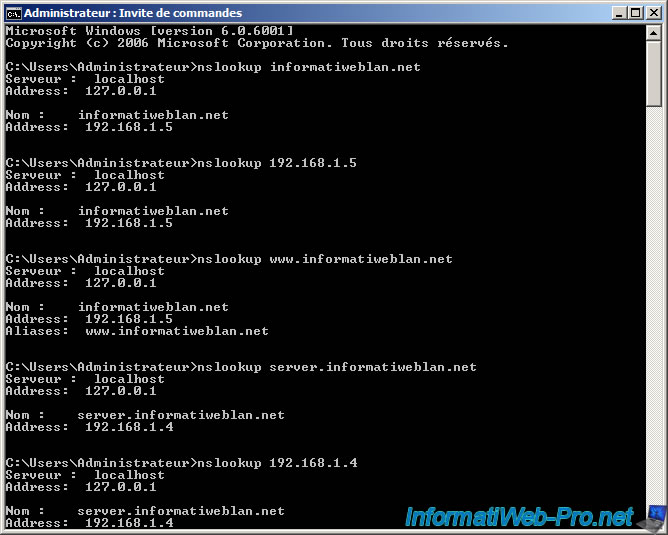
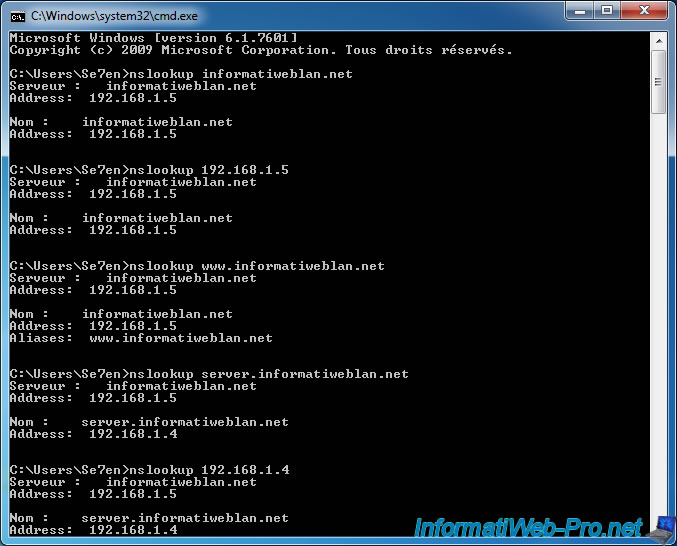
To test your DNS configuration, you can use the "nslookup" utility from the command prompt (by default, the shortcut is present in the start menu).
The server is the IP address (and the corresponding name) of the DNS server. The running Windows Server in our case. Computer
The name and address (and alias if such is the case) is the recording name, IP address and alias that is configured for one or this one.
8. Configuring Clients
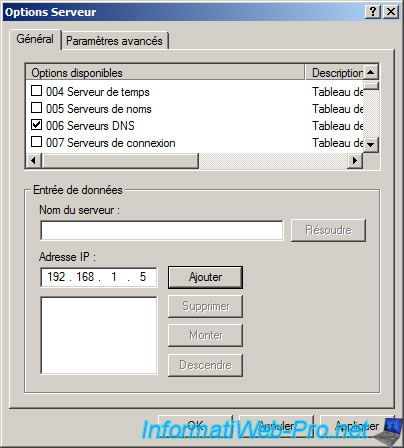
If you have installed a DHCP server on your windows server, you can configure it to automatically send the DNS server address to computers on your local network.
To do this, configure the "006 DNS Server" option. In our case, the IP address is "192.168.1.5".
If you have the ability to configure the address of the preferred and secondary DHCP settings of your router DNS server, you can specify the IP address of your server as the preferred DNS server.
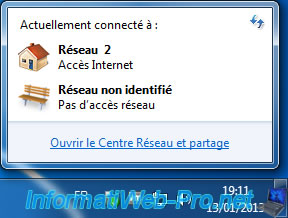
Otherwise, it will change the properties of your LAN connection. For example, in Windows 7 click the network icon in the system tray and click on "Open Network and Sharing Center".
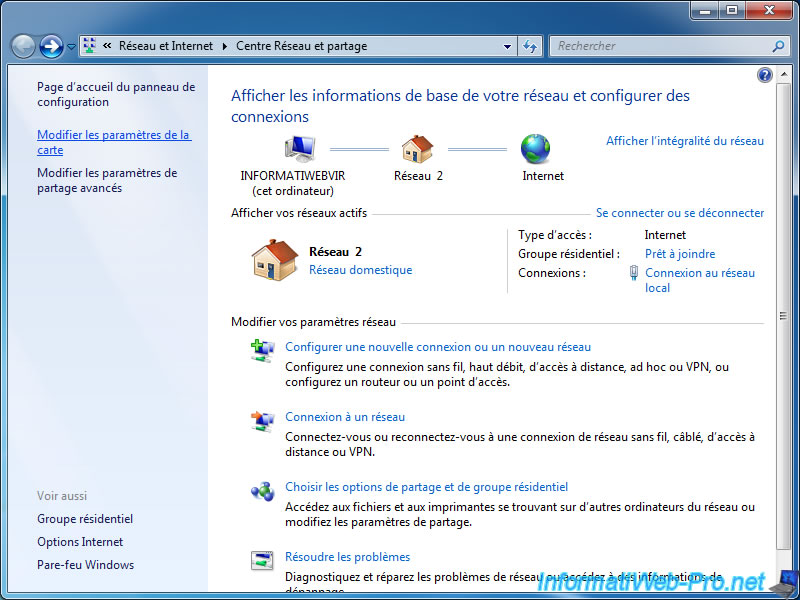
Then click "Change adapter settings".
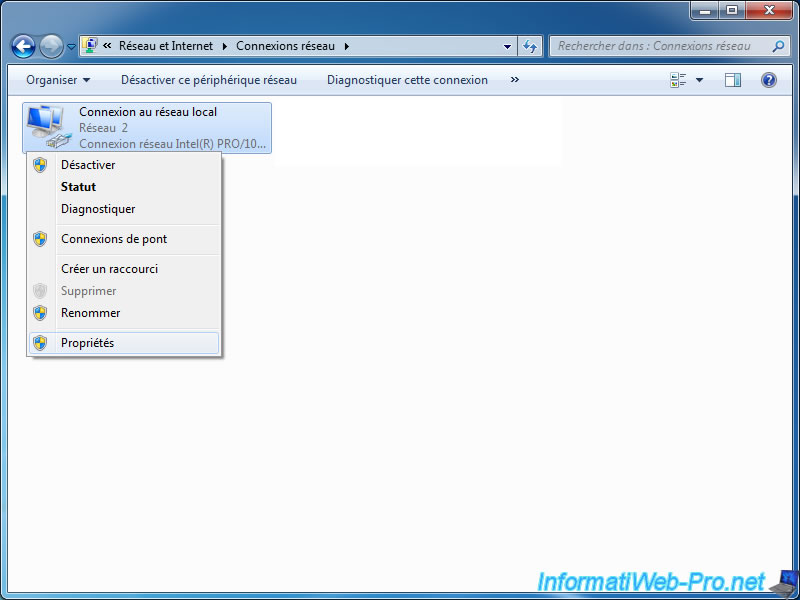
Then right click on your LAN connection and click "Properties".
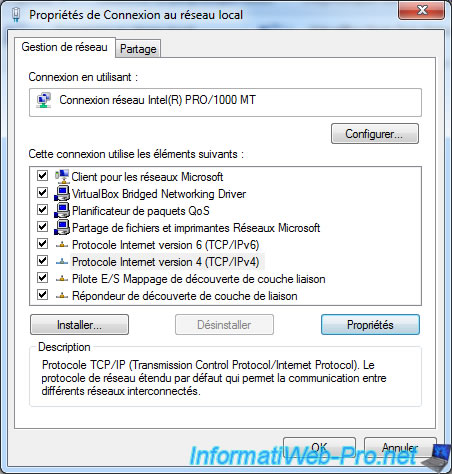
Select "Internet Protocol Version 4 (TCP/IPv4)" and click "Properties".
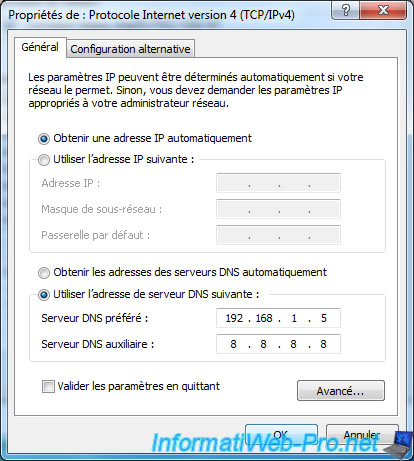
Select "Use the following DNS server addresses" and enter the IP address of your server as the preferred DNS server.
You can also specify the DNS server Google "8.8.8.8" as the alternate DNS server in order to have Internet even if your server is off.
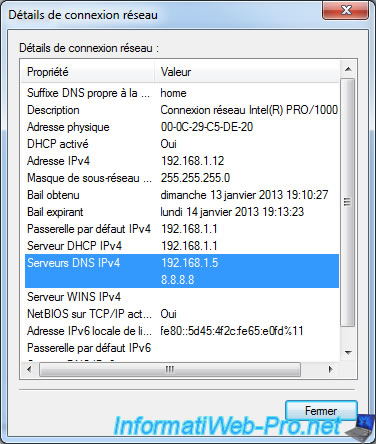
Once this is done, you will notice that there are two IP addresses as IPv4 DNS servers. If the first DNS server is not responding, Windows will ask the second specified server.
We can now access our 2 web servers via the DNS of our server.
If you also use the nslookup on the client PC, you will see that the DNS server is now "informatiweblan.net" (IP 192.168.1.5) instead of localhost (127.0.0.1 IP). This is simply because the IP address 127.0.0.1 is the IP address of your network card. Localhost can access, for example, a local web server (on the same computer), ...
Share this tutorial
To see also
-
Articles 5/1/2018
Why deploy DNSSEC on your DNS server ?
-
Windows Server 4/15/2018
WS 2012 / 2012 R2 - Create a DNS server and delegate subdomains
-
Windows Server 4/25/2018
WS 2012 / 2012 R2 - Create a secondary DNS server
-

Windows Server 5/11/2018
WS 2012 / 2012 R2 - Sign your DNS zones with DNSSEC

No comment