- Linux
- 15 January 2014 at 20:26 UTC
-

- 1/2

For those familiar with Windows Server and have already created an Active Directory, then you will understand faster this tutorial because Active Directory is an LDAP.
You will find the concepts of areas of Organizational Units that represent files, ...
Prerequisites :
- A registered domain name on the Internet or a Local DNS server (it will indicate to network computers via DHCP or manually).
- 12.04 LTS (or 12.04.xxx LTS) Ubuntu. The web interface "phpLDAPadmin is incompatible with the 13.10 version (which is not also an LTS).
Information : This tutorial was made with :
- Ubuntu 12.04.3 LTS (64 Bits)
- A local DNS server when we set up a fictitious domain "InformatiWebLAN.net".
- The Ubuntu PC has the name "informatiweb-pc" and the default user name is "InformatiWeb".
- Change the name of the machine
- Installing the server "OpenLDAP server (slapd)"
- Installation tools command line: "OpenLDAP utilities (ldap-utils)"
- Installation of a Web interface for LDAP "web based interface for Administering LDAP servers (phpldapadmin)"
- Allow OpenLDAP in the firewall
- Enable the firewall
- Test the connection to the LDAP server
- Configure the Web Interface "phpLDAPadmin"
- Allow the web server "Apache" in the firewall Ubuntu
- Encrypt the connection interface "phpLDAPadmin"
- Encrypt the connection between the LDAP server and clients
- Remove warnings displayed on each connection
1. Change the name of the machine
Since the linux machine will be a member of your domain, you must change the name of your machine.
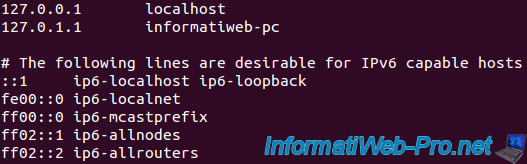
To do this, edit the file "/etc/hosts" in order to indicate the name of the domain name of the machine in addition to the default name.
Syntax: [name of Ubuntu Machine] mon_domaine.com [name of Ubuntu Machine].
Bash
sudo vi /etc/hosts
Press the "i" key to enter insert mode of vi or vim (improved version of Vi).
Replace the line :
Bash
127.0.1.1 informatiweb-pc
By :
Bash
127.0.1.1 ldap.informatiweblan.net informatiweb-pc
Then press Esc to exit insert mode and return to command mode.
Then type ": wq" to save the changes and exit the file.
So you fall into the console to its previous state.
Now our Ubuntu machine has two names:
- Informatiweb-pc: Normal machine name
- Ldap.informatiweblan.net: The domain name of the machine.
2. Installing the server "OpenLDAP server (slapd)"
To install the LDAP server, nothing more simple. Simply type the following command :
Bash
sudo apt-get install slapd
Then enter a password for the Administrator account LDAP when it is required.
If you are using a version of Ubuntu "desktop", you will get a small window like this:

3. Installation tools command line: "OpenLDAP utilities (ldap-utils)"
It is possible to use command line tools to manage your LDAP server. These tools contain particular "ldapadd" "ldapmodify" command, "ldapdelete" and "ldapsearch". However, we will use a single time to check the operation of the server. Feel free to create scripts using these tools if you want.
For the tutorial, we will use preferably a web interface that will facilitate our task.
To install these tools, simply type the following command.
Bash
sudo apt-get install ldap-utils
4. Installation of a Web interface for LDAP "web based interface for Administering LDAP servers (phpldapadmin)"
As indicated at the top of this tutorial, the Web interface used in this tutorial is not compatible with the version of Ubuntu 13.10. As stated on the site "bugs.launchpad.net".
For information: Version 13.10 is not a LTS release (at least at present), while the version is 12.04.
To install the web interface, simply type the following command:
Bash
sudo apt-get install phpldapadmin
Note : Since it is a coded PHP web interface, the Apache Web server is automatically installed with PHP and other dependencies required by these components module.
5. Allow OpenLDAP in the firewall
To begin, list the available applications like this :
Bash
sudo ufw app list
Now that you know how is called the LDAP server, allow by typing this :
Bash
sudo ufw allow "OpenLDAP LDAP"
Note : This command will allow this application to the two versions of the TCP / IP protocol :
Bash
The rule was added
The rule was added (v6)
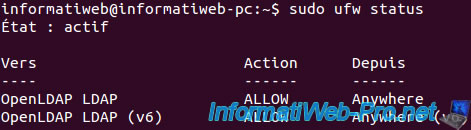
Then verify that the application "OpenLDAP LDAP" is allowed in the firewall.
Bash
sudo ufw status
If this application appears in the list is that it is allowed by the firewall.
6. Enable the firewall
For starters, check the status of the firewall by typing the following command:
Bash
sudo ufw status
If the firewall is enabled, allowed in the firewall applications will also be displayed.
Otherwise, you can activate it by typing the following command.
Note: The firewall is not enabled by default in Ubuntu 12.04 LTS.
Bash
sudo ufw enable
IMPORTANT : If you are connected via SSH to your server (in the case of a VPS for example), a warning is displayed.
Indeed, activation of the firewall will block the SSH connection if the connection is not allowed by the firewall.
So be careful not to block access to your VPS with the firewall.
To configure the firewall for SSH connection, see point 6 of our tutorial "Ubuntu - Install SSH server".
Once the firewall enabled, Ubuntu will display the following message :
Bash
The firewall is active and launched at system startup
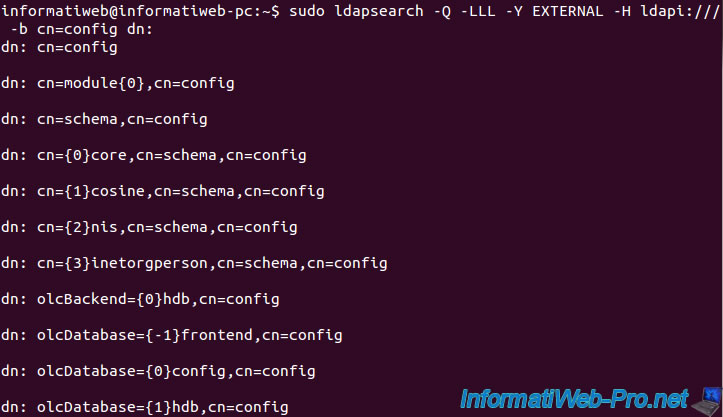
7. Test the connection to the LDAP server
To test the connection to the LDAP server, we will use the command line tools "OpenLDAP utilities (ldap-utils)" we have installed in point 3 of this tutorial.
Bash
sudo ldapsearch -Q -LLL -Y EXTERNAL -H ldapi:/// -b cn=config dn:
If all goes well, you should get this :
8. Configure the Web Interface "phpLDAPadmin"
We now set "phpLDAPadmin" to connect to our LDAP server and to change the default information displayed in "phpLDAPadmin".
To do this, you must edit the configuration file "config.php" from "phpLDAPadmin" located in the "/etc/phpldapadmin" folder.
Bash
sudo vi /etc/phpldapadmin/config.php
In this file, first look for the "Define your LDAP servers in this section" section and then modify the following information :
PHP
$servers->setValue('server','name','InformatiWeb LDAP Serveur'); // Server Name
$servers->setValue('server','host','127.0.0.1'); // Server address. Since the web interface is installed on the same computer as the LDAP server, you can leave the IP address : 127.0.0.1
$servers->setValue('server','base',array('dc=informatiweblan,dc=net')); // The research base server is based on the domain name of the server. Our local area is "informatiweblan.net", so we write "dc=informatiweblan,dc=net".
$servers->setValue('login','bind_id','cn=admin,dc=informatiweblan,dc=net'); // Change the information dc= as above. The cn=admin simply to specify that the connection will be made with the admin account on the LDAP server.
Now, when you access the Web interface, the server name will be changed, and the login information will already be pre-configured correctly.
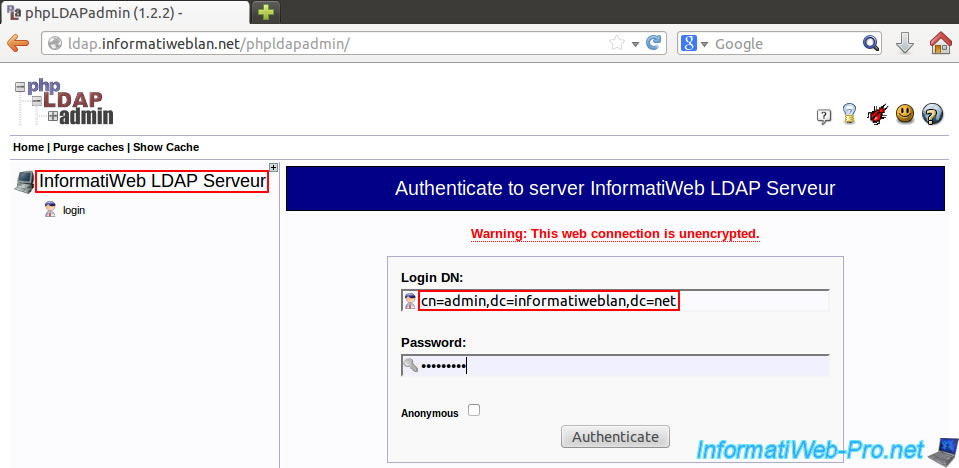
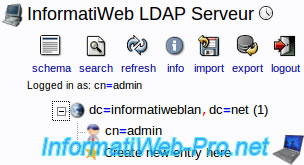
Type your password (the one specified during installation of the LDAP server) and you will arrive on this interface.
Click the + in the left column to list the contents of your LDAP and can add information.
9. Allow the web server "Apache" in the firewall Ubuntu
If you have enabled the firewall, you will not have remote access to the web "phpLDAPadmin" your LDAP server interface.
For this to be possible, you can simply allow "Apache" in the firewall Ubuntu :
Bash
sudo ufw allow Apache
10. Remove the error messages "phpLDAPadmin" (Fix)
At present, the version of "phpLDAPadmin" is 1.2.2 (by the apt-get command because this is not the case on source forge) and it shows you a series of warnings XML messages, classes as well as deleted attributes.
To remove them, refer to step "13. Remove warnings displayed on each connection" of this tutorial.
11. Encrypt the connection interface "phpLDAPadmin"
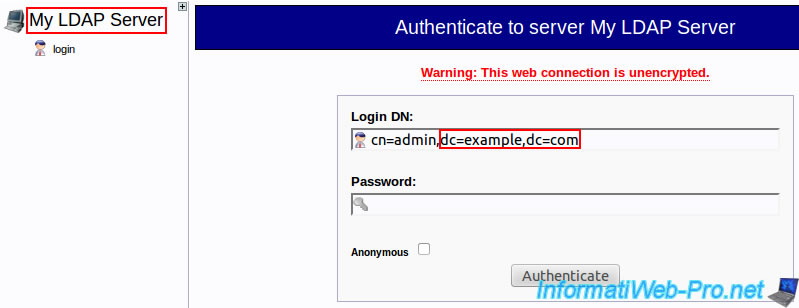
When you go to the login page "phpLDAPadmin", you probably have noticed the warning "Warning : the web connection is unencrypted" occurs.
To remove that, simply secure the connection to your Apache web server by using a SSL certificate. To do this, read our tutorial "Ubuntu - Secure your Apache web server (HTTPS) using SSL".
12. Encrypt the connection between the LDAP server and clients
To encrypt the connection between the server and the various LDAP clients, you must configure the LDAP server for this server also works on the "ldaps" protocol.
For this, read our tutorial "Ubuntu - Securing your LDAP server using SSL".
Share this tutorial
To see also
-

Linux 12/31/2016
Debian - Transform your server into a router and a DHCP server
-
Linux 12/12/2014
Debian / Ubuntu - Configure a DNS server (BIND)
-
Linux 9/12/2015
Debian / Ubuntu - Network monitoring with HTML statistics
-

Linux 6/17/2015
Debian / Ubuntu / CentOs - Block DDOS attacks
You must be logged in to post a comment