Enable NAT reflection on pfSense 2.6 to access your WAN IP address from the local network
- Firewall
- pfSense
- 02 July 2025 at 13:22 UTC
-

- 2/2

4. Redirect port 80 (HTTP) in your Box
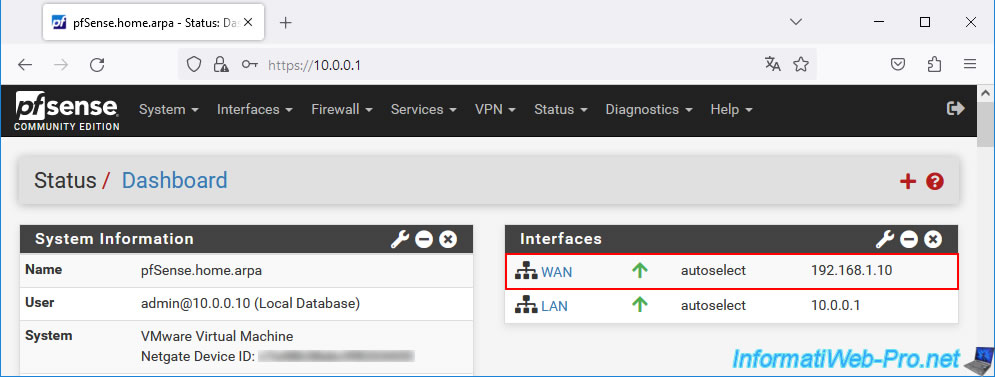
If pfSense has a private (local) IP address for its WAN interface, it means that pfSense acts as a router between your Box (provided by your ISP) and your computer.
In this case, you will first need to redirect port 80 (HTTP) used for external access to port 80 (HTTP) of pfSense.
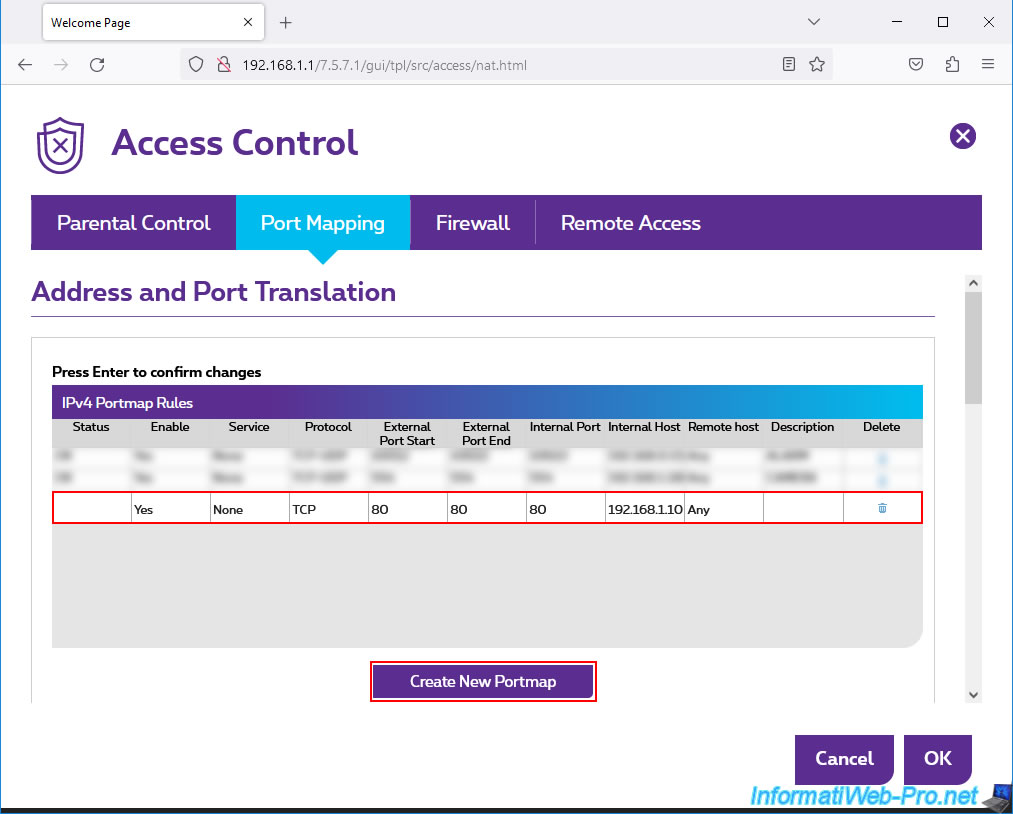
To do this, in the case of the Proximus bbox, access the address "http://192.168.1.1/" and connect with the user password physically written on your bbox.
Then go to "Access Control -> Port Mapping" and click "Create New Portmap" to create a new port forwarding rule.
Redirect external TCP port 80 (= the external one of bbox) to internal port 80 (= that of your pfSense machine) for the internal IP address (in our case: 192.168.1.10) corresponding to the WAN IP address of your pfSense machine.
Once this rule is configured, press Enter, then click OK.
5. Redirect port 80 (HTTP) on pfSense
For packets to arrive from the outside (from port 80 TCP = HTTP) to your internal web server (in our case: the IIS web server), it is necessary to also create a port forwarding on pfSense.
To do this, go to: Firewall -> NAT.
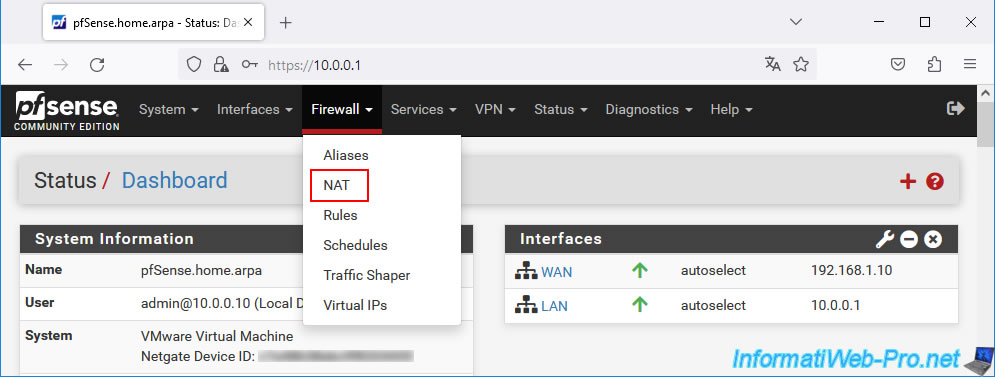
On the "Firewall / NAT / Port Forward" page that appears, click on the "Add" button.
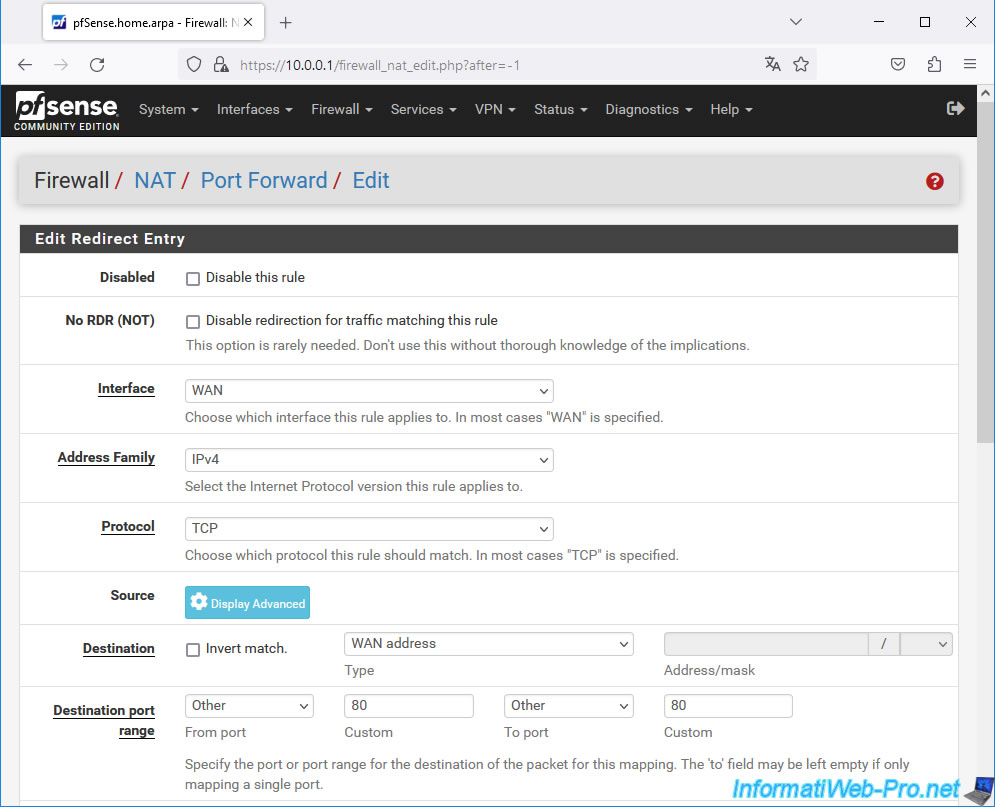
Configure this port forwarding rule like this:
- Interface: WAN.
- Address Family: IPv4.
- Protocol: TCP. The HTTP protocol is TCP type (connected mode).
- Destination: WAN address. Connections from outside arrive on the pfSense WAN interface.
- Destination port range: Other 80. Port used by default when accessing a website using HTTP.
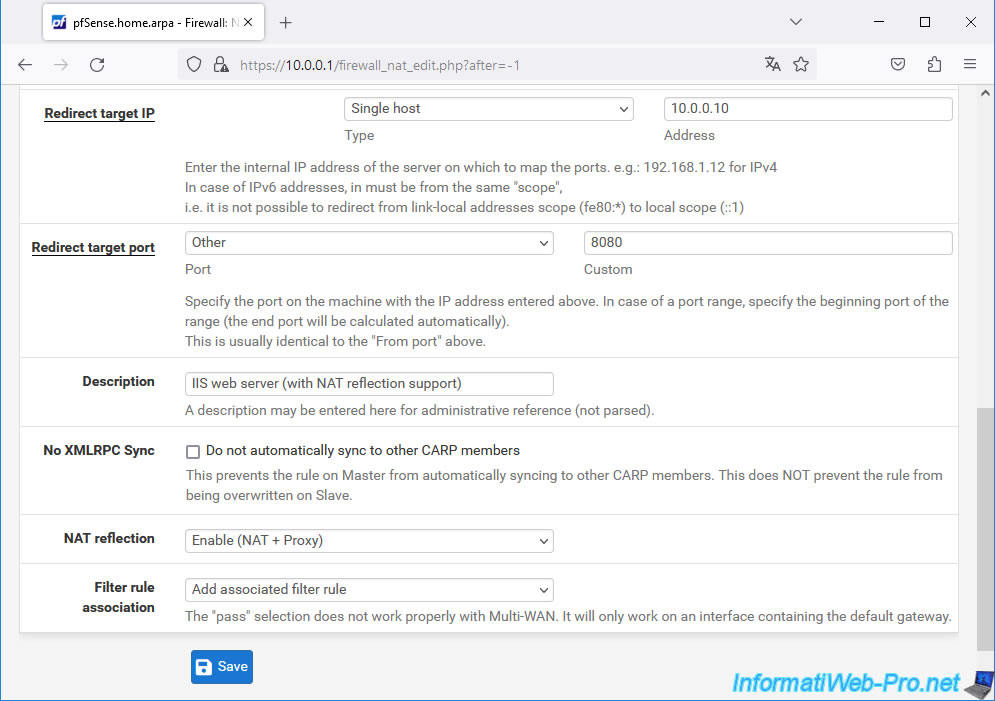
- Redirect target IP: the local IP address of your web server.
In our case, our IIS web server has the IP address "10.0.0.10". - Redirect target port: the port on which your web server listens.
Generally, this is port 80. However, for this tutorial, we changed the port used by our IIS web server to 8080 instead of 80 for the HTTP protocol. - Description: a purely indicative description.
In our case: IIS web server (with NAT reflection support). - NAT reflection: Enable (NAT + Proxy). This option is the most important in this case and allows access to your local web server (in this case) using the pfSense WAN IP address, as well as this port forwarding from your own local network.
Without enabling this "NAT reflection" option, accessing the pfSense WAN IP address from your local network would not work. The connection would simply fail.
Once this port forwarding rule is configured, click Save.
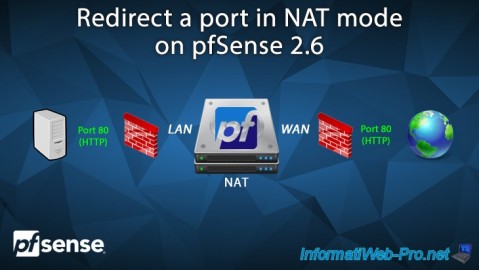
Note: to learn more about port forwarding under pfSense, refer to our tutorial: pfSense 2.6 - NAT (port forwarding).
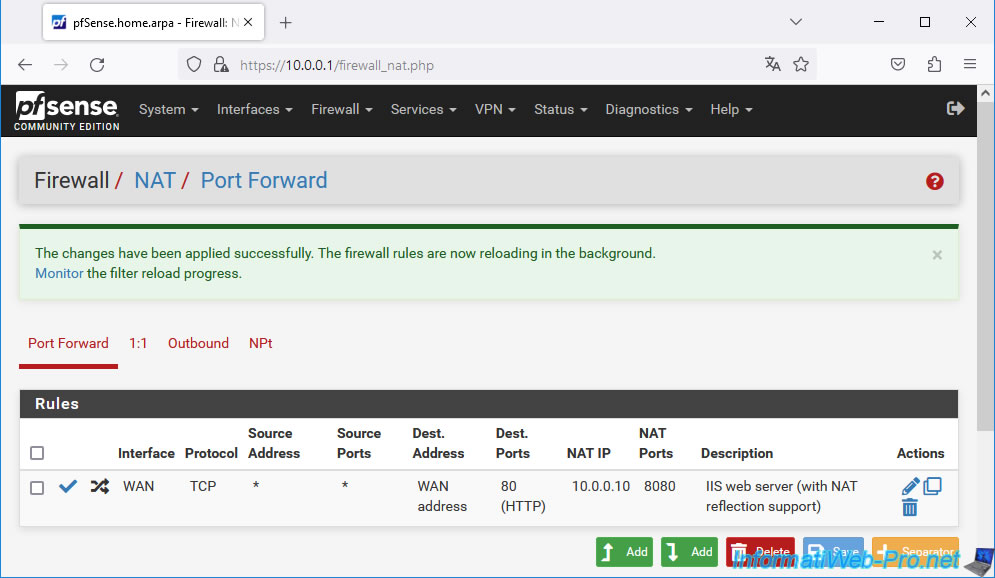
Click the "Apply Changes" button.
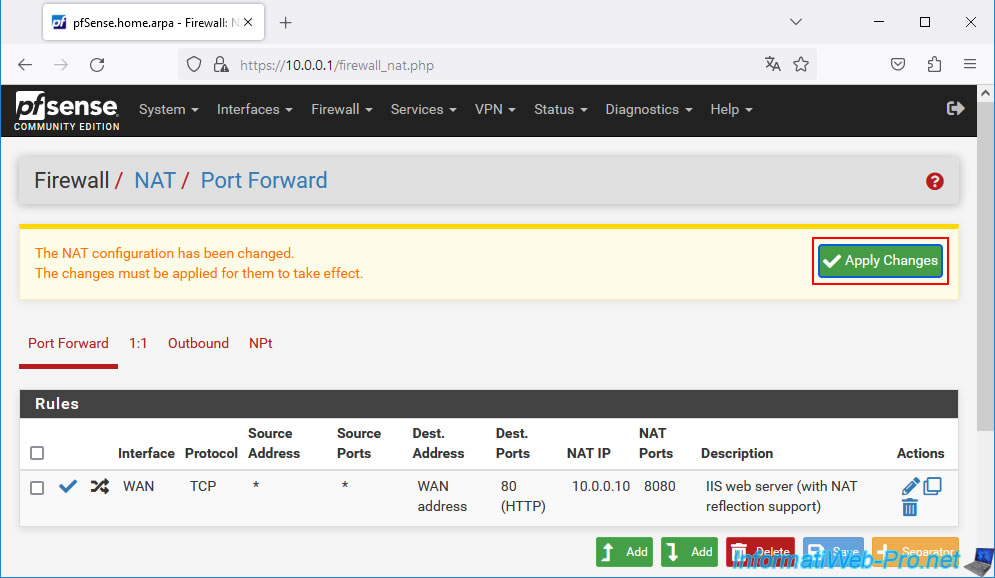
The redirection rule for external TCP port 80 (= that of pfSense) to internal port 8080 (= that of your web server) for the IP address corresponding to your IIS web server is configured.
6. NAT reflection not functional (if pfSense is an intermediate router)
If pfSense is a router located between your Box and your computer and the pfSense WAN interface therefore has a private (local) IP address, you will see that access to your domain from outside (or via a 3G connection or a VPN) will work.
However, from your local network, the connection will fail and your web browser will display an error.
In the case of Mozilla Firefox, you will see the "The timeout has expired" message appear after a certain time (30 seconds, or even 1 minute).
Note: this is what happens when loopback is prohibited in a router. Which is the case most of the time.

As said before, this is because the pfSense WAN interface has a private IP address instead of the public IP address distributed by your ISP.

This is because NAT reflection only works if you attempt to access the WAN IP address used by pfSense.
But this is not the case, since:
- pfSense has a private (local) IP address for its WAN interface.
In our case: 192.168.1.10. - your domain points to your public IP address distributed by your ISP.
NAT reflection would therefore work directly if you had the possibility to directly connect the WAN interface of pfSense via the DSL signal using the PPPoe protocol (for example).
Otherwise, it doesn't work (unless you use the trick you'll see later in this tutorial).
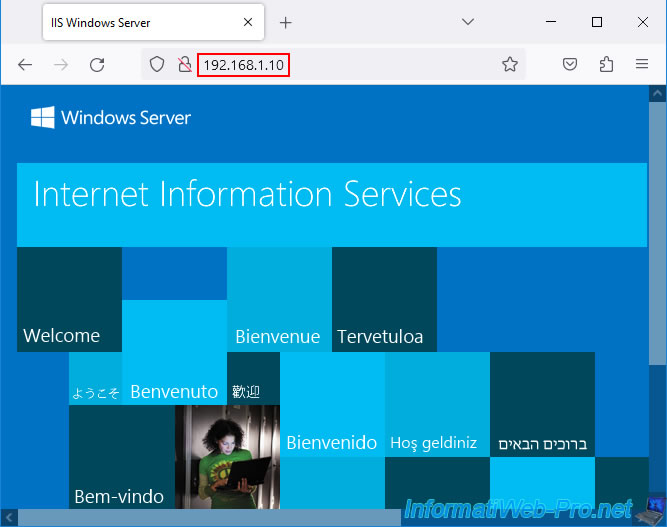
To prove that NAT reflection still works, type the pfSense WAN IP address into the address bar of your web browser from a computer on your local network.
As you can see, you access your local web server (listening on port 8080) by accessing the pfSense WAN IP address on port 80.
Redirection from external port 80 (= that of pfSense) to internal port 8080 (= that of your IIS web server) and NAT reflection therefore work correctly.
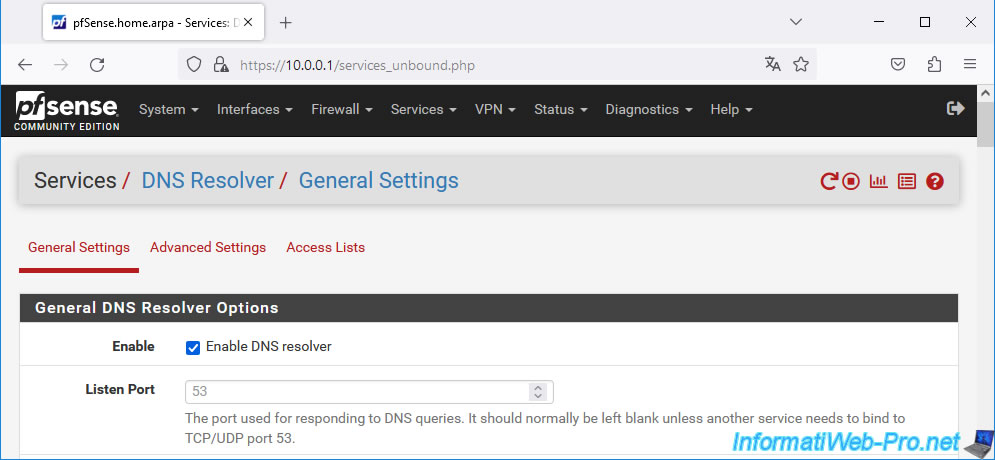
7. Split DNS via option: DNS overrides
To resolve this issue transparently to network devices on your local network, simply use the "DNS Overrides" option in the pfSense DNS Resolver.
To do this, go to: Services -> DNS Resolver.
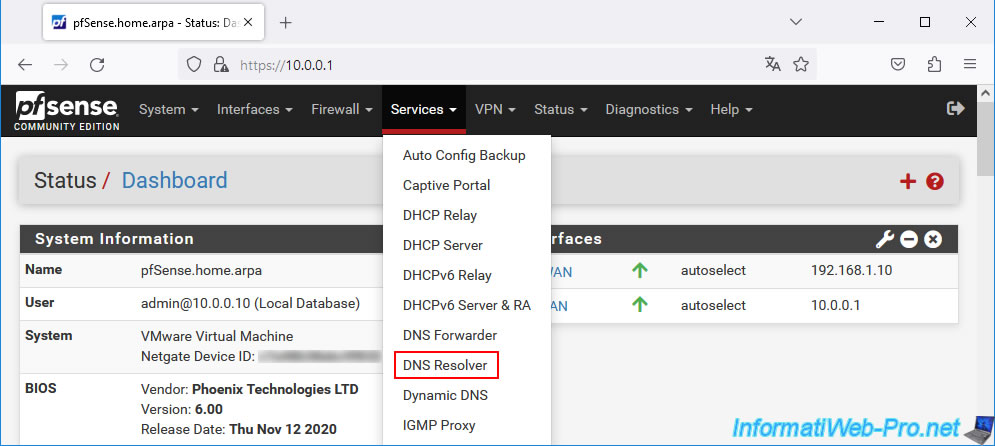
The DNS resolver settings appear.
Note that this is used by default by all network devices connected to the pfSense LAN network.
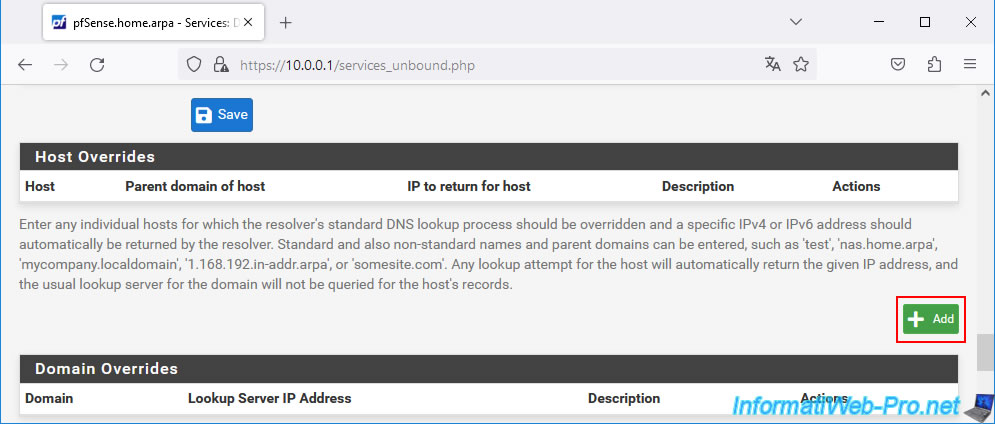
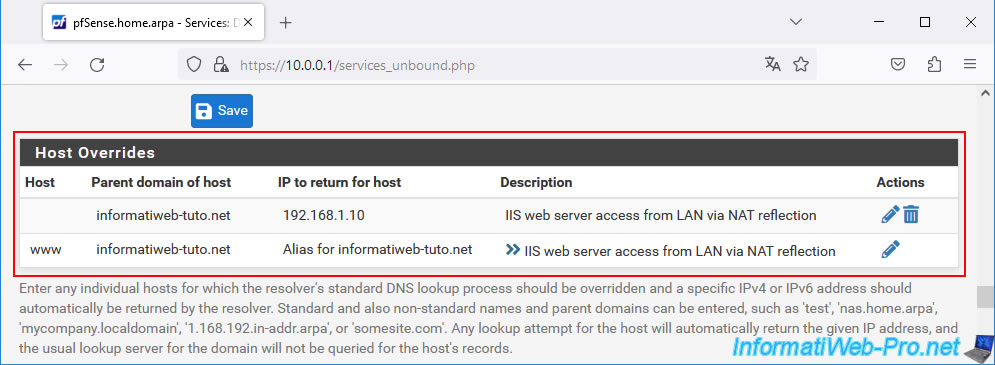
At the bottom of the page, you will find a "Host Overrides" section allowing you to rewrite DNS responses for specific domains and/or subdomains.
So, when clients on your LAN network request the IP address associated with this or that domain or subdomain, they will receive the IP address configured here instead of the one defined on the real domain (registered on public DNS servers).
Click "Add".
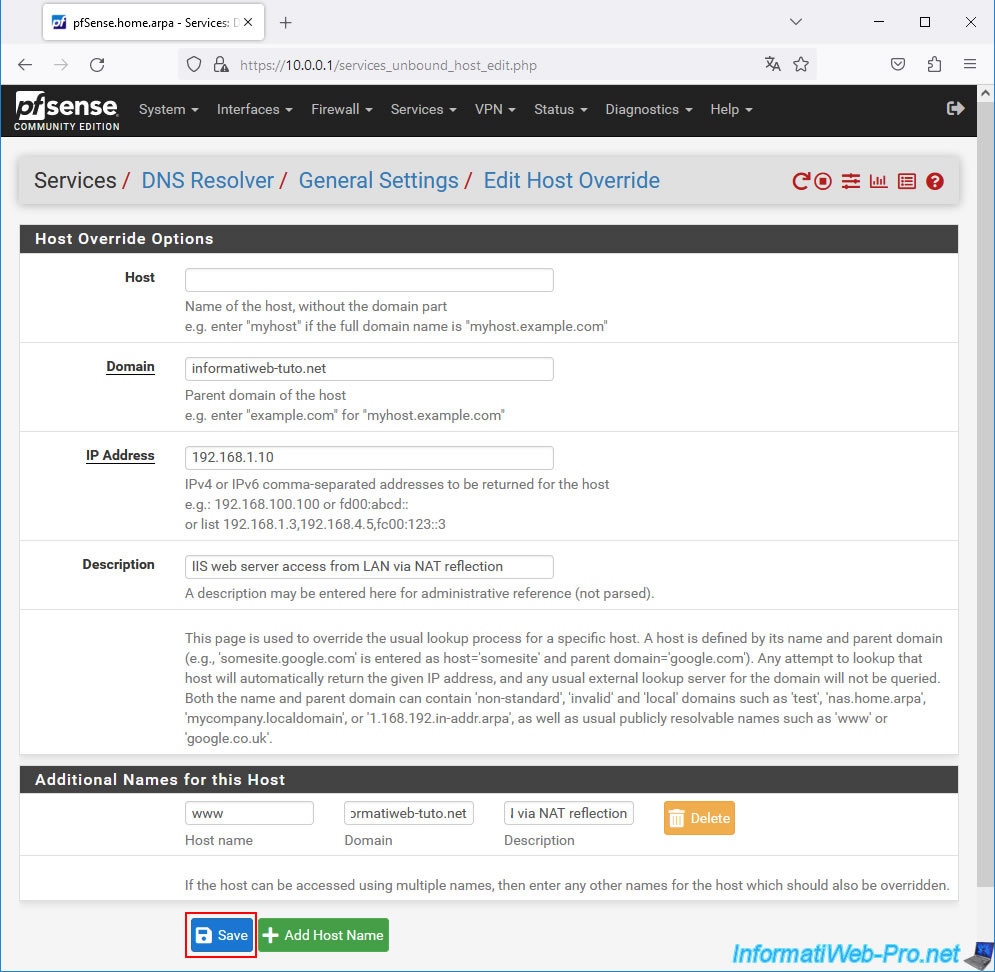
Configure the "Host Override Options" form like this:
- Host: (leave empty so that this concerns the root domain indicated in the next field (Domain).)
- Domain: provide your root domain which currently points to your public IP address.
- IP Address: specify the IP address of the pfSense WAN interface.
- Description: specify what you want.
For example: IIS web server access from LAN via NAT reflection. - Additional Names for this Host:
- Host name: www.
Which means this subdomain will point to the same IP address as specified above (IP Address). - Domain: again, enter your root domain.
- Description: state again what you want.
In our case, we wrote the same description as above.
- Host name: www.
Once this form is completed, click "Save".
Important : if you later add subdomains to your domain and they point to your public IP address again, you will also need to add them in the "Additional Names for this Host" section to fix the problem again for these new subdomains.
Click on the "Apply Changes" button that appeared at the top of the page.
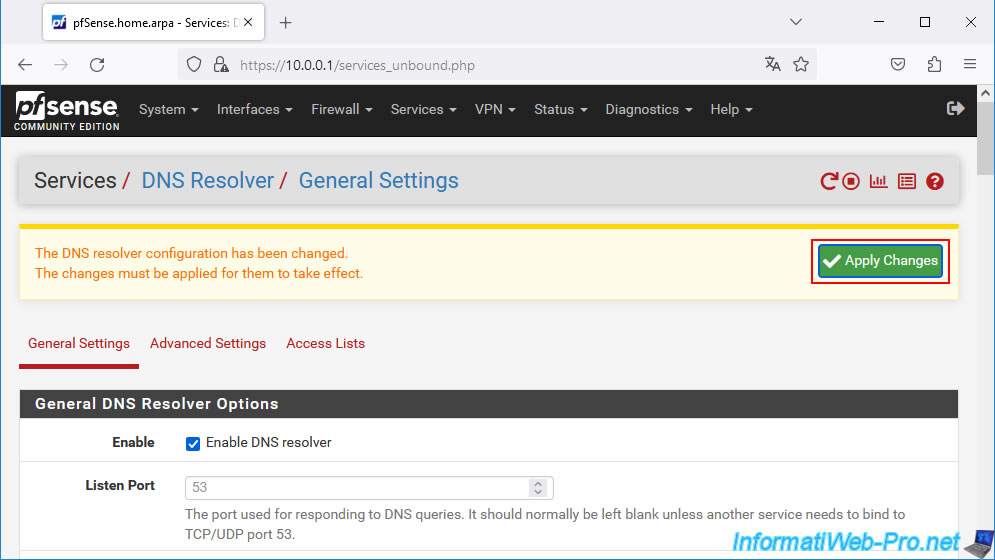
The DNS configuration has been updated on your pfSense machine.

At the bottom of the page, in the "Host Overrides" section, you will see that the pfSense DNS resolver will review the pfSense WAN IP address for your root domain, as well as its "www" subdomain.
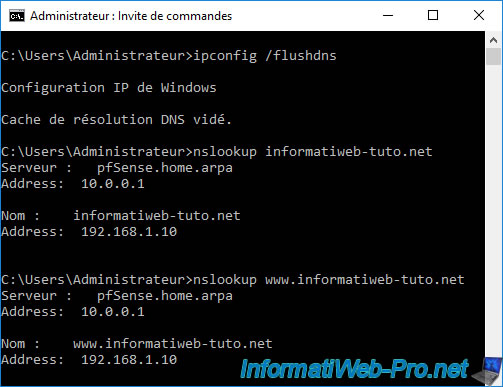
On your client computer, clear the DNS cache by typing this command:
Batch
ipconfig /flushdns
Plain Text
Successfully flushed the DNS Resolver Cache.
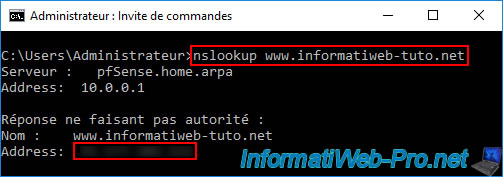
Then, verify that the pfSense DNS resolver returns the pfSense WAN IP address instead of your public IP address that you indicated in your domain configuration at your host using the "nslookup" command.
Batch
nslookup informatiweb-tuto.net
Plain Text
Server : pfSense.home.arpa
Address: 10.0.0.1

Name : informatiweb-tuto.net
Address: 192.168.1.10
Batch
nslookup www.informatiweb-tuto.net
Plain Text
Server : pfSense.home.arpa
Address: 10.0.0.1

Name : www.informatiweb-tuto.net
Address: 192.168.1.10
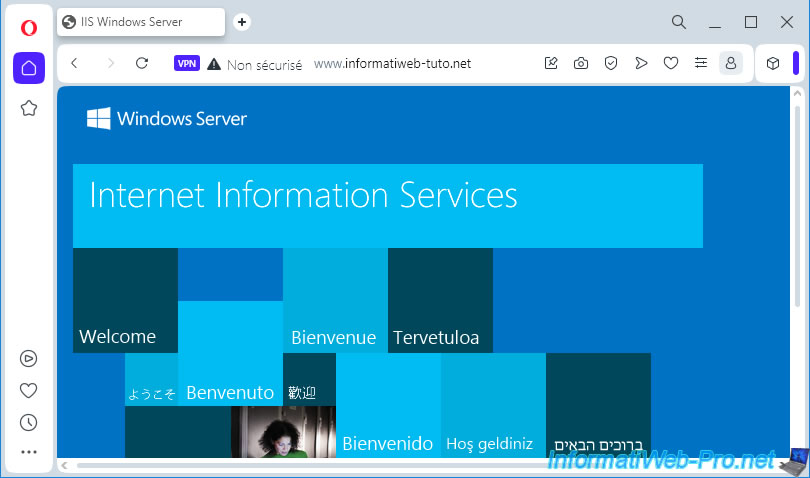
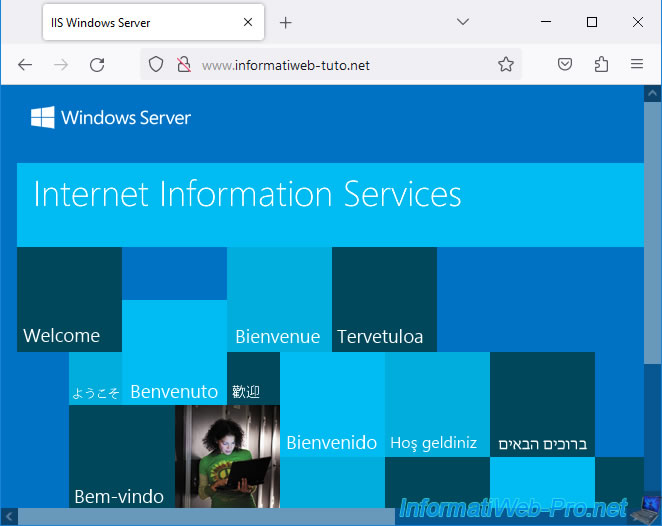
Relaunch your web browser and try accessing your "www" domain and subdomain again from your local network.
In both cases, you should see your IIS web server page appear.
Share this tutorial
To see also
-
Firewall 5/21/2025
pfSense 2.6 - Access to the web interface via the WAN interface
-

Firewall 9/17/2025
pfSense 2.6 - Create a site-to-site (S2S) VPN tunnel via OpenVPN secured with SSL/TLS (L3 mode)
-
Firewall 5/17/2025
pfSense 2.6 - Enable SSH protocol
-
Firewall 6/20/2025
pfSense 2.6 - NAT (port forwarding)
No comment