- VMware
- 17 January 2025 at 12:34 UTC
-

- 1/2

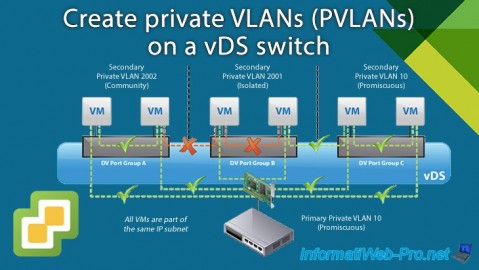
Thanks to the virtual distributed switch (vDS), you can connect your virtual machines to private VLANs (PVLANs).
Private VLANs (PVLANs) allow you to create subnets (sub-VLANs) within an existing VLAN or network.
- Why use private VLANs (PVLANs)?
- Private VLAN (PVLAN) modes
- Create private VLANs (PVLANs)
- Create distributed port groups to use private VLANs (PVLANs)
- Connect virtual machines on private VLANs (PVLANs)
- Testing network connectivity within and between private VLANs
- Internet inaccessible
1. Why use private VLANs (PVLANs)?
By default, to isolate virtual machines, you must use IP address ranges with specific subnets.
This can be a problem with IPv4, because you risk running out of IP addresses.
With private VLANs (PVLANs), hosts can more easily provide virtual machines to their customers without risking running out of IP addresses.
Indeed, thanks to a PVLAN in "Isolated" mode, you can provide the same LAN IP address to 2 virtual machines without this causing any problem. Indeed, 2 virtual machines located in the same PVLAN in isolated mode cannot communicate with each other, but can access the main VLAN (Promiscuous).
This also allows servers to be connected together in the background (such as database servers used from web servers) and only exposed front-end servers (such as front-end web servers) to the physical network to avoid that critical servers containing sensitive data cannot be attacked from the physical network or even the Internet.
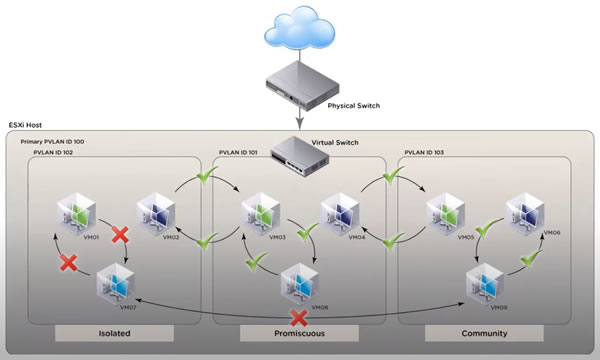
2. Private VLAN (PVLAN) modes
When you want to create a private VLAN (PVLAN), there are 3 modes available:
- Isolated: virtual machines that are members of the same PVLAN in "Isolated" mode cannot communicate with each other.
They can only communicate with virtual machines located in a PVLAN in “Promiscuous” mode. - Promiscuous: virtual machines that are members of a PVLAN in “Promiscuous” mode can communicate with each other, as well as with virtual machines located in a PVLAN in “Isolated” or “Community” mode.
- Community: virtual machines that are members of a PVLAN in "Community" mode can communicate with each other, as well as with virtual machines located in a PVLAN in "Promiscuous" mode. On the other hand, they cannot communicate with virtual machines located in a PVLAN in "Isolated" mode.
Source : Private VLANs - VMware Docs.
3. Create private VLANs (PVLANs)
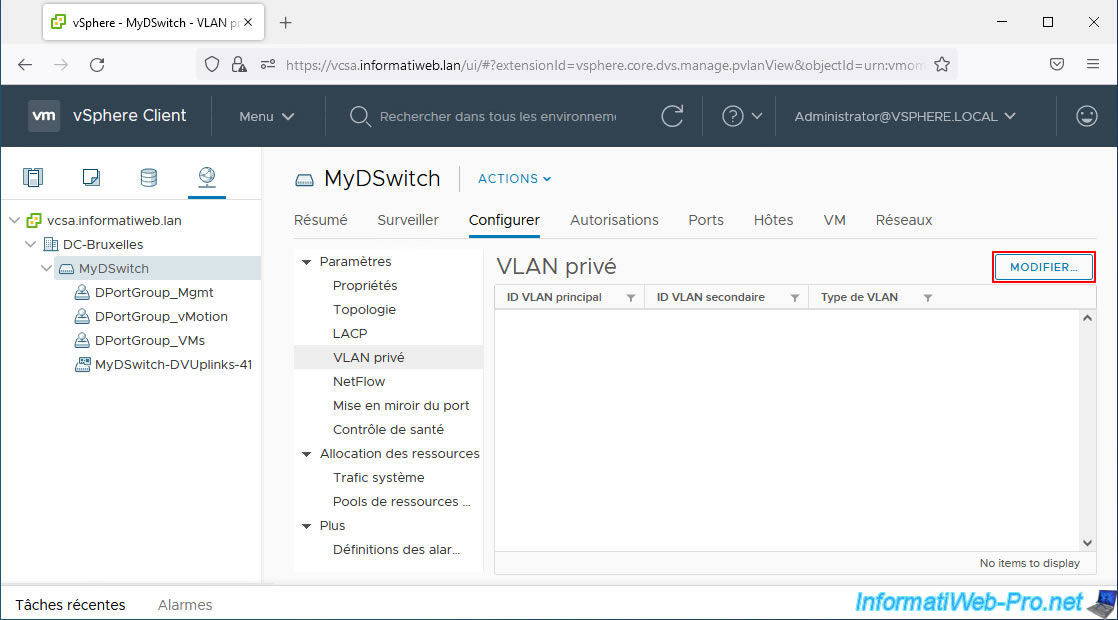
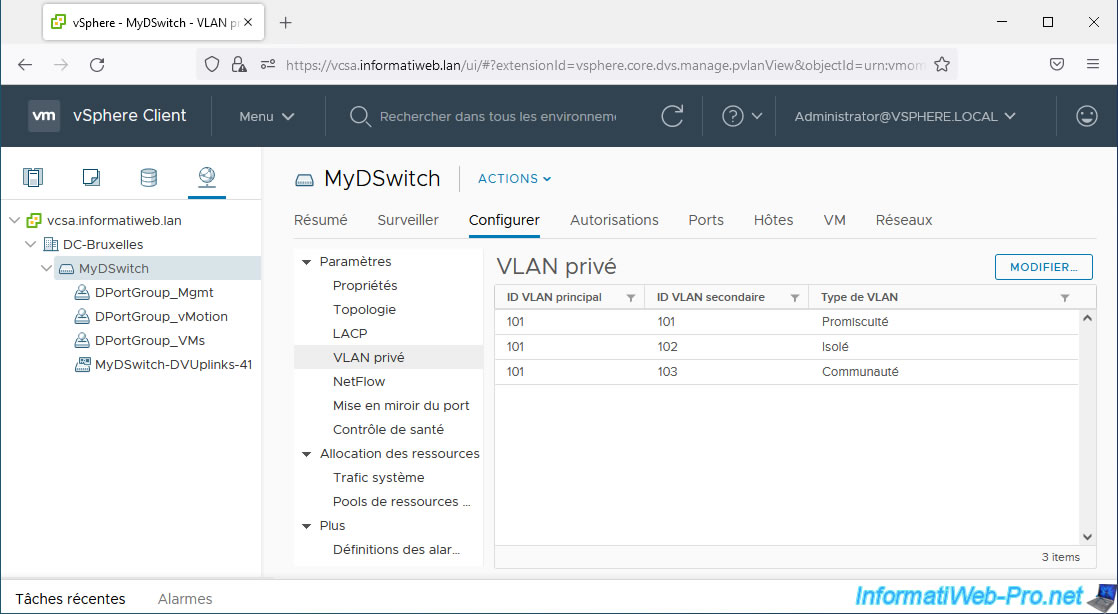
To create private VLANs (PVLANs) on your virtual distributed switch (vDS), select your virtual switch and go to: Configure -> Settings -> Private VLAN.
Then click: Edit.
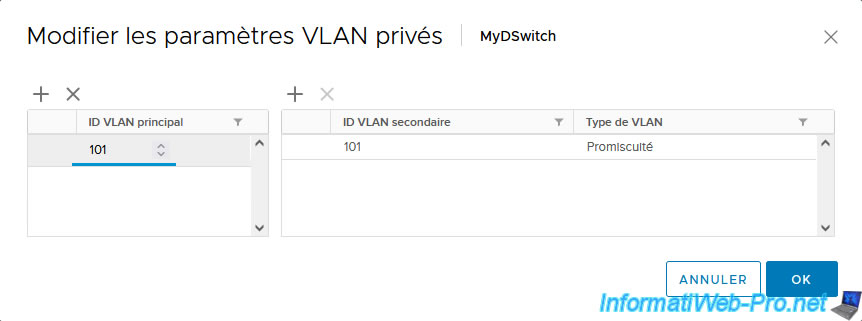
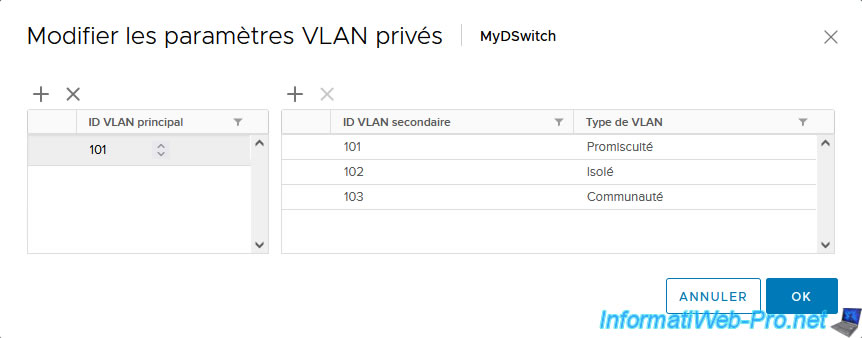
In the “Edit Private VLAN Settings” window that appears, click the “+” icon.
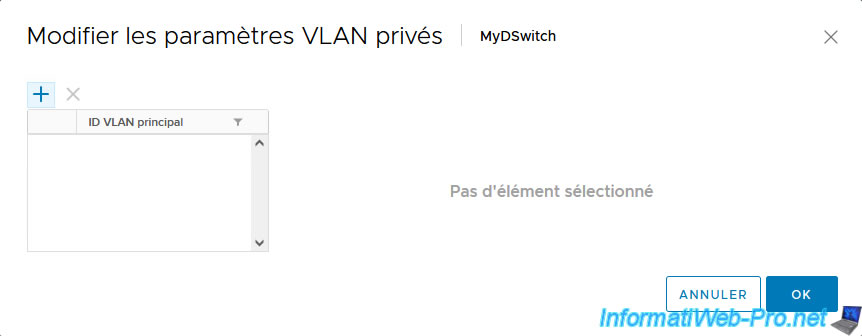
As you can see, the 1st VLAN created will be a primary and secondary VLAN and its type will be: Promiscuous.
In fact, it is via this VLAN that your virtual machines will have to pass to access the external network if necessary.
Note that the VLAN ID used will be the same for the primary VLAN and this secondary VLAN in "Promiscuous" mode.
Next, click the "+" icon on the right to add a secondary VLAN (a private VLAN).
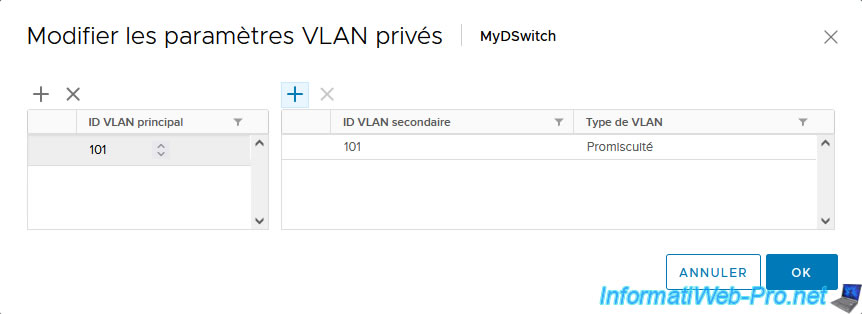
Defaults to a new secondary VLAN ID by incrementing the previous ID by 1.
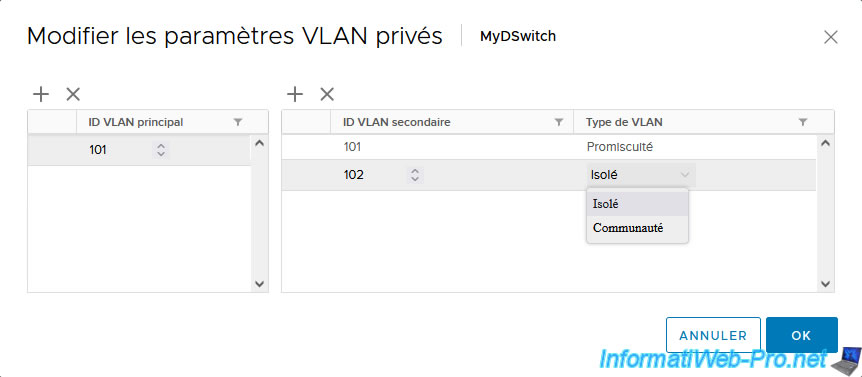
In our case, we will use a private VLAN in "Isolated" mode.
Note: as you can see, there can only be one private VLAN in "Promiscuous" mode.
Finally, add a 3rd private VLAN and choose “Community” mode.
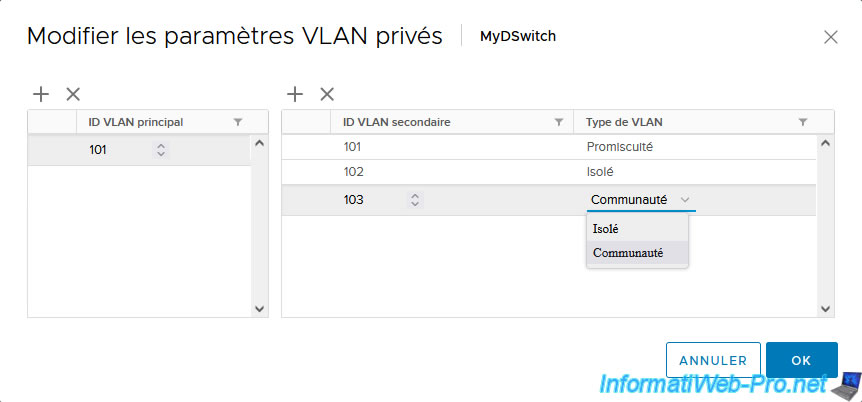
Now click OK.
The new private VLANs created appear.
4. Create distributed port groups to use private VLANs (PVLANs)
To connect your virtual machines on private VLANs (PVLANs), you must create distributed port groups on your virtual distributed switch (vDS) and choose the desired private VLAN ID (created previously).
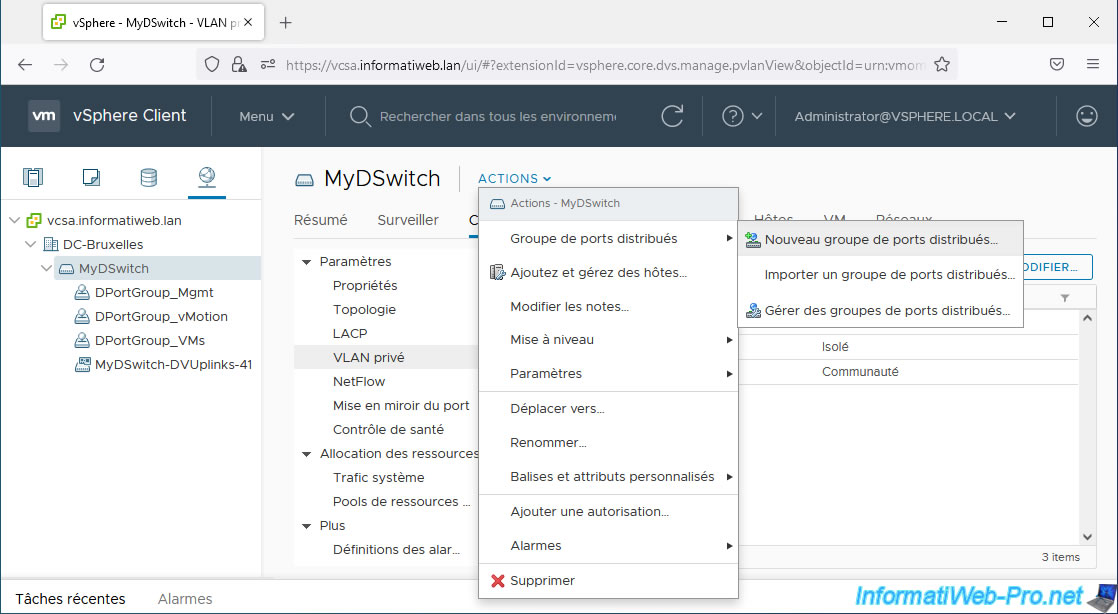
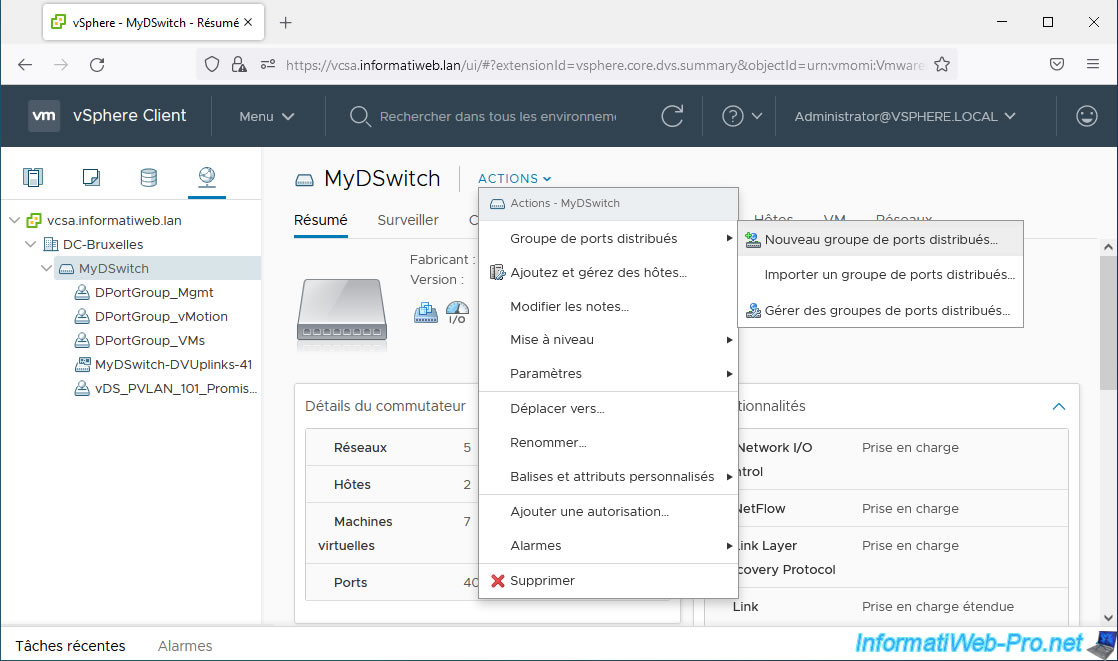
To do this, select the virtual distributed switch (vDS) where you created your private VLANs (PVLANs) and click: Actions -> Distributed Port Groups -> New Distributed Port Group.
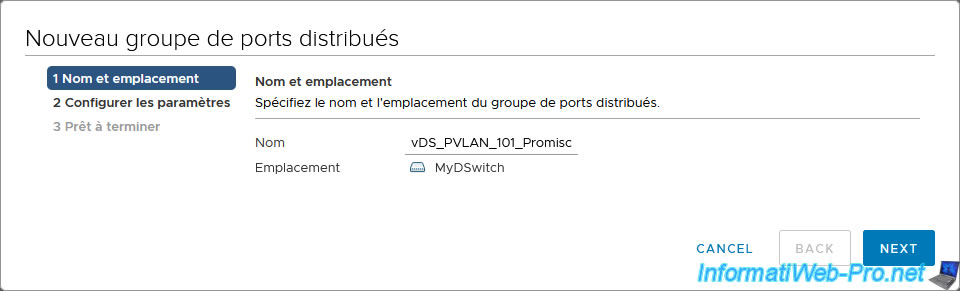
In the "New Distributed Port Group" wizard that appears, enter a name for this distributed port group.
In our case: vDS_PVLAN_101_Promiscuous.
In the settings for this new distributed port group, select "VLAN type: Private VLAN".
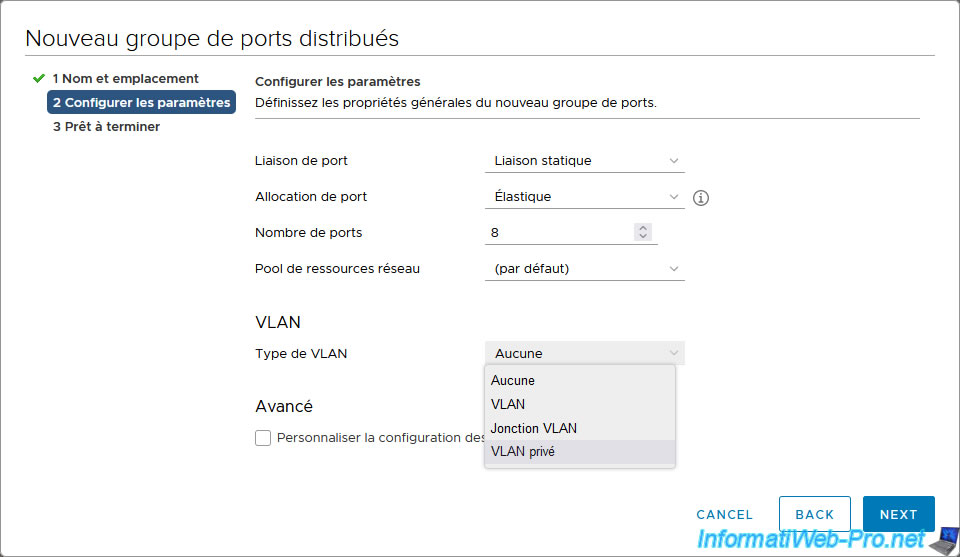
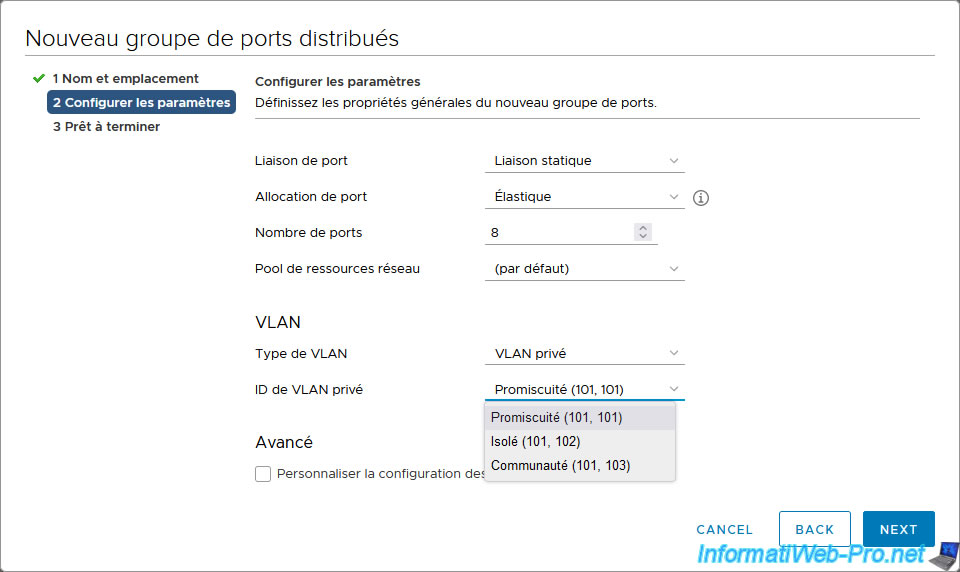
Then, in the "Private VLAN ID" list that appears, select the desired private VLAN ID (created previously).
In our case: Promiscuous (101, 101).
Click Finish.
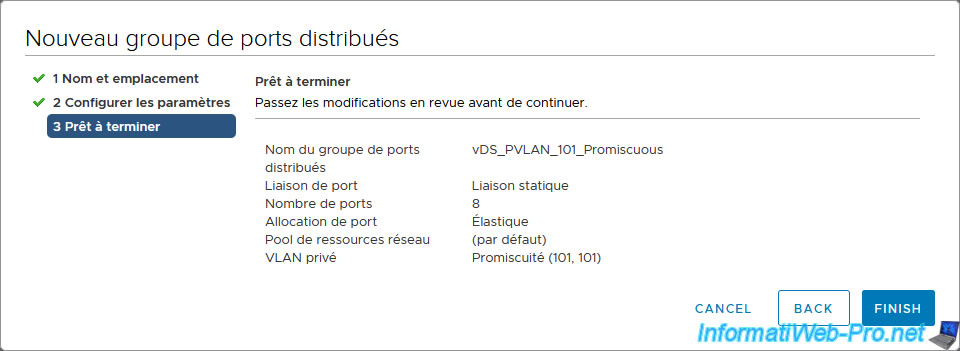
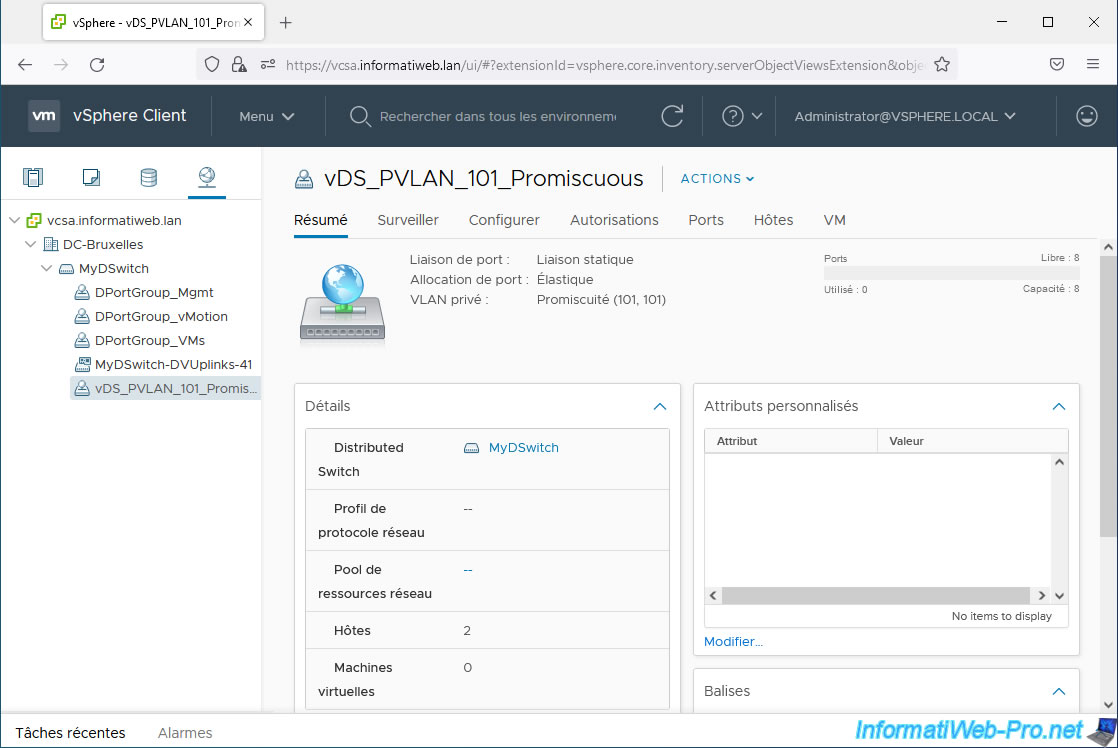
As you can see, our new port group "vDS_PVLAN_101_Promiscuous" uses a private VLAN "Promiscuous (101, 101)".
Create additional distributed port groups for your other private VLANs (PVLANs).
To do this, select your virtual distributed switch (vDS) again and click: Actions -> Distributed Port Groups -> New Distributed Port Group.
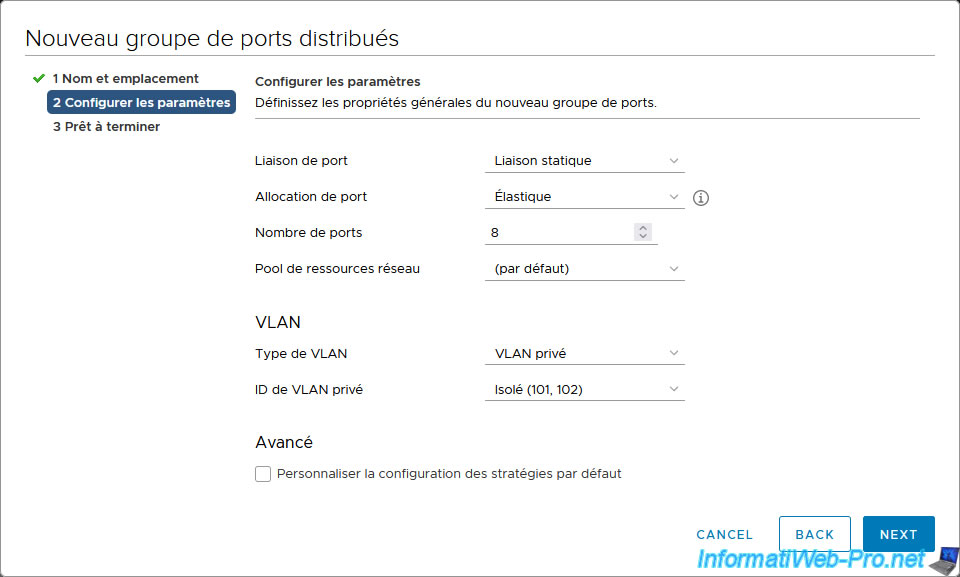
This time we create a distributed port group “vDS_PVLAN_102_Isolated”.

For this new distributed port group, we select the private VLAN ID "Isolated (101, 102)".
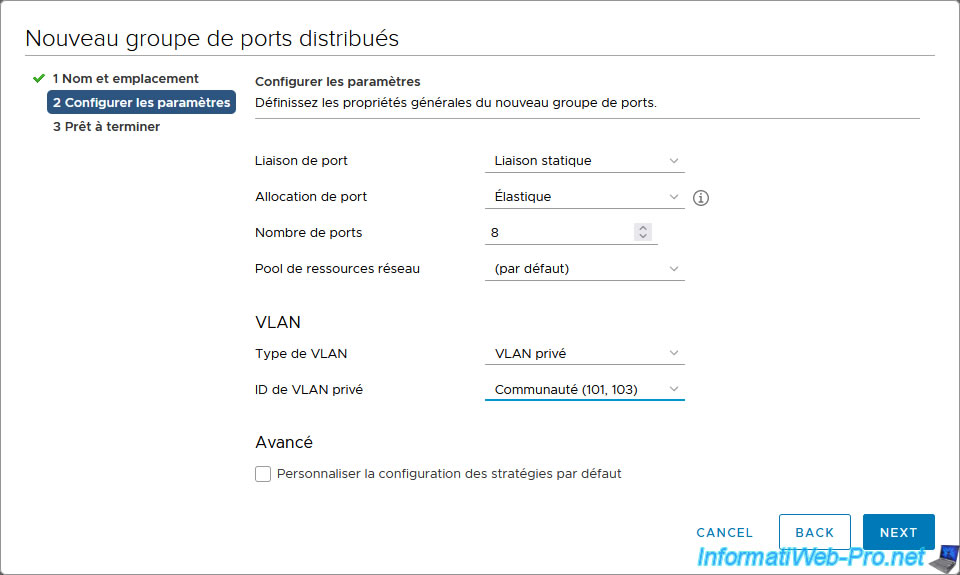
Finally, we create a 3rd group of distributed ports "vDS_PVLAN_103_Community".

For this distributed port group, we select the private VLAN ID "Community (101, 103)".
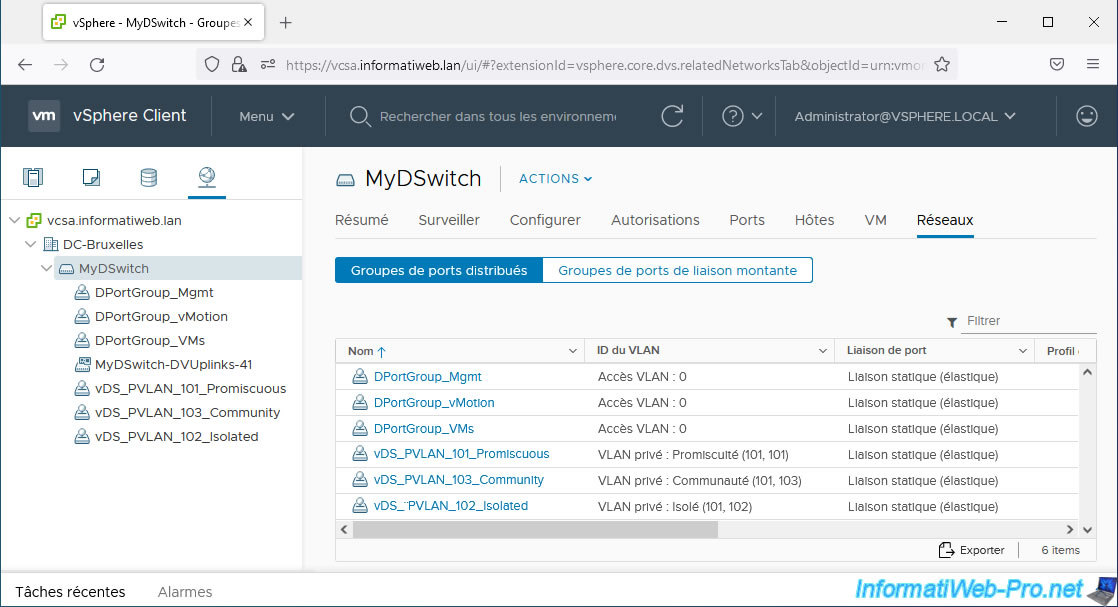
As you can see by going to the "Networks" tab of your virtual distributed switch (vDS), you have 3 port groups using private VLANs (PVLANs):
- vDS_PVLAN_101_Promiscuous: "Private VLAN: Promiscuous (101, 101).
- vDS_PVLAN_102_Isolated: "Private VLAN: Isolated (101, 102).
- vDS_PVLAN_103_Community: "Private VLAN: Community (101, 103).
Share this tutorial
To see also
-
VMware 8/21/2024
VMware vSphere 6.7 - Add a VMkernel interface
-

VMware 8/2/2024
VMware vSphere 6.7 - Collect logs with SexiLog
-
VMware 8/9/2024
VMware vSphere 6.7 - Collect logs with VMware Aria Operations for Logs
-
VMware 1/10/2025
VMware vSphere 6.7 - Create a LACP link (LAG)
You must be logged in to post a comment