Mirror a port on a vDS switch on VMware vSphere 6.7
- VMware
- VMware vCenter Server (VCSA), VMware vSphere
- 15 January 2025 at 14:14 UTC
-

- 2/2
4. Configure the remote VM to use Wireshark
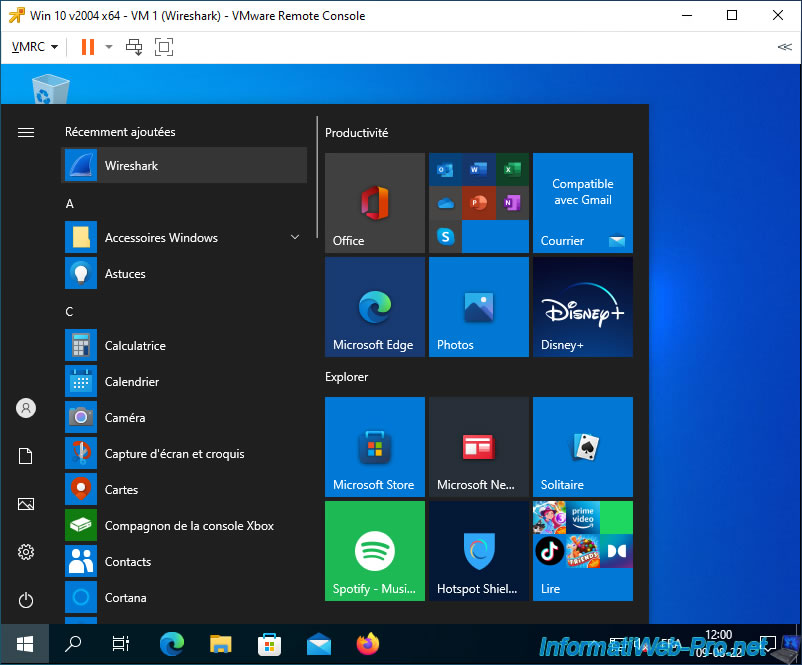
Launch Wireshark from the Windows start menu.
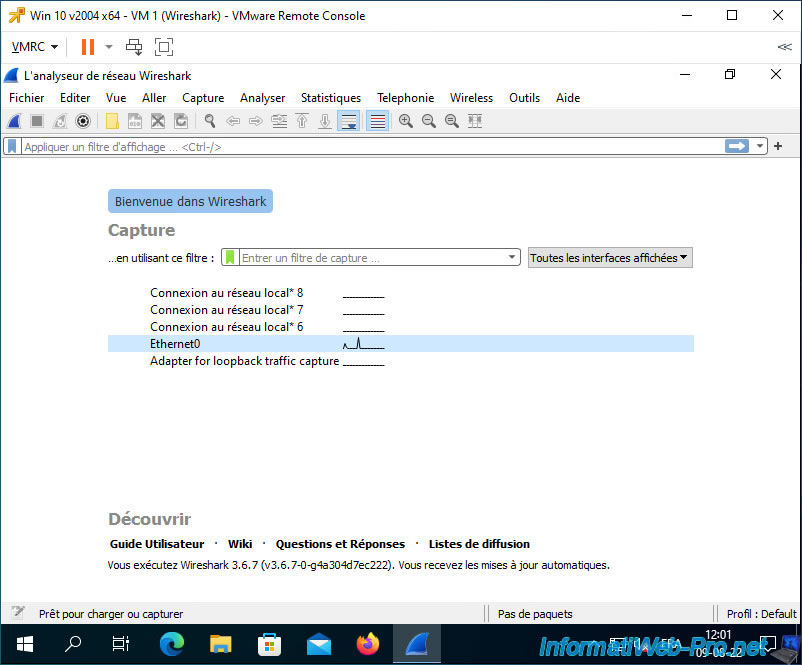
Make a duplicate of the network card name of this virtual machine.
You can easily see which network card is correct by looking at its usage using the small black graph.
In our case, this is the "Ethernet0" network card.
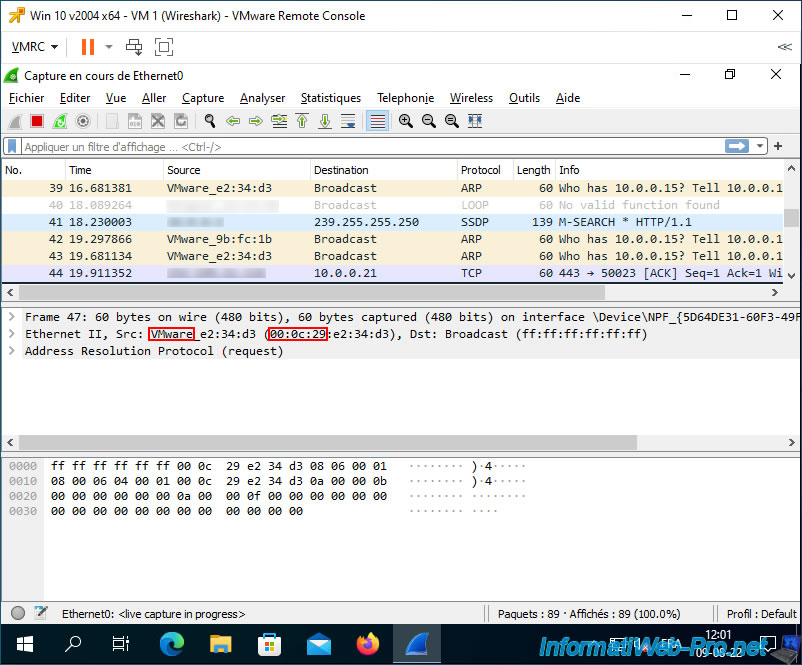
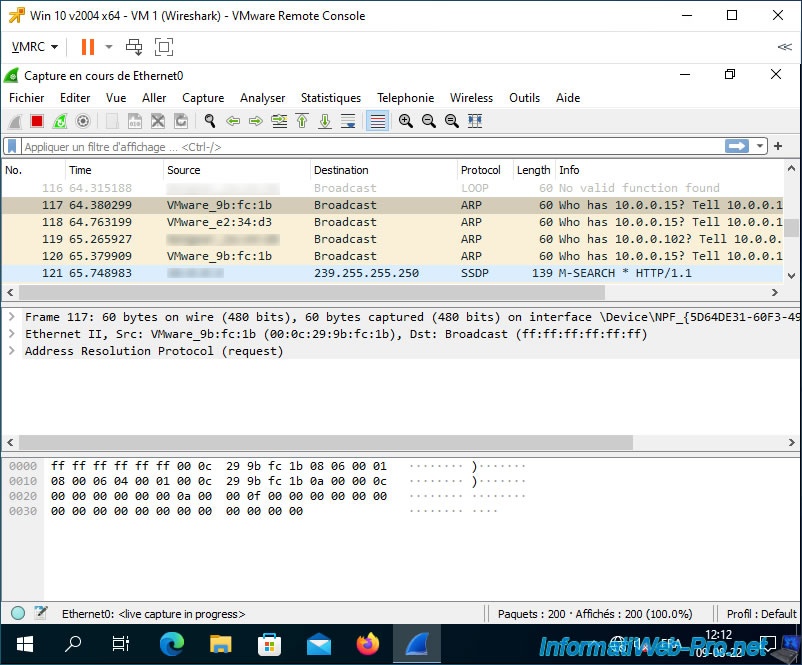
As you can see, by default, Wireshark already captures a lot of network frames, including:
- broadcast using the ARP protocol (the destination being an IP address always ending with ...255).
- broadcast using the SSDP protocol, whose destination IP address is always 239.255.255.250.
- TCP traffic that concerns our virtual machine, whose IP address is "10.0.0.21".
- and more
As you can see, Wireshark already captures the network traffic of the virtual machine on which it is installed.
Note that Wireshark replaces the beginning of detected MAC addresses with the name of the associated manufacturer in some places.
For example: the MAC prefix "00:0c:29" is managed by VMware.
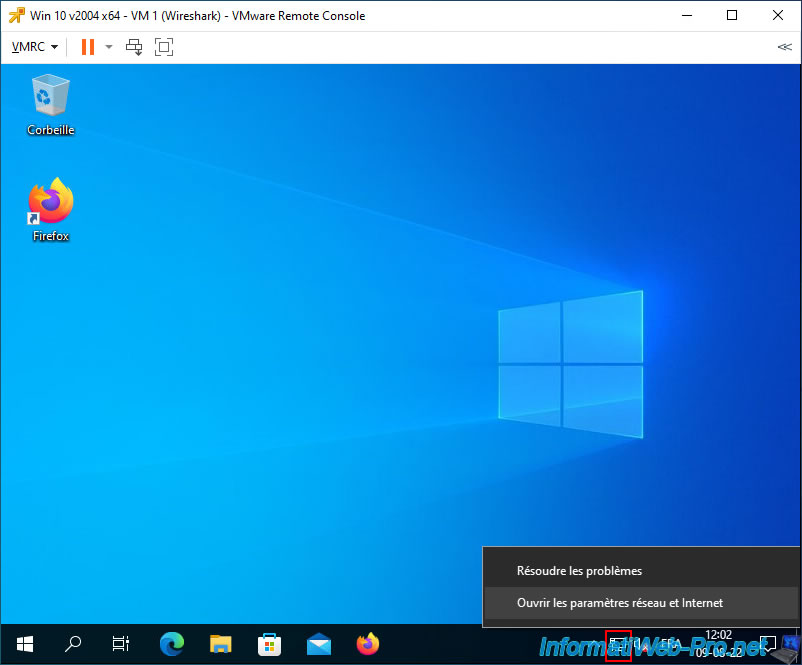
To avoid capturing the network traffic of this virtual machine and be able to monitor only the network traffic of the desired virtual machine (VM 2 in our case), you need to modify the network adapter settings of this VM 1 where Wireshark is installed.
To do this, in Windows 10, right-click "Open Network & Internet settings" on the network icon in the taskbar.
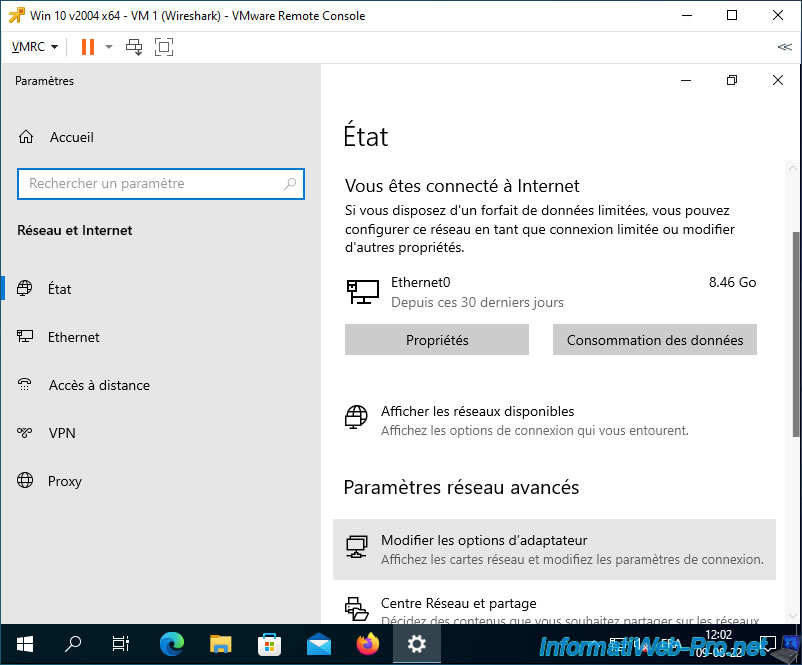
In the "Settings" window that appears, click "Change adapter options".
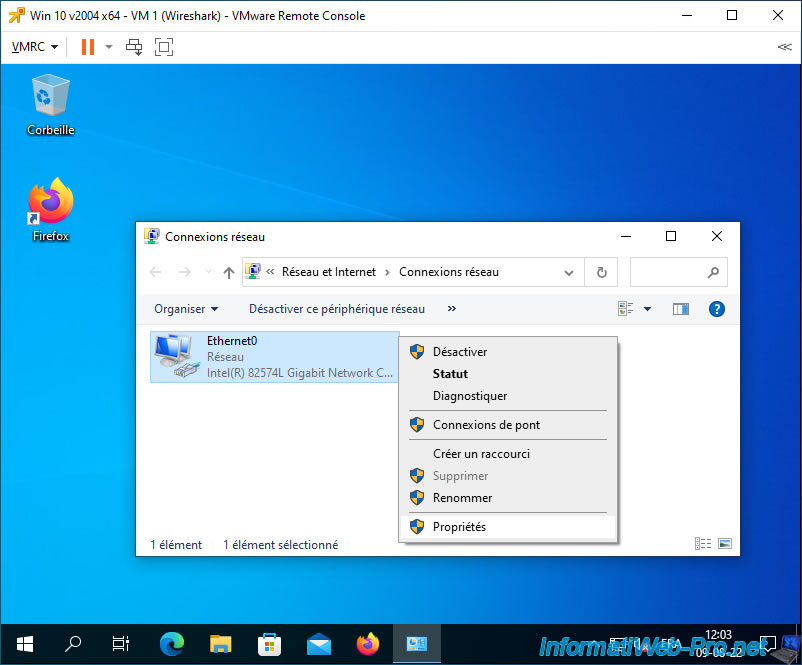
Right-click "Properties" on the network card that appears.
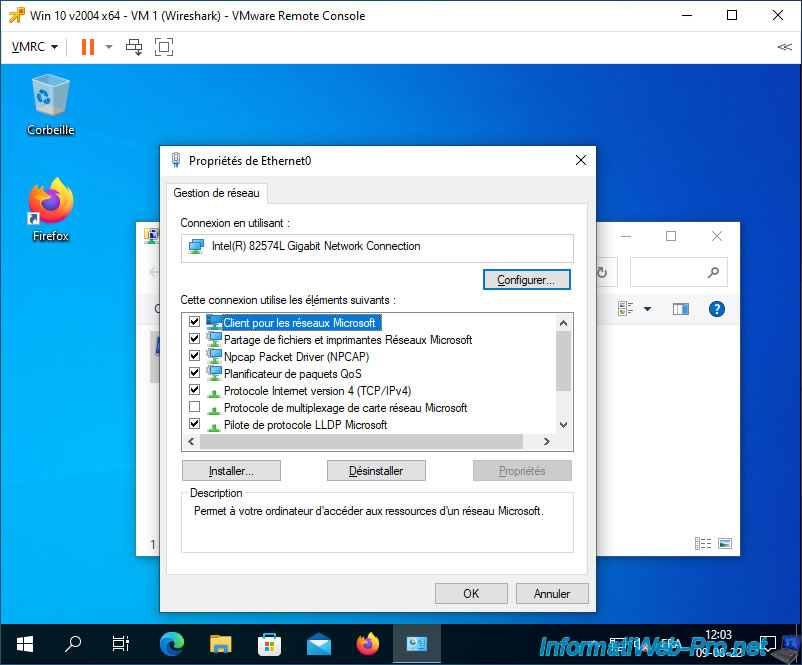
As you can see, by default, many components are activated, including Microsoft features, the TCP/IP protocol, ...
To avoid unnecessarily capturing too much network information about this VM 1, uncheck all components except the "Npcap Packet Driver (NPCAP)" component which is used to capture network traffic on this network adapter.
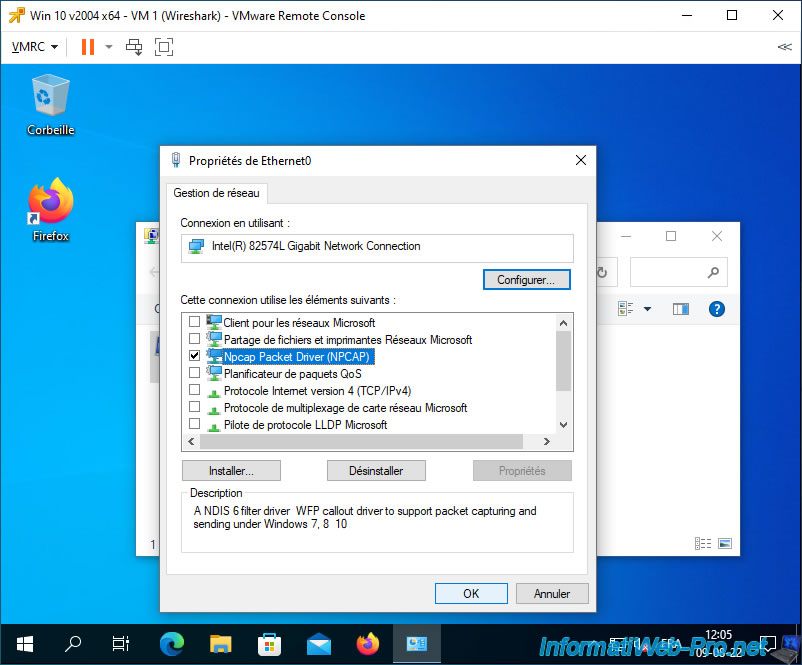
In Wireshark, all that will remain is the broadcast which is automatically sent by everyone to all devices connected to the network.
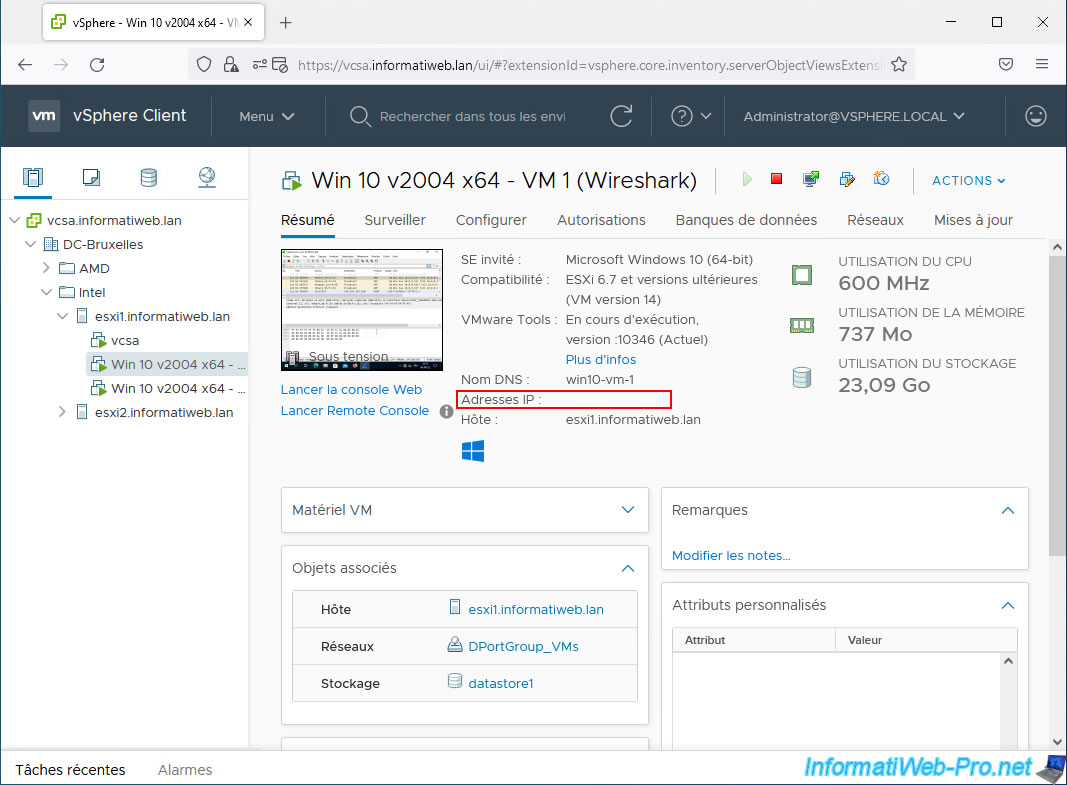
Note that deactivating the various network components (including the TCP/IPv4 or IPv6 protocol) will cause the IP address of this VM to disappear under vCenter given that it no longer has access to the network via an IP.
However, this will not prevent it from physically receiving network traffic through its MAC address.
5. Enable port mirroring
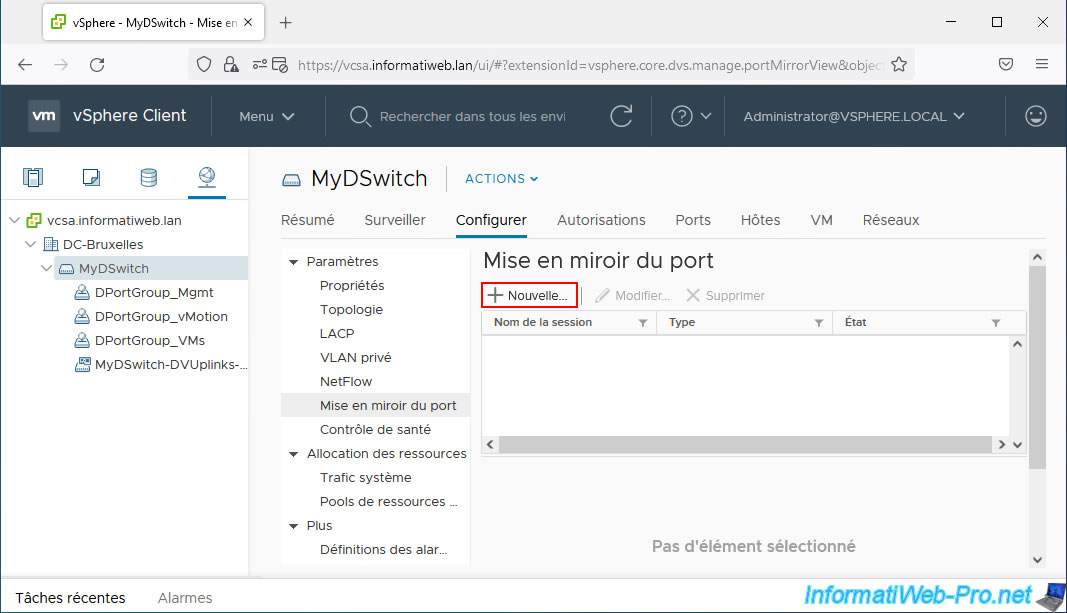
To duplicate network traffic from one port and send that copy to another port on your virtual distributed switch (vDS), select the virtual distributed switch (vDS) where the virtual machine you want to monitor is connected.
Then go to "Configure -> Settings -> Port Mirroring" and click New.
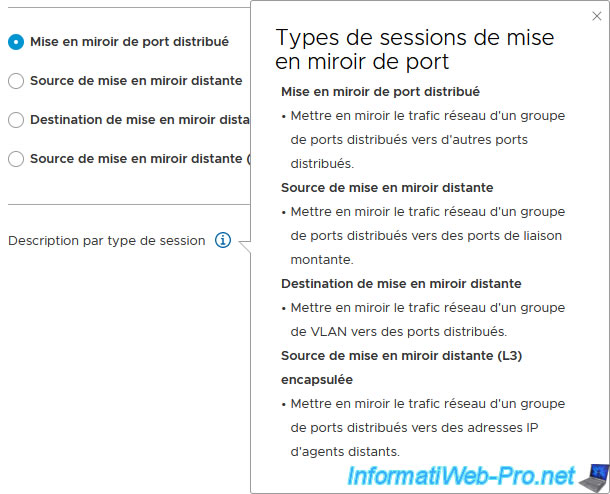
As you can see in the "Add Port Mirroring Session" wizard that appears, you can create different types of sessions for port mirroring.
To find out more about these different types of sessions, click on the little "i" to the right of "Description per session type".
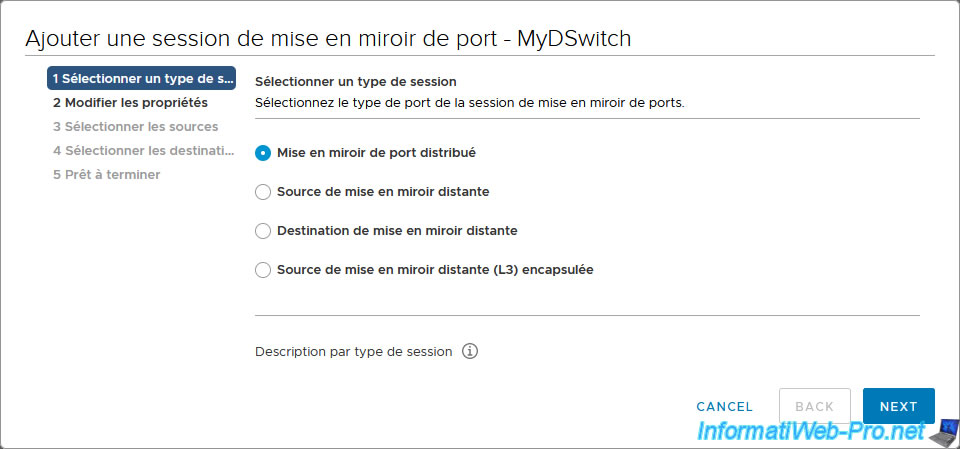
The different types of port mirroring sessions are:
- Distributed Port Mirroring: equivalent to SPAN that allows network traffic of a virtual machine to be mirrored from one distributed port group to the same or another distributed port group on the same host.
If the source and destination VM are not on the same host, this port mirroring session will not work. - Remote Mirroring Source: an equivalent of RSPAN that mirrors network traffic from a distributed port group to uplink ports.
- Remote Mirroring Destination: allows centralized monitoring of network traffic received through a VLAN system from an RSPAN session to distributed ports.
The "Remote Mirroring Source" and "Remote Mirroring Destination" options are therefore linked since the 1st option duplicates the traffic to send it in an RSPAN session and the 2nd option allows this copy to be retrieved on the switch destination to send it to the desired distributed port. - Encapsulated Remote Mirroring (L3) Source: equivalent of ERSPAN which allows the network traffic of a virtual machine to be mirrored from a group of distributed ports to an IP address (therefore using layer 3 (= L3) of the OSI model).
In our case, our 2 virtual machines are connected on the same port group and more precisely on the same distributed virtual switch, so we select "Distributed Port Mirroring".
Source : Select Port Mirroring Session Type - VMware Docs.
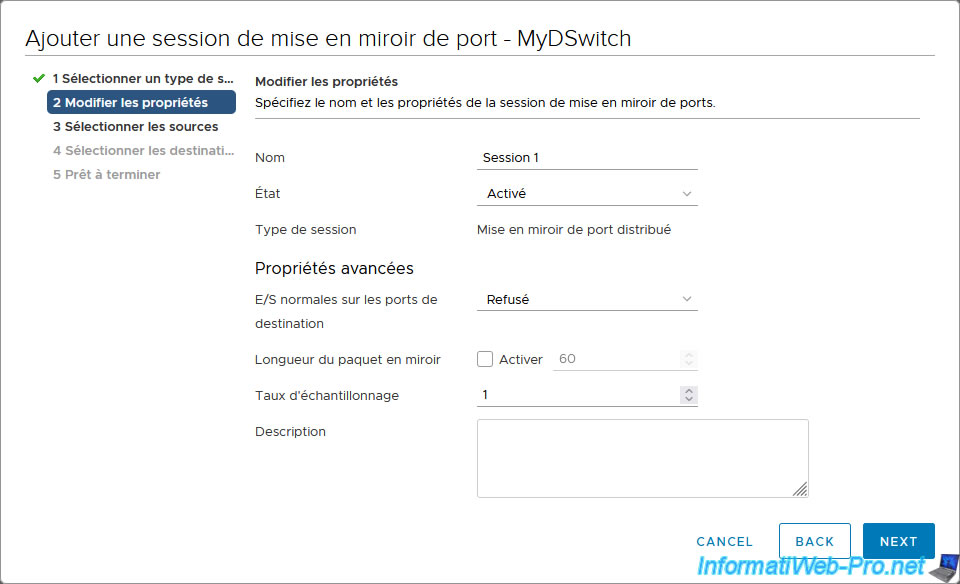
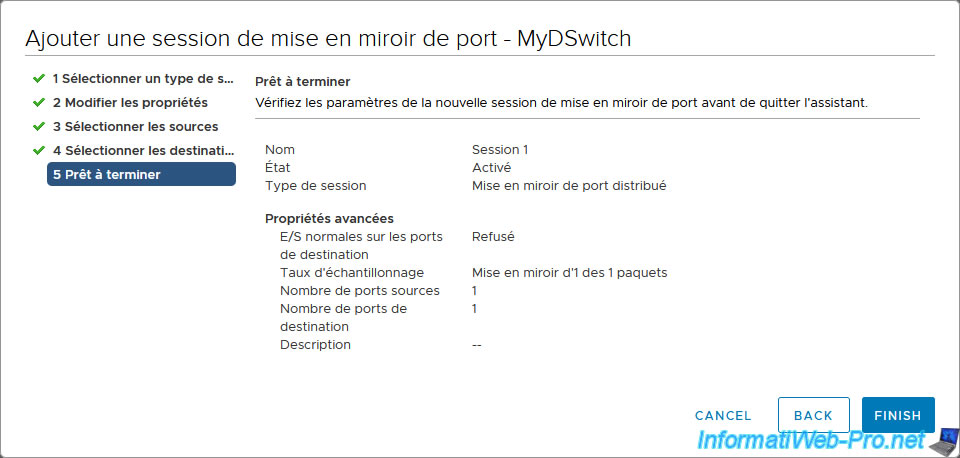
In the properties that appear, simply provide a name for this port mirroring session, choose "Status: Enabled" and leave the rest as default.
The available properties are:
- Name: name under which this port mirroring session will appear under VMware vCenter Server (VCSA).
- Status: allows you to enable or disable this port mirroring session.
- Session type: displays the type of port mirroring session you just selected.
- Normal I/O on destination ports: select to allow mirrored traffic, but deny incoming traffic.
- Mirrored packet length: enabling this setting limits the size of mirrored network frames by truncating them to the value defined here.
- Sampling rate: packet sampling speed. This is enabled by default.
- Description: a description you want to add for this port mirroring.
Source : Specify Port Mirroring Name and Session Details - VMware Docs.
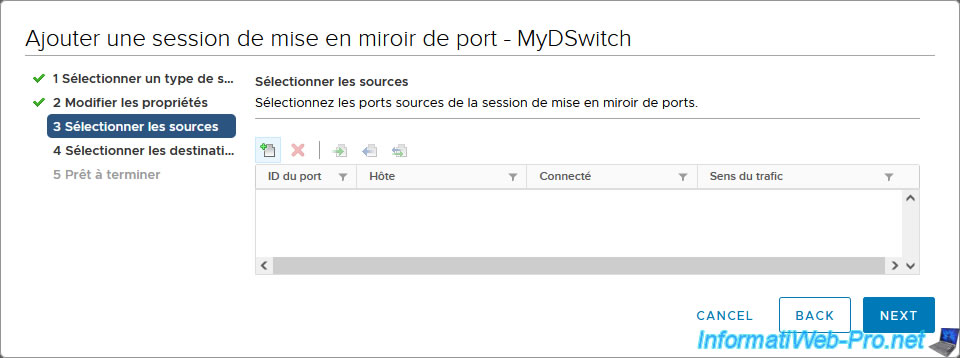
In the "Select sources" step, click on the 1st icon (+).
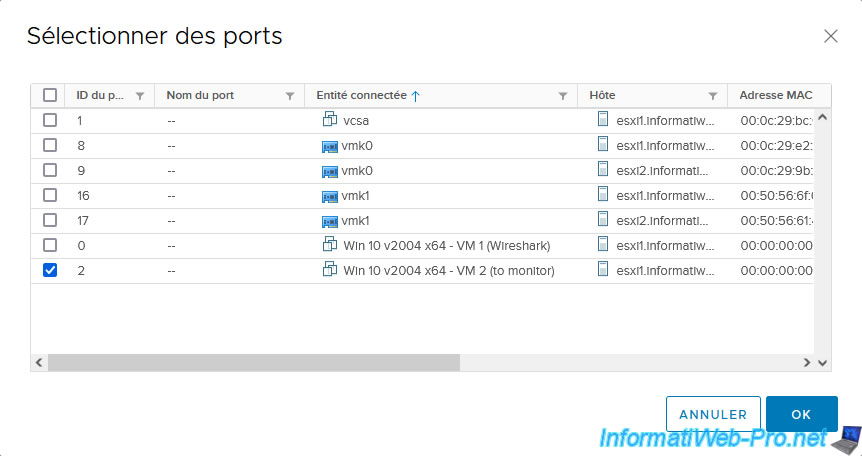
In the "Select Ports" window that appears, select the port corresponding to the virtual machine whose network traffic you want to copy.
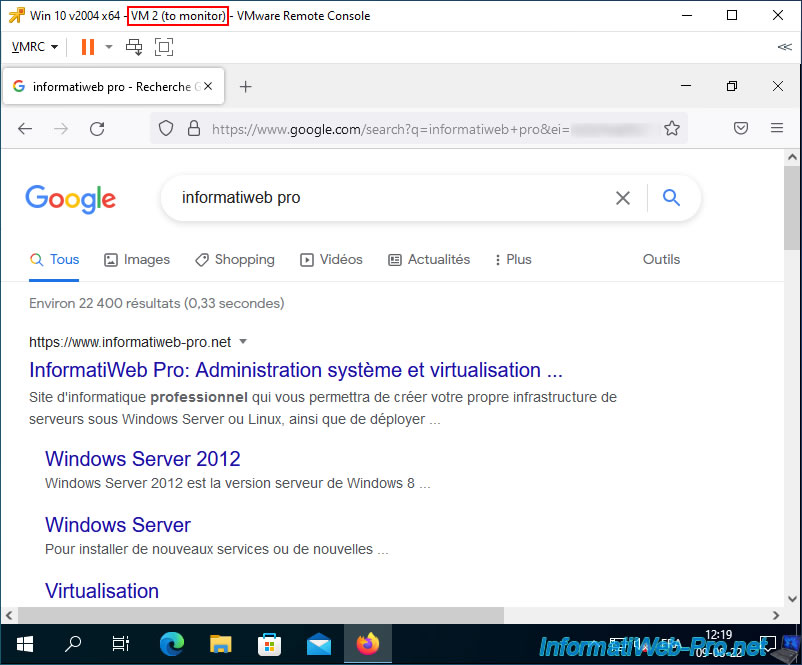
In our case, the virtual machine "Win 10 v2004 x64 - VM 2 (to monitor)".
Click Next.
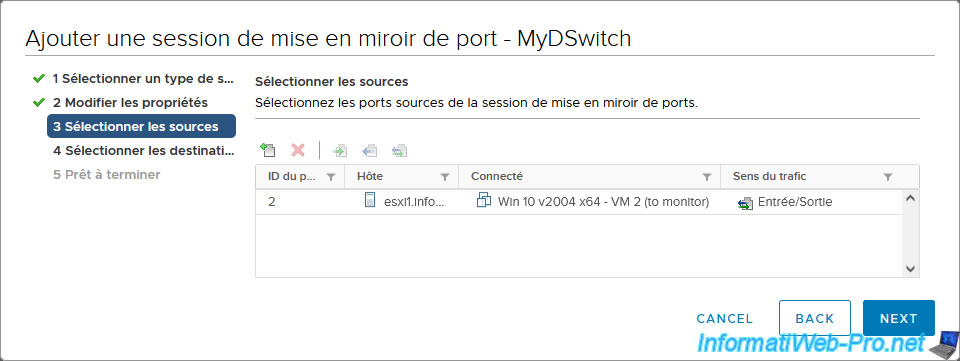
For the destination, click on the 1st icon (+) again.
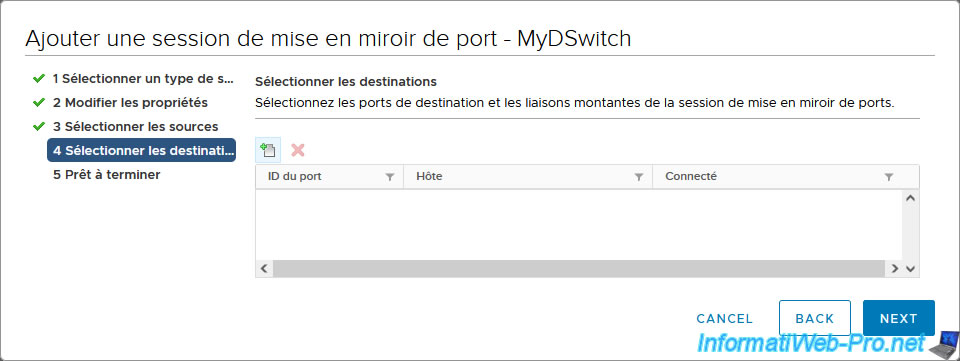
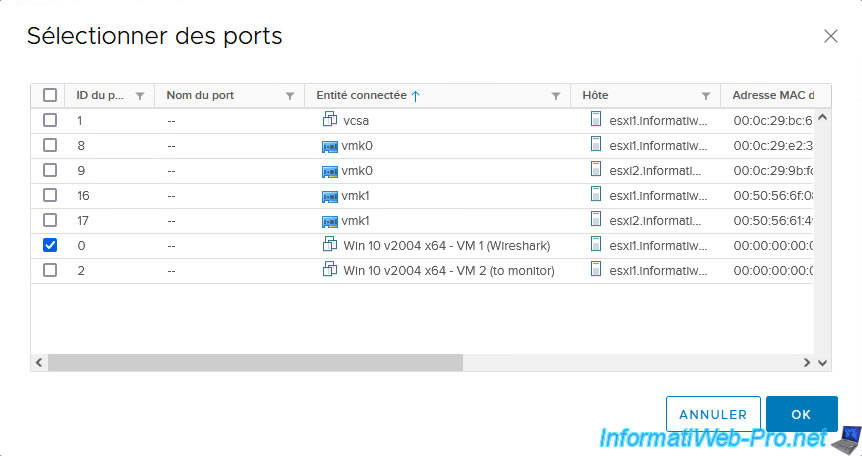
In the "Select Ports" window that appears, select the port corresponding to the virtual machine from which you want to monitor the mirrored copy of network traffic.
In our case, the virtual machine "Win 10 v2004 x64 - VM 1 (Wireshark)".
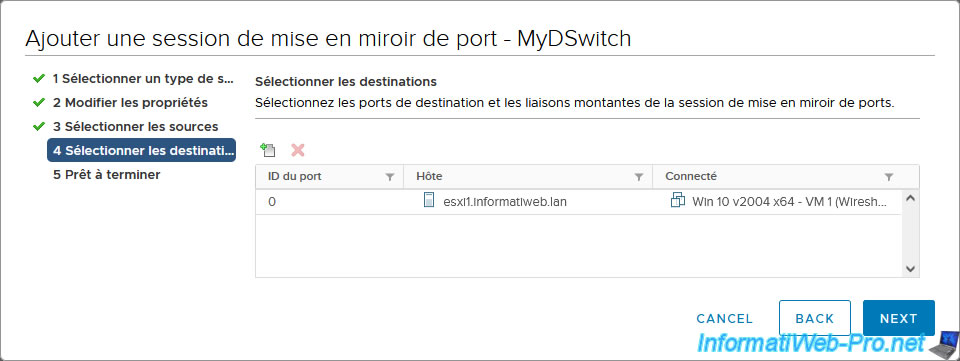
The desired virtual machine appears.
Click: Next.
A summary of the port mirroring session addition appears.
Click Finish.
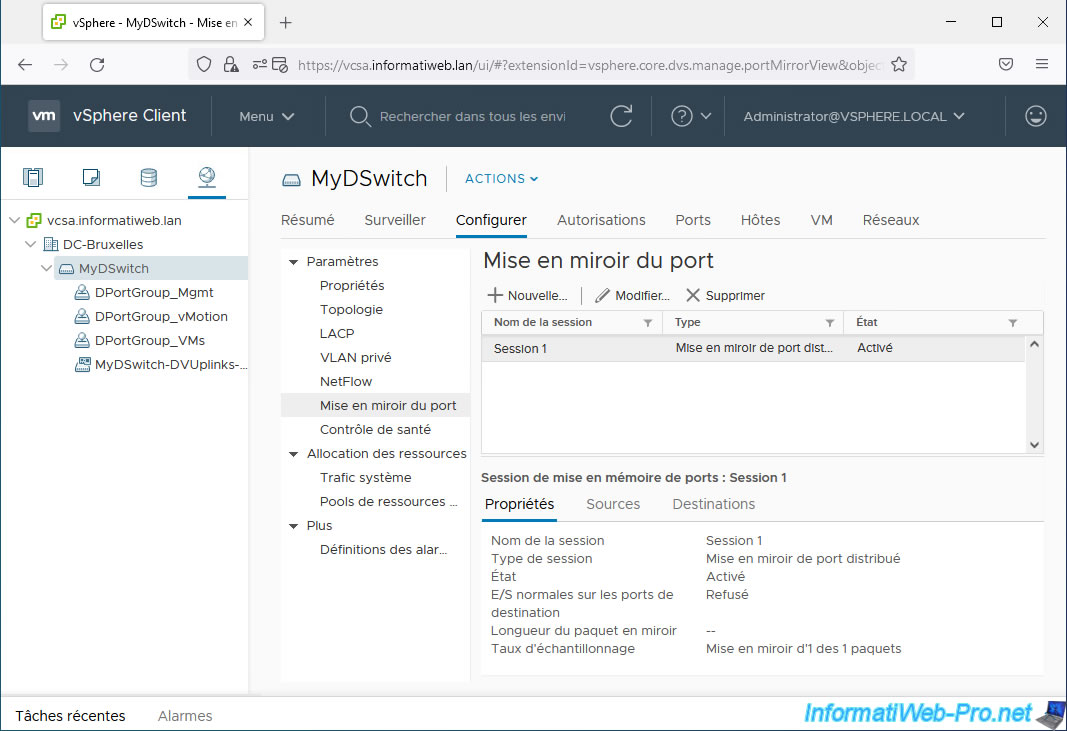
The created port mirroring appears.
6. Capturing mirrored network traffic
To test port mirroring, we launched Wireshark on our "VM 1 (Wireshark)", then visited a simple website on our "VM 2 (to monitor)".
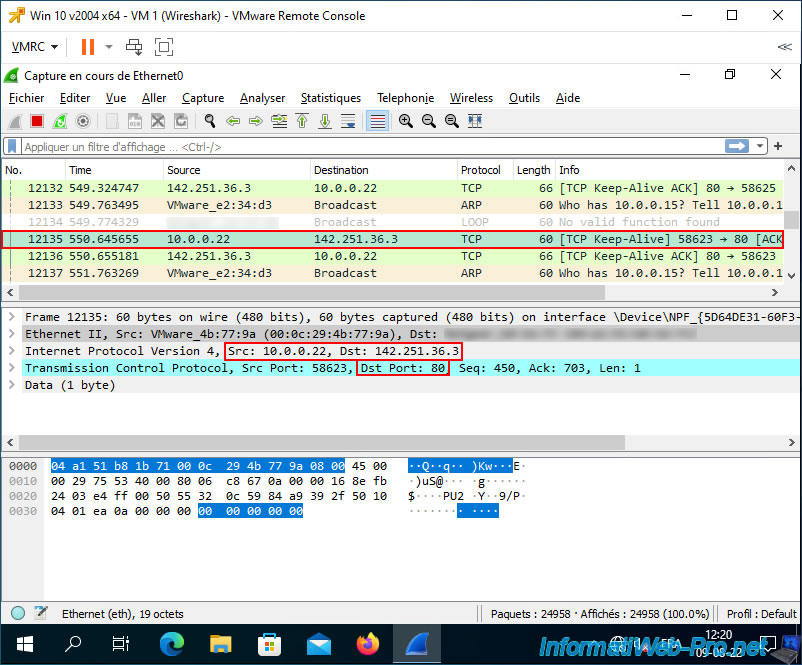
On our virtual machine where Wireshark is running, you will see traffic whose source or destination matches the virtual machine whose network traffic is being duplicated (via port mirroring).
In our case, we can see that the name of the monitored VM (Win10-VM-2) appears, as well as its IP address "10.0.0.22" (see the start of the tutorial for information regarding our Windows 10 virtual machines).
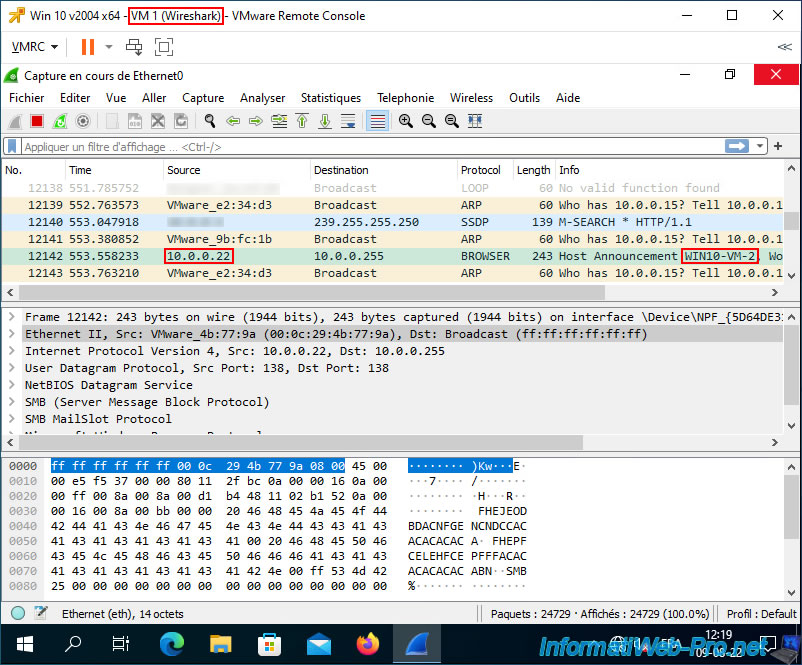
By searching, you can also find network traffic corresponding to the visit to the website.
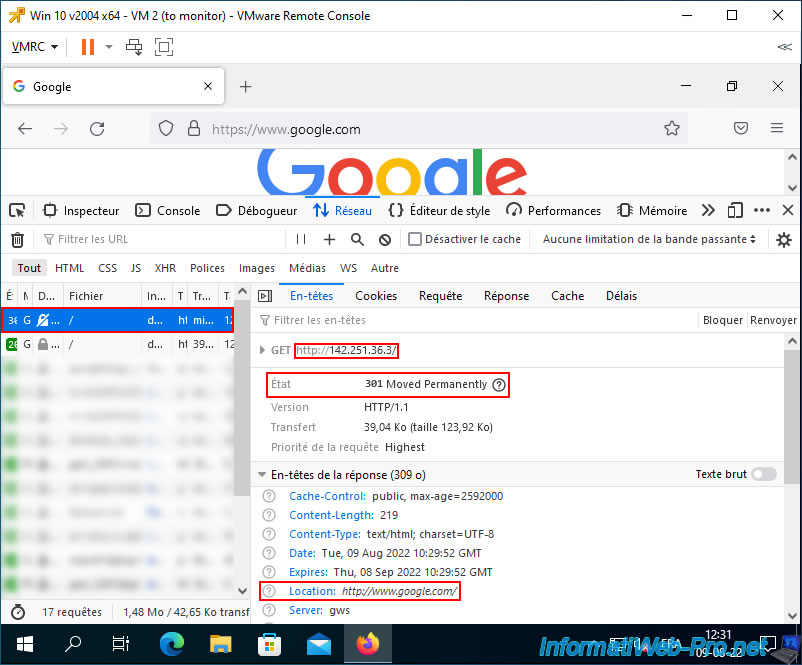
Hence the appearance of the TCP protocol on port 80 (HTTP) and the IP address "142.251.36.3".
Note that this IP address corresponds to the Google site.
Share this tutorial
To see also
-
VMware 3/31/2023
VMware ESXi 6.7 - How CPU management works
-
VMware 4/28/2023
VMware ESXi 6.7 - Use an USB network adapter
-

VMware 7/31/2024
VMware vSphere 6.7 - Add an Active Directory identity source
-
VMware 9/26/2025
VMware vSphere 6.7 - Migrate VMs via vMotion (vDS / L2 network)

No comment