Create a VMware vSphere 6.7 infrastructure by installing vCenter Server with an external database (SQL Server)
- VMware
- 14 February 2024 at 15:15 UTC
-

- 4/5

4.5. Install the native SQL client in version 11.0
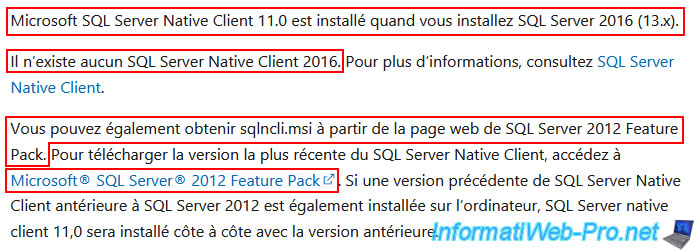
If you look for SQL Server 2016 native SQL client on the internet, you won't find it.
Indeed, if you go to the “Installing SQL Server Native Client” page of the Microsoft documentation, you will see that:
- the SQL Server 11.0 native client is installed automatically when you install SQL Server 2016 on your server.
- there is no native SQL Server client in version 2016.
- you can download the native SQL Server 11.0 client by downloading the "sqlncli.msi" file available on the "Microsoft® SQL Server® 2012 SP4 Feature Pack" download page whose link is referenced on this same page.
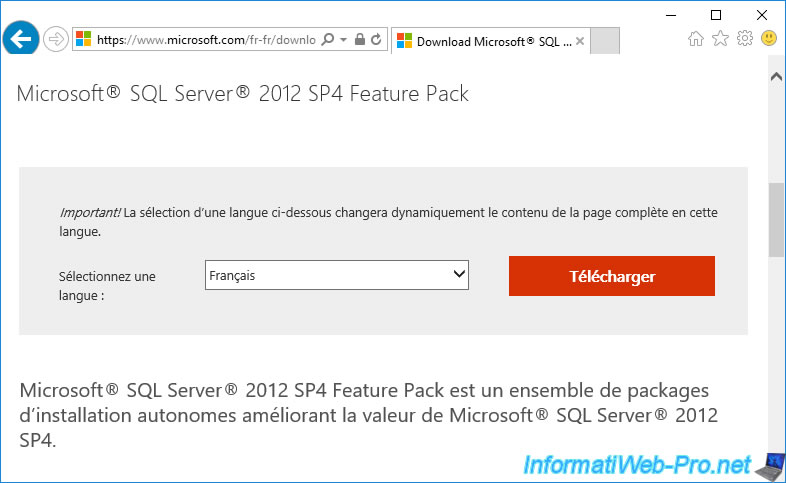
Go to this "Microsoft® SQL Server® 2012 SP4 Feature Pack" download page and click: Download.
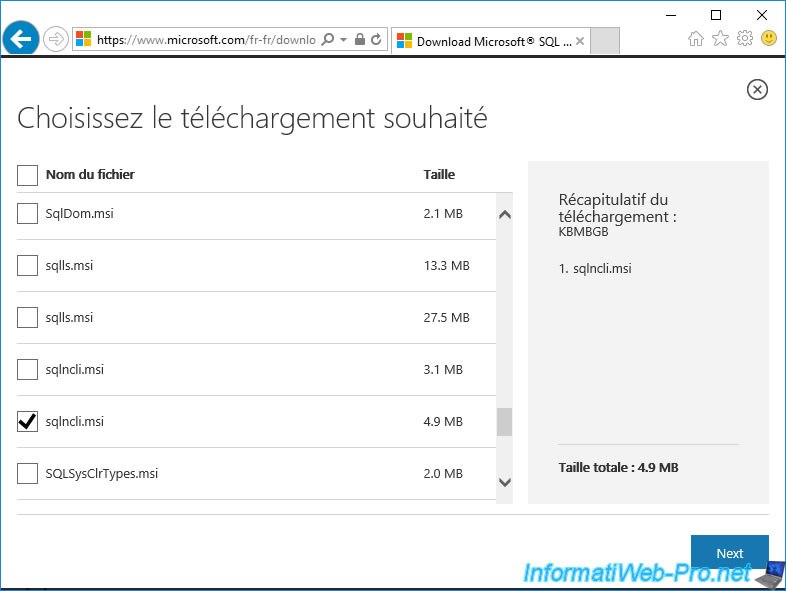
In the list of proposed files, check the 2nd box "sqlncli.msi".
The heaviest "sqlncli.msi" file is necessarily the 64-bit (x64) version of this native SQL Server client.
Then click Next.
The download of the "sqlncli.msi" file will start automatically or be offered (depending on the configuration of your web browser).
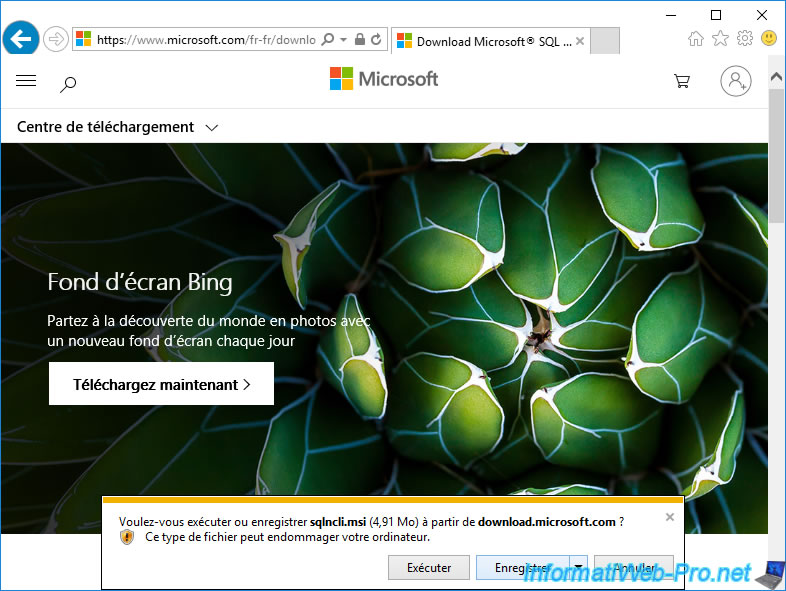
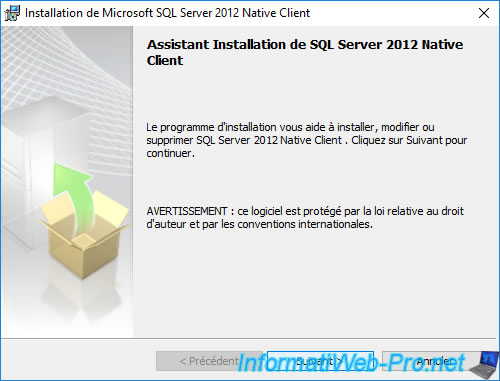
Once the file is downloaded, install this native SQL Server client on the server where you will install VMware vCenter Server.
To install it, simply click Next at each step.
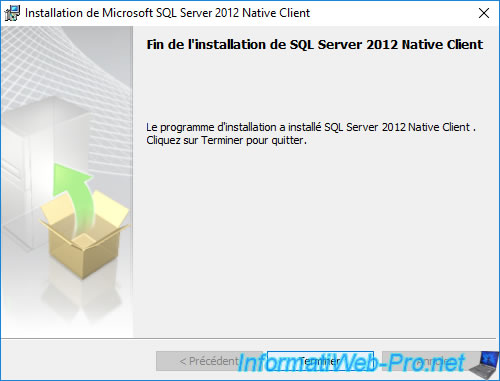
Once the installation is complete, click Finish.
4.6. Configure firewall for remote access to SQL Server
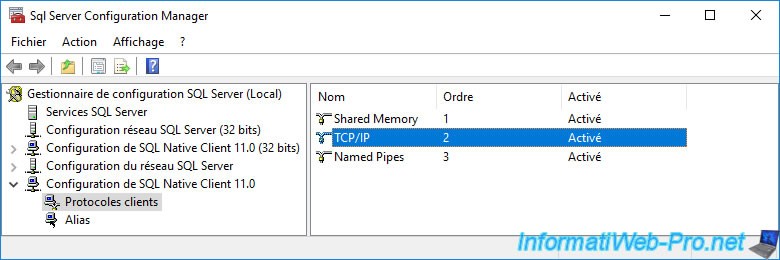
To find out which port to open in the firewall of your server where SQL Server is installed, launch the "SQL Server 2016 Configuration Manager" program found in the Windows Server 2016 start menu.
Then, in the window that opens, go to “SQL Native Client 11.0 Configuration -> Client Protocols” and double-click on “TCP/IP”.
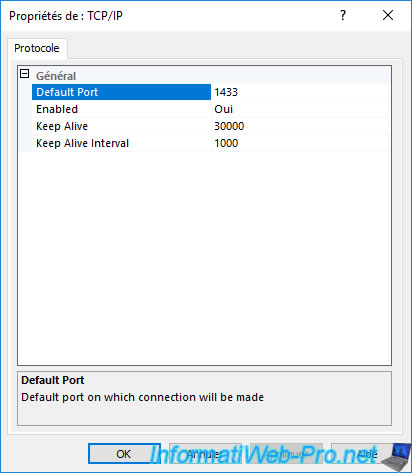
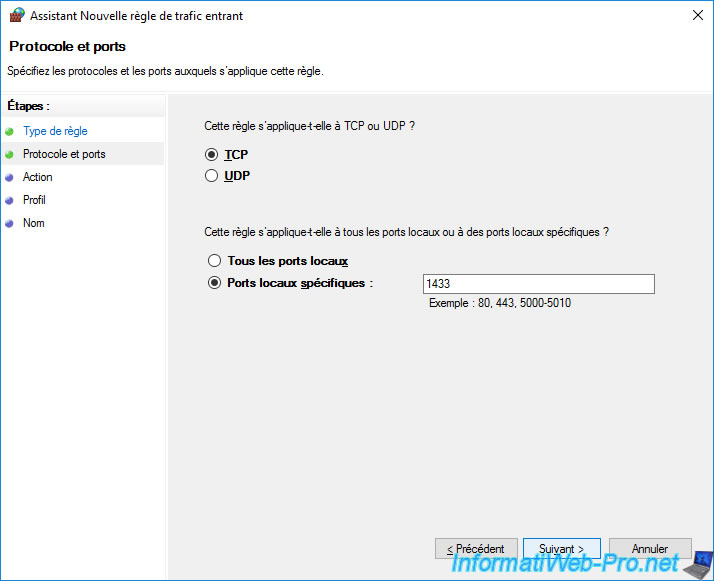
In the "Properties of: TCP/IP" window that appears, look at the value indicated for: Default Port.
By default, this is port 1433 in TCP.
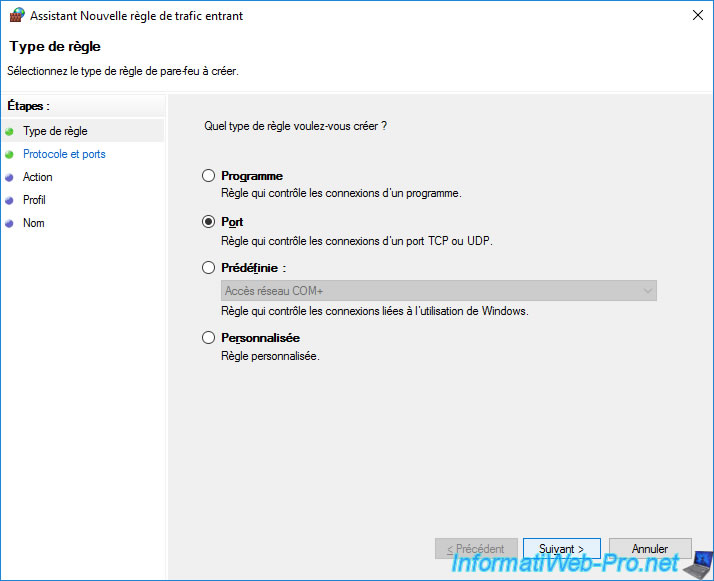
Now go to your server's firewall and right-click "New Rule" on "Inbound Rules".

Select "Port", then click Next.
Select "TCP", then provide the port number (default: 1433) that you saw using the SQL Server 2016 Configuration Manager program.
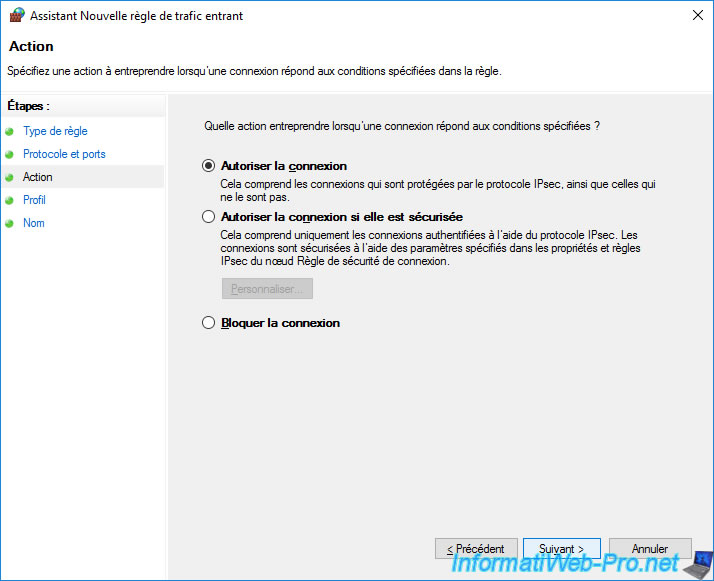
Select “Allow the connection” and click Next.
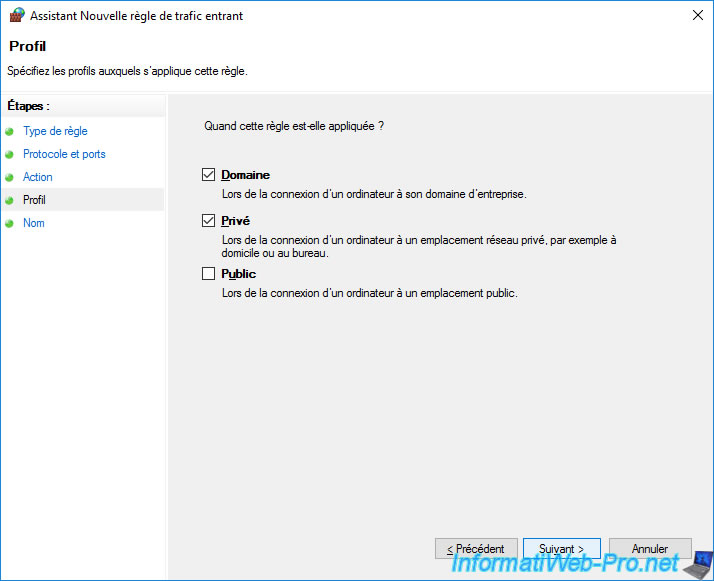
Only check the “Domain” and “Private” boxes for security.
Specify "SQL Server" for the name of this rule and click Finish.

4.7. Configure the ODBC data source for VMware vCenter Server
Before VMware vCenter Server can connect to your SQL Server database, you must first configure a 64-bit ODBC data source using a native SQL client. version 10 or 11.
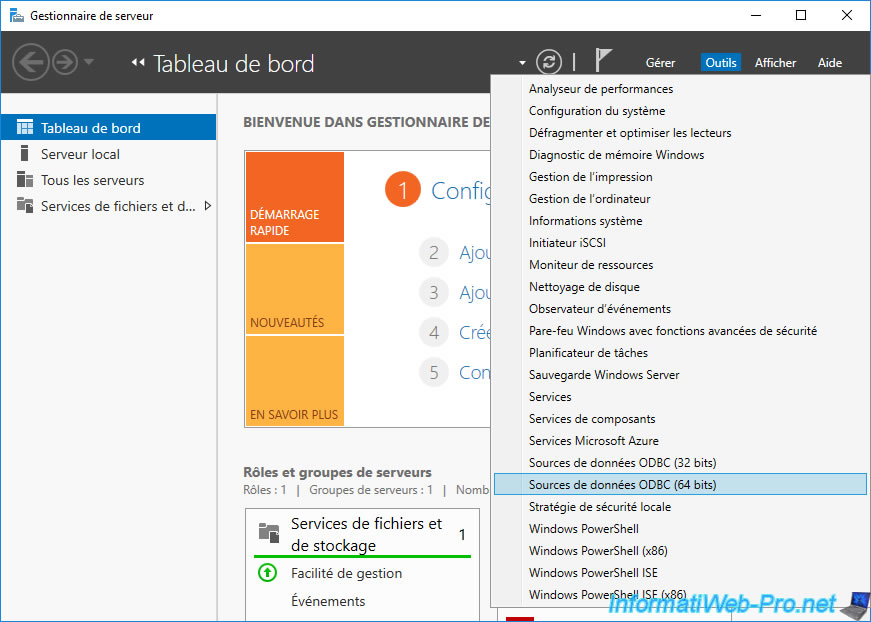
To do this, in the Windows Server 2016 server manager, go to: Tools -> ODBC Data Sources (64-bit).
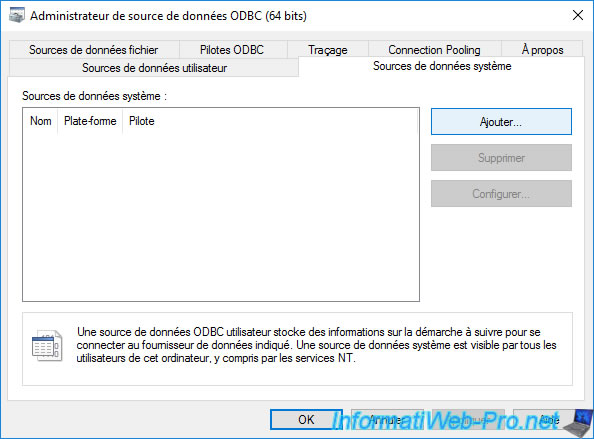
In the "ODBC Data Source Administrator (64-bit)" window that appears, go to the "System Data Sources" tab and click "Add".
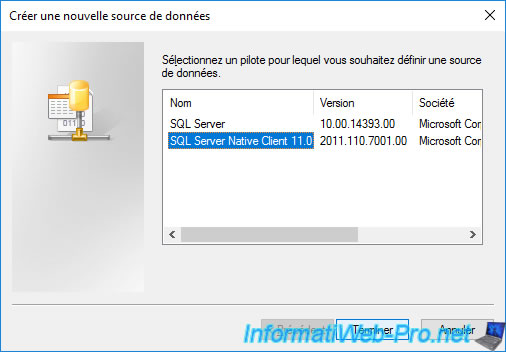
Select the "SQL Server Native Client 11.0" driver you just installed and click Finish.
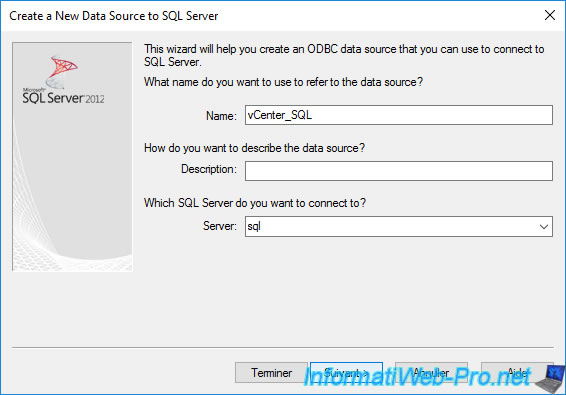
Indicate :
- Name : vCenter_SQL
- Server : the IP address or NETBIOS name of your server where SQL Server is installed
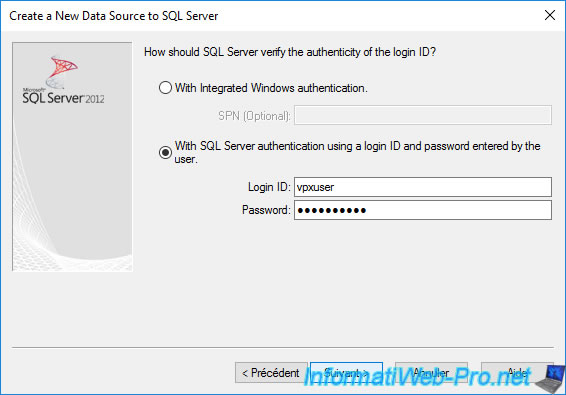
Select "With SQL Server authentication using a login ID and password entered by the user" and provide the username and password created in step "4.4. Configuring the SQL Database for VMware vCenter Server" of this tutorial.
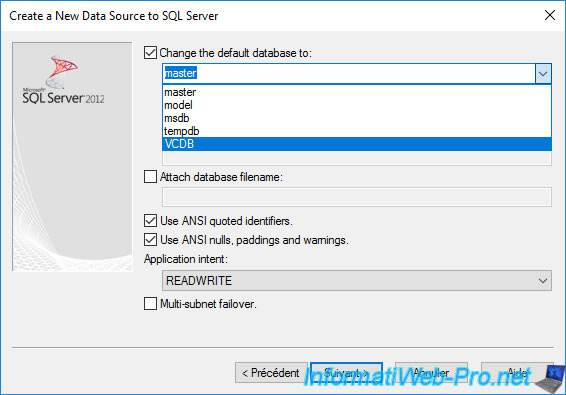
Check the “Change the default database to” box and select the database created previously on your SQL Server.
In our case: VCDB.
Then click Next.
Note: if the list of databases does not appear, make sure you have opened TCP port 1433 for incoming traffic in your SQL Server firewall.
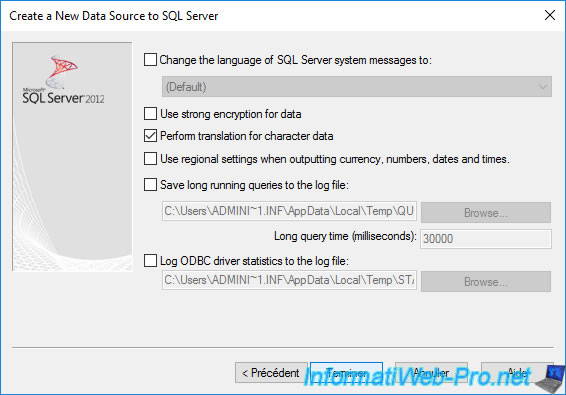
Click Finish.
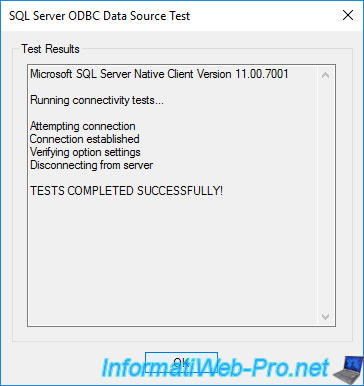
In the "ODBC Microsoft SQL Server Setup" window that appears, click "Test Data Source" to make sure it works.
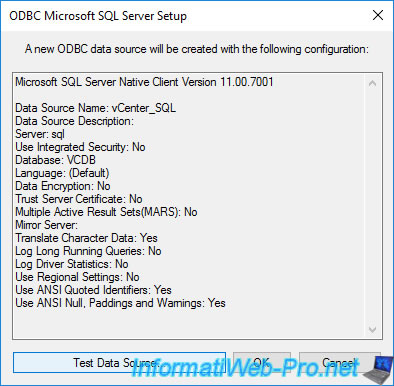
If the message "TESTS COMPLETED SUCCESSFULLY" appears, it is working.
Click OK to close the "ODBC Data Source Administrator (64-bit)" window.

Source : Configure a SQL Server ODBC Connection.
Share this tutorial
To see also
-
VMware 3/13/2024
VMware ESXi 6.7 - Synchronize the clock of ESXi hosts from a time server (NTP)
-
VMware 3/8/2024
VMware ESXi 6.7 - Synchronize the clock of VCSA from a time server (NTP)
-
VMware 7/31/2024
VMware vSphere 6.7 - Add an Active Directory identity source
-
VMware 5/22/2024
VMware vSphere 6.7 - Change default console
No comment