- VMware
- 05 October 2022 at 08:56 UTC
-


To update your VMware ESXi hypervisor, you can use the ISO file of the new version or use an Offline Bundle in zip format.
In this tutorial, we will update our VMware ESXi 6.7.0 hypervisor to 6.7.0 Update 03 thanks to an Offline Bundle.
- Download the update as an Offline Bundle
- Store the update (Offline Bundle) in a datastore
- Enable VMware ESXi SSH server
- Enable maintenance mode
- Install the update from the command line (CLI)
- Update installed
1. Download the update as an Offline Bundle
To begin, you can see that our hypervisor is version 6.7.0 and its Build number is 8169922.
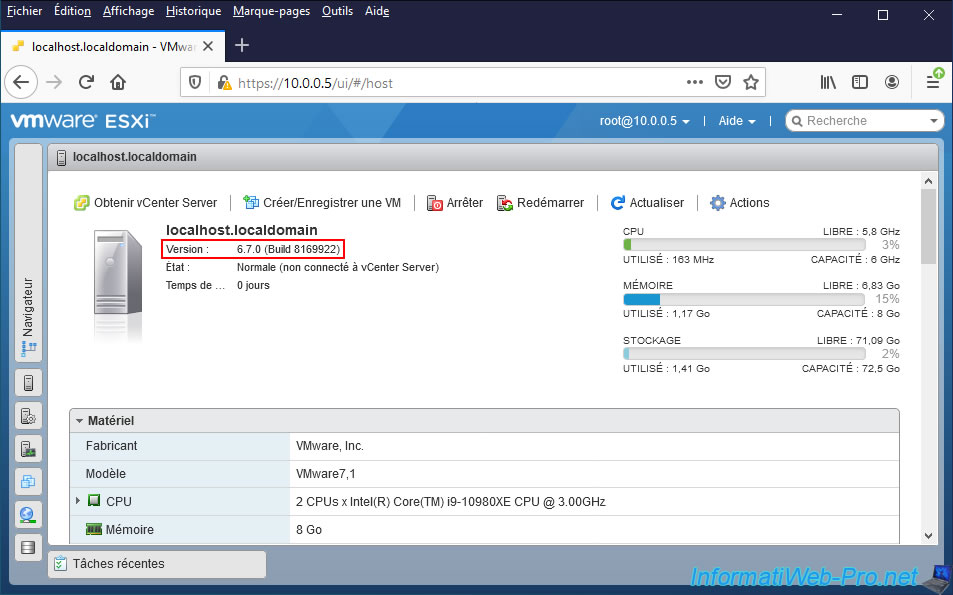
In our case, we are going to update our VMware ESXi hypervisor to version 6.7.0 U3.
Log in to your VMware account and find the download page for the update you want.
In our case, we found this page : VMware vSphere Hypervisor (ESXi) 6.7U3.
If necessary, ask Google, it's easier.
After finding the download page for this update on the VMware website, we can see that this update is available in several formats.
In our case, we need the Offline Bundle for this update.
Except that VMware won't let us download this update from this page. Although we downloaded the evaluation version of VMware ESXi 6.7 with this same VMware account.
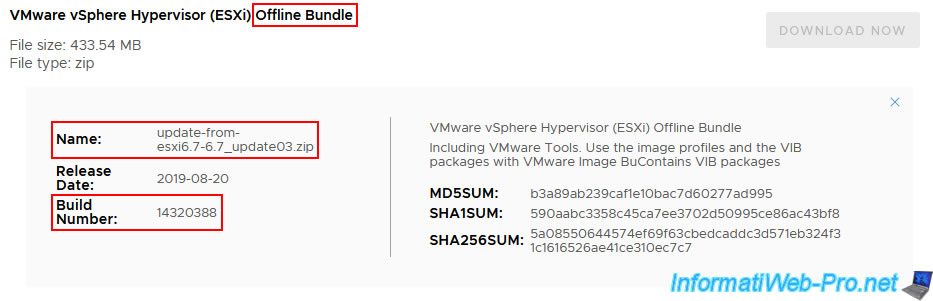
If the "Download now" button is blue in your case, download the "VMware vSphere Hypervisor (ESXi) Offline Bundle" file.
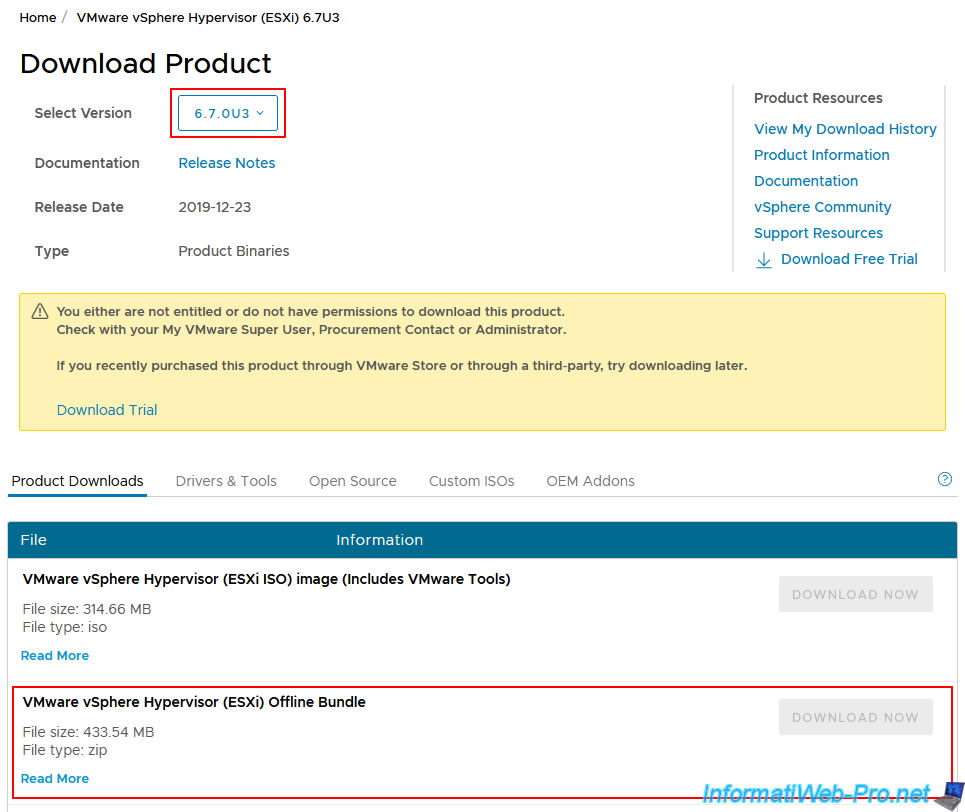
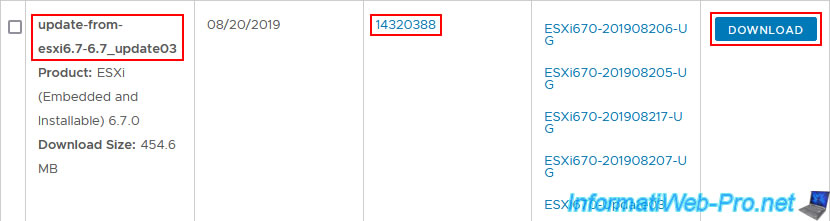
Otherwise, click on the "Read More" link of this download to know the name of the file to download (update-from-esxi6.7-6.7_update03.zip) or its build number (14320388).
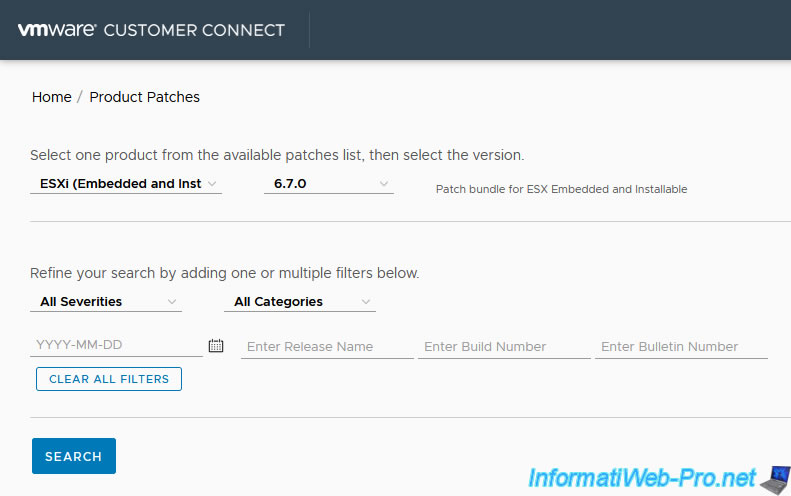
Then, through this alternative page of the official VMware website : Product Pages
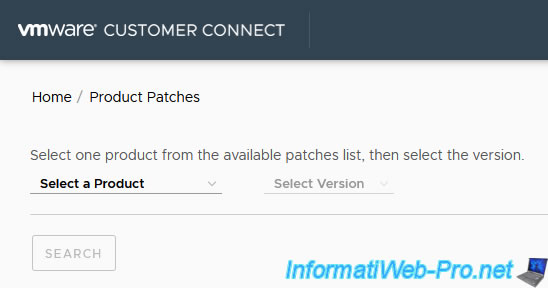
Select "ESXI (Embedded and Installable)" as the product and "6.7.0" as the version, then click Search.
In the list, find the name of the Offline Bundle you want to download by the name of the desired file (without its ".zip" extension) or by its build number.
As expected, you will find the desired update and the "Download" button will be blue.
Click on it.
Si besoin, appuyez sur "CTRL + F" pour faire une recherche dans la page.
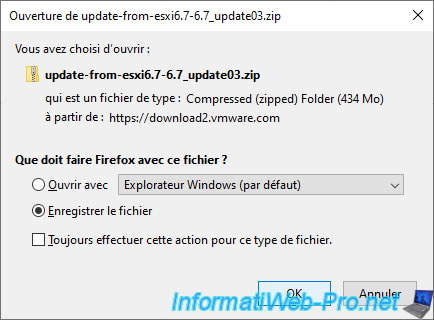
This time, the download is working and you can see the file is downloaded from the VMware server.
2. Store the update (Offline Bundle) in a datastore
To update your VMware ESXi hypervisor using an Offline Bundle, you will need to use the command line.
But for this, you must first send the downloaded Offline Bundle to a datastore of your hypervisor.
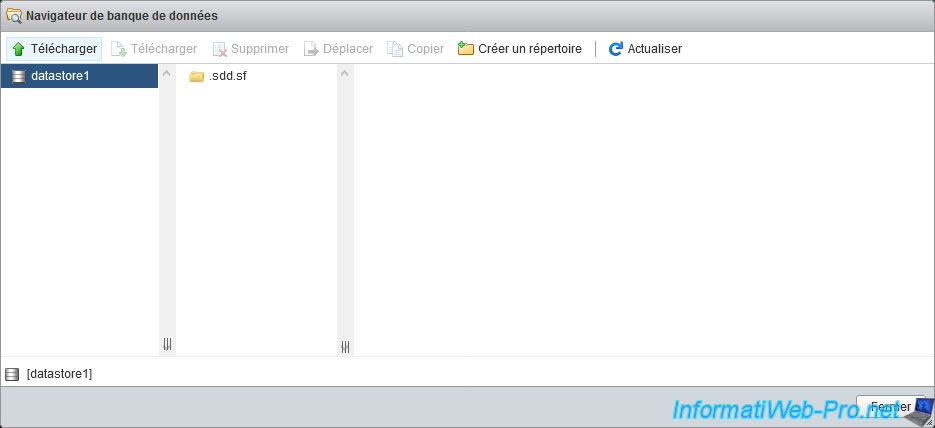
To do this, in the web interface of your hypervisor, go to "Storage -> Datastores" and click on "Datastore browser".
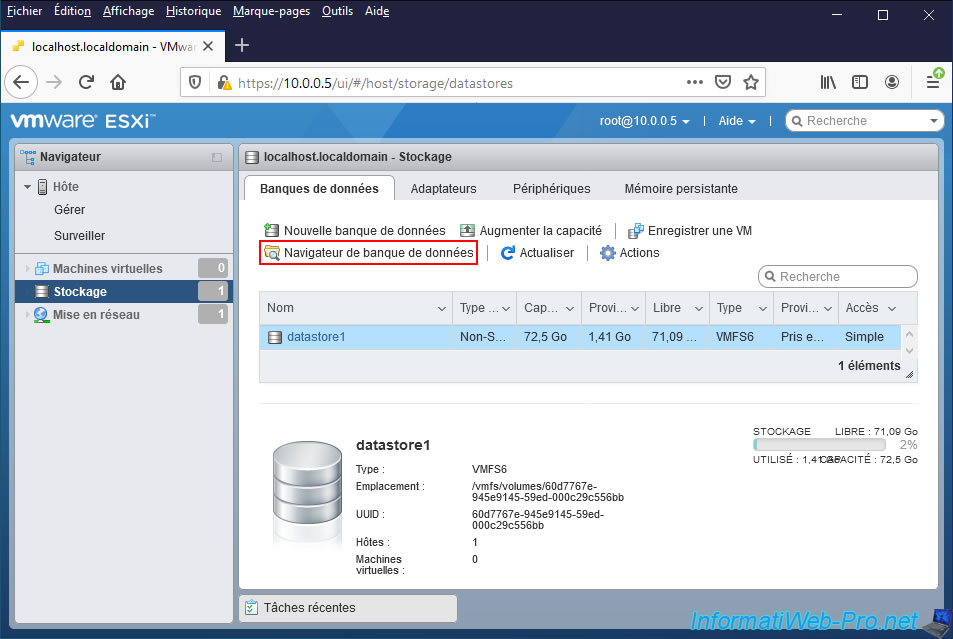
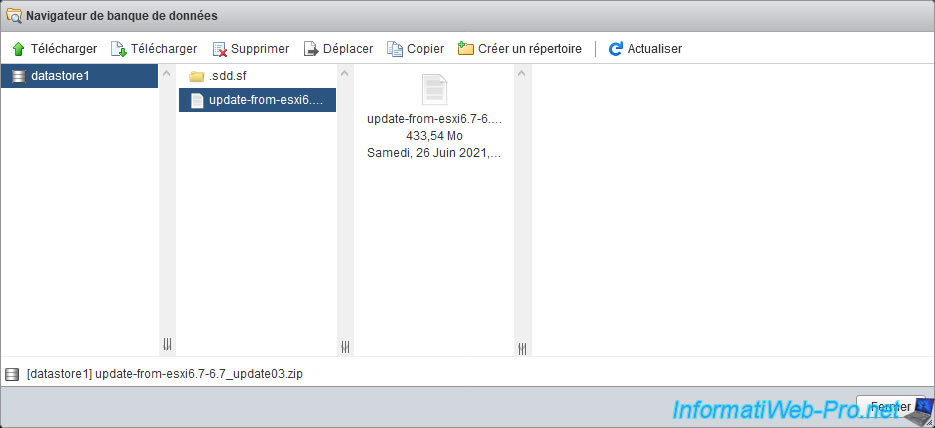
Select the datastore and folder where you want to store this update zip file and click "Upload".
In our case, we are going to store it at the root of our "datastore1" datastore (created by default by the VMware ESXi installer).
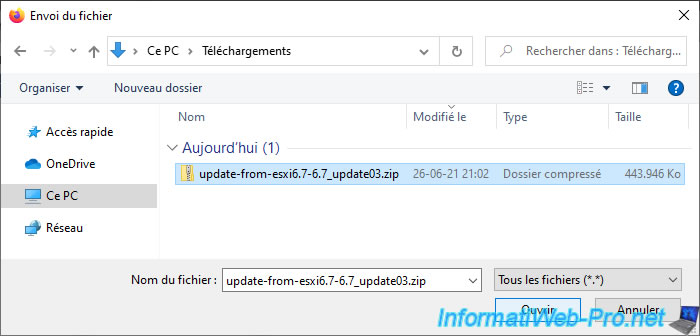
Select the previously downloaded zip file and click Open.
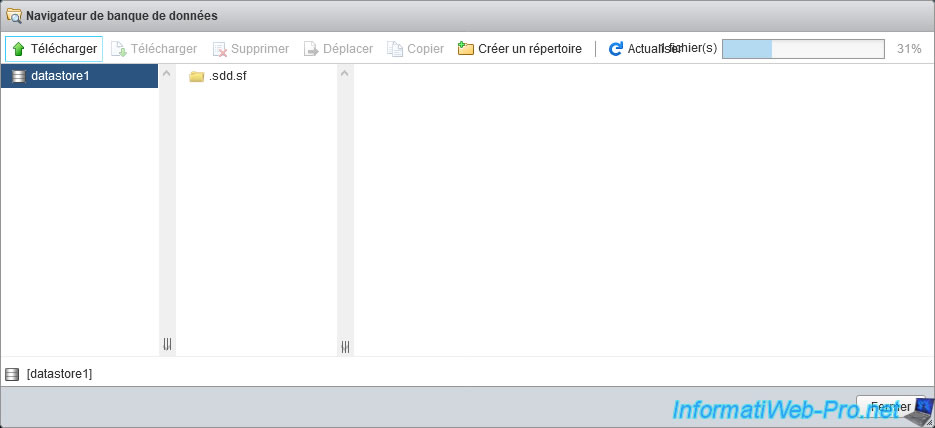
Wait while the zip file is sent to your datastore.
Our Offline Bundle is now in our datastore1.
3. Enable VMware ESXi SSH server
To be able to manage your VMware ESXi hypervisor remotely from the command line, the SSH protocol must be enabled on it.
To do this, go to "Host -> Manage -> Services", select the "TSM-SSH" service and click "Start".

4. Enable maintenance mode
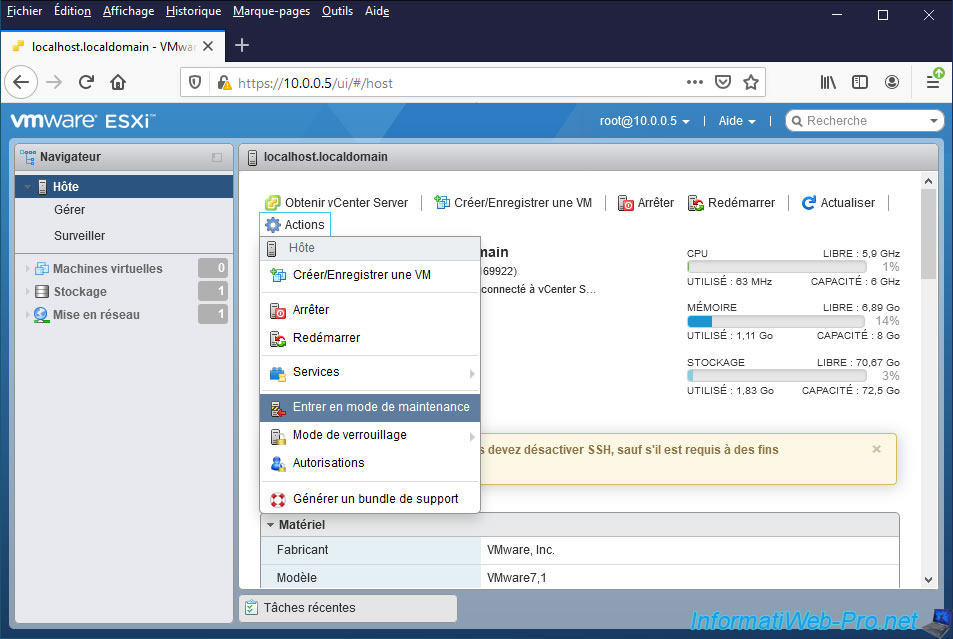
Before updating your VMware ESXi hypervisor, it's important to put it in maintenance mode to prevent virtual machines from running on it or some virtual machines from starting during the update of it.
To do this, in "Host", click on "Actions -> Enter maintenance mode".
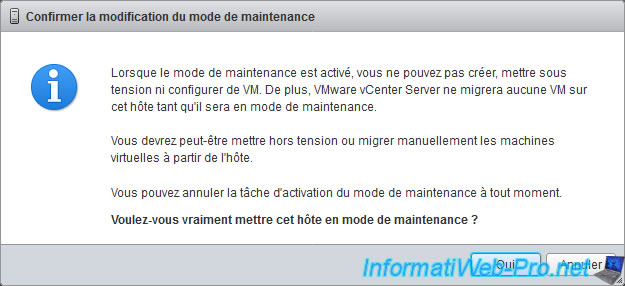
Confirm the maintenance of your VMware ESXi hypervisor.
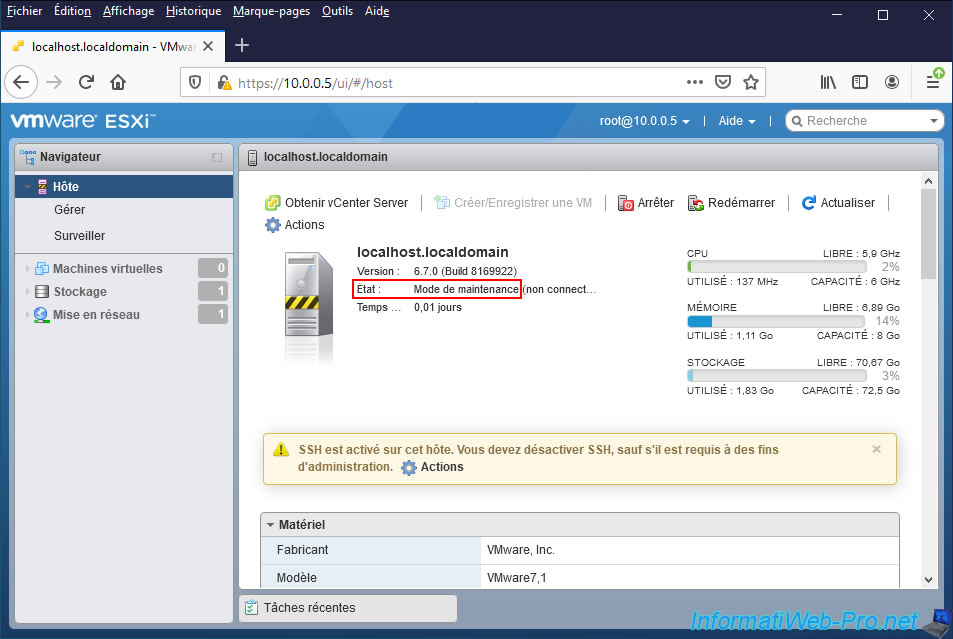
Your hypervisor is now under maintenance.
5. Install the update from the command line (CLI)
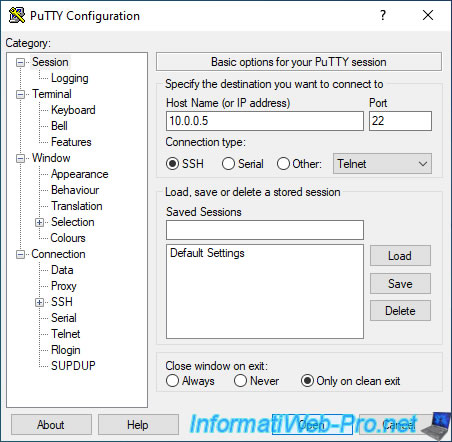
To start, connect in SSH to your VMware ESXi server using PuTTY (or any other SSH client).
Once connected to your server, go to the "/vmfs/volumes" folder where the datastores are located.
Bash
cd /vmfs/volumes
List the existing datastores.
Bash
ls
In our case, we will find in particular our "datastore1" datastore and its identifier (UUID).
Plain Text
60d7767e-945e9145-59ed-000c29c556bb
...
datastore1
Go to the datastore where you stored your update zip file (or "Offline Bundle").
In our case, it's in our datastore : datastore1.
Bash
cd datastore1
Check that the zip file is there.
Bash
ls
Plain Text
update-from-esxi6.7-6.7_update03.zip
Then, start the installation of this update by specifying the full path to this zip file.
Even if you are already in the correct folder. Indeed, otherwise, errors may occur during installation.
Bash
esxcli software vib install -d /vmfs/volumes/datastore1/update-from-esxi6.7-6.7_update03.zip
Wait while the update is installed, then, once installed, this will be displayed :
Plain Text
Installation Result
Message: The update completed successfully, but the system needs to be rebooted for the changes to be effective.
Reboot Required: true
VIBs Installed: ...
As you can see, the update installed correctly :
Plain Text
Installation Result
Message: The update completed successfully, ...
Finally, restart your server as requested using the command : reboot.
Bash
reboot
6. Update installed
Once the server is restarted, you will see that VMware ESXi is now in version 6.7.0 Update 3 (Build 14320388).

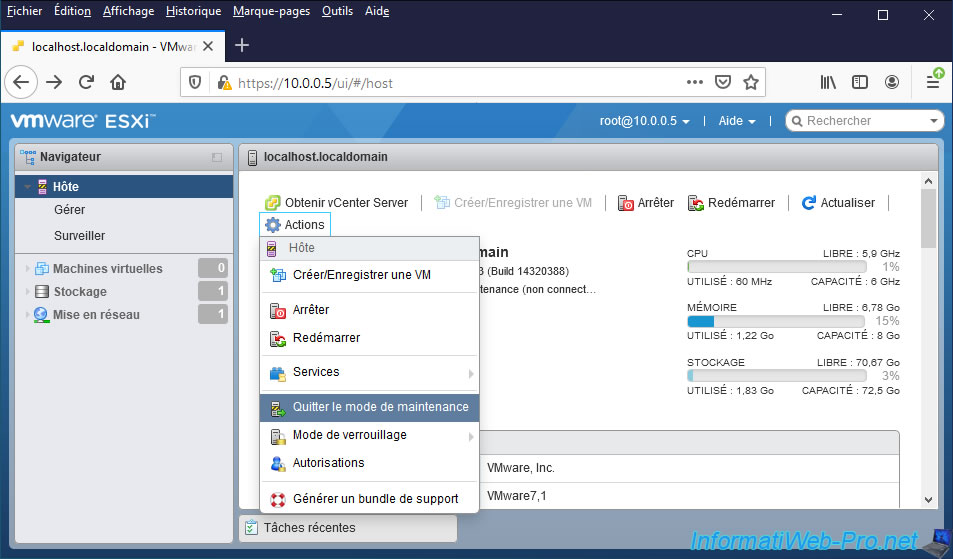
If the update went well, don't forget to disable the maintenance mode by clicking on : Actions -> Exit maintenance mode.
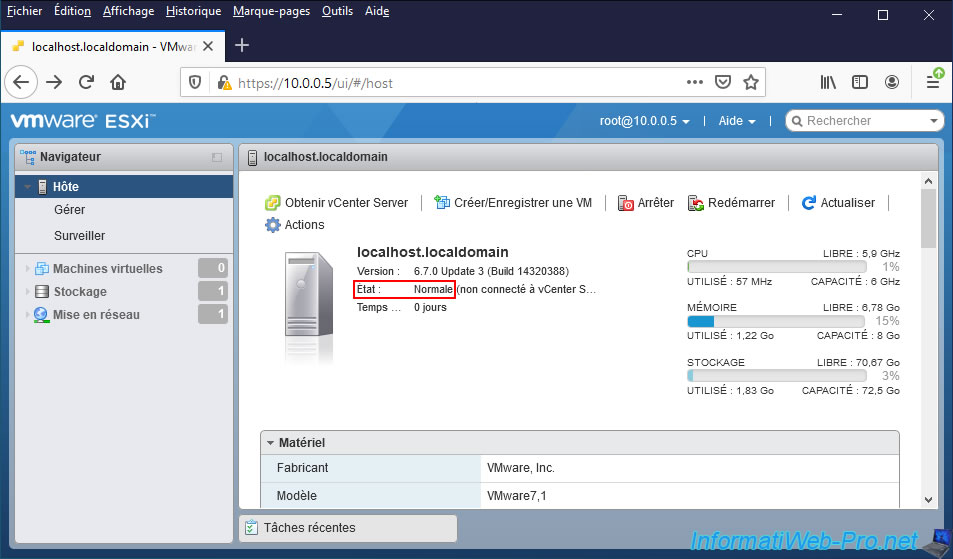
Now, his status is "Normal" again.
Share this tutorial
To see also
-

VMware 5/25/2022
VMware ESXi 6.0 - Install the VMware Host Client web client
-

VMware 5/27/2022
VMware ESXi 6.5 - Add a network driver in the installation ISO
-

VMware 1/27/2023
VMware ESXi 6.7 - Enable virtualization-based security (VBS)
-

VMware 12/2/2022
VMware ESXi 6.7 - Install and use the VMRC console on Linux
You must be logged in to post a comment