- VMware
- VMware vCenter Server (VCSA), VMware vSphere
- 24 April 2024 at 13:36 UTC
-

Previously, we showed you how to extend a datastore on a disk that was partially used when it was created.
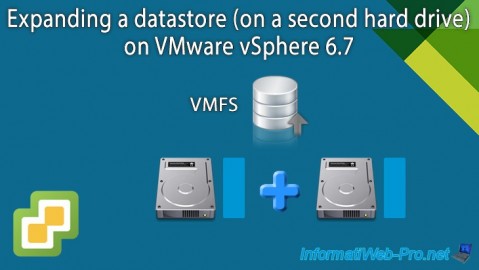
However, you can also expand a datastore by adding a second physical disk to it as you will see below.
This is very convenient when you create a datastore on an iSCSI disk, because you can ask the storage array administrator to increase the size of your iSCSI disk.
Then, expand your datastore on the added space on this iSCSI disk.
1. Create a VMFS datastore
To get started, select your VMware ESXi host and click: Actions -> Storage -> New Datastore.
Note: for more information regarding creating a datastore from the VMware vSphere Client, refer to our tutorial "VMware vSphere 6.7 - Create a datastore".
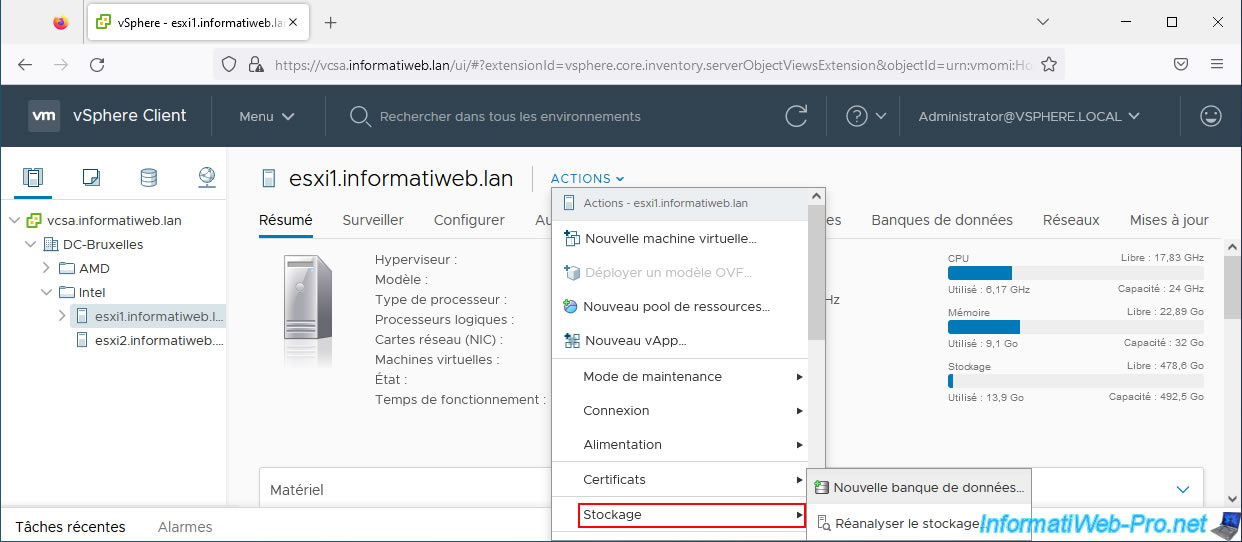
In the "New Datastore" wizard that appears, select "VMFS".
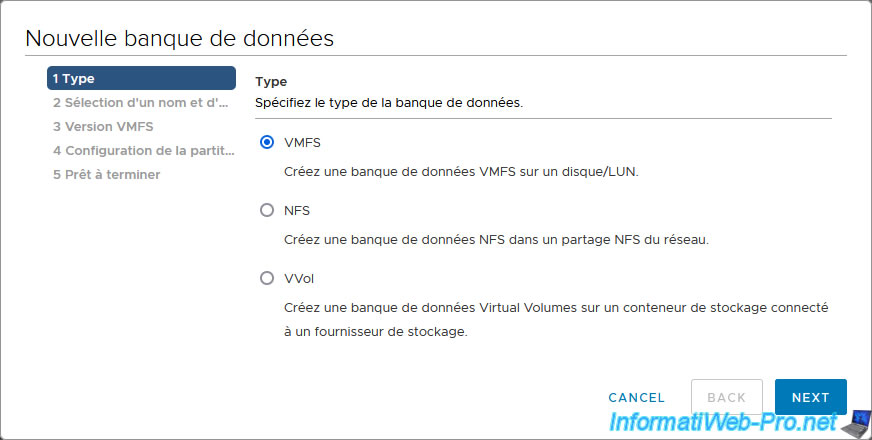
Enter a name for this datastore and select the disk (hard disk, SSD or iSCSI disk, for example) on which you want to create it.
In our case, we will use a 200 GB local disk.
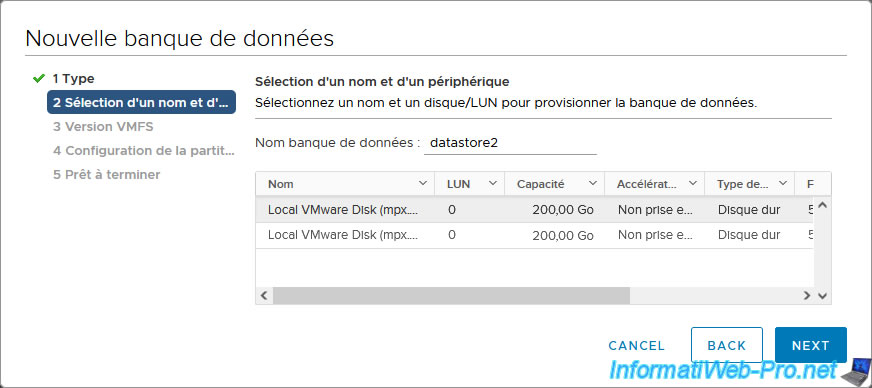
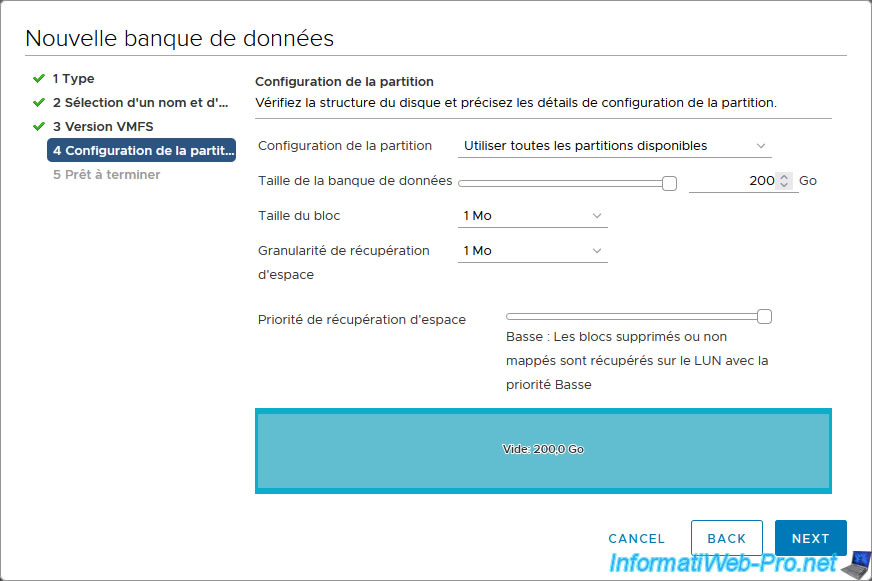
By default, all available space on the selected disk will be used.
Just click Next.
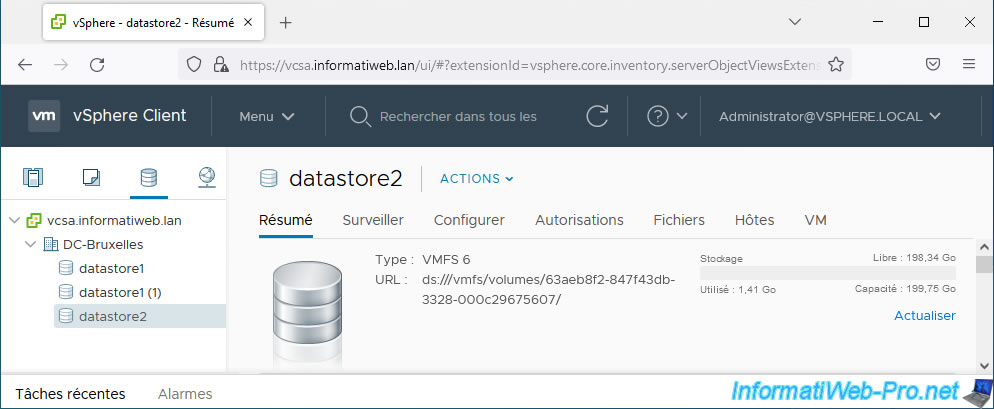
Your datastore has been created.
In our case, we therefore have a capacity of approximately 200 GB.
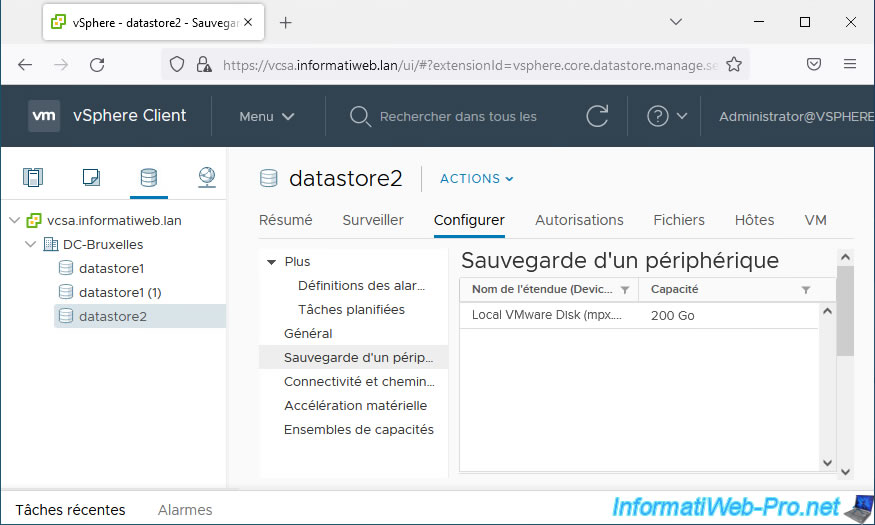
Go to the "Configure" tab of your datastore and go to the "Device Backing" section.
As you can see, this datastore is made up of a single 200 GB disk at the moment.
2. Extend the datastore onto a 2nd disk
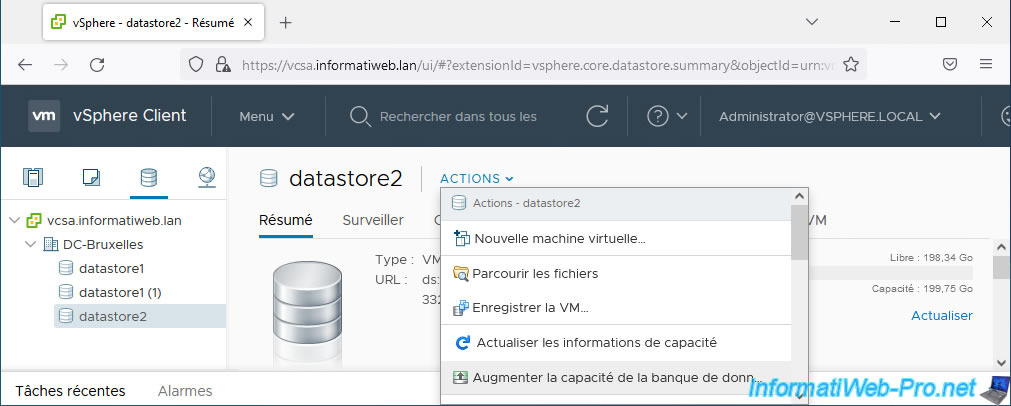
To expand your datastore with a 2nd disk, select it and click: Actions -> Increase Datastore Capacity.
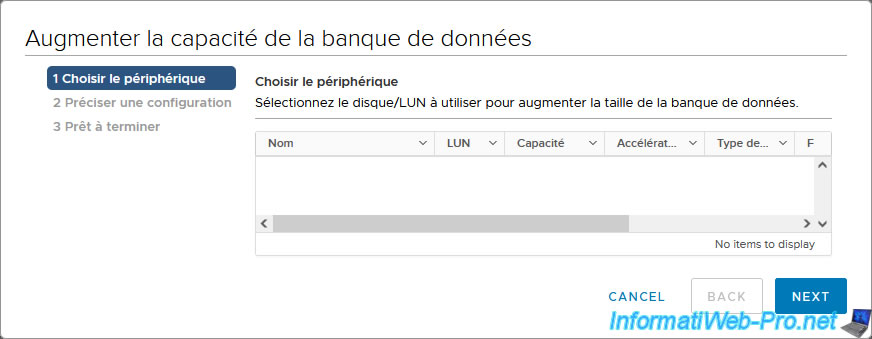
The "Increase Datastore Capacity" wizard will appear.
However, by default, available disks will not appear.
Indeed, by default, filters are applied by vCenter Server (as explained in our previous tutorial cited at the beginning of this tutorial).
To allow your datastore to grow, you will need to modify vCenter Server's advanced settings.
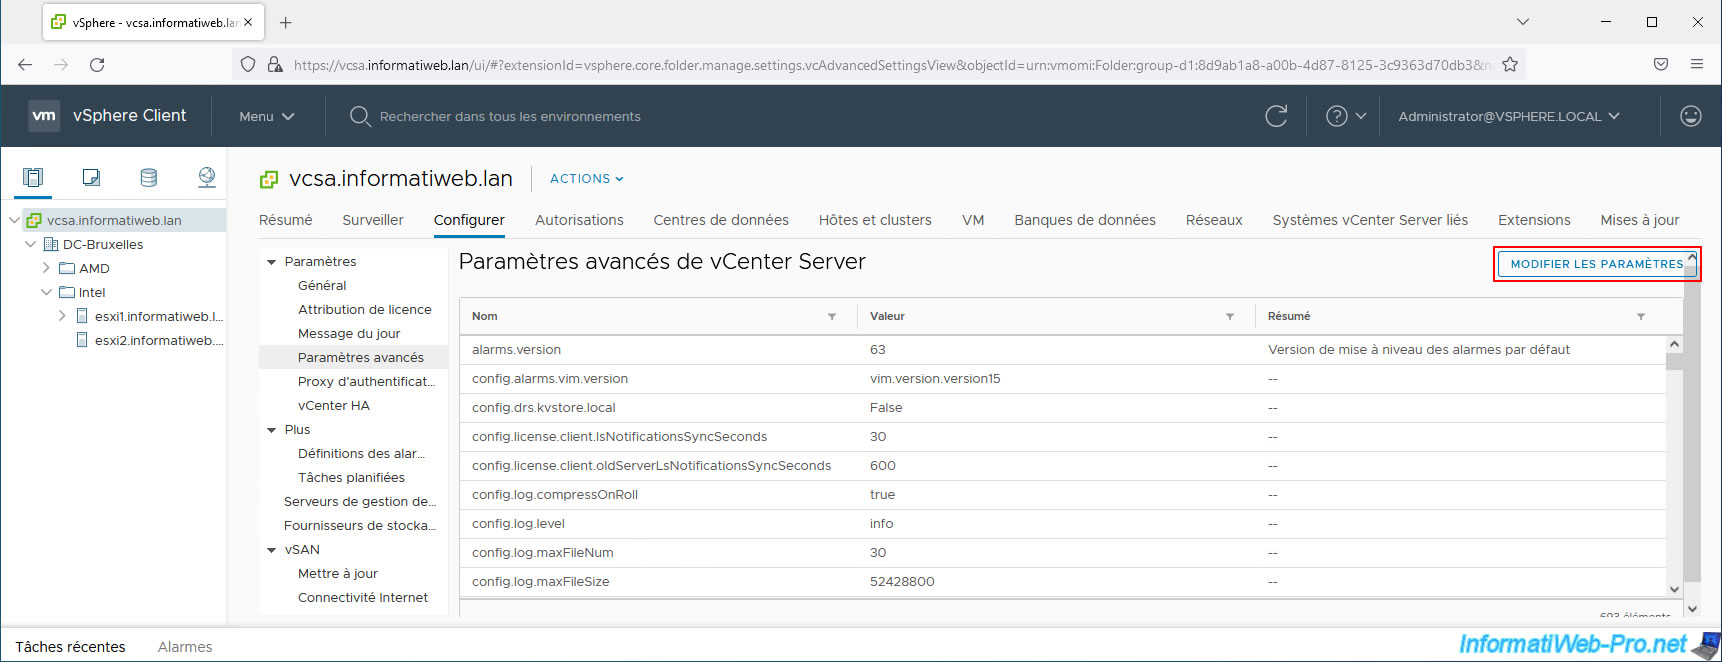
To do this, select your vCenter Server instance (VCSA) and go to: Configure -> Settings -> Advanced vCenter Server settings.
Then click: Edit Settings.
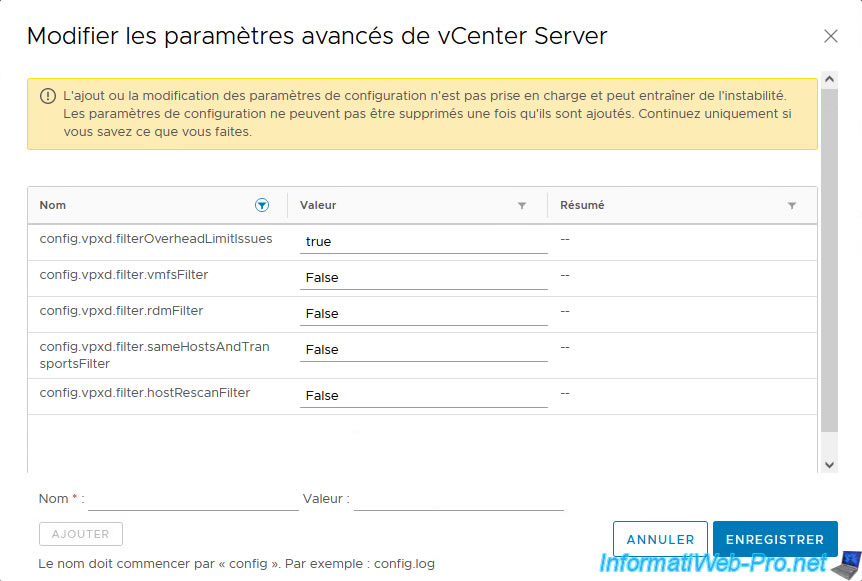
In the "Edit vCenter Server Advanced Settings" window that appears, add the following advanced settings one by one:
- config.vpxd.filter.vmfsFilter : False
- config.vpxd.filter.rdmFilter : False
- config.vpxd.filter.sameHostsAndTransportsFilter : False
- config.vpxd.filter.hostRescanFilter : False
Then click "Save".
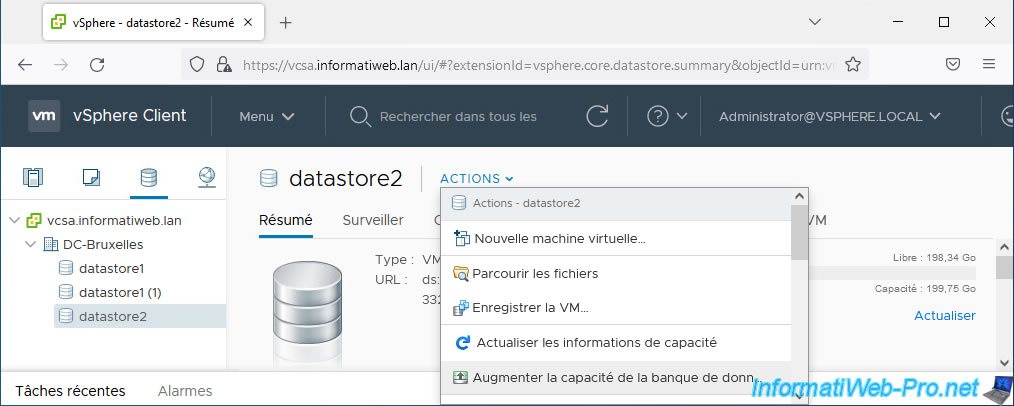
Now that the filters have been disabled, select the datastore you were trying to expand and click: Actions -> Increase Datastore Capacity.
Now, your second disk appears.
Select it and click Next.
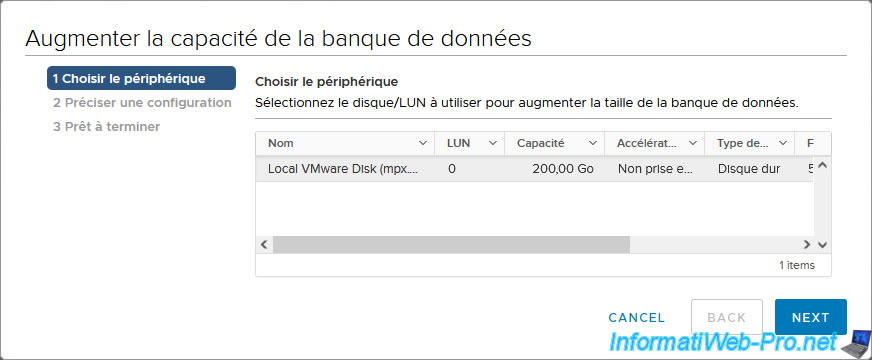
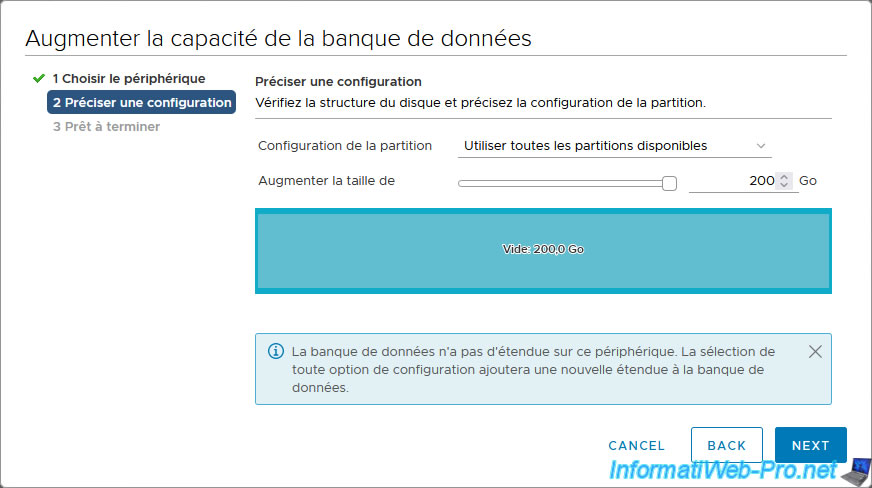
By default, all available space will be used.
Click Next.
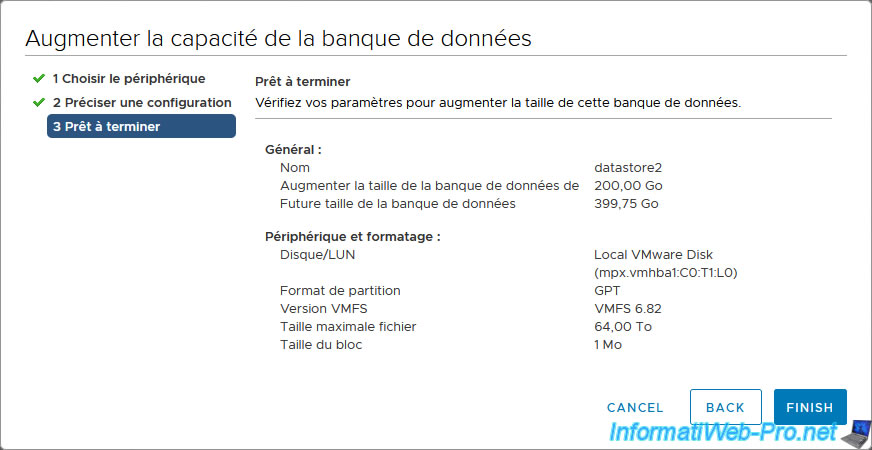
A summary is displayed.
Click Finish.
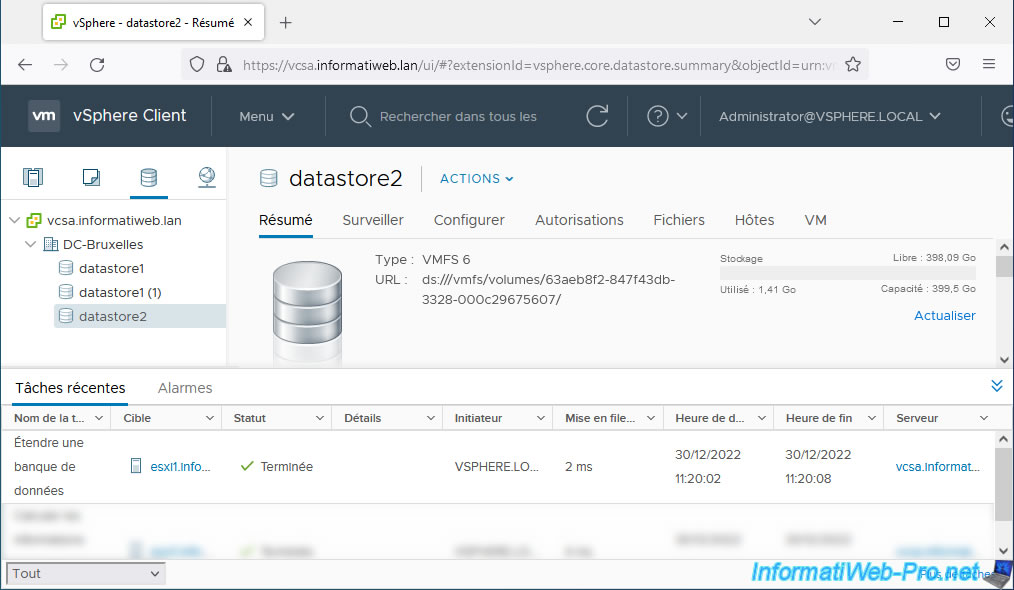
As you can see in the "Summary" tab of your datastore, its capacity (size) has increased.
In our case, its capacity increased from around 200 GB to 400 GB.
In the list of recent tasks, you will see the task "Extend a datastore" appear.
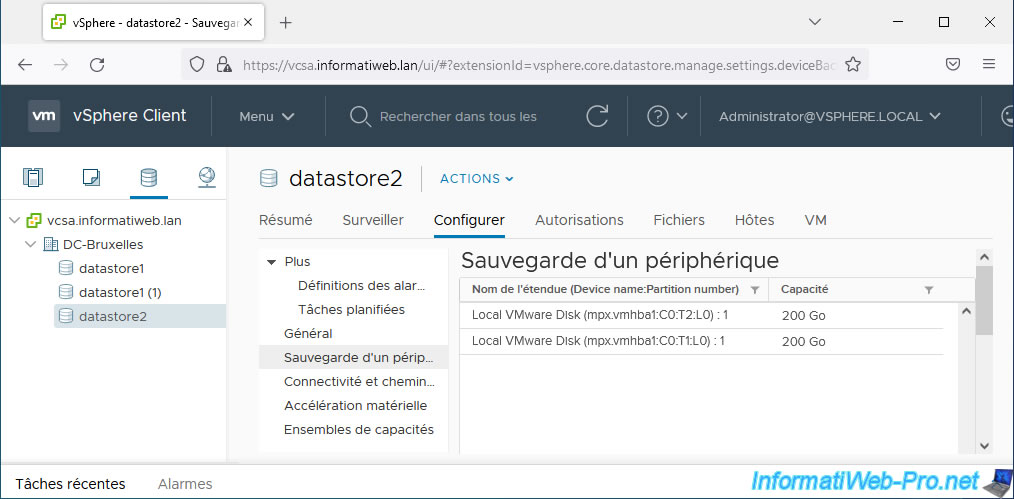
Go to "Configure -> Device Backing" and you will see that your datastore is now made up of 2 disks.
In our case: 2 disks of 200 GB each.
Share this tutorial
To see also
-

VMware 9/23/2022
VMware ESXi 6.7 - Make virtual machines unique
-

VMware 4/28/2023
VMware ESXi 6.7 - Use an USB network adapter
-

VMware 12/13/2024
VMware vSphere 6.7 - Create a vApp
-
VMware 2/16/2024
VMware vSphere 6.7 - Install vCenter Server with integrated database

You must be logged in to post a comment