- VMware
- 31 May 2024 at 07:55 UTC
-


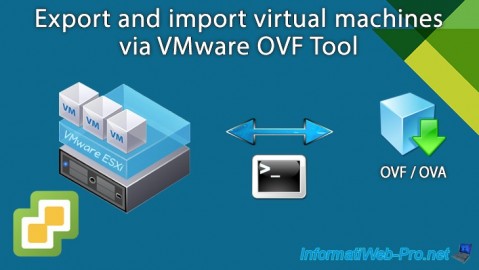
Although you can export and import virtual machines or vApps from the "vSphere Client" web interface of your VMware vCenter Server, it may be interesting to know how to do it also from the command line using the VMware OVF Tool.
Especially since depending on the virtual machine or vApp to be imported or exported in OVF / OVA format, problems may arise when you launch its export or import from your favorite web browser.
Which is much rarer with the command line tool.
This command line tool is therefore very interesting, because it offers better stability and therefore better results for your exports and/or imports of virtual machines or vApps from or to your VMware vCenter Server (or VCSA).
- Download VMware OVF Tool (ovftool)
- Get information about your VMware vCenter Server (VCSA) objects
- Export a virtual machine in OVF format from your VMware vCenter Server using the VMware OVF Tool (ovftool)
- Import a virtual machine in OVF format to your VMware vCenter Server using the VMware OVF Tool (ovftool)
- Export a virtual machine in OVA format from your VMware vCenter Server using the VMware OVF Tool (ovftool)
- Import a virtual machine in OVA format to your VMware vCenter Server using the VMware OVF Tool (ovftool)
1. Download VMware OVF Tool (ovftool)
To download VMware OVF Tool, go to our "VMware OVF Tool" page and click the "Download" button.
You will be redirected to the new "VMware OVF Tool" download page on the Broadcom website.

In the "Downloads" section of this page, you can download the zip version of this tool for Windows and Linux in 32-bit (x86) and 64-bit (x64) for free.
Be sure to click on one of the buttons in the red box below, otherwise you may not be able to download this tool.
Indeed, only the zip version of this tool is available for free (requires being connected with a VMware account, even if you do not have any VMware product license).

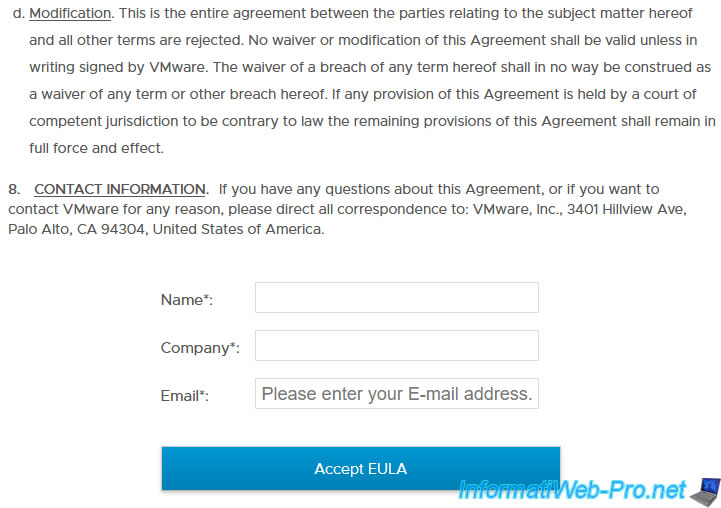
When you click on one of the "Download" buttons above, VMware will ask you to accept their license agreement.
Provide your name, company name, and VMware account email address and click: Accept EULA.
If you don't have a company and just want to learn how to use VMware products, enter "None" (or whatever you want) for the "Company" box.
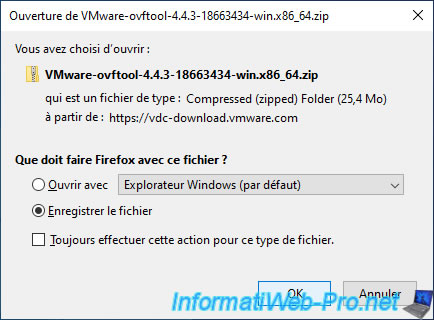
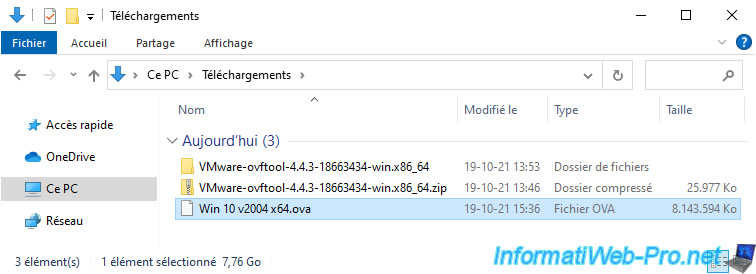
The file offered for download will look like this: VMware-ovftool-4.4.3-18663434-win.x86_x64.zip.
Once the tool has been downloaded in zip version, decompress the downloaded file by right-clicking "Extract" on it.

Enter the created folder, then the "ovftool" folder.
In this folder, you will find the "ovftool.exe" program that you will use in the rest of this tutorial.

2. Get information about your VMware vCenter Server (VCSA) objects
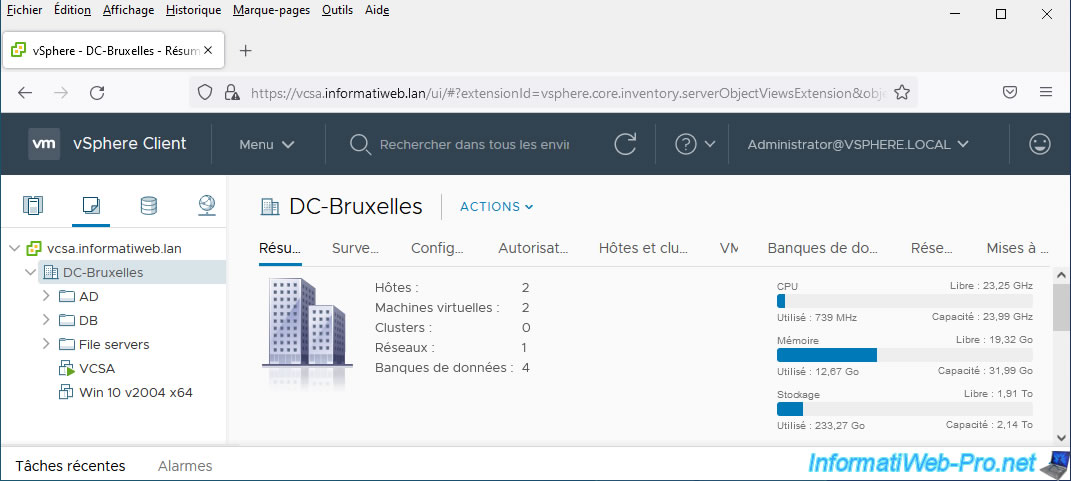
To export or import virtual machines or vApps from or to your VMware vCenter Server (VCSA), it is important to understand how the path of the different visible objects (data centers, folders, virtual machines, ...) is structured in your server inventory.
To do this, the easiest way is to connect to the root of your server from ovftool so that this tool offers you the list of possible options for the location you are trying to access on your server.
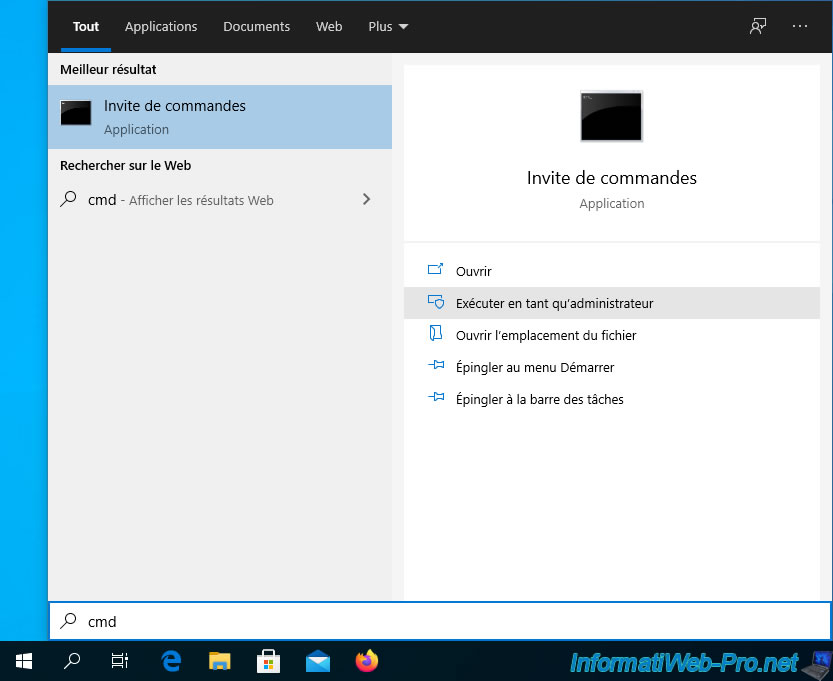
To get started, open a command prompt (cmd.exe) as administrator.
Then, in the command prompt that appears, move to the folder where the "ovftool.exe" file is located.
Batch
cd C:\Users\Administrator\Downloads\VMware-ovftool-4.4.3-18663434-win.x86_64\ovftool
Next, log in to the root of your VMware vCenter Server using the command below.
Parameters used:
- --noSSLVerify: allows you to disable verification of the validity of the SSL certificate used on your VMware vCenter Server.
This is necessary when you try to connect to your server using its IP address instead of its domain name or when this server is protected with a self-signed certificate (which by definition is therefore not secure). - "vi://10.0.0.104/": allows you to access the root of your VMware vCenter Server so that the ovftool tool tells you what you can access on your server.
Batch
ovftool.exe --noSSLVerify "vi://10.0.0.104/"
Once the above command is executed, the ovftool tool will ask for your login credentials for the desired VMware vCenter Server.
In our case, we will use the "administrator@vsphere.local" account created by default.
Plain Text
Enter login information for source vi://10.0.0.104/
   Username:
Once the authentication is successful, the ovftool tool will tell you that the target object (in this case: the server root) is not a valid object type and it will therefore offer you a series of values to complete the path you indicated in your order.
In our case, it suggests that we complete the path by indicating the name of our data center "DC-Brussels" present at the root of our VMware vCenter Server.
Plain Text
Enter login information for source vi://10.0.0.104/
Username: administrator@vsphere.local
Password: ***********
Error: Found wrong kind of object (Folder). Possible completions are:
  DC-Brussels/
So, we add the name of this data center in the parameter path "vi://server name or IP/" and we run the ovftool command again.
Batch
ovftool.exe --noSSLVerify "vi://10.0.0.104/DC-Brussels"
Refill your vCenter Server credentials and ovftool gives you new values for the new location you are trying to access.
This time, it tells us that we are in a data center and that the available values are:
- vm: to access the list of virtual machines and vApps available at the root of this data center.
In other words, the list of virtual machines and vApps that you could see for this data center by going to the "VMs and Templates" tab of your VMware vCenter Server inventory. - host: to access the list of VMware ESXi hosts (also called "computing resources" in the various vCenter Server wizards)
Plain Text
...
Error: Found wrong kind of object (Datacenter). Possible completions are:
  vm/
  host/
We add the "vm" option to access the list of virtual machines and vApps present in this data center.
Batch
ovftool.exe --noSSLVerify "vi://10.0.0.104/DC-Bruxelles/vm"
This time, ovftool tells us that we are in a folder and asks us to complete it by indicating:
- the name of a virtual machine present at the root of this data center: Win 10 v2004 x64 or VCSA.
- the name of a vApp: RDS_vApp.
- the name of a folder present in this data center, whose name therefore ends with a "/": "AD/", "DB/" or "File servers/".
Plain Text
...
Error: Found wrong kind of object (Folder). Possible completions are:
  RDS_vApp
  Win 10 v2004 x64
  VCSA
  AD/
  DB/
  File servers/
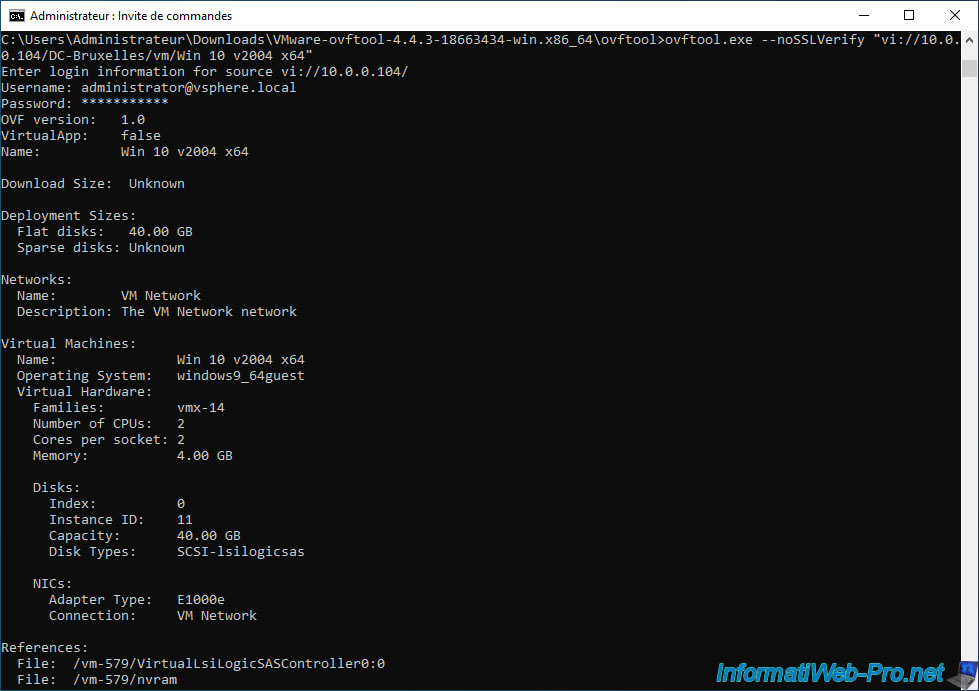
Finally, we can for example obtain information about our "Win 10 v2004 x64" virtual machine by typing this:
Batch
ovftool.exe --noSSLVerify "vi://10.0.0.104/DC-Brussels/vm/Win 10 v2004 x64"
Plain Text
...
OVF version:   1.0
VirtualApp:    false
Name:          Win 10 v2004 x64
...
Virtual Machines:
  Name:               Win 10 v2004 x64
  Operating System:   windows9_64guest
  Virtual Hardware:
    Families:         vmx-14
    Number of CPUs:   2
    Cores per socket: 2
    Memory:           4.00 GB
...
A little earlier, the ovftool tool had also told us that a "host" option was available.
If you add this option to the path you want to access, you will be able to find the list of VMware ESXi hosts available on your server:
Batch
ovftool.exe --noSSLVerify "vi://10.0.0.104/DC-Brussels/host"
Which, in our case, tells us the name of 2 folders:
- Intel
- AMD
Note that we created these folders to separate hosts with an Intel processor and those with an AMD processor for compatibility reasons (mainly with vMotion).
Plain Text
...
Error: Found wrong kind of object (Folder). Possible completions are:
  Intel/
  AMD/
To know the list of hosts available in this "Intel" folder, we add the name of this folder behind the "host" option:
Batch
ovftool.exe --noSSLVerify "vi://10.0.0.104/DC-Brussels/host/Intel"
This time, the ovftool tool shows us the list of VMware ESXi hosts located in this folder:
Plain Text
...
Error: Found wrong kind of object (Folder). Possible completions are:
  esxi1.informatiweb.lan/
  esxi2.informatiweb.lan/
3. Export a virtual machine in OVF format from your VMware vCenter Server using the VMware OVF Tool (ovftool)
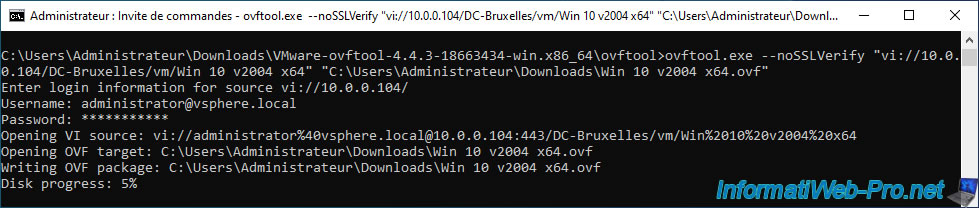
To export a virtual machine from your VMware vCenter Server to your computer using the VMware OVF Tool (ovftool), use the command below.
Parameters used:
- --noSSLVerify: allows you not to check the validity of the vCenter Server SSL certificate.
- "vi://10.0.0.104/DC-Brussels/vm/Win 10 v2004 x64": domain name or IP address of the VMware vCenter Server (or VCSA) followed by the path of the object corresponding to the virtual machine you are want to export.
- "C:\Users\Administrator\Downloads\Win 10 v2004 x64.ovf": path and name of the file under which the virtual machine will be exported.
In this case, the virtual virtual machine will be exported in OVF format with the vmdk, ... files associated with it.
Batch
ovftool.exe --noSSLVerify "vi://10.0.0.104/DC-Brussels/vm/Win 10 v2004 x64" "C:\Users\Administrator\Downloads\Win 10 v2004 x64.ovf"
Which will display this once you enter your credentials again:
Plain Text
Enter login information for source vi://10.0.0.104/
Username: administrator@vsphere.local
Password: ***********
Opening VI source: vi://administrator%40vsphere.local@10.0.0.104:443/DC-Brussels/vm/Win%2010%20v2004%20x64
Opening OVF target: C:\Users\Administrator\Downloads\Win 10 v2004 x64.ovf
Writing OVF package: C:\Users\Administrator\Downloads\Win 10 v2004 x64.ovf
Disk progress: 5%
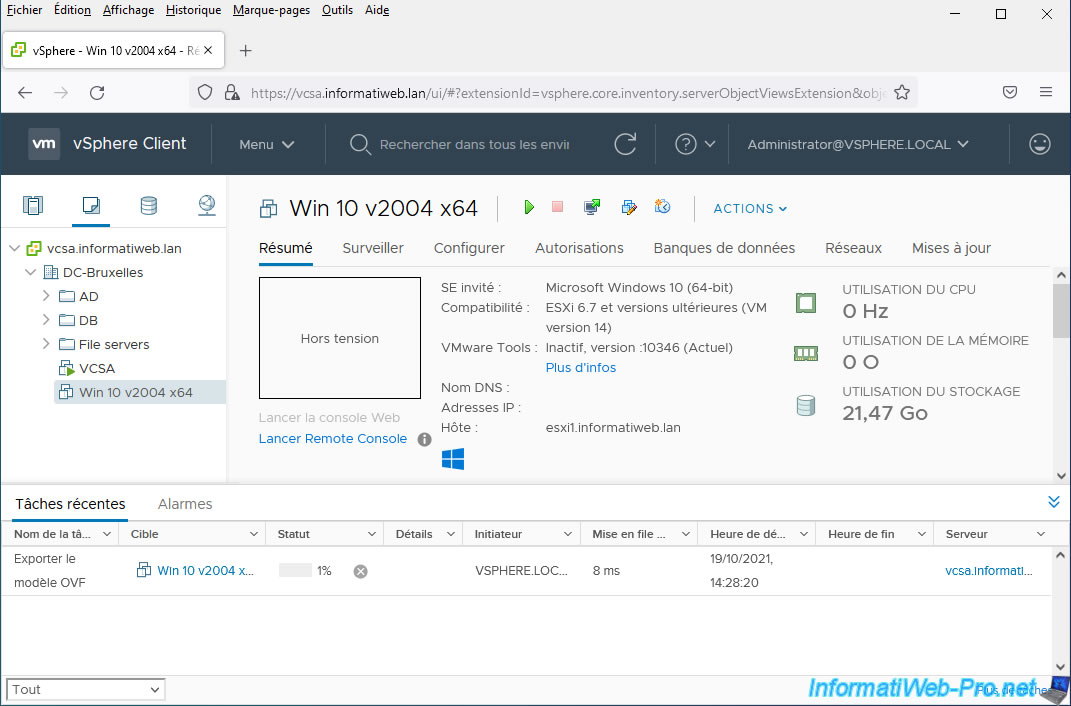
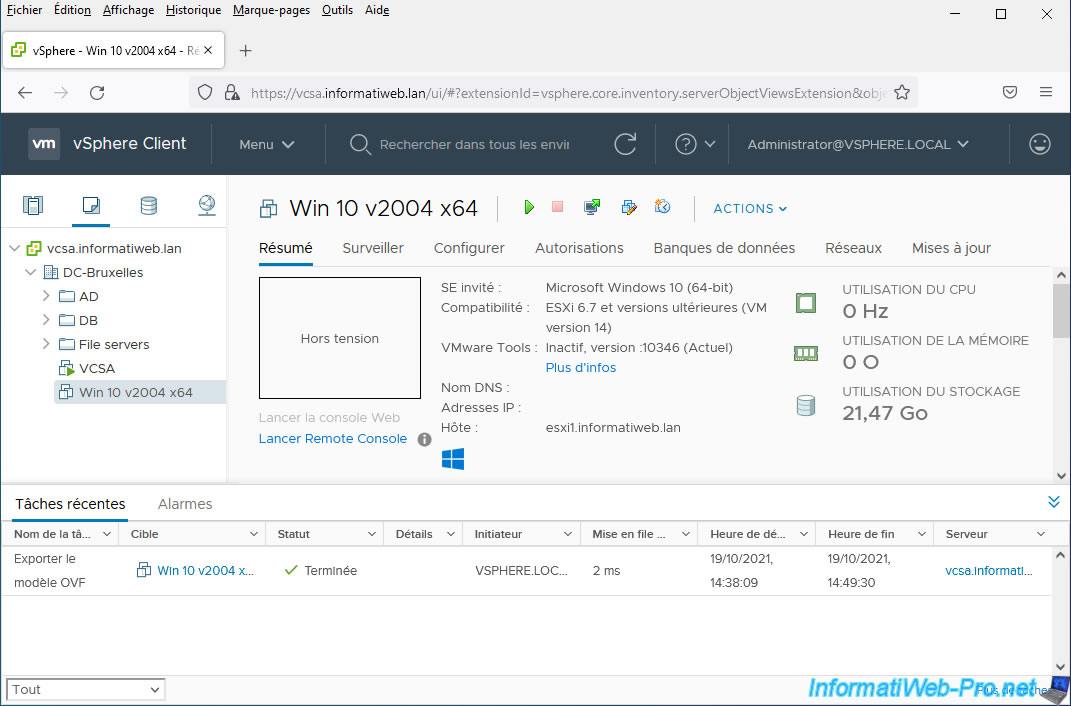
If you look in the web interface of your VMware vCenter Server (VCSA), you will see that an "Export OVF Template" task is running.
On your computer's hard drive, you will see a ".vmdk.tmp" file appear.
This corresponds to the virtual hard disk of the virtual machine that you are exporting from your VMware vCenter Server (or VCSA).

Once the export of your virtual machine is complete, you will see this:
Plain Text
Transfer Completed
Completed successfully
![]()
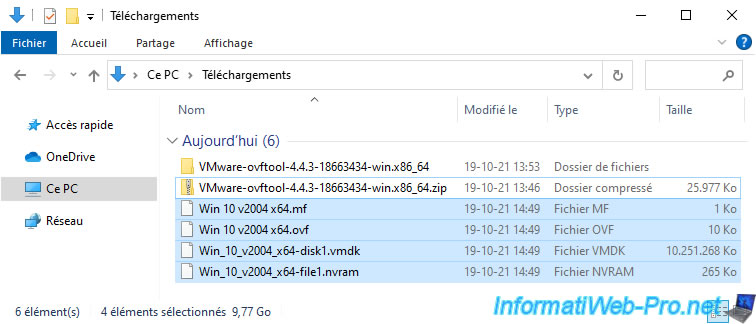
On your hard drive, you will find:
- a ".mf" file: the manifest file allowing you to check the presence and integrity of the other exported files.
- an ".ovf" file: the configuration file of the virtual machine in OVF format.
- one or more ".vmdk" files: the hard disk(s) of this virtual machine.
- a ".nvram" file: current configuration of the BIOS or EFI firmware of the virtual machine.
If you return to the "vSphere Client" web interface of your VMware vCenter Server, you will see that the "Export OVF Template" task is completed.
4. Import a virtual machine in OVF format to your VMware vCenter Server using the VMware OVF Tool (ovftool)
To import a virtual machine onto your VMware vCenter Server using the VMware OVF Tool (ovftool), you will need the name of the datastore where you want to store it.
In our case, the HDD2 datastore.

You will also need to know where you want to store this virtual machine.
In our case, in our "DC-Brussels" data center.
Now, in Command Prompt, type the command below.
Parameters used:
- --noSSLVerify: to disable verification of the SSL certificate used on your server.
- -ds=HDD2: indicates that the virtual machine will be created in the "HDD2" datastore of your VMware vCenter Server (or VCSA).
- -n="Win 10 v2004 x64 Bis": indicates that the created virtual machine will be named "Win 10 v2004 x64 Bis".
- "C:\Users\Administrator\Downloads\Win 10 v2004 x64.ovf": indicates the full path to the configuration file in OVF format of the virtual machine located on your computer.
- vi://10.0.0.104/DC-Brussels/host/Intel/esxi1.informatiweb.lan: indicates that the virtual machine will be created on your VMware vCenter Server (whose IP address is "10.0.0.104" in our case ) and that the VMware ESXi host that will be used to run this virtual machine is "esxi1.informatiweb.lan" (this host is located in an "Intel" folder in our case).
Batch
ovftool --noSSLVerify -ds=HDD2 -n="Win 10 v2004 x64 Bis" "C:\Users\Administrator\Downloads\Win 10 v2004 x64.ovf" vi://10.0.0.104/DC-Brussels/host/Intel/esxi1.informatiweb.lan
Provide your vCenter Server credentials as requested by the ovftool tool and this will be displayed:
Plain Text
Opening OVF source: C:\Users\Administrator\Downloads\Win 10 v2004 x64.ovf
The manifest validates
Enter login information for target vi://10.0.0.104/
Username: administrator@vsphere.local
Password: ***********
Opening VI target: vi://administrator%40vsphere.local@10.0.0.104:443/DC-Brussels/host/Intel/esxi1.informatiweb.lan
Deploying to VI: vi://administrator%40vsphere.local@10.0.0.104:443/DC-Brussels/host/Intel/esxi1.informatiweb.lan
Disk progress: 10%
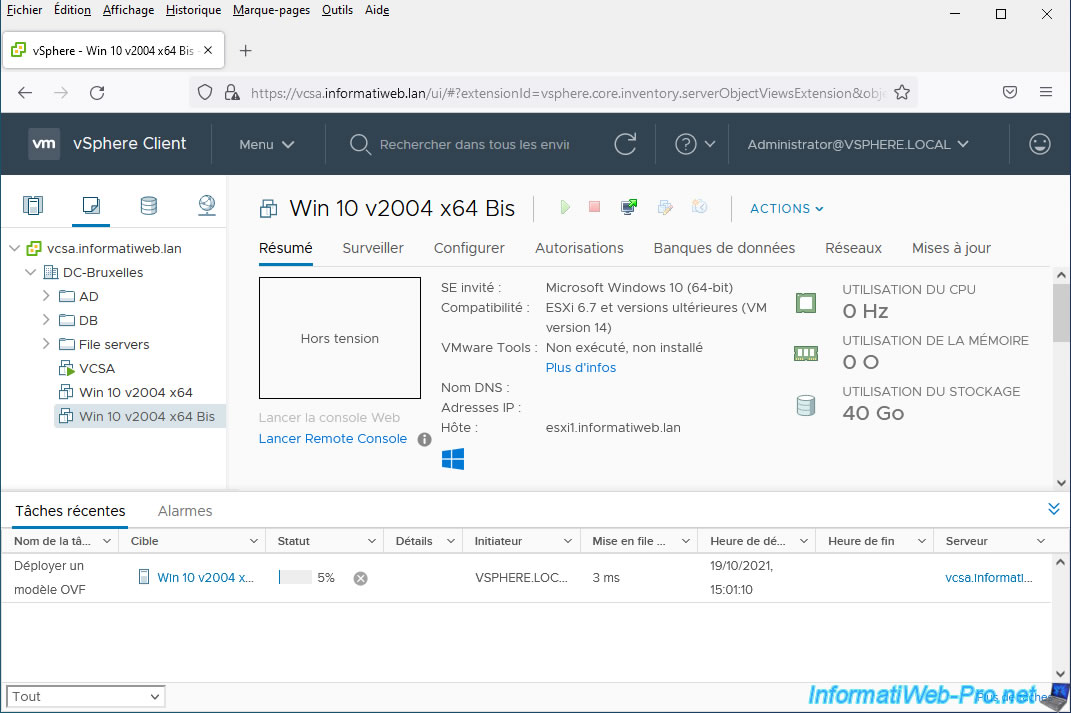
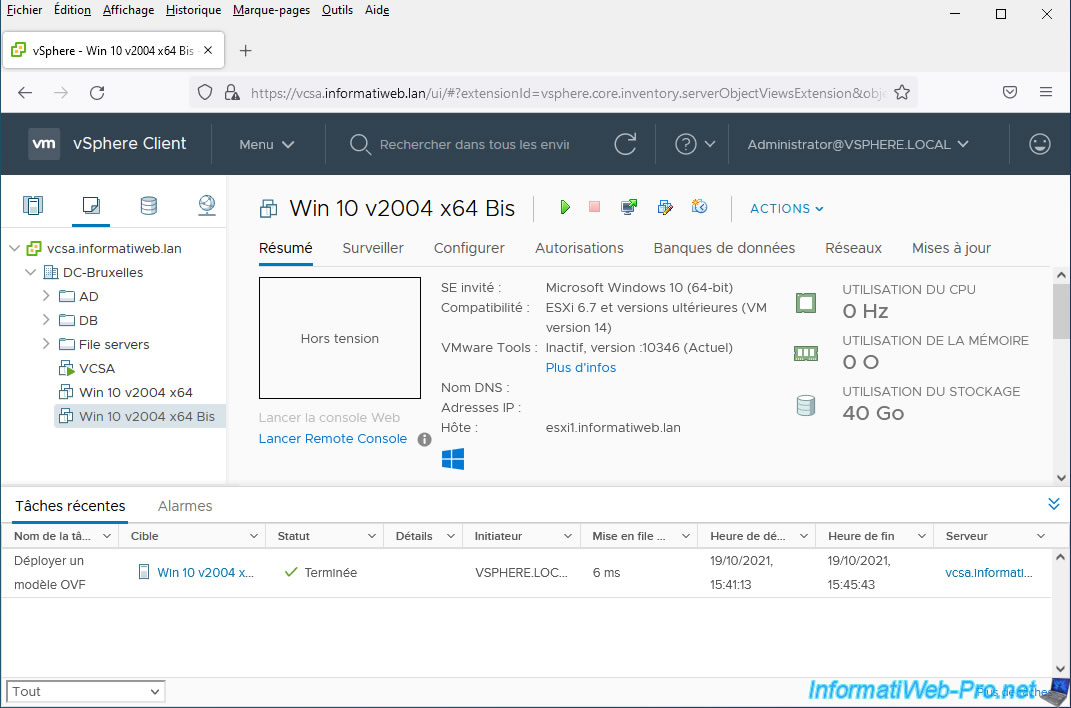
If you go to the "vSphere Client" web interface of your VMware vCenter Server, you will see that a "Deploy OVF Template" task is running.
Once the virtual machine import is complete, this will be displayed:
Plain Text
Transfer Completed
Completed successfully
On your VMware vCenter Server, you will see that the "Deploy OVF Template" task has completed and your new virtual machine is available.

5. Export a virtual machine in OVA format from your VMware vCenter Server using the VMware OVF Tool (ovftool)
To export a virtual machine from your VMware vCenter Server in OVA format instead of OVF format, the procedure is very similar.
The only difference is that you must specify the file extension ".ova" instead of ".ovf". VMware OVF Tool will take care of the rest.
To export our "Win 10 v2004 x64" virtual machine in OVA format, we will use this command:
Batch
ovftool.exe --noSSLVerify "vi://10.0.0.104/DC-Brussels/vm/Win 10 v2004 x64" "C:\Users\Administrator\Downloads\Win 10 v2004 x64.ova"
Which will display this:
Plain Text
Enter login information for source vi://10.0.0.104/
Username: administrator@vsphere.local
Password: ***********
Opening VI source: vi://administrator%40vsphere.local@10.0.0.104:443/DC-Brussels/vm/Win%2010%20v2004%20x64
Opening OVA target: C:\Users\Administrator\Downloads\Win 10 v2004 x64.ova
Writing OVA package: C:\Users\Administrator\Downloads\Win 10 v2004 x64.ova
Disk progress: 41%
On your VMware vCenter Server, you will see the "Export OVF template" task appear again (even if the destination format is OVA).
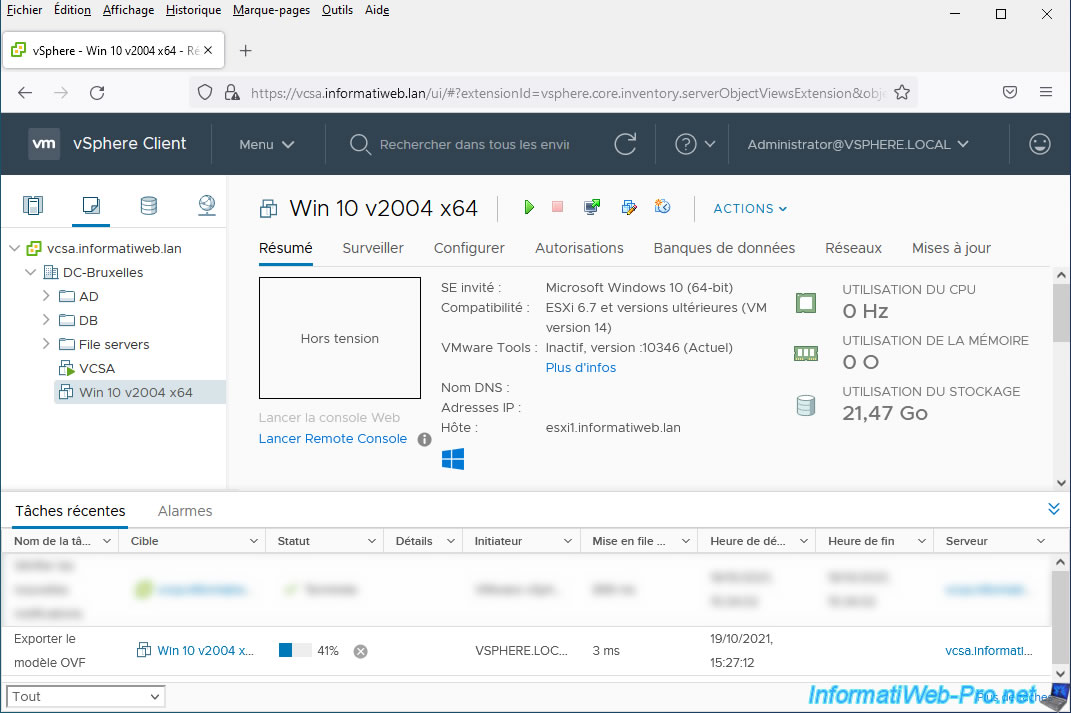
On your computer's hard drive, you will see that the file created will this time have the ".ova" extension.
Once the export to OVA format is complete, this will be displayed:
Plain Text
Transfer Completed
Completed successfully
As expected, you will only have an ".ova" file.
An ".ova" file is simply an archive in which you will find all the usual OVF format files.

6. Import a virtual machine in OVA format to your VMware vCenter Server using the VMware OVF Tool (ovftool)
For importing the virtual machine in OVA format, the technique is the same, except that the source file will be an ".ova" file instead of ".ovf".
We use the command below.
Batch
ovftool --noSSLVerify -ds=HDD2 -n="Win 10 v2004 x64 Bis" "C:\Users\Administrator\Downloads\Win 10 v2004 x64.ova" vi://10.0.0.104/DC-Brussels/host/Intel/esxi1.informatiweb.lan
Which gives this:
Plain Text
Opening OVA source: C:\Users\Administrator\Downloads\Win 10 v2004 x64.ova
The manifest validates
Enter login information for target vi://10.0.0.104/
Username: administrator@vsphere.local
Password: ***********
Opening VI target: vi://administrator%40vsphere.local@10.0.0.104:443/DC-Brussels/host/Intel/esxi1.informatiweb.lan
Deploying to VI: vi://administrator%40vsphere.local@10.0.0.104:443/DC-Brussels/host/Intel/esxi1.informatiweb.lan
Disk progress: 20%
Once the import is complete, this will be displayed:
Plain Text
Transfer Completed
Completed successfully
The virtual machine will appear as expected on your VMware vCenter Server.
For the task running in the background, it will be named "Deploy OVF Template" as when importing a virtual machine in OVF format.
Share this tutorial
To see also
-

VMware 12/20/2024
VMware vSphere 6.7 - Clone vApps
-
VMware 10/4/2024
VMware vSphere 6.7 - Clone virtual machines
-
VMware 10/9/2024
VMware vSphere 6.7 - Clone virtual machines to a content library
-
VMware 10/11/2024
VMware vSphere 6.7 - Convert a Hyper-V virtual machine to a VMware VM
You must be logged in to post a comment