Enable vSphere DRS on a cluster to automate resource management in a VMware vSphere 6.7 infrastructure
- VMware
- 26 February 2025 at 14:22 UTC
-

- 2/2

6. DRS affinity and anti-affinity rules
6.1. Prefered DRS affinity rules
Using DRS, you can set affinity and anti-affinity rules as a preference or as a necessity.
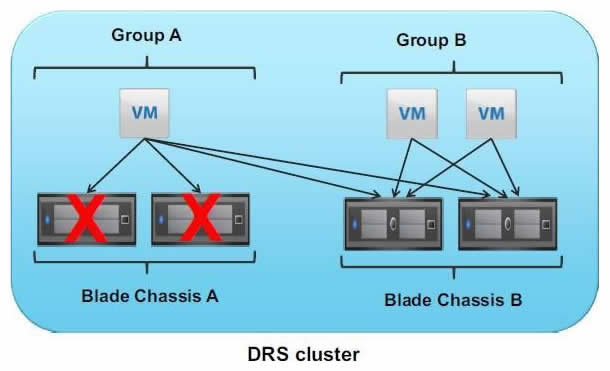
In this first example, you tell DRS that you prefer the virtual machines in group A to run on the "Blade Chassis A" host group.
For group B virtual machines, they will need to run on the "Blade Chassis B" host group.
This means that in the event of a failure of the hosts in the "Blade Chassis A" host group, the virtual machines can be restarted on another host group to ensure the availability of the services hosted by these virtual machines.
6.2. Required DRS affinity rules
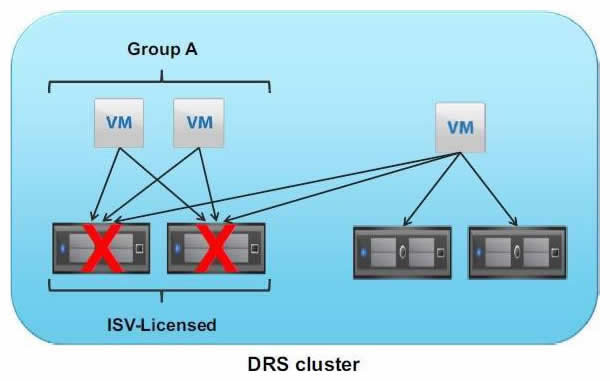
In this 2nd example, you tell DRS that virtual machines in group A should run only on the "ISV-Licensed" host group.
In case the hosts in the "ISV-Licensed" group fail, the virtual machines in group A cannot be restarted on other host groups.
The services hosted on the virtual machines in this group A will therefore no longer be available.
This type of rule (necessity) is therefore used mainly to avoid licensing problems.
Indeed, some manufacturers are intransigent in respecting licenses. In the event that the VM is migrated to another group of hosts, the license conditions of the solution you use in one of your VMs may no longer be respected.
6.3. Add a VM group
As explained previously, rules are applied using groups of VMs and groups of hosts.
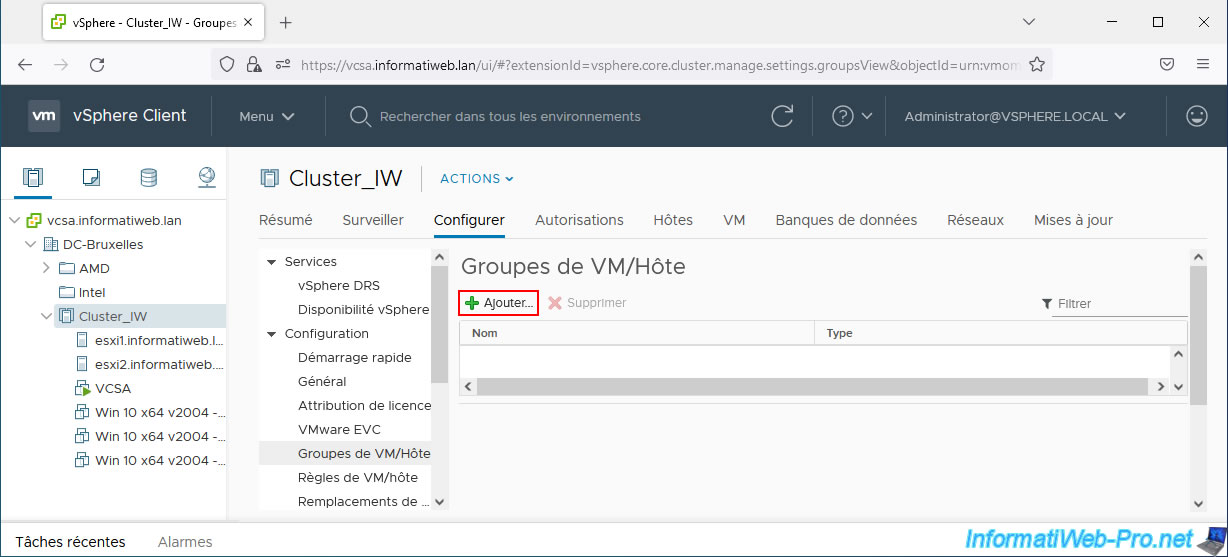
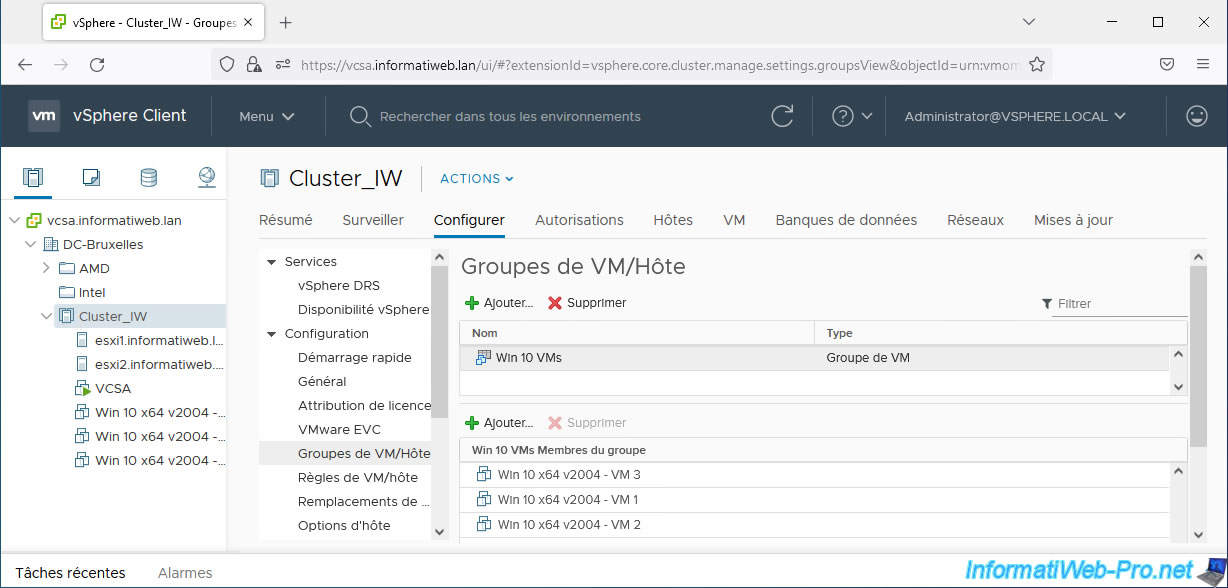
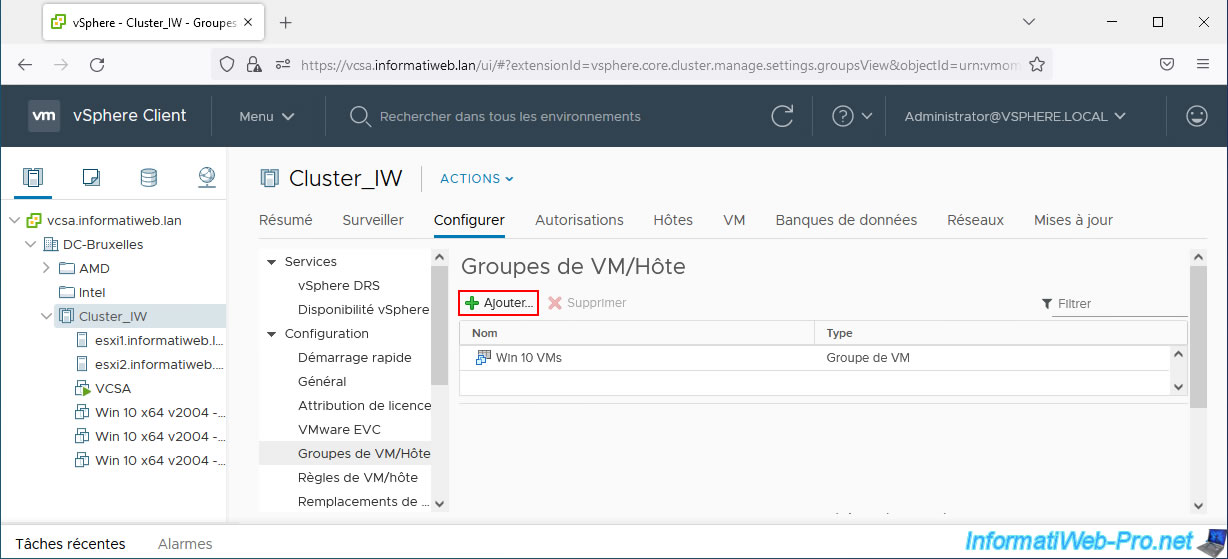
To get started, select your cluster and go to: Configure -> Configuration -> VM/Host Groups.
Then, click: Add.
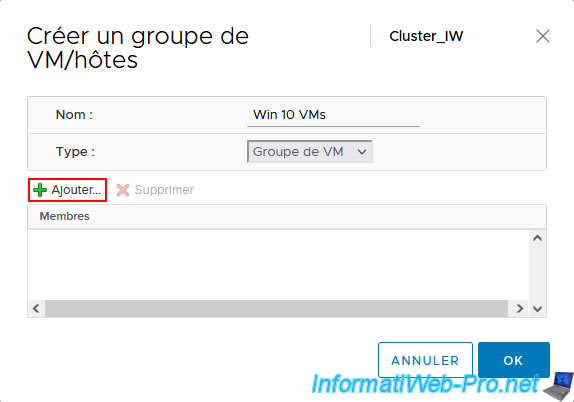
In the "Create VM/Host Group" window that appears, provide a name for this VM group and select "VM Group" as the type.
Then, click: Add.
Select the virtual machines you want to add to this group and click OK.
In our case, our virtual machines running Windows 10.
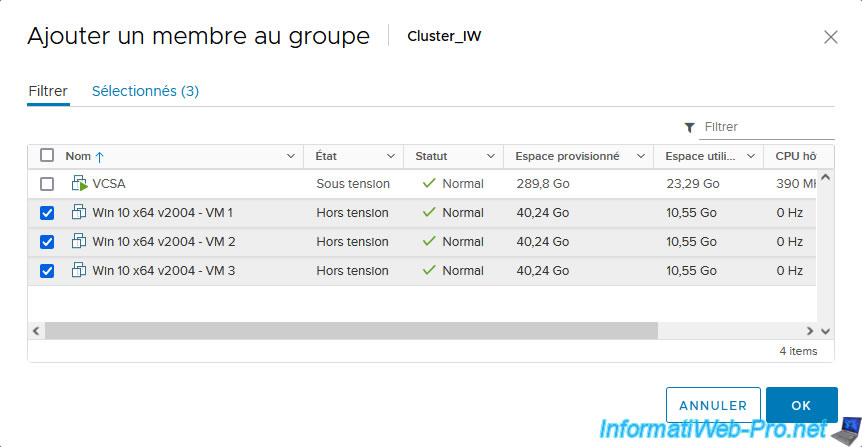
Click OK.
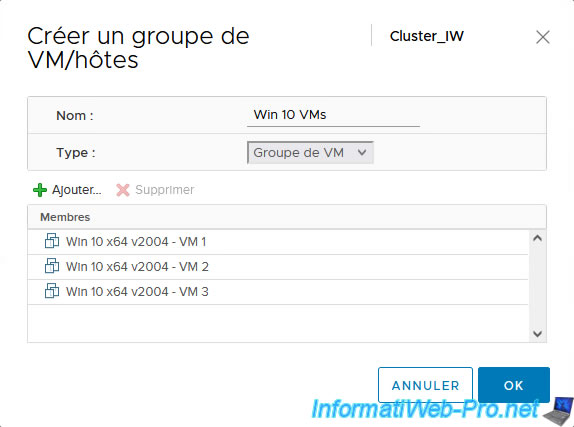
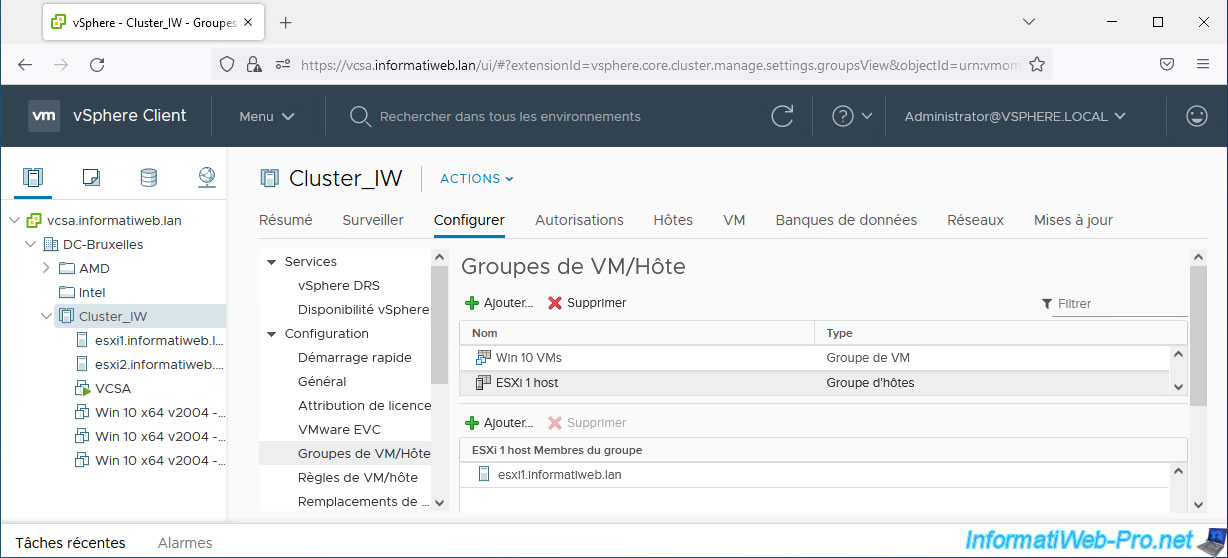
The added VM group appears in the "VM/Host Groups" list.
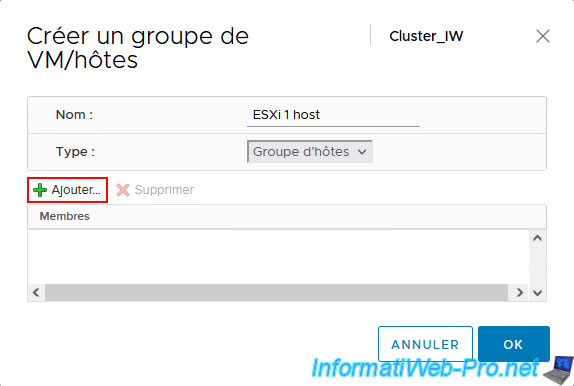
6.4. Add a host group
Now, click again: Add.
In the "Create VM/Host Group" window that appears, provide a name for this host group and this time select "Host Group" as the type.
Then click: Add.
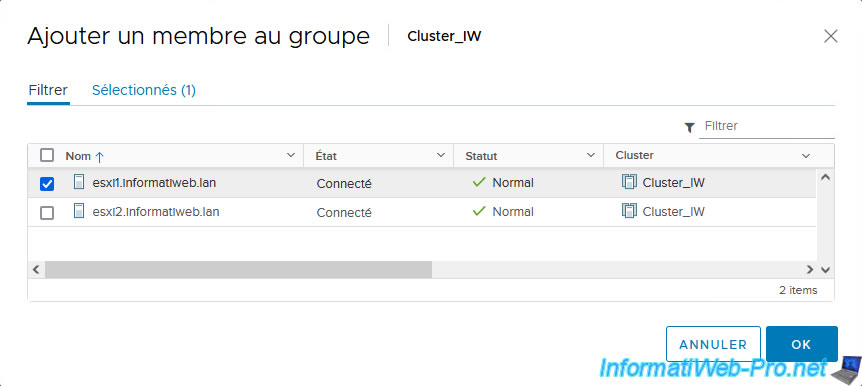
For this example, we will only select one host, as we only have 2 for this tutorial.
Once you have selected the desired host(s), click OK.
Click OK.
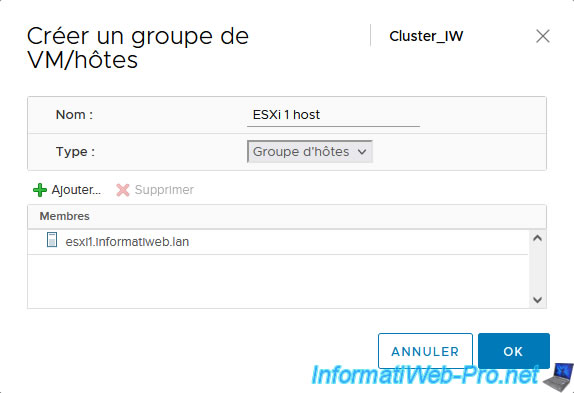
The added host group appears.
6.5. Add a VM/host rule
In the "VM/Host Rules" section, click: Add.
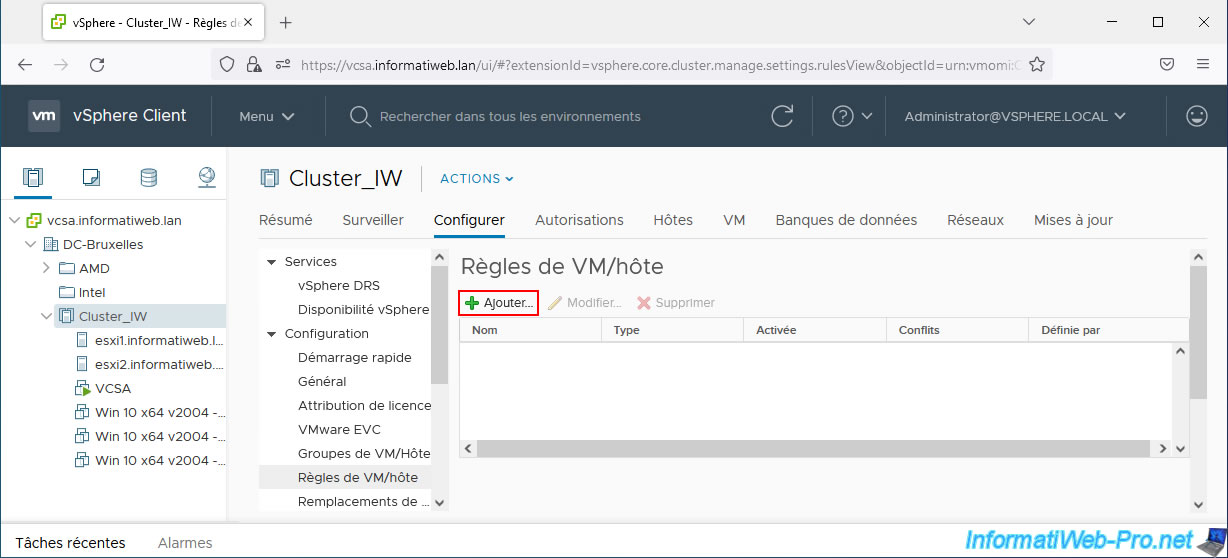
In the "Create VM/Host Rule" window that appears, provide a name for this rule and check the "Enable rule" box.
For the type of rule, you will have the choice between:
- Keep Virtual Machines Together: always run virtual machines added to the list on the same host.
Example: run virtual machines that communicate a lot with each other via the network on the same host to favor the internal network.
Which is more efficient and which avoids saturating the bandwidth of the physical network. - Separate Virtual Machines: allows virtual machines added to the list to always run on different hosts.
Example: running virtual machines whose data is replicated between them so that one VM is still available on a working host, while the other VM may have been on a host that has failed. - Virtual Machines to Hosts: allows you to specify whether virtual machines in a specific VM group always run or preferably run on a specific host group.
- Virtual Machines to Virtual Machines: allows you to specify a cluster dependency restart condition.
In other words, the virtual machines of the 1st group of VMs selected will have to be restarted before the virtual machines of the 2nd group of VMs are restarted.
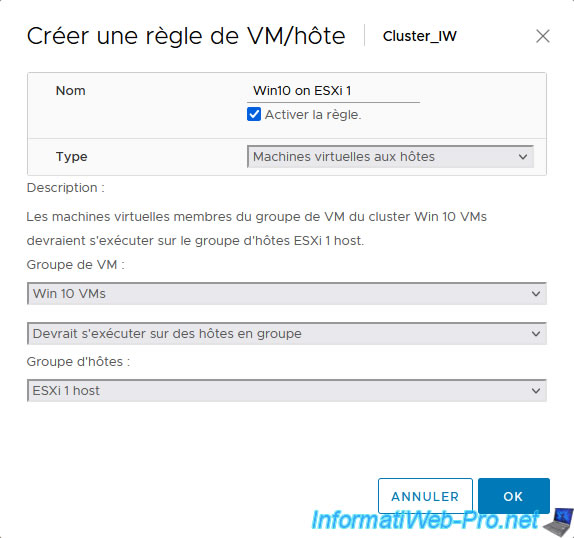
In our case, we will create a "Virtual Machines to Hosts" type rule.
Sources :
- Using DRS Affinity Rules - VMware Docs
- Create a VM-Host Affinity Rule - VMware Docs
- VMware vSphere Metro Storage Cluster Recommended Practices
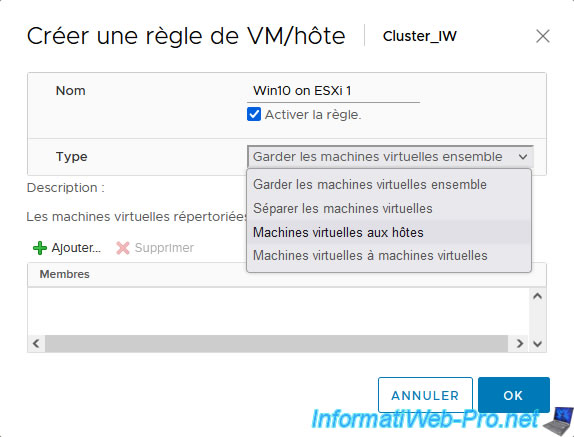
In this case, you will need to select:
- VM Group: the desired group of VMs.
- Affinity :
- Must run on hosts in groups: VMs in the desired VM group will always need to run on the desired host group.
- Should run on hosts in group: VMs in the desired VM group will preferably run on the desired host group, but these can be migrated to another host group if necessary (in case of failure of hosts in the source host group, for example).
- Must Not run on hosts in group: VMs in the desired VM group will never run on the desired host group.
- Should Not run on hosts in group: VMs in the desired VM group will preferably run on other hosts than the desired host group, but these could run on the desired host group selected host if necessary.
- Host Group: the desired host group.
In our case, we want our Windows 10 virtual machines to run preferably on our "esxi1" host which is part of our "ESXi 1 host" host group.
The added VM/host rule appears
If you select it, you will be able to see the virtual machines and hosts affected by this rule, as well as a description of what this rule entails.
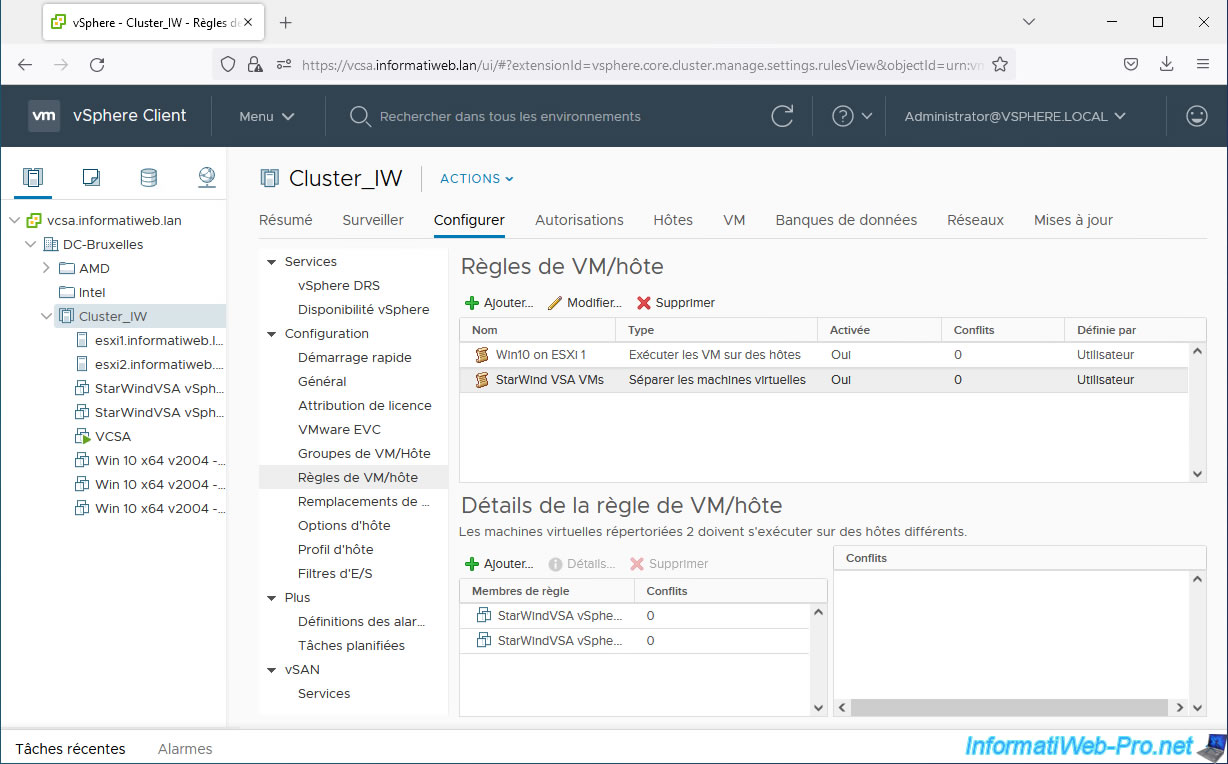
Important : if DRS detects conflicts between different VM/host rules, you will see the number in the "Conflicts" column increase.
On the other hand, also be aware that the rules only apply when the virtual machines are powered on (started).
In other words, a conflict occurs between 2 VM/host rules, but the virtual machines affected by these rules are turned off, the conflict will not be detected.
The conflict will only appear when the virtual machines concerned are powered on.

6.6. Separate virtual machines on different hosts (example)
Now that you know what the different options are and how to set up your own DRS rules, here is a small example.
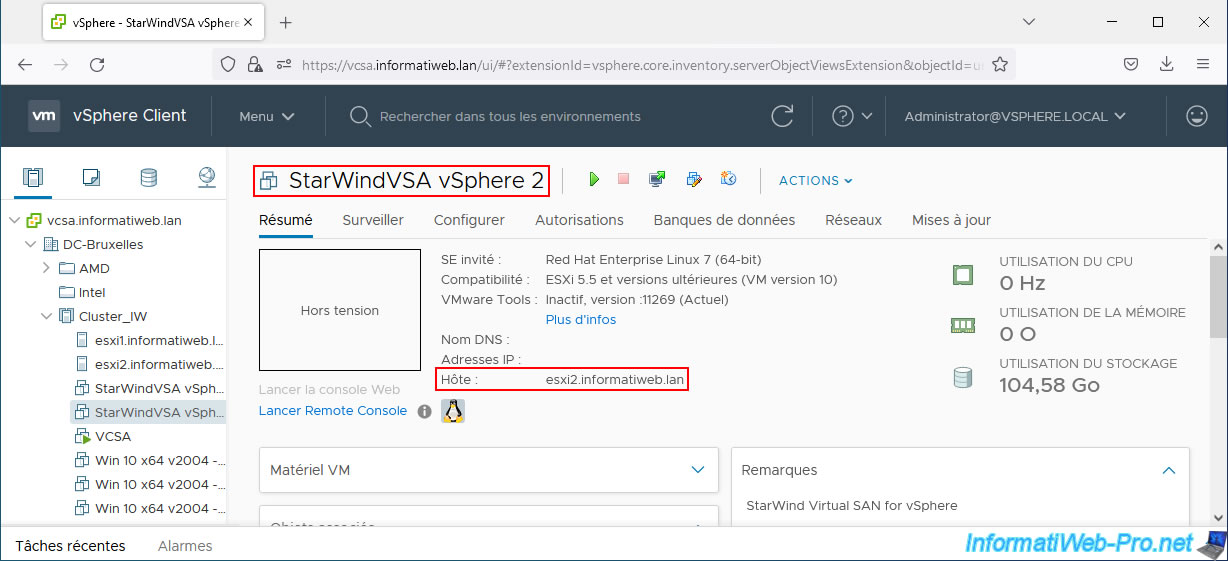
In a previous tutorial, we deployed the StarWind Virtual SAN solution on VMware vSphere.
Which involved deploying 2 StarWindVSA vSphere virtual machines. One virtual machine per host.
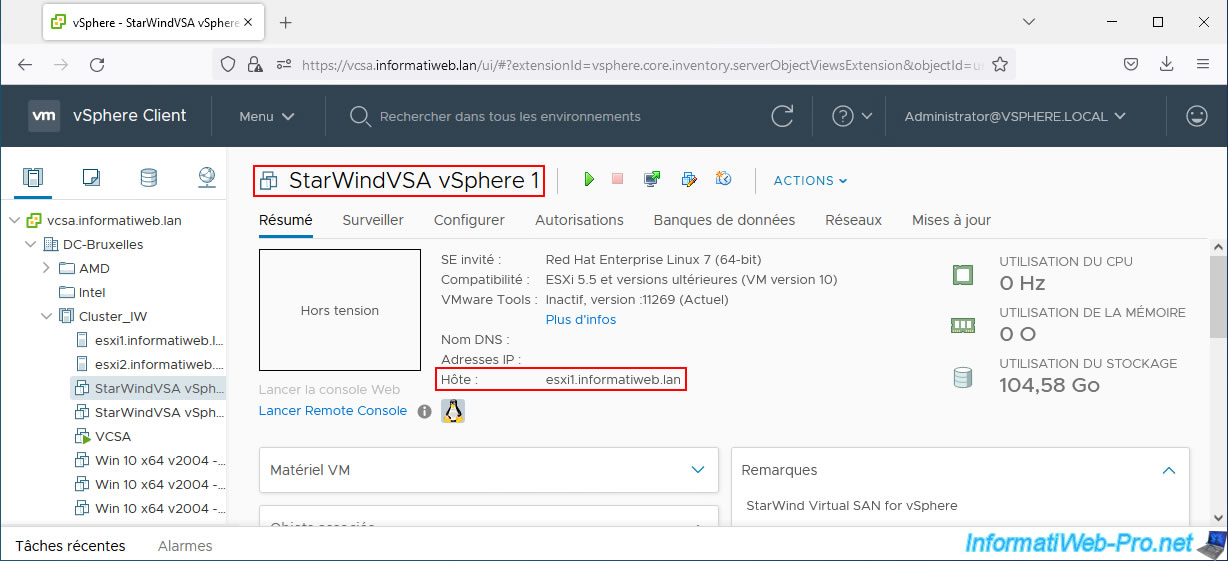
In fact, these are storage servers accessible via iSCSI, whose data is replicated from one virtual machine to another.
In other words, StarWind Virtual SAN shared storage accessible via the iSCSI protocol is available via any of these 2 virtual machines.
In this case, you will easily understand that it is imperative to signal DRS to always separate these virtual machines on different hosts in your cluster.
So, if one host goes down, the other "StarWind VSA vSphere" virtual machine is still functional and the shared storage remains available as if nothing had happened.
Which would not be the case if the 2 StarWind VSA vSphere virtual machines ended up on the same host by accident. (A migration of a StarWind VM would be necessary at least for a StarWindVSA vSphere virtual machine to be functional again.)
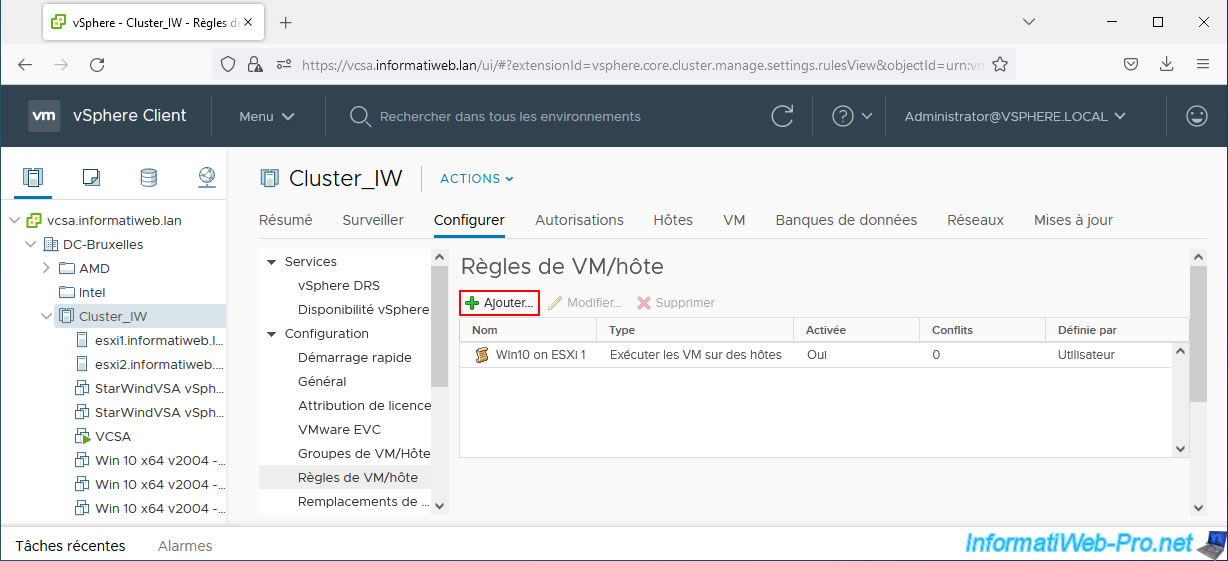
To ensure that StarWind Virtual SAN storage is always available, even if one of our hosts fails, we select our VMware vSphere cluster and go to: Configure -> Configuration -> VM/Host Rules.
Then we click on: Add.
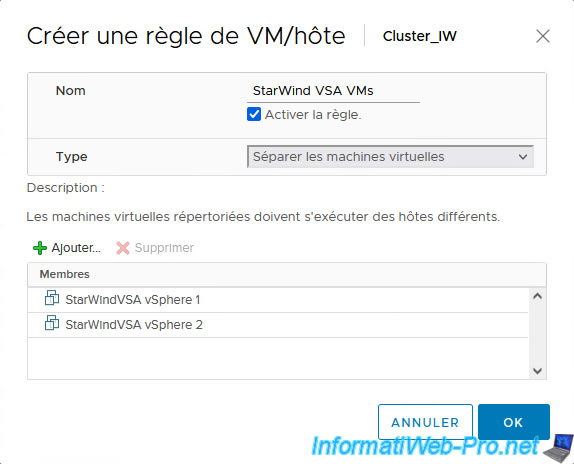
In the "Create VM/Host Rule" window that appears, we specify:
- Name: StarWind VSA VMs.
- Enable rule: we check the box to enable this rule.
- Type: Separate virtual machines.
- Members: we click on "Add" and we add our "StarWindVSA vSphere X" virtual machines.
As you can see, VMware tells you that the virtual machines listed must run on different hosts.
We click OK.
The new rule created appears.
Share this tutorial
To see also
-

VMware 3/5/2025
VMware vSphere 6.7 - Cluster admission control
-

VMware 2/14/2025
VMware vSphere 6.7 - Create a cluster
-

VMware 2/19/2025
VMware vSphere 6.7 - Create a cluster and enable EVC mode
-
VMware 2/12/2025
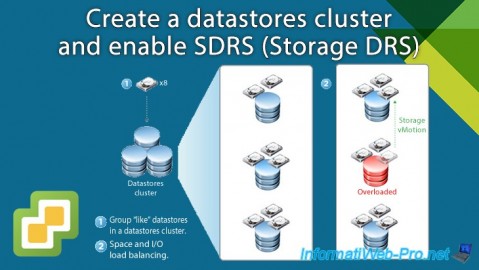
VMware vSphere 6.7 - Create a datastores cluster and enable SDRS
No comment