Create an iSCSI datastore on VMware vSphere 6.7
- VMware
- 30 August 2024 at 11:33 UTC
-

- 2/2

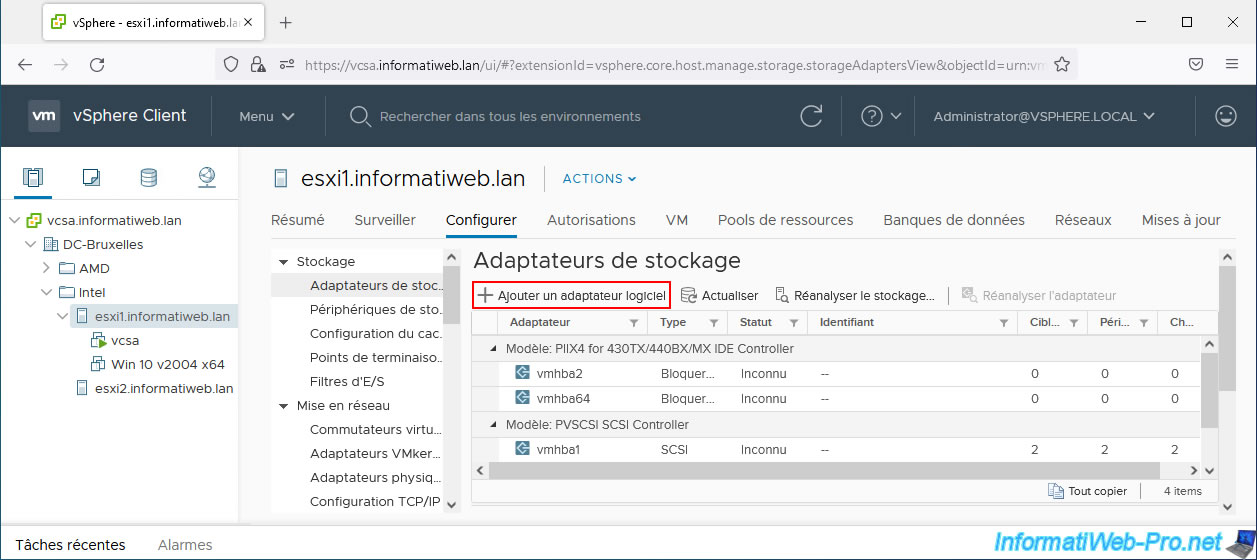
3. Add and configure a software iSCSI adapter
In the "Configure -> Storage -> Storage Adapters" section, click: Add Software Adapter.
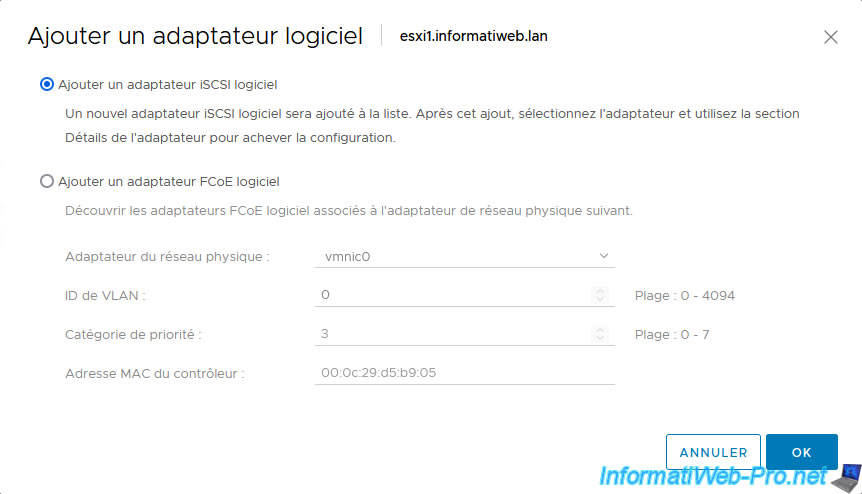
In the "Add Software Adapter" window that appears, select "Add software iSCSI adapter" and click OK.
Once the iSCSI Software Adapter is added, you will see that an iSCSI identifier "Iqn.1998-01.com.vmware:[host name]-..." will have been automatically assigned to your host .
This is the unique identifier (iqn) generated for the iSCSI initiator (iSCSI client) of your VMware ESXi host.
Select this software iSCSI controller, then go to the "Dynamic Discovery" tab (below) and click Add.
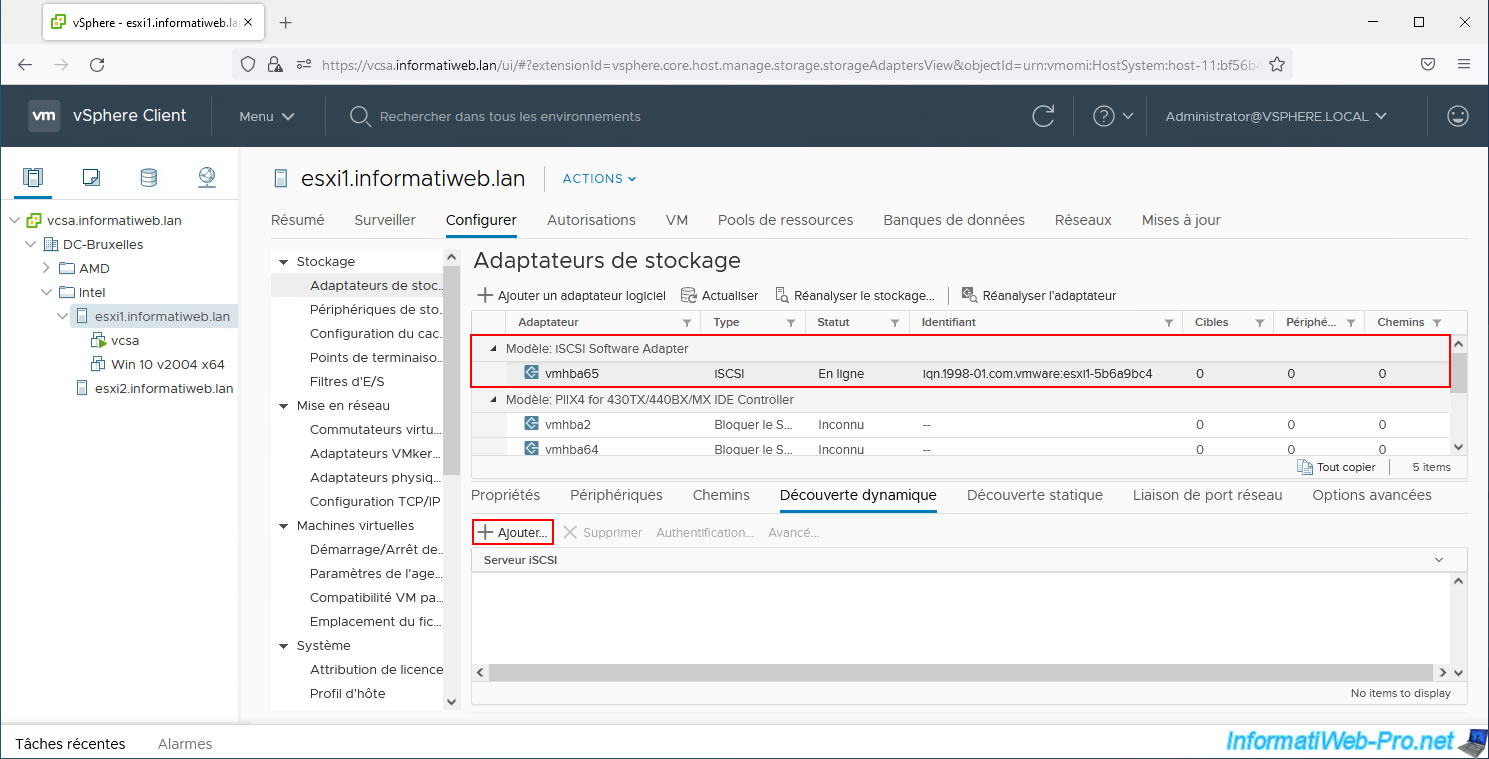
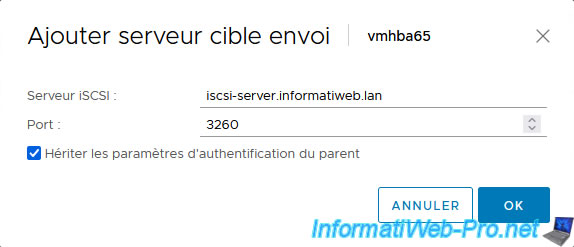
When using dynamic discovery, the only information needed is:
- iSCSI Server: the domain name or IP address of the iSCSI server.
- Port: 3260 (default port).
Note: if you go through the "Static Discovery" tab, you can also specify the name of the desired iSCSI target.
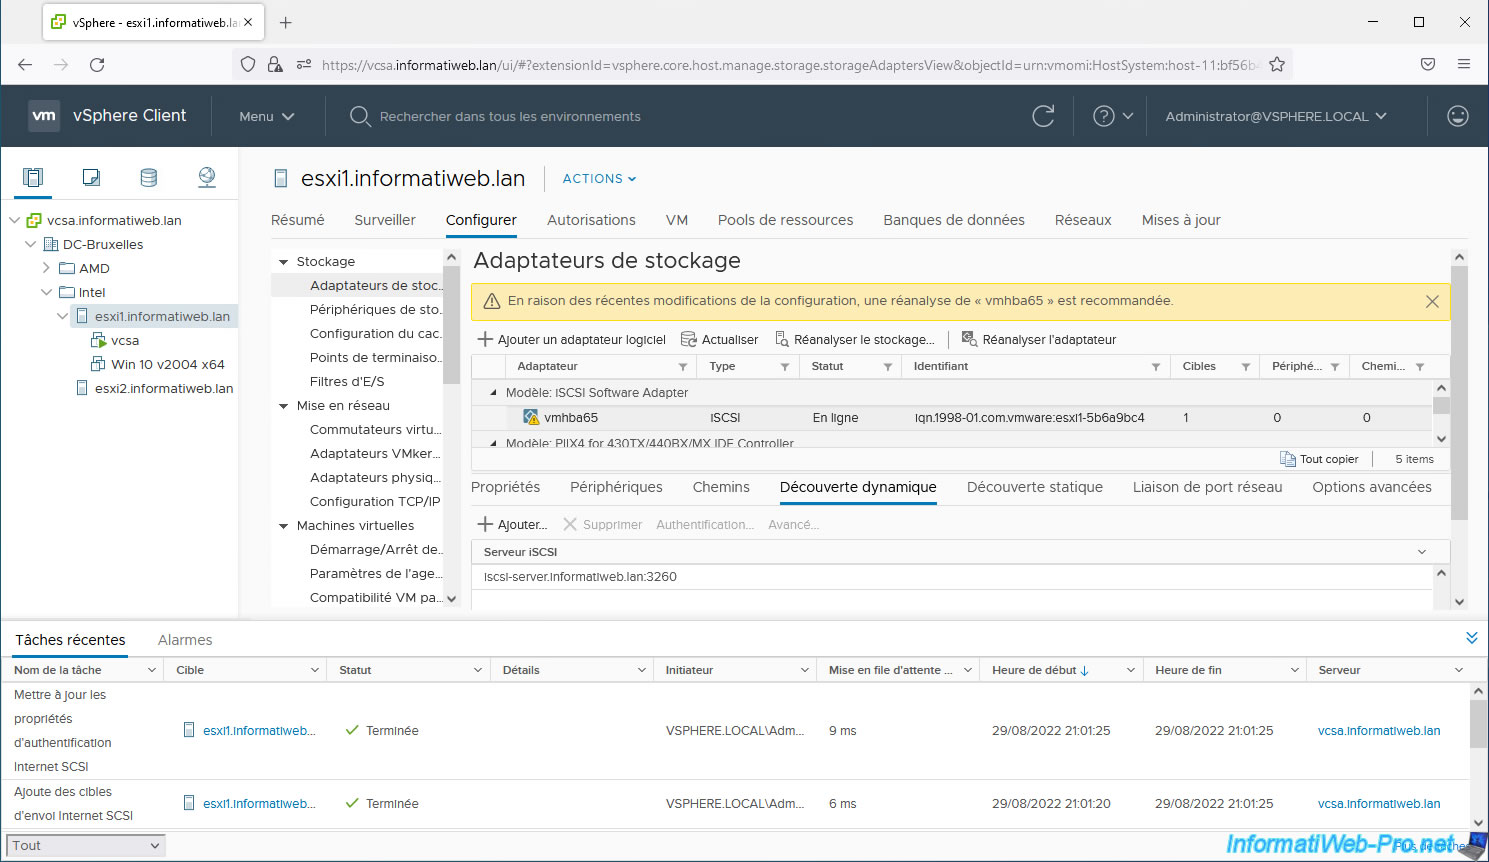
Once the iSCSI server has been added, a warning will appear:
Plain Text
Due to recent configuration changes, a rescan of "vmhba65" is recommended.
In recent tasks, you will find the tasks:
- Update Internet SCSI authentication properties
- Add Internet SCSI send targets
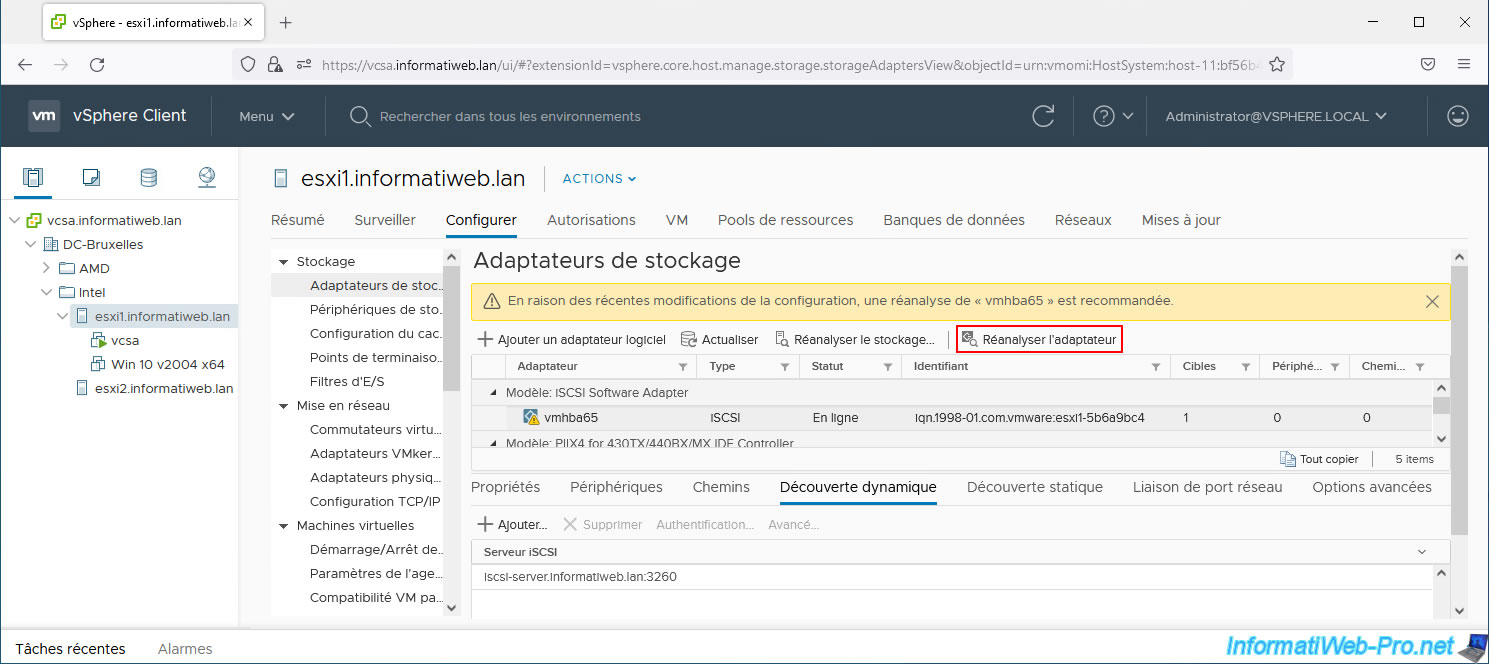
As prompted by this warning, click: Rescan Adapter.
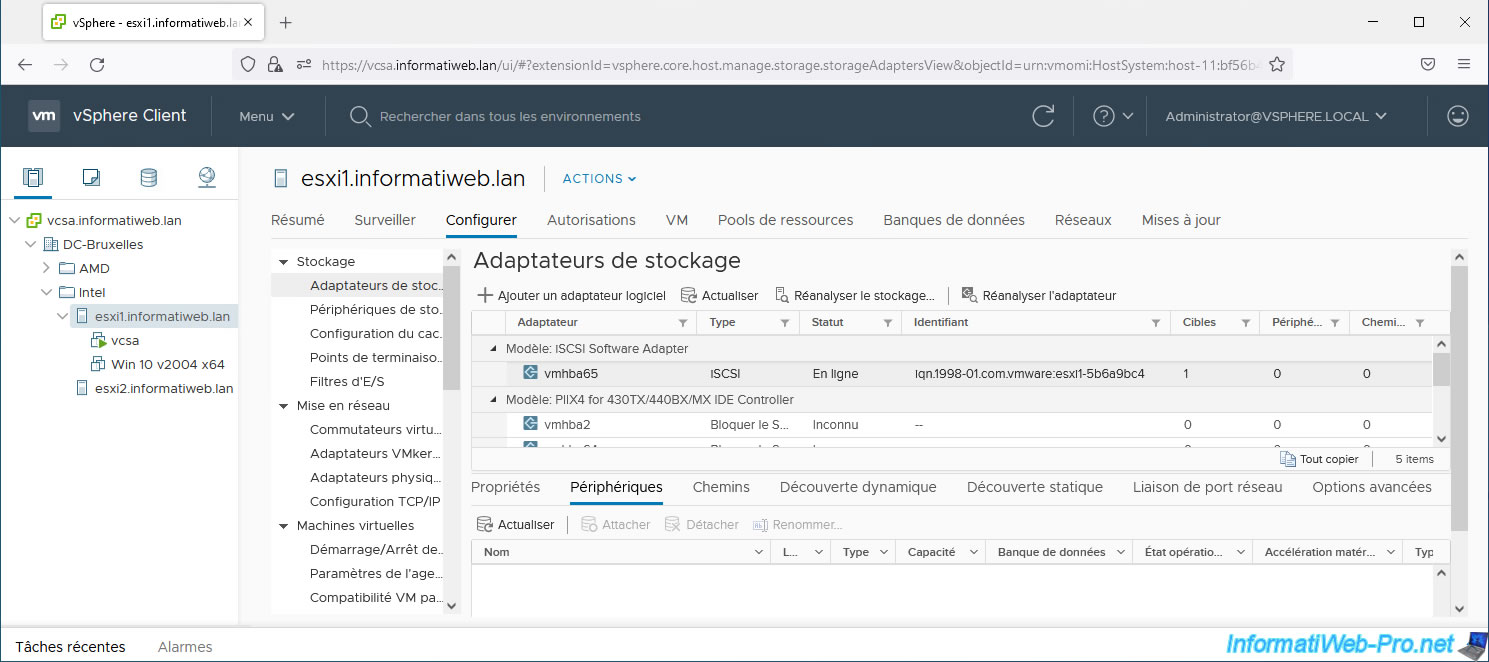
If no CHAP authentication is defined on your iSCSI server and your iSCSI initiator is authorized to connect to it, you may see devices appear in the "Devices" tab.
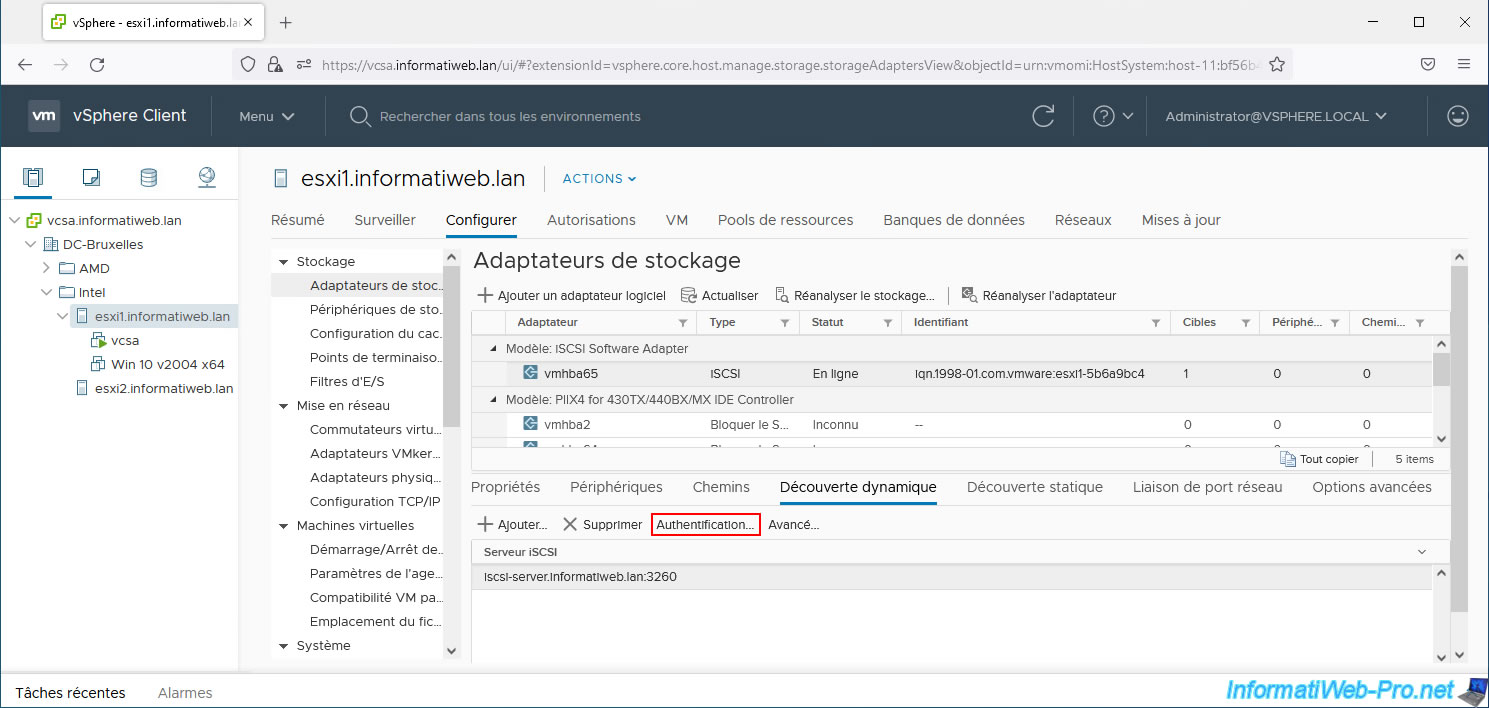
4. Configure CHAP authentication on the iSCSI initiator
In the "Dynamic Discovery" tab, select the added iSCSI server and click "Authentication" to specify the necessary "CHAP" authentication information (defined on your iSCSI server).
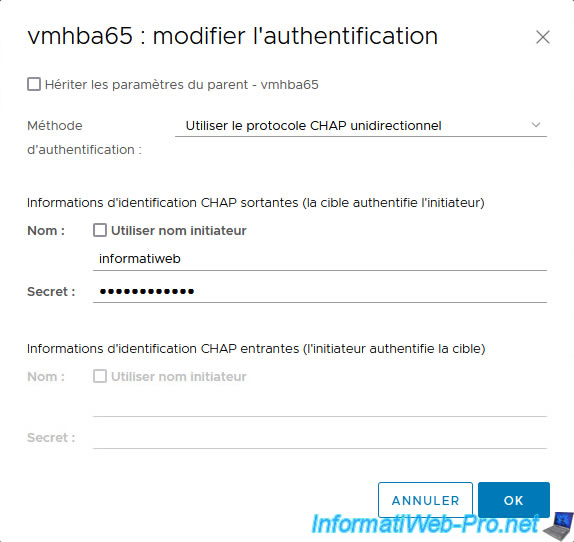
In the "vmhbaXX: Edit Authentication" window that appears, uncheck the "Inherit settings from parent - vmhbaXX" box to be able to change:
- Authentication Method:
- None: no CHAP or reverse CHAP authentication.
- Use unidirectional CHAP if required by target: a non-CHAP connection will be preferred, but a CHAP connection can be used if the iSCSI target requires it.
- Use unidirectional CHAP unless prohibited by target: reverse option. A CHAP connection will be preferred, but a non-CHAP connection may be used if the iSCSI target requires it.
- Use unidirectional CHAP: a CHAP connection will be made and the connection will fail if the CHAP handshake fails.
- Use Bidirectional CHAP: allows the iSCSI initiator and target to use CHAP authentication.
Which allows you to use the 2 options below (outgoing CHAP and incoming CHAP).
- Outbgoing CHAP Credentials (target authenticates the initiator): corresponds to CHAP authentication on Windows Server.
- Incoming CHAP Credentials (initiator authenticates the target): corresponds to reverse CHAP authentication on Windows Server.
In our case, we had configured CHAP authentication on our iSCSI server (iSCSI target), so we indicate:
- Authentication Method: Use unidirectional CHAP. To ensure that the connection is established only if the specified CHAP credentials are correct.
- Outbgoing CHAP Credentials (target authenticates the initiator):
- Name: the user name specified for CHAP authentication on your iSCSI server.
- Secret: the associated password.
Source : Selecting CHAP Authentication Method - VMware Docs.
Now that the CHAP credentials are configured, you need to force your VMware ESXi host to rescan its iSCSI adapter so that the new device (in this case: the iSCSI virtual disk created on your iSCSI server) is discovered.
To do this, select your software iSCSI controller "iSCSI Software Adapter" and click: Rescan Adapter.
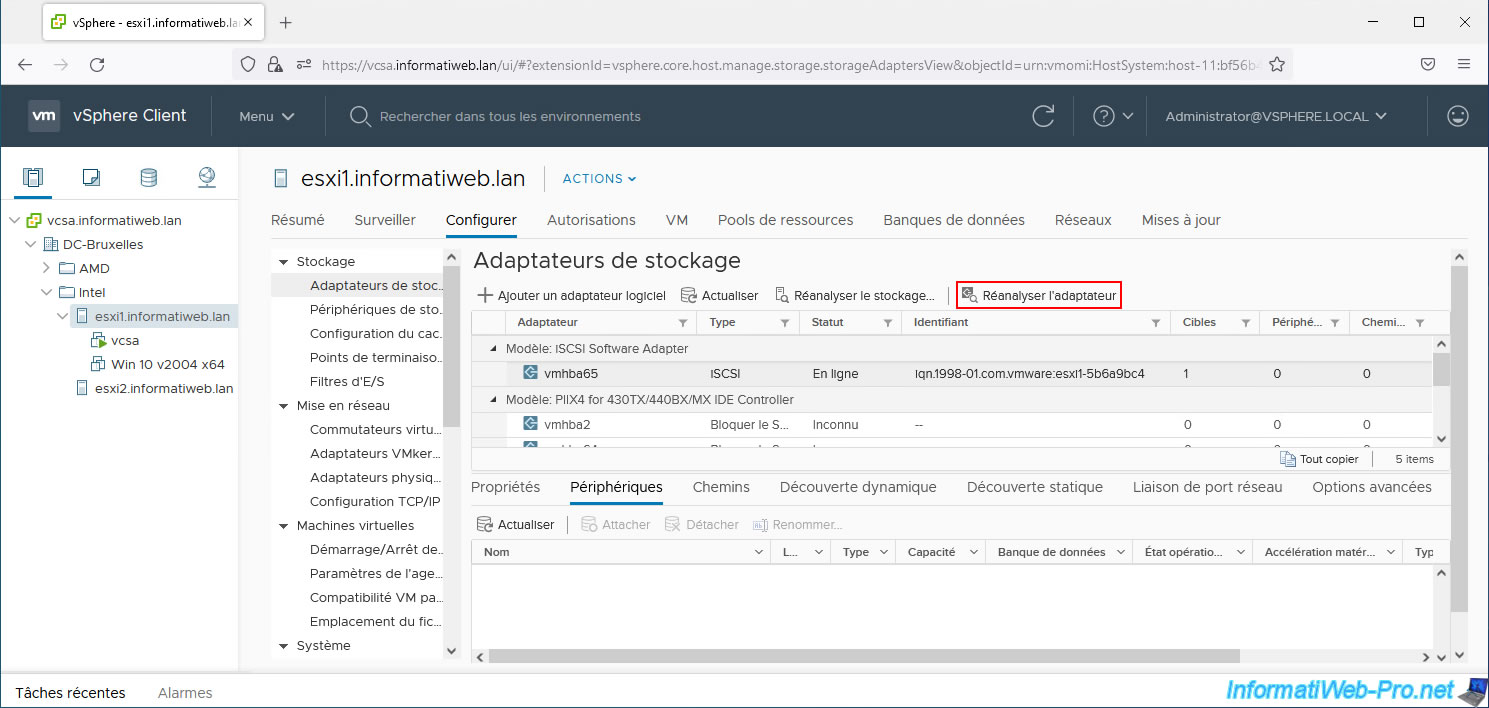
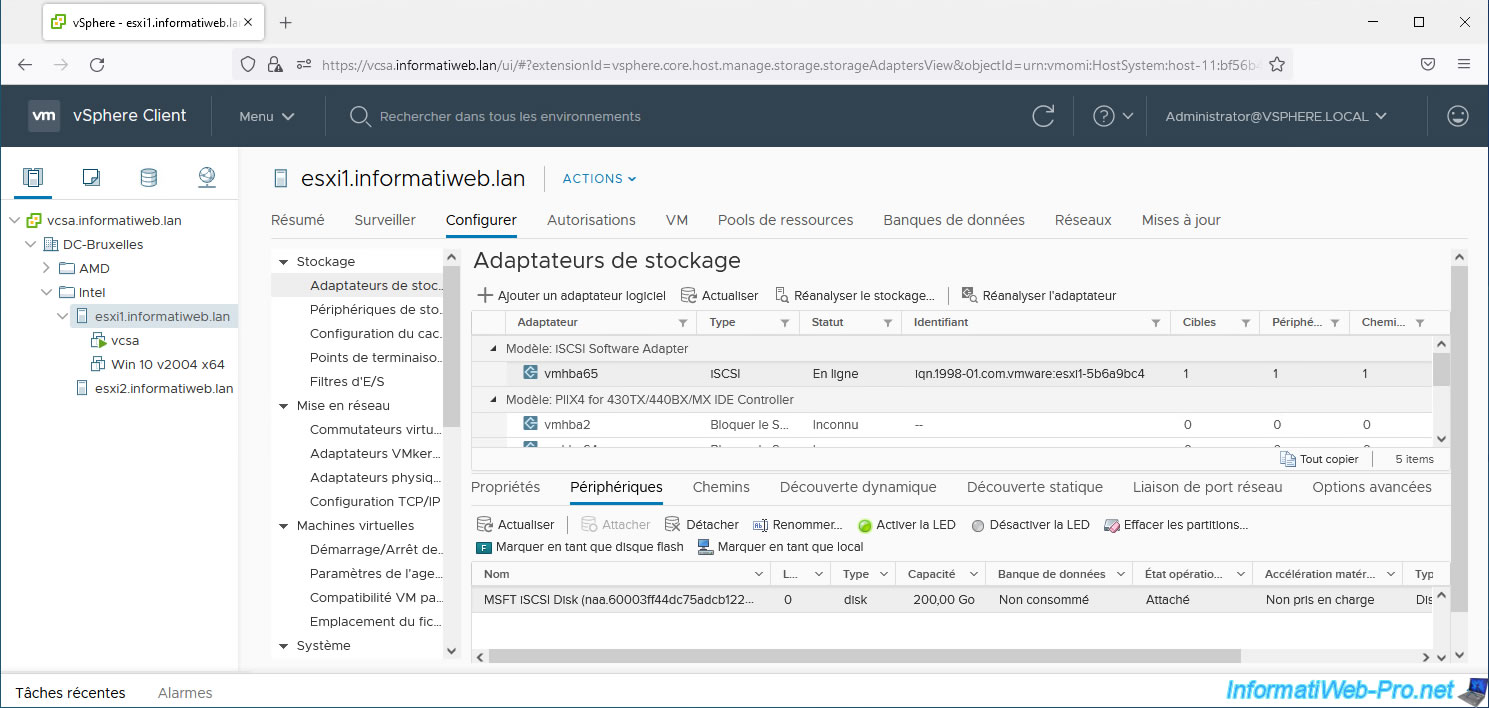
Your iSCSI virtual disk appears in the "Devices" tab at the bottom of the page.
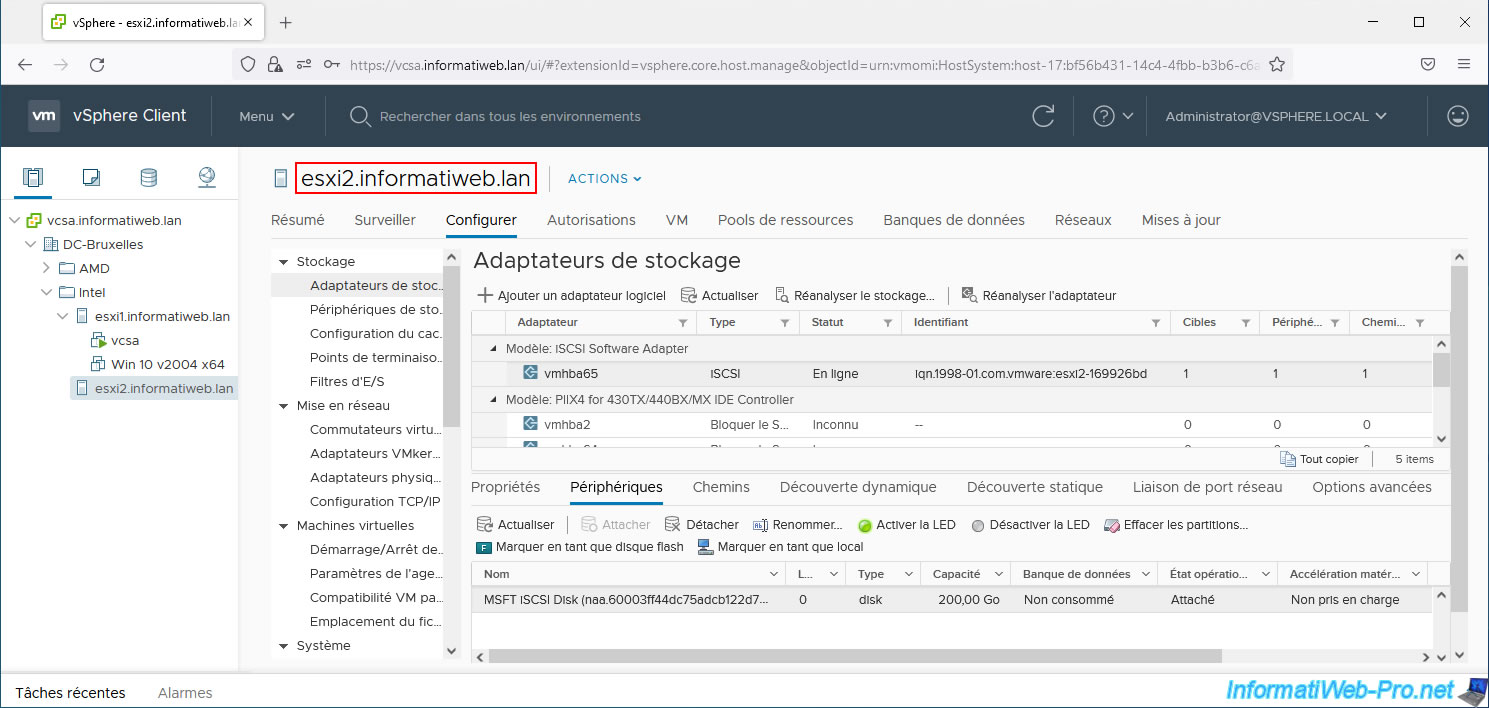
Do the same on your 2nd host if you also want to access this iSCSI virtual disk from this host.
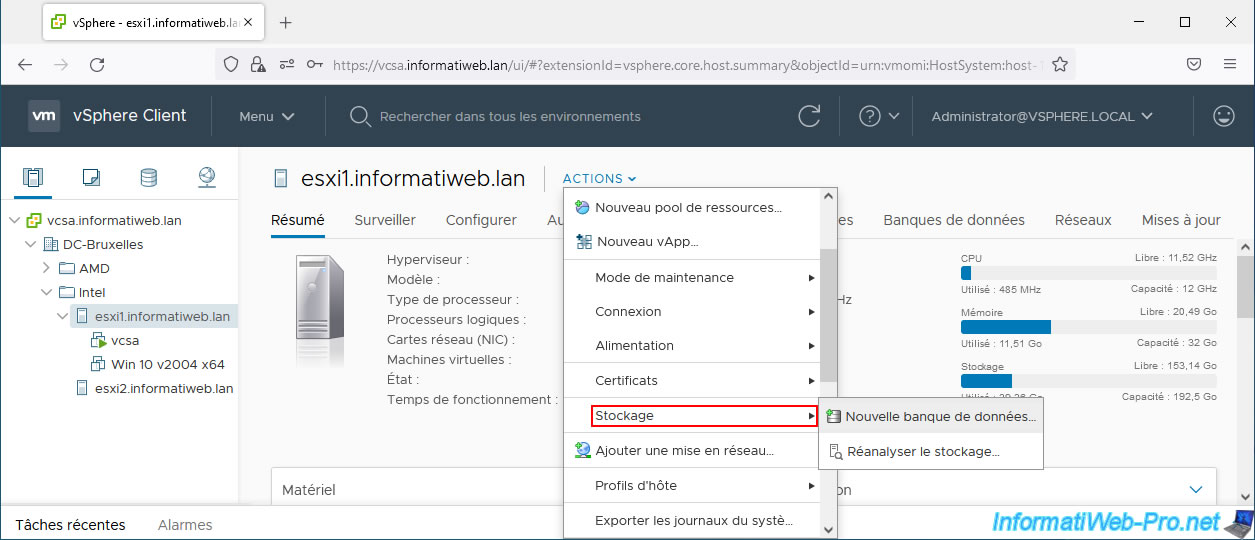
5. Create an iSCSI datastore
Select your VMware ESXi host and click: Actions -> Storage -> New Datastore.
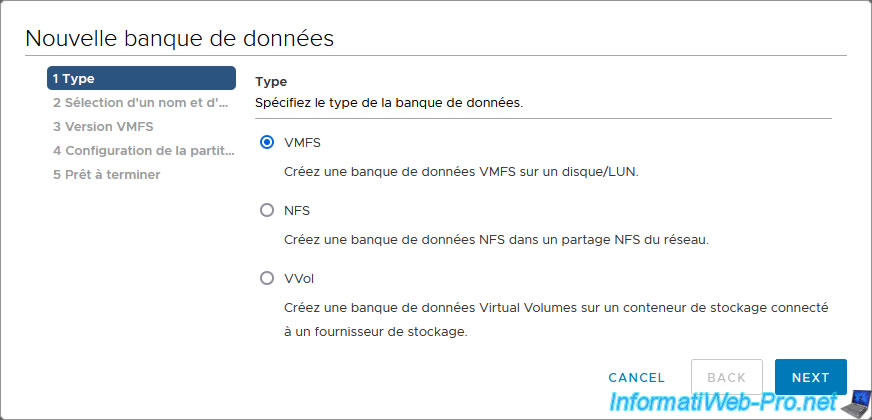
In the "New Datastore" wizard that appears, select "VMFS" and click Next.
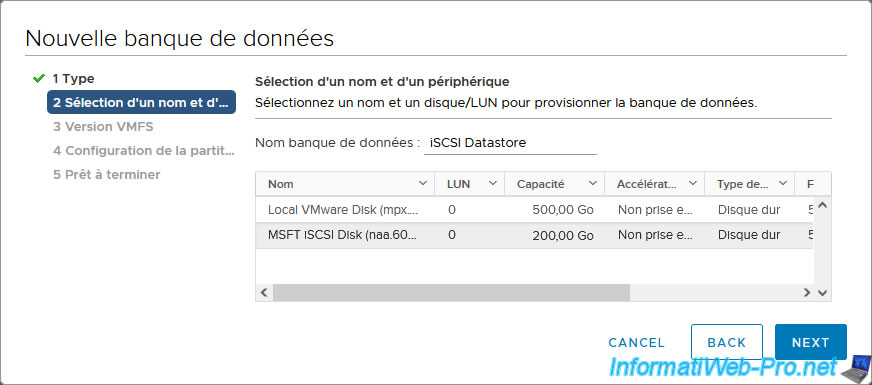
As you can see, for datastores of type "VMFS", the wizard displays the local disks, as well as the iSCSI disks of your iSCSI server connected via the previously configured software iSCSI controller.
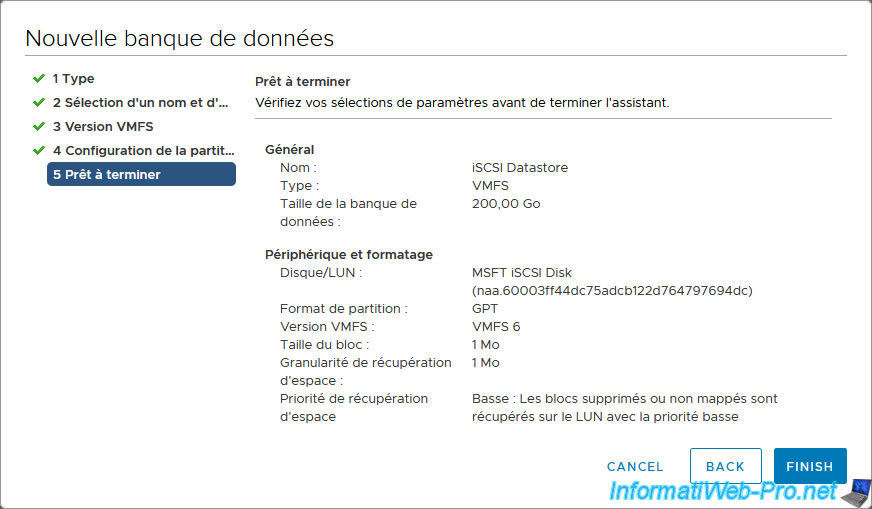
Provide a name for your iSCSI datastore and select your iSCSI virtual disk.
In our case, this is our disk "MSFT iSCSI Disk".
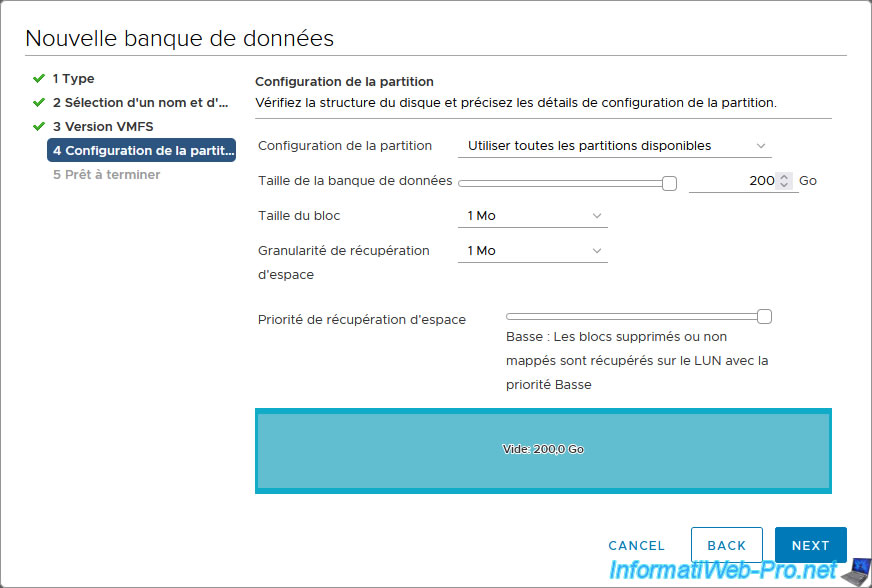
Select "VMFS 6" to benefit from all the features available in your version of VMware vSphere.

For the iSCSI datastore size, by default, all space from the previously selected iSCSI virtual disk will be used.
A summary of the iSCSI configuration appears.
As you can see, in the case of an iSCSI datastore, the file system created will be VMFS.
Unlike an NFS datastore where the file system seen by the VMware ESXi host would be NFS and the real file system will be the one defined on the NFS server (eg: NTFS, EXT4, ...).
Click on: Finish.
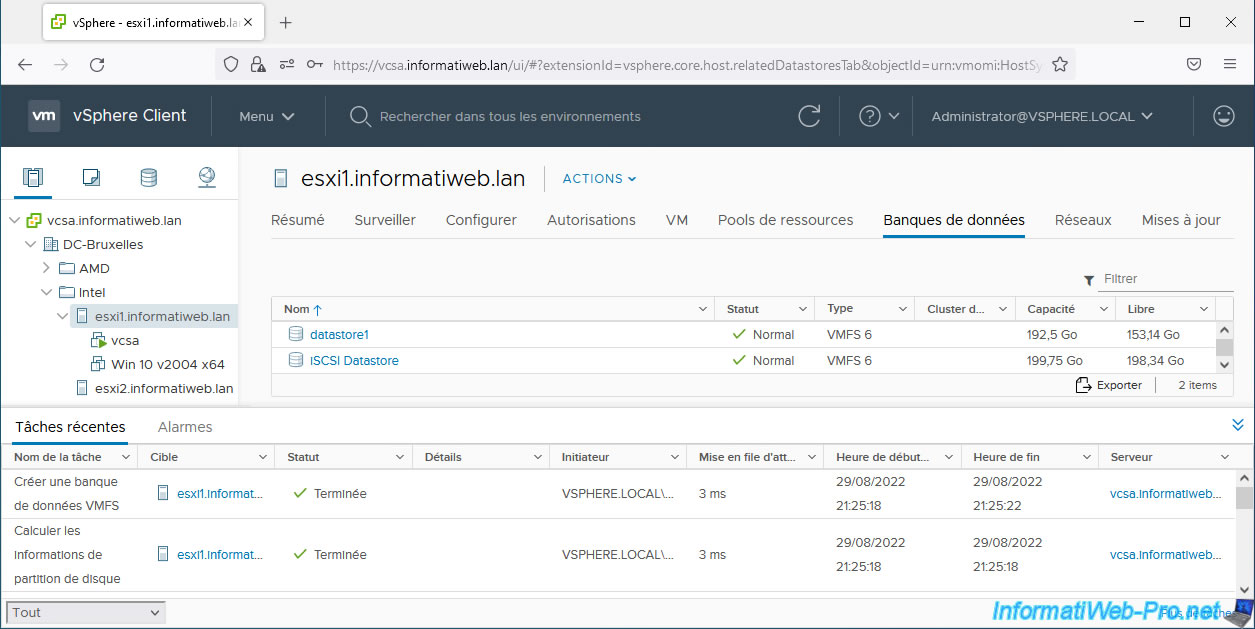
Your iSCSI datastore appears.
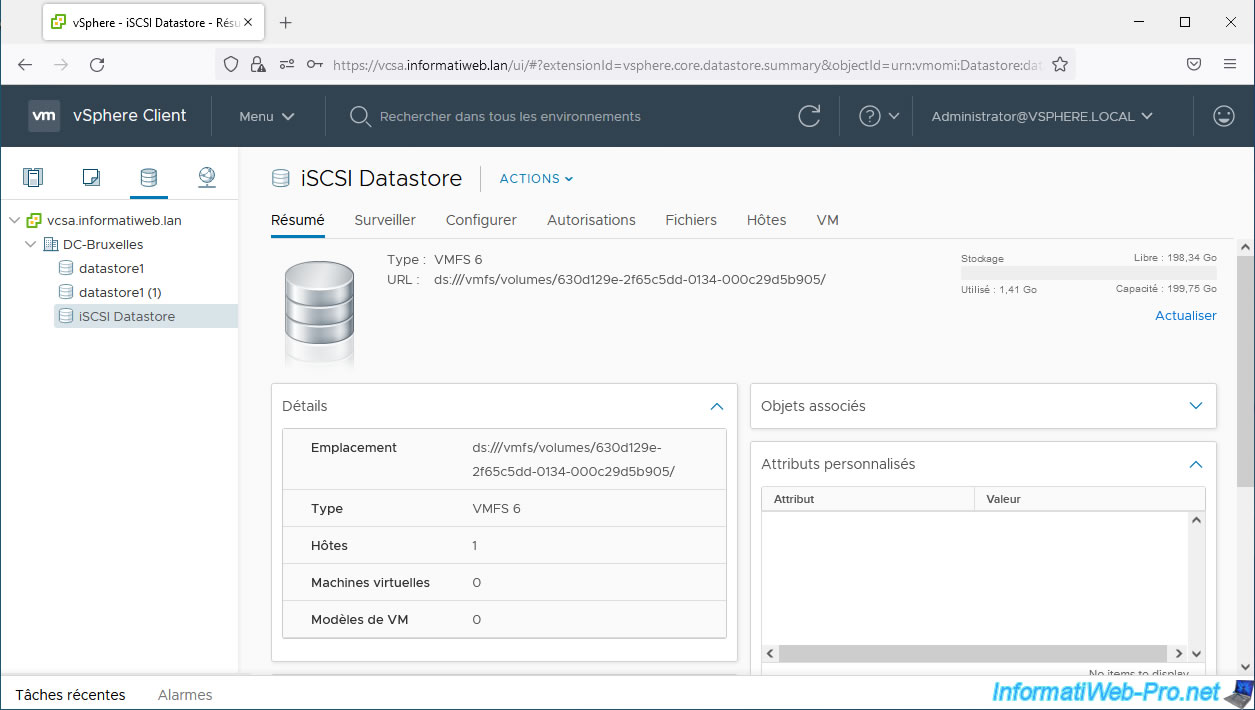
In the "Summary" tab of your iSCSI datastore, you will see that it is a "VMFS 6" type datastore and that nothing indicates that it is a data created on an iSCSI server.
In the "Configure -> General" tab, you will be able to see the capacity of your iSCSI datastore.
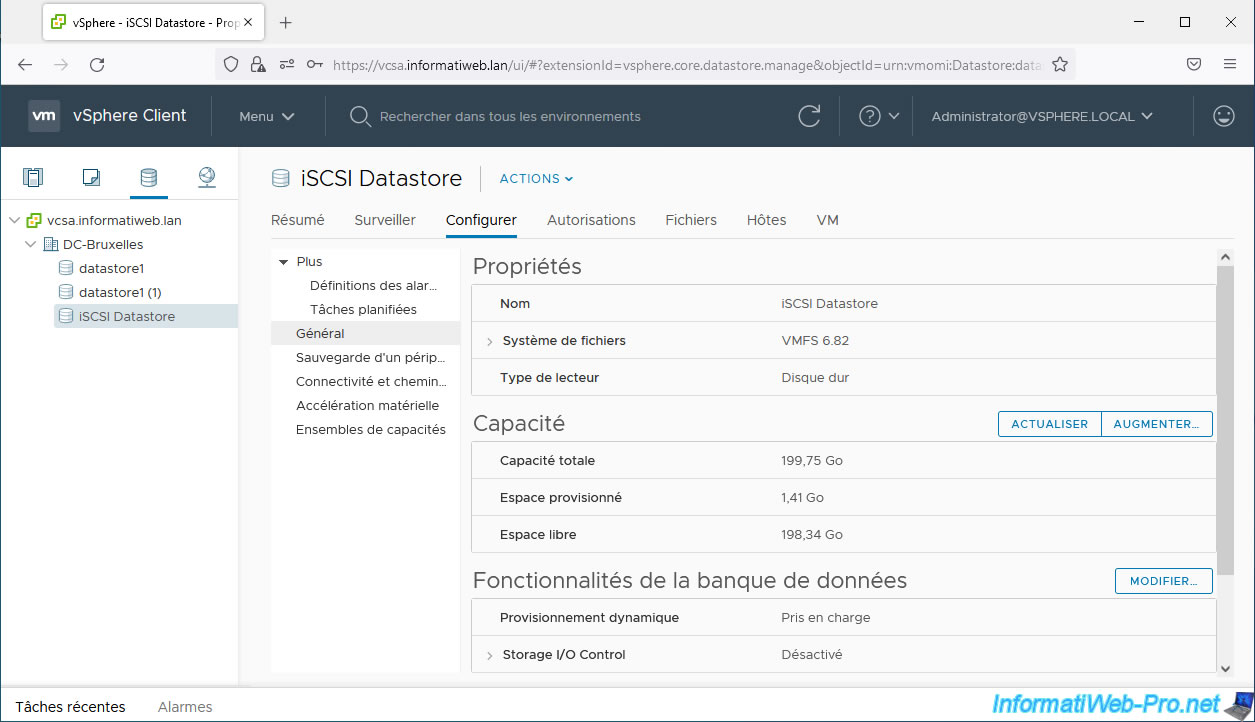
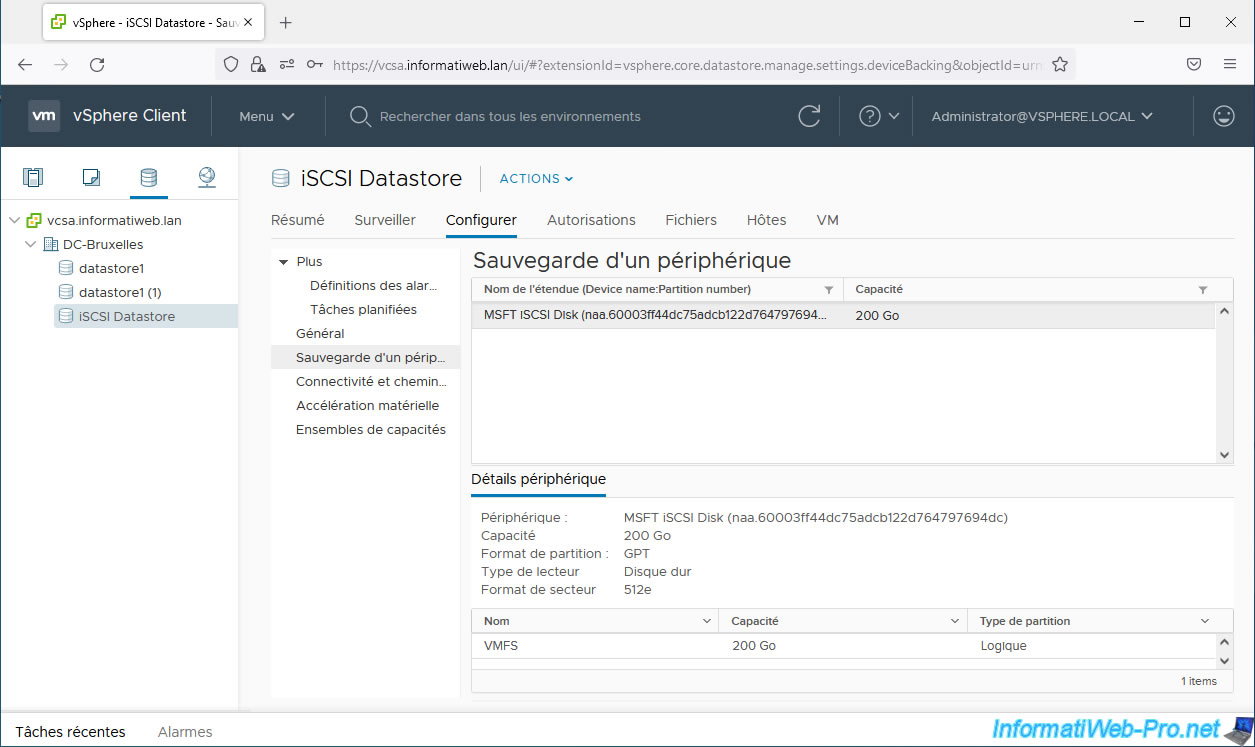
To see that it is a remote datastore, go to: Configure -> Device Backing.
In our case, we can see that it was created on a device named "MSFT iSCSI Disk".
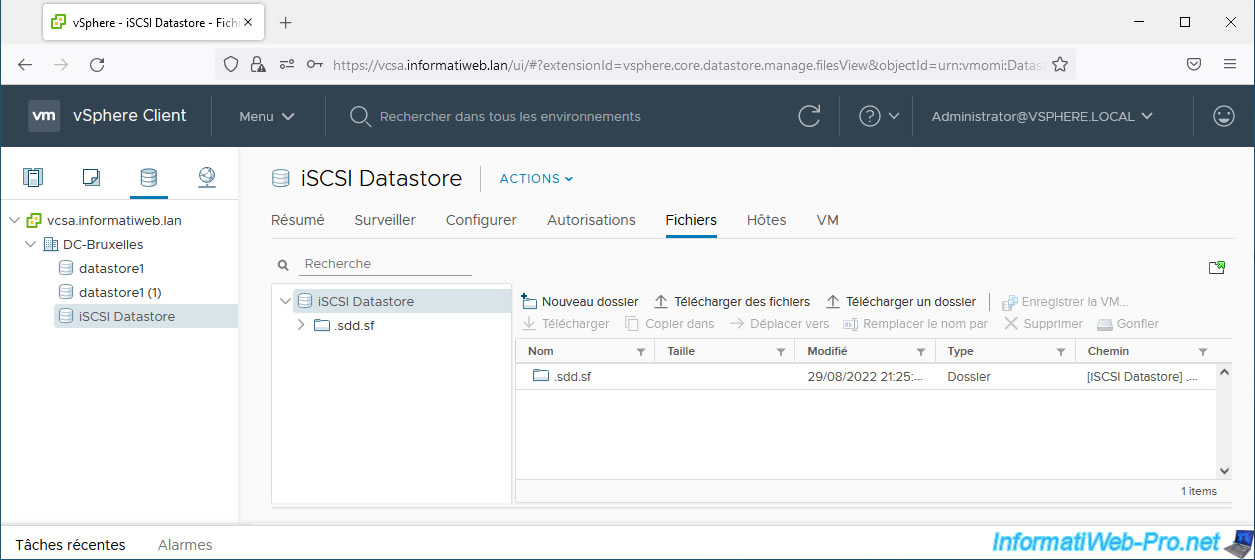
To view the contents of your datastore, go to the "Files" tab (as for a local VMFS datastore).
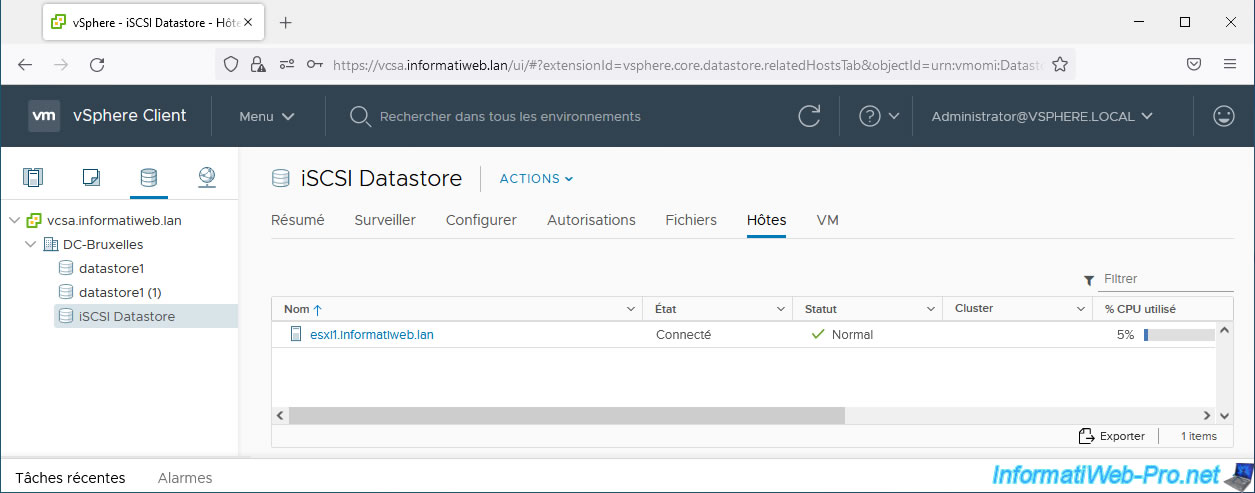
In the "Hosts" tab, you will see that this datastore is used only by your host.
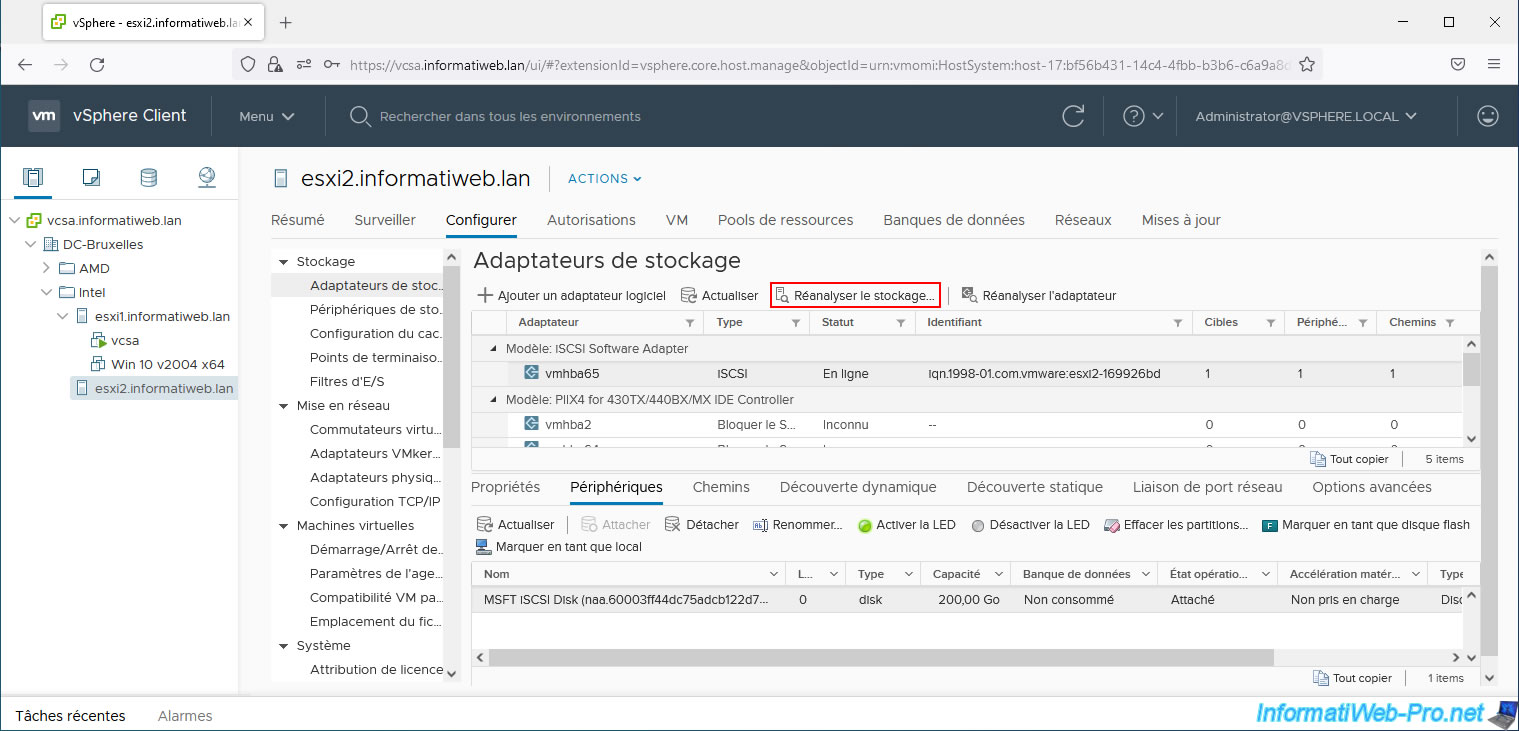
6. Detect the iSCSI datastore from a 2nd VMware ESXi host
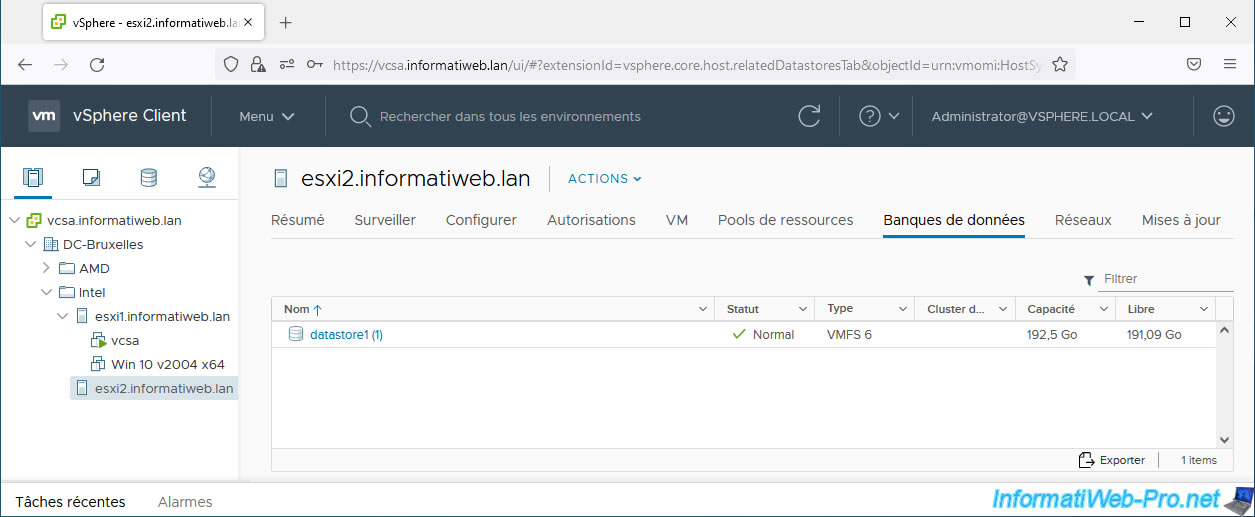
As you can see, at the moment your 2nd host does not see the iSCSI datastore you just created.
If you select this 2nd host and go to "Configure -> Storage -> Storage Adapters -> Devices", you will see that the device seen by this host is nevertheless the same as the iSCSI virtual disk seen by your 1st host.
However, in the "Datastore" column, you will see the mention "Not consumed".
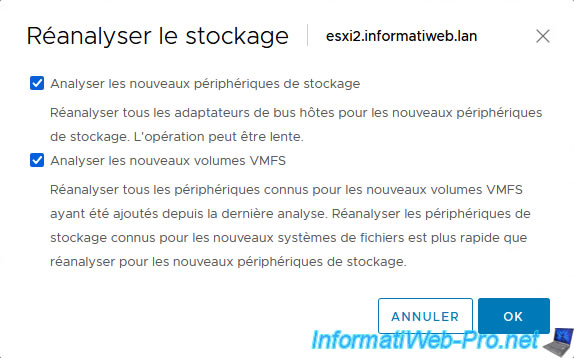
To fix the problem, select this software iSCSI controller and click "Rescan Storage".
In the "Rescan Storage" window that appears, leave the 2 boxes checked and click OK.
- Scan for new Storage Devices: allows you to rediscover new iSCSI virtual disks available on your iSCSI server (iSCSI target), if necessary, if your host can access them.
- Scan for new VMFS Volumes: detects the datastore created on your iSCSI virtual disk.
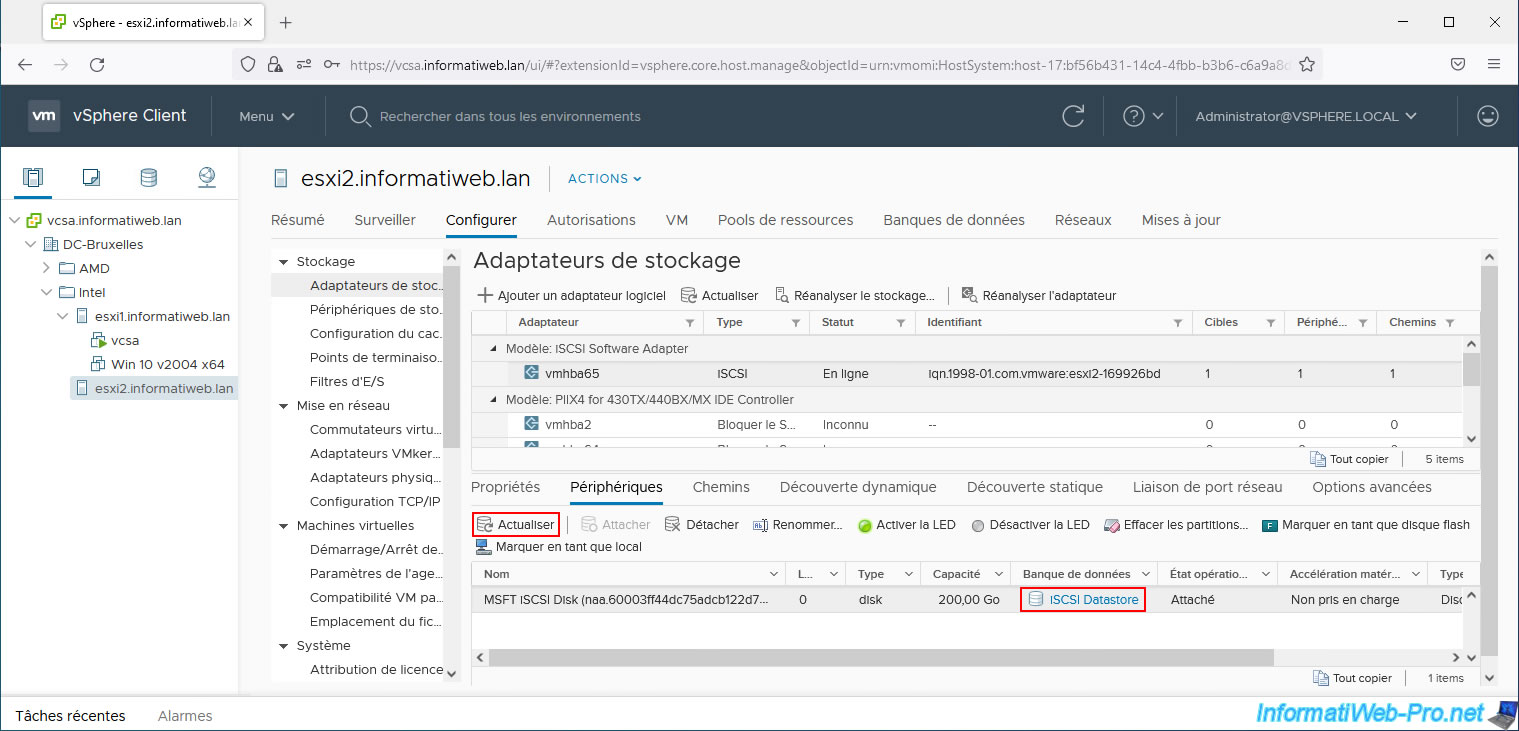
Then, in the "Devices" tab, click "Refresh".
As you can see, your host now sees your iSCSI datastore created on this iSCSI virtual disk from your 1st VMware ESXi host.
If you go to the "Datastores" tab of your 2nd host, you will see that your previously created iSCSI datastore will automatically appear.
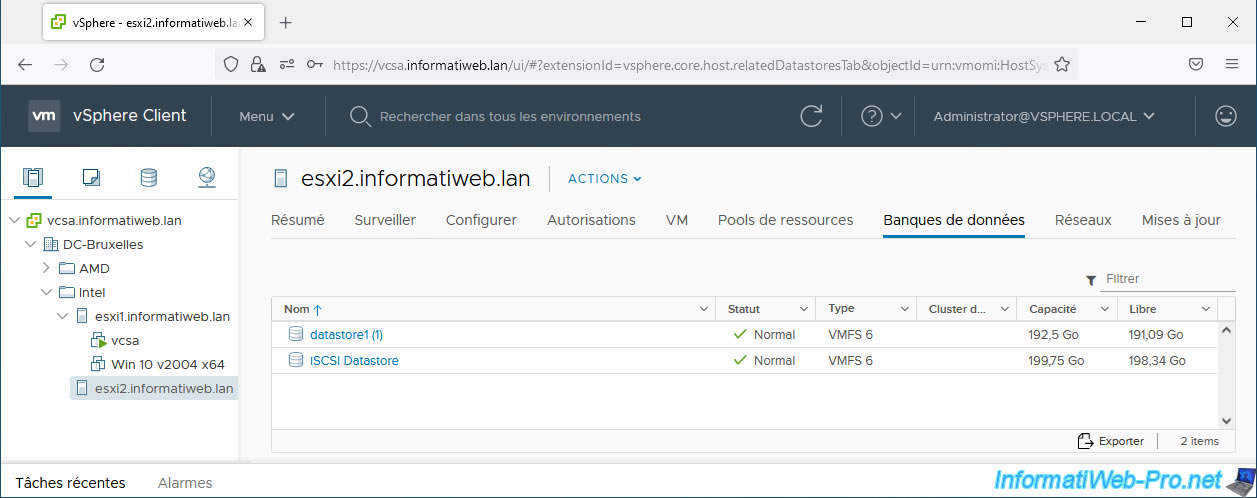
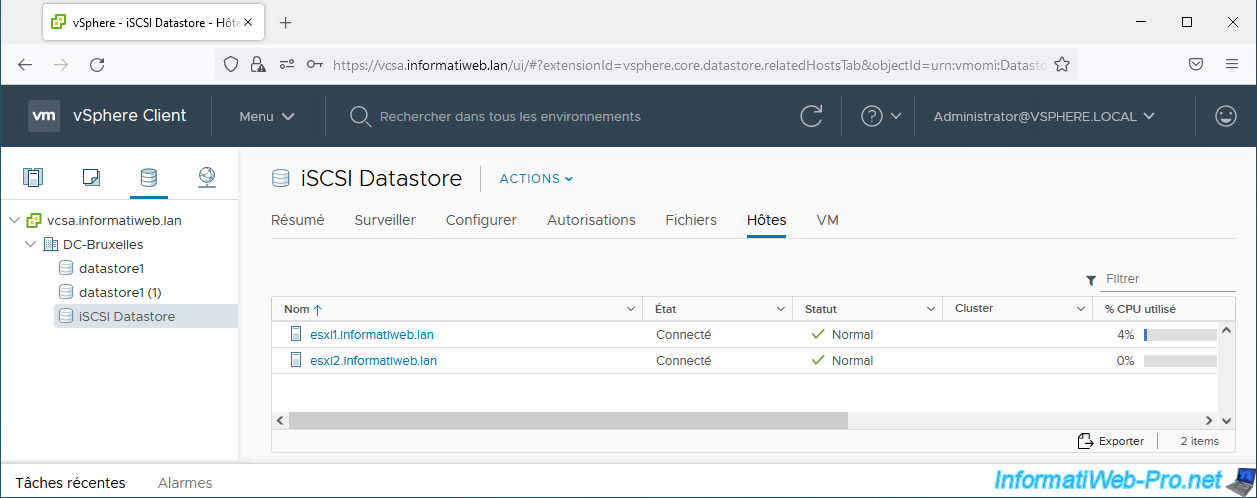
If you go to the "Hosts" tab of your iSCSI datastore, you will see that it is used by your 2 hosts.
Note: there is therefore no option to mount the datastore on additional hosts as was the case with NFS, as this is managed via adding and configuring an iSCSI controller, then manually rescanning the storage from the additional host from which you also want to access your datastore.
Share this tutorial
To see also
-

VMware 5/15/2024
VMware vSphere 6.7 - Add a physical disk to host
-

VMware 9/27/2024
VMware vSphere 6.7 - Array integration APIs (VAAI)
-

VMware 9/6/2024
VMware vSphere 6.7 - Configure port binding (iSCSI traffic)
-

VMware 6/13/2024
VMware vSphere 6.7 - Configure Virtual Flash (SSD cache)
No comment