Create a content library (to store ISO files and VM templates) on VMware vSphere 6.7
- VMware
- 04 December 2024 at 14:08 UTC
-

- 4/4

4. Deploy from an OVF template
To deploy a new virtual machine from an OVF template stored in your content library, you can also right-click on the desired location (data center or folder) and click: New Virtual Machine.
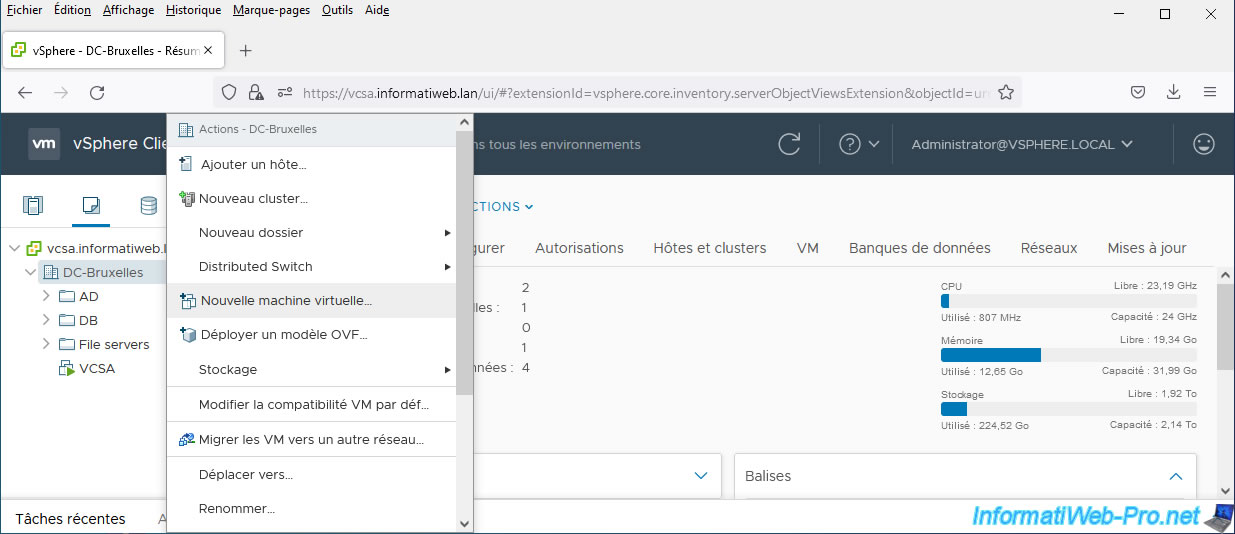
Then, choose: Deploy from template.
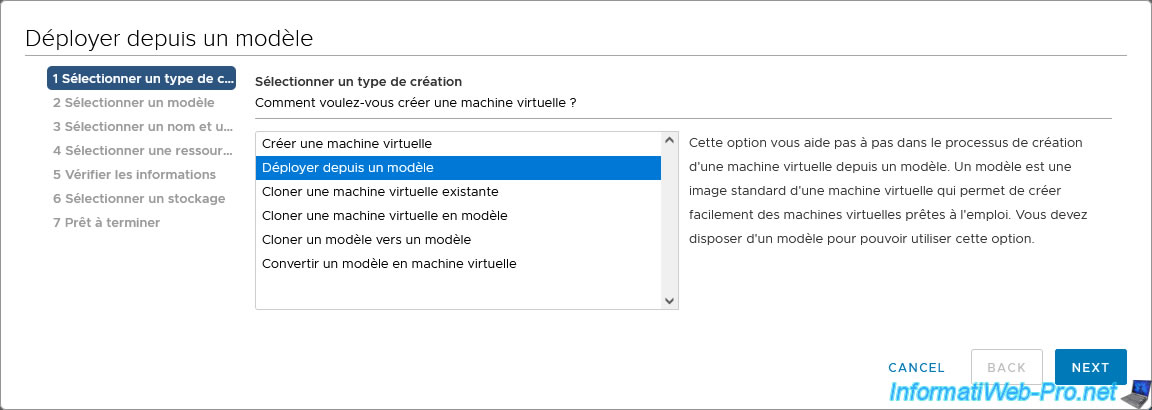
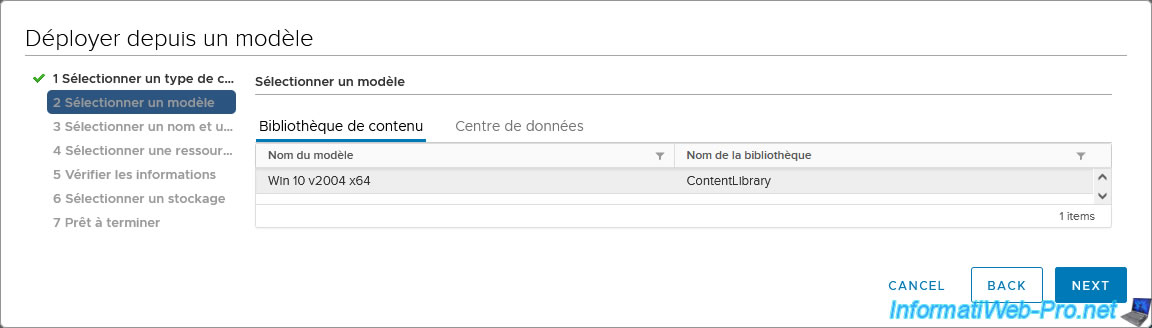
In the "Content Library" tab, you will see the OVF template that you had previously imported into your content library.
Select it and click: Next.
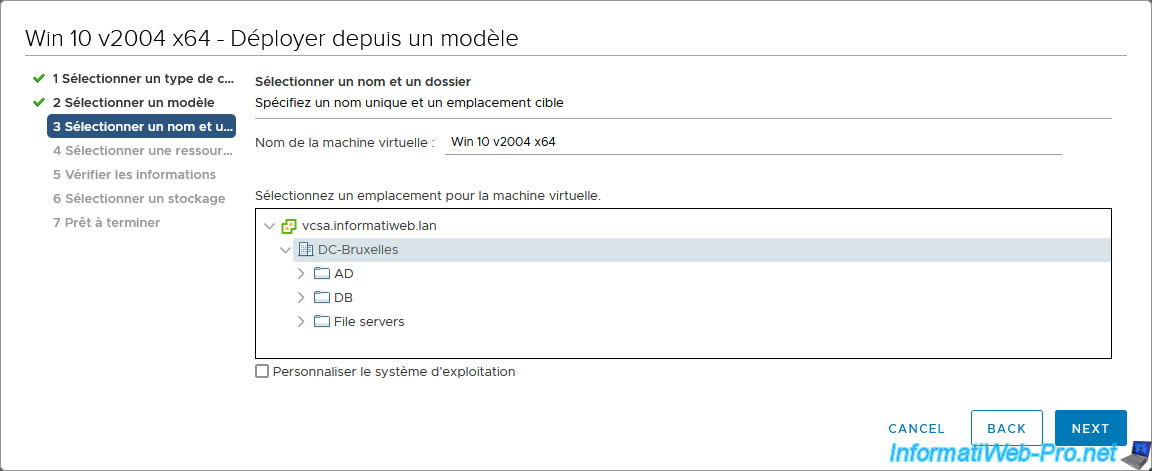
Specify a name for the new virtual machine that will be created from the chosen OVF model, then select the location where it should be added.
Note: to automatically personalize the guest operating system using a VM specification (previously created), check the "Customize operating system" box.
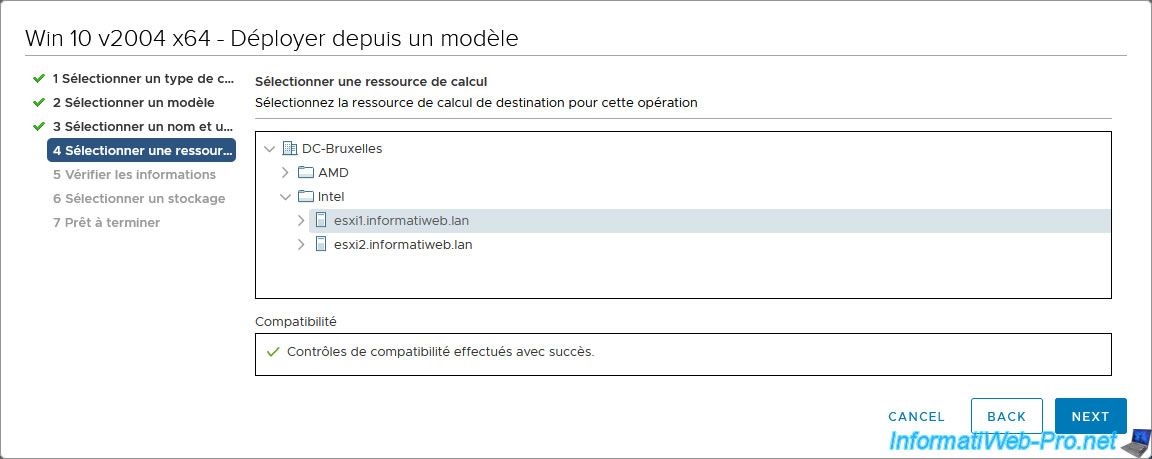
Select the compute resource that will be used to run this new virtual machine.
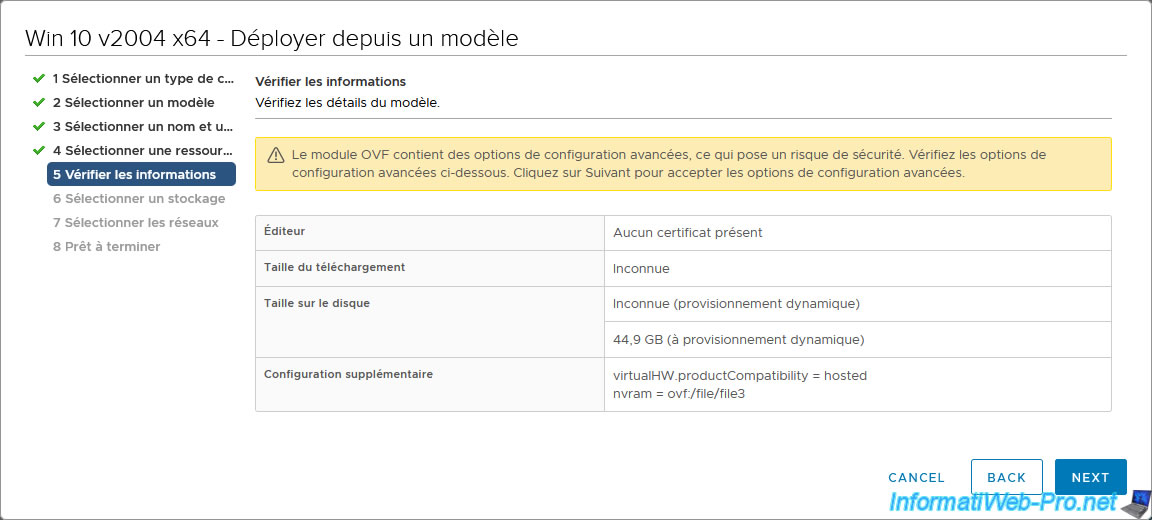
Information about the template appears.
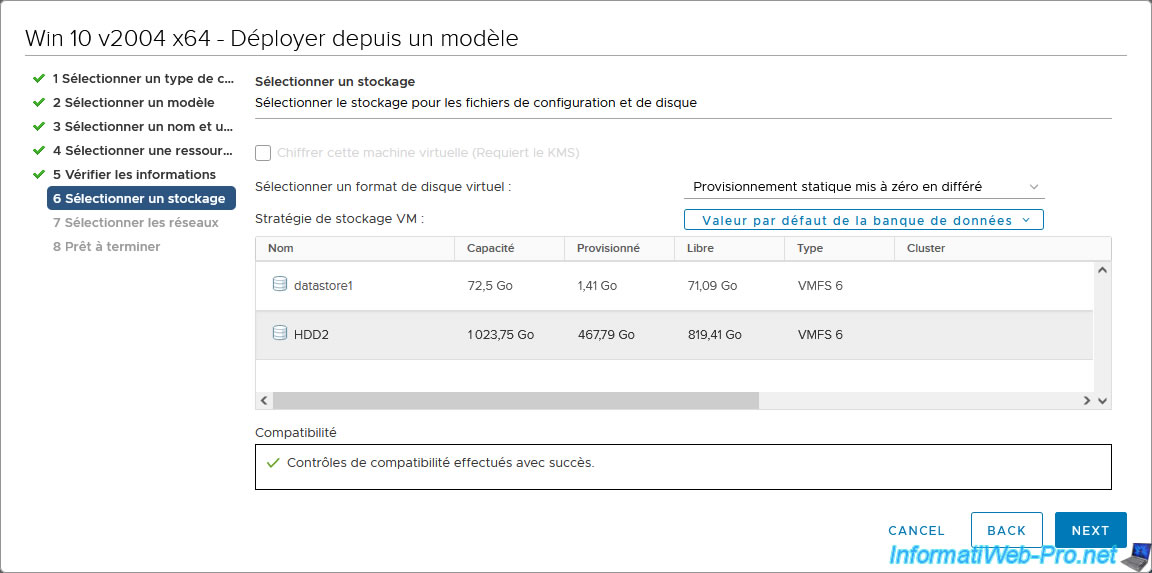
For the virtual disk format, you will be able to choose the type of provisioning to use for the virtual hard disk of this virtual machine.
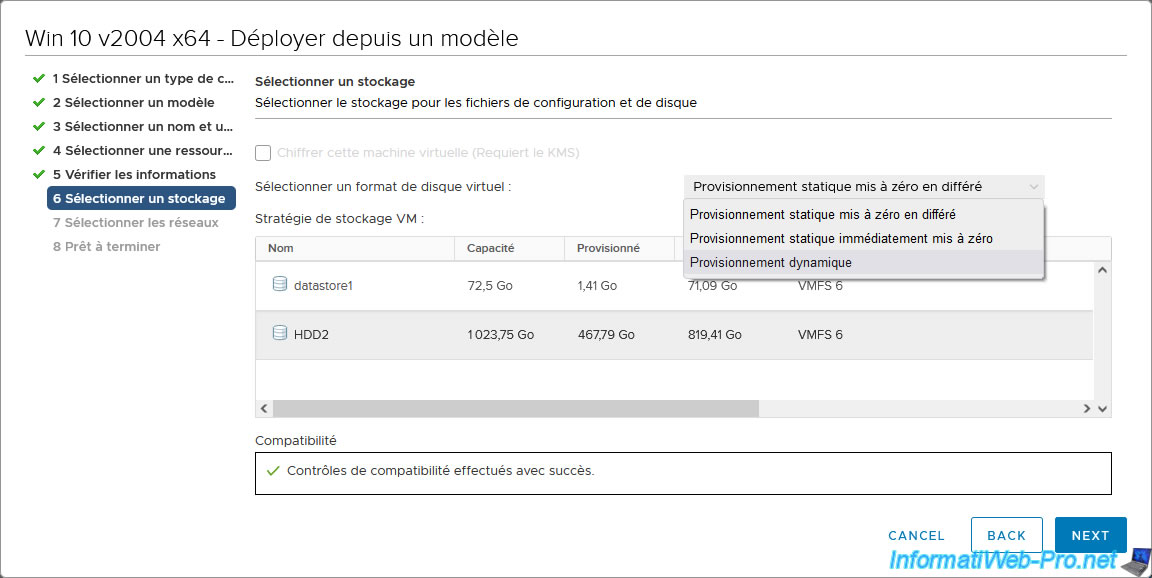
Next, select which datastore you want to store this new virtual machine in and click Next.
Select the network you want to connect your virtual machine to.
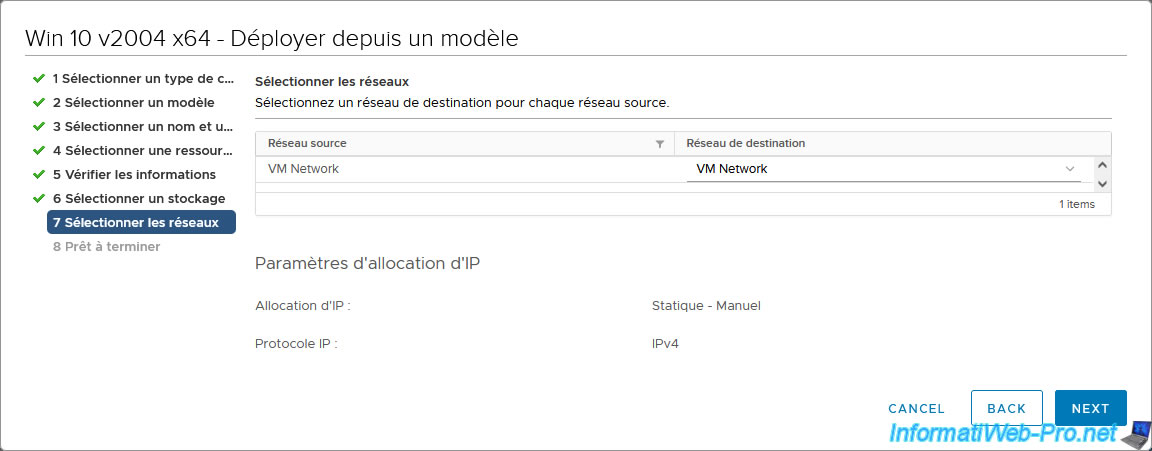
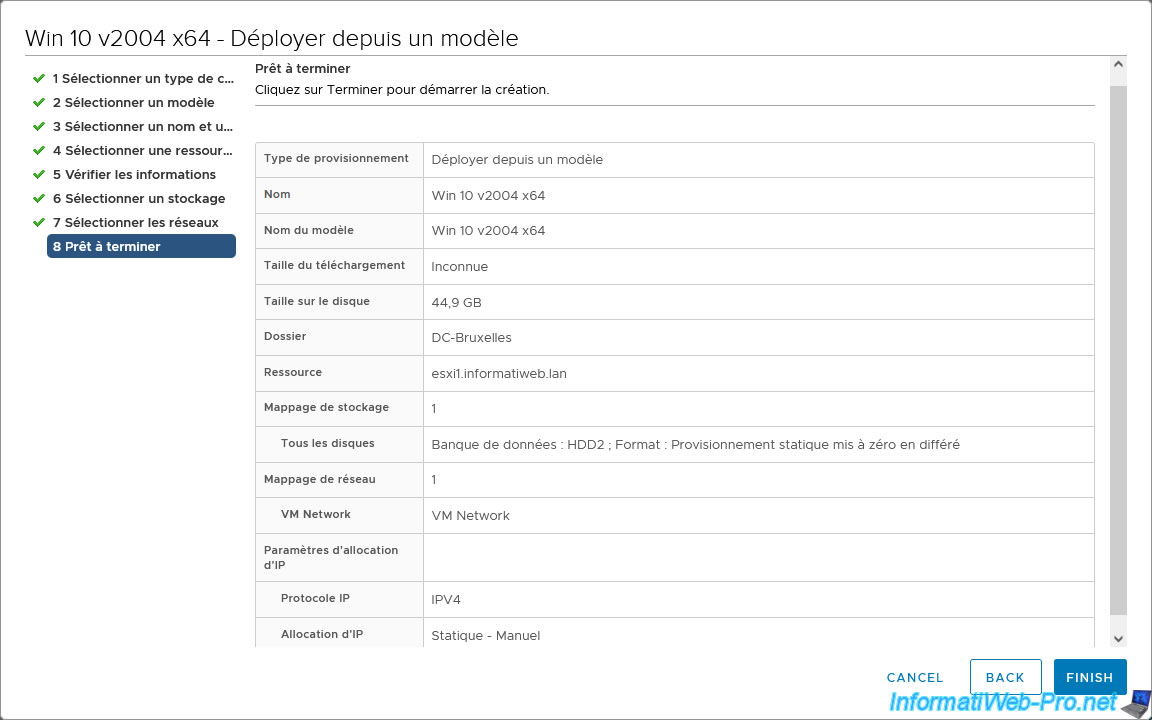
A summary of the configuration of this deployment appears.
Click Finish.
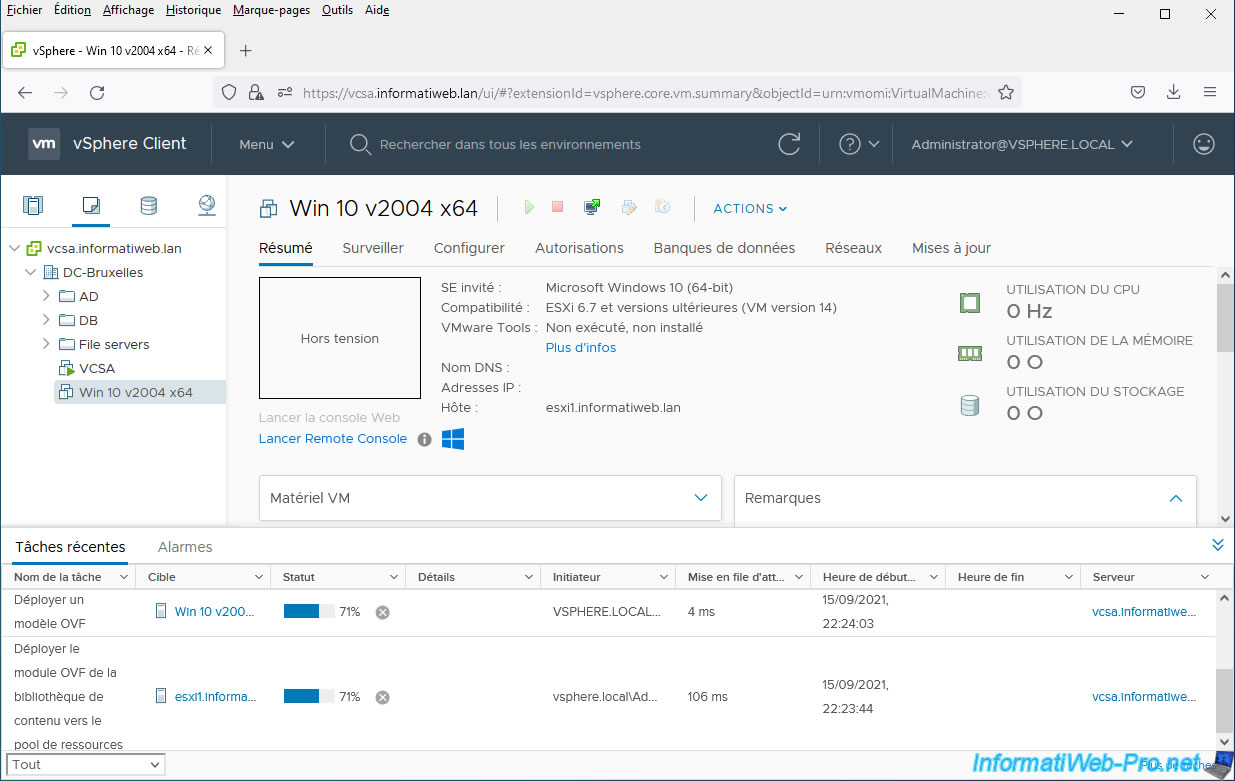
At the start of creating your new virtual machine, a "Transfer one or more files" task will be running.
![]()
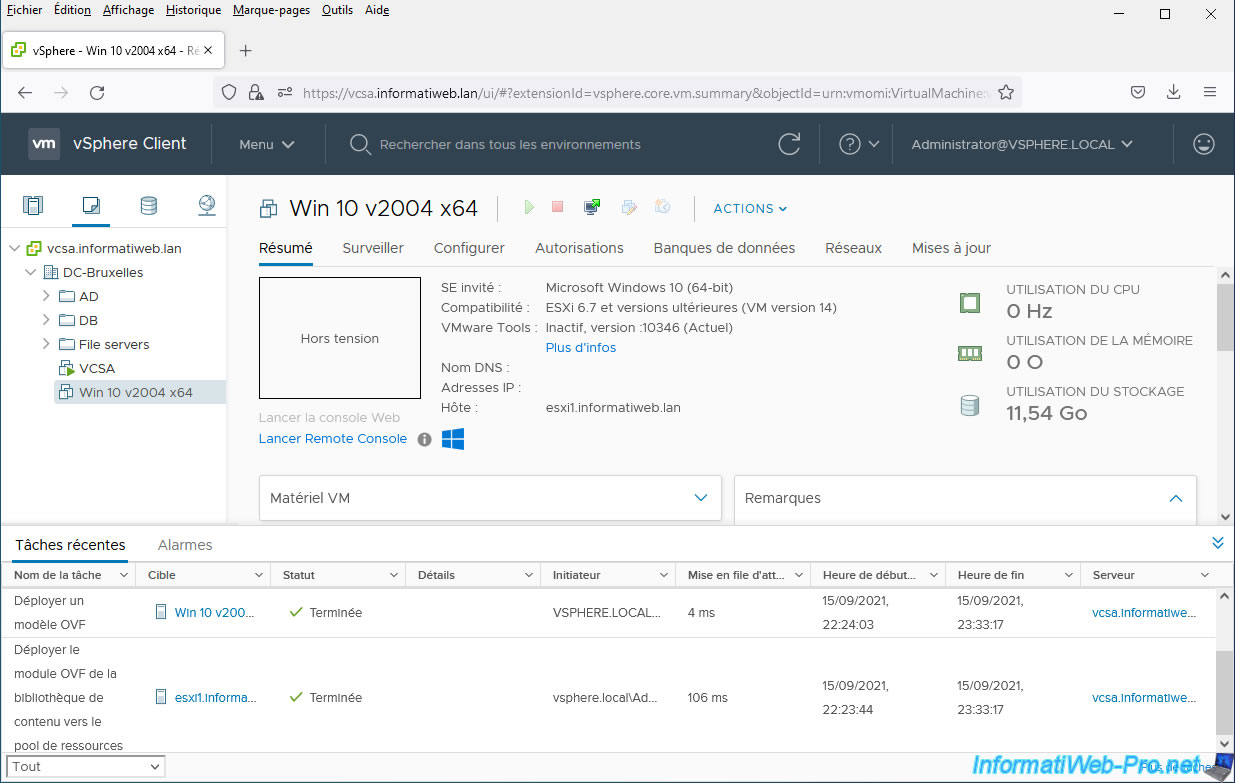
A little later, this "Transfer one or more files" task will complete.
![]()
However, the deployment of your new virtual machine will continue with 2 tasks:
- Deploy an OVF template
- Deploy OVF module from content library to resource pool
Once your OVF template deployment is complete, these 2 tasks will be completed.
5. Create a virtual machine and use a content library ISO file
As you saw previously, you can store OVF templates, but also ISO files in your content library.
You can therefore use these ISO files from an existing virtual machine or create a new virtual machine and install its guest operating system using one of these ISO files.
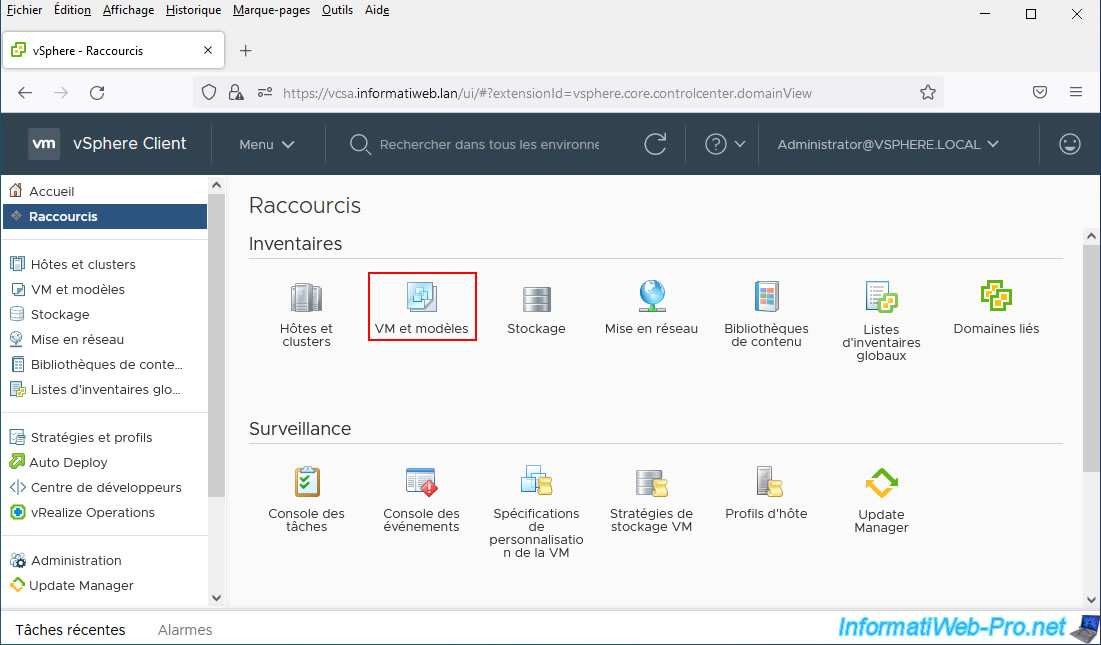
To get started, view your VMware vCenter Server shortcuts by clicking the "vSphere Client" link at the top of the page, then click: VMs and Templates.
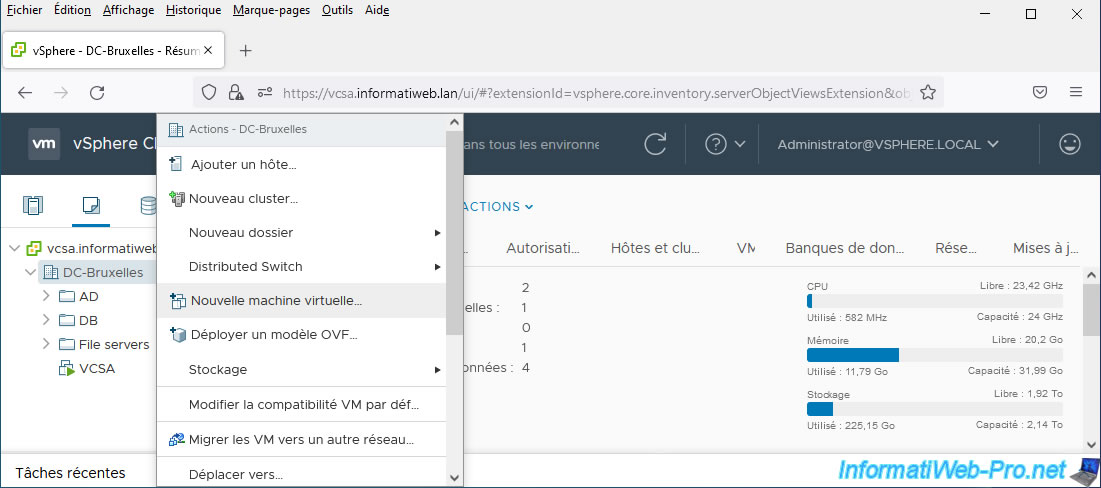
Next, right-click on the data center or folder where you want to add a new virtual machine and click: New Virtual Machine.
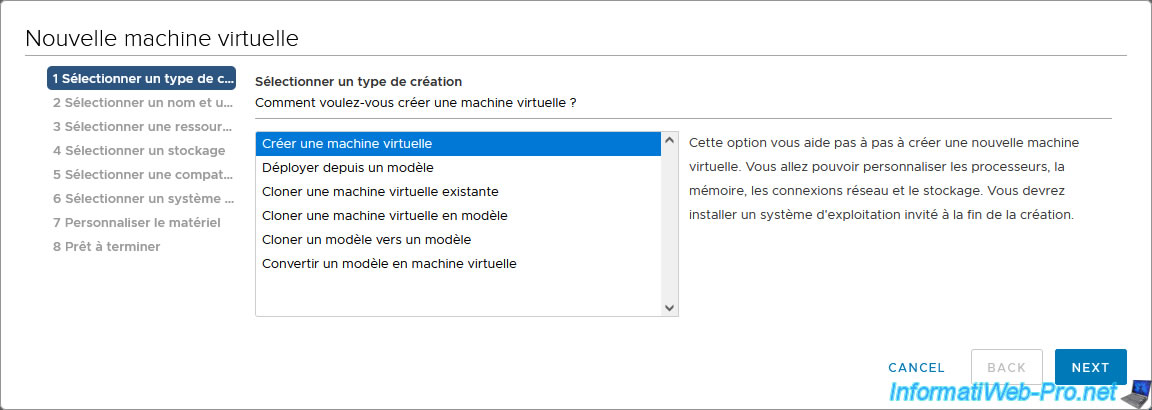
Select "Create a new virtual machine" and click Next.
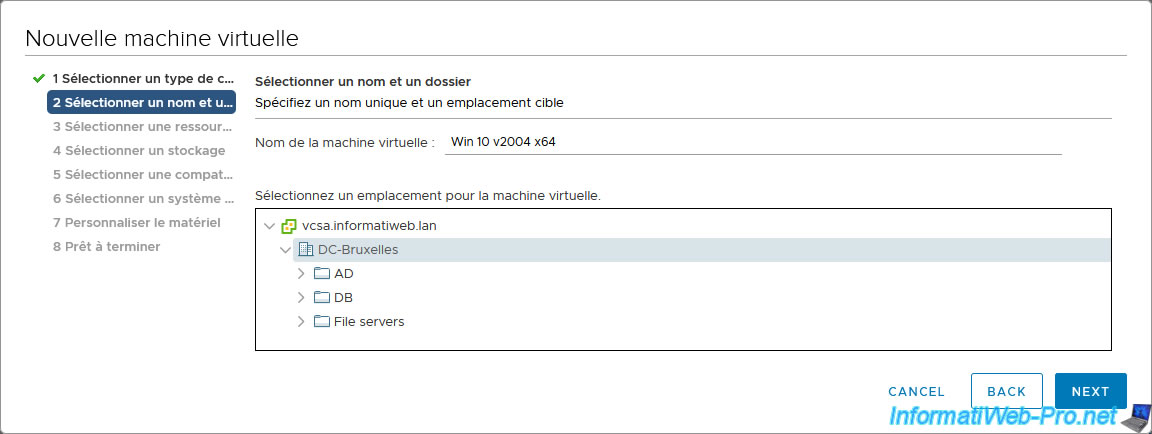
Provide a name for your new virtual machine and where you want to add it.
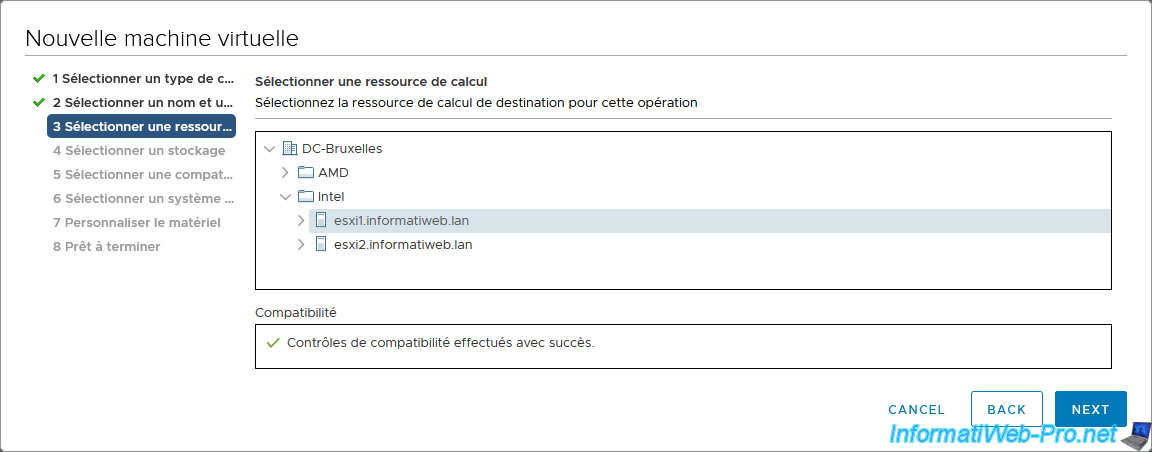
Select the compute resource (hypervisor) that will be used to run this virtual machine.
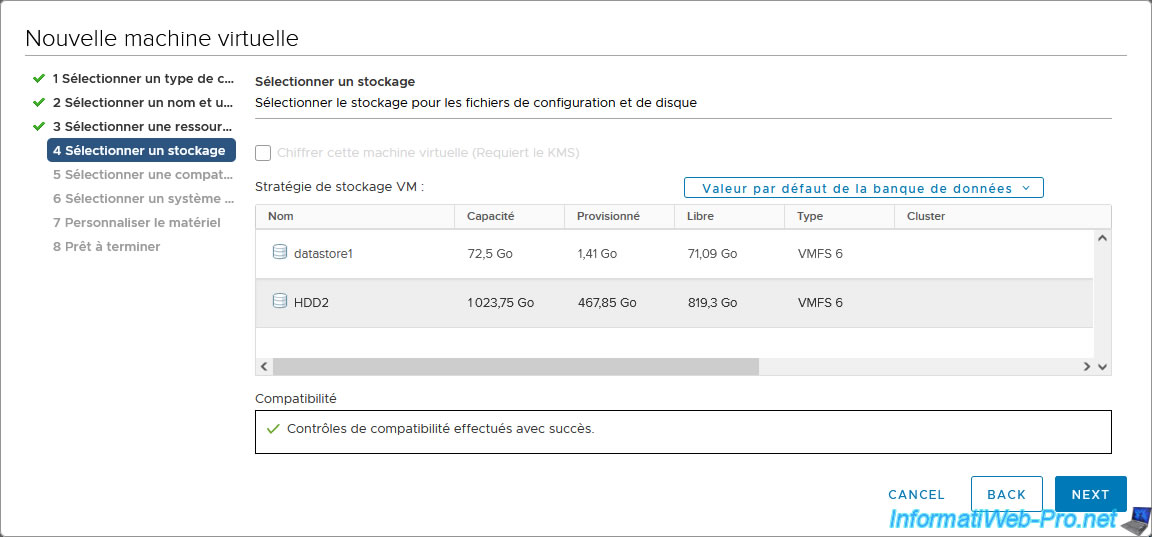
Select the datastore where you want to store this virtual machine.
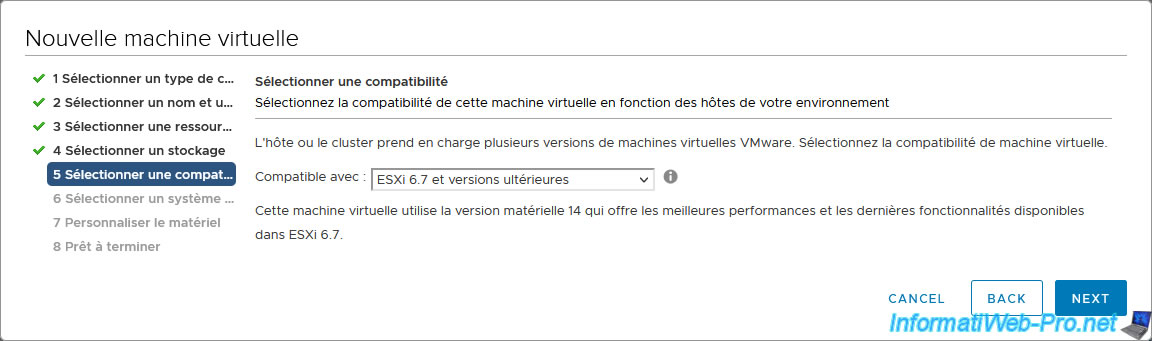
Select the compatibility level you want to use for this virtual machine and therefore also the version of its virtual hardware.
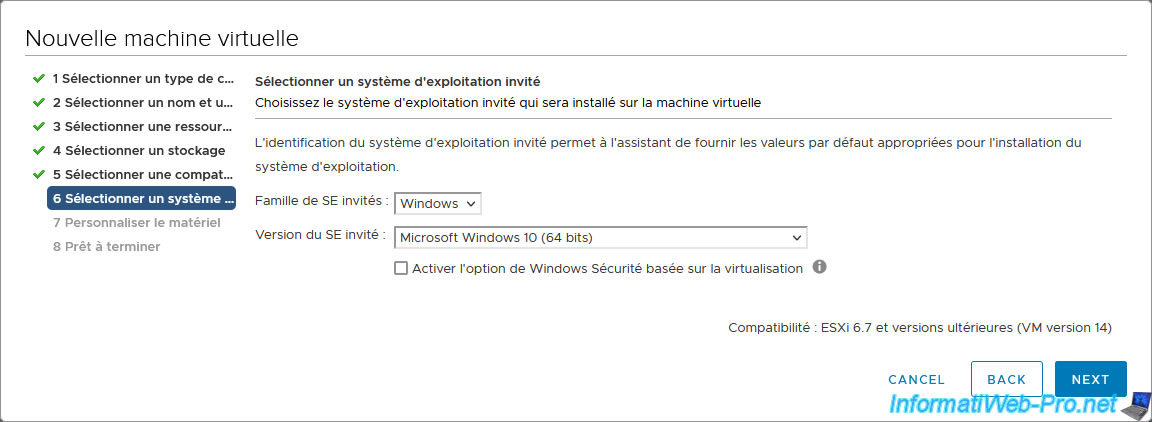
Select the operating system family you want to install in this new virtual machine, as well as its version.
In our case: Microsoft Windows 10 (64-bit).
Adapt the virtual hardware there if necessary, then select "Content Library ISO File" for the virtual CD/DVD drive.
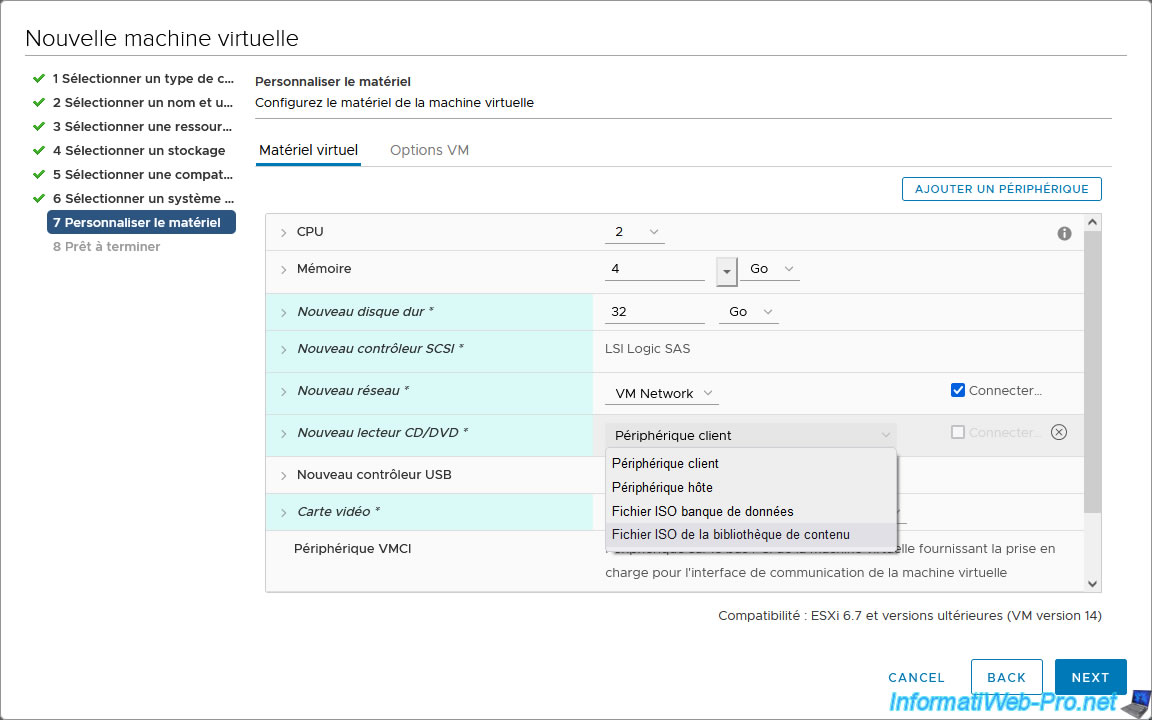
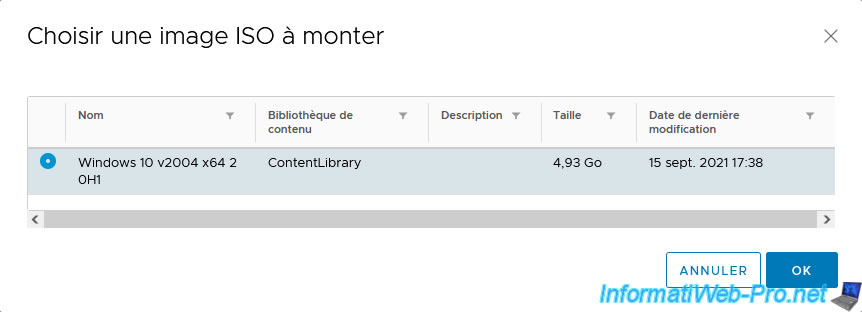
The ISO file previously imported into your content library will appear.
Select it and click OK.
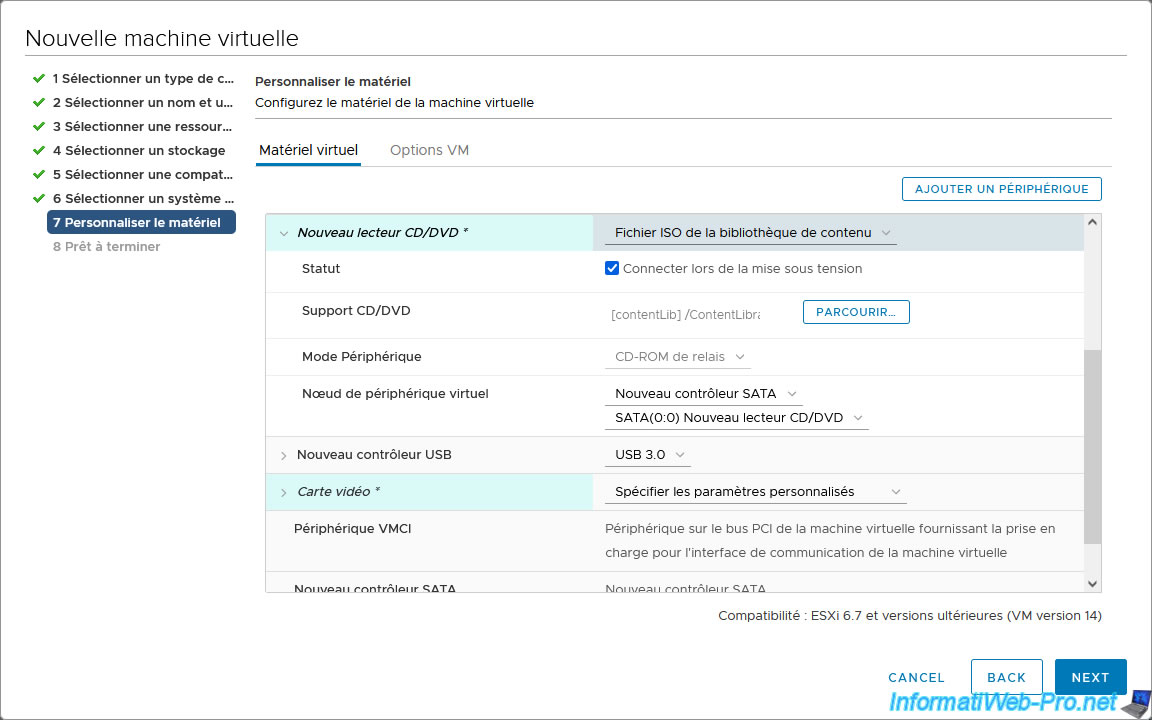
Don't forget to check the "Connect At Power On" box for this new CD/DVD drive so that your virtual machine automatically boots to the desired guest operating system installation CD/DVD.
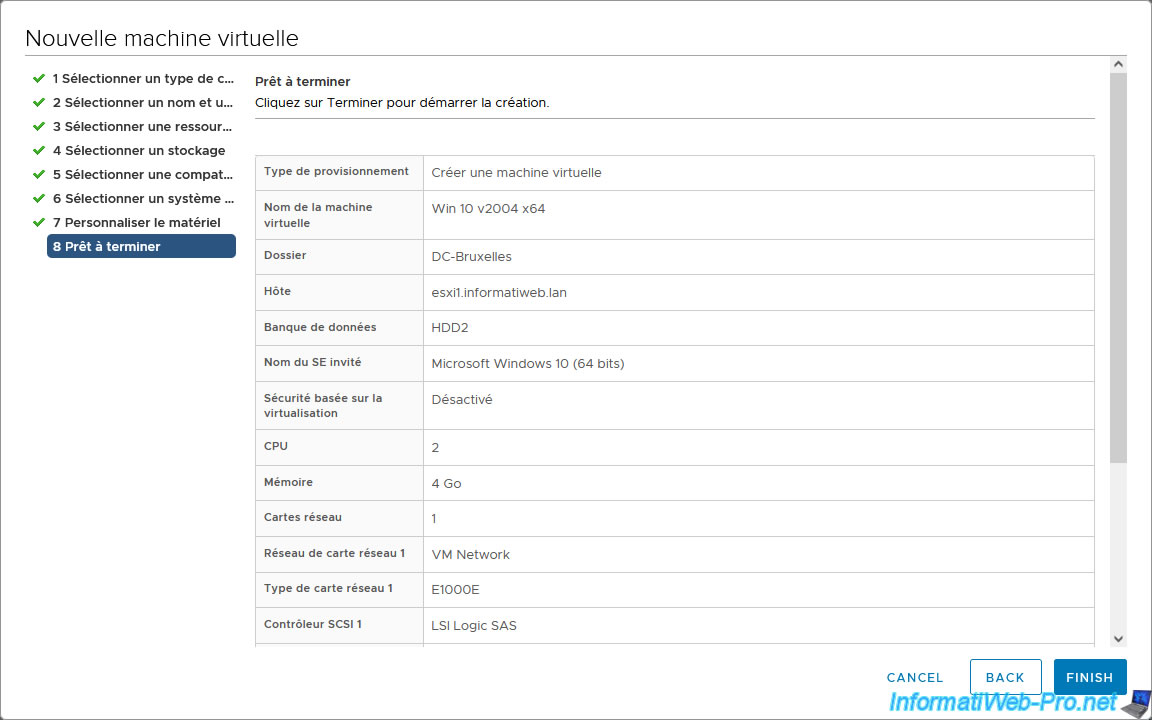
A summary of your virtual machine configuration appears.
Click Finish.
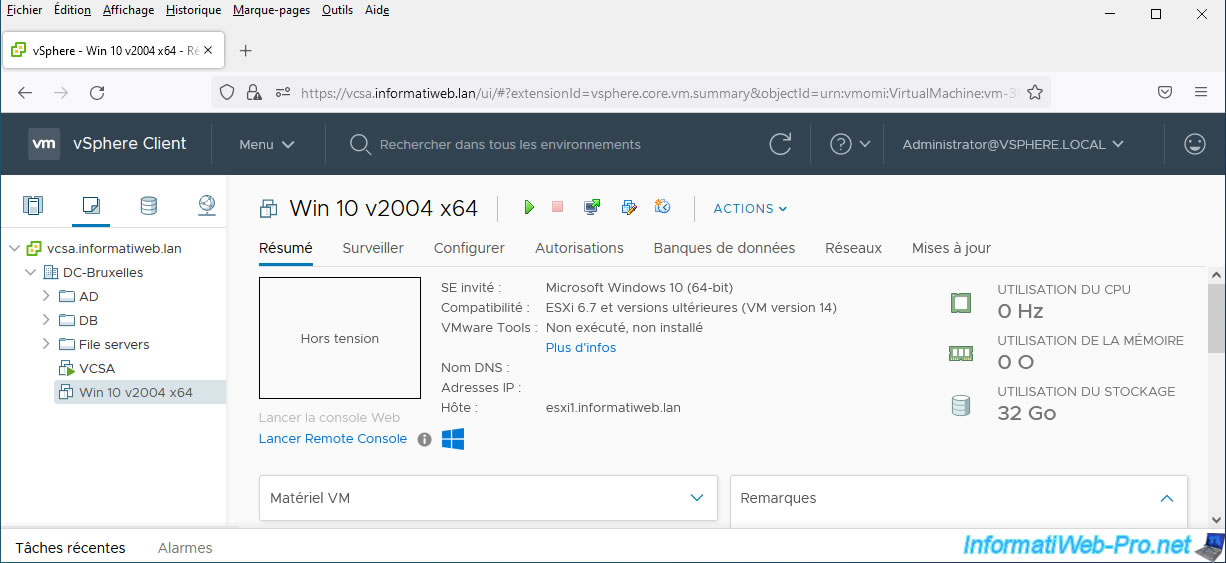
Your virtual machine has been created.
All you have to do is start it to install the guest operating system from the ISO file stored in your content library.
Once the guest operating system is installed, don't forget to install VMware Tools there as well.
Share this tutorial
To see also
-

VMware 5/15/2024
VMware vSphere 6.7 - Add a physical disk to host
-

VMware 9/27/2024
VMware vSphere 6.7 - Array integration APIs (VAAI)
-

VMware 9/6/2024
VMware vSphere 6.7 - Configure port binding (iSCSI traffic)
-

VMware 6/13/2024
VMware vSphere 6.7 - Configure Virtual Flash (SSD cache)
No comment