Configure port binding (for iSCSI traffic) on VMware vSphere 6.7
- VMware
- 06 September 2024 at 08:11 UTC
-

- 3/3

3. Configuring the iSCSI server
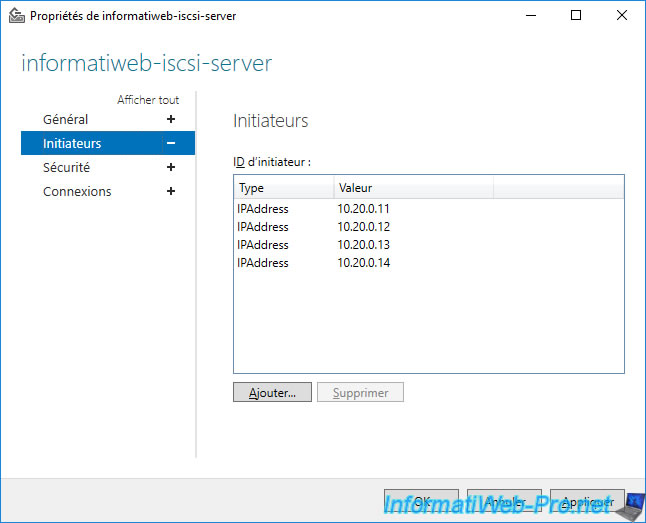
On your iSCSI server, modify the properties of your iSCSI target and go to the "Initiators" section.
In the list that appears, add the IP addresses of your VMware ESXi hosts for the network dedicated to iSCSI traffic.
In our case, these are the IP addresses "10.20.0.11" to "10.20.0.14".
4. Configure port binding for iSCSI traffic
Since you are using several network cards connected to the same subnet (network ID), it is necessary to configure the iSCSI port link for it to work correctly.
Indeed, by default, the use of several VMkernel adapters on the same subnet is not supported. For iSCSI traffic, network port binding on your host's software iSCSI controller helps resolve the issue.
Source: Multi-homing on ESXi/ESX (2010877).
Important : network port binding for iSCSI traffic should only be used if the VMkernel adapters are on the same network and on the same virtual switch (vSwitch).
Sources :
- Considerations for using software iSCSI port binding in ESX/ESXi (2038869)
- Requirements for iSCSI Port Binding - VMware Docs
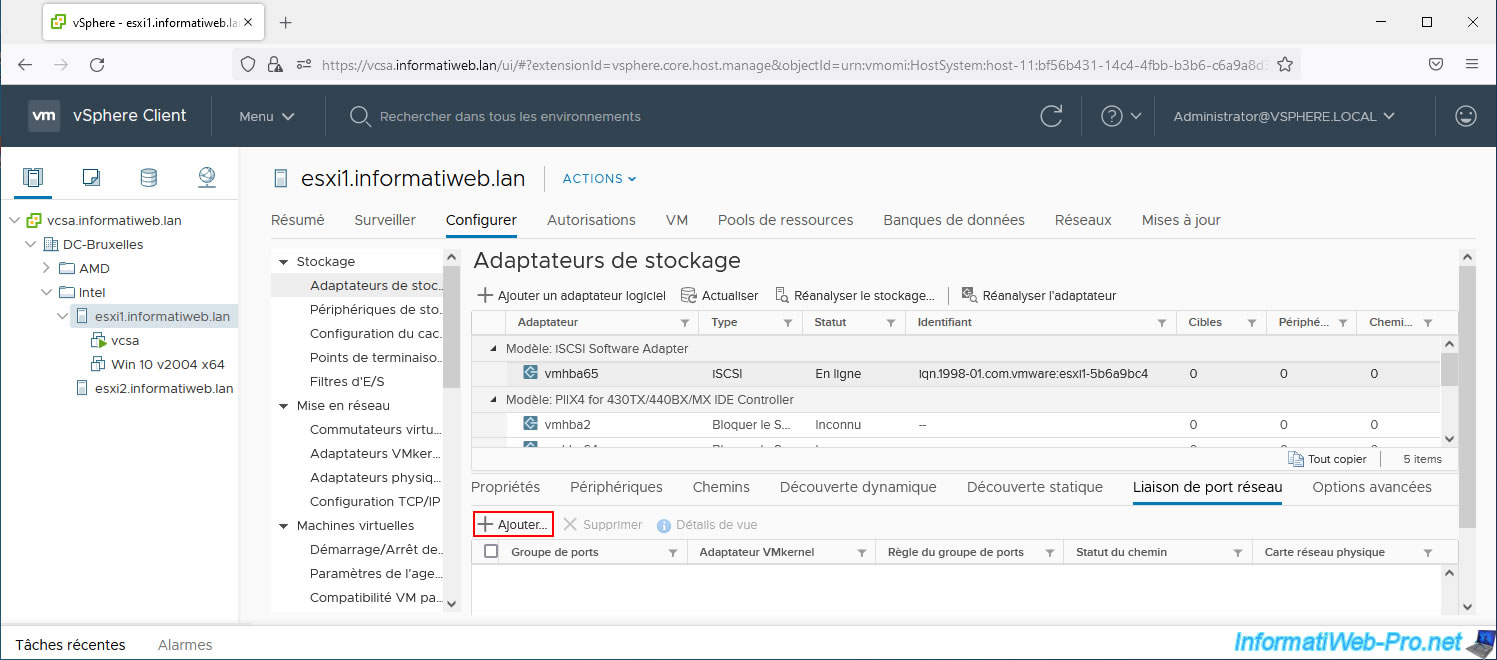
To do this, select your VMware ESXi host and go to “Configure -> Storage -> Storage Adapters”.
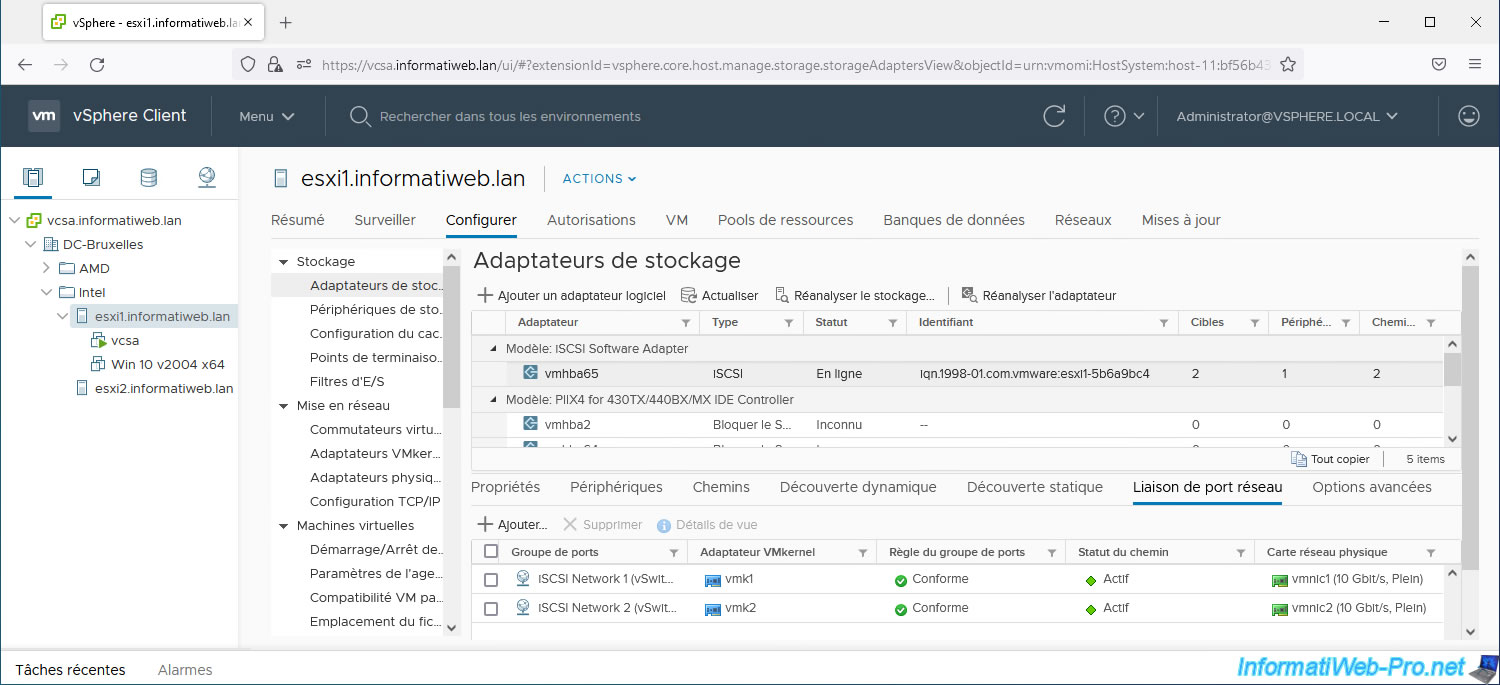
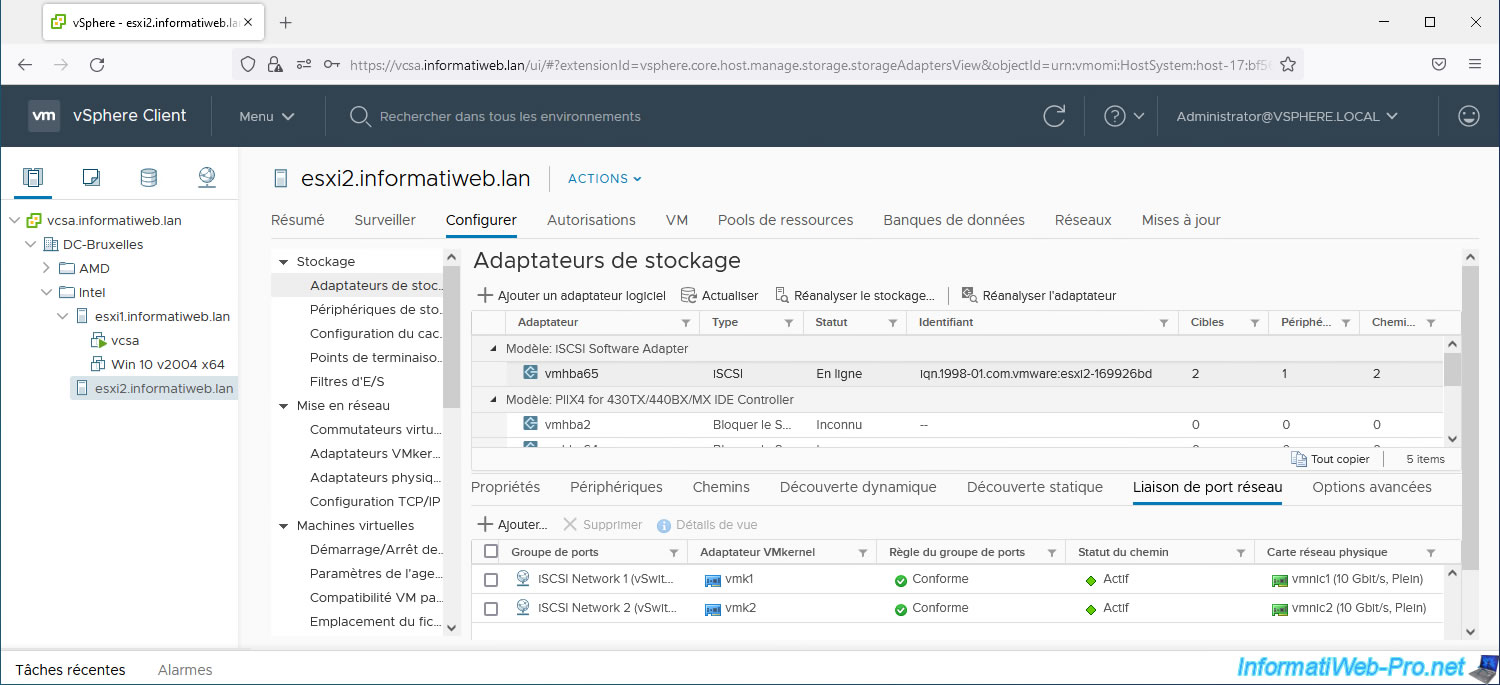
Next, select your software iSCSI controller (iSCSI Software Adapter), go to the "Network Port Binding" tab (bottom) and click: Add.
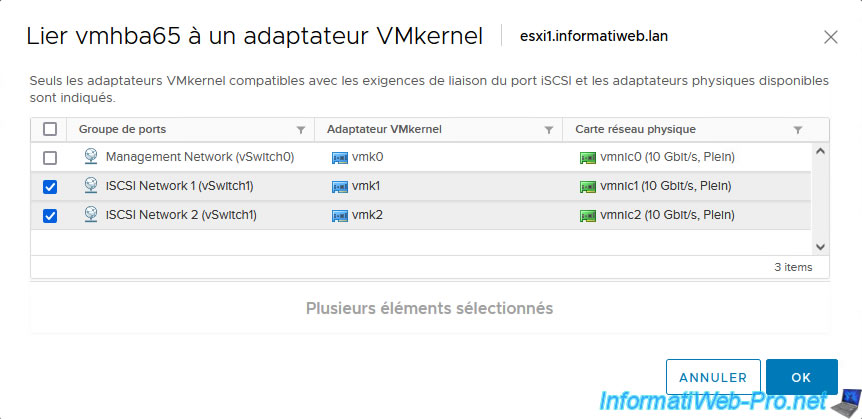
Select the 2 VMkernel adapters created previously for iSCSI traffic.
In our case :
- iSCSI Network 1 (vSwitch1) / vmk1 / vmnic1 (10 Gbit/s, Full)
- iSCSI Network 2 (vSwitch1) / vmk2 / vmnic2 (10 Gbit/s, Full)
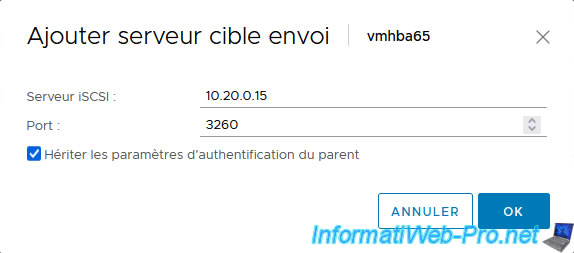
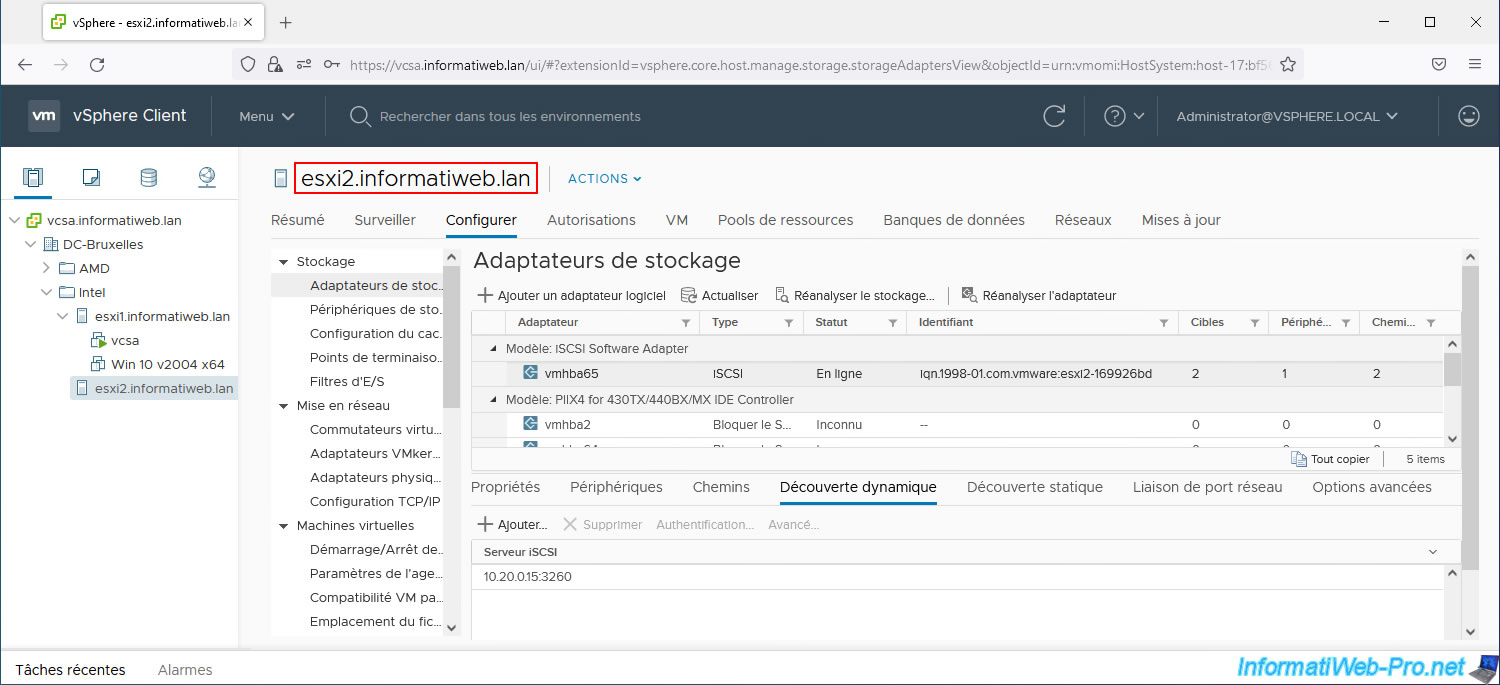
Next, go to the “Dynamic Discovery” tab and click: Add.
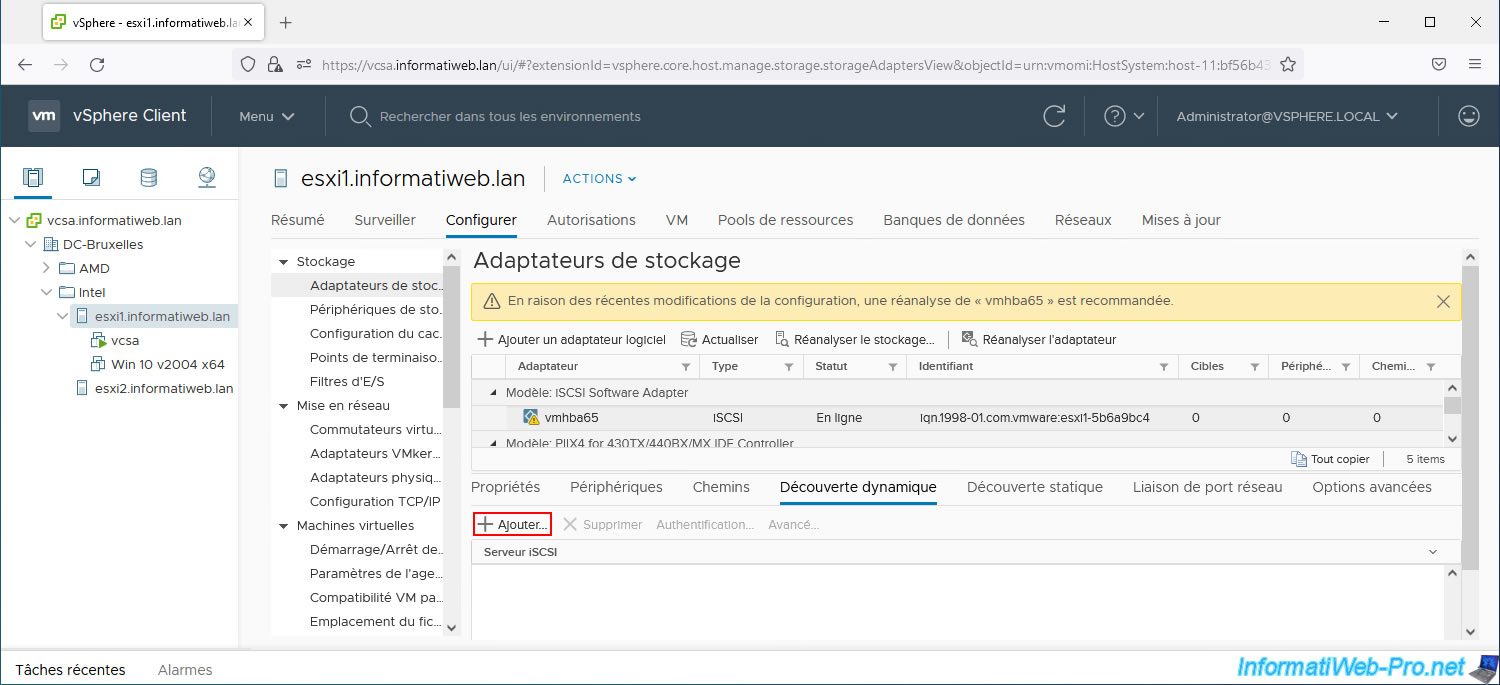
In the "Add Send Target Server" window, provide the IP address of your iSCSI server for the iSCSI dedicated subnet.
In our case, this is the IP address: 10.20.0.15.
If CHAP and/or reverse CHAP authentication is configured on your iSCSI server, select the added iSCSI server and click: Authentication.
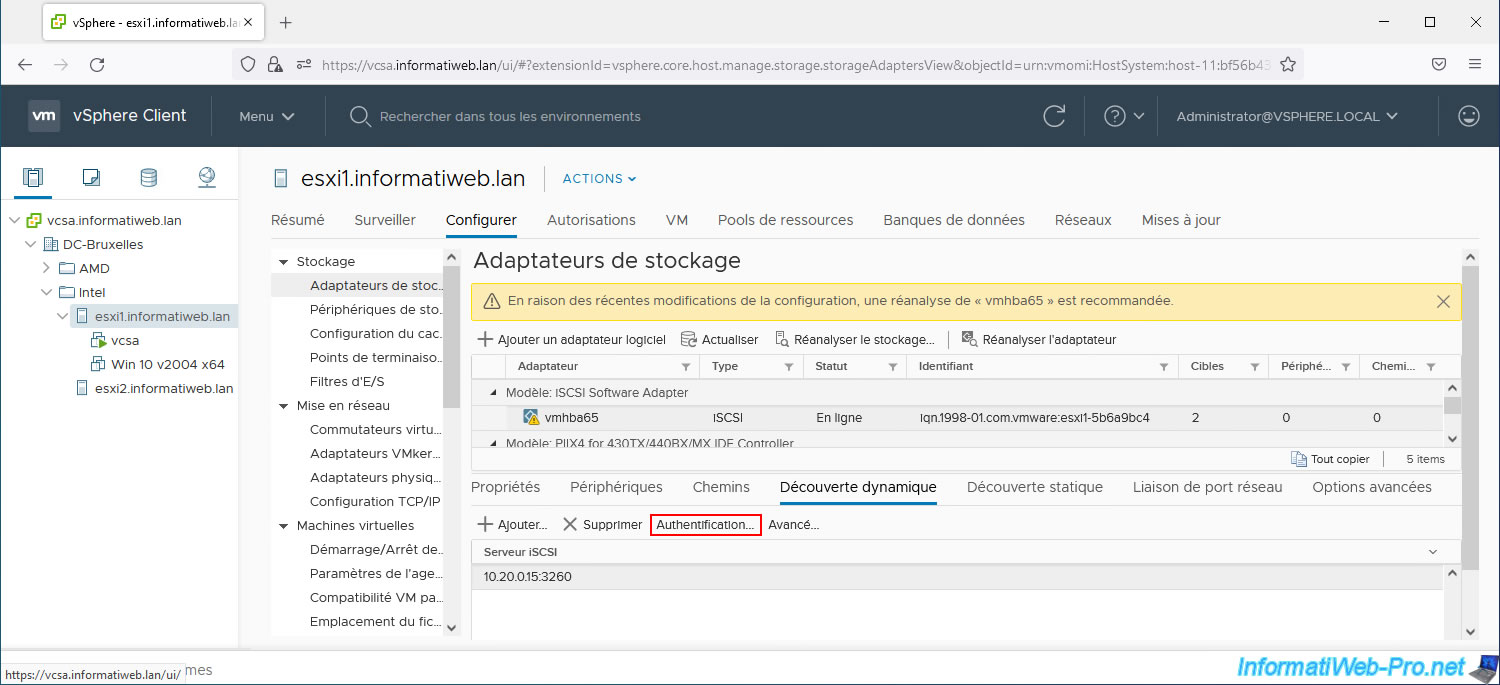
In our case, we had activated CHAP authentication on our iSCSI server.
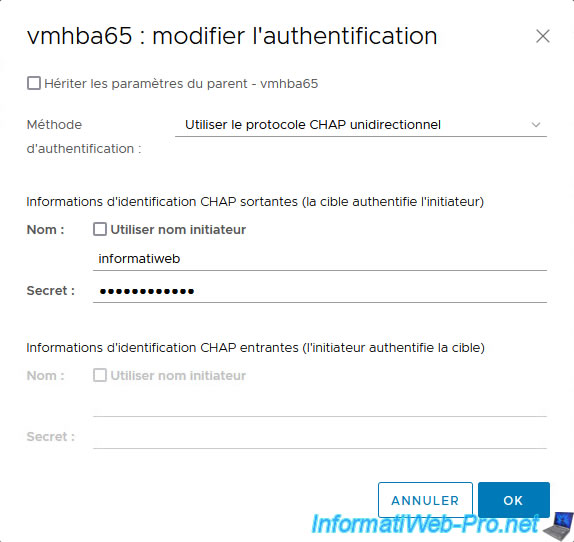
So, we select:
- Authentication method: Use unidirectional CHAP
- Outgoing CHAP Credentials (target authenticates the initiator):
- Name: user name configured for CHAP authentication.
- Secret: the associated password
Note: for more information regarding these options, refer to step "4. Configure CHAP authentication on the iSCSI initiator" of our tutorial on creating an iSCSI datastore on VMware vSphere.
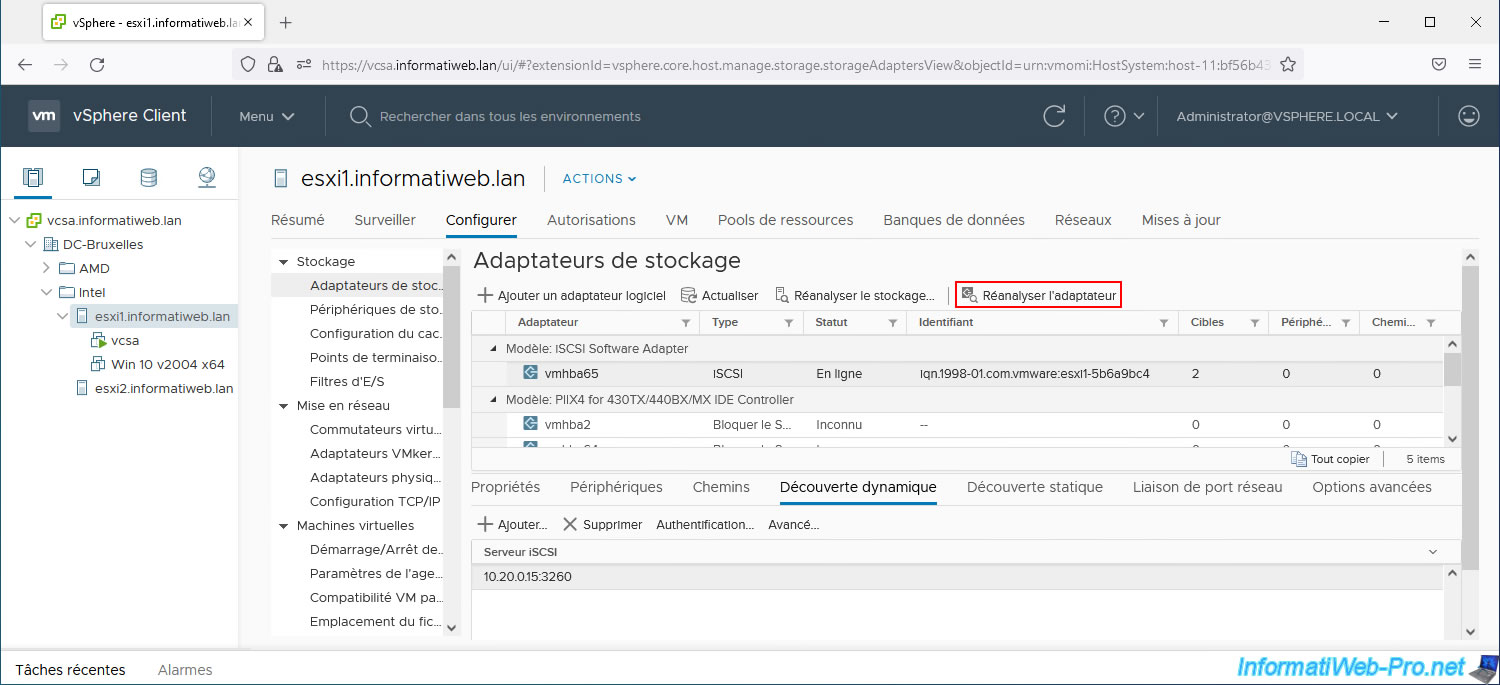
As requested by the warning displayed at the top of the page, you must click on: Rescan Adapter.
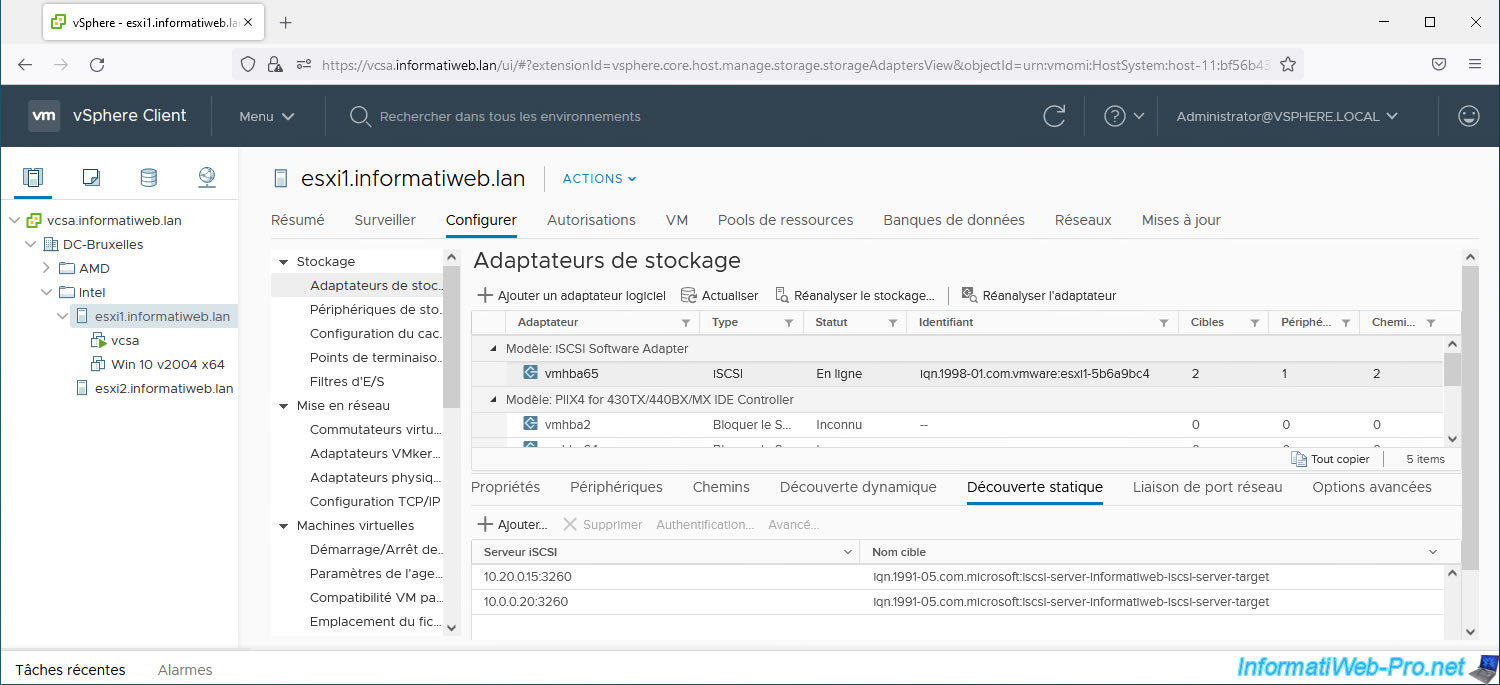
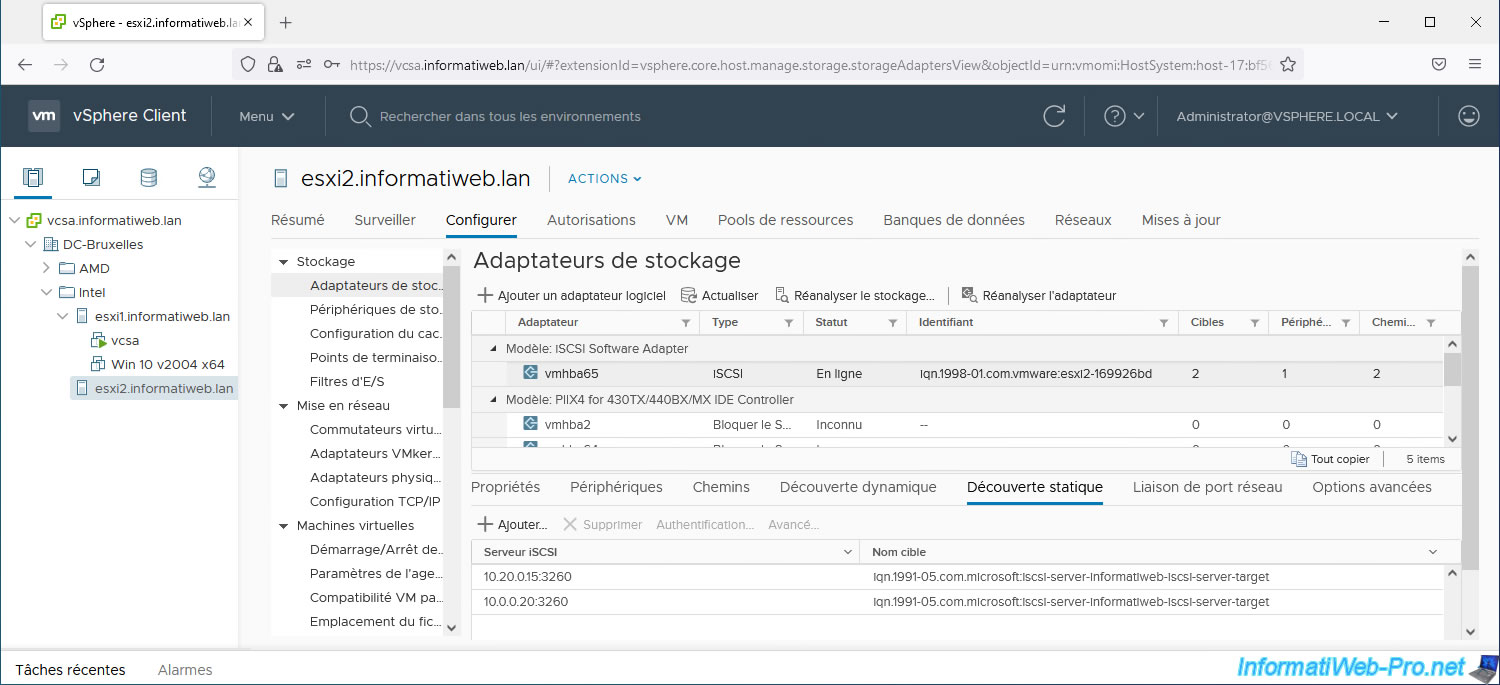
In the “Static Discovery” tab, you will see your iSCSI target appear several times.
Once for the normal network (via the VMkernel interface "vmk0") and a second time for the network dedicated to iSCSI (via the VMkernel interfaces "vmk1" and "vmk2").
Go back to the "Network Port Binding" tab and you will see that the path status is now active for your 2 VMkernel adapters created for iSCSI traffic.
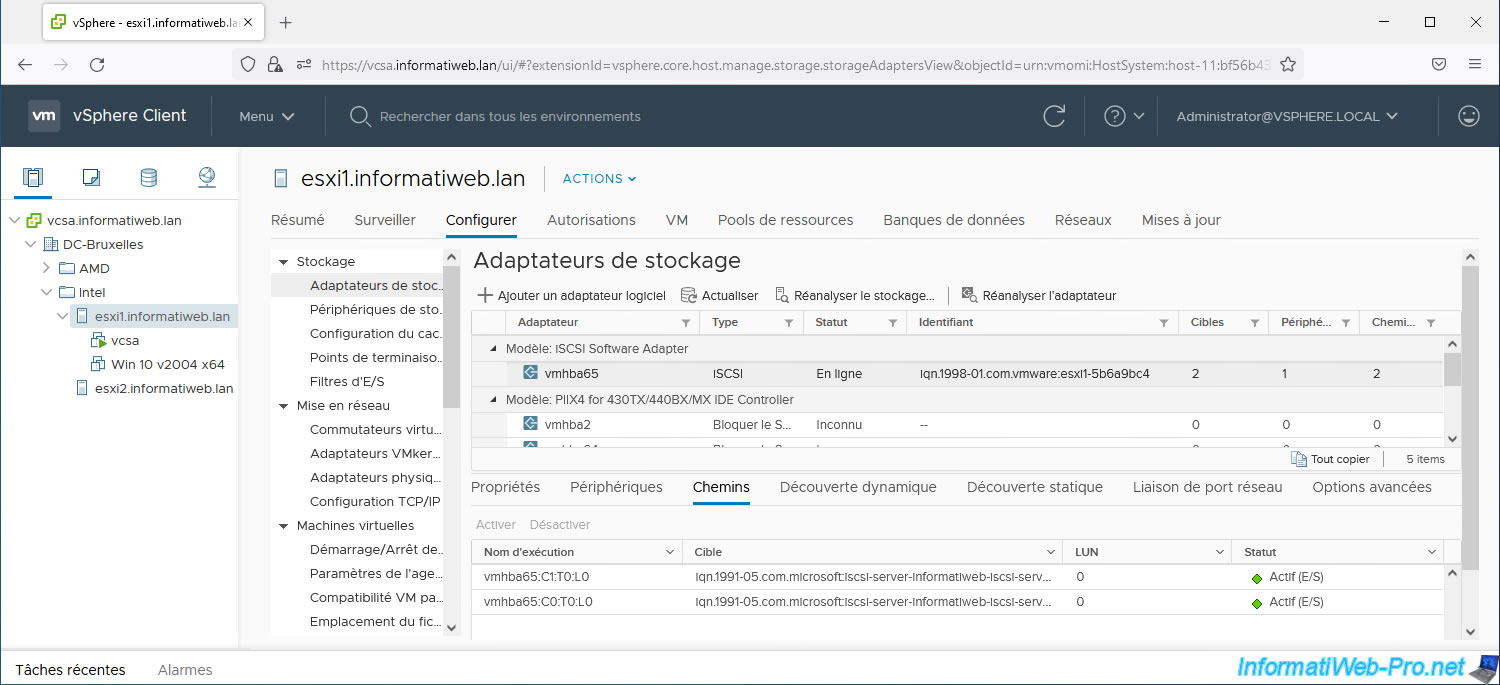
In the "Paths" tab you will see that 2 paths are used.
In our case, we can see that an "Active / Active" mode is used thanks to the "Status" column.
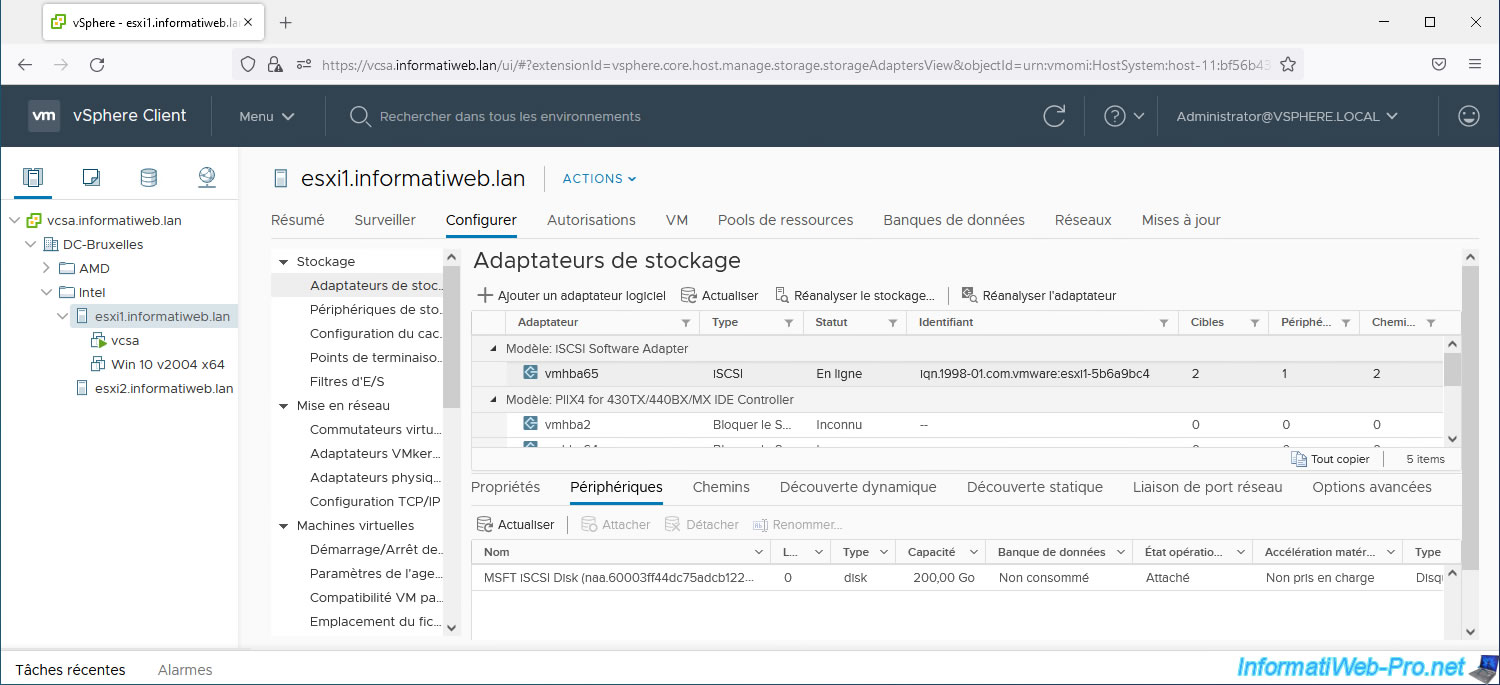
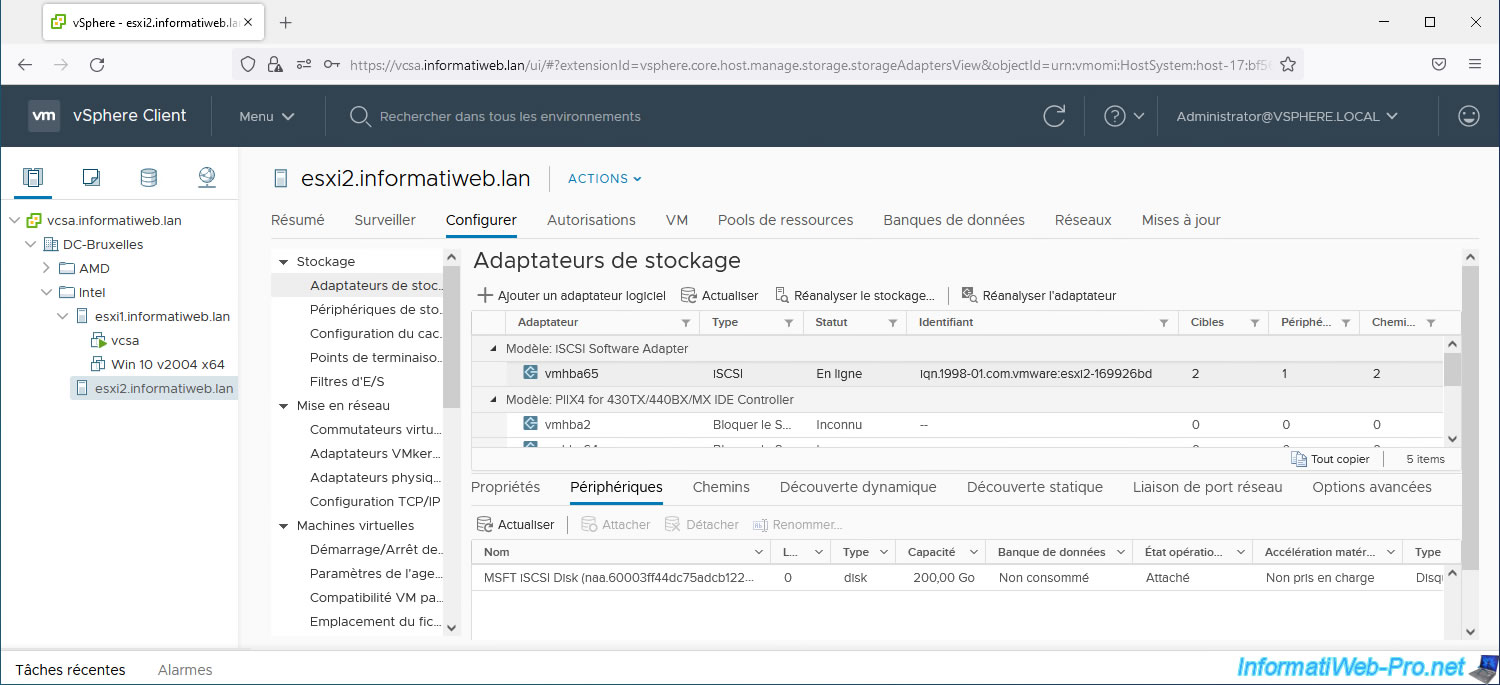
In the "Devices" tab, you will see that your iSCSI virtual disk only appears once even though 2 paths are used for the same server.
5. Configure port binding for iSCSI traffic (on 2nd host)
If applicable, on your 2nd VMware ESXi host, remember to also configure this network port binding for its software iSCSI controller.
6. Create an iSCSI datastore
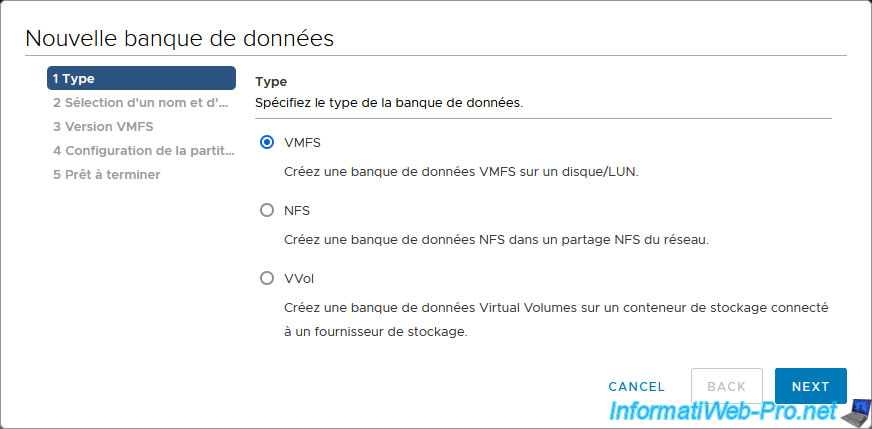
To create an iSCSI datastore, select your VMware ESXi host and click: Actions -> Storage -> New Datastore.

In the "New Datastore" wizard that appears, select "VMFS" and click Next.
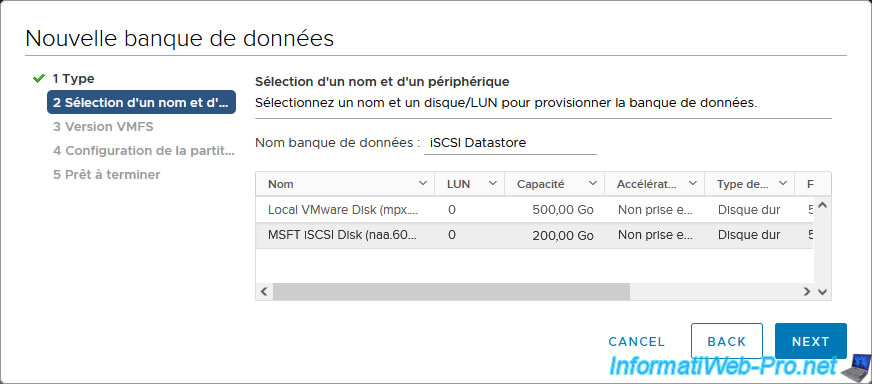
Provide a name for your new iSCSI datastore and select your iSCSI virtual disk.
In our case, it is the disk: MSFT iSCSI Disk.
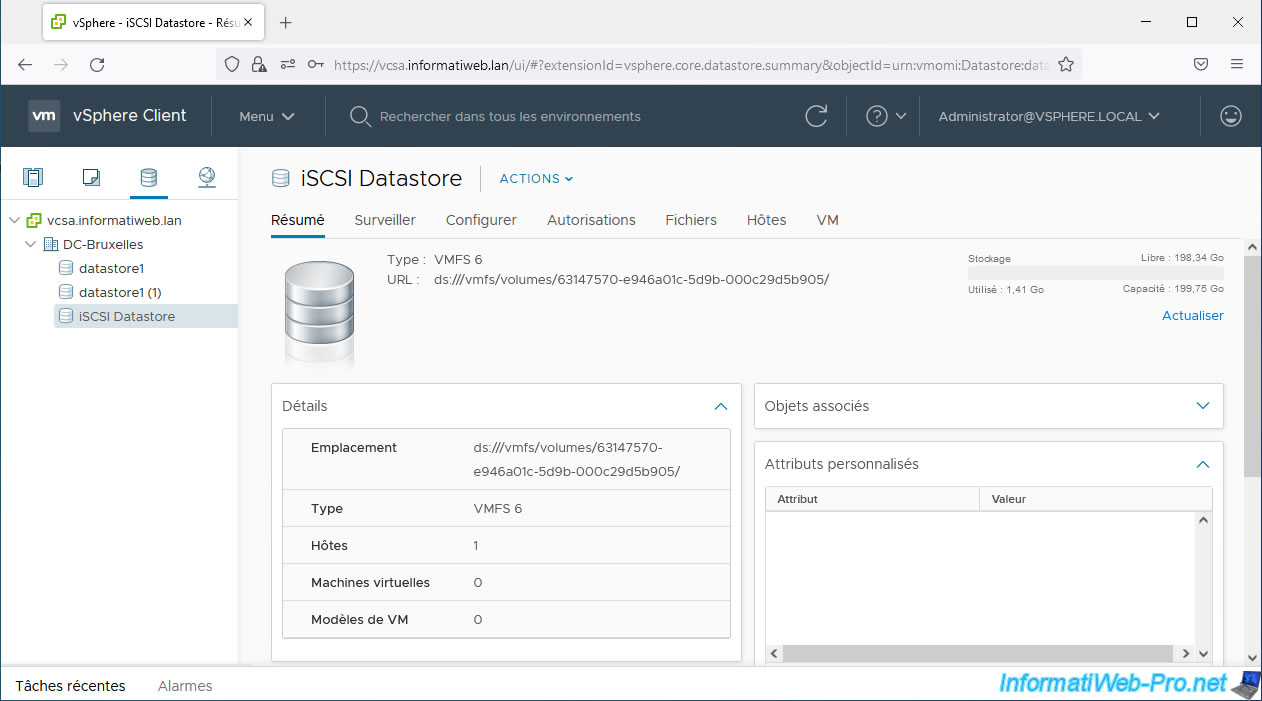
Your iSCSI datastore has been created.
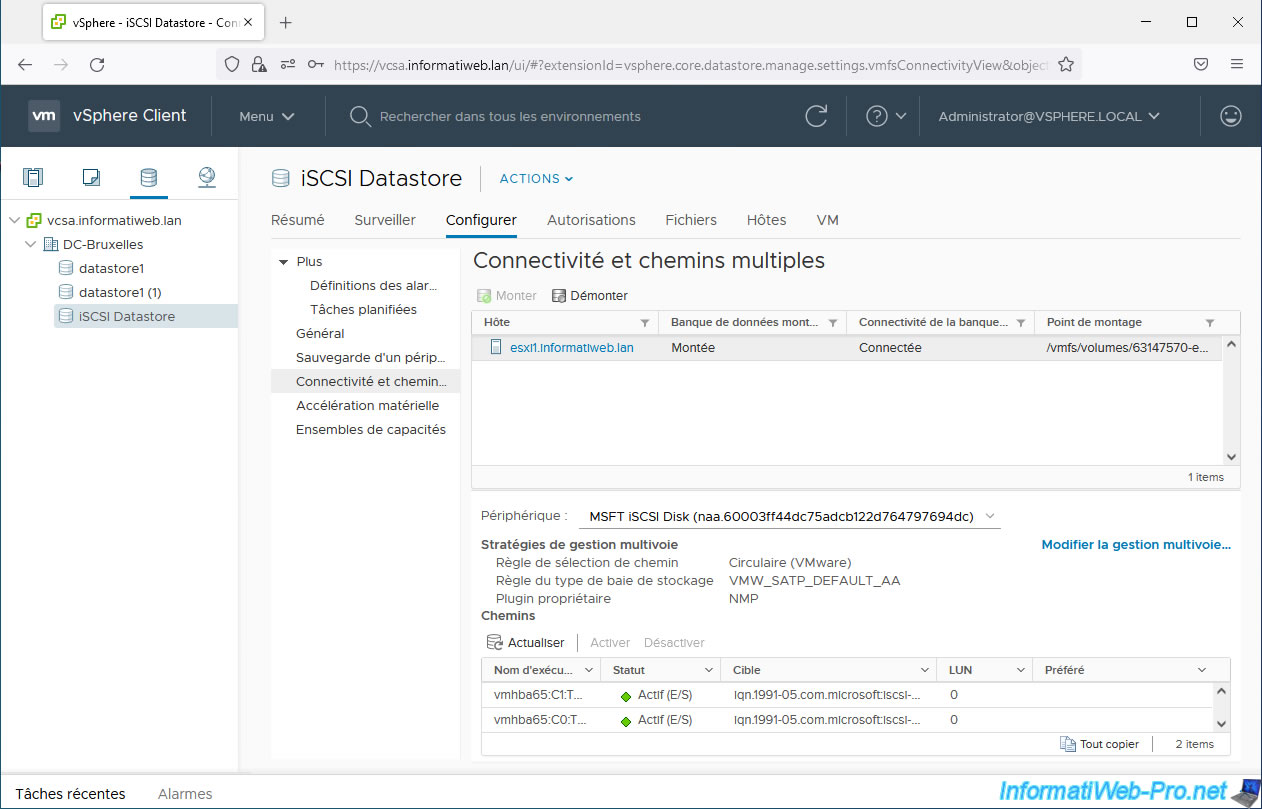
Go to "Configure -> Connectivity and Multipathing" and select your VMware ESXi host.
As you can see at the bottom of the page, 2 paths are used.
To modify multipath management, click: Edit Multipathing.
Which will allow you to do "active / active" or "active / passive".
7. Detect the iSCSI datastore from a 2nd VMware ESXi host
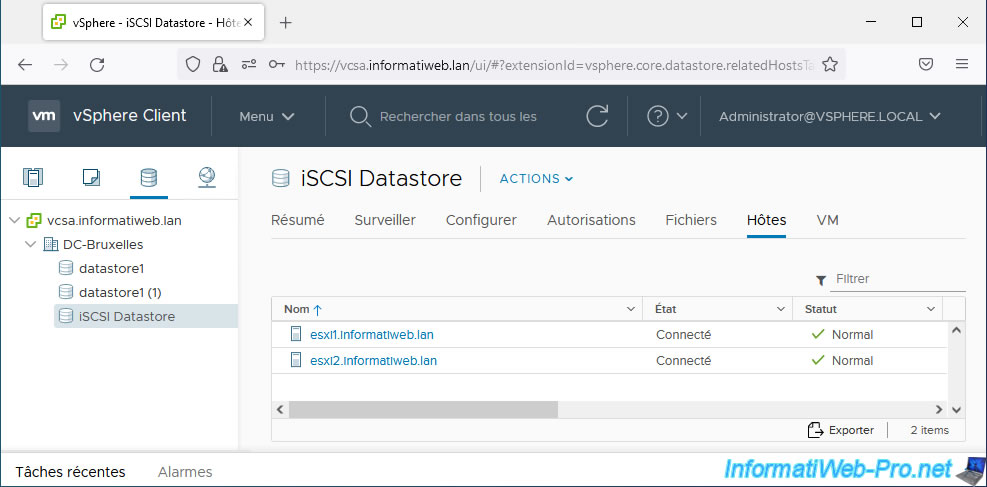
As you can see in the "Hosts" tab of your datastore, it is only used by 1 host at the moment.

So that this is also detected by your 2nd VMware ESXi host connected to the same iSCSI server, you must select this 2nd VMware ESXi host and go to: Configure -> Storage -> Storage Adapters.
Next, select its software iSCSI controller and click: Rescan Storage.
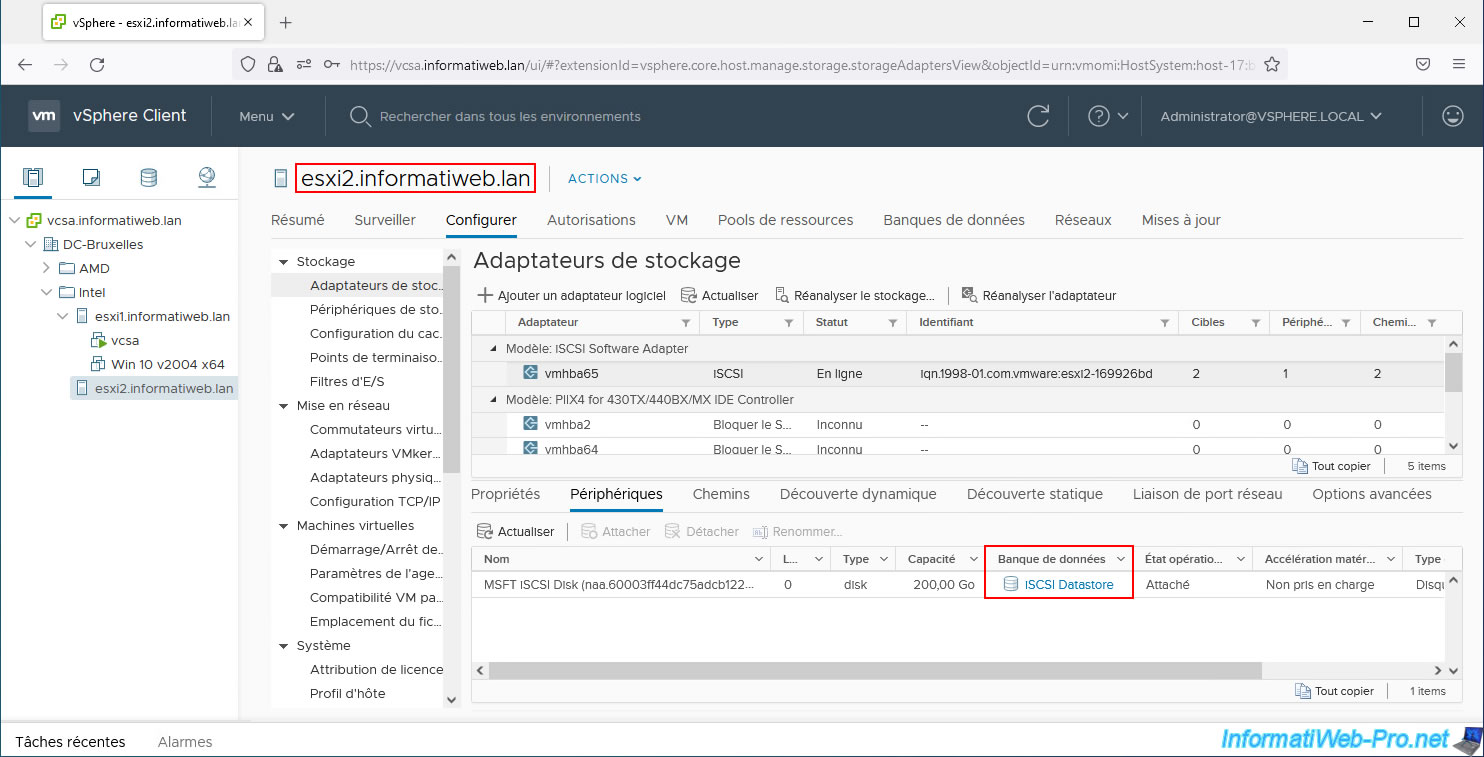
As you can see at the bottom of the page, in the "Devices" tab, at the moment, your host thinks that your iSCSI disk is not in use (Not Consumed).
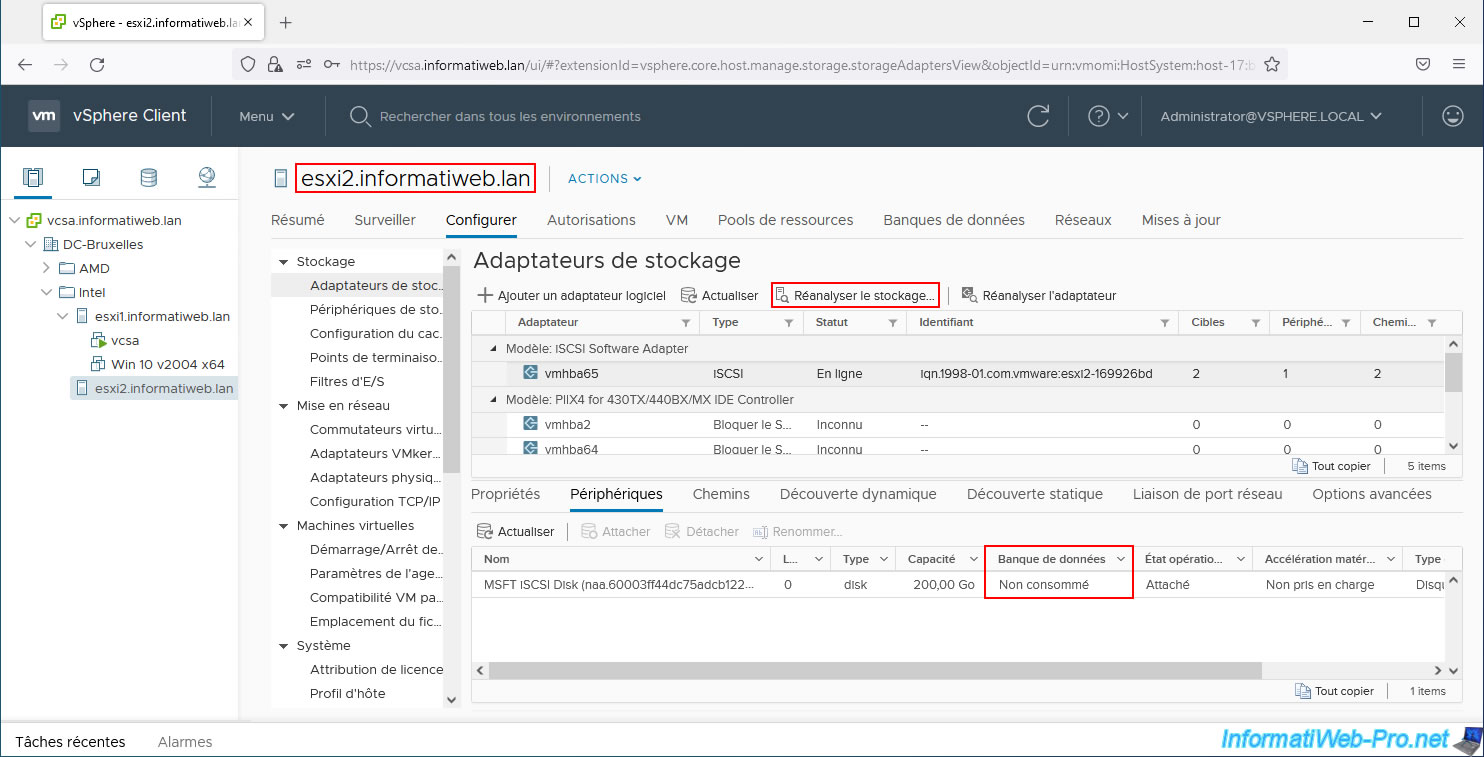
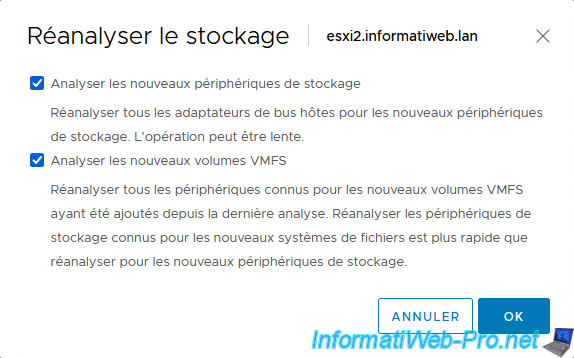
Leave the 2 boxes checked so that the new datastore created previously on your iSCSI disk can be detected and click OK.
As expected, your 2nd VMware ESXi host now recognizes the datastore previously created on your iSCSI disk.
If you go to the "Hosts" tab of your iSCSI datastore.
Share this tutorial
To see also
-

VMware 5/15/2024
VMware vSphere 6.7 - Add a physical disk to host
-

VMware 9/27/2024
VMware vSphere 6.7 - Array integration APIs (VAAI)
-

VMware 6/13/2024
VMware vSphere 6.7 - Configure Virtual Flash (SSD cache)
-
VMware 12/4/2024
VMware vSphere 6.7 - Create a content library
No comment