Install, configure and deliver desktops by using MCS with Citrix XenDesktop 7.6
- Citrix
- Citrix XenApp / XenDesktop
- 13 May 2015 at 12:13 UTC
-

- 3/4

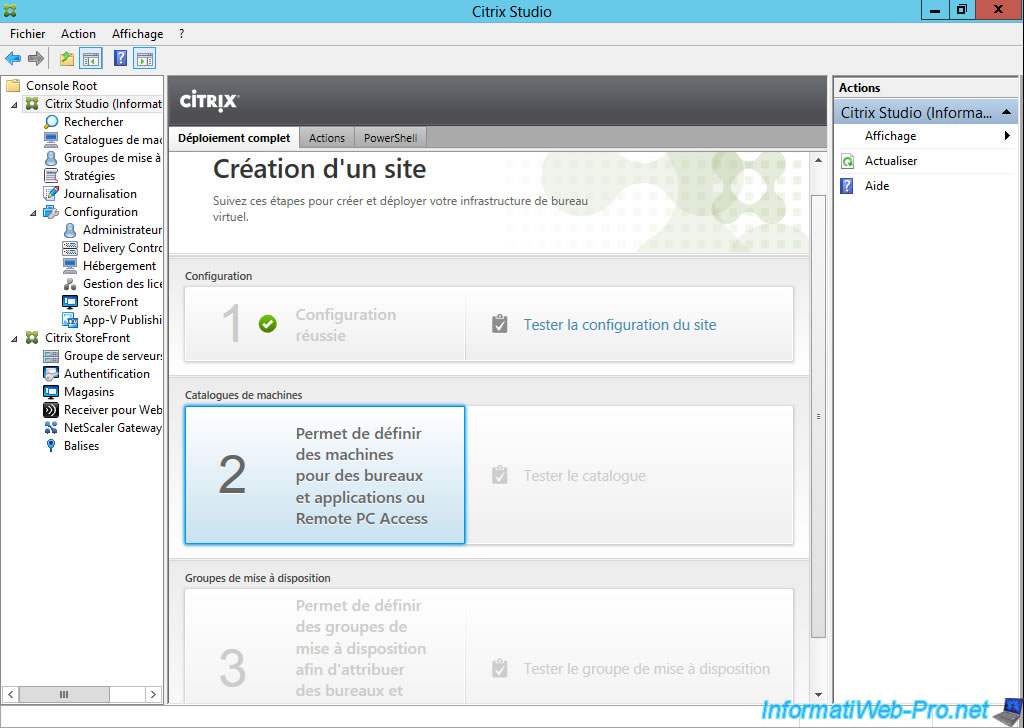
7. Creating the machines catalog
In Citrix Studio, click on the step 2 : "Sets machines for desktops and applications or Remote PC Access".
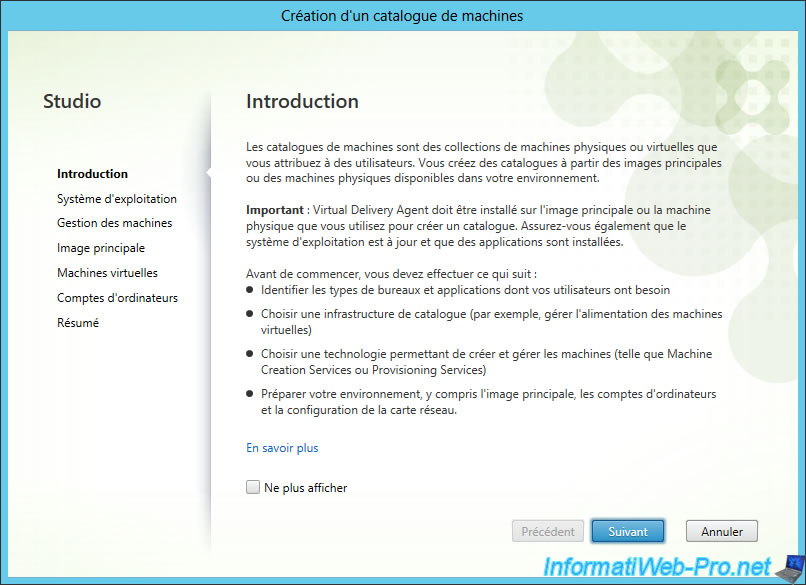
As stated in the introduction, the Virtual Delivery Agent (VDA) must be installed on the physical or virtual machine that you will select in the wizard.
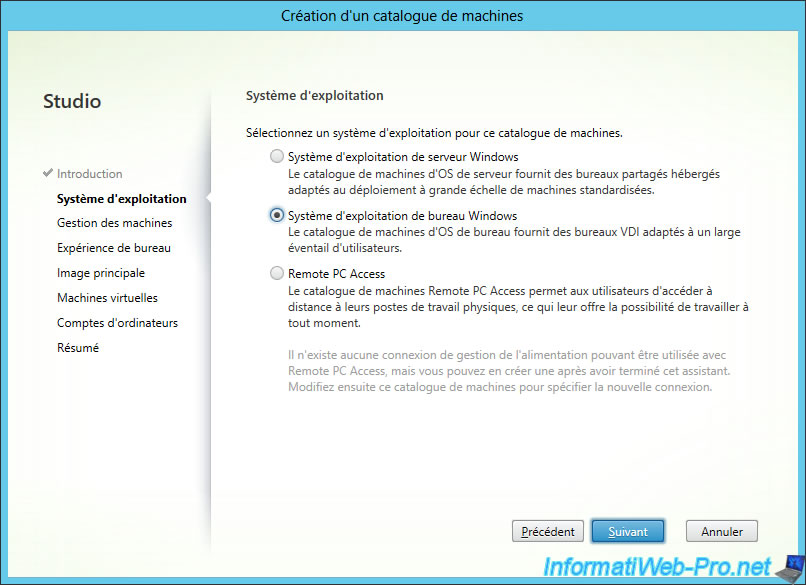
Select "Windows desktop operating system" because Windows 7 is a client version of Windows.
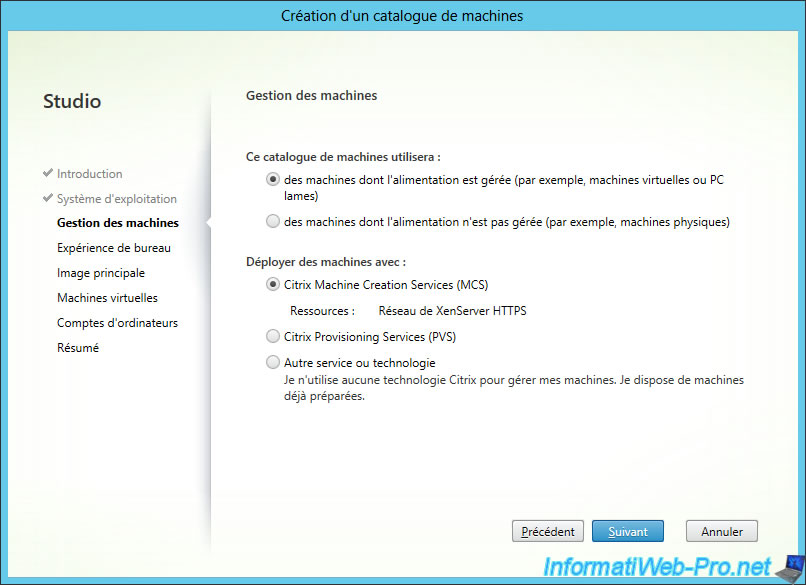
Because we've added a connection to a Citrix XenServer server in the site configuration, the choice "machines whose power is managed ..." is not grayed out.
Select "machines whose power is managed ..." because it is a virtual machine, and "Citrix Machine Creation Services (MCS)" to create copies of our virtual machine.
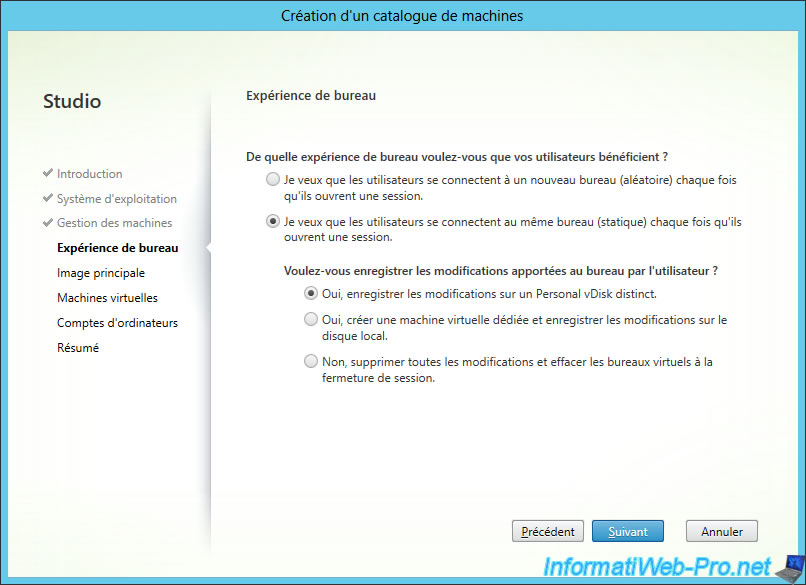
Select "... same desktop (static) ..." in order to save the changes made by the user on a virtual disk (Personal vDisk).
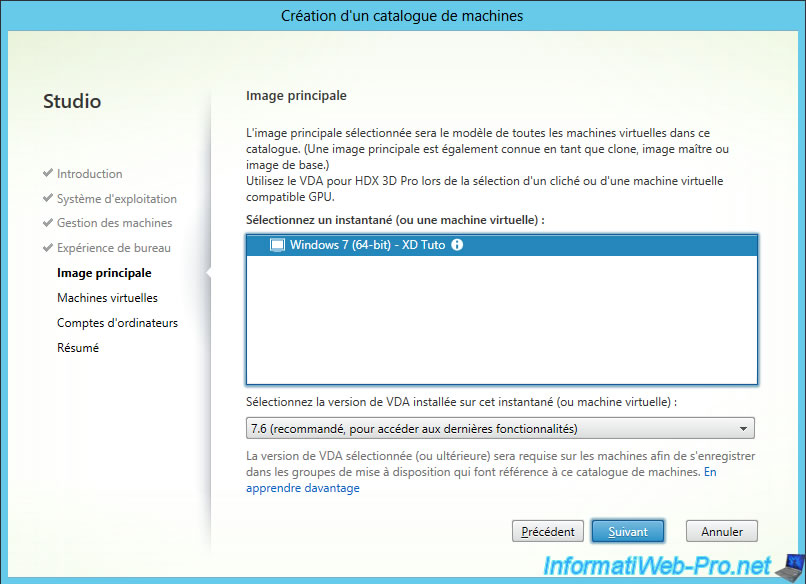
Select a virtual machine or a snapshot of a VM to use to create your virtual machines.
Note : select the version of VDA installed on the machine. In our case : 7.6
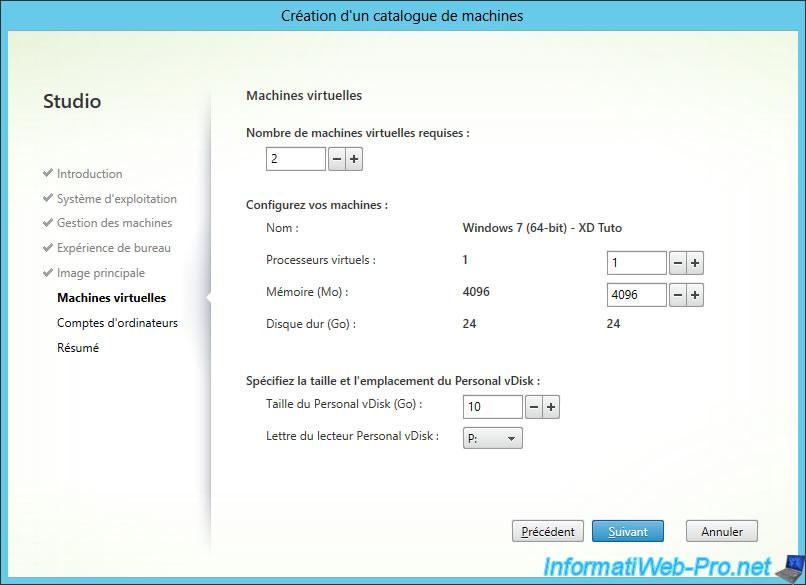
Set the resources and storage space of virtual machines that will be created on your "XenServer" virtualization server. As the number of virtual machines to be created.
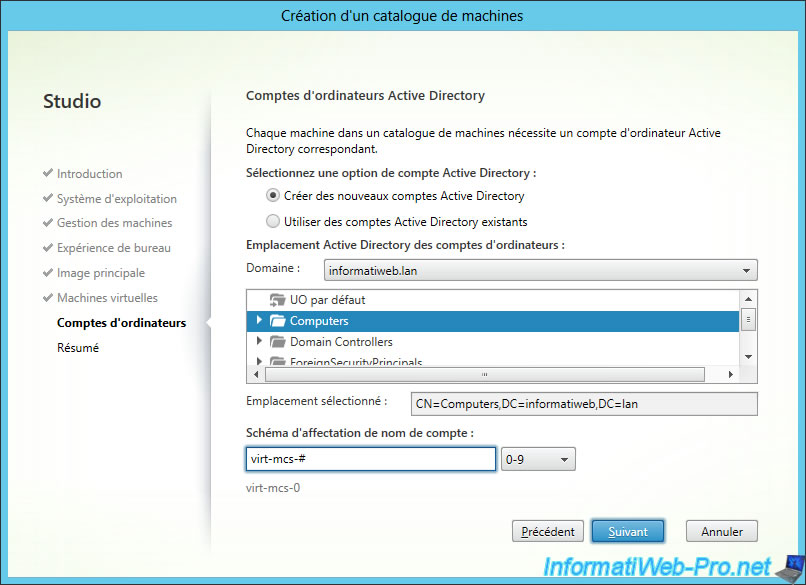
Select the organizational unit (OU) where virtual machines are created and specify the template to use for the names of machines.
Note : In our case, MCS will create the machines : "virt-mcs-1" and "virt-mcs-2".
Specify a name and description for the catalog of machines.
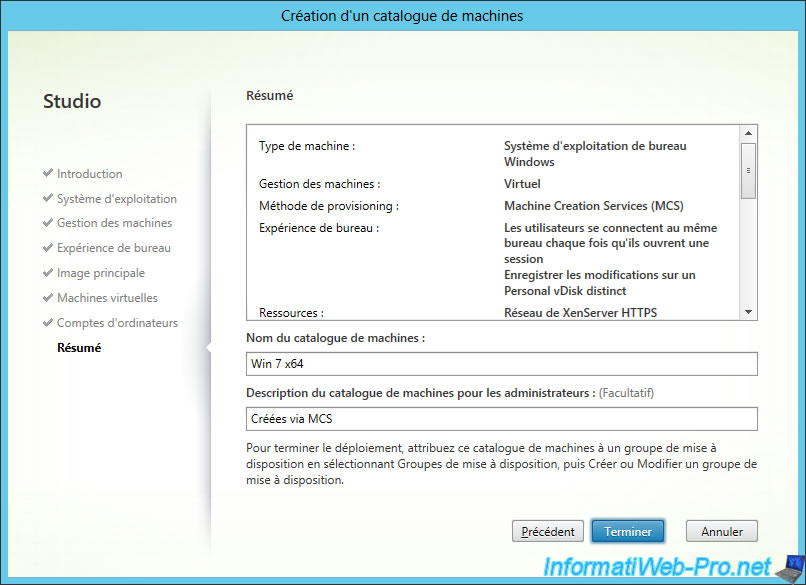
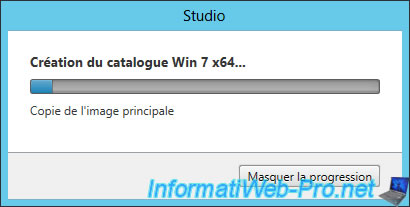
MCS creates virtual machines and the catalog.
Note: Copies of the virtual machine takes time. Everything depends on the performance of your servers (in particular: the XenServer server) and the size of the hard disk of the virtual machines selected in the wizard.
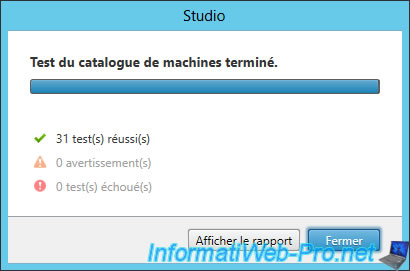
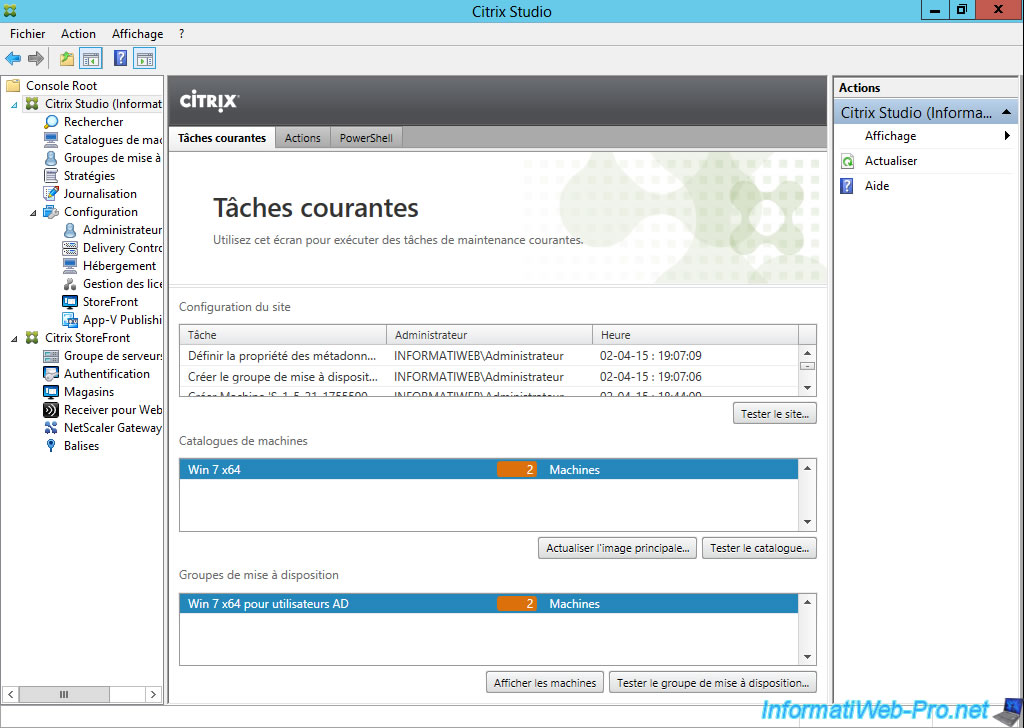
Click "Test Catalog".
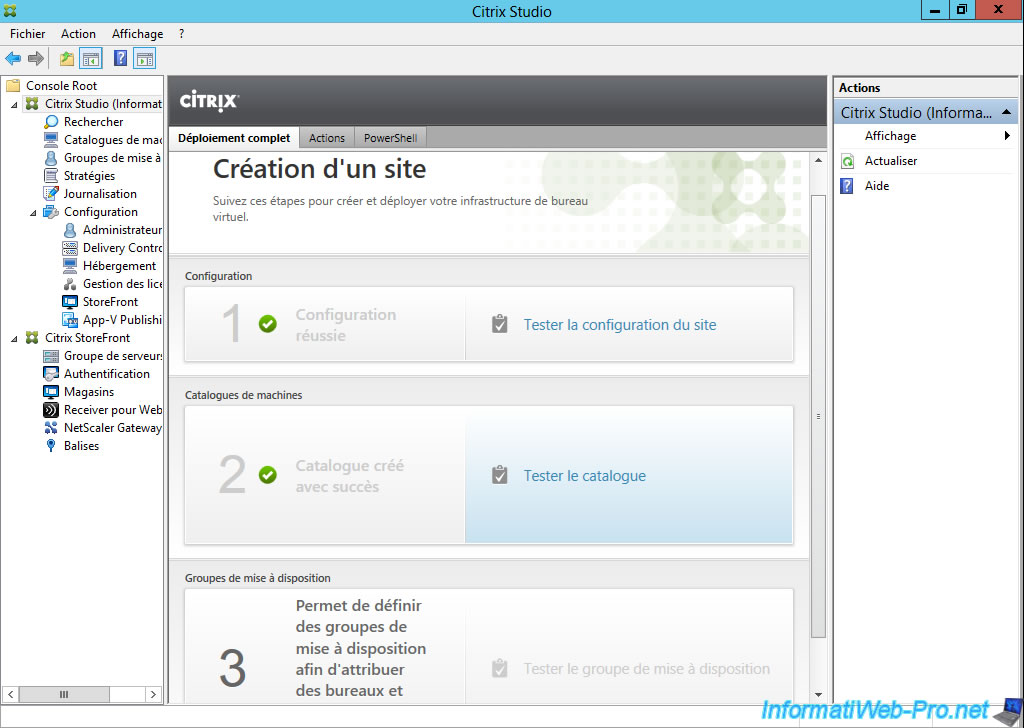
If all goes well, all the tests will have succeeded.
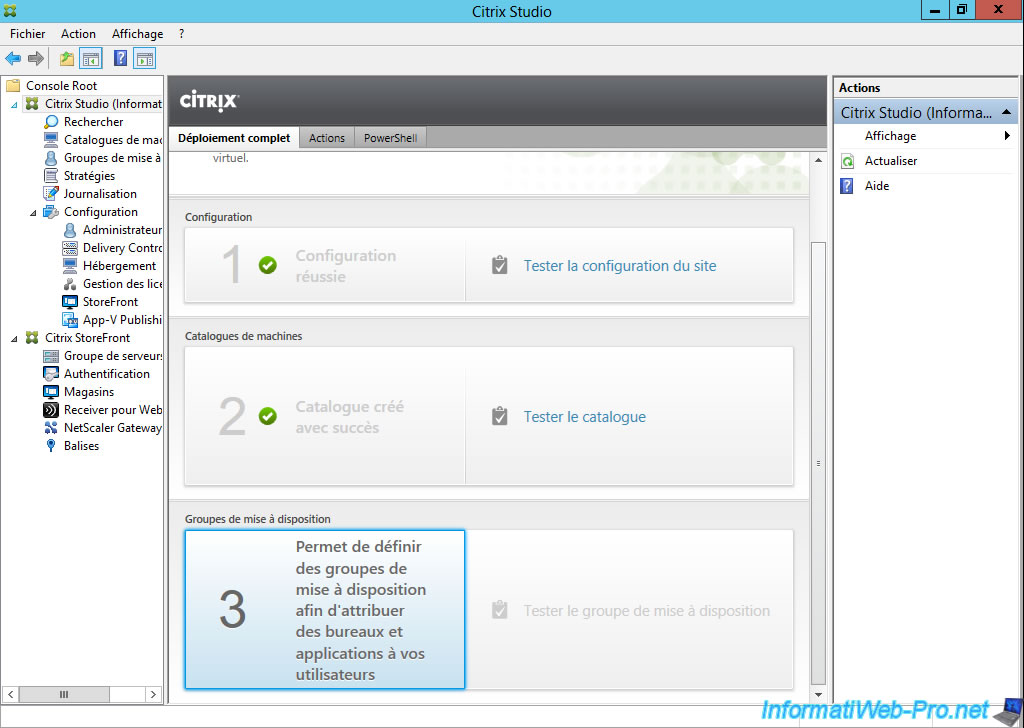
8. Assigning users to machines (delivery groups creation)
Click on step 3 : "Sets the delivery groups to assign desktops and applications to your users".
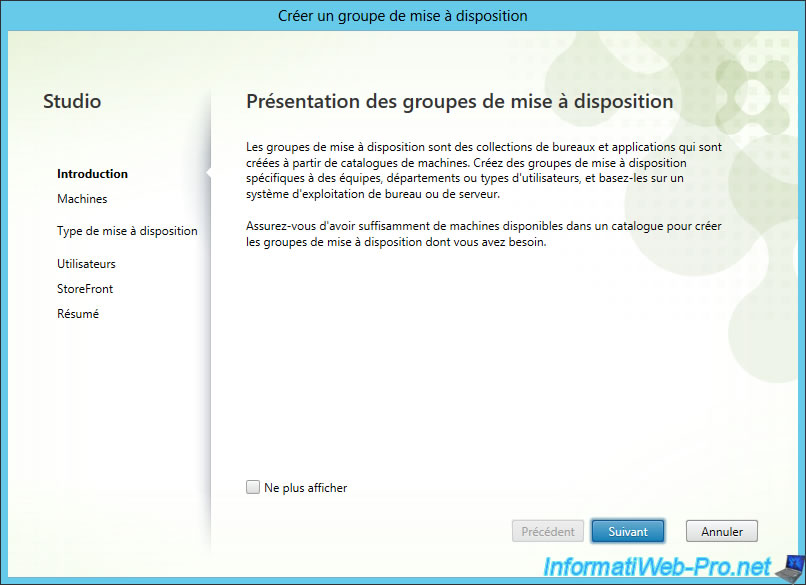
Click "Next".
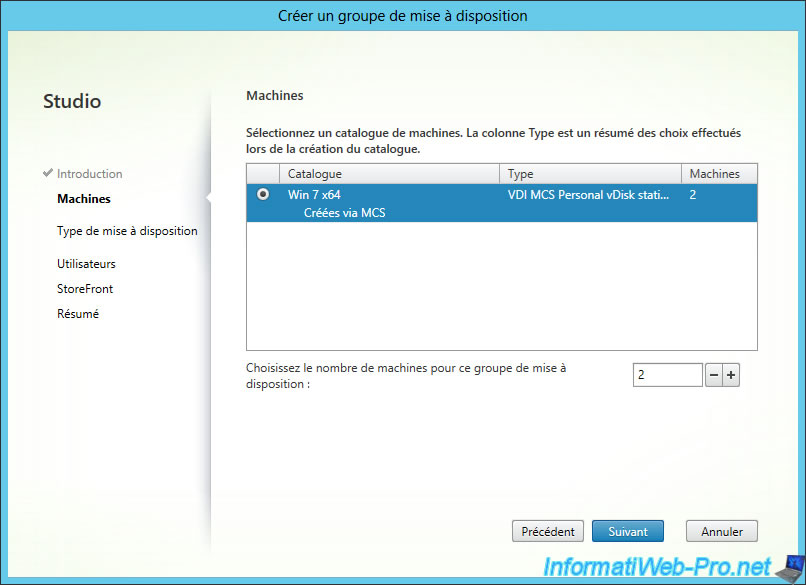
Select the catalog of machines to use and the number of machines to be added to this delivery group.
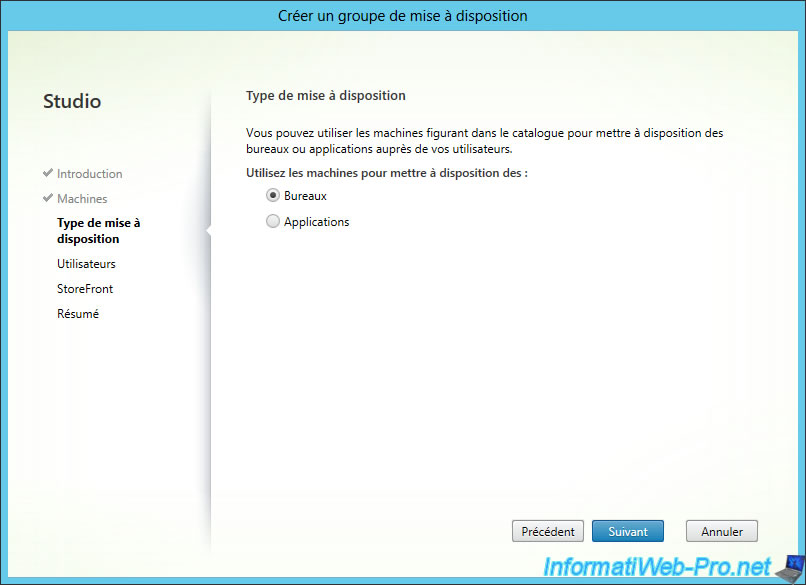
Select "Desktops".
Click "Add".
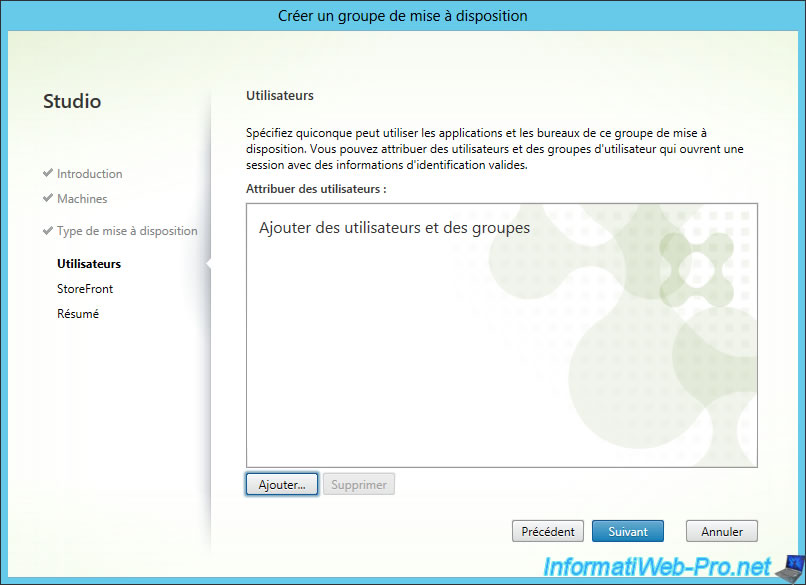
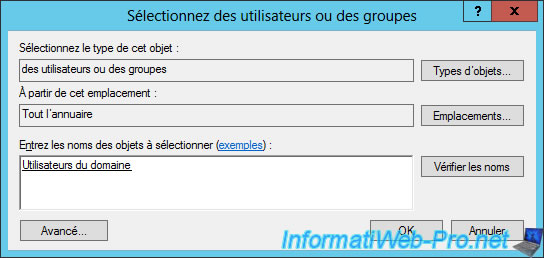
And add users and / or users groups of your Active Directory.
In our case, these machines will be accessible by the domain users.
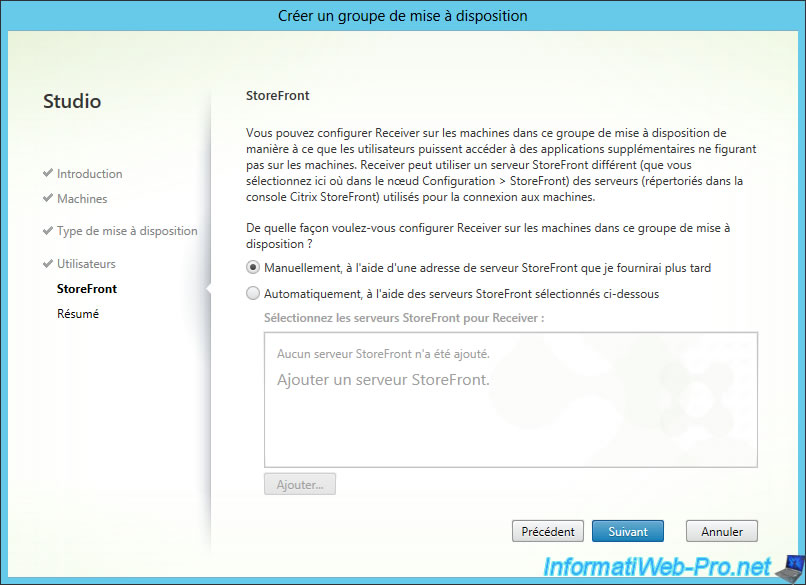
Configure the storefront of machines if you wish.
Note : Citrix Receiver must be selected during installation VDA to use this option.
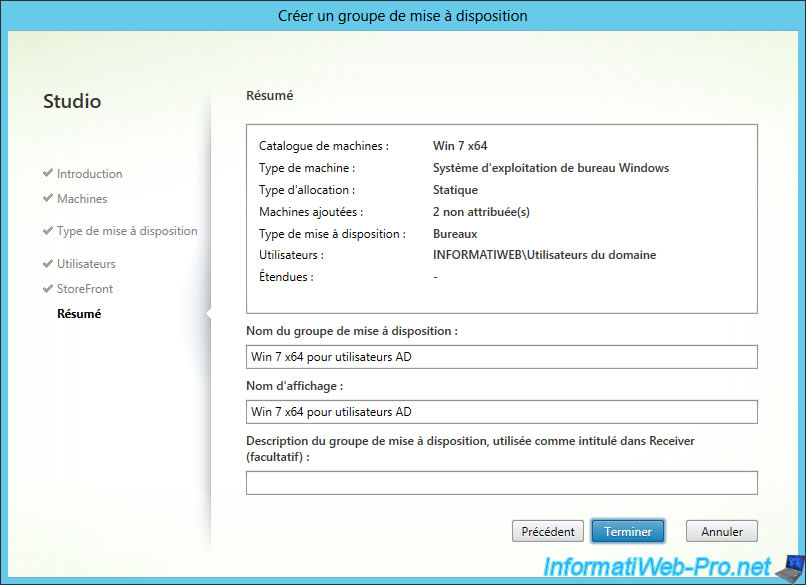
Specify a name and a display name and click "Finish".
Now, 3 steps of Citrix Studio have disappeared.
9. Citrix Receiver : Installation and client test
To download and install Citrix Receiver:
- Download it from the Citrix website
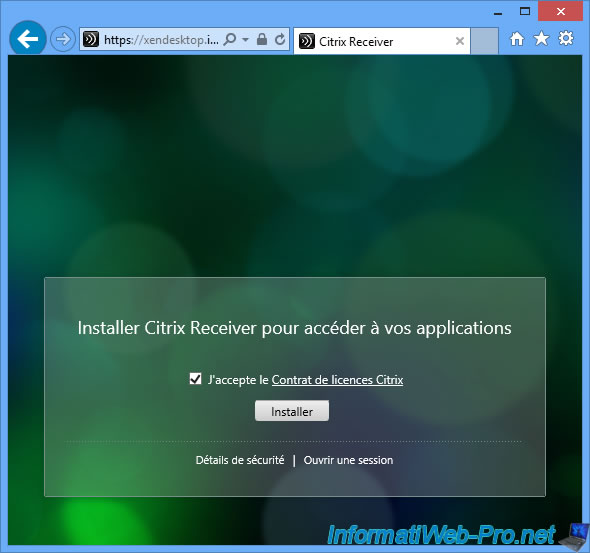
- Or download it from the StoreFront server (use the address ending by "StoreWeb" and not by "Store")
On the StoreFront page, check the box and click "Install".
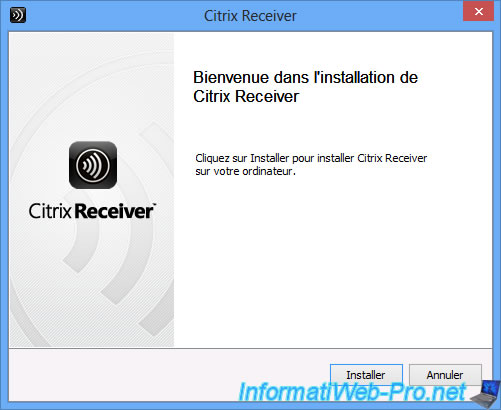
Click "Install".
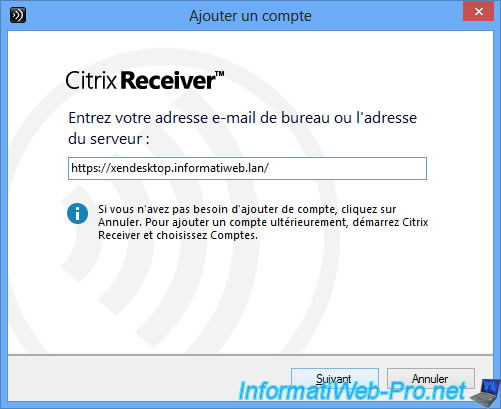
Click "Add an account".

Then, enter the "https" address of your StoreFront server.
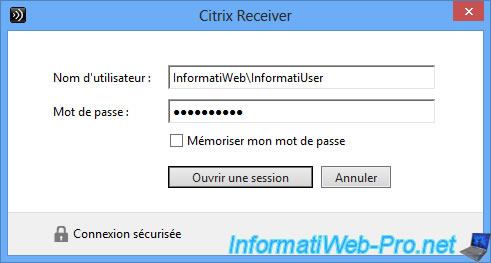
Connect with an Active Directory user.
Preferably, an authorized user to use the published desktops.
Click "Yes".
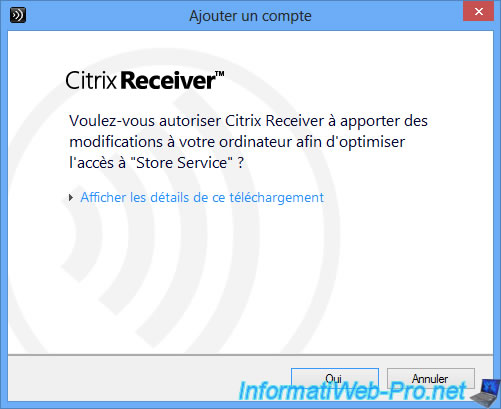
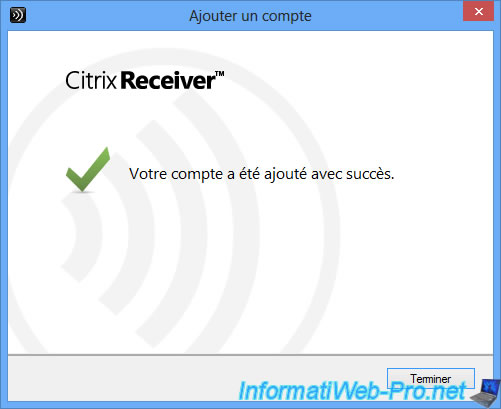
Citrix Receiver is configured.
To access published desktops (those you can use), click + icon.
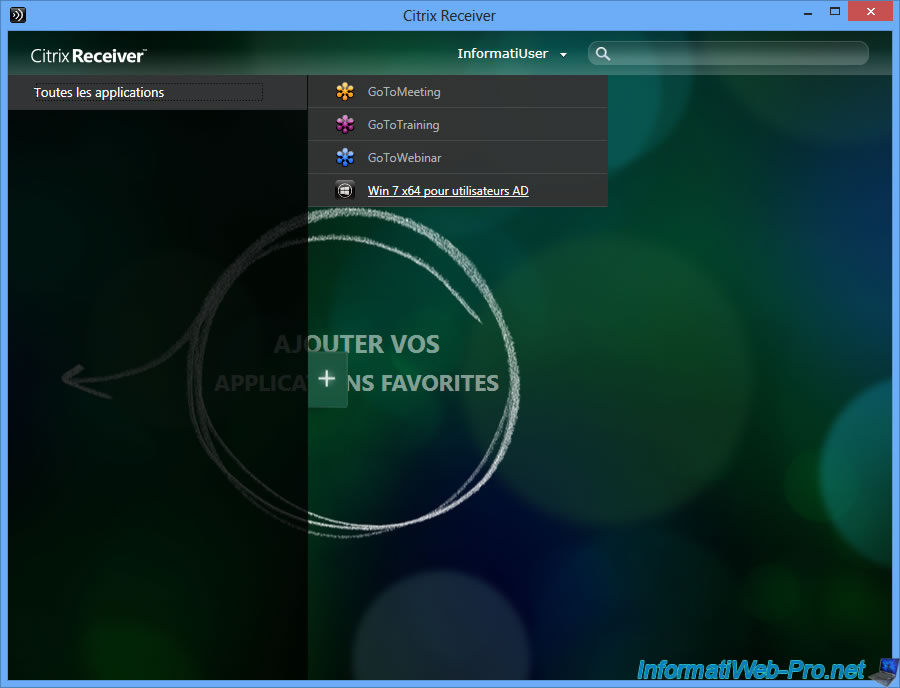
Then, click on the icon that will appear in the middle of the window.
If all goes well, a window "... - Desktop Viewer" will appear. Wait while the start of the virtual machine (if necessary) and the opening of your session on this machine.
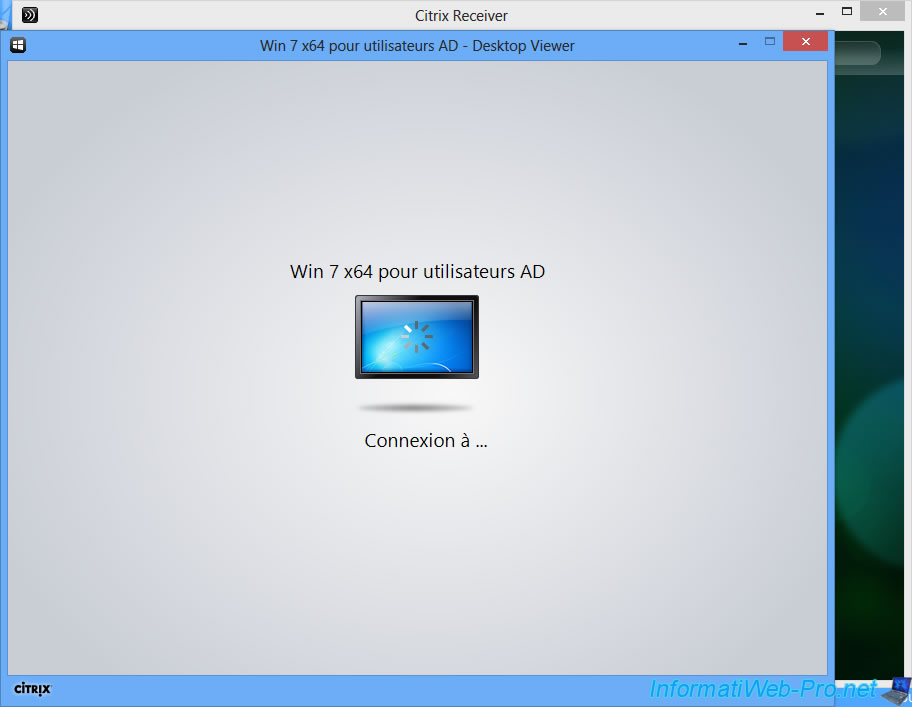
The desktop of the virtual machine running on XenServer, is displayed.
In the icons on the taskbar, you will find 2 Citrix icons. The VDA and the other corresponding to the Citrix Receiver client.

If you go to "Computer" (or : workstation), you'll see partitions of the virtual machine and the "Personal vDisk".
The changes you make in this virtual machine will (in reality) saved on the Personal vDisk.
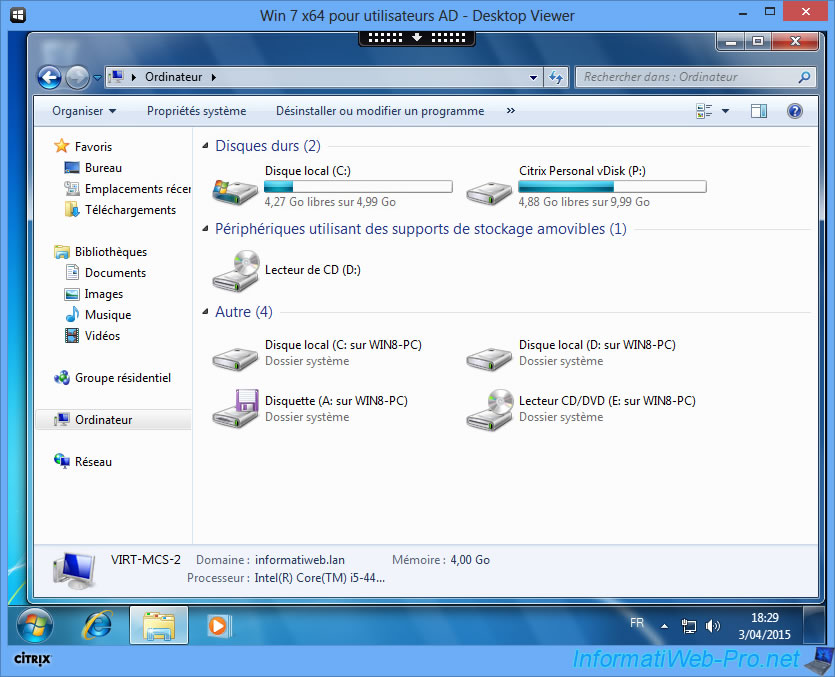
As you can see, the changes you make in your session are saved on the Personal vDisk (in the Users folder for theses folders : My Documents, My Pictures, ...).

Share this tutorial
To see also
-
Citrix 5/14/2016
Citrix XenApp / XenDesktop 7.6 - Load balancing
-
Citrix 8/2/2016
Citrix XenApp / XenDesktop 7.6 - Single Sign-On (SSO)
-
Citrix 3/22/2015
Citrix XenApp 7.6 - Applications delivery
-
Citrix 3/27/2016
Citrix XenDesktop 7.6 - PVS - vDisks updates
No comment