- Citrix
- Citrix XenApp / XenDesktop
- 27 March 2016 at 16:32 UTC
-

- 1/2
PVS (Provisioning Services) is a technology created by Citrix that allows you to stream the hard drive of a machine to dynamically generate the hard disk of other virtual machines.
In summary, there is only one source hard drive on the PVS server and this hard drive will be streamed to several virtual machines. This saves disk space and time for maintain these machines.
In short, in this tutorial, we will customize the virtual desktop of 2 users and update the source image that is used by these 2 users.
Note : this is the continuation of our tutorial : Citrix XenDesktop - Desktops delivery by PVS
- Customization of virtual desktops by users
- Creating an update of the source vDisk
- vDisk : Test mode (since version 7.6)
- vDisk : Production mode
- Bonus : Shut down properly virtual machines created by PVS
- Bonus : Reboot virtual machines set in maintenance
1. Customization of virtual desktops by users
As you can see, our 2 users have, for the moment, the same desktop.
Only in appearance, because in reality, each user is connected to a separate virtual machine :
- User1 is logged on the virtual machine "virt-pvs-1"
- User2 is logged on the virtual machine "virt-pvs-2"
as you'll see later in this tutorial.
Indeed, these 2 machines (virt-pvs-1 and virt-pvs-2) boot on the network and use the same vdisk streamed by the PVS server.
They have the same operating system with the same look.
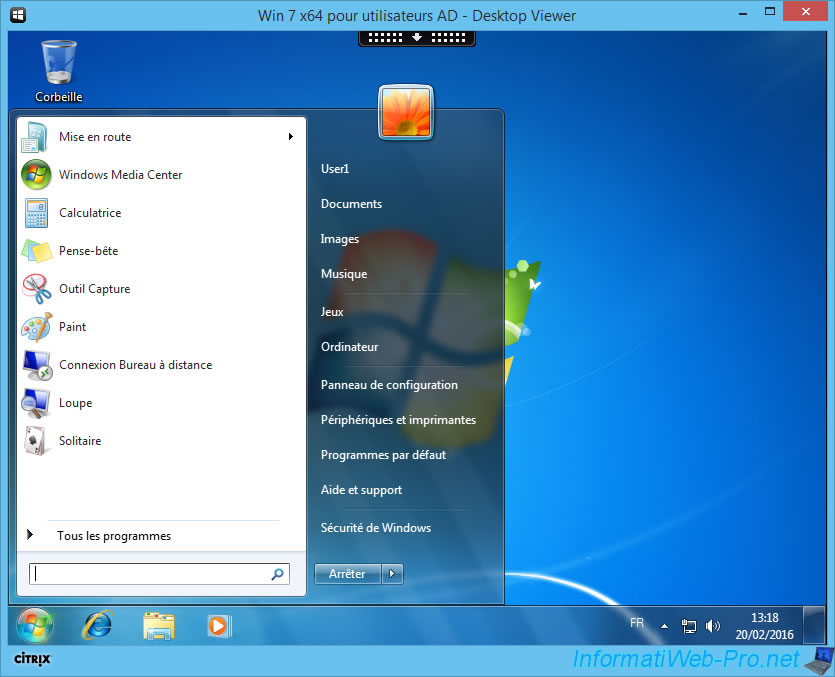
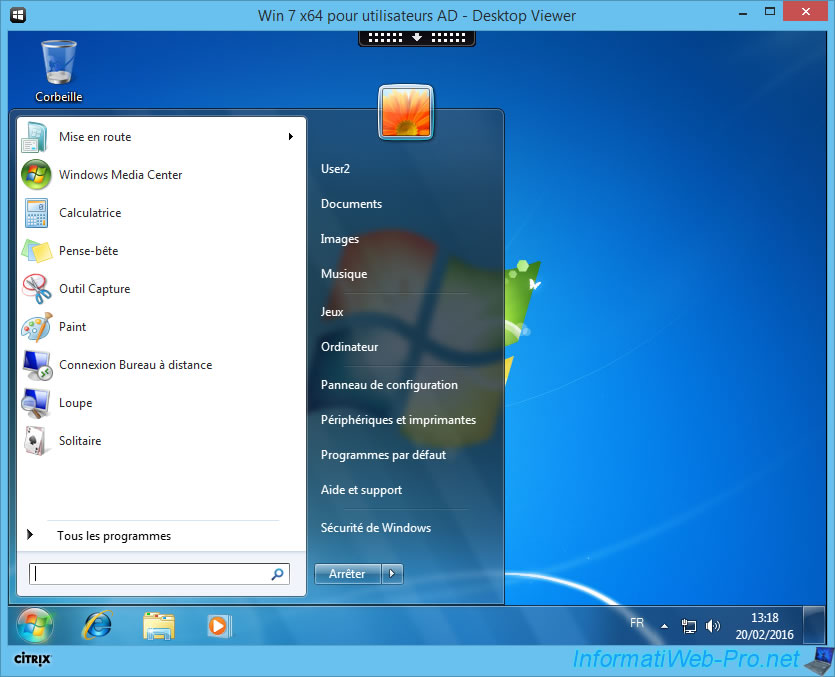
With the support for Personal vDisk enabled during the installation of the VDA and the creation of the delivery group, these two users can customize their desktops and install their programs.
Changes made and installed programs will be automatically saved in the Personal vDisk of the user.
In this tutorial, we will use this example:
- User1 is a web developer.
- User2 is a secretary
The web developer (User1) installs "Sublime Text" (which is a text editor with syntax highlighting) and changes his wallpaper to use a picture related to the programming.
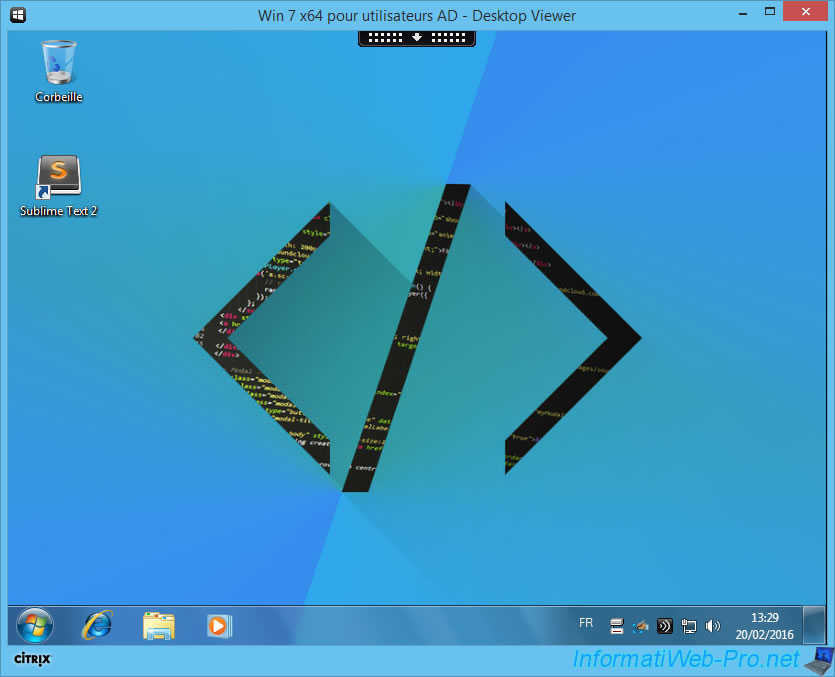
The secretary (User2) install OpenOffice, because she needs :
- A text processor (like Word)
- An equivalent of Excel to create tables and manage accounting
- Etc.
She also changes his wallpaper to use an image related to the office.
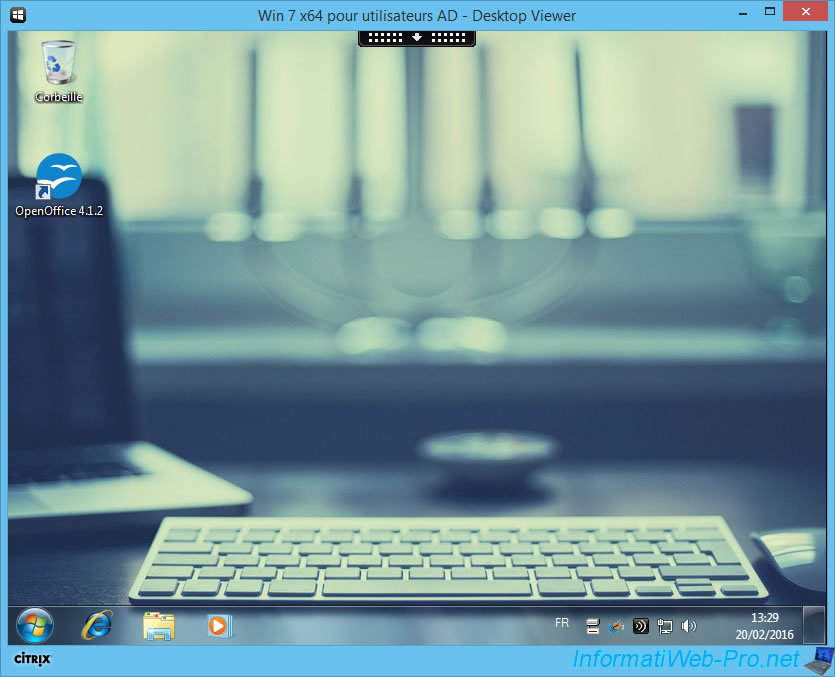
As you can see, Sublime Text 2 is installed in "C:\Program Files (x86)\Sublime Text 2".
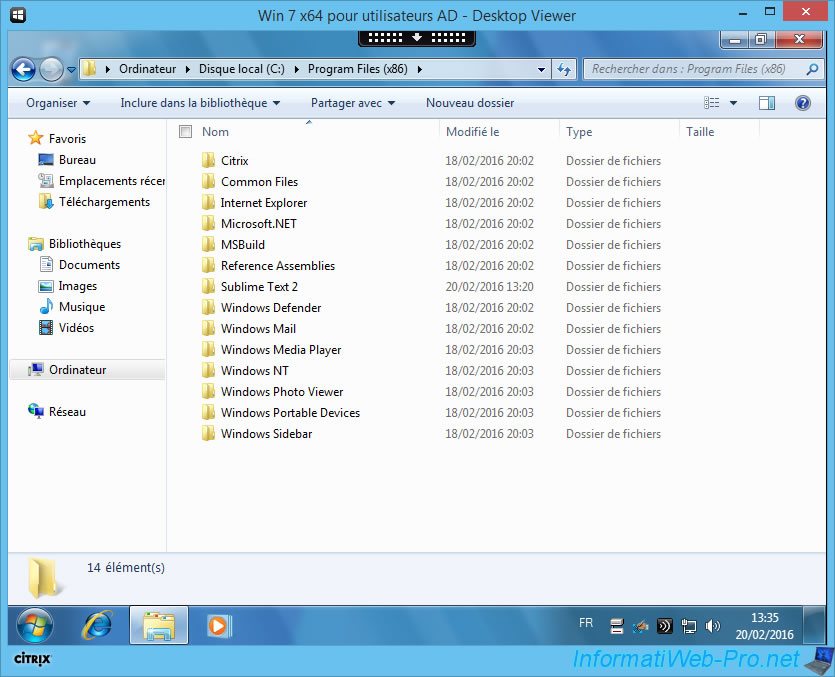
And OpenOffice is installed in "C:\Program Files (x86)\OpenOffice 4".
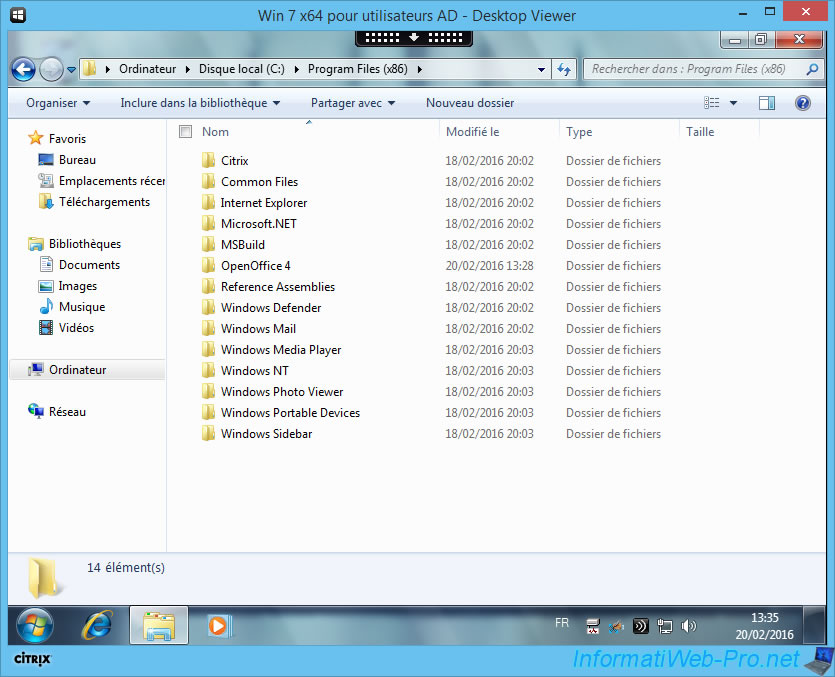
That said, the user think I install a program in the C partition, but in reality, all changes are stored transparently in the personal disk (personal vDisk).
Indeed, the local C drive is a fusion of the source vDisk created by the system administrator and the user's personal vDisk.
2. Creating an update of the source vDisk
Because the hard drive is streamed, the source disk created by the system administrator will never be altered.
And because all virtual machines created by PVS, boot on the network, this means that the system administrator must only manage one virtual machine.
Once updated and released, the update can be used by your users and any user's changes will not be lost.
In short, to update the source vDisk, go to the PVS server and run the "Provisioning Services Console" program.
Sign in with your Windows password or those who have access to the management of the PVS server.
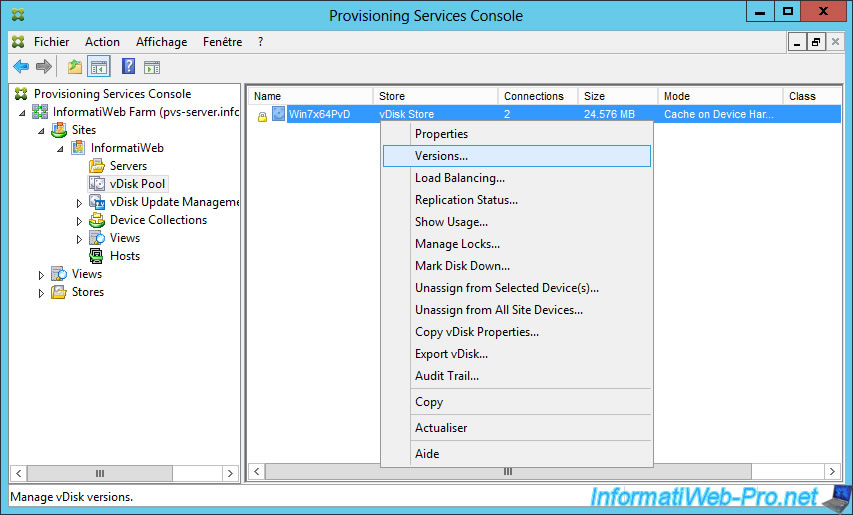
Then, go to "vDisk Pool."
Right-click on the vDisk to update and click "Versions".
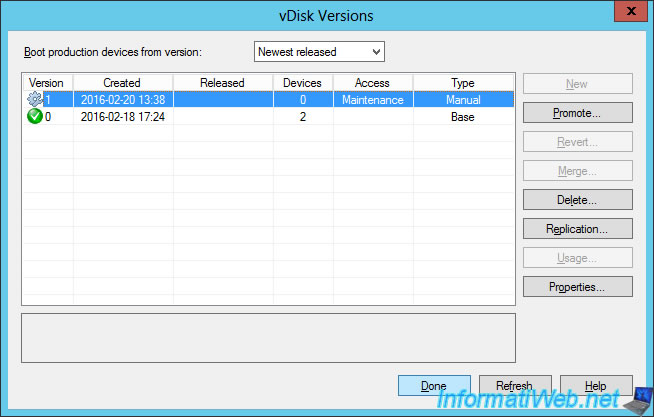
In the "vDisk Versions" window that appears, click "New".
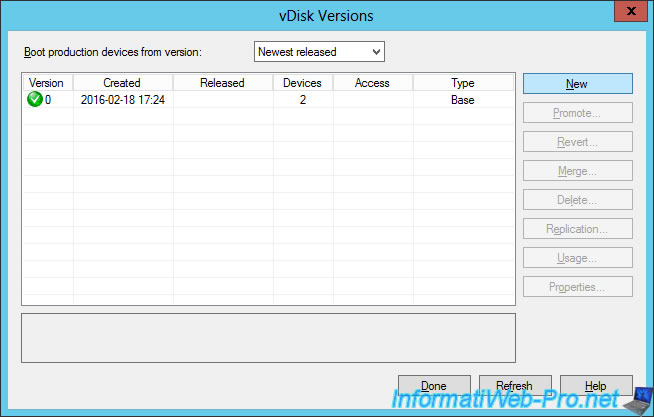
A new virtual disk is displayed with a access "Maintenance".
This means that this virtual disk will be used only by the machines with type : Maintenance.
Note : virtual machines of your users are in "Production" and will not have access to this virtual disk.
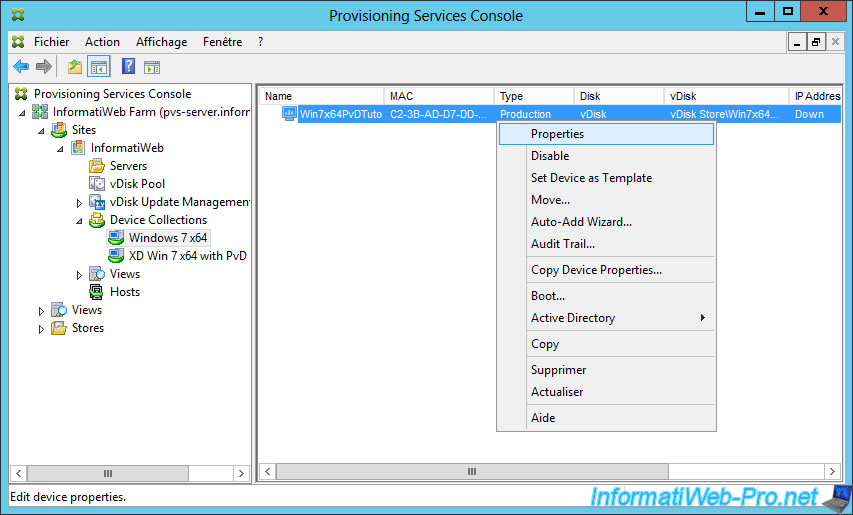
Then, in "Device Collections," select your reference virtual machine, right click on it and click "Properties".
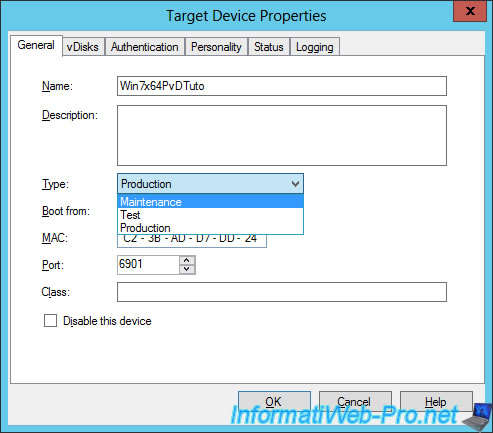
Select "Type: Maintenance".
Then, connect to your XenServer server through XenCenter and boot your virtual machine used for the maintenance of this vDisk.
This virtual machine is configured to boot from the network and will automatically connect to the PVS server.
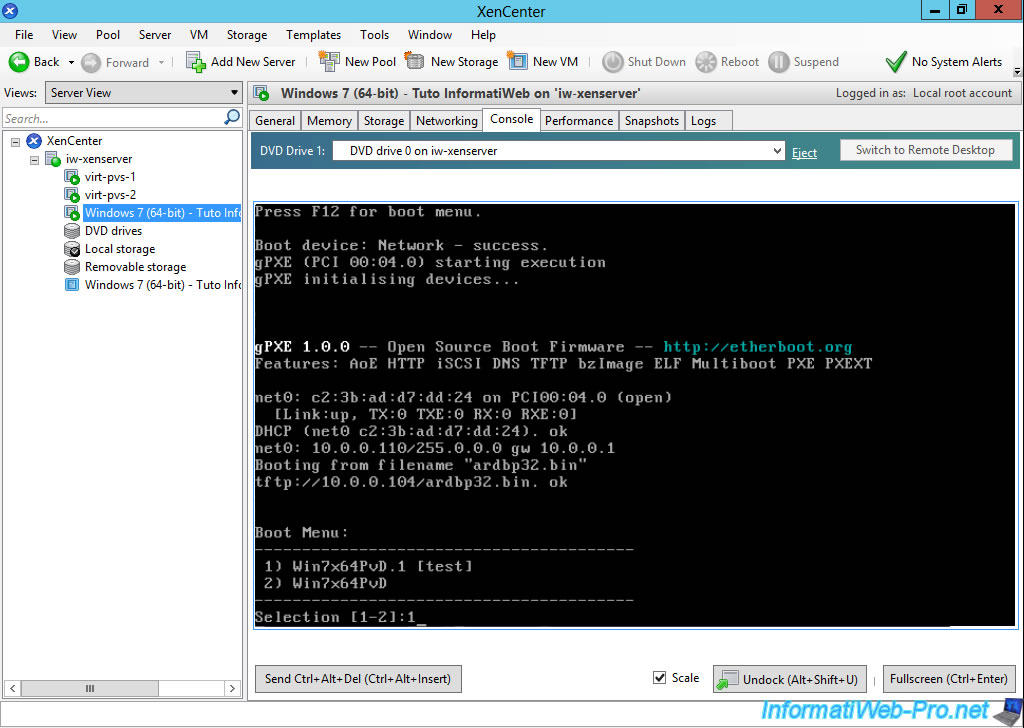
Because the MAC address of this virtual machine is the MAC address of the "Target Device" machine that we have just put into the "Maintenance" type, we get a boot menu that allows us to start on the "Maintenance (1)" version or the "Production (2)" version.
We choose the version : 1.
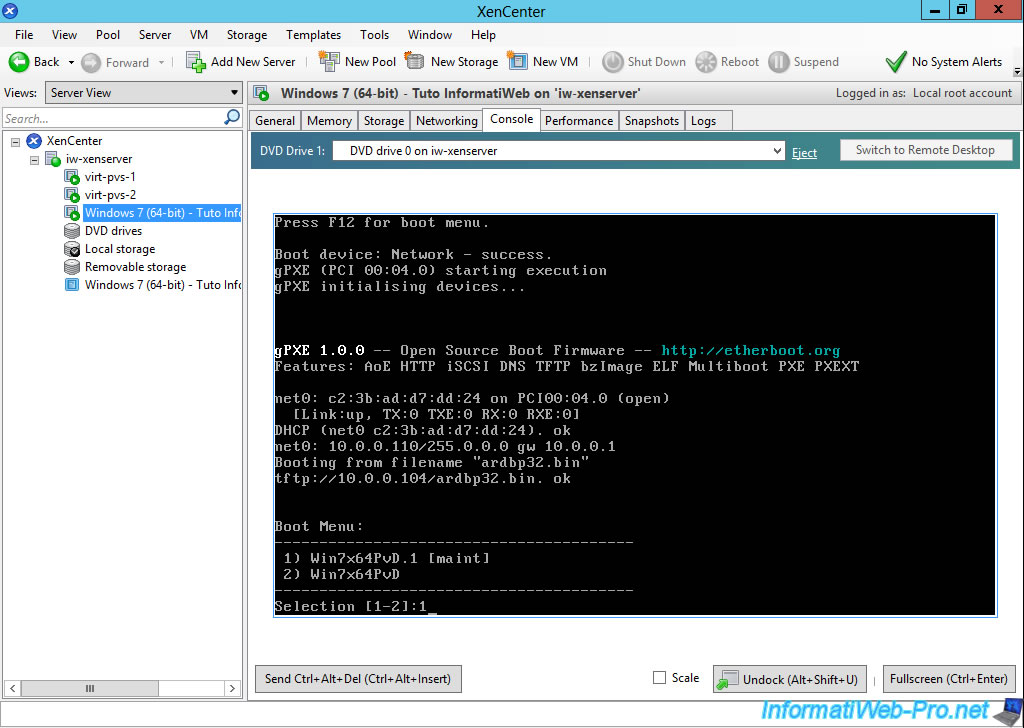
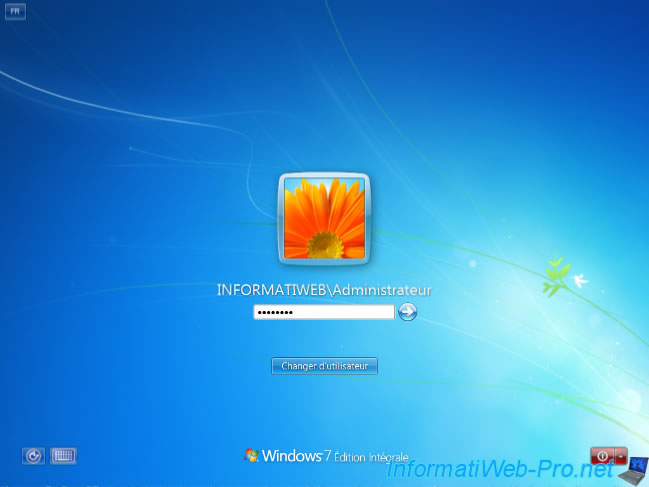
Windows 7 boot from the virtual disk in maintenance mode.
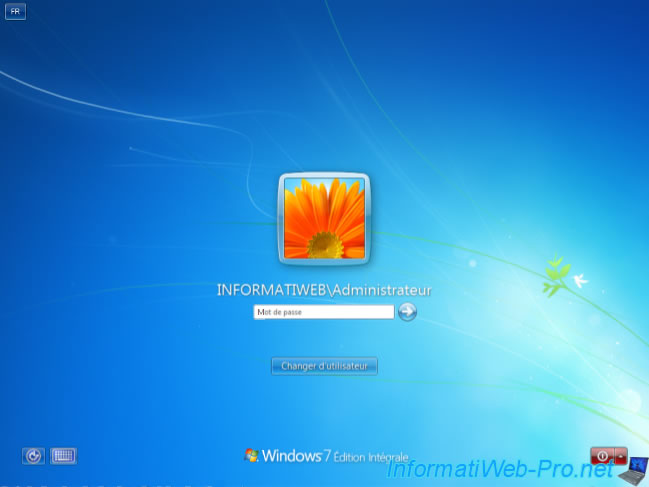
Sign in with an administrator account to easily manage the machine.
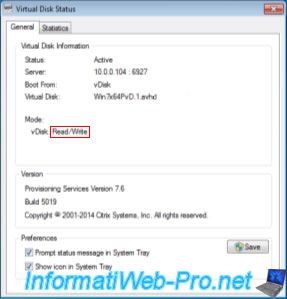
By clicking on the "Virtual Disk" icon next to the clock, you will see that this virtual disk is in mode : Read / Write (Read / Write).
This means that any changes made here will be saved in the source virtual disk (created by the administor of the PVS server).
To make life easier for our users, we will :
- Install two popular web browsers : Mozilla Firefox and Google Chrome.
- Accept the contracts of use of installed programs (if needed)
- Configure those programs for our users.
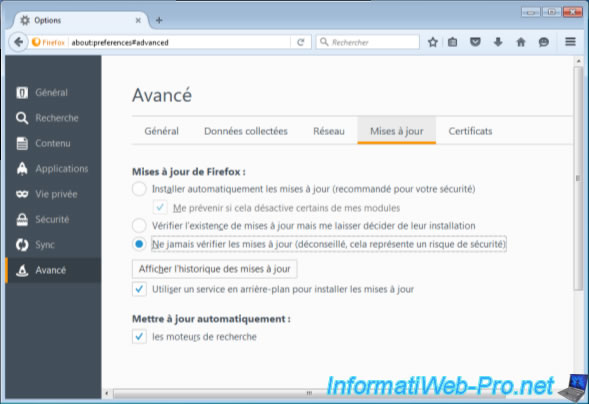
In addition, to prevent users make updates themselves, we will disable the automatic update feature of installed programs.
Indeed, it is the administrator who will install these updates to avoid compatibility issues, and to optimize the disk space used by the virtual disks.
Indeed, if the administrator installs the updates, it takes only once the necessary space in the base virtual disk. But, if many users install the same update, the updates will be stored in each virtual disk of each user. In this case, we lose the benefit of PVS.
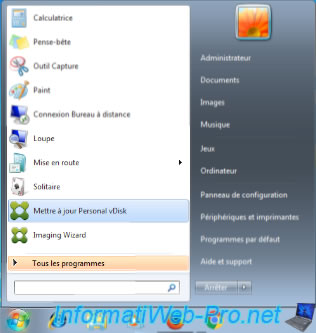
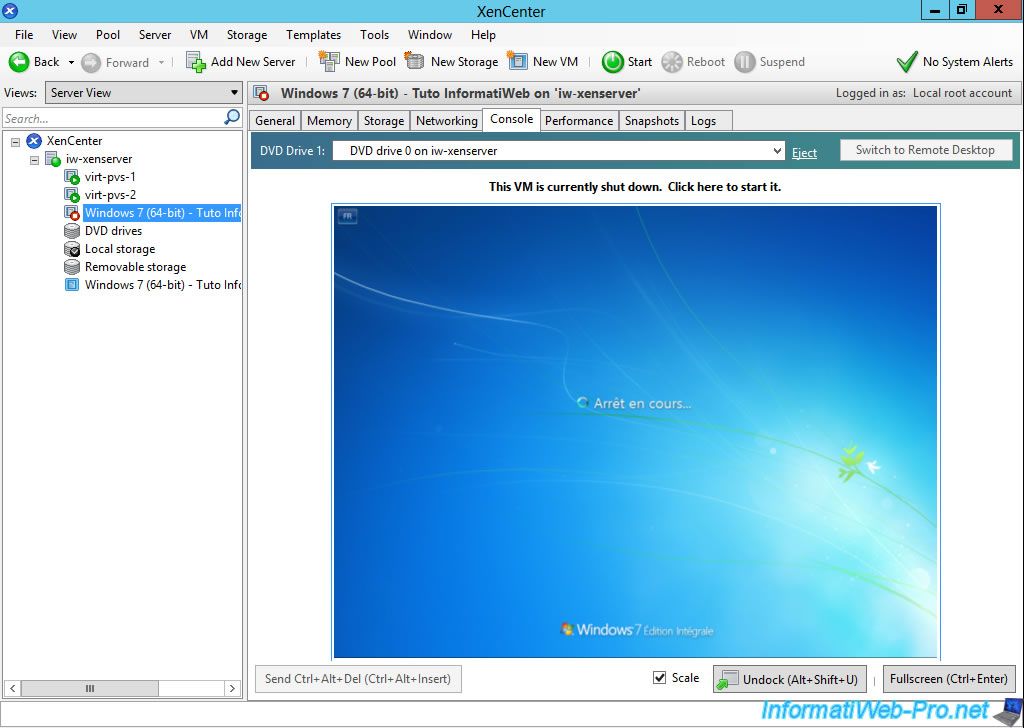
Once you have finished installing the necessary programs, go to the Start menu and click "Update Personal vDisk".
Citrix Personal vDisk updates the inventory and automatically shut down the virtual machine at the end of this update.

3. vDisk : Test mode (since version 7.6)
Since the version 7.6, it is possible to test the virtual disk before placing it into production.
This allows you to detect any bugs that might occur when you restart the virtual machine.
To do this, go to the PVS console and return to "vDisk Pool". Right click on your vDisk and click on "Versions".
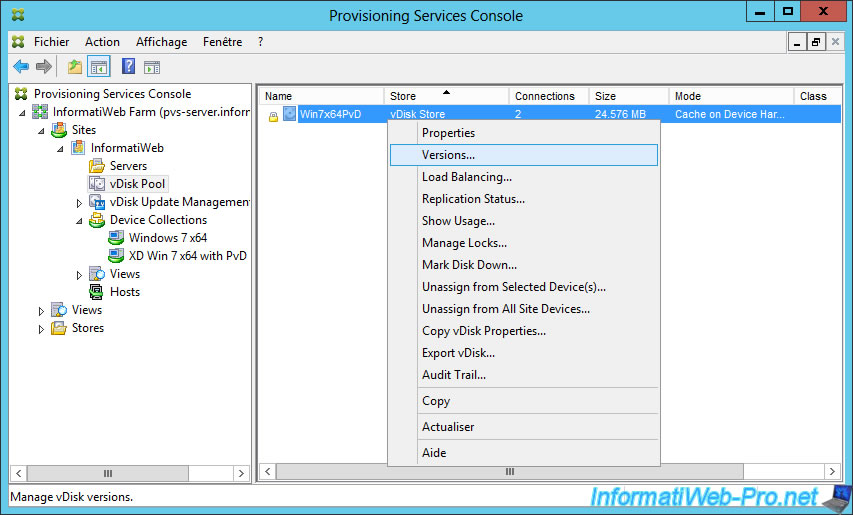
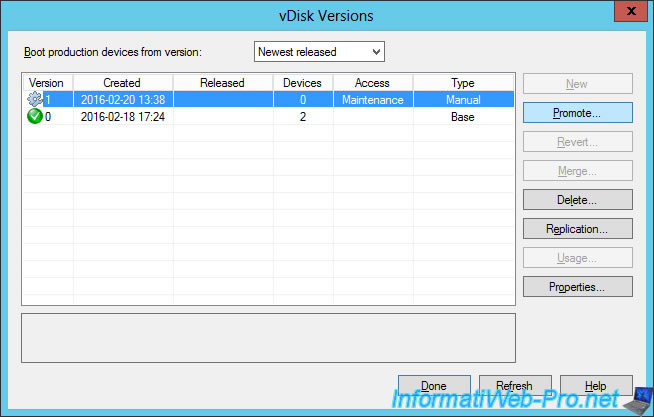
Select the vDisk that is currently in "Maintenance" mode and click "Promote".
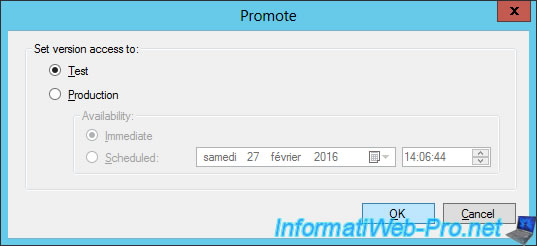
Select "Test" and click OK.
Now, the access of this vDisk is "Test". Click "Done".
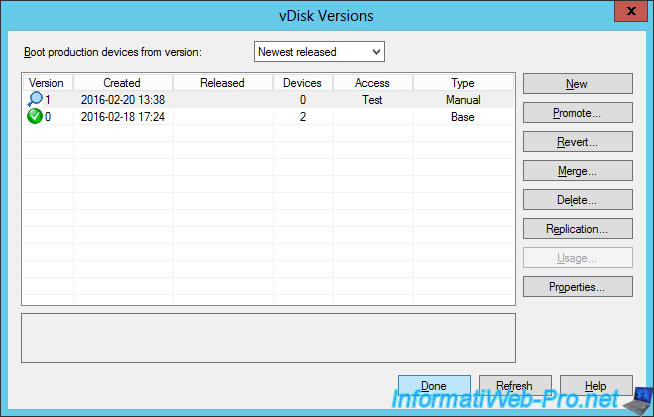
Select your reference virtual machine, right click on it and click "Properties".
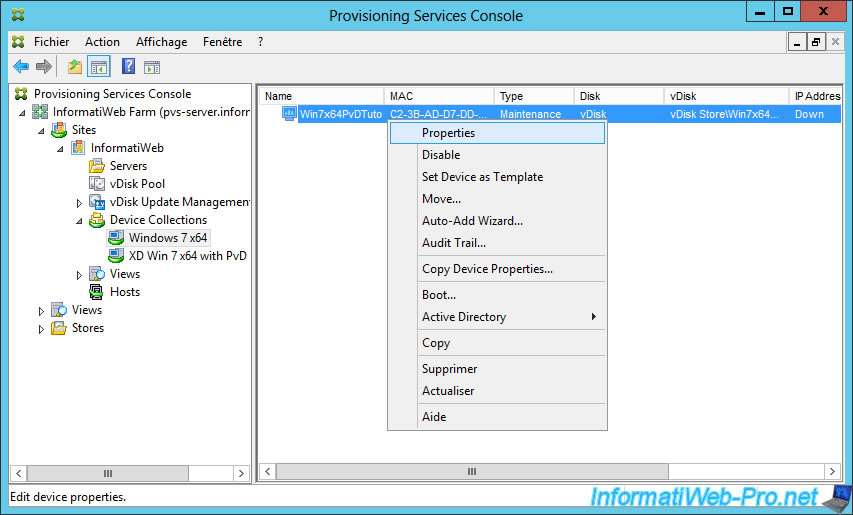
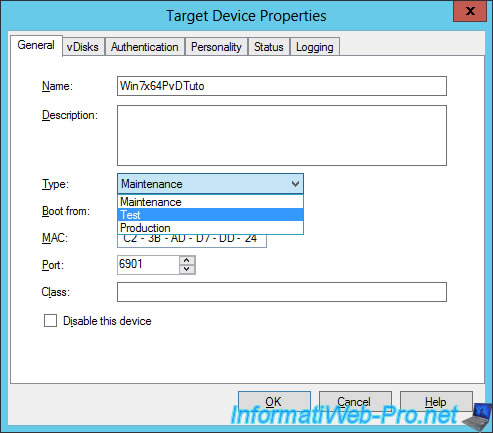
Select "Type: Test".
Start your reference virtual machine using XenCenter and choose the "test" version.
Sign in with an administrator account as earlier.
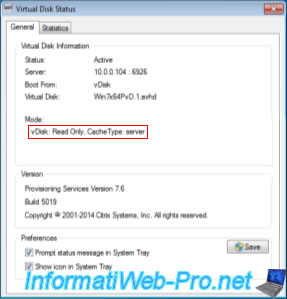
This time, you will notice that :
- The vDisk is in mode : read only
- The cache type is : server
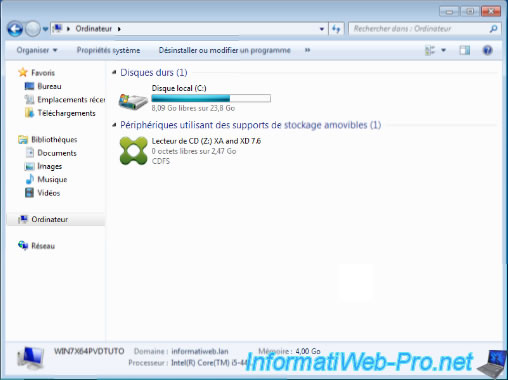
Indeed, if you go to the workstation (or computer since Win. Vista), you will see that the partitions "WCDisk" (write cache) and "Citrix Personal vDisk" (the user's personal disk) do 'not appear.
This is logical because the virtual disk is read-only and the cache is located on the server for the test mode of a vDisk.
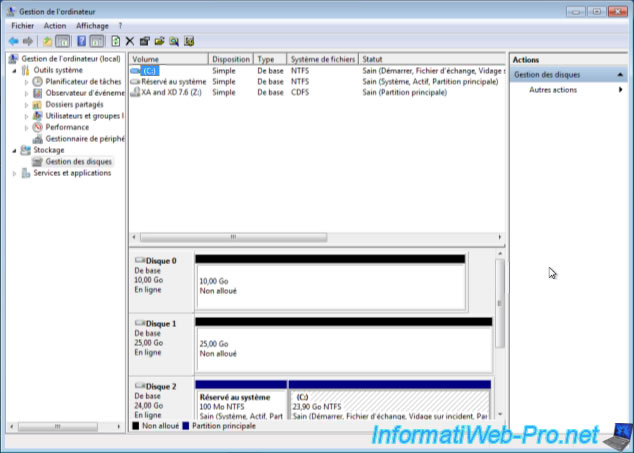
Moreover, the 2 hard drives that PVS displays in production mode are not displayed in the Disk Management.
Which leaves our 2 virtual hard disks in unallocated. (For more information, see our tutorial on PVS indicated earlier in this tutorial)
After testing the virtual machine, stop it.
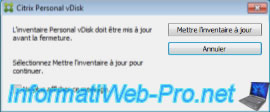
During Windows shutdown, Citrix will launch the "Citrix Personal vDisk" program.
Click Cancel to cancel the Windows shutdown.
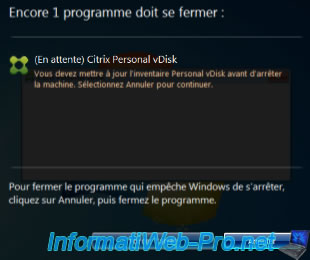
Then, click Cancel to cancel the updateof the personnal disk because the virtual disk is read-only and that the personal disk does not exist in test mode.
Note : If you attempt to update the inventory, the program will display an error at the end of the attempted update.
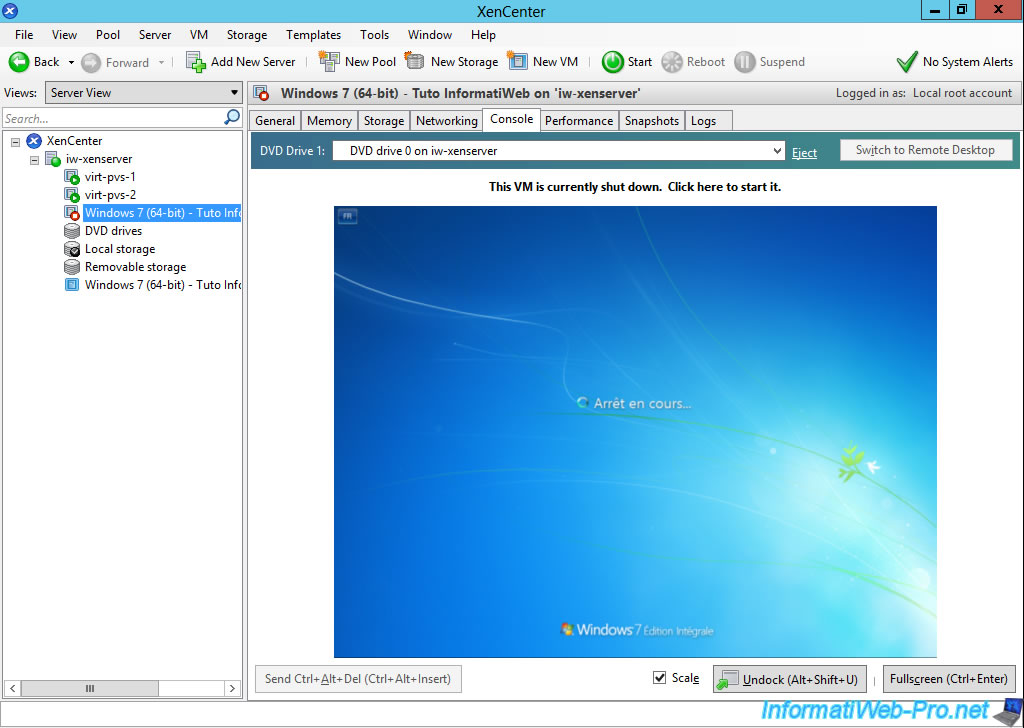
Shut down Windows again, and it will shut down correctly.
Share this tutorial
To see also
-
Citrix 4/9/2016
Citrix NetScaler Gateway 11.0 - Configuration and integration with XenApp/XenDesktop
-
Citrix 5/14/2016
Citrix XenApp / XenDesktop 7.6 - Load balancing
-
Citrix 5/13/2015
Citrix XenDesktop 7.6 - Deliver desktops by using MCS
-
Citrix 5/31/2015
Citrix XenDesktop 7.6 - Deliver desktops by using PVS

You must be logged in to post a comment