Configure a multi-site Active Directory infrastructure on Windows Server 2022 and 2016
- Windows Server
- 10 November 2025 at 17:31 UTC
-

- 2/11

5.3. Create local users for VPN server authentication
5.3.1. Create a user on site 1 (Brussels) so that site 2 (Paris) can connect to it
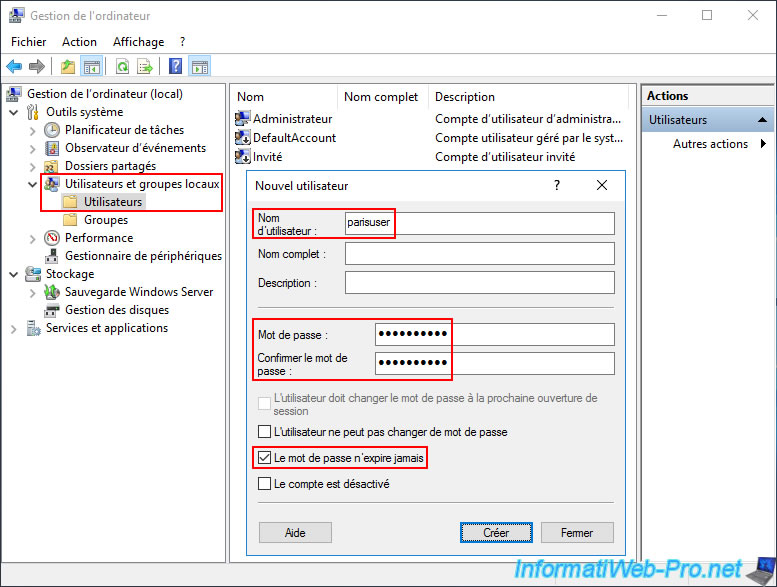
On the "brux-vpn" server at Site 1 (Brussels), open the "Computer Management" console and go to the "Local Users and Groups -> Users" section.
Then, right-click "New User" and type a username for the user account that Site 2 (Paris) will use to connect to Site 1 (Brussels).
In our case, this is the local user "parisuser" (initially, before deploying the multi-site Active Directory infrastructure).
Next, uncheck the "User must change password..." box and only check the "Password never expires" box.
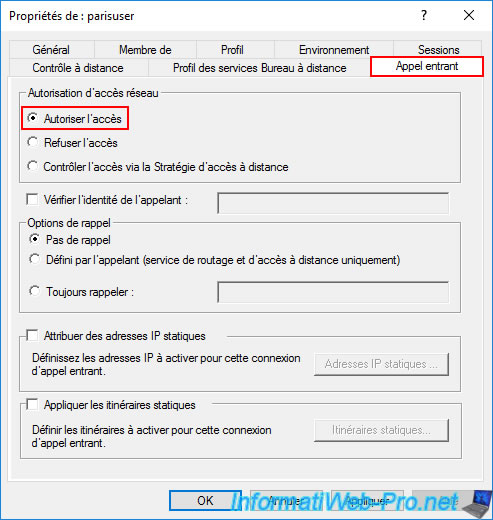
Once the user account is created, double-click on it.
In the "Incoming Calls" tab, select the "Allow Access" option at the top.
5.3.2. Create a user on site 2 (Paris) so that site 1 (Brussels) can connect to it
On the "paris-vpn" server of Site 2 (Paris), also create a local user (but this time, it will be used by Site 1 (Brussels) to authenticate to the VPN server of Site 2 (Paris)).
In our case, we created a "bruxuser" user on our "paris-vpn" server.
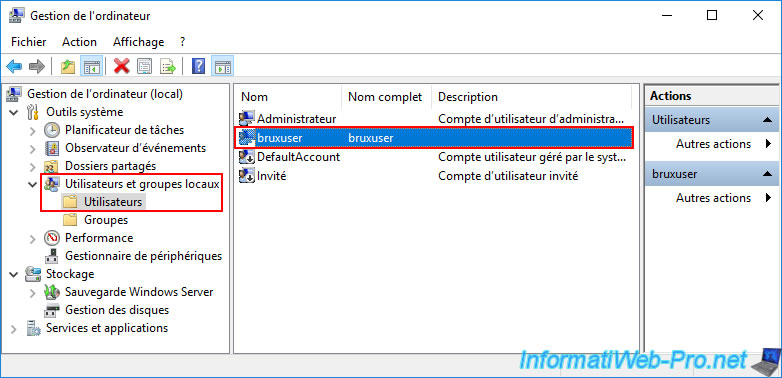
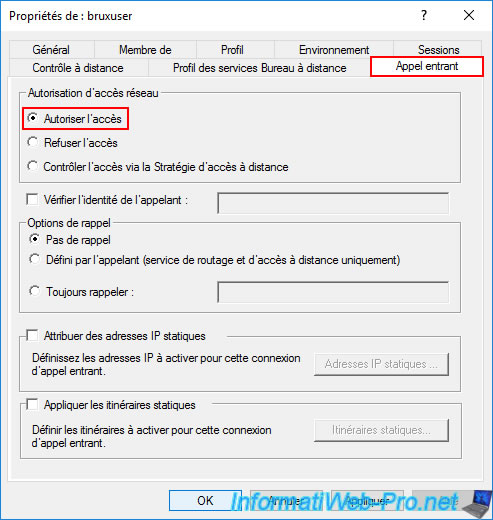
Once the user is created, double-click on it and go to the "Incoming Calls" tab.
Select the "Allow Access" option for this second user.
5.4. Configure routing and remote access with required VPN tunnels
To configure VPN tunnels between your two physical sites, refer to steps "5. Install role: Remote Access (Routing and Remote Access)" to "10.8. Test connectivity between your physical sites (via VPN tunnel using L2TP protocol)" in our tutorial on creating a Site-to-Site (S2S) VPN Tunnel via PPTP/L2TP on Windows Server 2022, 2016 and 2012.
Very briefly, you will need the "Remote Access" role on your two VPN servers (brux-vpn / paris-vpn).

For this "Remote Access" role, you will need to install only these role services:
- DirectAccess and VPN (remote access).
- Routing.

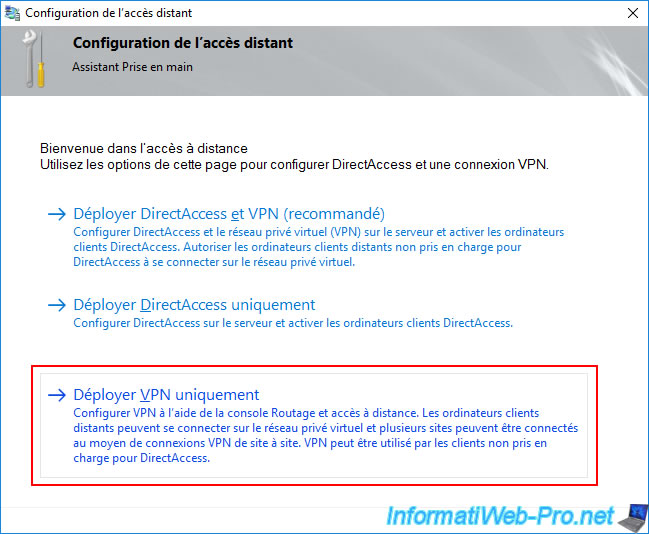
When the "Remote Access" role installation is complete, click the "Open Getting Started Wizard" link and click "Deploy VPN only".
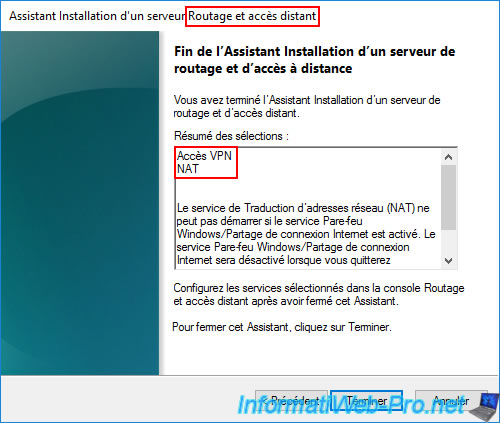
In the Routing and Remote Access (RRAS) console, launch the configuration wizard for this service and select "Custom Configuration," then select the "VPN Access" and "NAT" options.
Warning : several configuration steps are required in this console (for site-to-site VPN tunnels and for network routing (NAT)), as explained in the tutorial cited above.
5.5. VPN connections established (using L2TP)
5.5.1. Site-to-site VPN tunnel between site 1 (Brussels) and site 2 (Paris) established
Once your VPN servers are configured as explained in the previous step of this tutorial, you will see that Site 1 (Brussels) is successfully connected to Site 2 (Paris).
In our case, the "BRUX-VPN" server is successfully connected to Site 2 (Paris) using the "Paris" on-demand connection (visible in the "Network Interfaces" section).
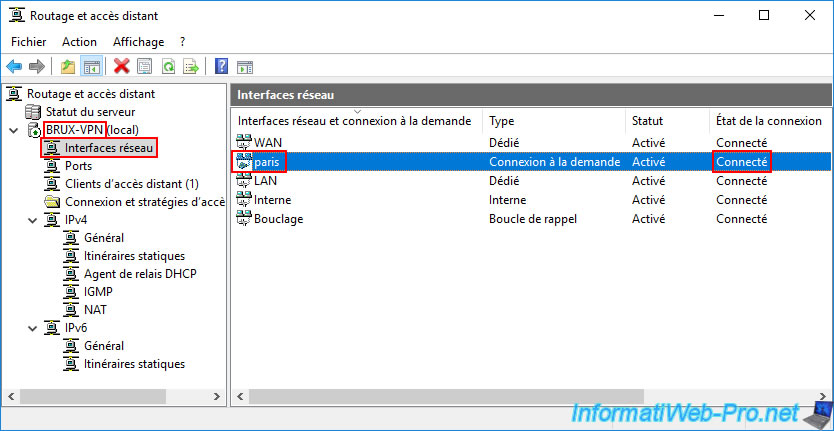
In the "Ports" section, verify that you are using the "L2TP" protocol. The active ports must be those for this "L2TP" protocol.
Indeed, it is more secure and stable (on Windows Server) than the "PPTP" protocol (easier to configure).

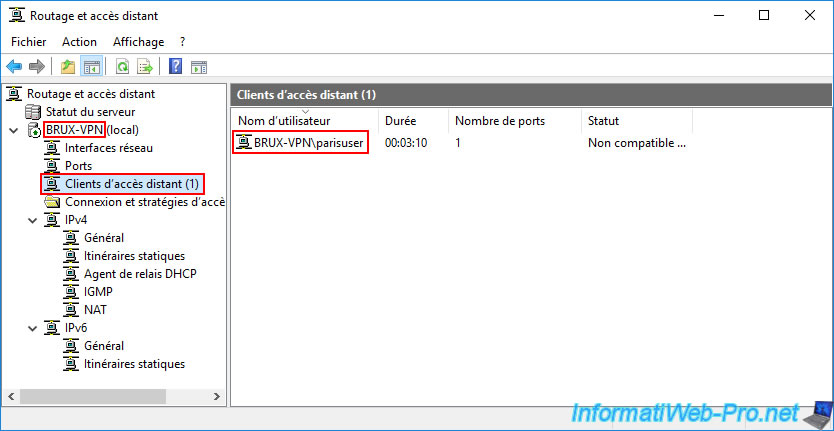
In the "Remote Access Clients" section of our "BRUX-VPN" server, you can see that the user "parisuser" is logged in.
In other words, this is the VPN server "PARIS-VPN" connecting to our "BRUX-VPN" server via the "brux" on-demand connection created on the remote server (PARIS-VPN).
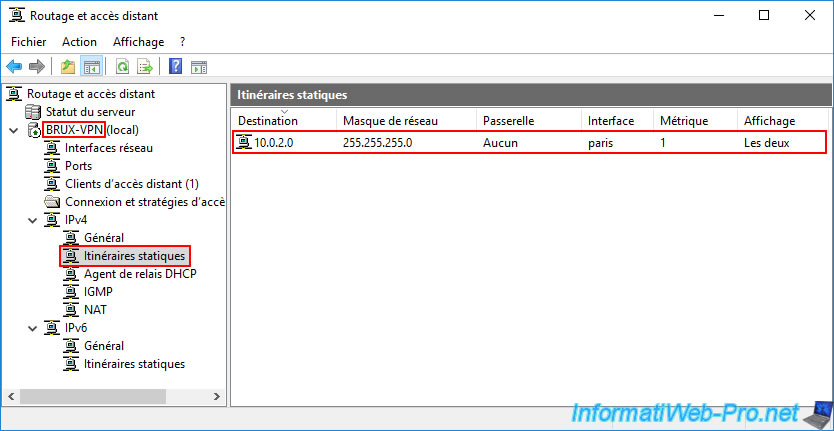
In the "Static Routes" section, you will see that the VPN server "BRUX-VPN" at Site 1 (Brussels) knows that the subnet "10.0.2.0" is located at Site 2 (Paris) and can access it via the "paris" network interface.
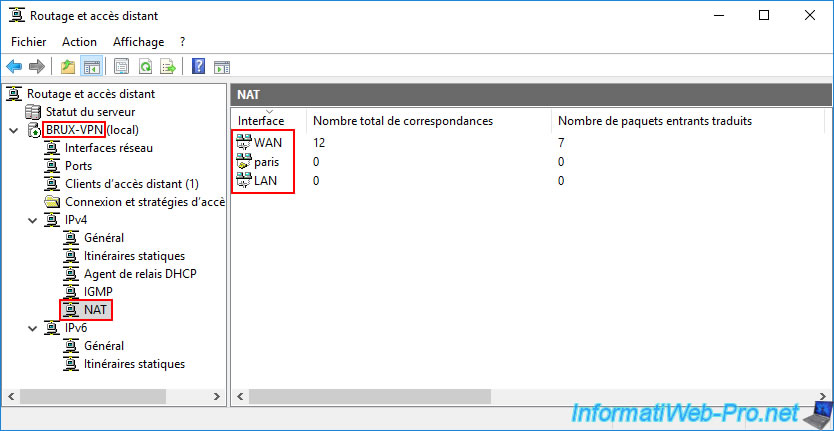
In the "NAT" section, check that your three network interfaces appear.
This is what enables automatic packet routing between these three networks:
- WAN: the "WAN" network card (including Internet access) of this "BRUX-VPN" VPN server.
- paris: the "paris" dial-up interface created on this VPN server, which provides access to the remote network of Site 2 (Paris).
- LAN: the LAN network card for accessing the local network of Site 1 (Brussels).
5.5.2. Site-to-site VPN tunnel between site 2 (Paris) and site 1 (Brussels) established
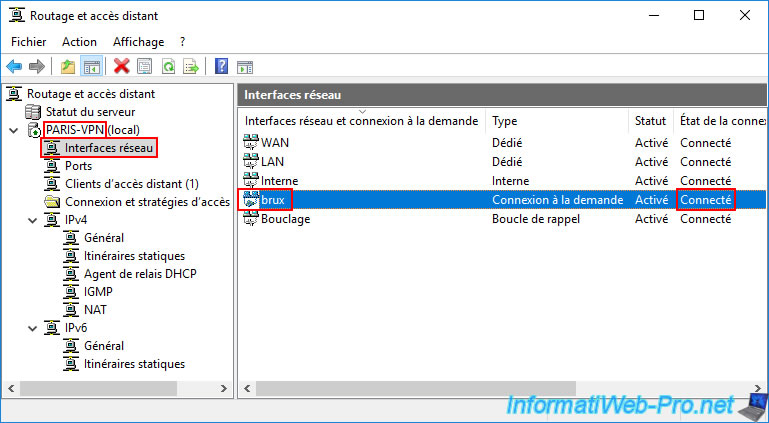
On your remote VPN server (PARIS-VPN), go to the "Network Interfaces" section and check that the on-demand connection created (in our case "brux") is connected.
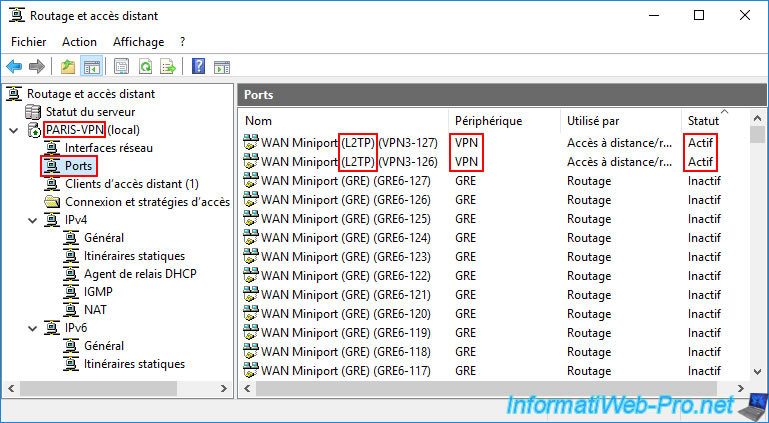
Again, in the "Ports" section of your "PARIS-VPN" VPN server (site 2), check that the active ports are those for the "L2TP" VPN protocol.
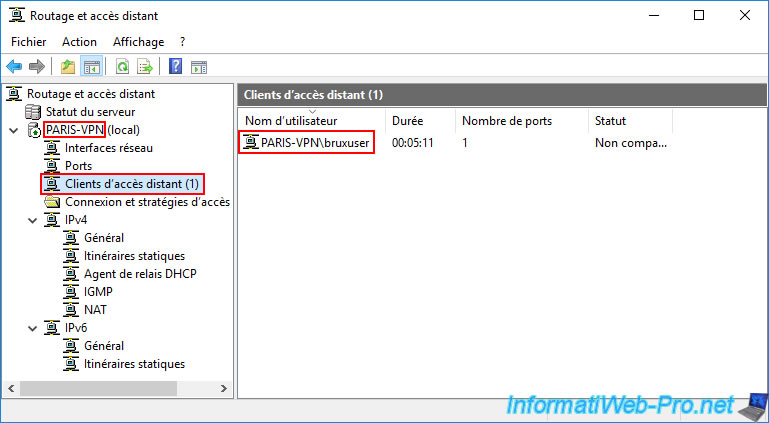
On this remote VPN server (PARIS-VPN), you can see this time that it is the user "bruxuser" who is connected to your remote VPN server.
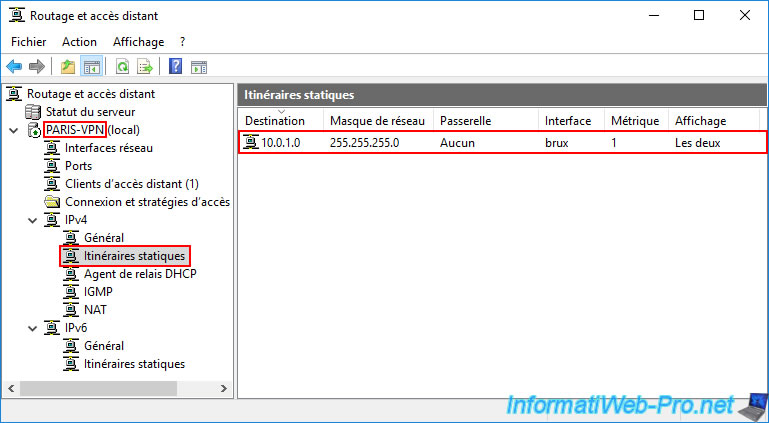
In the "Static Routes" section, you will see that the VPN server "PARIS-VPN" at Site 2 (Paris) knows that the subnet "10.0.1.0" is located at Site 1 (Brussels) and can access it via the network interface "brux".
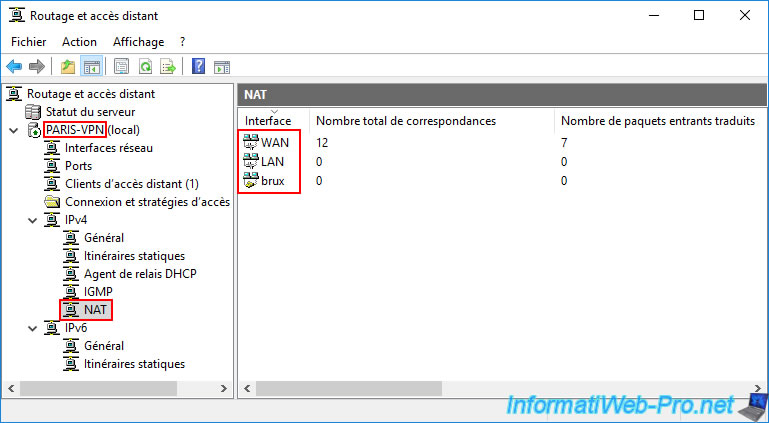
Again, in the "NAT" section of this remote VPN server (PARIS-VPN), check that your 3 network interfaces appear so that network packets are routed correctly.
6. Edit the network configuration of your 2 VPN servers for use in a multi-site Active Directory infrastructure
Before deploying your multi-site Active Directory infrastructure, you must modify the network configuration of the two network cards on each VPN server so that they use only your local Active Directory domain controllers as DNS servers.
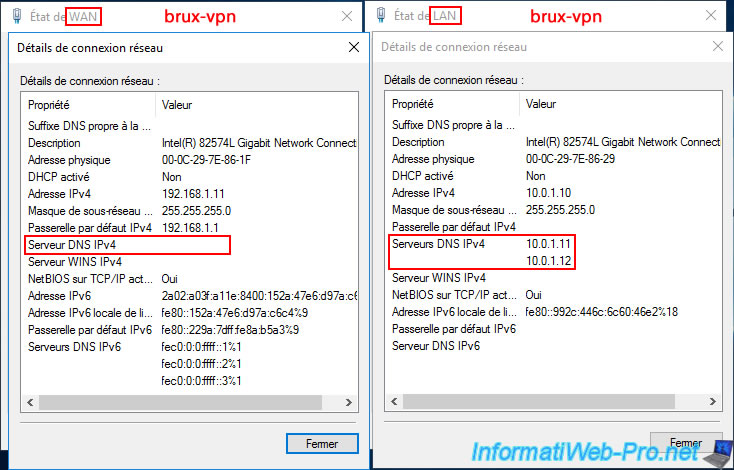
For the "brux-vpn" server at Site 1 (Brussels), modify the network configuration of your "LAN" network card and specify these IP addresses for:
- Preferred DNS server: 10.0.1.11 (brux-dc1).
- Alternate DNS server: 10.0.1.12 (brux-dc2).

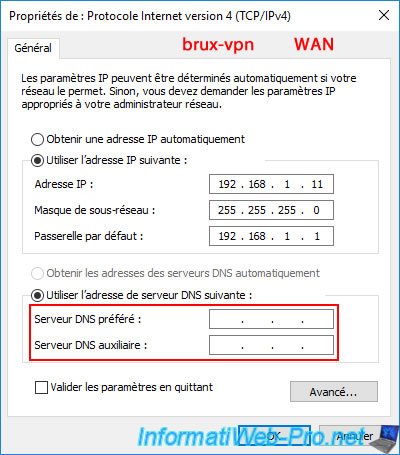
Warning : it's also important to remove the IP addresses you may have specified as DNS servers for your VPN server's WAN interface.
The goal is to ensure that it can only use those of your Active Directory domain controllers.
Otherwise, your Active Directory infrastructure could become unavailable to this server, as it attempts to resolve your AD domain through one of these DNS servers (potentially Google's or another).
For the VPN server "brux-vpn", this gives this for the network configuration of its "WAN" and "LAN" network cards.
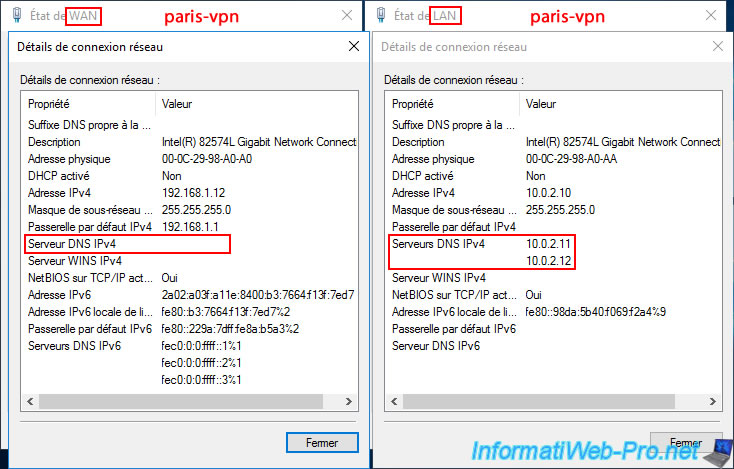
For the VPN server "paris-vpn", this gives this for the network configuration of its "WAN" and "LAN" network cards.
Share this tutorial
To see also
-

Windows Server 4/16/2021
Windows Server - AD DS - How Active Directory replication works
-

Windows Server 4/30/2021
Windows Server - AD DS - Overview of Active Directory functional levels
-

Windows Server 4/3/2021
Windows Server - AD DS - The basics of Active Directory
-

Windows Server 5/21/2021
WS 2016 - AD DS - Add a domain controller to an existing AD domain
No comment