Use inheritance, application, ... of group policies (GPO) in an Active Directory infrastructure under Windows Server 2016
- Windows Server
- 03 September 2021 at 11:38 UTC
-

- 2/2
4. Bypass inheritance blocking by applying GPO
As mentioned previously, it's possible to block inheritance to not receive group policies defined on the parent.
By default, it's also possible to redefine group policies in a GPO linked to a child location so as not to receive the settings configured on the parent locations.
Now, assuming that you are part of a group with offices in several countries, you will probably want to prevent a local administrator (of a physical local office) from blocking the inheritance of the group policies that you have defined on the root of the Active Directory domain or attempts to hide them by resetting them with a child GPO.
To do this, all you need to do is enable the "Enforced" setting on the link to the GPO object that you created at the root of the domain or on a parent location.
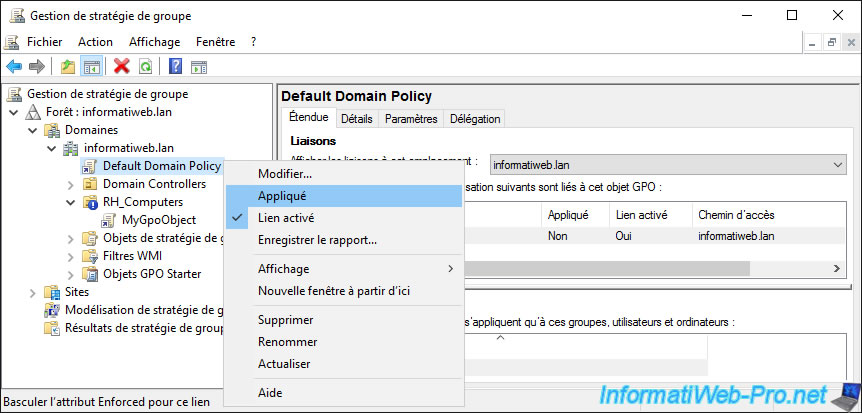
Now that the "Enforced" setting has been enabled on a parent link, all children will receive these Group Policies (even if Group Policy inheritance blocking had been enabled on a child location).
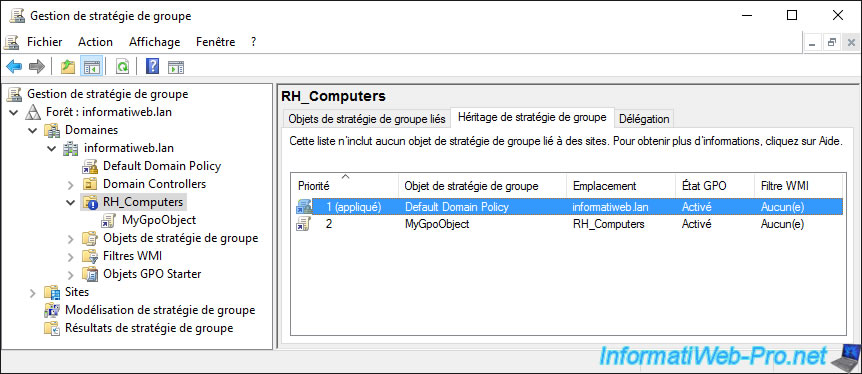
Also, if you look at the Group Policy inheritance of your child location, you will see that the order of application of the various GPOs linked to it will have changed.
The link with the "Enforced" setting enabled now takes precedence over the GPO you linked to that location.
The administrator of this local office can no longer block the group policies defined by the group (hierarchical superior) nor redefine the policies defined in this one to try to hide them, because the applied object has priority over the object linked to the child location.
If your local administrator is a little smart, he may try to enable the "Enforced" setting on his child link as well to try to take priority over the group administrator.
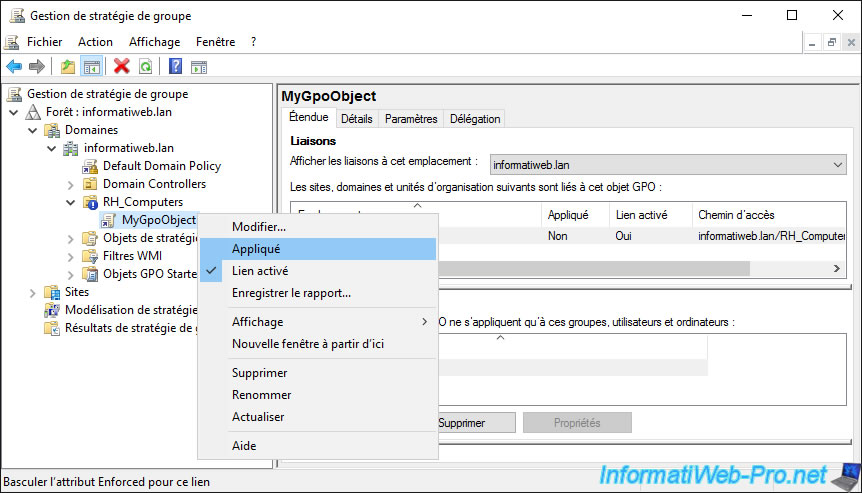
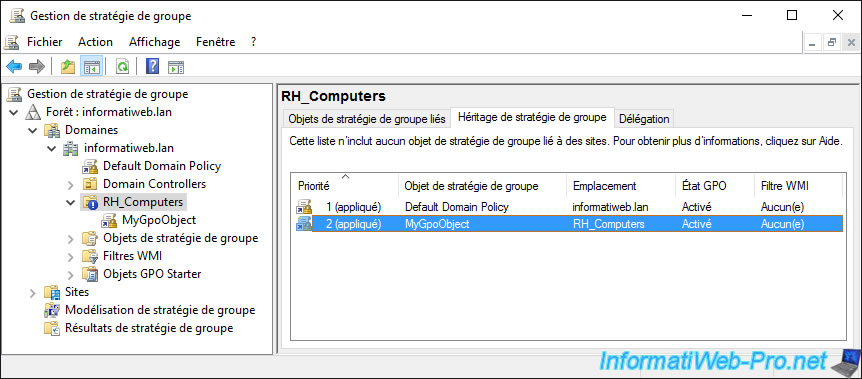
Except it won't work. As soon as you enforce the application of a GPO object, the order of application of the different GPOs is reversed.
It's the link defined on the parent that takes priority over links added on child locations.
5. Security filtering
By default, when you link a Group Policy Object (GPO) to a location, the security filtering is set to : Authenticated Users.
In other words, it concerns everyone.
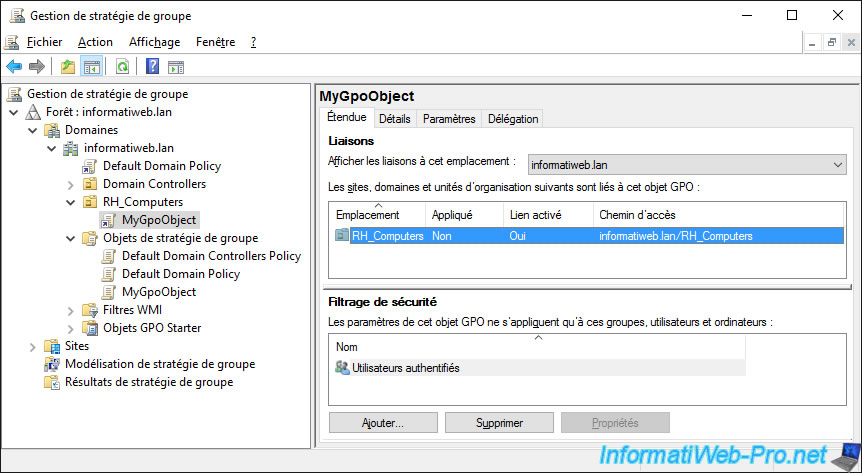
However, when you need to limit access to specific users (for reasons of software licenses, for example), it may be worthwhile to change this security filtering.
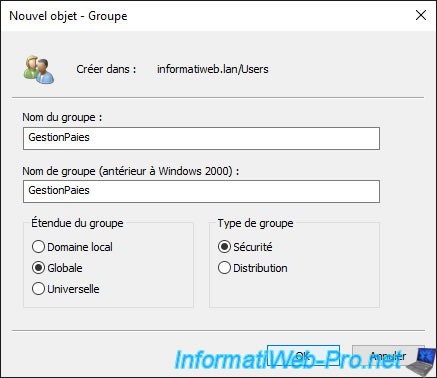
For simplicity, we are going to create a new group which must be of type : Security.
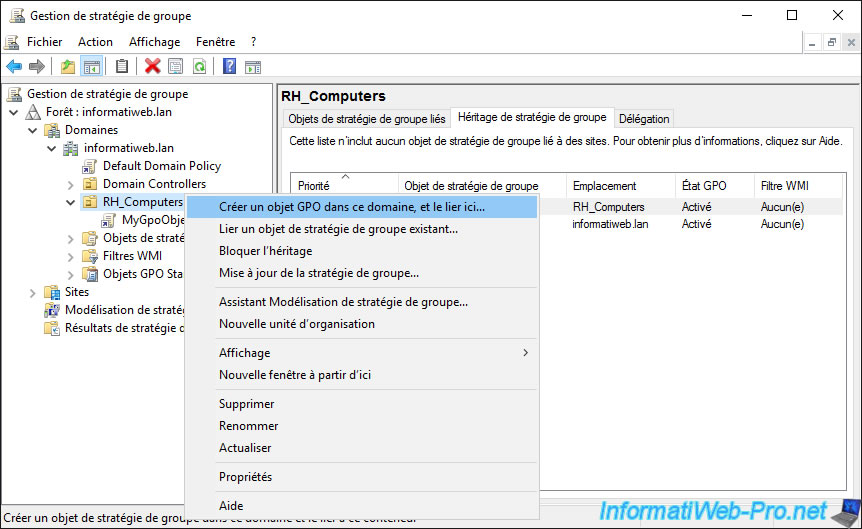
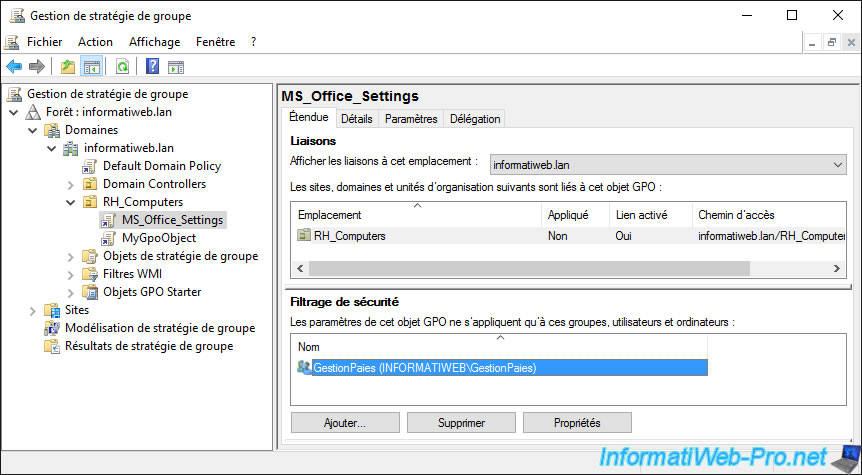
For the example, we will create a new GPO object and link it to our "RH_Computers" organizational unit.
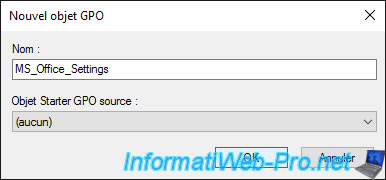
In our case, we specify "MS_Office_Settings" as the name of the GPO object.
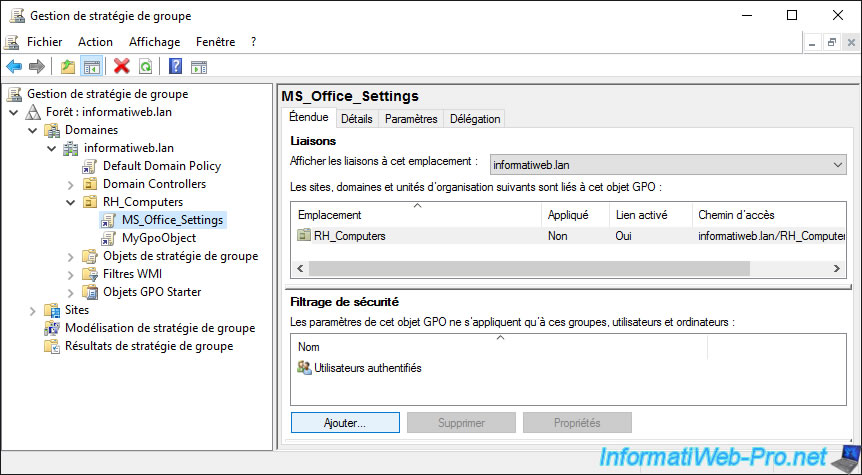
Currently, security filtering is set to "Authenticated Users". Which is the default setting.
Click on : Add.
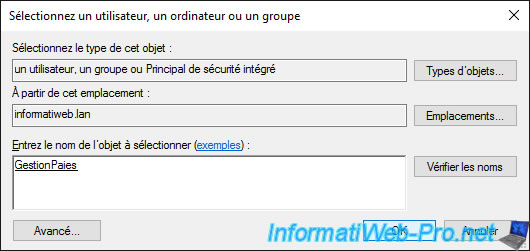
Specify the name of the group created previously.
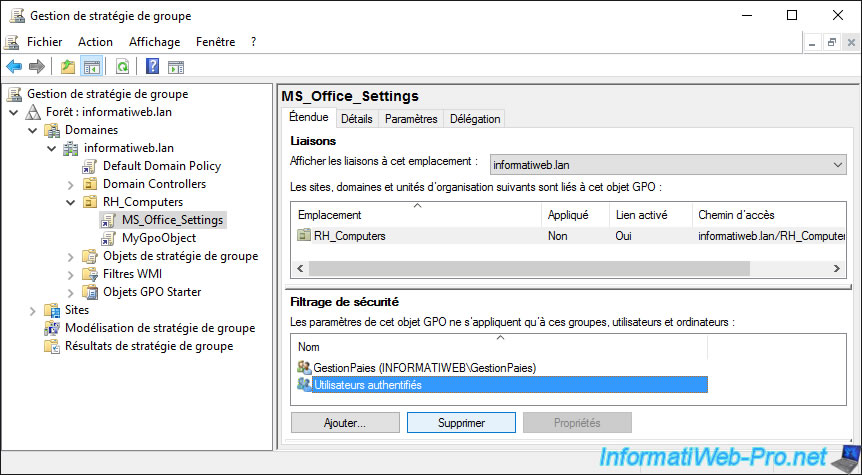
Then, remove the "Authenticated Users" group from the list.
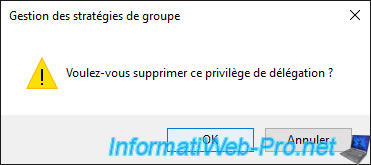
Confirm the removal of this delegation privilege.
Now, the group policies defined in this "MS_Office_Settings" GPO will be applied to the "RH_Computers" location only when a user from our "GestionPaies" group logs on.
6. WMI filtering
To take the filtering for Group Policy enforcement even further, you can use WMI filters.
6.1. Create a WMI query
To create a WMI filter, you must first know what WMI (Windows Management Instrumentation) is and what it's made of.
Although there is a "wbemtest" utility on all versions of Windows, we find that Microsoft's "WMI Code Creator" program is much easier to learn when starting out in WMI.
WARNING : WMI is read and write accessible and editing data in this WMI layer without knowing what you are doing can physically damage your computer.
We therefore recommend that you only perform "SELECT" requests (therefore a read) on the WMI layer and not any modifications on it.
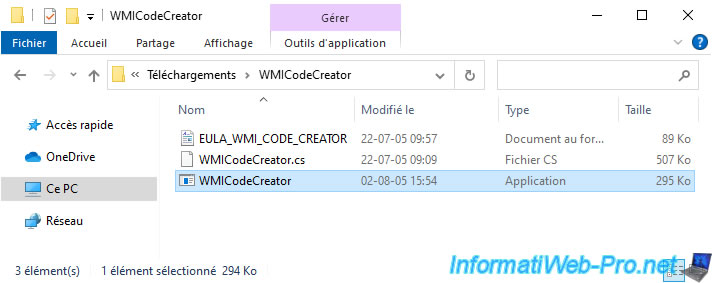
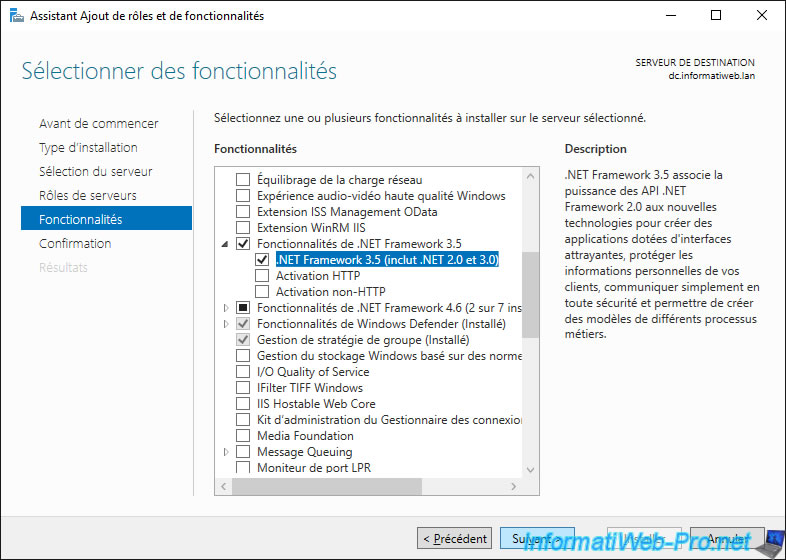
In order for the "WMI Code Creator" program to work, you must install the ".Net Framework 3.5" on the computer or server where you want to launch it.
Knowing that you must obviously run this program on the computer to target to obtain the information that will allow you to target him and not another.
To install the ".Net Framework 3.5" on the client versions of Windows, you must enable the corresponding feature : .Net Framework 3.5 ...
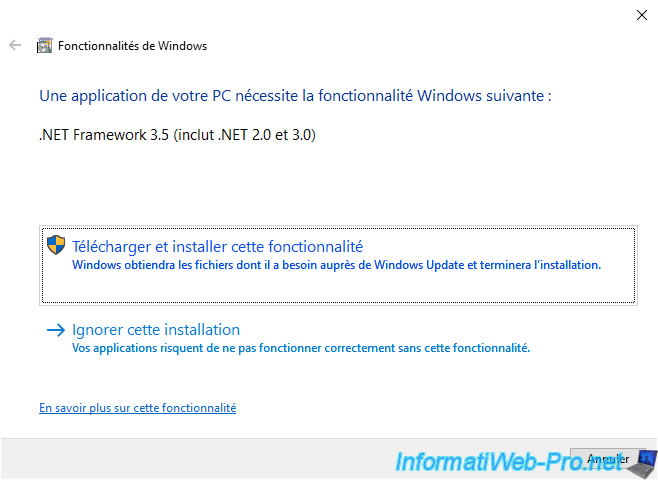
On server versions of Windows, you will need to open the Add Roles and Features Wizard and enable the ".NET Framework 3.5 Features -> .NET Framework 3.5 (includes .NET 2.0 and 3.0)" feature.
For the detailed procedure, refer to our tutorial : Install .Net Framework 2.0, 3.0 and 3.5 on Windows Server
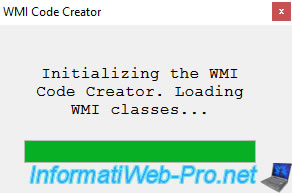
Once the .NET Framework 3.5 is installed, you can launch the "WMI Code Creator" program.
Wait while the WMI classes are loaded.
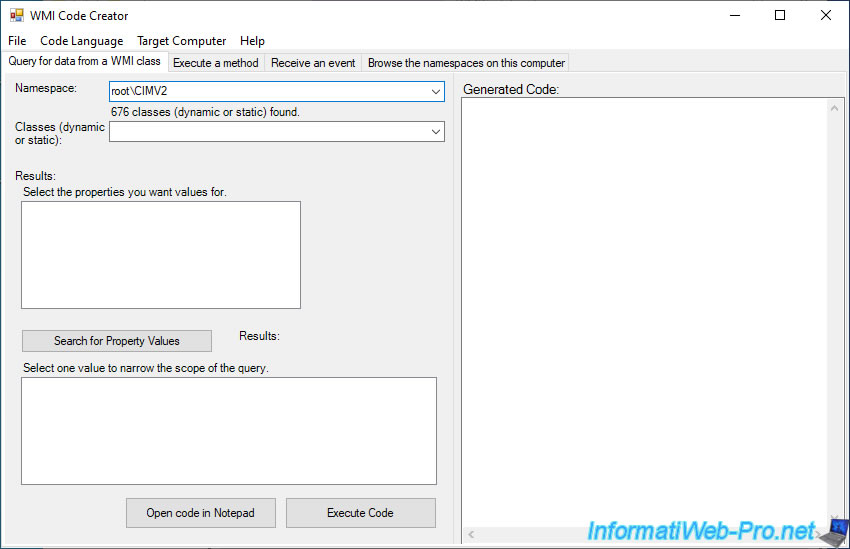
The namespace you will use the most will be : root\CIMV2.
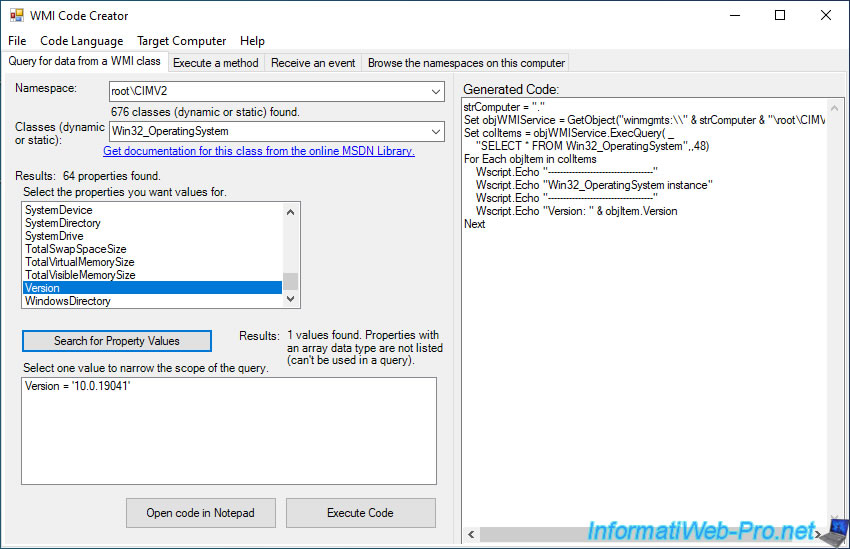
In this "root\CIMV2" namespace, you will find many classes including the "Win32_OperatingSystem" class.
By selecting this "Win32_OperatingSystem" WMI class, the list of its properties will be displayed.
If we select the "Version" property, we see that the version of our client PC is : 10.0.19041.
While looking up the official Microsoft documentation, we then found this article : Create WMI Filters for the GPO.
In this article, Microsoft explains how to target a specific version of Windows using just this "Win32_OperatingSystem" WMI class and its properties : ProductType and Version.
Although the "WMI Code Creator" program is interesting for finding the desired information, the "wbemtest" program is also useful, because it allows you to execute a WMI query and therefore to test if it's correct and if it returns the desired result.
Knowing that the WMI filter in Active Directory works on a true or false basis. If the WMI query returns a positive result, the affected group policies will be applied, otherwise not.
Launch the "wbemtest" program integrated in all versions of Windows and Windows Server and click on the "Connection" button.
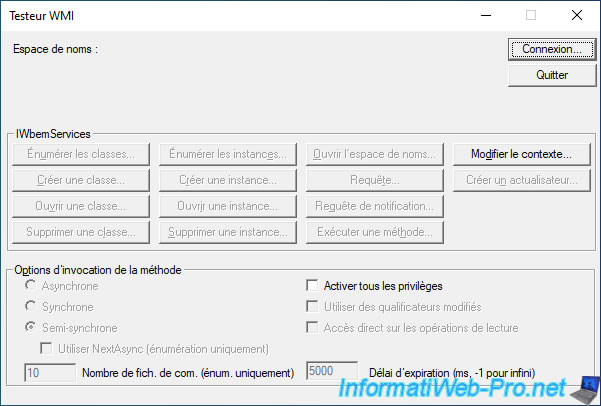
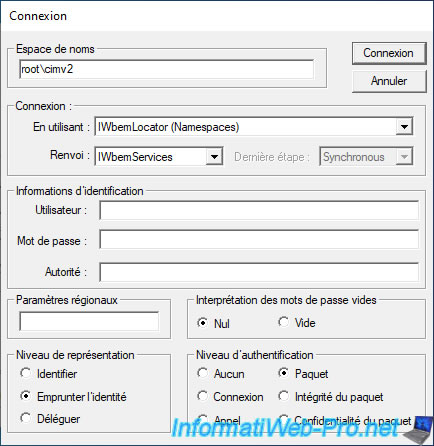
Do not change anything in this window and simply click on : Connection.
Note : as you can see, this utility connects by default to the "root\CIMV2" namespace.
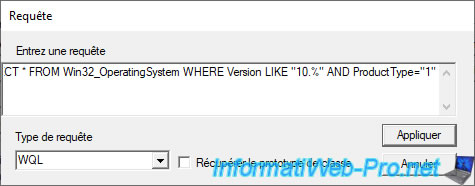
According to the official Microsoft documentation (cited previously), we can target Windows 10 client PCs using this WMI request :
SQL
SELECT * FROM Win32_OperatingSystem WHERE Version LIKE "10.%" AND ProductType="1"
- for the PC to be under Windows 10, its version must begin with "10."
- and that it's indeed a computer with a client version of Windows : ProductType = 1
Note that the format for WMI queries is : WQL. This is why the WQL format is very similar to SQL queries used with database servers : Microsoft SQL Server, MySQL, ...
To test this query, click the "Query ..." button, paste the WMI query and click "Apply".
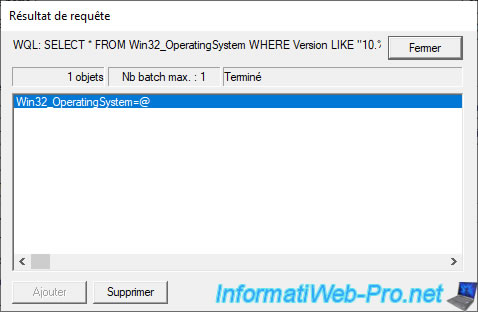
If the query returns a result (an object), your query is good and Active Directory will therefore consider the result to be : true.
Double click on the displayed result.
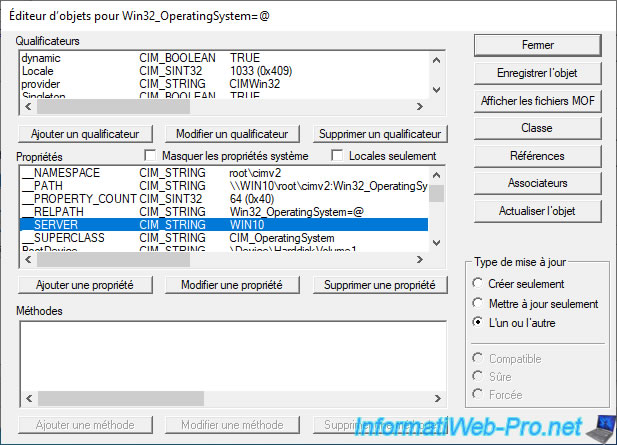
The object editor appears with a lot of information.
Don't change anything here, but you can see it did find our computer so the NETBIOS name is : WIN10.
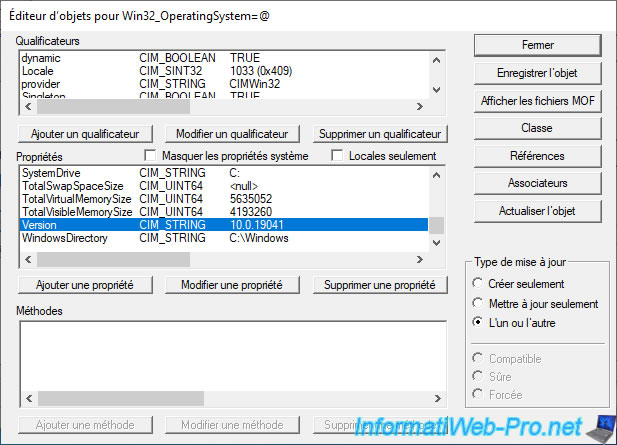
And that the version of Windows installed on our computer is : 10.0.19041.
Which starts well with "10." as shown in our WMI query.
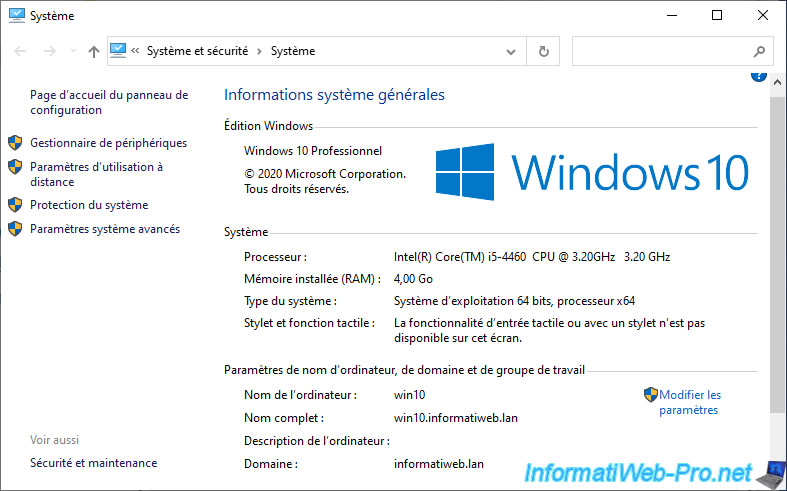
If you view the Windows system properties, you will find the NETBIOS name of your computer.
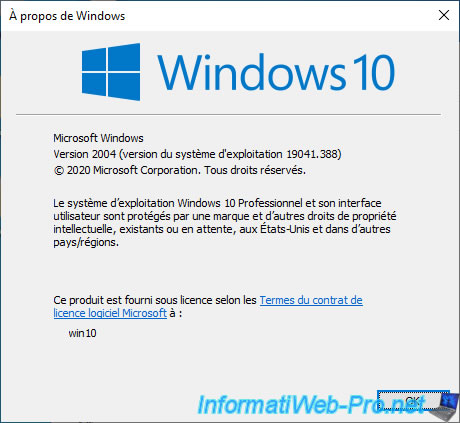
And you can know its version by launching the "winver.exe" program available on all versions of Windows.
Note that the version available through the WMI layer is the one indicated in parentheses (19041) and not the public "name" of that version (2004).
6.2. Create a WMI filter
Now that we have found the WMI query allowing us to target what we wanted (in our case : client PCs with Windows 10), we just need to create a new WMI filter in our Active Directory infrastructure.
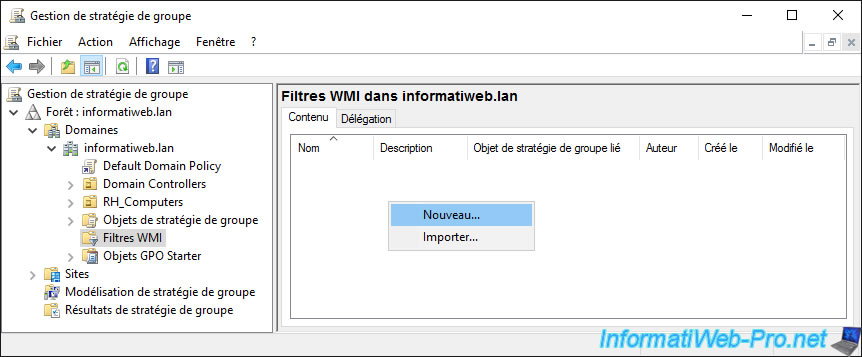
To do this, select the "WMI Filters" folder and right-click "New" in the list on the right.

Provide a name and description for this WMI filter and click the "Add" button to add a WMI query for it.
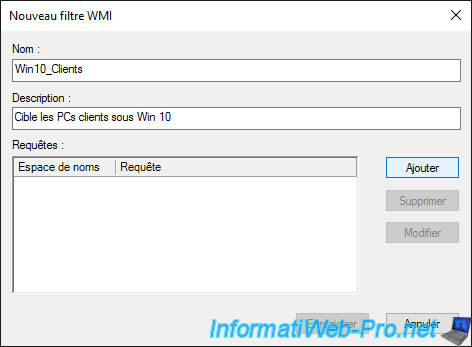
As indicated previously, the namespace used will be : root\CIMv2.
Paste the WMI query created earlier and click OK.
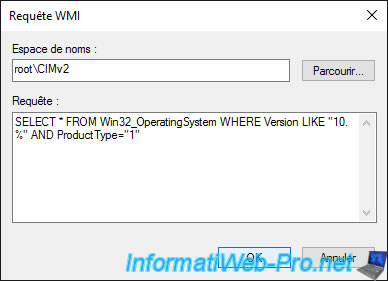
The query has been added.
Important : as you can see, no check was made to see if this request was valid or not. Hence the usefulness of testing it first on via "wbemtest" to make sure your WMI query is correct.
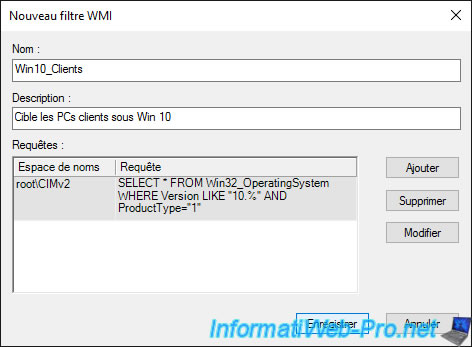
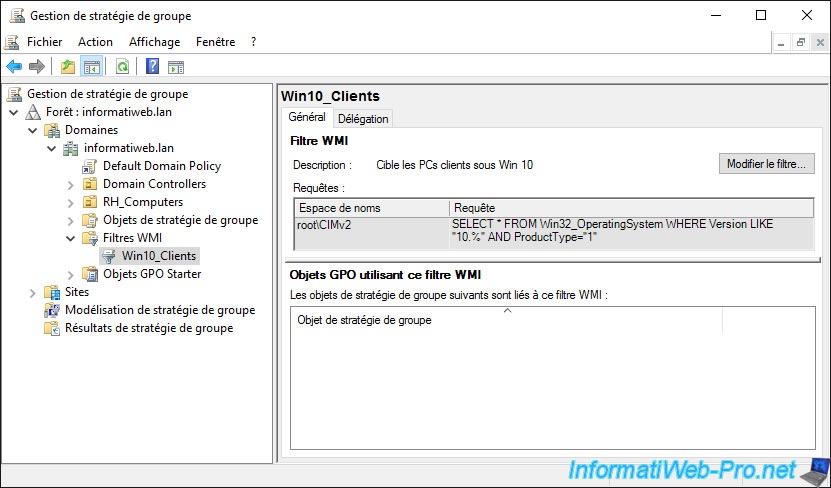
Our WMI filter has been created.
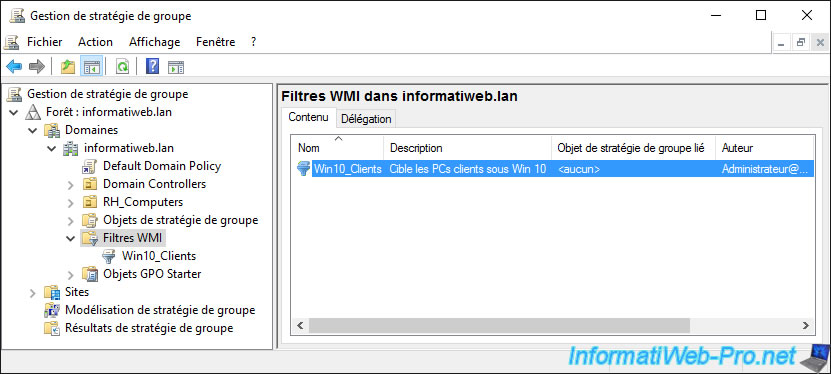
If you select it on the left or double click on it, you will find :
- his name
- its description
- the associated query (or queries)
- the list of GPOs using this WMI filter
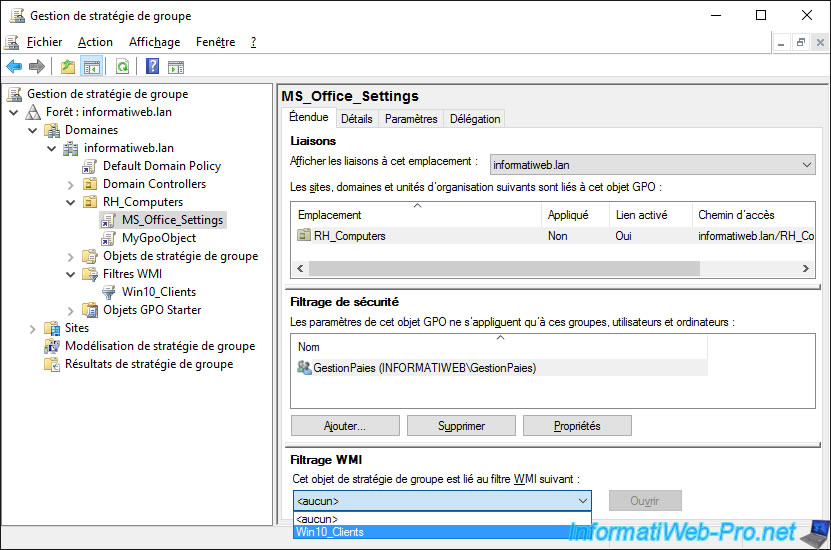
In our case, we will choose the link to the "MS_Office_Settings" GPO object and select our "Win10_Clients" WMI filter in the "WMI filtering" section.
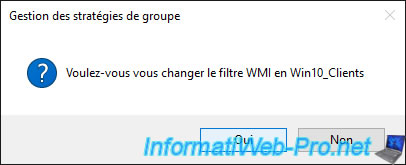
Confirm the change of the WMI filter.
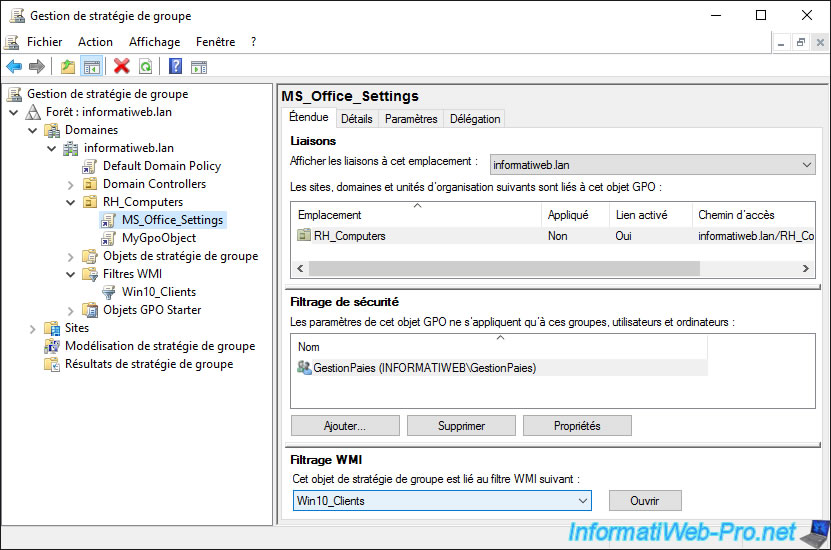
Now, the group policies of our "MS_Office_Settings" GPO will be applied only :
- for the "RH_Computers" location (and its children if there are any)
- IF the user who connects is part of the "GestionPaies" group
- AND ONLY IF the client PC is on Windows 10
Share this tutorial
To see also
-

Windows Server 4/16/2021
Windows Server - AD DS - How Active Directory replication works
-
Windows Server 4/30/2021
Windows Server - AD DS - Overview of Active Directory functional levels
-
Windows Server 4/3/2021
Windows Server - AD DS - The basics of Active Directory
-

Windows Server 5/21/2021
WS 2016 - AD DS - Add a domain controller to an existing AD domain

No comment