Securing an IIS web server on Windows Server 2016
- Windows Server
- 27 October 2023 at 11:11 UTC
-

- 2/5
3. Request certificate for the IIS web server from mmc console
To request a certificate for your IIS web server, you have 2 options :
- launch an mmc console on your web server : which is always possible
- generate a certificate request from the IIS manager of your web server and submit it to your certification authority via its web interface.
But, this requires that your certificate authority's web interface is installed.
To request a certificate from the mmc console, launch this console from the server where IIS is installed.
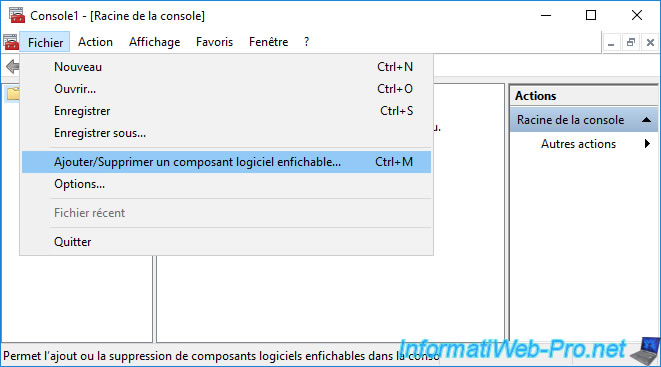
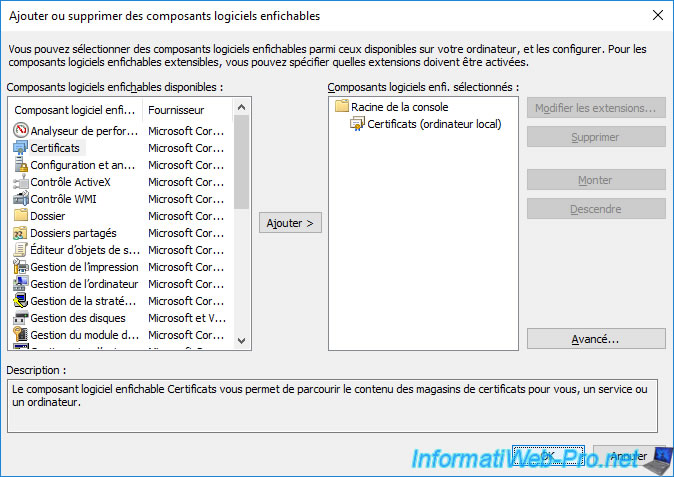
Then, in the mmc console that appears, go to : File -> Add/Remove Snap-in.
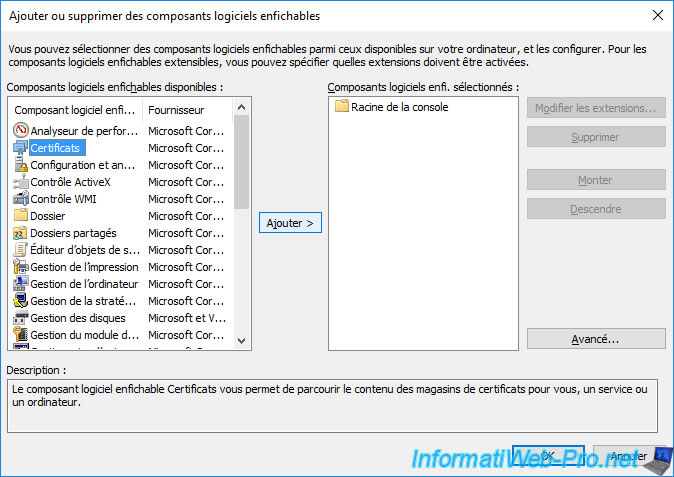
Add the "Certificates" component.
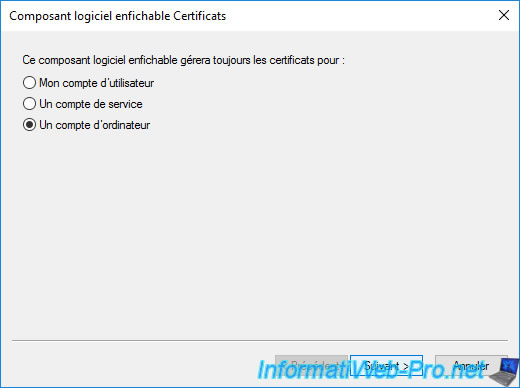
Choose "Computer account" and click Next.
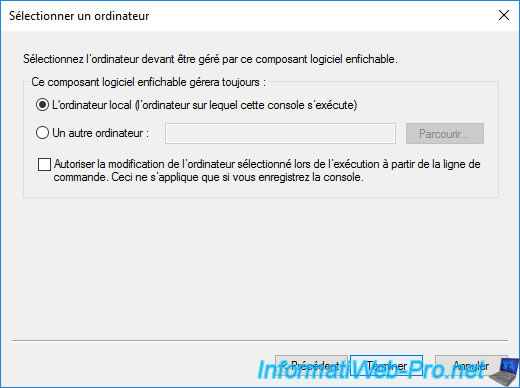
Leave the "Local computer..." option selected and click Finish.
Click OK.
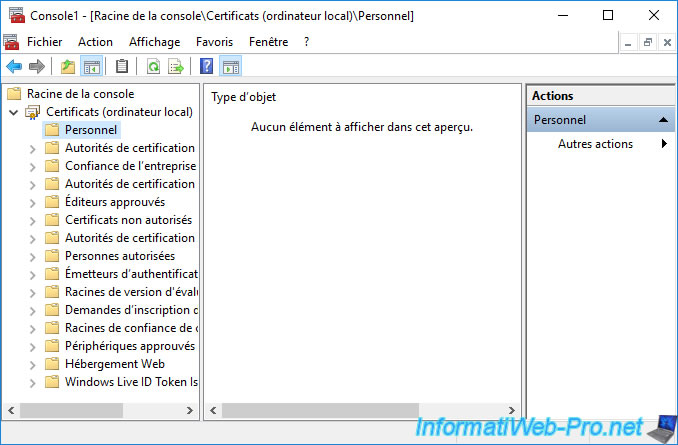
As you can see, by default we don't have a personal certificate on our web server.
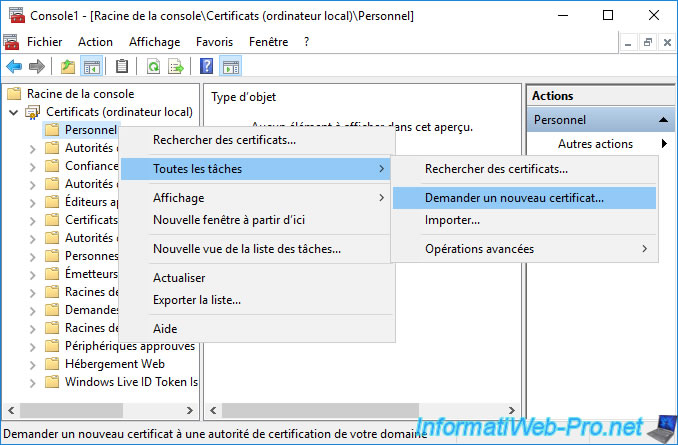
Right-click on your "Personal" certificate store and click : All Tasks -> Request New Certificate.
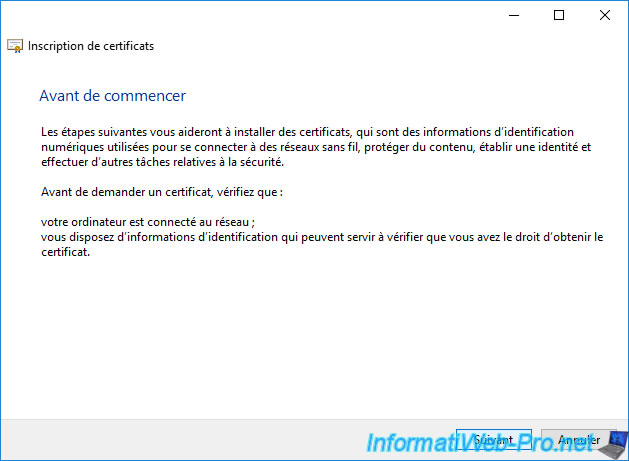
The "Certificate Enrollment" wizard appears.
Click Next.
Click Next.
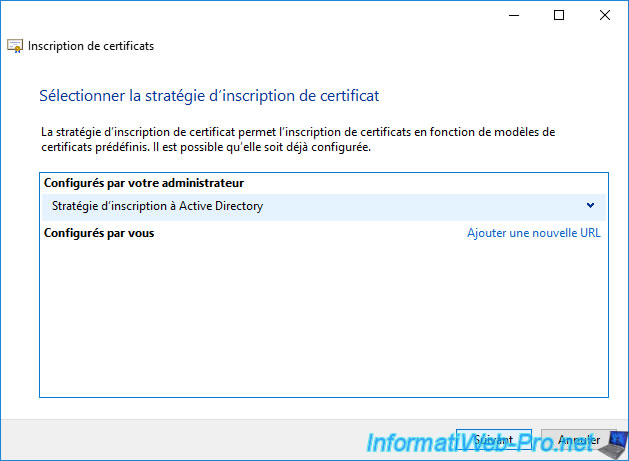
Check the box for the new certificate template you just created and click the "More information is required to enroll for this certificate" link that appears.
Note : if this certificate template doesn't appear in your case, make sure that :
- this certificate template is part of the certificate templates to be issued by your certification authority
- the user account you are logged in with has the right to enroll certificates using this certificate template
- the computer account corresponding to the server you are on has the right to enroll certificates using this certificate template
- the "Authenticated Users" group has at least "Read" permission for this certificate template
For the link displayed in blue, it's present only if the "Supply in the request" option is selected in the "Subject Name" tab.
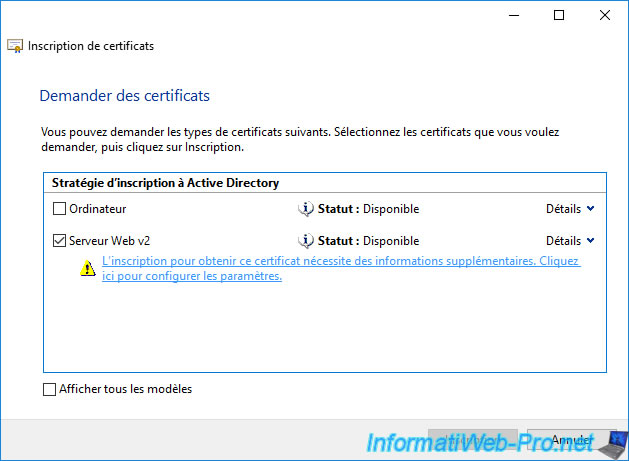
In the "Certificate Properties" window that appears, select "Common name" as the subject type and type in the domain name of your web server.
More precisely, the name to be indicated is the one that you wish to specify in the address bar of your browser to access the website hosted on it.
Note : if the name you want to use to access your website is different from the domain name of your web server, an additional DNS record will need to be created on your local DNS server.
Once the common name has been indicated, click on the "Add" button.
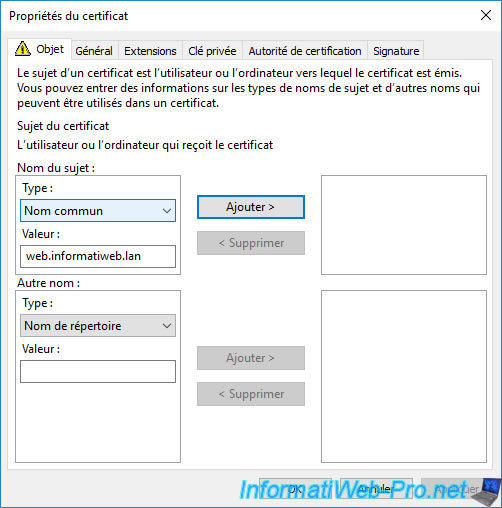
The desired common name (CN) appears on the right.
Note : the common name (CN) is the only mandatory information. The rest is optional.
In the "General" tab, you can specify a friendly name for it if you wish.
This makes it easier for you to identify your certificates in the future.
However, be aware that this name is also publicly visible if someone looks at the certificate information protecting your IIS web server.
Then, click OK.
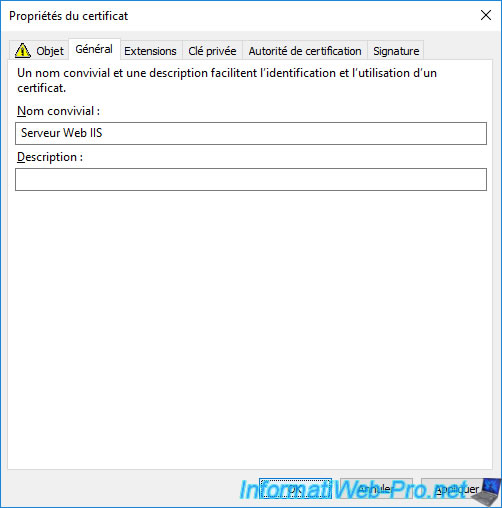
Now, the blue link is gone.
Click on : Enroll.
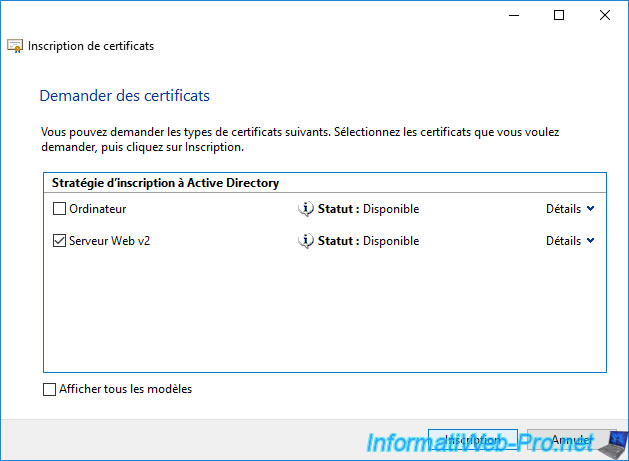
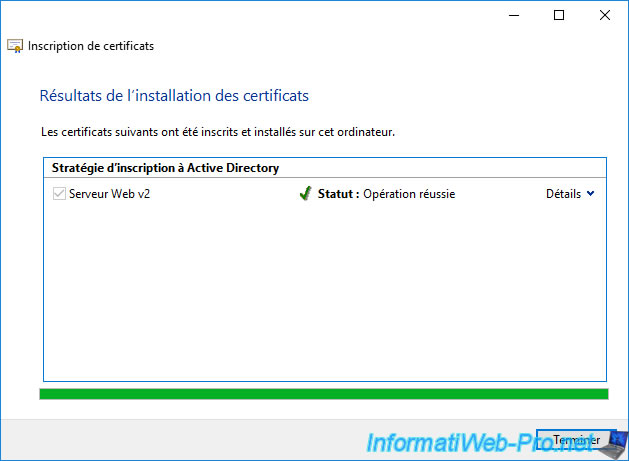
After successful certificate enrollment, click Finish.
The enrolled (issued) certificate will appear in your web server's "Personal" certificate store.
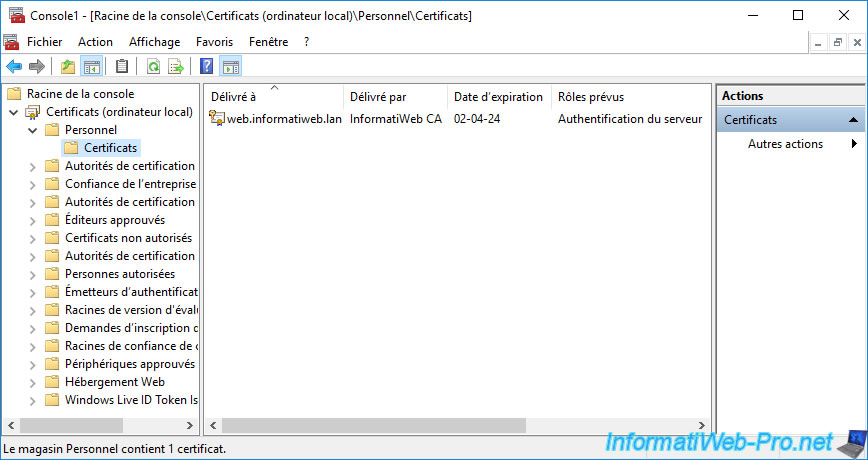
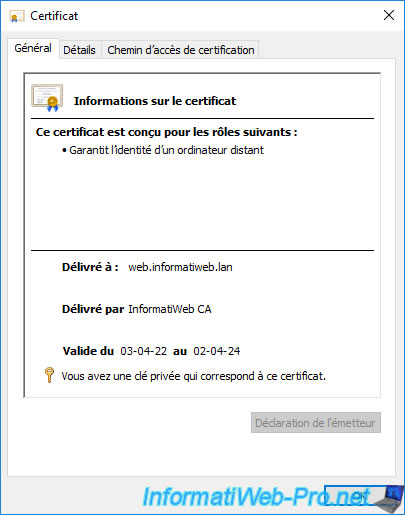
If you double click on it, you will see that this one :
- guarantees the identity of a remote computer
- was issued to : the name of your web server or the domain name of the site you wish to secure on it
- was issued by : the name of your certification authority
- is valid for 2 years (default)
- has an associated private key. This is only present in your personal store.
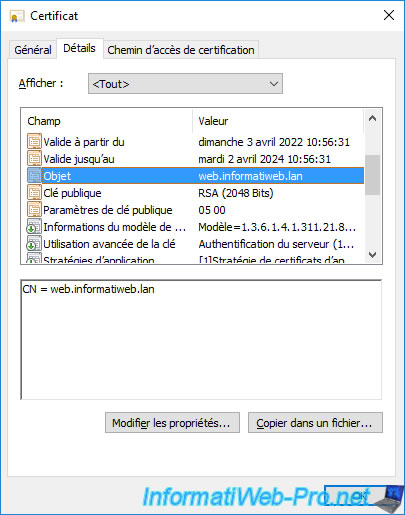
If you go to the "Details" tab and select the "Subject" field, you will see that the common name corresponds to the domain name of your web server.
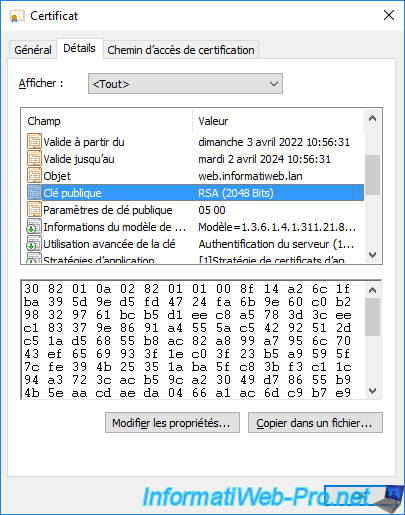
As expected, you can see the public key of this certificate (and any visitor will also have access to it).
Indeed, it's thanks to this public key that the visitor can decrypt the response sent by your web server (response which was previously encrypted thanks to the associated private key).
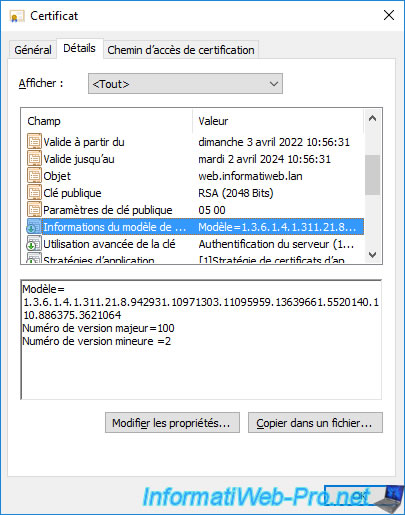
If you select the "Certificate Template Information" field, you will be able to see the unique identifier of the certificate template used.
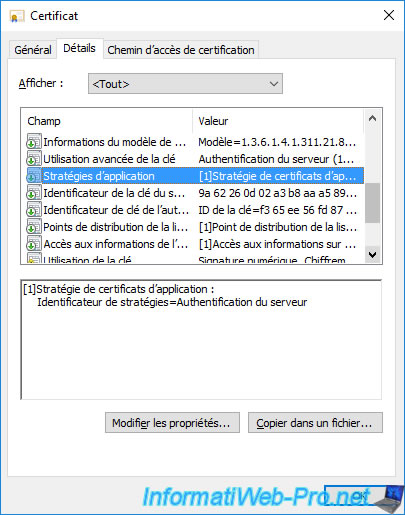
If you select the "Application Policies" field, you will see that this certificate will be used for server authentication.
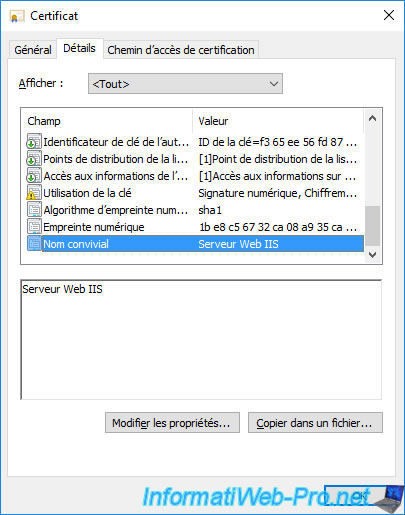
As explained previously, if you provide a friendly name for your certificate, it will appear in the certificate information.
Field that will also be publicly visible to visitors to your website.
Share this tutorial
To see also
-
Articles 1/26/2024
SafeNet Authentication Client (SAC) - Installation and overview
-
Articles 9/8/2023
What is encryption and how does it work ?
-
Windows Server 12/29/2023
WS 2016 - AD CS - Backup and restore a certificate authority (CA)
-

Windows Server 1/19/2024
WS 2016 - AD CS - Buy smart cards and log in via them

No comment