Install and configure an NDES server (SCEP protocol) on Windows Server 2016
- Windows Server
- 17 November 2023 at 17:53 UTC
-

- 2/2

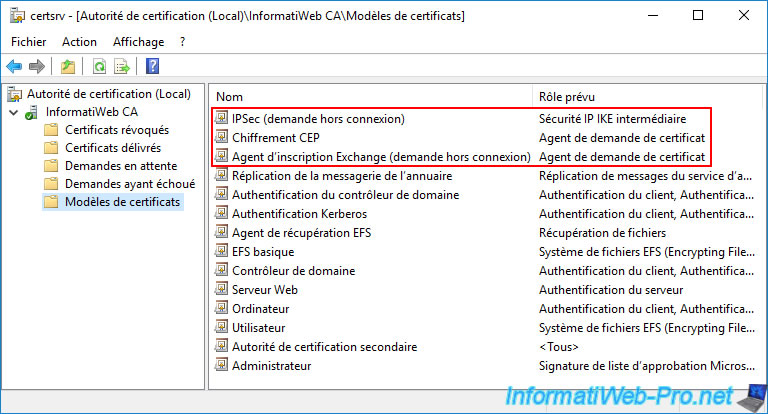
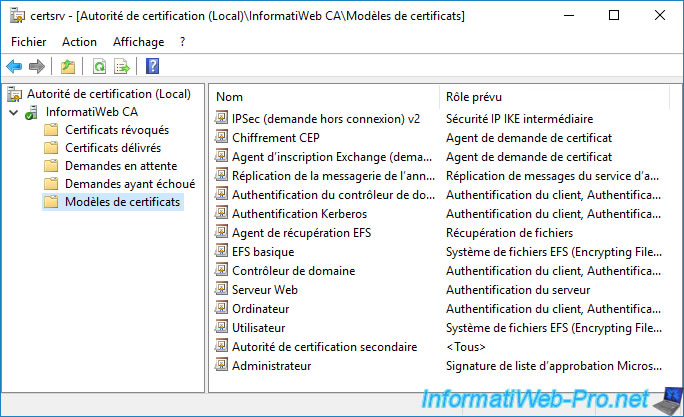
4. New certificate templates created on your CA
If you go to your certification authority, you will see that 3 new certificate templates have been created :
- IPsec (Offline request) : certificate template that will be used for the certificates you enroll for your network devices
- CEP Encryption : certificate template used by the administrator to encrypt certificate requests
- Exchange Enrollment Agent (Offline request) : same, but for signing certificate requests
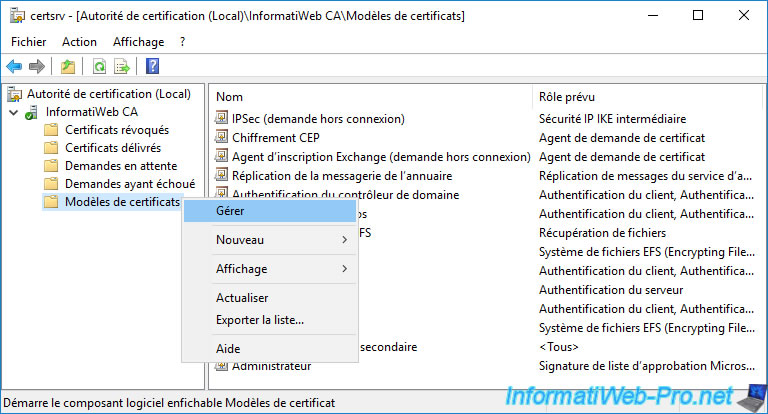
Right-click "Manage" on "Certificate Templates".
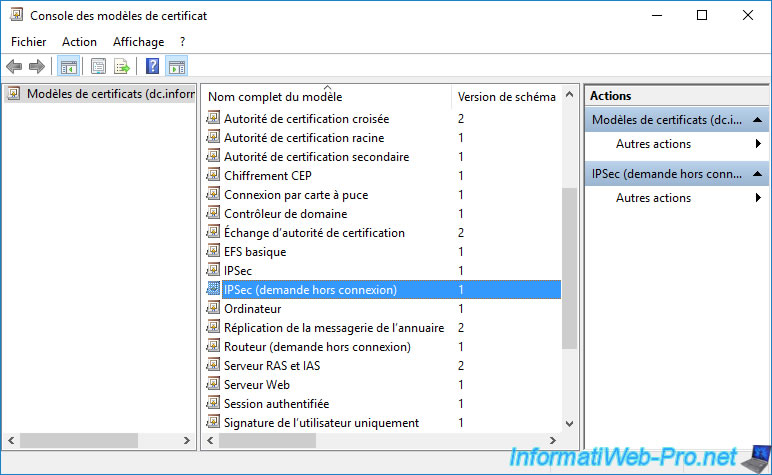
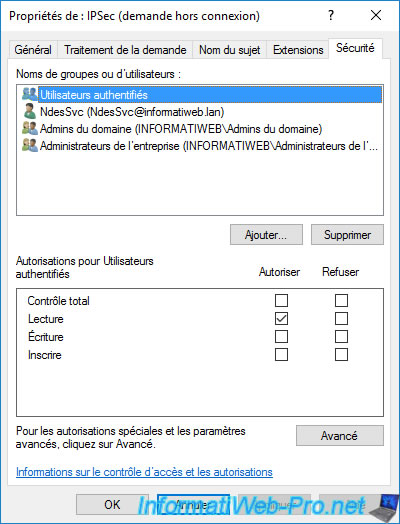
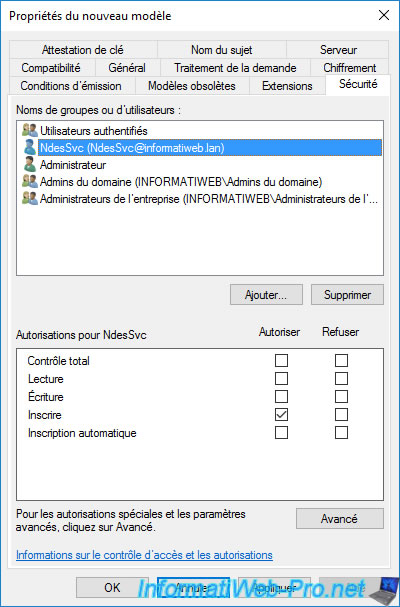
Double-click on the "IPSec (Offline request)" certificate template.
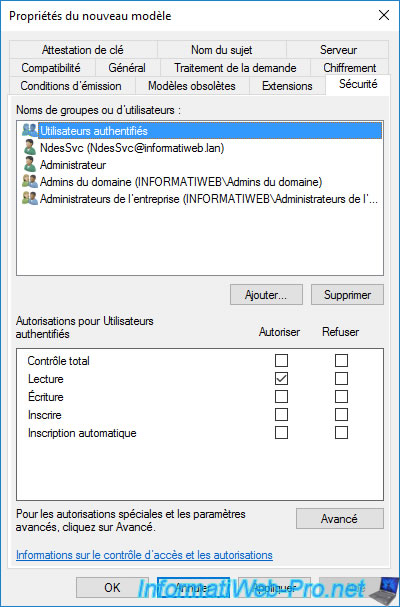
If you go to the "Security" tab, you will see that the service account (in our case : NdesSvc) specified when configuring your NDES server has the right to enroll certificates using the template.
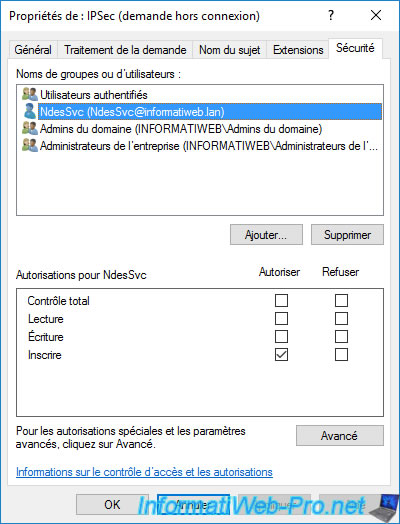
By dependency, he also has read rights since he is one of the authenticated users.
Then, you will see that domain admins and enterprise admins have "Read", "Write" and "Enroll" rights on the 3 new certificate templates mentioned above.
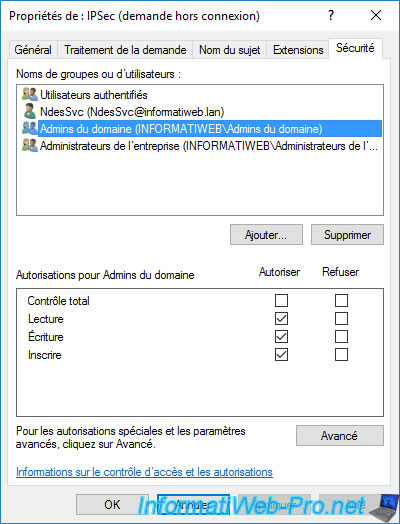
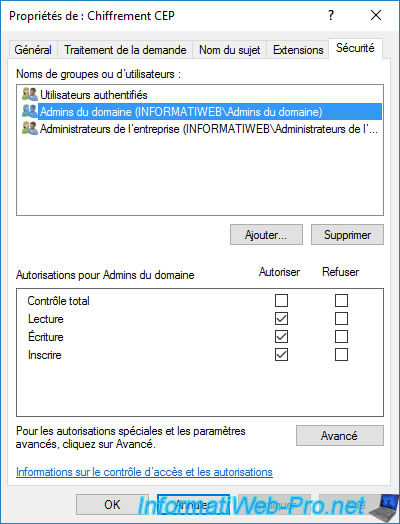
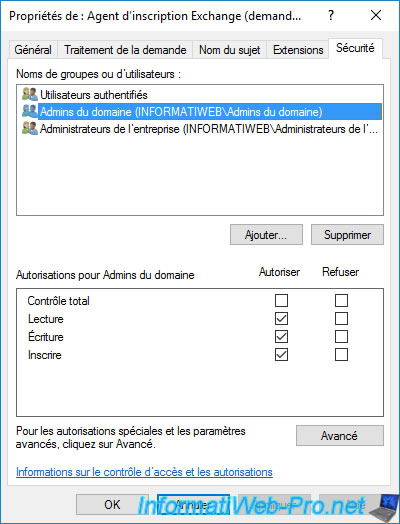
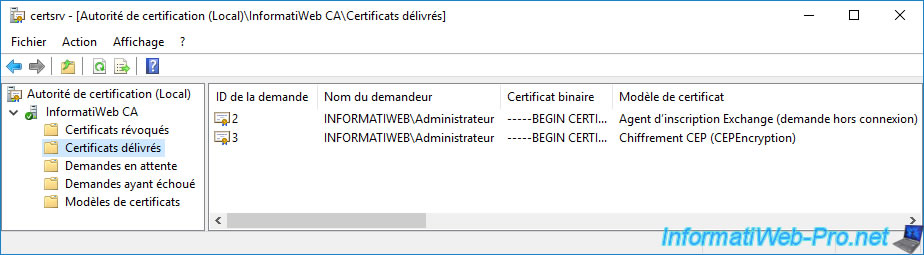
On your CA, you will see that 2 certificates based on the "Exchange Enrollment Agent (Offline request)" and "CEP Encryption" templates have been automatically issued to the domain administrator.
5. Generate temporary passwords for your network devices
To enroll certificates for your network devices using the SCEP protocol, you will need a temporary password provided by your NDES server.
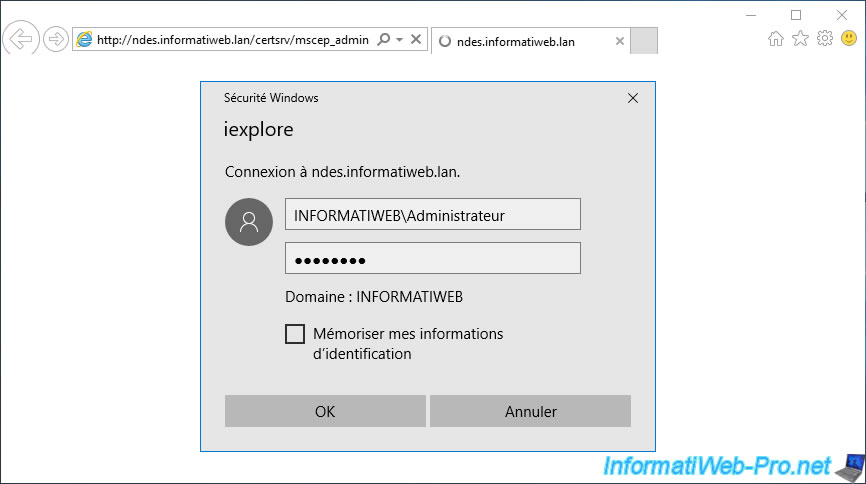
To get a temporary password, go to "http://[NDES server domain name]/certsrv/mscep_admin" and log in as the domain administrator.
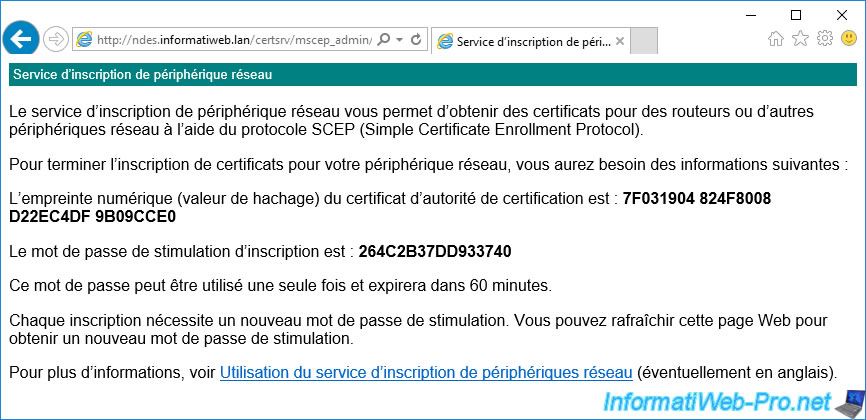
The "Network Device Enrollment Service" page appears with :
- the thumbprint of the CA certificate
- the temporary password to specify on the network device you want to secure
Warning : as indicated on this page, this password is valid by default for 60 minutes (1 hour).
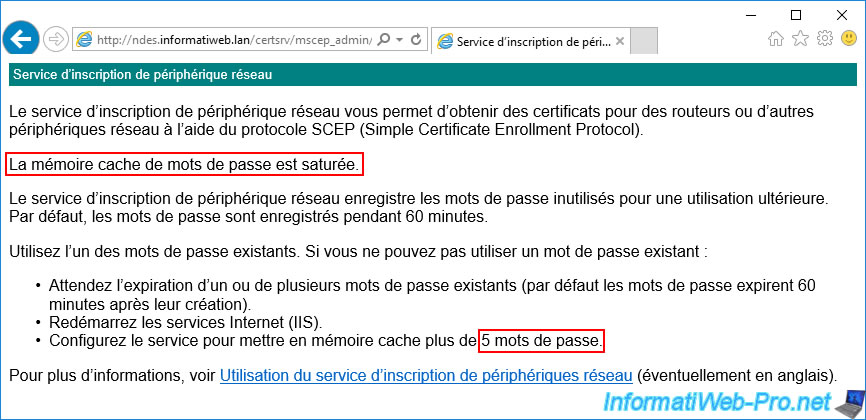
Warning : all generated passwords are cached and the NDES server is configured to generate a maximum of 5 passwords.
Once these 5 passwords have been generated, your server will display the "The password cache is full" error.
Indeed, as long as you have not used at least one of the generated passwords cached by your server, this error will reappear.
To resolve this issue, you will need to :
- wait for cached passwords to expire. But 1 hour is a long time.
- restart your NDES server's IIS server to remove cached temporary passwords.
- configure your NDES server to generate more passwords. Default : 5.
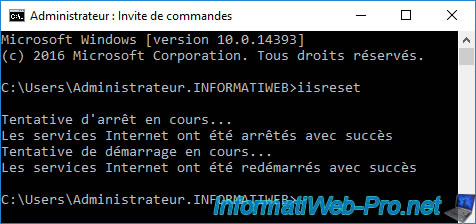
In our case, we chose to restart our IIS server. Which is the simplest.
To do this, open a command prompt and run the command :
Batch
iisreset
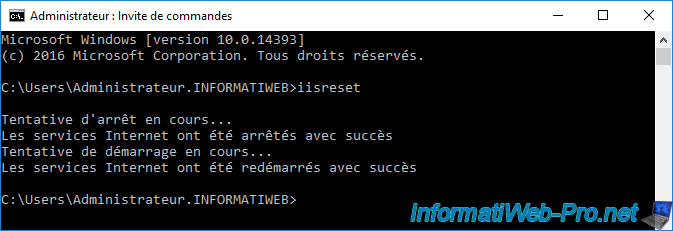
Now, your NDES server is working again and a new password will appear when you refresh the "Network Device Enrollment Service" page.

6. Change Network Device Enrollment Service (NDES) settings through the registry
As explained previously, your NDES server is configured to generate up to 5 different temporary passwords and these are valid for 60 minutes.
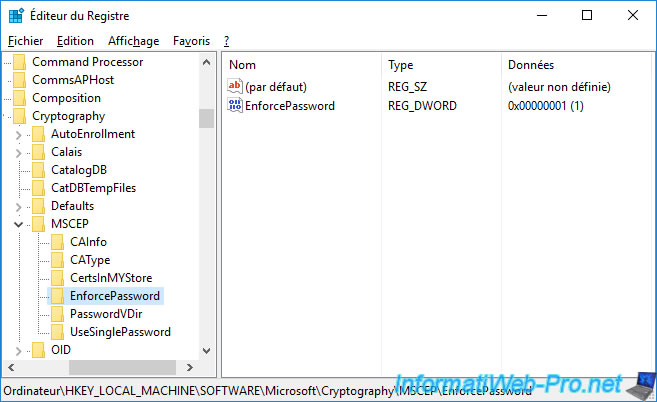
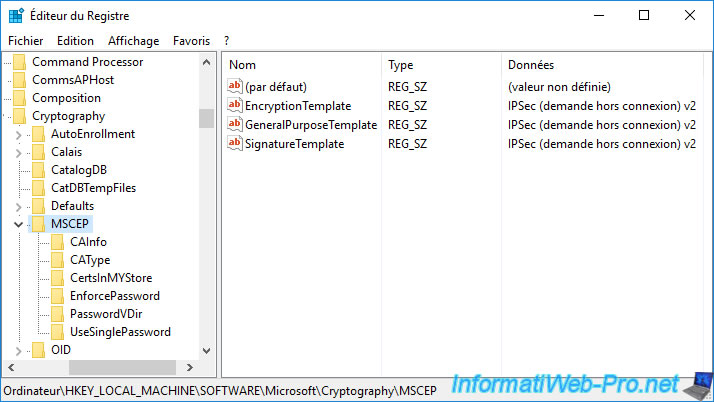
This default operation can be modified by modifying the parameters available in the registry key : HKEY_LOCAL_MACHINE\SOFTWARE\Microsoft\Cryptography\MSCEP.
You can, for example, enable or disable the use of temporary passwords by modifying the "EnforcePassword" parameter.
1 = use temporary passwords and 0 = DON'T use passwords (which is strongly discouraged).
You can also choose to use a single password with the "UseSinglePassword" parameter.
Warning : this requires additional configuration for it to work.
In the "MSCEP" folder, you can also change the certificate template used by default to enroll certificates for your network devices.
7. Use a custom certificate template for your network device certificates
By default, your NDES server will enroll certificates for your network devices using the "IPSec (Offline request)" certificate template.
However, you can also use a custom certificate template to be able to modify the key size to use and/or the lifetime of the certificates that will be generated (for example).
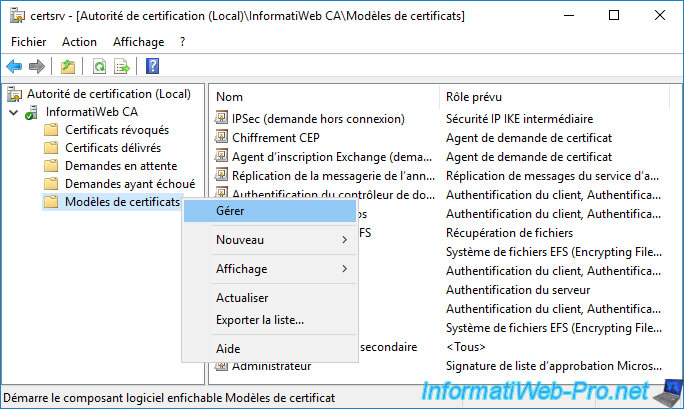
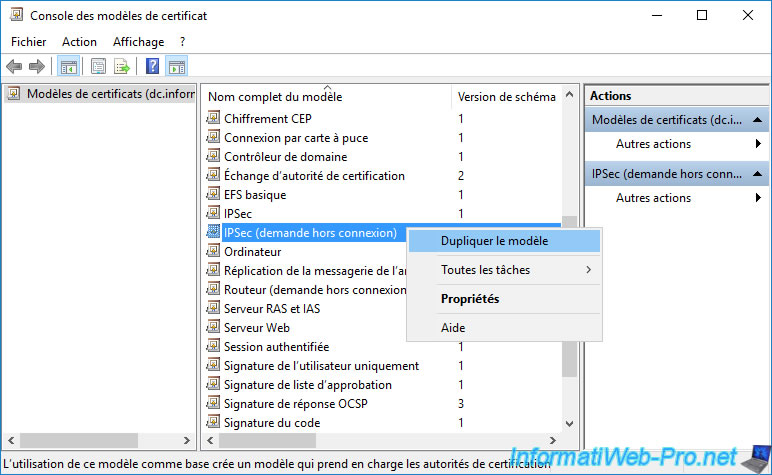
To do this, on your certification authority, right-click "Manage" on "Certificate Templates".
Duplicate the "IPSec (Offline request)" certificate template.
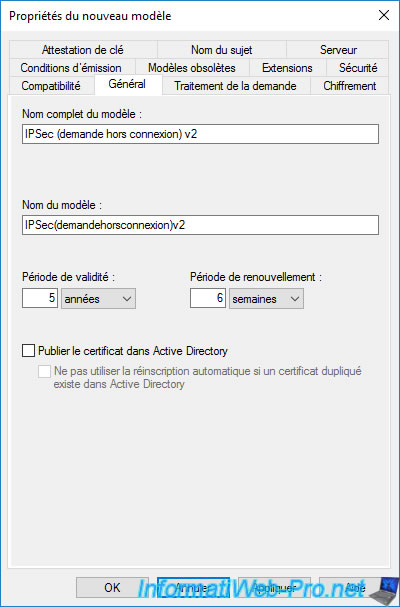
Change the lifetime of the certificates that will be generated (for example) by modifying the "Validity period" setting present in the "General" tab.
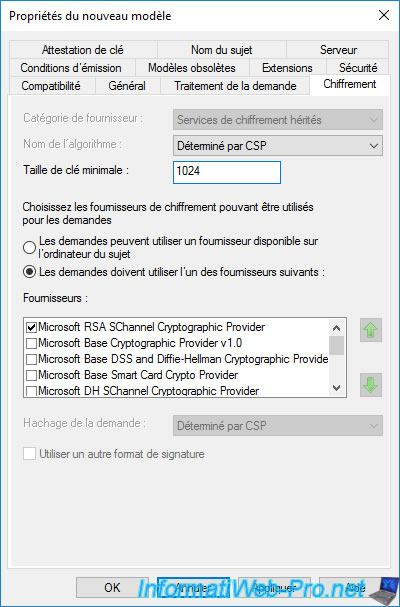
In the "Cryptography" tab, you will see that the minimum key size is 2048.
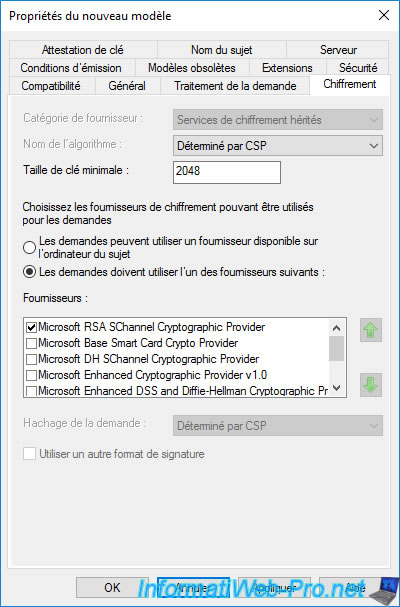
However, your network devices may not support this default key size.
To solve the problem, you can for example authorize the use of a key size of 1024 instead of 2048 by modifying the value "Minimum key size".
In the "Security" tab, you will see that the service account specified when configuring your NDES server has the "Enroll" right.
This allows your NDES server to enroll certificates using this new certificate template.
This user also has the "Read" right thanks to the "Authenticated users" group.
Click OK.
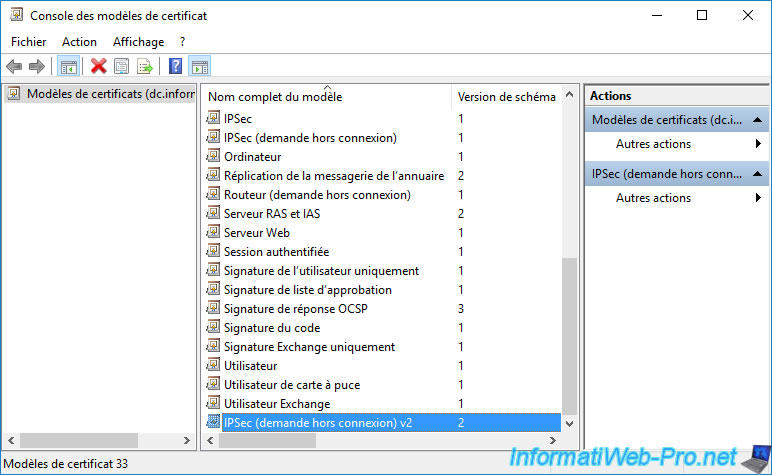
The new custom certificate template appears in the list.
As usual, don't forget to add the newly created certificate template to the list of certificate templates that your certificate authority can issue.
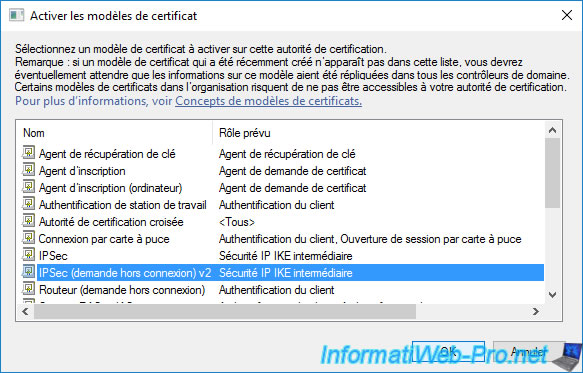
To do this, right-click "New -> Certificate Template to Issue" on "Certificate Templates".
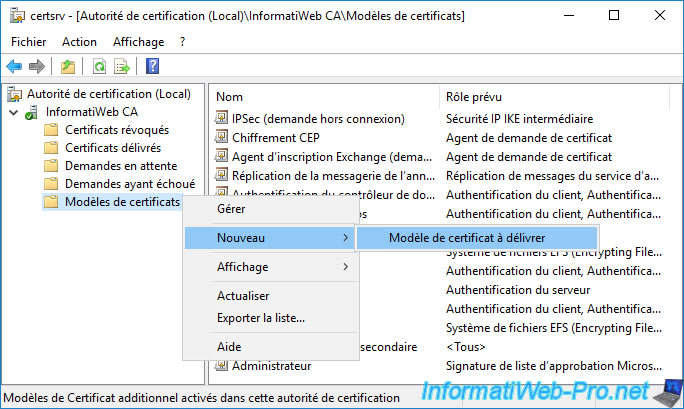
Select the newly created certificate template and click OK.
The newly created certificate template appears in the list.
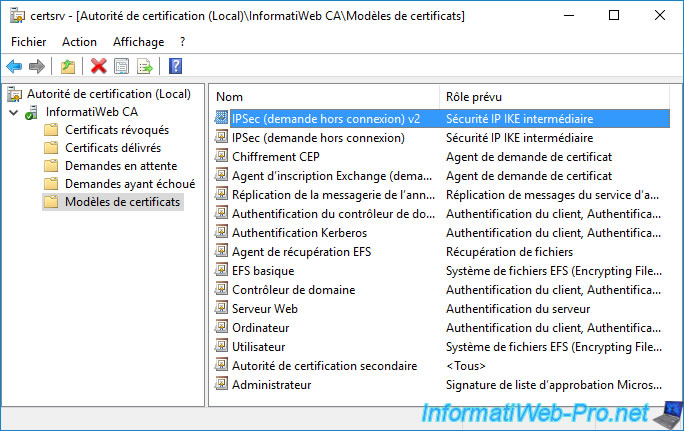
Since it's a copy of the original "IPSec (Offline request)" certificate template.
Remember to remove the original certificate from this list.
Note : this only removes it from the list of certificate templates to be issued. The certificate template as such will not be deleted.
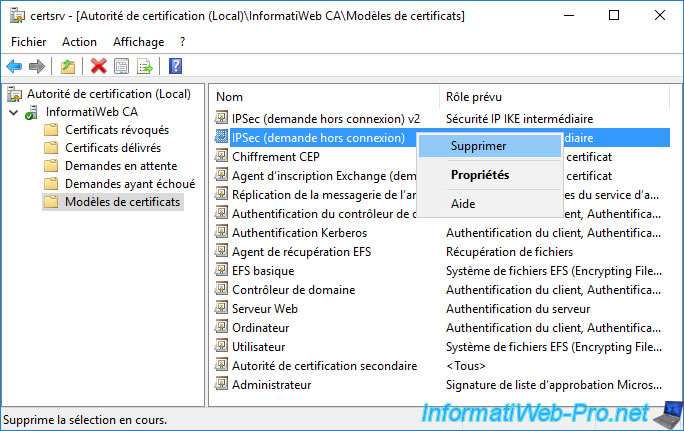
Confirm removing this certificate template from the list of certificate templates to issue.
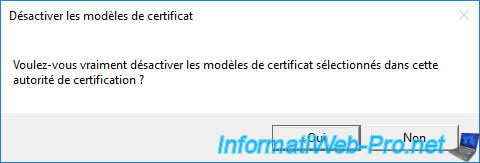
The original certificate template disappears from the list.
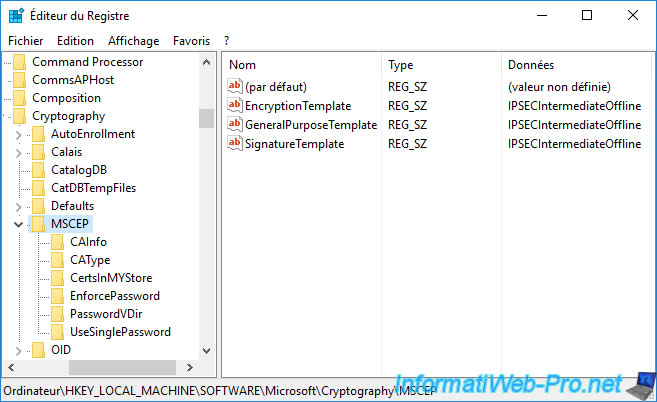
Now, for your NDES server to use this new certificate template, you must modify the data present in the registry key : HKEY_LOCAL_MACHINE\SOFTWARE\Microsoft\Cryptography\MSCEP.
As you can see, there are 3 different pieces of data that indicate which certificate template will be used depending on the purpose of the certificate that will be registered :
- EncryptionTemplate : key encryption
- GeneralPurposeTemplate : key encryption and digital signature
- SignatureTemplate : digital signature
As you can see, by default, only one certificate template is used in all cases.
Specifically, it's the "IPSec (Offline request)" certificate template.
Source : Configure infrastructure to support SCEP with Intune.

Modify the value of these 3 data and indicate the name of the certificate template created previously.
In our case : IPSec (Offline request) v2.
Important : when you modify data in this registry key "HKEY_LOCAL_MACHINE\SOFTWARE\Microsoft\Cryptography\MSCEP", you must restart the web server of your NDES server for the changes to take effect.
To do this, open a command prompt and run the command :
Batch
iisreset
Share this tutorial
To see also
-

Articles 1/26/2024
SafeNet Authentication Client (SAC) - Installation and overview
-

Articles 9/8/2023
What is encryption and how does it work ?
-
Windows Server 12/29/2023
WS 2016 - AD CS - Backup and restore a certificate authority (CA)
-

Windows Server 1/19/2024
WS 2016 - AD CS - Buy smart cards and log in via them
No comment