Replicate data from multiple iSCSI servers with StarWind Virtual SAN on Windows Server 2012
- Windows Server
- iSCSI
- 07 May 2017 at 17:12 UTC
-

- 4/4
10. Connect a Windows Server server to your iSCSI server
On Windows Server 2012, you will find the "iSCSI Initiator" program. (This program is installed by default.)
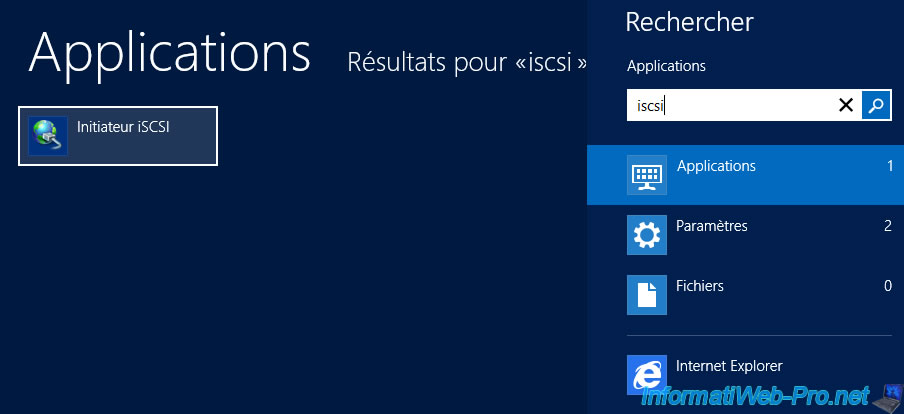
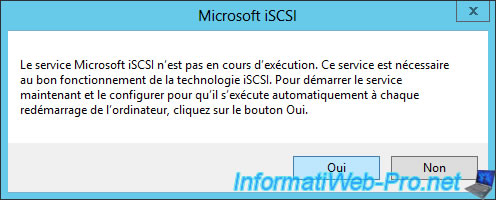
At first launch, a message will appear indicating that the iSCSI client is not running.
Click Yes to start it automatically every time you start your server.
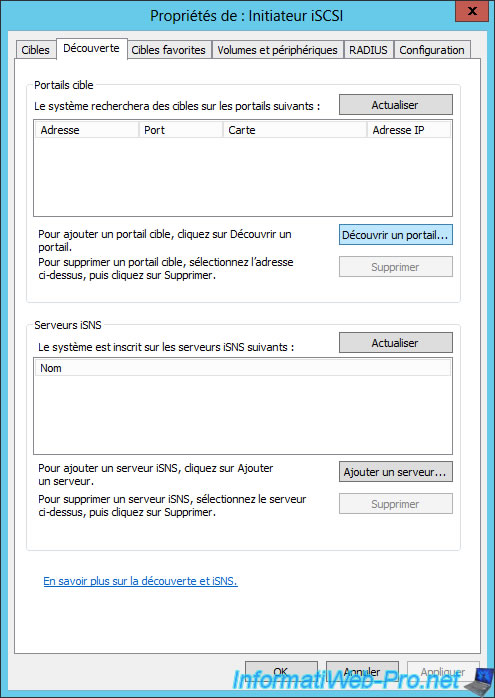
In the "Discovery" tab, click Discover Portal.
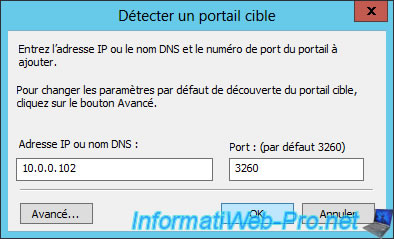
Specify the IP address of your iSCSI server and click OK.
Then, in the "Targets" tab, select a target and click "Login".
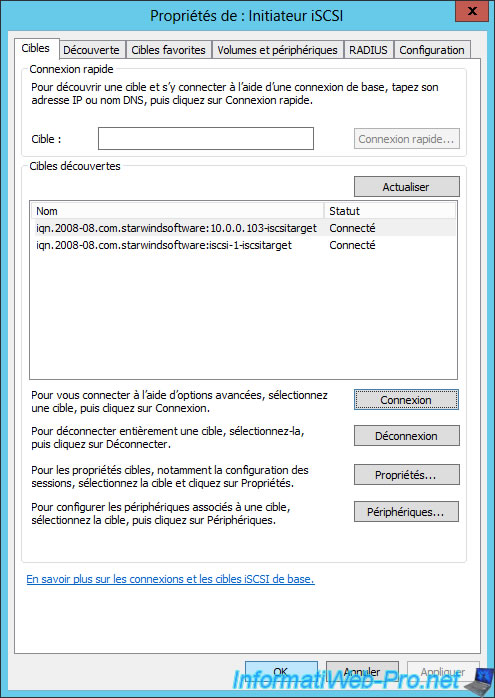
Click OK.
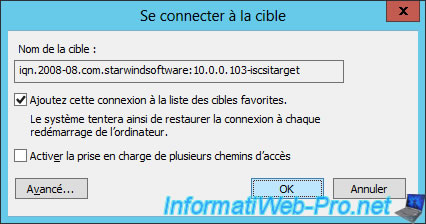
Now, the status of the target is : Connected
Do the same with the other target.

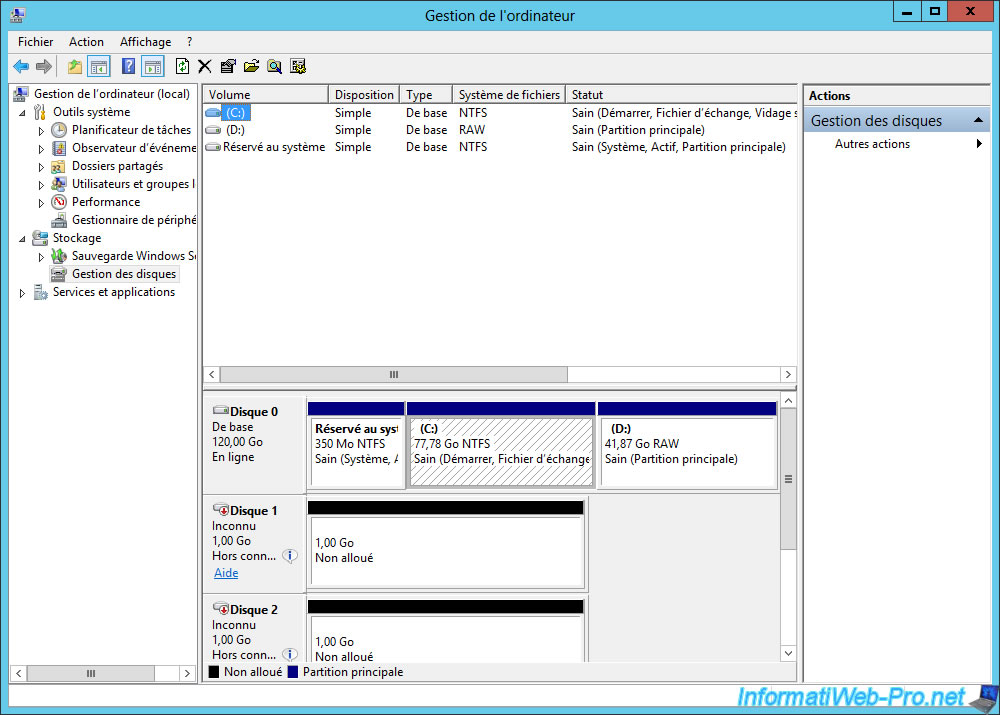
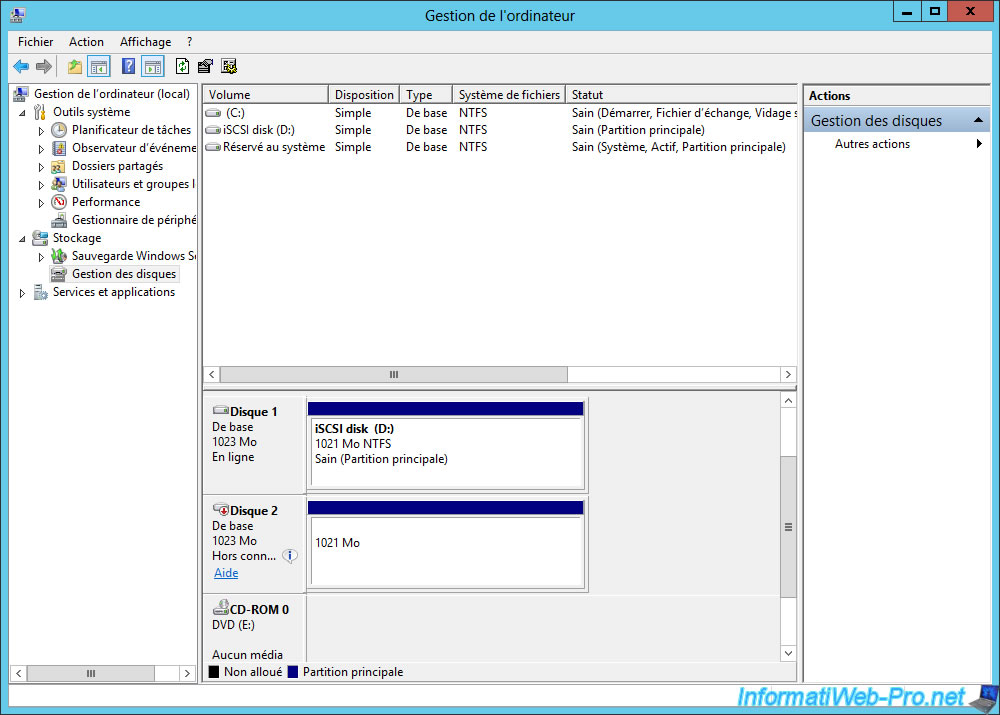
In the Disk Manager, you will see that 2 hard drives of 1 GB have appeared.
Indeed, this is the virtual disk of our 2 iSCSI servers.
Nevertheless, as the 1st is replicated on the 2nd, everything we do on the 1st disk will be automatically copied to the 2nd disk.
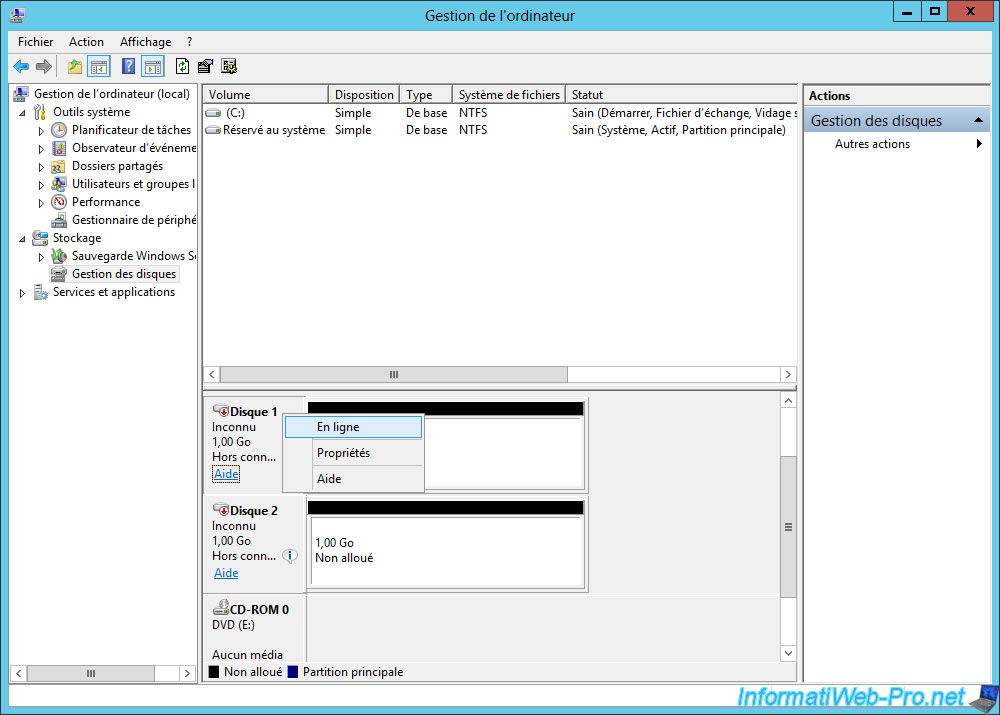
To start, right click on each disk and click on "Online".
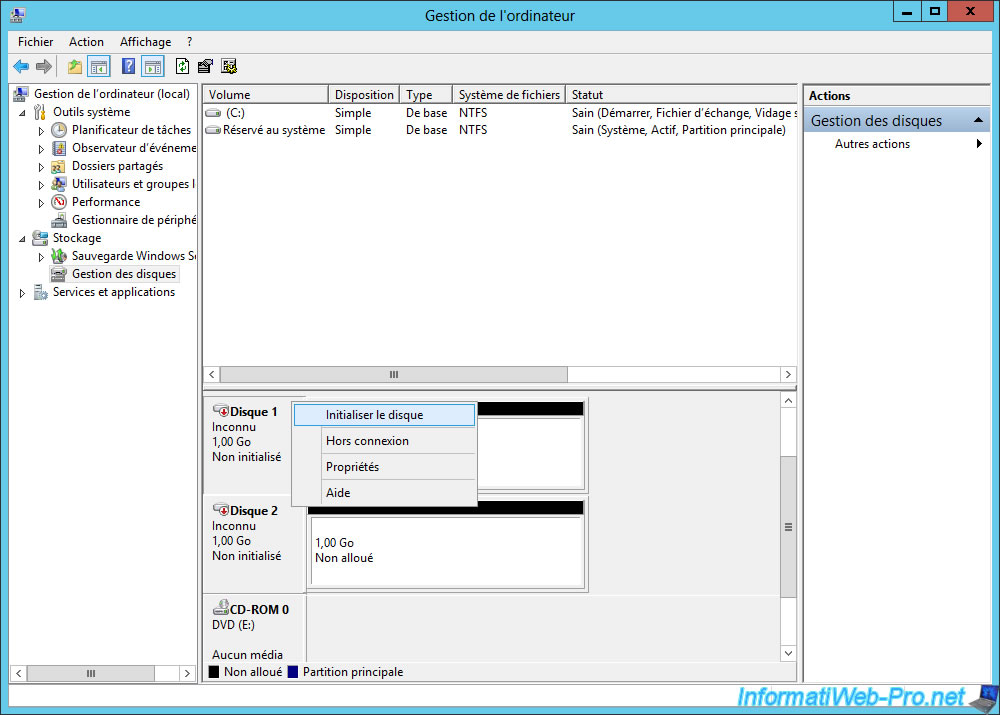
Then, right-click on one of the disks and click "Initialize Disk".
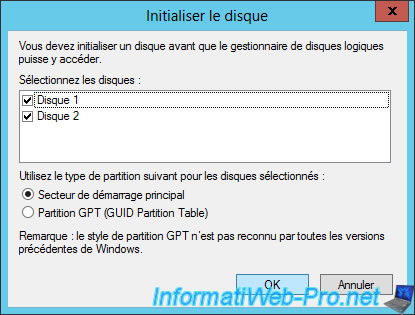
Click OK.
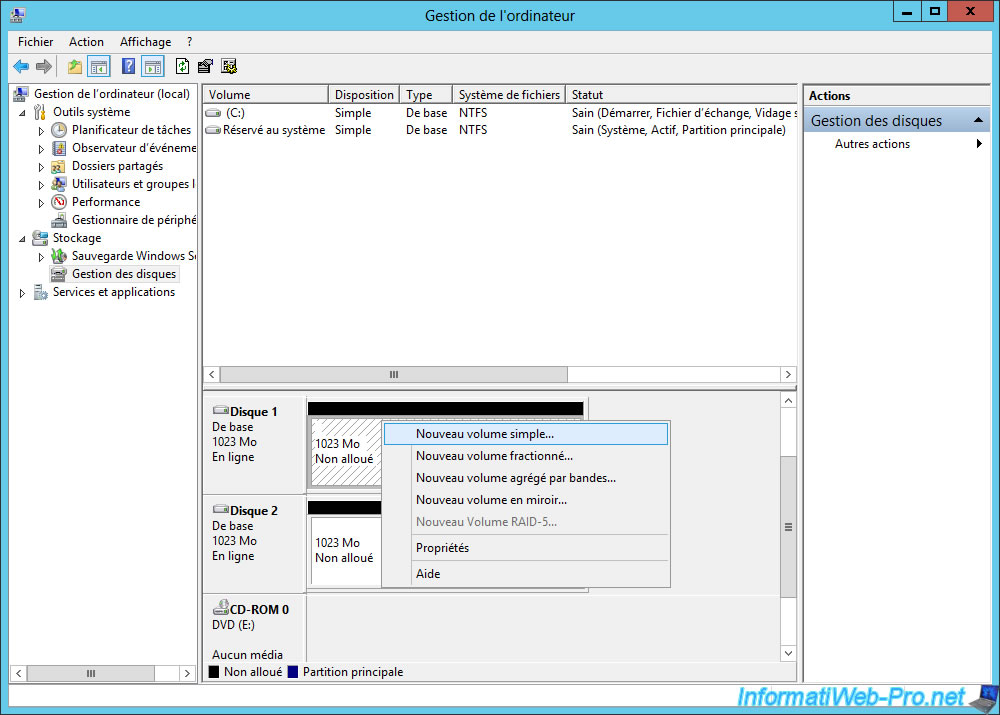
The disks are initialized.
Now, you can partition them as you would with any hard drive.
For more information about the partitioning of a hard disk, see our tutorial : Windows Vista to 11 - Partitioning your hard drive
In our case, we created a single partition on our iSCSI disk.
And as you can see, the other drive is not yet partitioned.
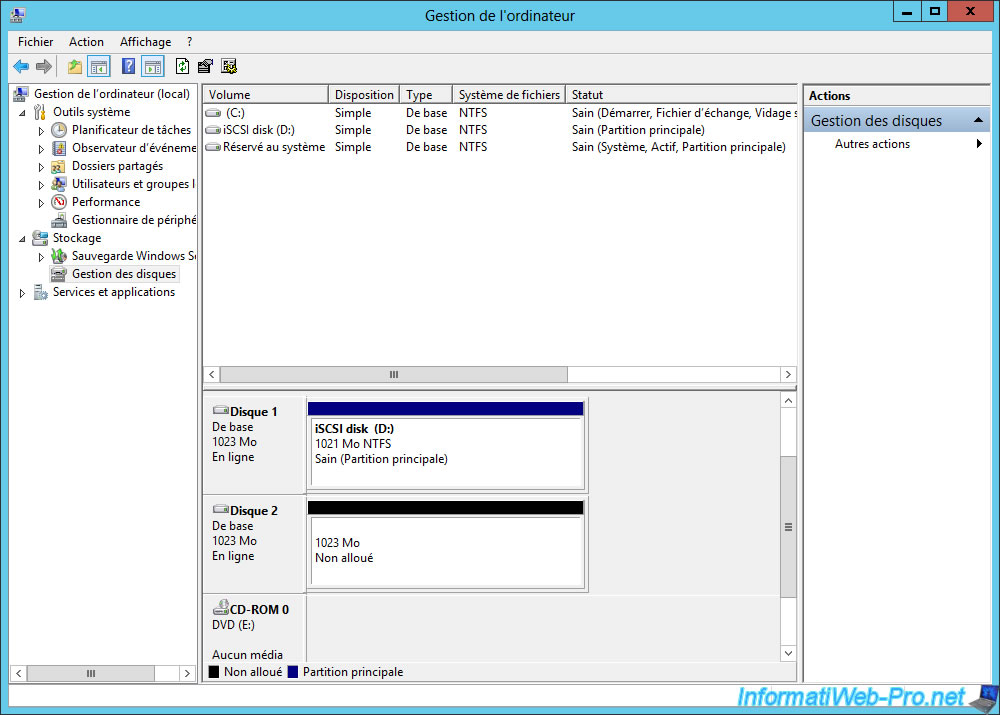
A few seconds later, if you press F5, you will see that the second drive will be offline again and partitioned. (The bar has become blue instead of black)
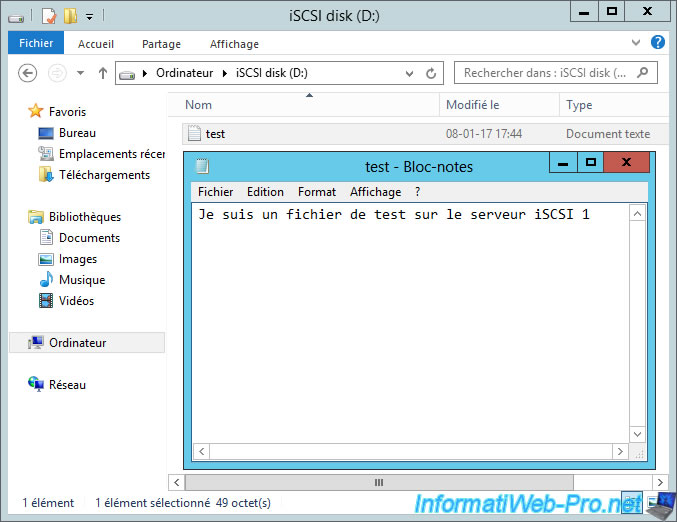
To test the automatic replication of the data, we simply created a text file on the disk on our 1st iSCSI server.
11. Use the replicated data
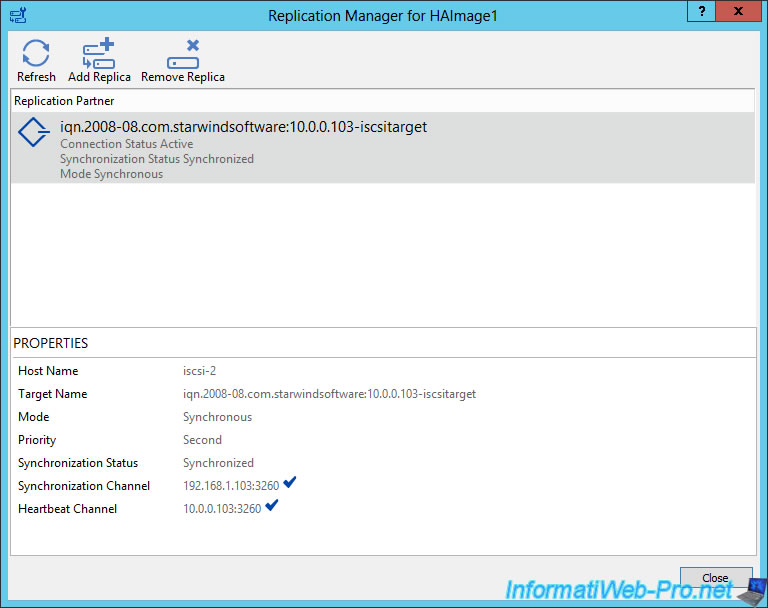
To use the replicated data, select the desired disk in the StarWind console, and click "Replication Manager".
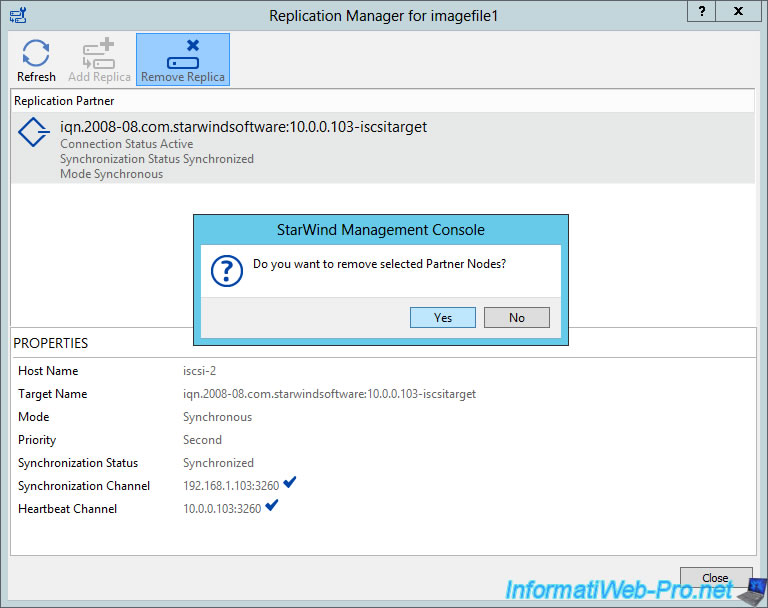
Then, click "Remove Replica" and confirm by clicking Yes.
For the moment, your 2nd server appears empty.
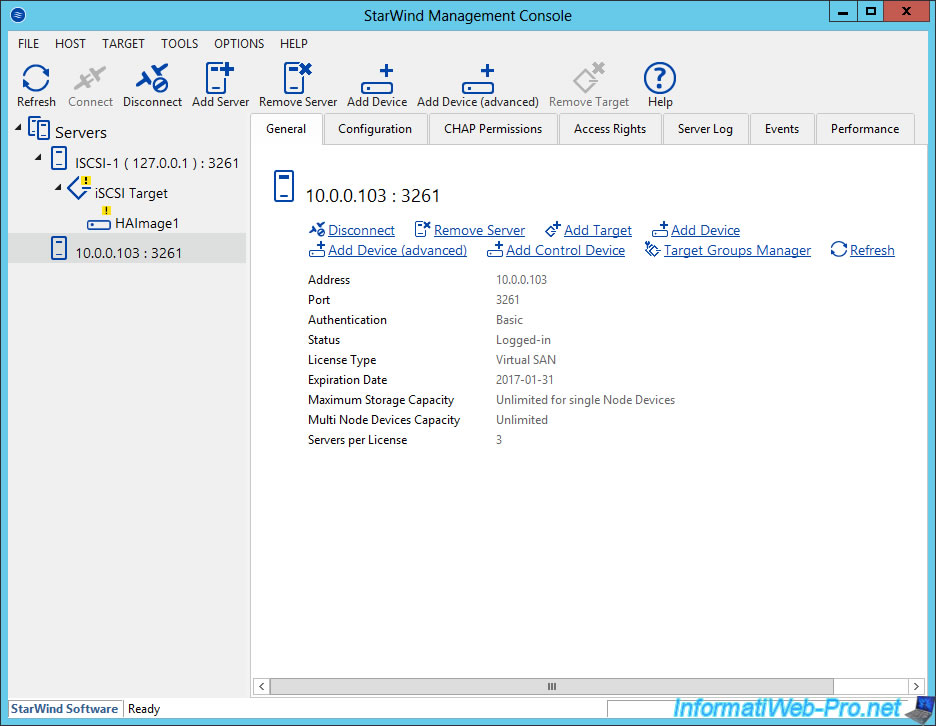
Right click on it and click on "Add Device (advanced)".
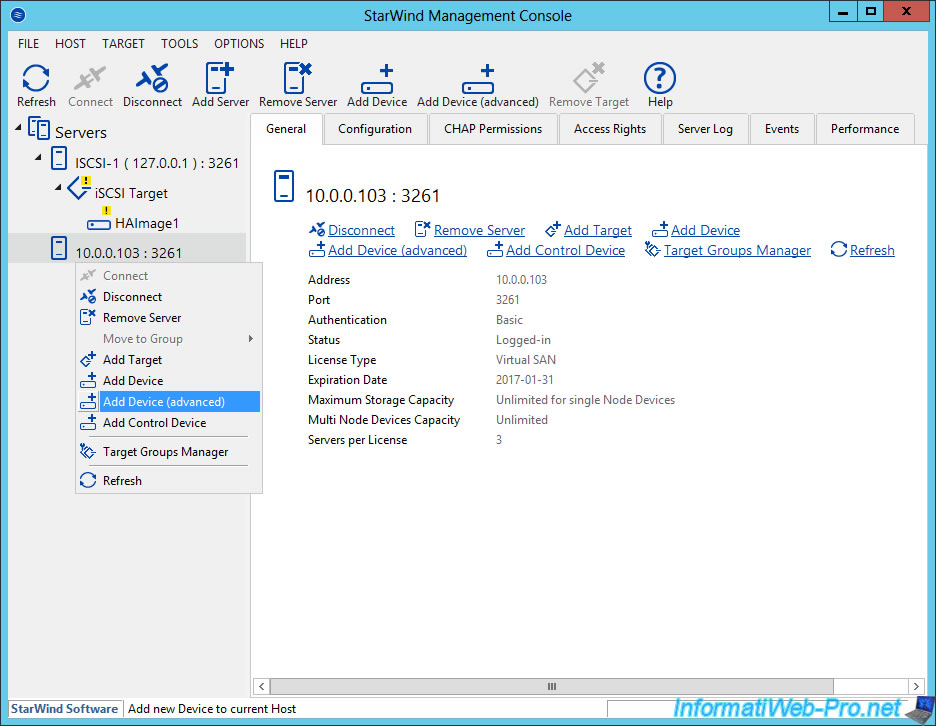
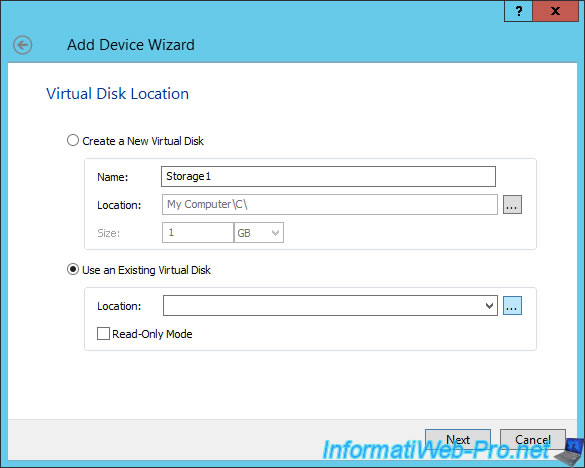
Select the "Use an Existing Virtual Disk" option and click the "..." button.
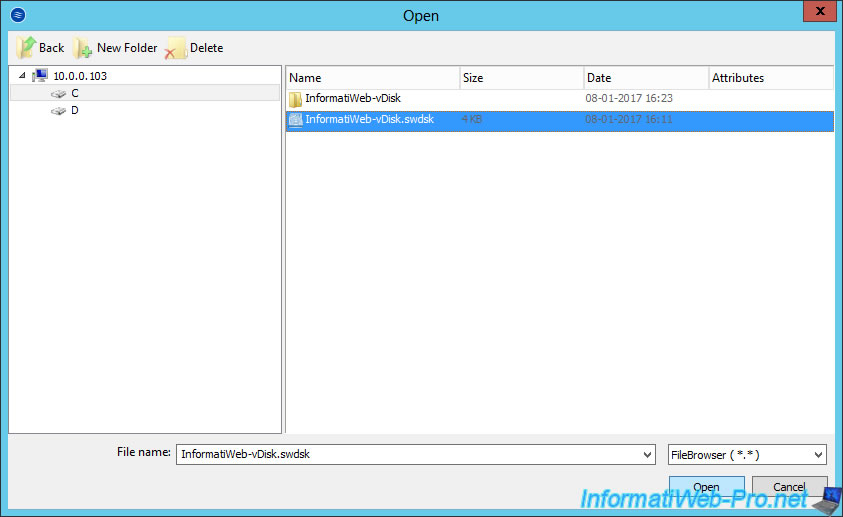
Select the virtual disk on the hard disk of this 2nd server.
Select "Create new Target" and enter a name for this iSCSI server.
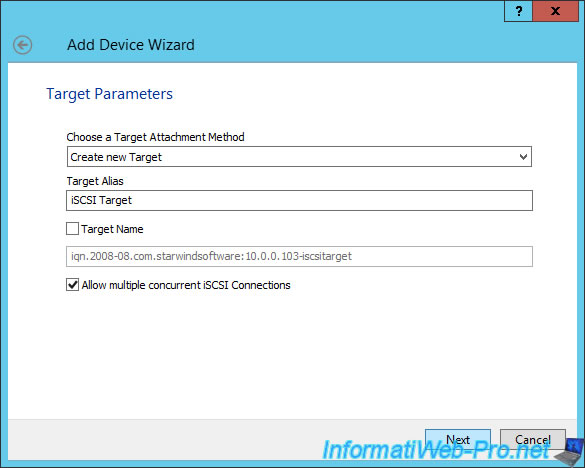
Click Create.
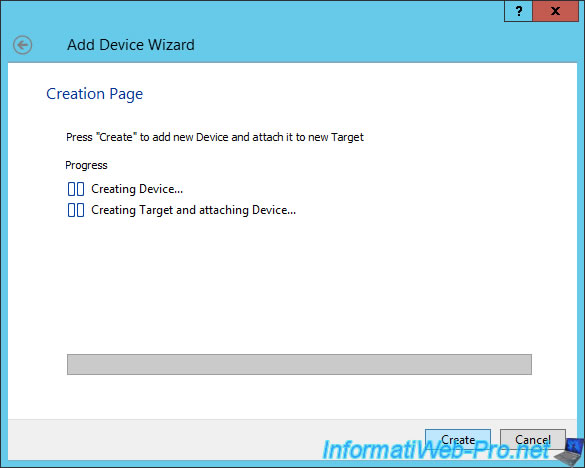
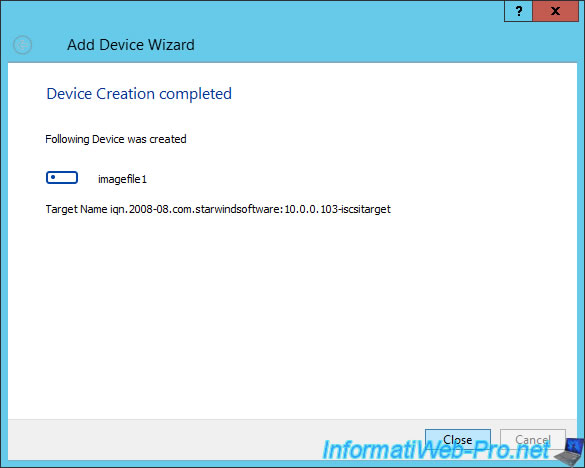
The iSCSI server was successfully created and the virtual disk was associated with this new iSCSI server.
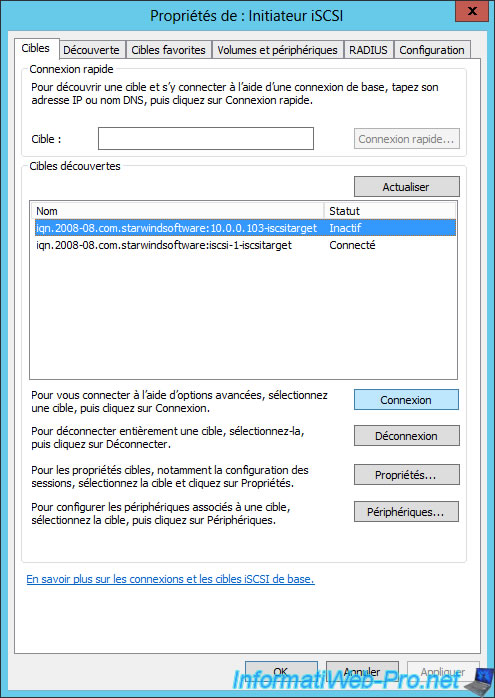
In the iSCSI client, select your 2nd iSCSI server and click Connect.
The disk reappears as "Offline".
Right click "Online" on this one.
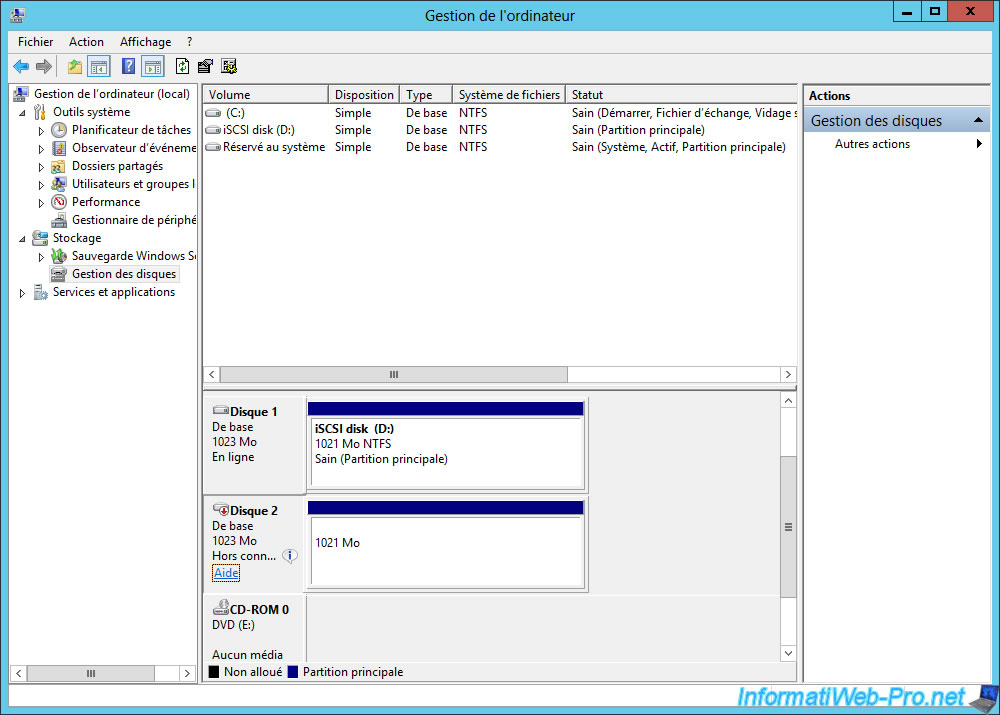
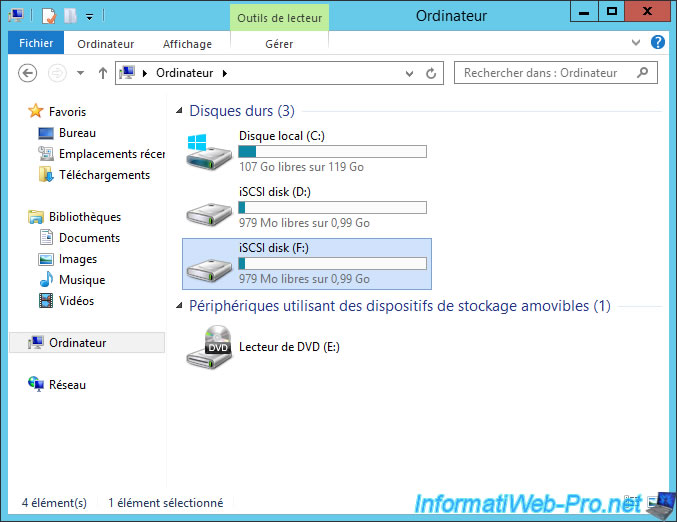
And as you can see, the 2nd disk is identical to the 1st.
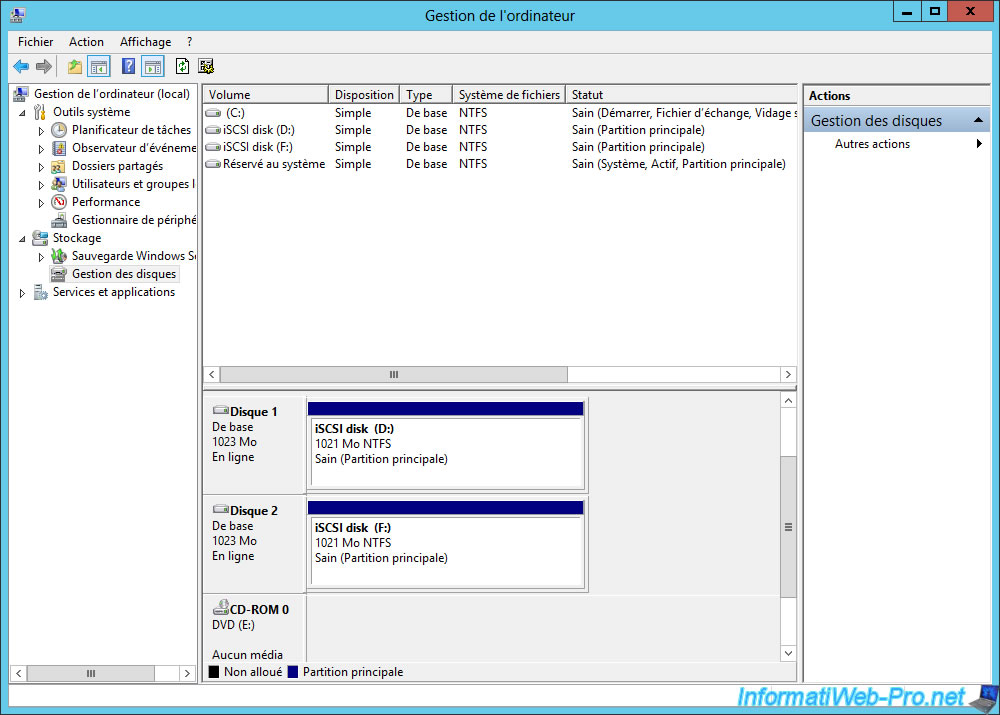
These 2 iSCSI disks are displayed :
- the one with the letter D corresponds to the disk of our 1st server
- and the one with the letter F corresponds to the disk of our 2nd server
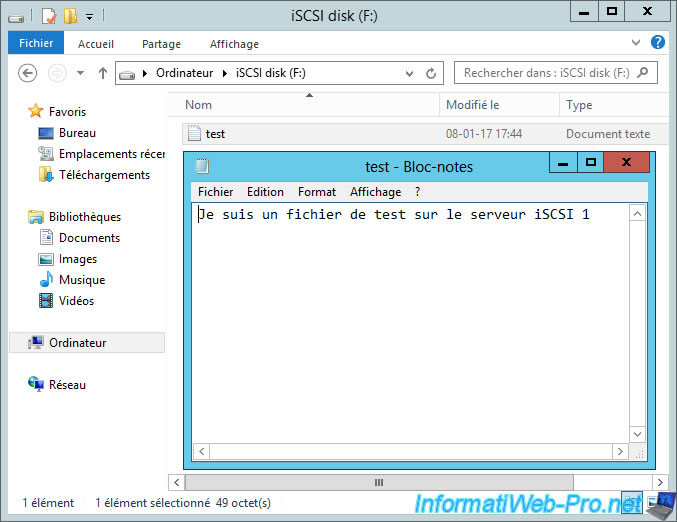
When we open the text file of the second partition (letter : F), we find the file that we created on the disk of our 1st iSCSI server.
This proves that the data has been replicated automatically.
If the first server crashes, your data will always be available on the 2nd server.
Share this tutorial
To see also
-
Windows Server 4/29/2017
WS 2012 - Install an iSCSI server and an iSCSI client
-

Windows Server 6/28/2019
WS 2012 / 2012 R2 - Improve the performance of your iSCSI server with MPIO

No comment