Replicate data from multiple iSCSI servers with StarWind Virtual SAN on Windows Server 2012
- Windows Server
- iSCSI
- 07 May 2017 at 17:12 UTC
-

- 2/4

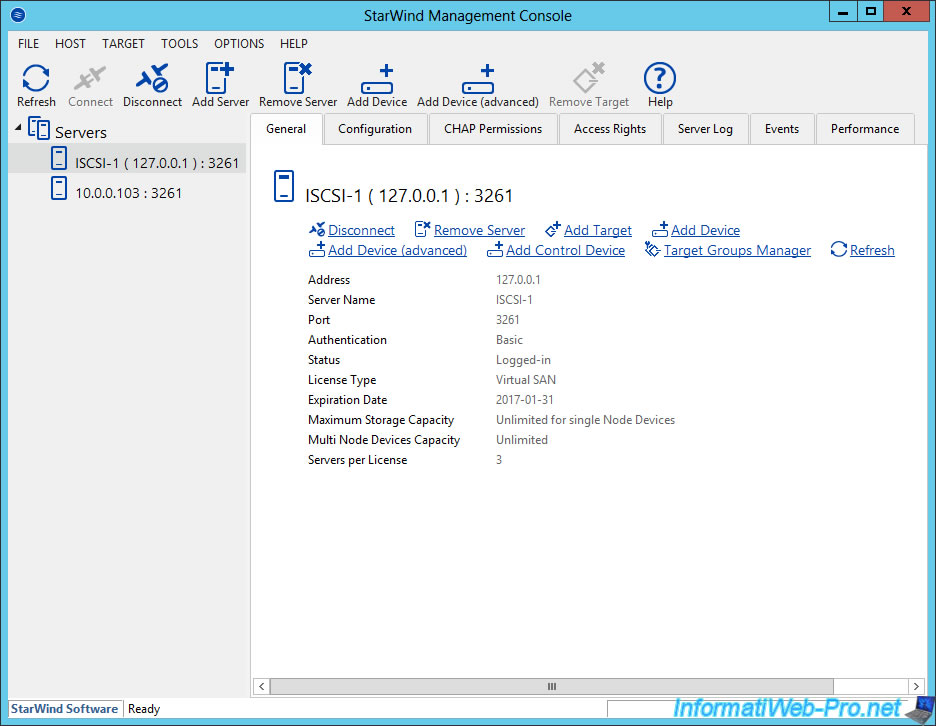
4. Create a StarWind iSCSI Server
To create an iSCSI server (also called "iSCSI target"), simply select your StarWind server and click on the "Add Target" link.
Specify a name for your iSCSI server.
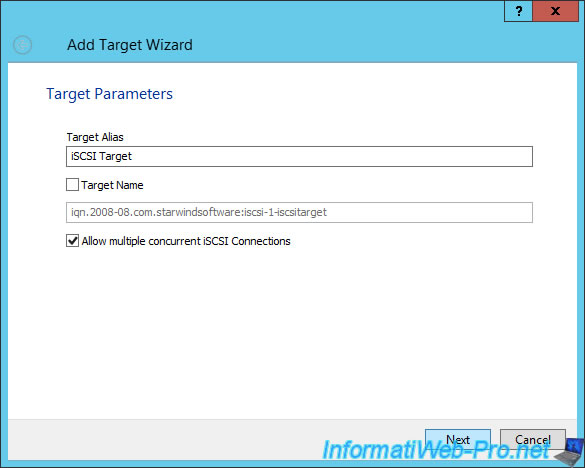
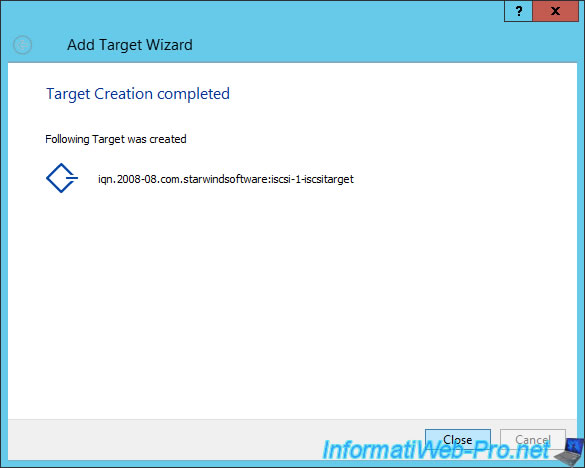
Click Create.

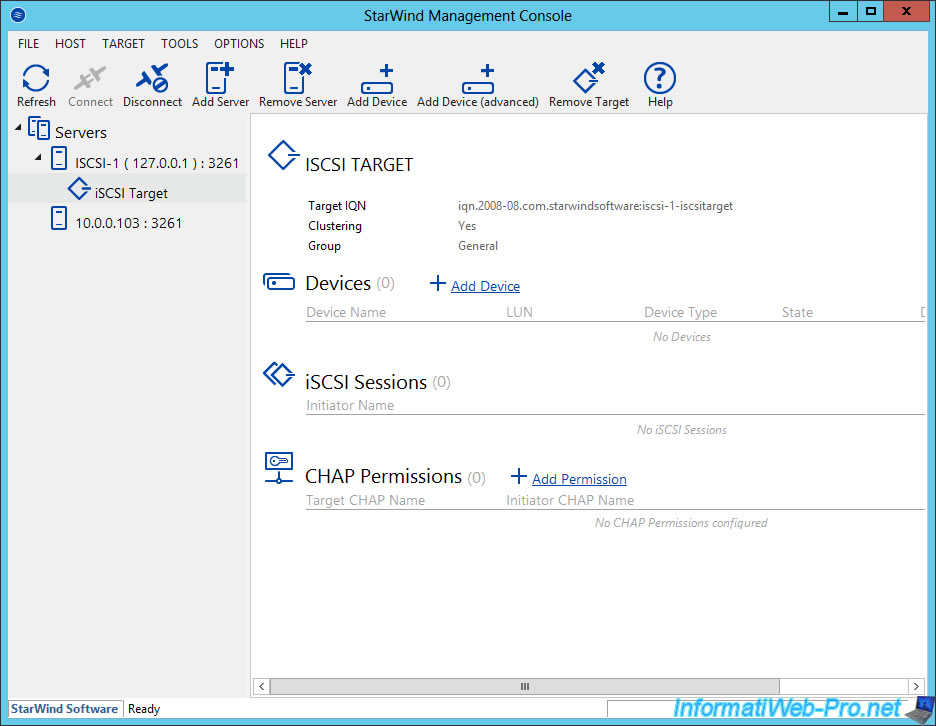
Your iSCSI server has been successfully created.
5. Create an iSCSI device (virtual hard disk, ...)
In this tutorial, we will create a virtual disk (as you would with the Microsoft iSCSI server).
To do this, select your iSCSI server created by StarWind and click on the "Add Device (advanced)" button or the "Add Device" link on the right.
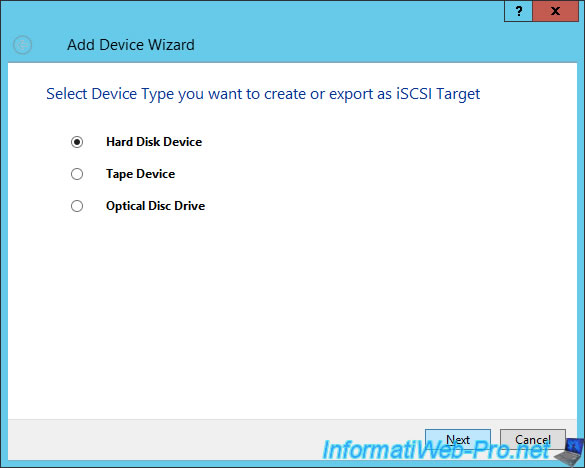
Select "Hard Disk Device".
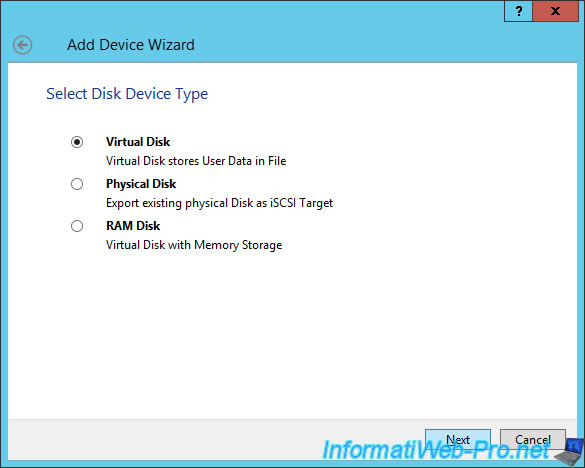
Then : Virtual Disk.
And finally :
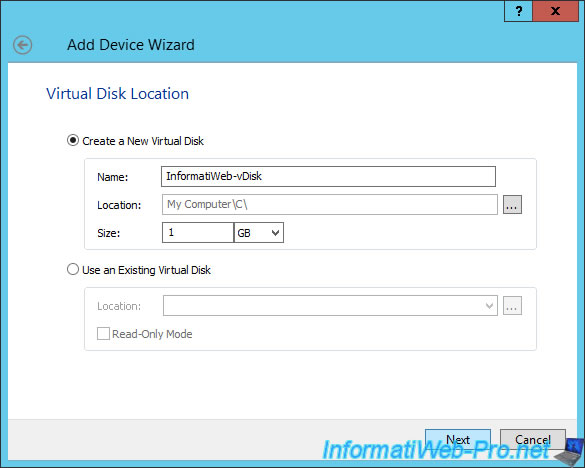
- select : Create a New Virtual Disk
- enter a name for your virtual disk
- select where you want to store it
- specify the maximum size it can have
Note: for this tutorial, we have indicated a size of 1GB for replication to take a short time. But, adapt the size to your needs.
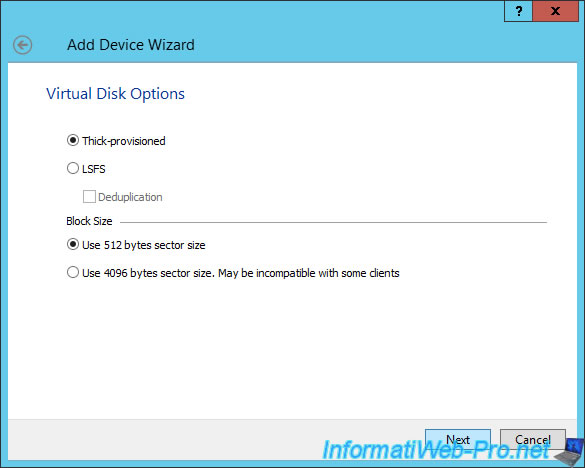
For the options of the virtual disk, you have 2 possibilities :
- Thick-provisioned : space will be pre-allocated. This means that our 1 GB virtual drive will always take 1 GB of space on the physical hard drive. Even if this virtual disk is empty. This allows you to have better performance.
- LSFS (Log-Structured File System) : it's a smart system that came up with version 8 of the program to improve performance when writing to the virtual disk. This choice is recommended if you want to link this virtual disk to a hypervisor (virtualization server).
If you select LSFS, you can also enable the "Deduplication" option which will allow you to reduce the space used by this virtual disk. Indeed, thanks to this option, 2 identical files will take only the necessary place once.
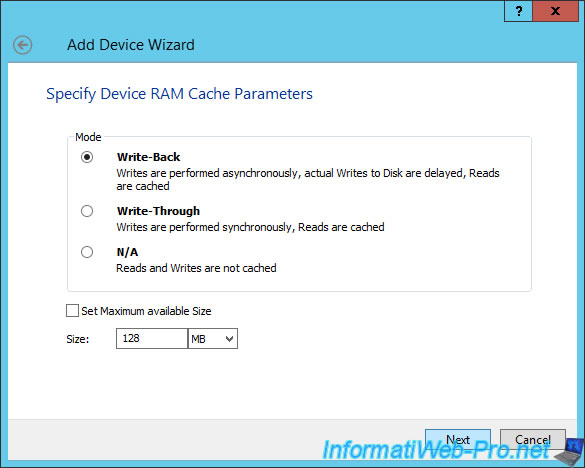
To improve the performance of your iSCSI server, StarWind Virtual SAN offers to enable a cache system using the RAM of your physical server.
Proposed options are :
- Write-Back : asynchronous writes for better performance. Nevertheless, there is a risk of data inconsistency using this cache system.
- Write-Through : synchronous writes. Performance is worse, but there will be no risk of inconsistency for your data.
- N/A : the cache system will be disabled.
Then, you can limit the size of the cache.
If you select "Set Maximum available Size", the size will be equal to the available space in memory.
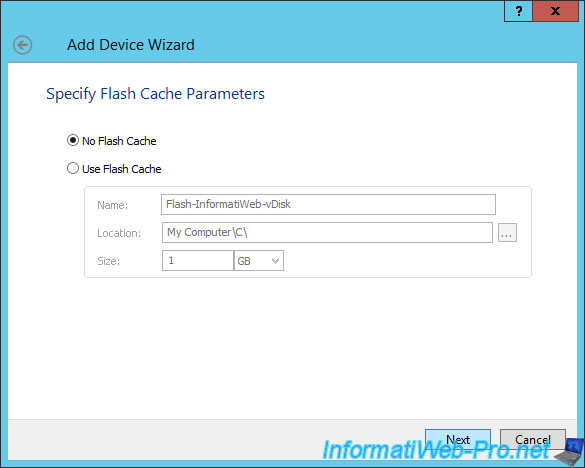
If you have a SSD (which is always much faster than a hard drive), you can also enable the Flash Cache (also called L2 Cache).
The principle is almost identical, except that the cache will be a virtual file that you will store on a SSD to improve the performance of your iSCSI server (when writing/reading).
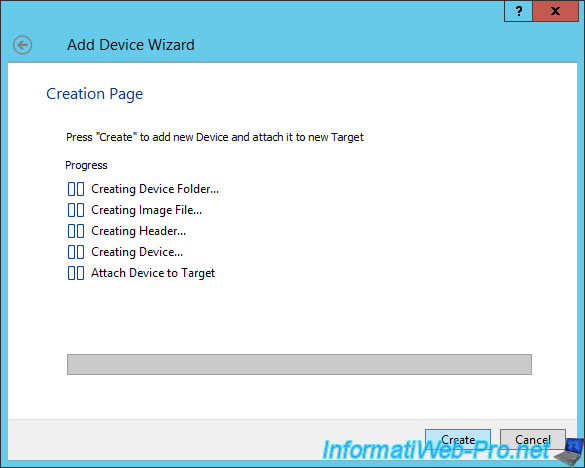
Click Create.
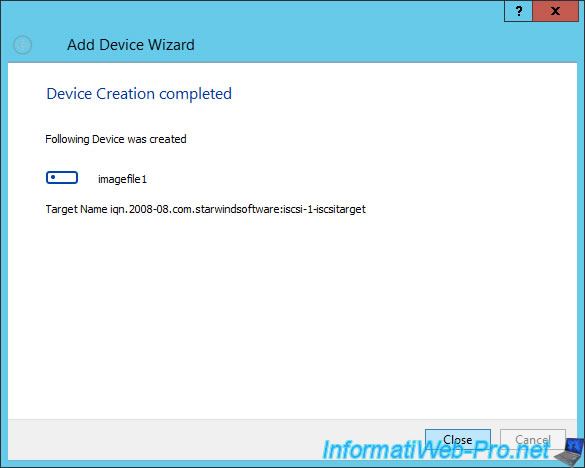
Your virtual disk was successfully created on your StarWind iSCSI server.
6. Enable data replication of your iSCSI server
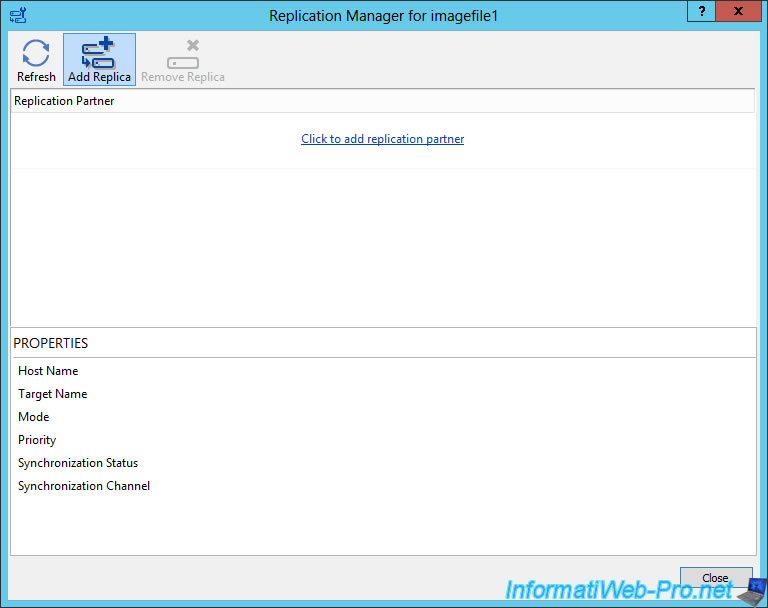
To enable data replication of your iSCSI server, select the virtual disk that you want to replicate to the remote iSCSI server, and then click Replication Manager.
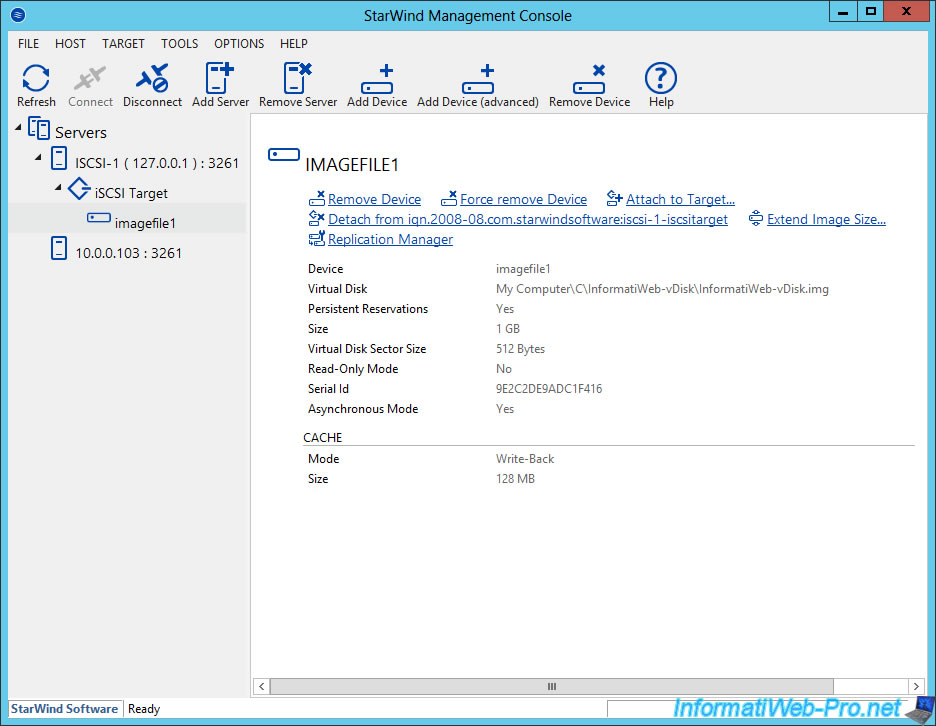
The replication manager opens for the selected virtual disk.
Click Add Replica.
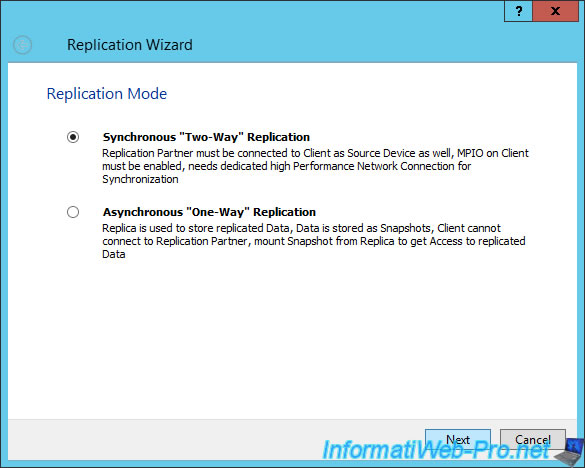
For replication, you can choose between :
- Synchronous "Two-Way" Replication : synchronous replication. Replication will be done in real time.
- Asynchronous "One-Way" Replication : asynchronous replication. Replication will be slightly delayed. Additionally, clients will not be able to connect to the server where the data will be replicated. Only the master server will be accessible as long as replication is enabled.
Note that asynchronous replication also allows you to create snapshots. This can be very handy to restore data in case of data corruption.
In our case, we chose synchronous replication.
This involves :
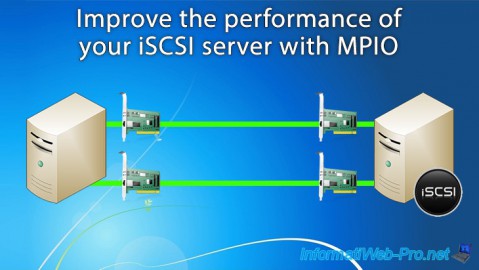
- that the client supports MPIO (Multipath IO).
- to have a dedicated high-performance network for data replication. Hence the use of 2 network cards per server.
Note : the "Asynchronous One-Way Replication" option is not available in the free version.
Specify the IP address of the 2nd StarWind server.
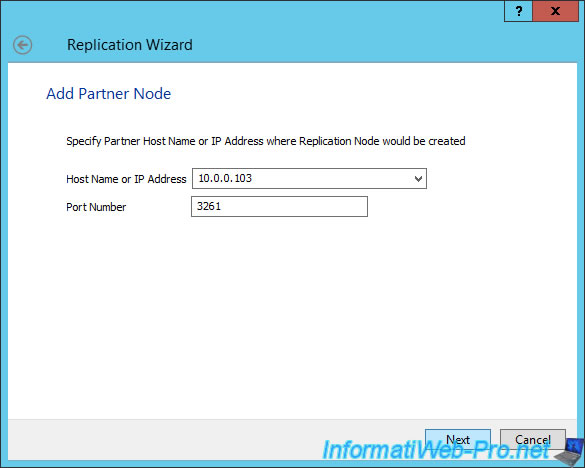
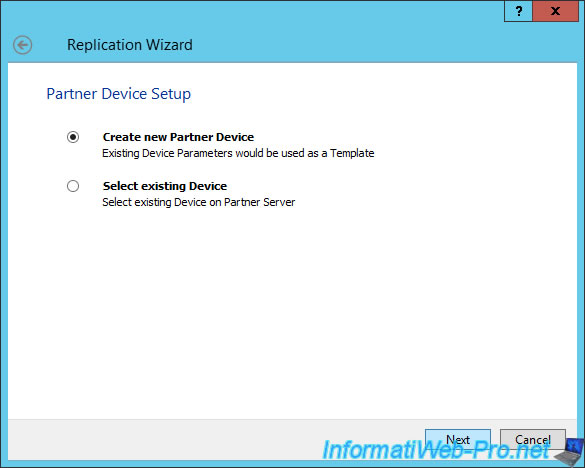
Select "Create new Partner Device".
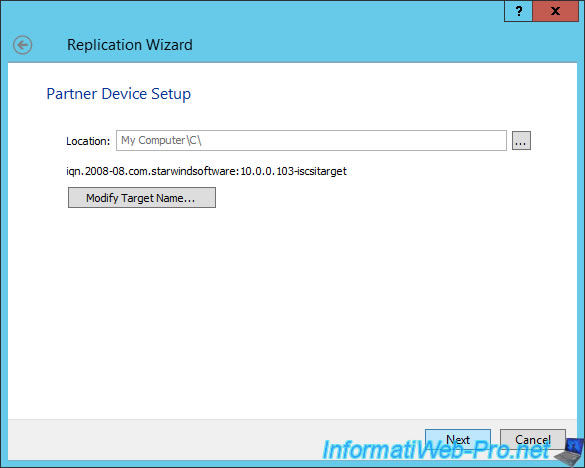
Select where you want to store the virtual disk on the remote StarWind server.
Then, click Next.
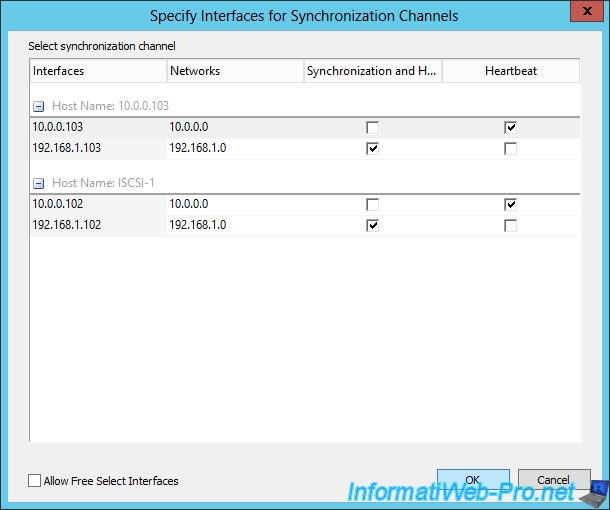
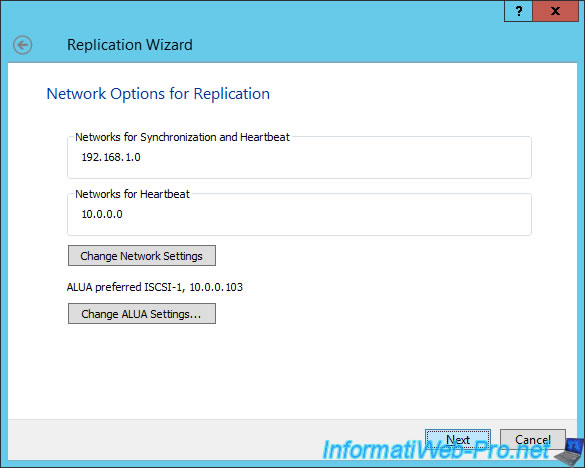
Click "Change Network Settings".
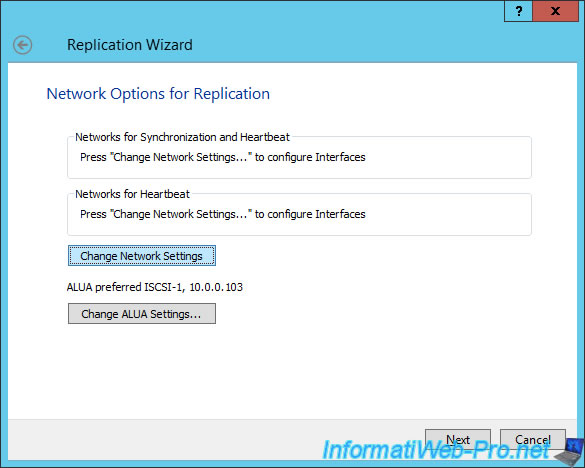
As mentioned earlier, it's recommended to use a dedicated network for data synchronization (replication).
Our 2 servers therefore have 2 network cards each.
The 192.168.1.0 network corresponds to the dedicated network connecting our 2 servers.
We will therefore allow synchronization on this network.
For the other network, we will enable only the heartbeat. A system that allows servers to know if the remote server is always accessible.
Note : as you can see, the heartbeat is enabled for both networks. This is highly recommended.
Then, click Next.
Select "Synchronize from existing Device".

Click "Create Replica" to enable data replication.
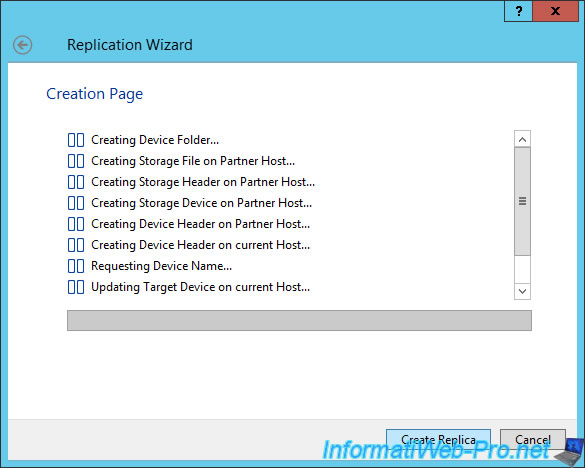
Enabling replication will create an image (a virtual disk) "HAimage" on the remote server.
This will be synchronized in real time with the virtual disk of the 1st server.

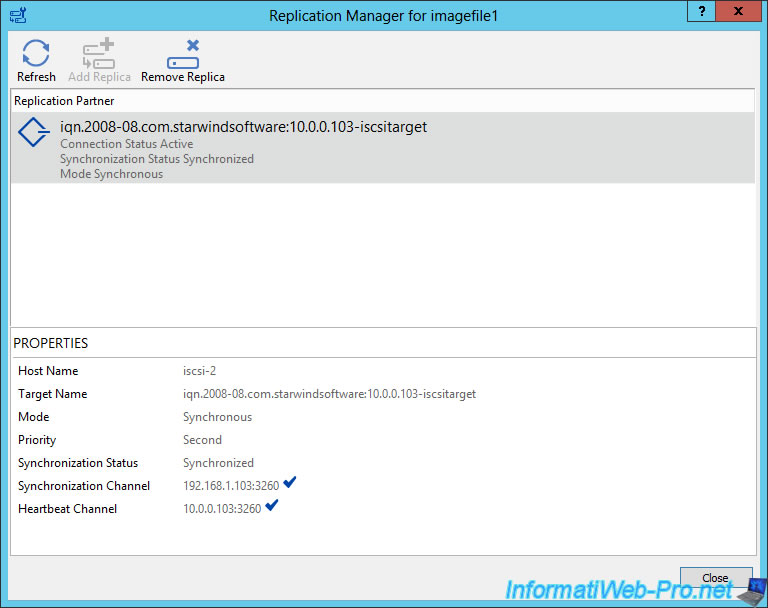
StarWind will synchronize the data. (Synchronization Status : Synchronizing)
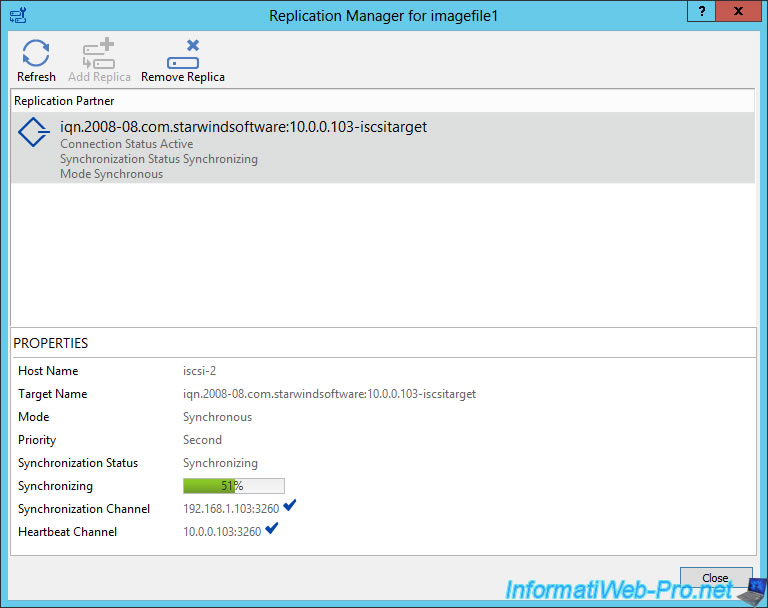
When synchronization is complete, the status will be : Synchronized.
Share this tutorial
To see also
-
Windows Server 4/29/2017
WS 2012 - Install an iSCSI server and an iSCSI client
-
Windows Server 6/28/2019
WS 2012 / 2012 R2 - Improve the performance of your iSCSI server with MPIO
No comment