Set up high availability (HA) on your RDS infrastructure (step by step) on Windows Server 2012 / 2012 R2
- Windows Server
- 07 June 2019 at 11:07 UTC
-

- 10/12

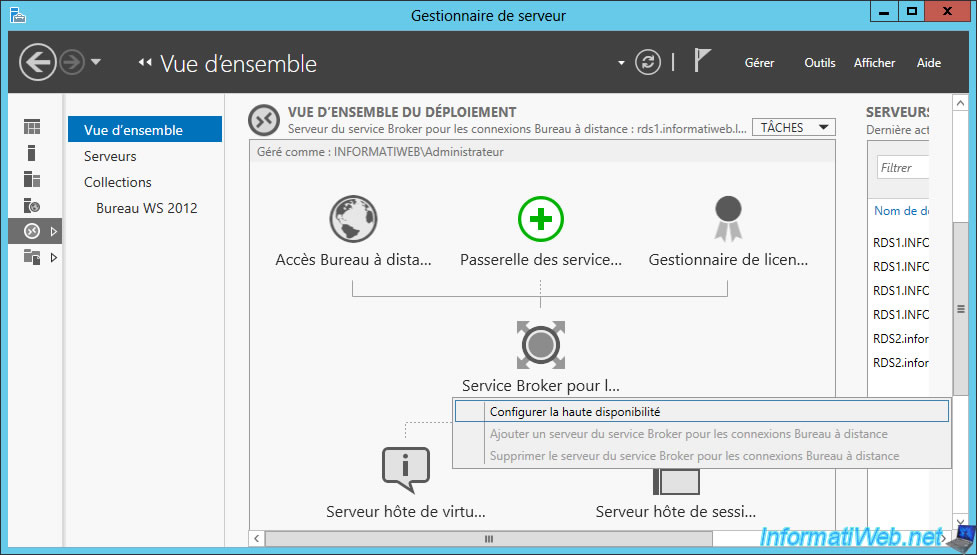
10.11. Enable the high availability of the broker service
Now that all the prerequisites are fulfilled, we can finally activate the high availability of the broker service.
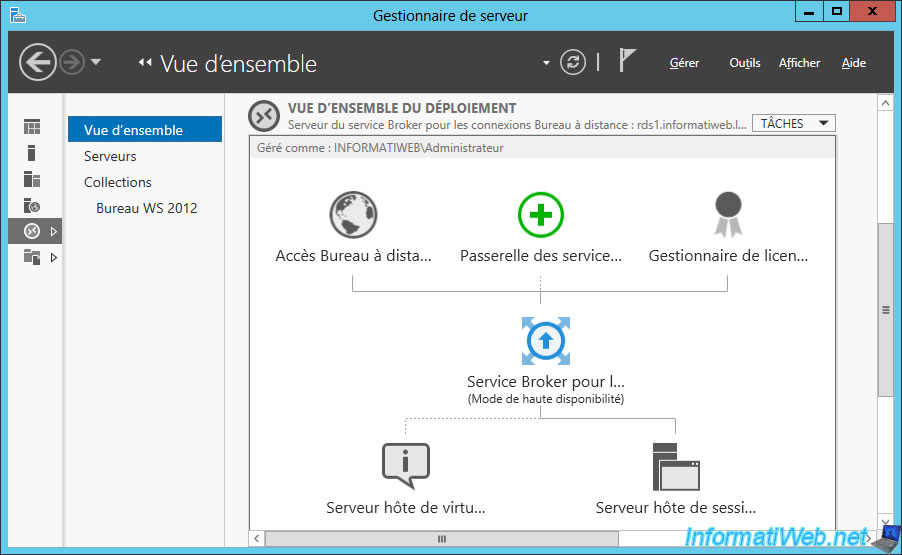
To do this, go to the overview of the RDS deployment and right-click "Configure RD Connection Broker for HA" on the RD Connection Broker.
The list of prerequisites (which we have just completed) is displayed.
Click Next.

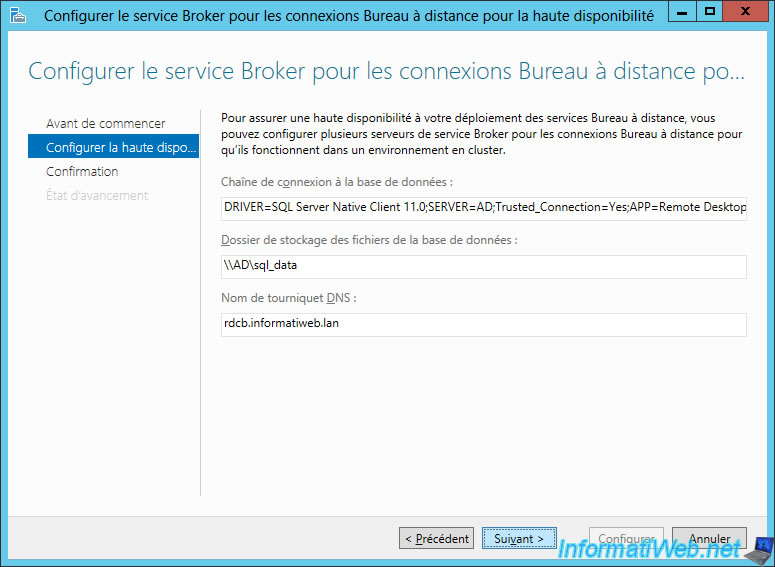
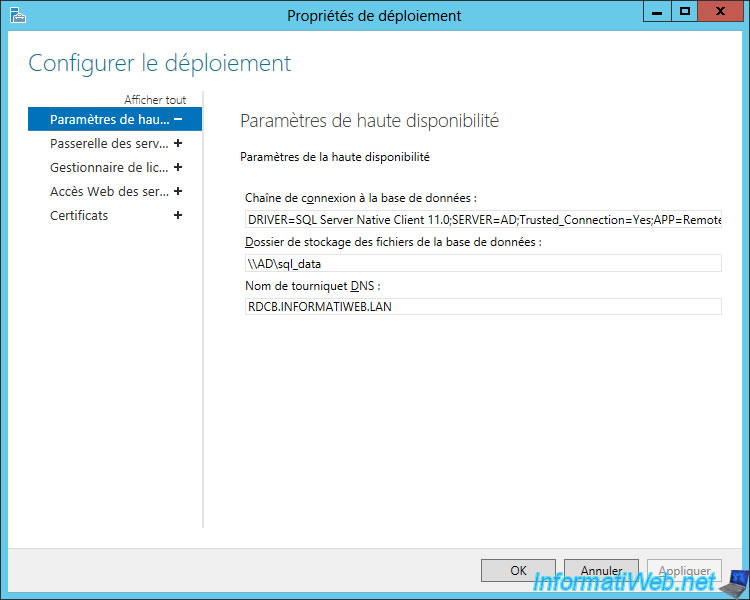
The wizard will ask you for 3 informations :
- the database connection string
- the folder to store database files : \\AD\sql_data
- the DNS round robin name : rdcb.informatiweb.lan
For the database connection string, we relied on the one provided by Microsoft :
DRIVER=SQL Server Native Client 11.0;SERVER=<SQL Server Name>;Trusted_Connection=Yes;APP=Remote Desktop Services Connection Broker;DATABASE=<DB Name>
In our case, it gives :
DRIVER=SQL Server Native Client 11.0;SERVER=AD;Trusted_Connection=Yes;APP=Remote Desktop Services Connection Broker;DATABASE=RDCB_DB
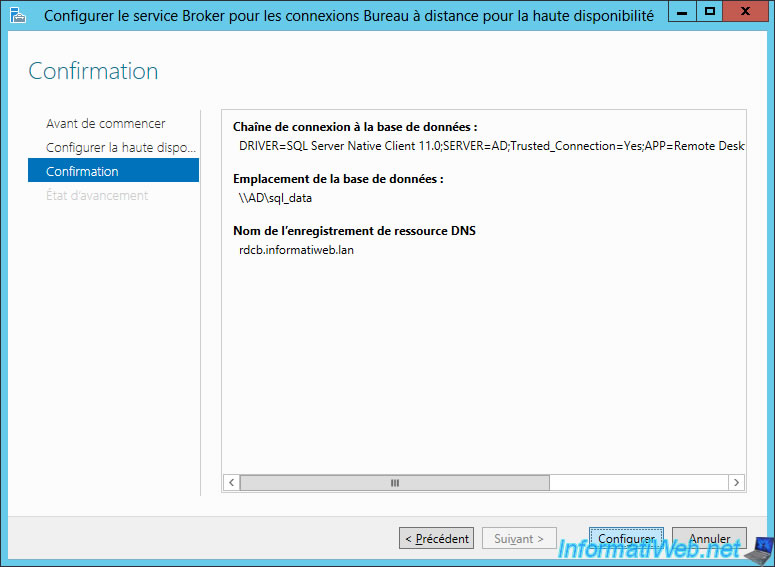
If you arrive here, it's that almost all the configuration of the prerequisites is good.
Click Configure.
If all goes well, the configuration of high availability will succeed.
If an error occurs, check that :
- your servers are able to connect to the SQL server (and TCP port 1433 is open on the remote server)
- they are allowed to connect and create a database (dbcreator right) on your SQL server
- the shared folder is accessible and your servers are able to create and delete files in this network share
- your servers use a domain network (in case of network loss, it happens that Windows use a public network type)
- and that the rest of the configuration is good
If all is good, try restarting your servers (including the SQL server).
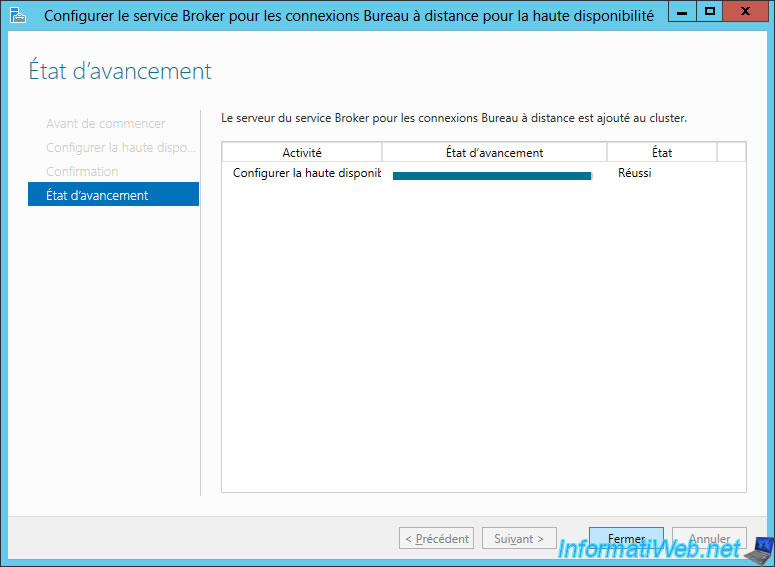
In the shared folder, you will find 2 new files :
- RDCBDB.mdf
- RDCBDB_log.ldf

Now, the Broker service of your RDS infrastructure is in High Availability Mode.
10.12. Adding the right owner on the SQL database
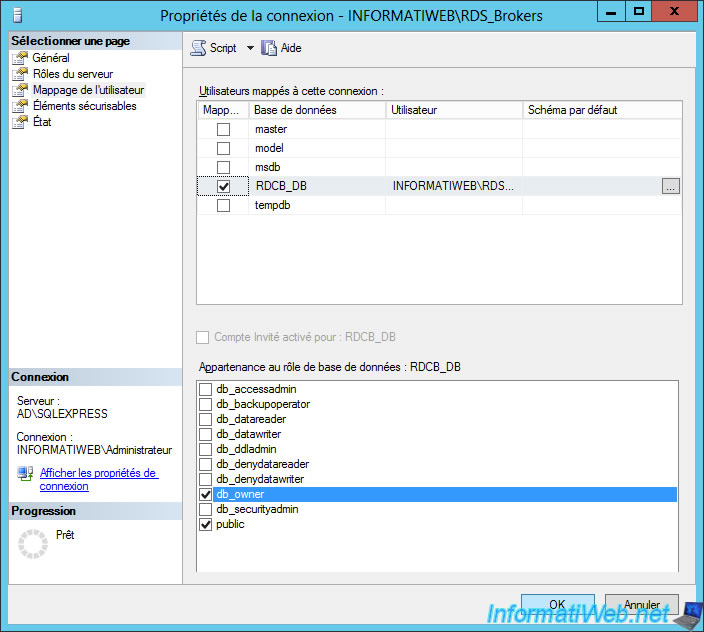
To avoid future errors and to be sure that your brokers will be able to manage the database without problems, Microsoft recommends giving them the owner right to the database just created by the wizard.
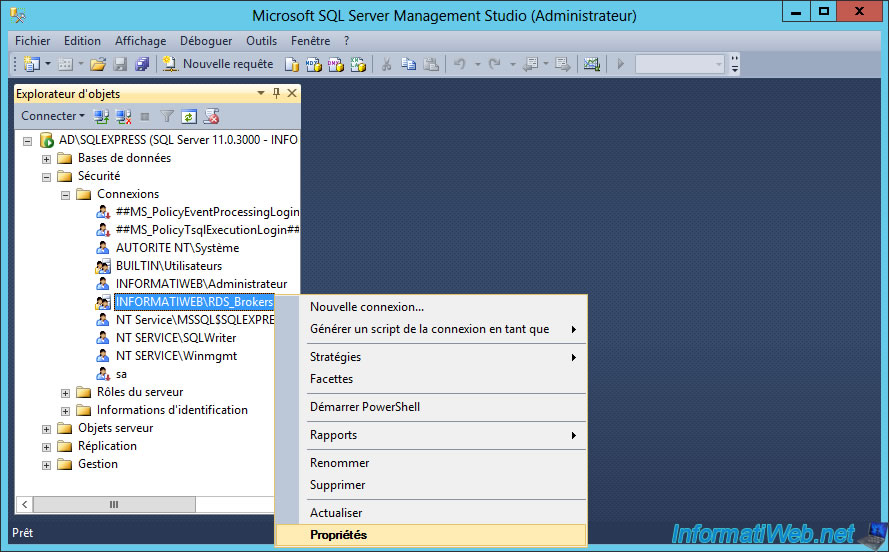
To do this, return to "Microsoft SQL Server Management Studio" and go to : Security -> Connections.
Right click on the "INFORMATIWEB\RDS_Brokers" connection and click on "Properties".
In "User Mapping", check the "RDCB_DB" box, then check the "db_owner" box at the bottom.
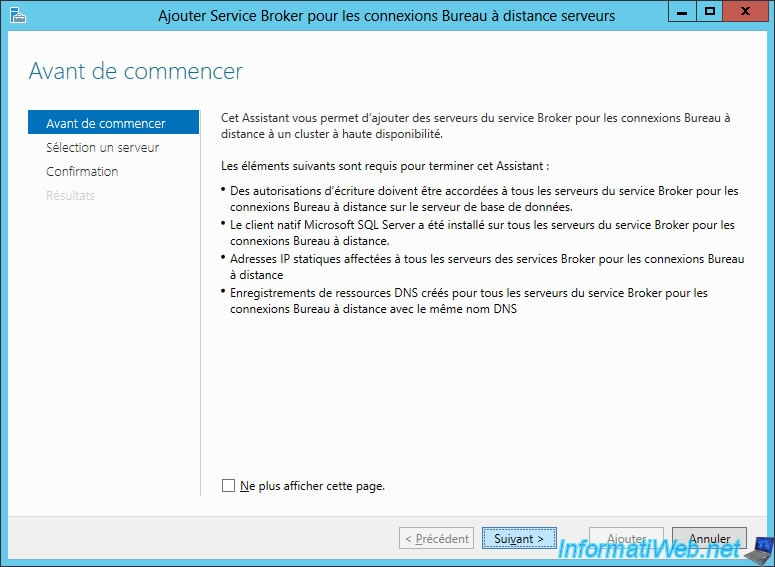
10.13. Adding the 2nd broker server for the high availability of this service
Although the high availability of the broker service is enabled, there is currently only one server that provides service availability.
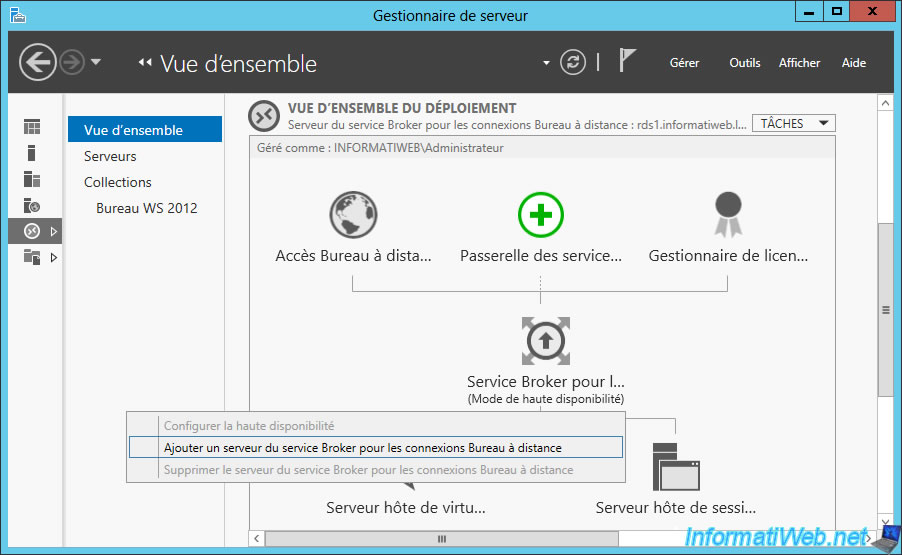
To add your 2nd RDS server, right-click on "RD Connection Broker" and click : Add RD Connection Broker Server.
The same pre-requisites as before are displayed.
Click Next.
Select your 2nd RDS server and click the middle button.
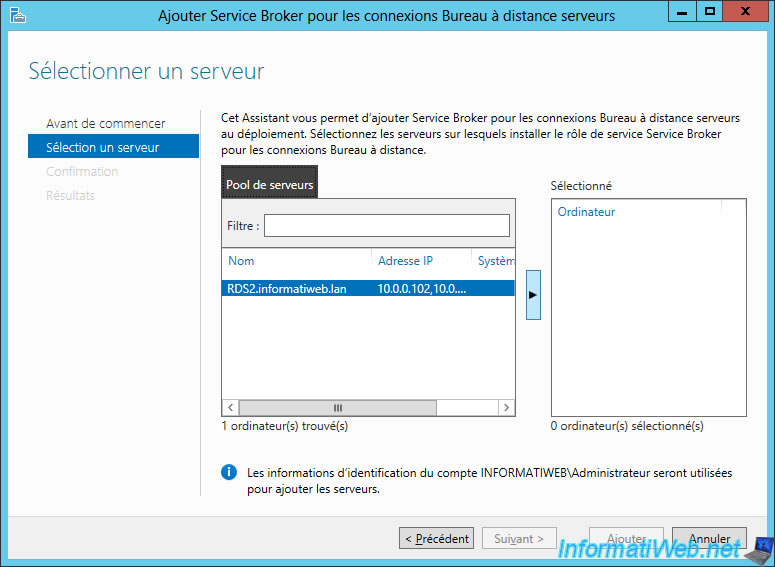
Note that for the moment, the broker service is not installed on this 2nd server.
Confirm the addition of the server.
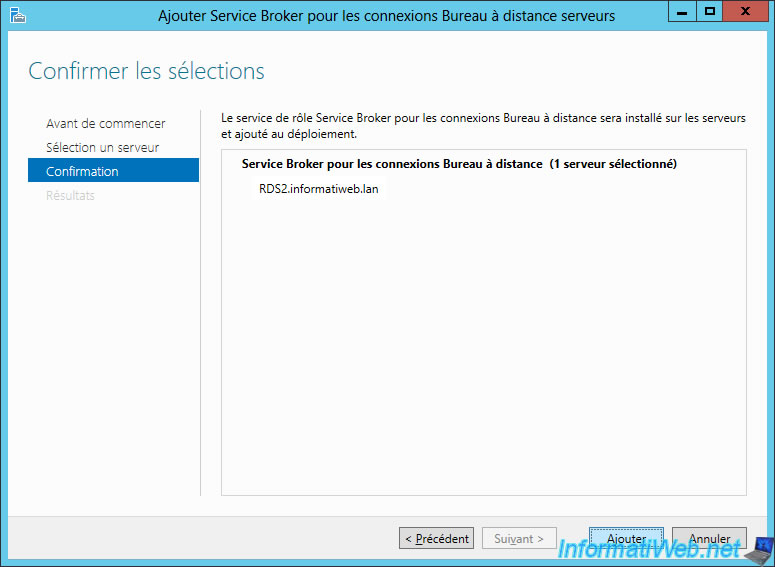
The wizard remotely installs the remote service on this 2nd server.
If an error is displayed when adding the 2nd RDS server, make sure that you have assigned the "db_owner" role to your brokers server on the "RDCB_DB" database as explained above.

In the RDS deployment settings, you will find the parameters used.
Share this tutorial
To see also
-

Windows Server 3/8/2019
WS 2012 / 2012 R2 / 2016 - RDS - Access RemoteApp via a modern application
-

Windows Server 4/28/2019
WS 2012 / 2012 R2 / 2016 - RDS - Attempt to unblock the session as a user
-

Windows Server 3/16/2019
WS 2012 / 2012 R2 / 2016 - RDS - Change the properties of RemoteApps
-
Windows Server 1/13/2019
WS 2012 / 2012 R2 / 2016 - RDS - Configure user profile disks (UPD)
No comment