Set up high availability (HA) on your RDS infrastructure (step by step) on Windows Server 2012 / 2012 R2
- Windows Server
- 07 June 2019 at 11:07 UTC
-

- 11/12

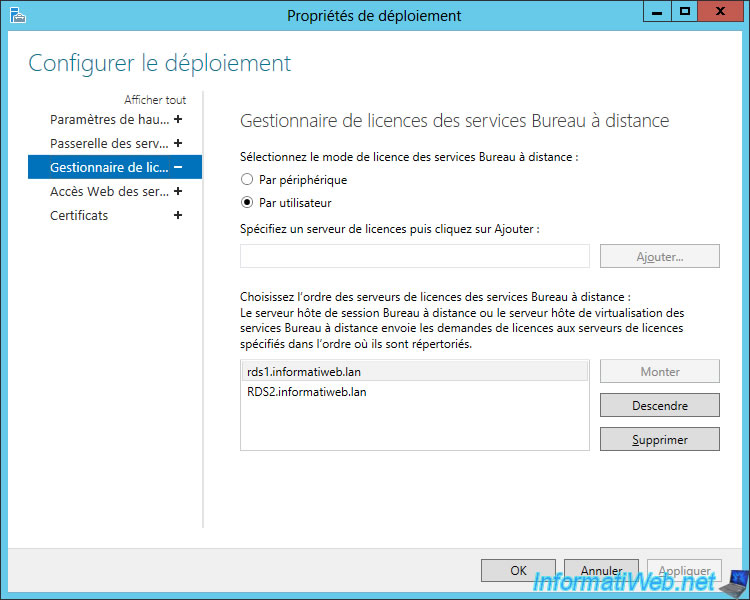
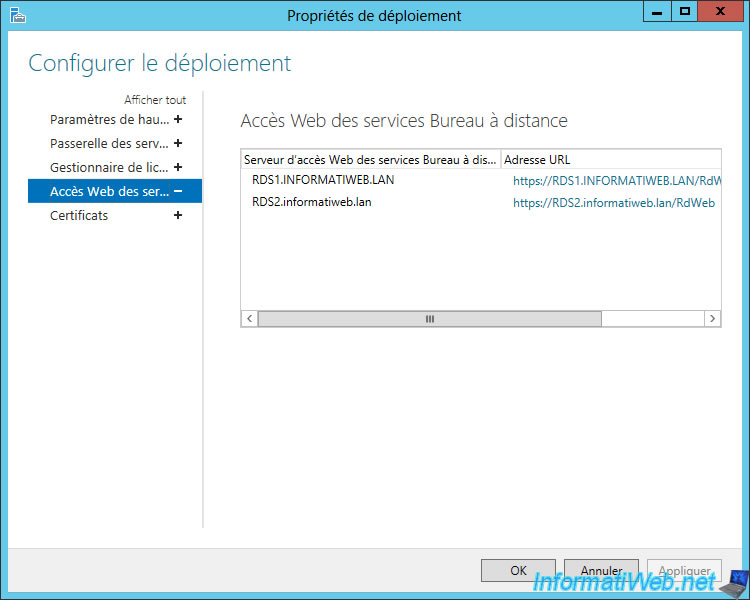
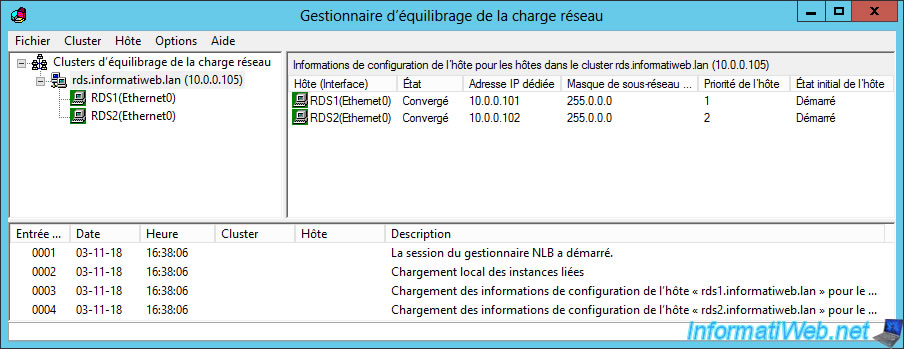
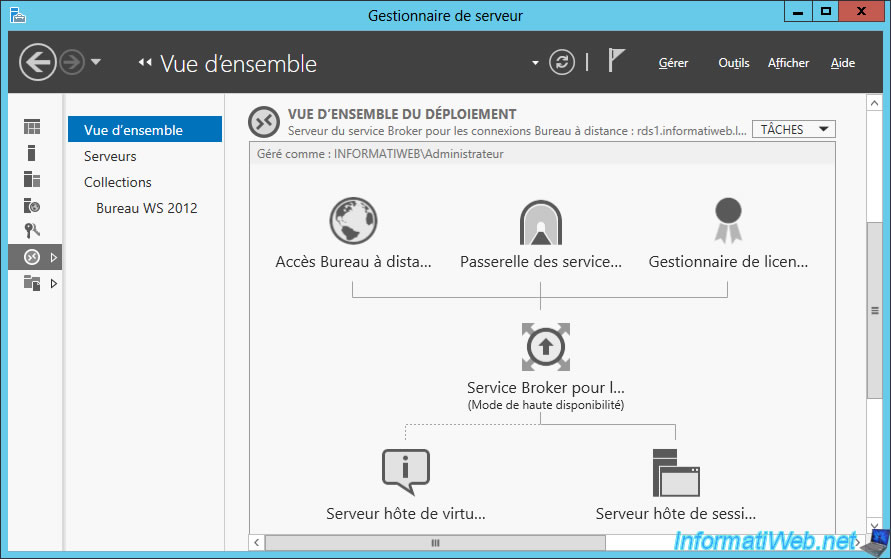
11. Current state of the high availability of your RDS infrastructure
As you can see, currently your infrastructure is highly available for :
- license servers
- RDS web access
- the broker service (which manages the connections to your RDS infrastructure)
- the session host (which hosts the desktops or RemoteApp programs)
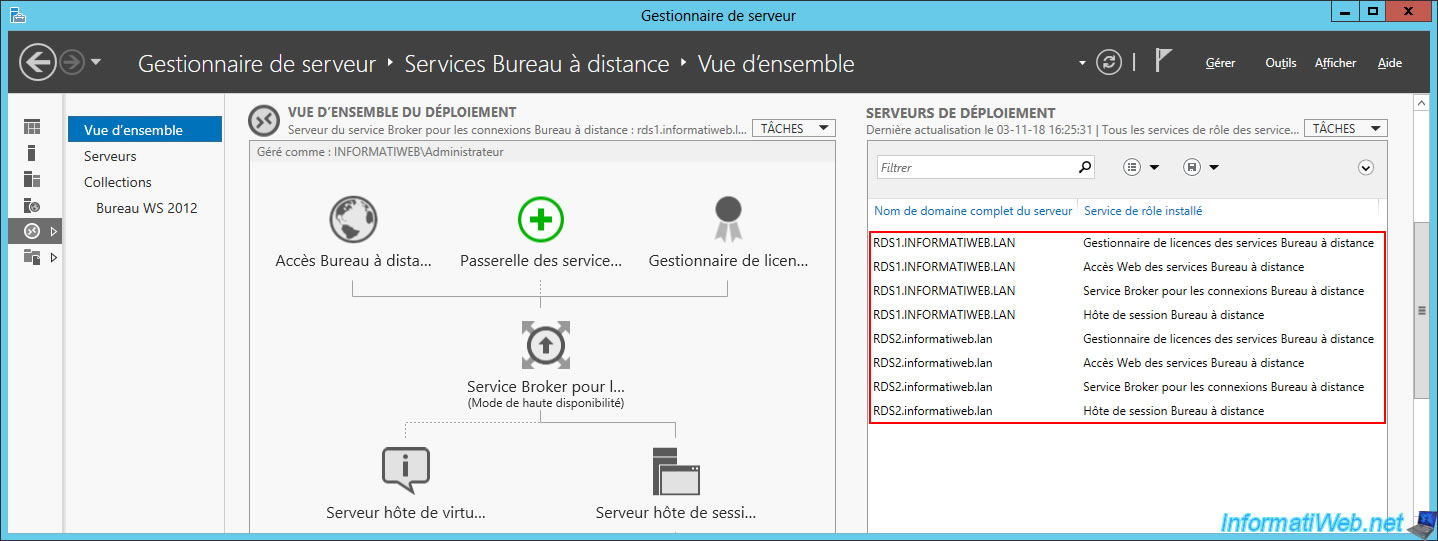
To be sure, make sure your license servers are listed in the "RD Licensing" section of the RDS deployment properties.
Ditto for RD Web Access.
And that your RDS cluster is well configured.
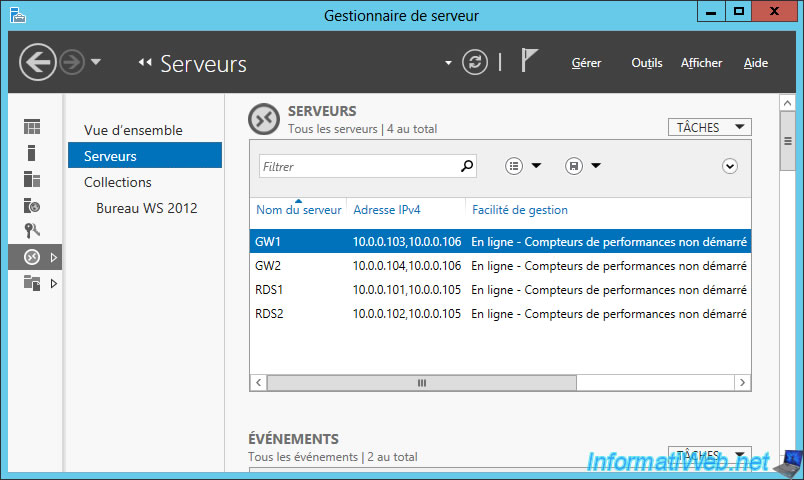
12. High availability of the RDS gateway
Now that your RDS infrastructure is highly available from your local network (if you are unaware that the certificates are not yet configured), you can add 2 highly available RDS gateways to provide secure remote access to your RDS infrastructure by following our tutorial : RDS - Implement high availability for your RDS gateways
Once you have followed this tutorial, here is what it will give.
The "RD Gateway" icon will have appeared.
2 new servers (GW1 and GW2) will have appeared with one IP address each and the other (10.0.0.106 in our case) corresponding to the GW cluster (managed via NLB).
13. RDS infrastructure certificates
13.1. Certificate request for the broker
Since the broker service will manage the requests of our users, we will no longer be able to use the certificate of our RDS web access for the Broker service.
If you try to do this, your users will be notified that the remote server (rdcb) is using a valid certificate for another server (rds).
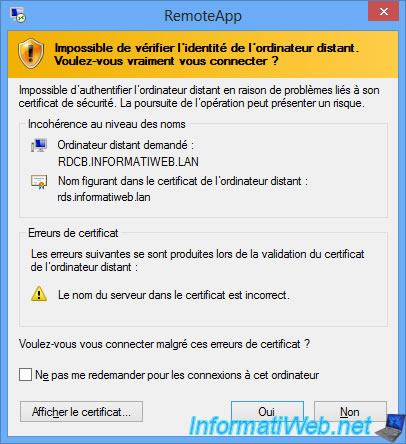
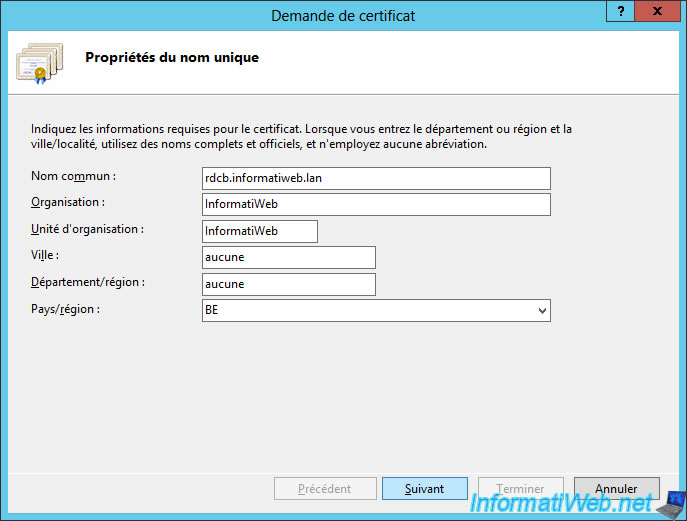
To request a certificate for the broker name (rdcb.informatiweb.lan in our case), we will need to create a certificate request from IIS to be able to specify for which domain name we wish to obtain a certificate.
Specify the domain name of your broker service (and more precisely the one that corresponds to the round-robin DNS record name specified when activating the high availability of the broker service).
In our case : rdcb.informatiweb.lan
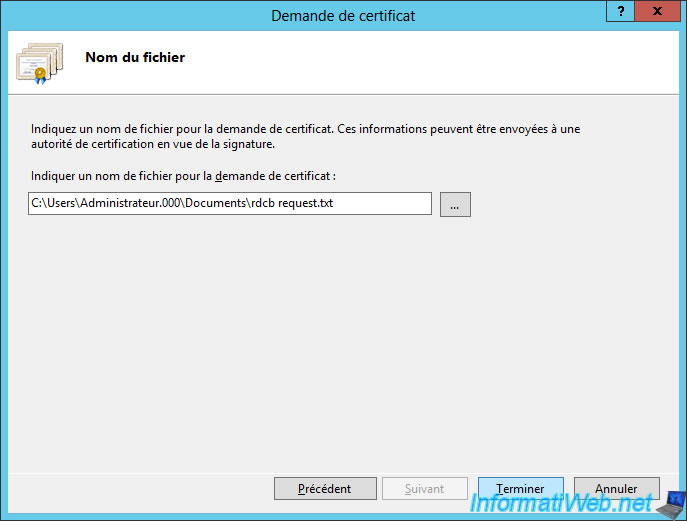
Save the certificate request.
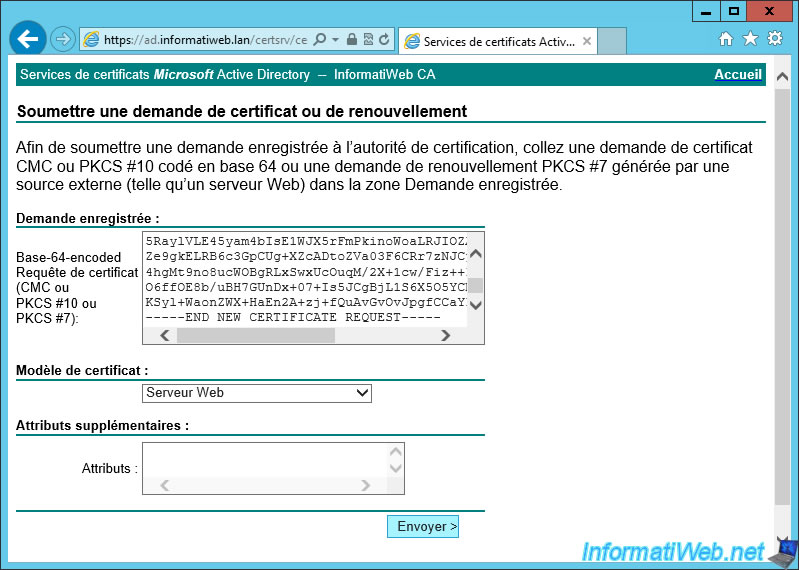
Submit this request to your CA through its web interface by selecting the "Web Server" template since the purpose is to authenticate the server.
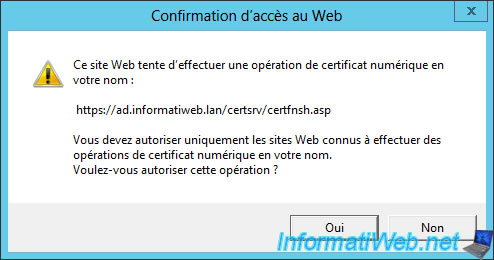
Confirm the digital certificate operation.
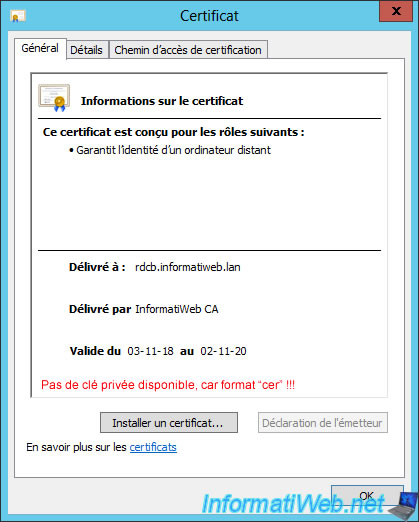
Download the certificate.
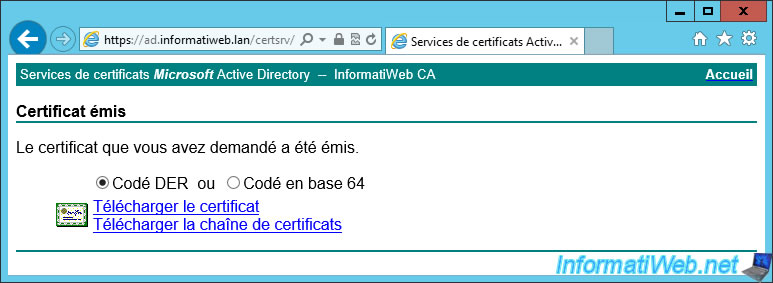
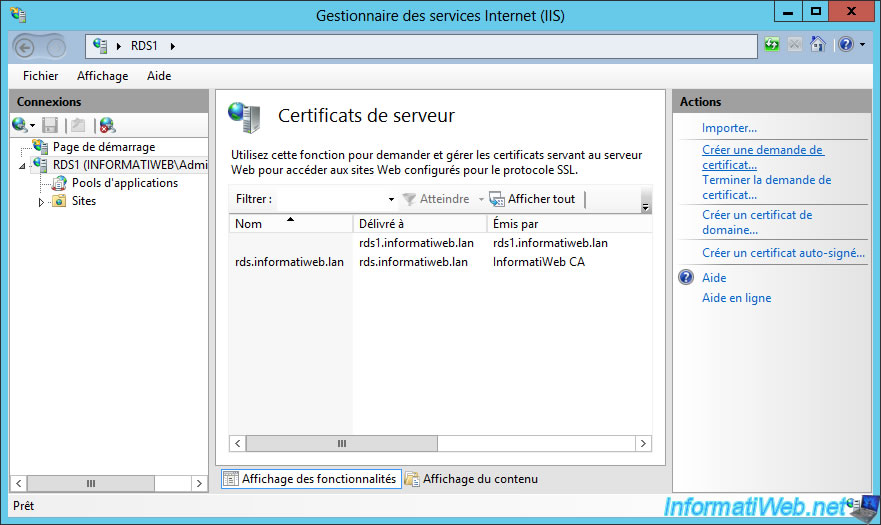
Nevertheless, as you can see by opening this certificate, there is no private key in the downloaded file (in cer format).
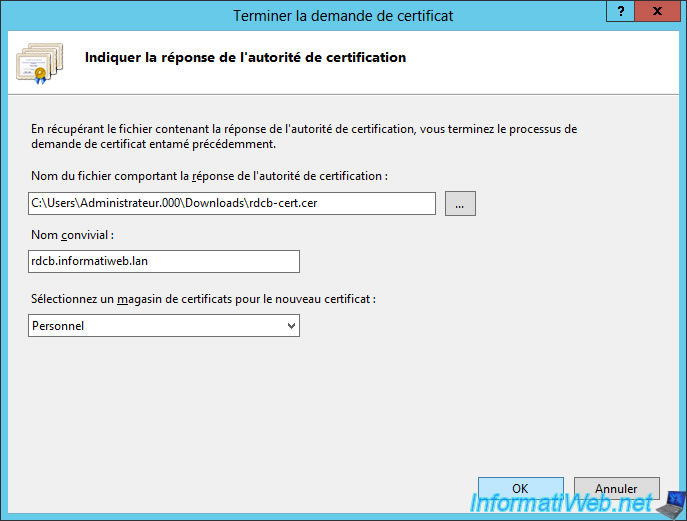
In IIS, click "Finish Certificate Request" and then :
- select the downloaded certificate
- specify the round-robin DNS record name of your broker service : rdcb.informatiweb.lan
- choose the certificate store : Personal
13.2. Export the certificate in pfx format
As you already know, you need the pfx version of the certificate to import it into the deployment properties of your RDS infrastructure.
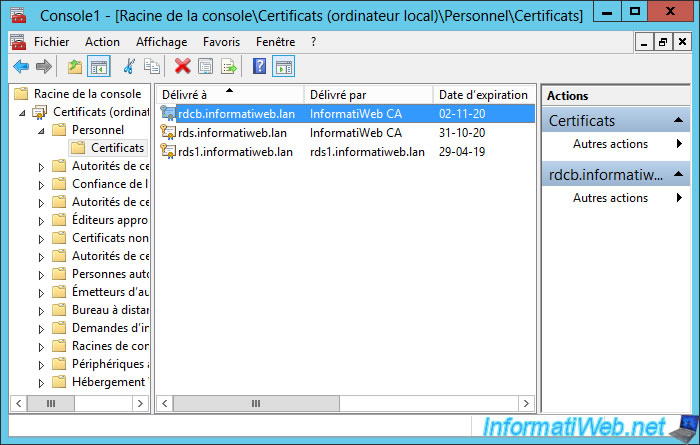
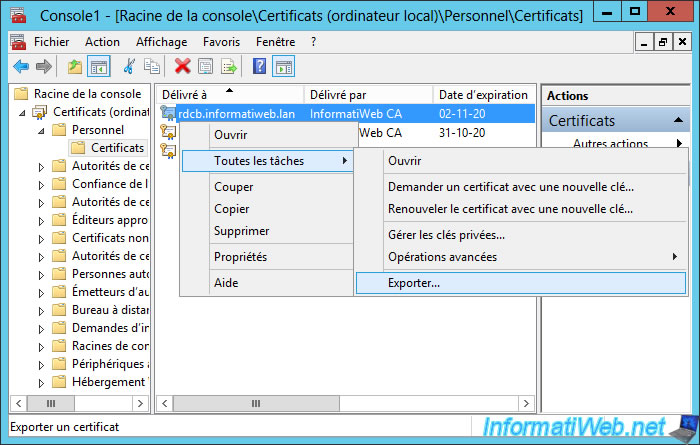
For this, now that the request has been created and completed from IIS, you can find it in your server's certificate store.
A quick reminder to access it : Launch the mmc console and add the "Certificates" snap-in for the local computer.
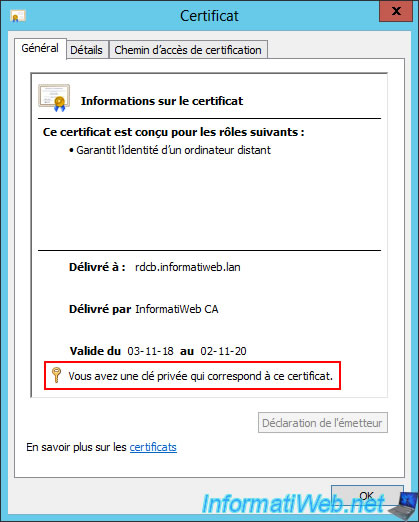
In the "Personal" store (selected from IIS), you will find your certificate for : rdcb.informatiweb.lan
If you double click on it, you will see that it has a private key (unlike the "cer" file format previously downloaded).
Right-click "All Tasks -> Export" on this one.
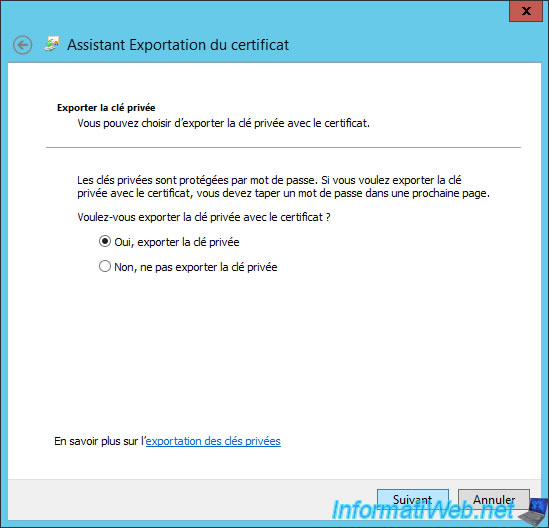
Select "Yes, export the private key".
Select "Personal Information Exchange - PKCS #12 (.PFX)".
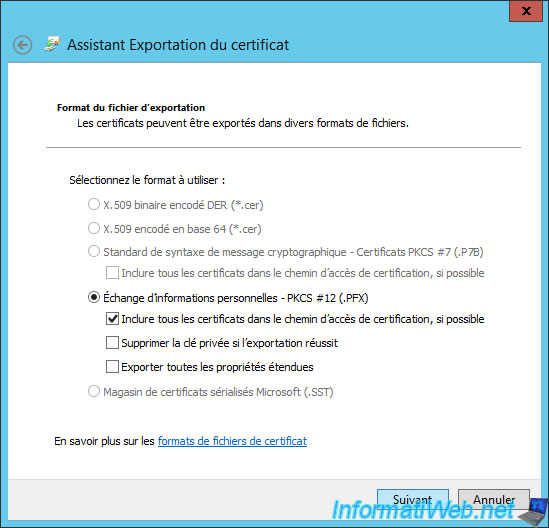
Provide a password to protect the private key available with this certificate.
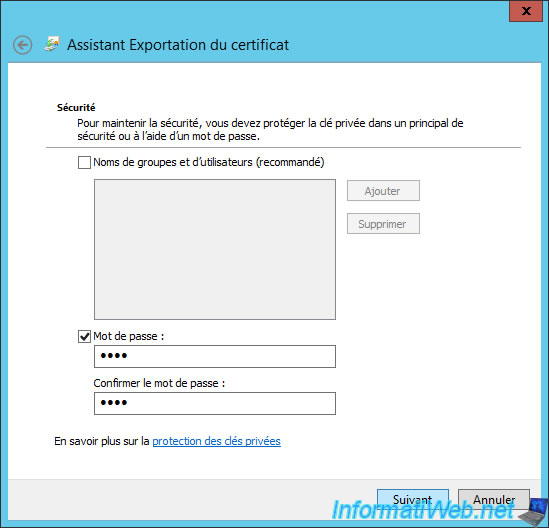
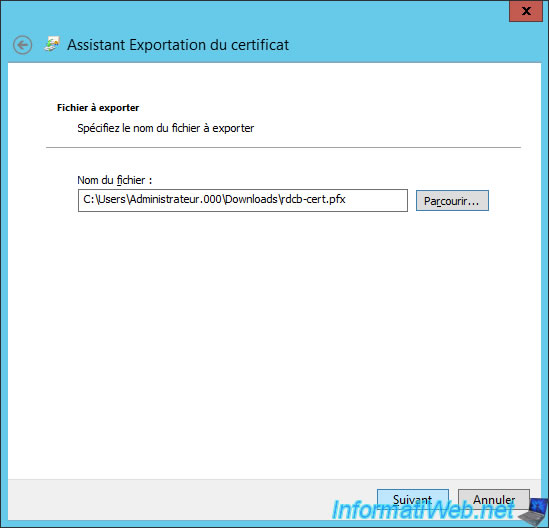
Export this certificate in pfx format.
Share this tutorial
To see also
-
Windows Server 3/8/2019
WS 2012 / 2012 R2 / 2016 - RDS - Access RemoteApp via a modern application
-
Windows Server 4/28/2019
WS 2012 / 2012 R2 / 2016 - RDS - Attempt to unblock the session as a user
-
Windows Server 3/16/2019
WS 2012 / 2012 R2 / 2016 - RDS - Change the properties of RemoteApps
-
Windows Server 1/13/2019
WS 2012 / 2012 R2 / 2016 - RDS - Configure user profile disks (UPD)
No comment