How works, benefits, installation and configuration of Windows MultiPoint Server 2012
- Windows Server
- 17 January 2018 at 11:12 UTC
-

- 7/7

14.4. Launch an application on user stations
With the Launch option of the Applications section, you will be able to :
- launch an application on user stations
- open a folder
- open a document
- open a website
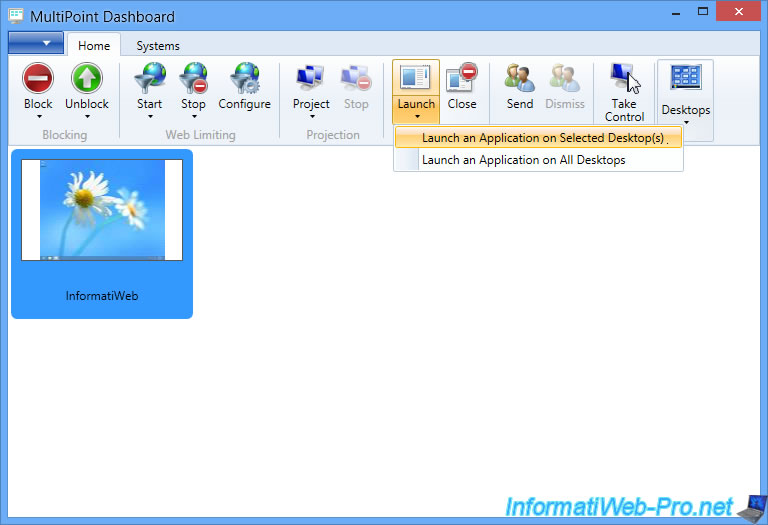
14.4.1. Launch an application
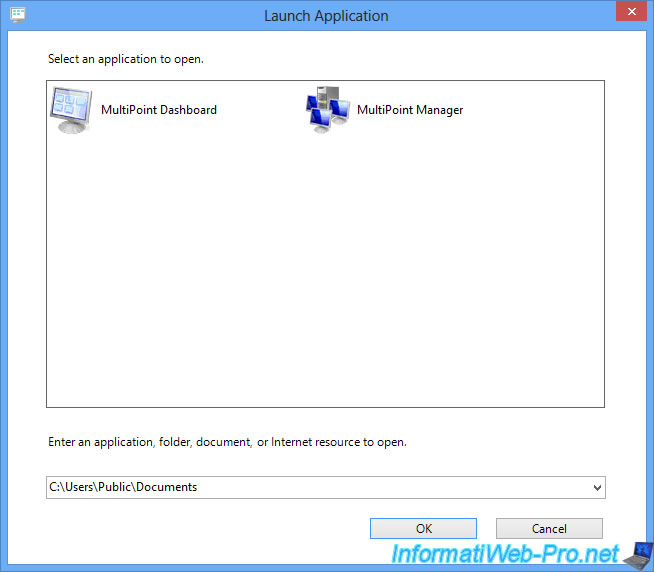
By default, Windows MultiPoint Server offers 2 MultiPoint applications.
And as you can see, Windows MultiPoint Server doesn't allow you to add an application.
Nevertheless, after a few tests, we noticed that Windows MultiPoint Server was looking at a particular place in Windows that allowed it to automatically detect new installed programs.
After installing Adobe Acrobat Reader DC on our Windows MultiPoint Server, we noticed that this new program had appeared in MultiPoint Dashboard.
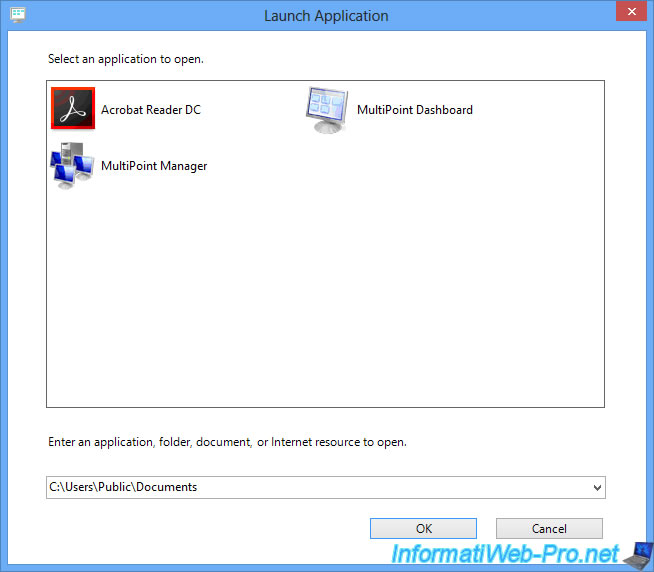
If we select this new application, we see that MultiPoint Dashboard will launch a shortcut present in this folder : C:\ProgramData\Microsoft\Windows\Start Menu\Programs
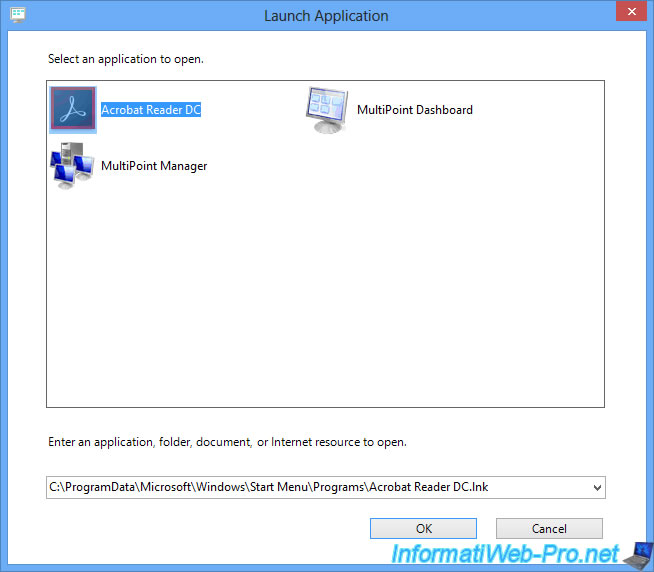
As you can see, this folder already contains a shortcut for Adobe Acrobat Reader DC.
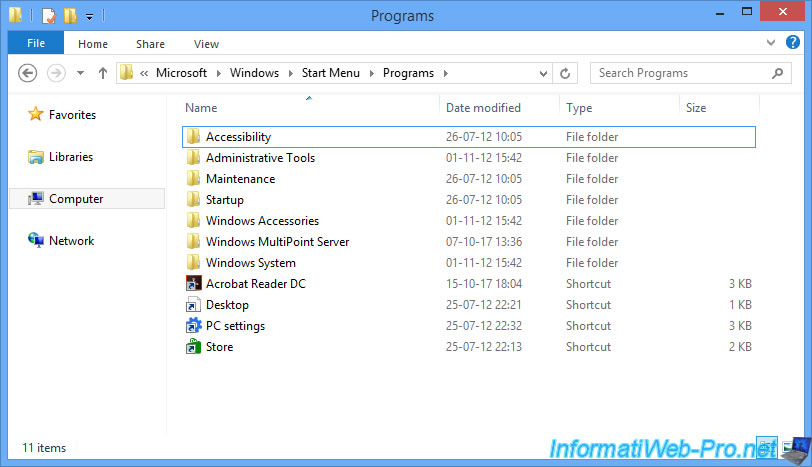
To add an application in the MultiPoint Dashboard, just add a shortcut to it in this folder.
For this tutorial, we will add a shortcut to the notepad program.
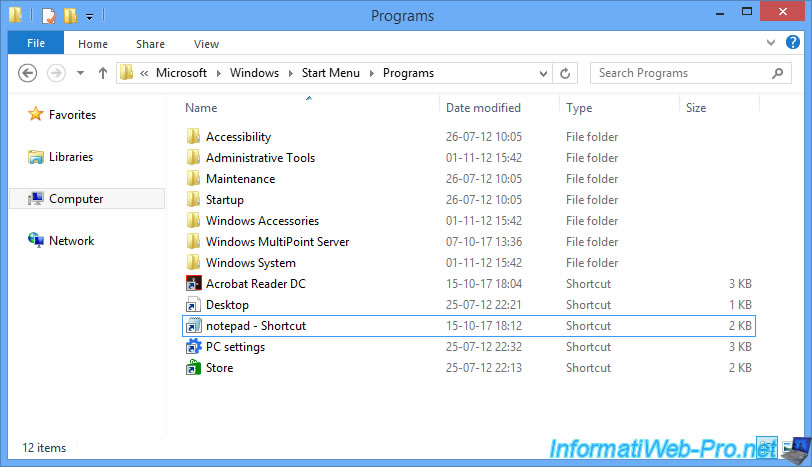
Now, MultiPoint Dashboard also offers us the notepad program.

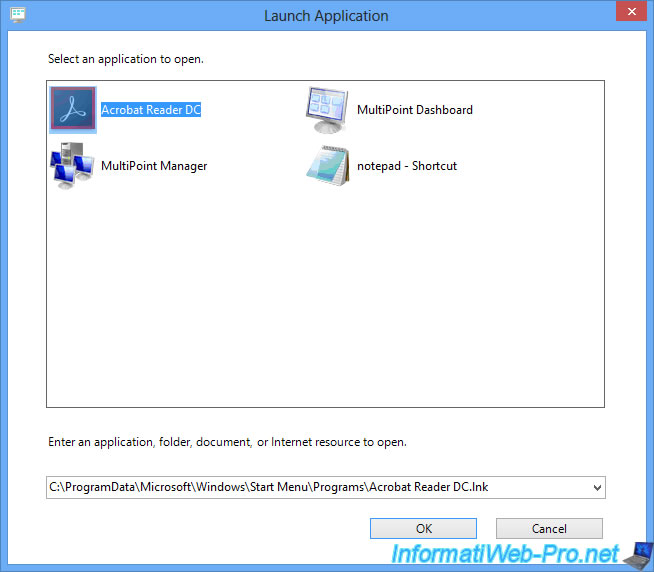
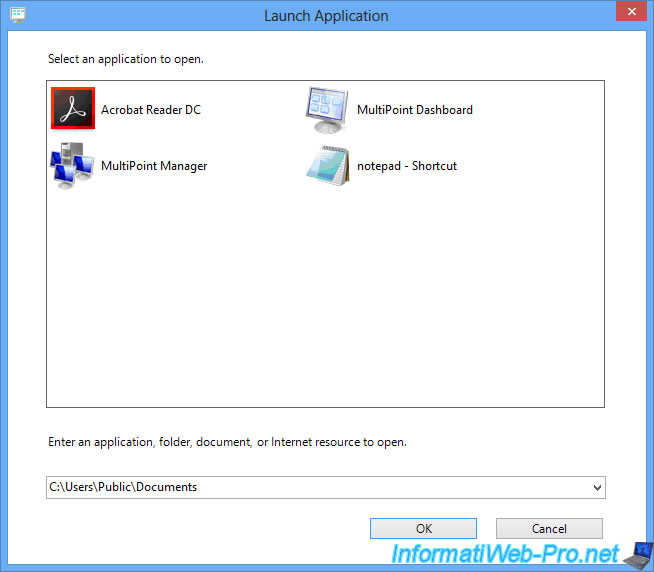
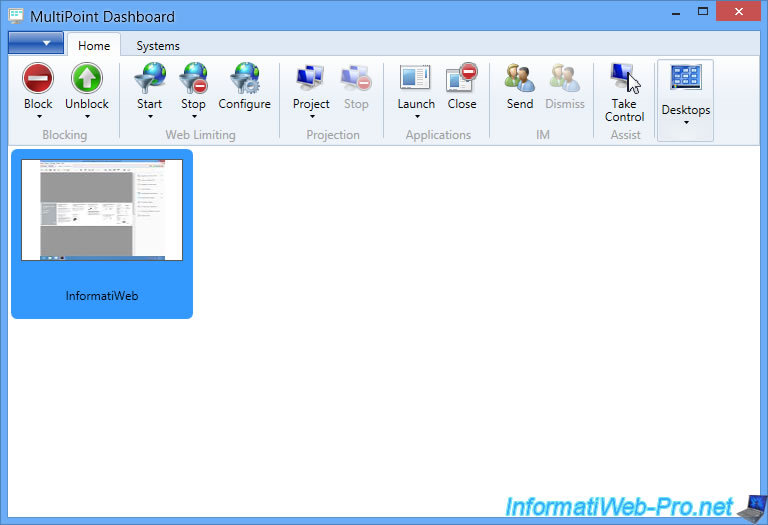
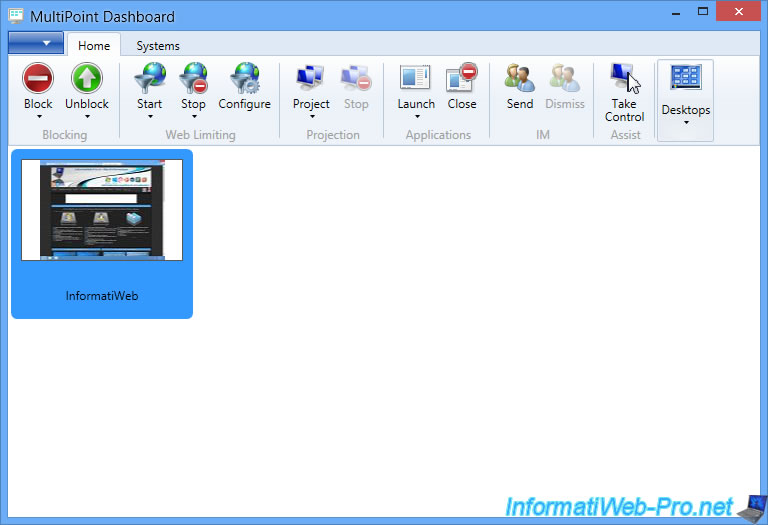
Let's launch Adobe Acrobat Reader DC on the user stations.
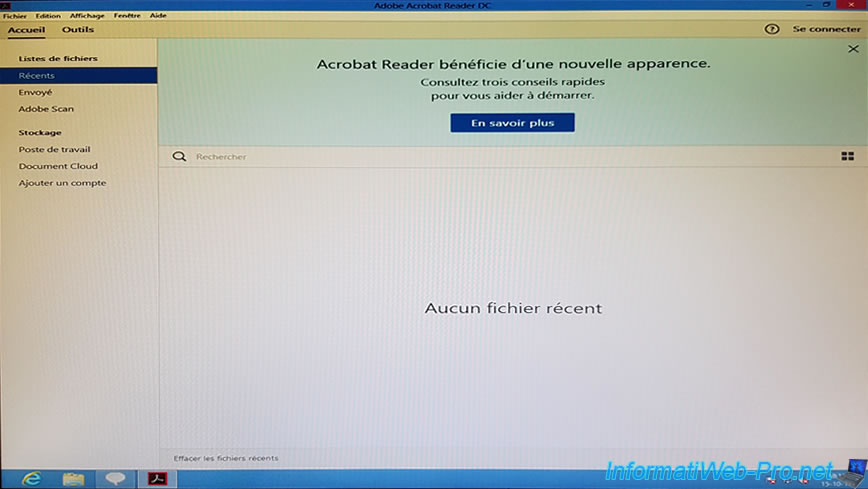
As you can see, the desired application is automatically launched on the desired user stations.
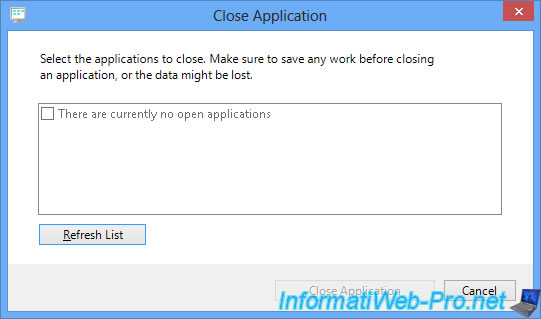
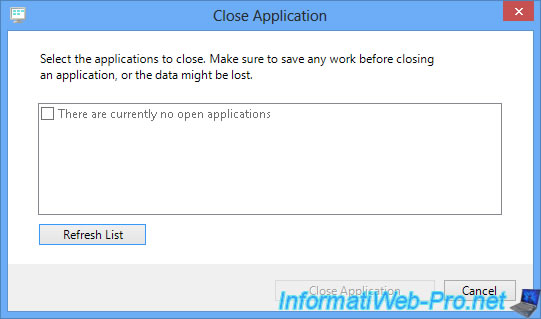
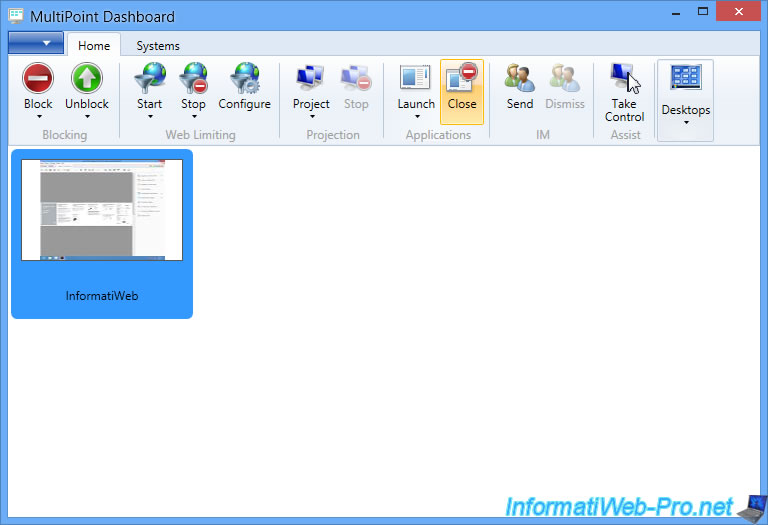
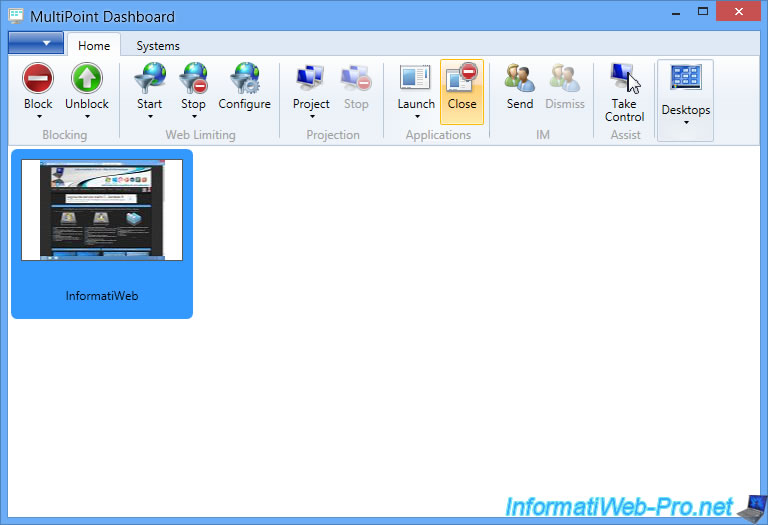
To close this application, you can select the desired user station and click Close.

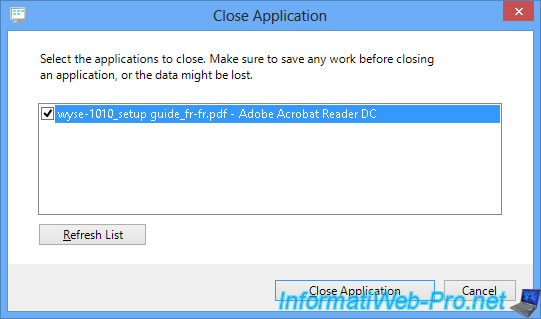
Check the application you want to close on this user station and click Close Application.

Once closed, it will disappear from the list.
14.4.2. Open a folder
To open a folder, just specify the folder path to open and click OK.
Warning : your users must have the rights to access the desired folder.
The desired folder automatically opens on the desired user stations.
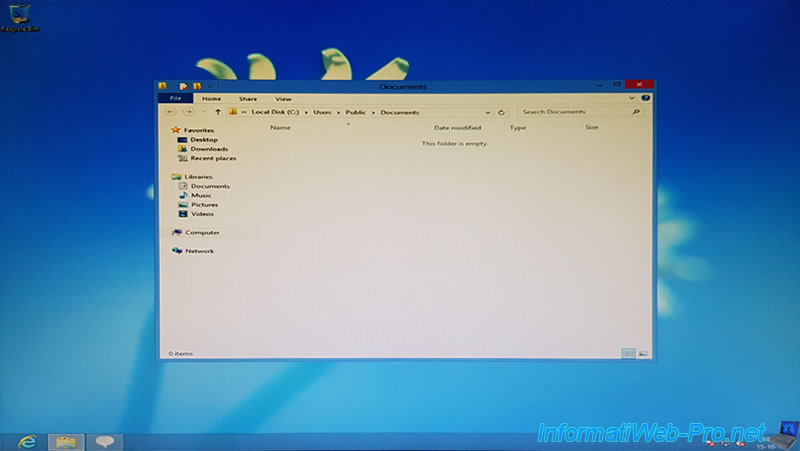
Note that you will also see the result from the MultiPoint Dashboard.
However, since the folder is opened by the file explorer (which itself is part of explorer.exe), you will not be able to remotely close it.
Otherwise, the taskbar and the desktop of your users will disappear.
14.4.3. Open a document
Thanks to the MultiPoint Dashboard, you can also open a document on the stations of your users.
If they have the right to access it, of course.
To do this, simply specify the path of the file to open and click OK.
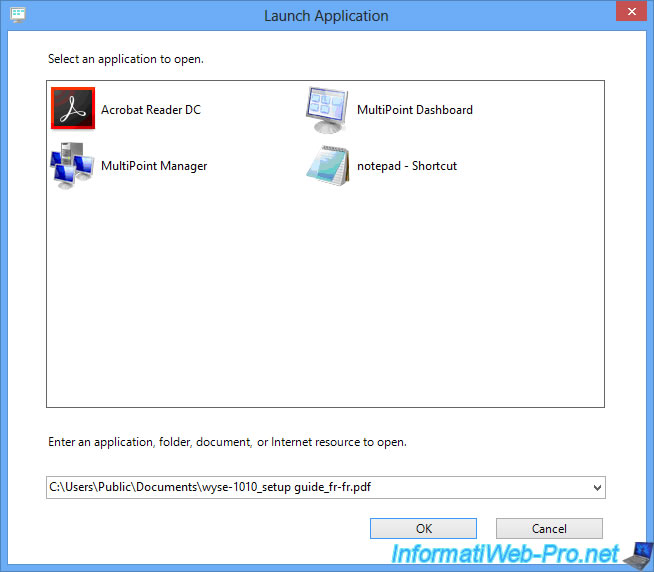
Since the Adobe Acrobat Reader DC program is configured as the default program for PDF files, this program will be automatically launched to open our PDF file on the stations of our users.
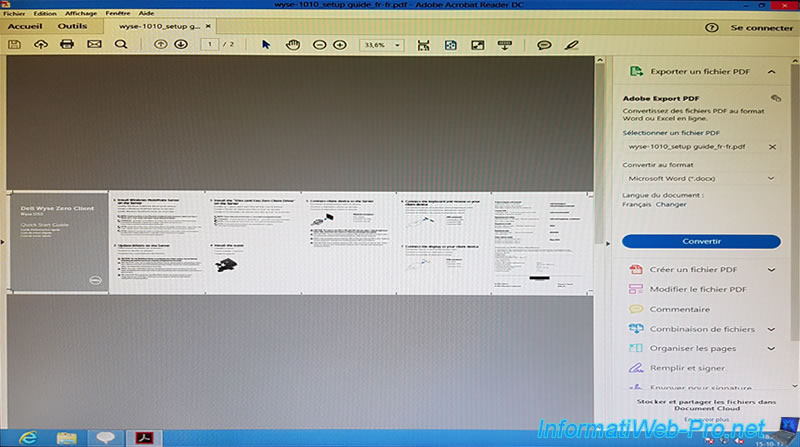
As before, you will also see the result with the MultiPoint Dashboard.
To close the application that opened this document, click the Close button.
Then, select the application that was launched to open your document.
14.4.4. Open a website
Finally, thanks to MultiPoint Dashboard, you can also open a website on the stations of your users.
To do this, enter the desired site address and click OK.
As before, the desired website will be displayed via the default browser of your server.
In our case, the site is displayed with Internet Explorer (IE), because it's the only web browser that is installed on our server.

To close the web browser (and therefore the website open on the user stations), click Close.
And select the web browser used.

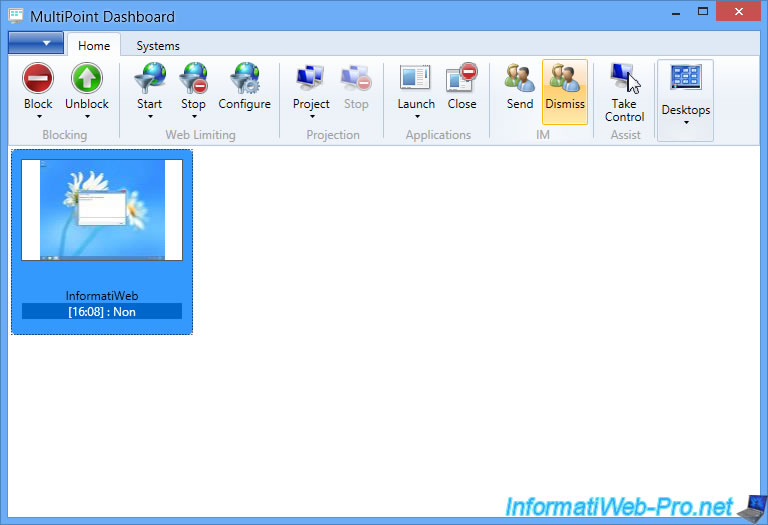
14.5. Internal messaging (IM)
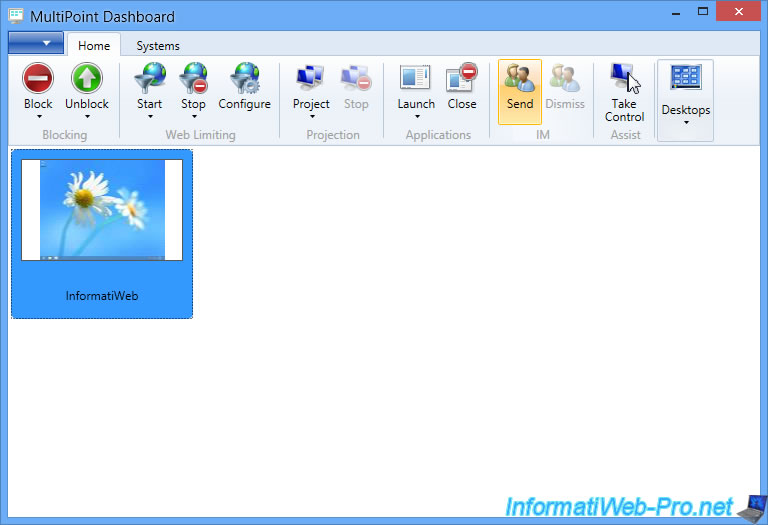
As previously explained, thanks to Windows MultiPoint Server, you can also communicate privately with your users (your students).
To do this, select a user's station and click Send.
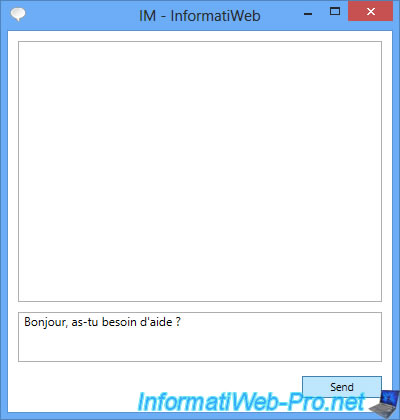
A small IM window appears.
Type a message and click Send.
On your side, you see the name of the user with whom you discuss in the title of the window.
On the side of the user (the student), he will see by default that he speaks with the admin.
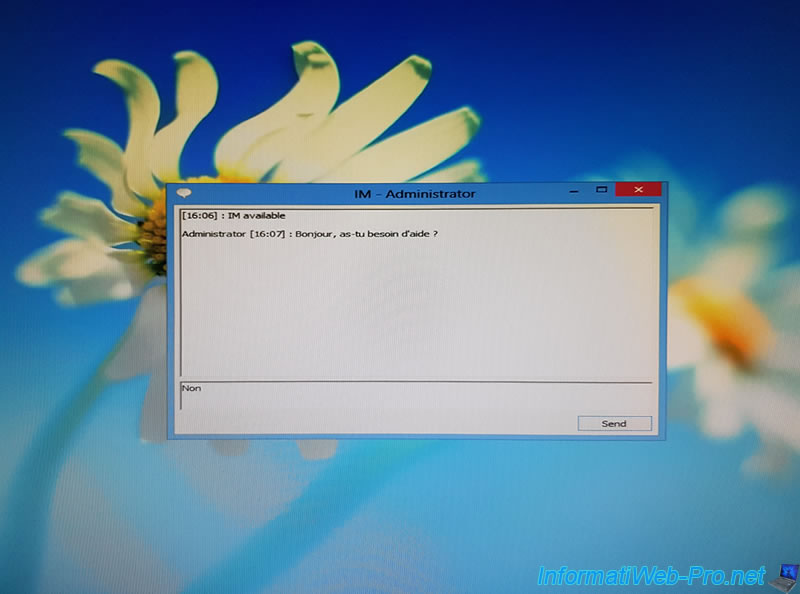
Here is an example of a conversation.

Once the discussion is over, simply click on Dismiss to close the IM window.
14.6. Remote control of the desktop
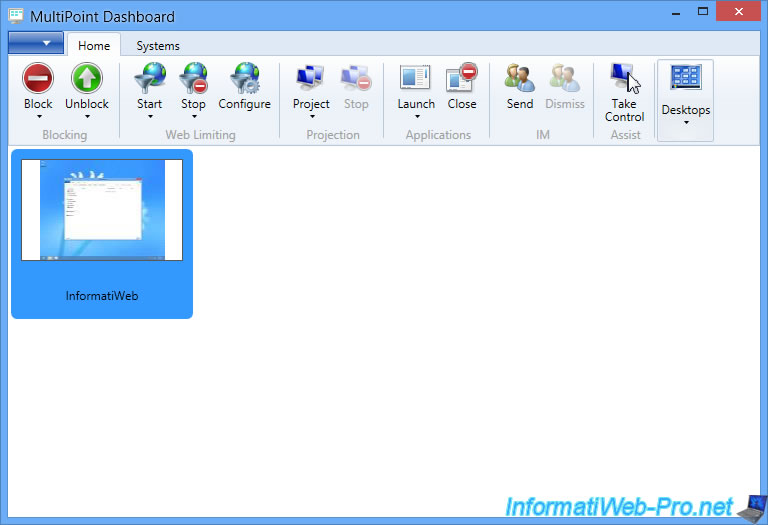
With Windows MultiPoint Server, you can quickly take remote control of a user station.
Indeed, just select the station of the desired user, then click on Take Control.
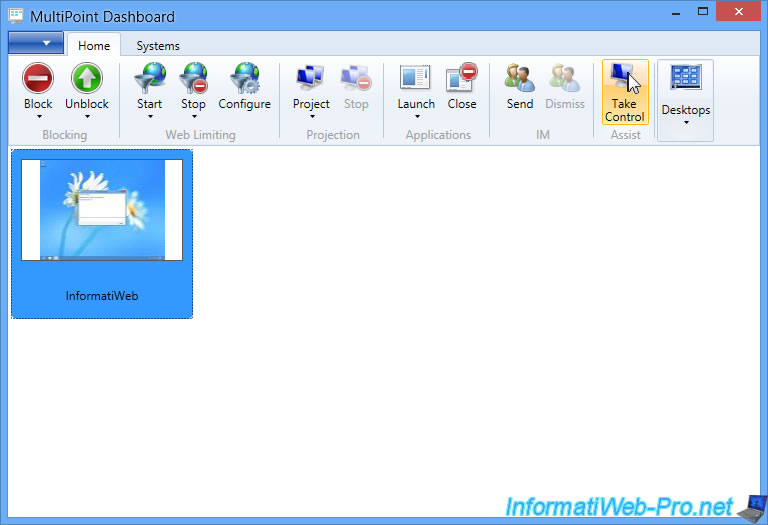
This will give you access to the user's session.
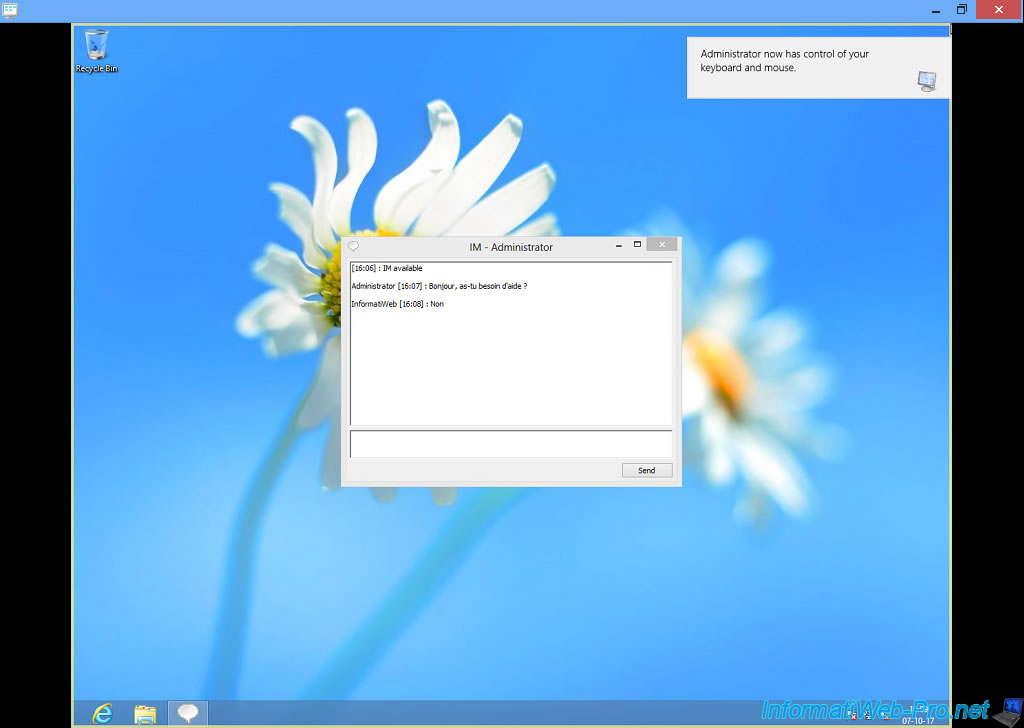
The user will of course be warned of this remote control (as you can see at the top right of the image).

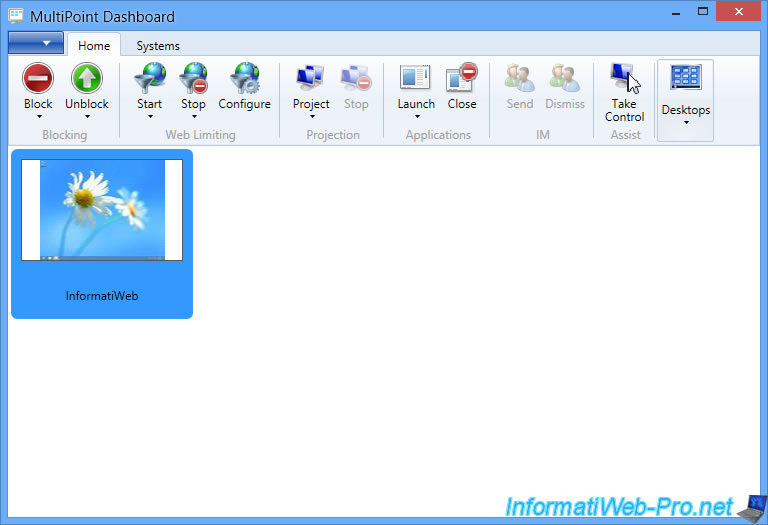
14.7. Change the display type of stations
If you wish, you can also change the size of the thumbnails below.
![]()
14.8. System configuration and disabling internal messaging
In the "Systems" tab, you will find your WMS server.
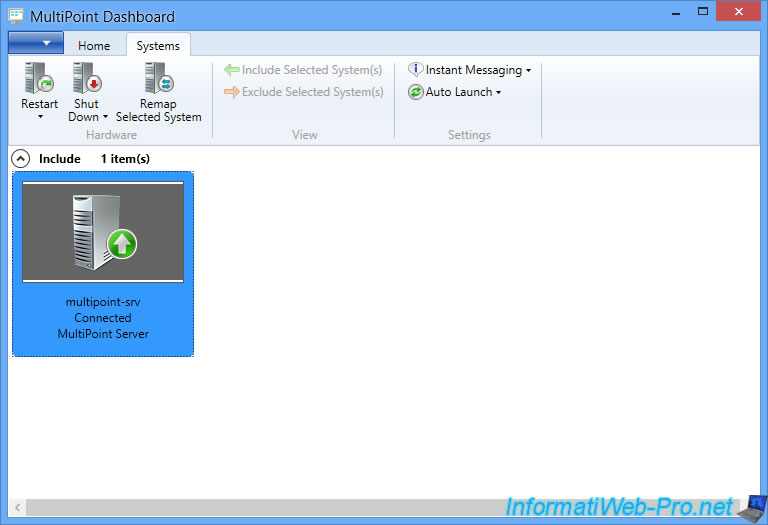
And you can disable the internal Instant Messaging if you wish.

Once disabled, the options of the "IM" section will be grayed out.
15. Bonus : assign a different IP address to each user station
As you noticed in step "10. Testing User Sessions", by default, all users will share the same LAN IP address.
This can be problematic if you want to identify each user separately (on an intranet site for example).
To overcome this problem, Windows MultiPoint Server provides an option to assign a different LAN IP address for each user station.
To enable this option, start the "MultiPoint Manager" program and click on "Edit server settings".
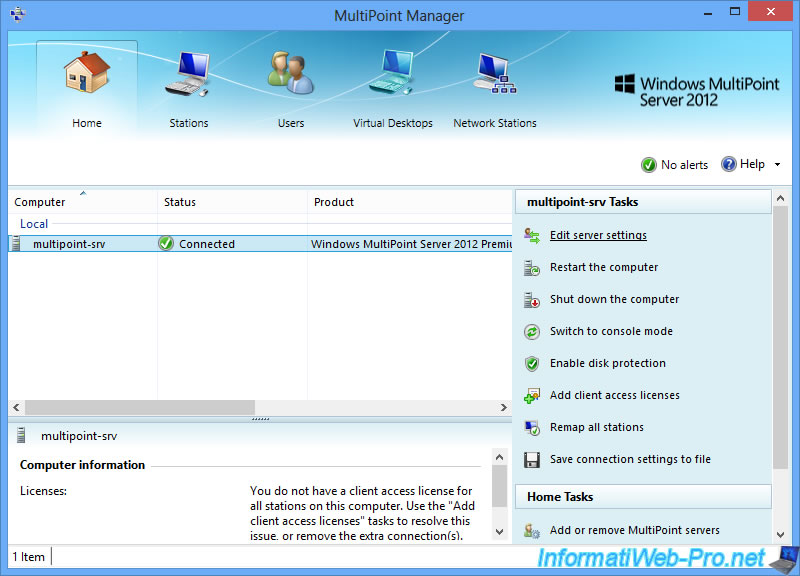
Check the "Assign a single IP to each station" box and click OK.

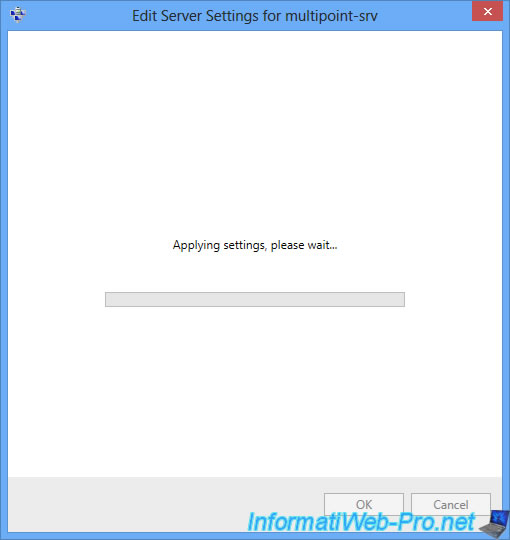
Windows applies the settings.
However, you will have to restart your MultiPoint Server so that each user station will receive a different IP address.
Indeed, even restarting only the client stations, this change will not be used. It's therefore mandatory to restart the server to enable this option.

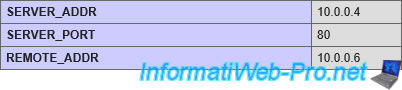
After rebooting, you will find that the user stations now have 2 local IP addresses :
- the IP address of the server : 10.0.0.101
- an additional IP address assigned by the MultiPoint server : 10.0.0.6
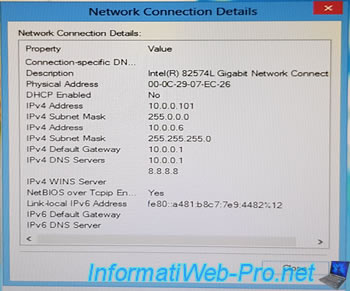
If you have a web server on your local network, you will see that your web server will only see the additional IP address of the user (10.0.0.6 in our case) and not that of the MultiPoint server (10.0.0.101 in our case ).
Share this tutorial
To see also
-
Windows Server 2/12/2018
WMS 2012 - Enable the Disk Protection
-
Windows Server 3/24/2018
WMS 2012 - Join virtual desktops to an AD
-
Windows Server 2/21/2018
WMS 2012 - Joining an AD and use roaming profiles
-
Windows Server 2/3/2018
WMS 2012 - Manage desktop computers with the MultiPoint Connector
No comment