Install and secure a complete mail server (Mail, SMTP, Auth by SASL, IMAP, POP3, webmail, TLS and SSL) on Debian
- Linux
- 25 February 2015 at 15:52 UTC
-

- 5/5

14. Generate or buy SSL certificates
To secure the different messaging protocols, you have 2 options :
- Install a CA on your server to avoid paying SSL certificates.
To do this, follow this : Debian / Ubuntu - Create a root certification authority (Root CA) - Request valid certificates free of charge from the "StartSSL" certification authority : Secure your website for free with StartSSL.
- Buy valid certificates from a well-known authority as : Symantec SSL, GeoTrust, ...
Whatever the solution used, we will assume that the certificates you use will not cause validity problems. If you choose one of the proposed solutions, you will not have problems.
However, if you choose to use your own CA, be sure to import the certificate from your CA in trusted authorities of client devices (computer, smartphone, tablet, ...) for your certificates are considered valid.
Now that you know how to obtain valid SSL certificates, we can go to the next step.
15. Secure the webmail over HTTPS
Edit the "/etc/apache2/sites-available/webmail" VirtualHost created in step 7 of the tutorial to enable the https protocol of this VirtualHost.
To do this, follow our tutorial : "Debian / Ubuntu - Secure your Apache web server (HTTPS) using SSL".
At step 5 of the tutorial mentioned above, we recommend you to add the redirection : port 80 => port 443. Thus, users who arrive using the "http" protocol will be automatically redirected to the version using the protocol "https ".
16. Secure SMTP over TLS
To secure SMTP with TLS, simply change the "/etc/postfix/main.cf" file by adding and / or editing the following lines :
Plain Text
smtp_use_tls = yes
smtp_tls_note_starttls_offer = yes
smtpd_tls_auth_only = no
smtpd_use_tls = yes
smtpd_tls_cert_file=/etc/ssl/certs/subdomains-cert.pem
smtpd_tls_key_file=/etc/ssl/private/subdomains-key.pem
#smtpd_tls_CAfile = /usr/lib/ssl/misc/demoCA/cacert.pem
smtpd_tls_loglevel = 1
smtpd_tls_received_header = yes
smtpd_tls_session_cache_timeout = 3600s
tls_random_source = dev:/dev/urandom
Note : Because our SMTP server is accessible through the "smtp.informatiweb-tuto.net" address in our case, we used our SSL certificate valid for subdomains (common name : *.informatiweb-tuto.net).
Then, restart Postfix.
Bash
service postfix restart
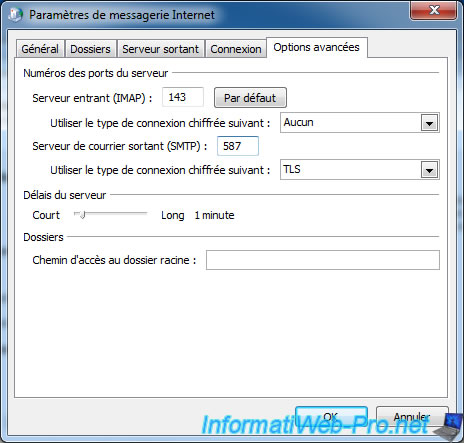
Finally, change the SMTP settings in your email client to use port 587 (submission port) with TLS encryption.
17. Secure IMAP and POP3 over SSL
To secure IMAP and POP3 of courier, install these two packages :
Bash
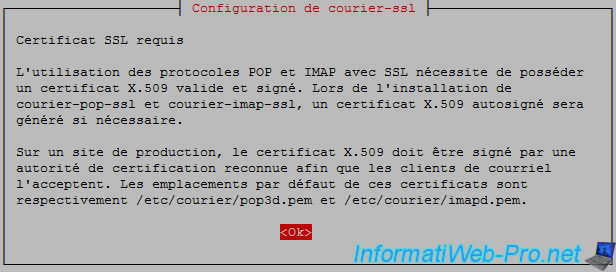
apt-get install courier-imap-ssl courier-pop-ssl
During installation, a message appears to alert you that SSL certificates are required.
Instead of changing the default certificates, we will modify configuration files "courier-imap-ssl" and "courier-pop-ssl" to use our "subdomains-cert.pem" SSL certificate.
According to the documentation of the "DigiCert" certification authority, the SSL certificate that we will use should look like this:
Plain Text
-----BEGIN CERTIFICATE-----
...
-----END CERTIFICATE-----
-----BEGIN PRIVATE KEY-----
...
-----END PRIVATE KEY-----
To do this, grab the "CERTIFICATE" part of the file "/etc/ssl/certs/subdomains-cert.pem" and the "PRIVATE KEY" part of the file "/etc/ssl/private/subdomains-key.pem" and paste all in a "subdomains-cert-pack.pem" file.
In our case, our file is located here : /etc/ssl/certs/subdomains-cert-pack.pem
Once created, edit the file "/etc/courier/imapd-ssl" and "/etc/courier/pop3d-ssl" like this:
Plain Text
TLS_CERTFILE=/etc/ssl/certs/subdomains-cert-pack.pem
And uncomment the line :
Plain Text
TLS_PROTOCOL="TLS1_1:TLS1:SSL3"
For safety, the file that contains the certificate and private key must be accessible only by root.
To do this, change the owner of that file to "root" and give all rights to the owner only.
Bash
chown root:root /etc/ssl/certs/subdomains-cert-pack.pem
chmod 700 /etc/ssl/certs/subdomains-cert-pack.pem
Finally, restart "courier-imap-ssl" and "courier-pop-ssl" services.
Bash
service courier-imap-ssl restart
service courier-pop-ssl restart
Now you can retrieve your mails through IMAPS (IMAP secured with SSL).

or POP3S (POP3 secured with SSL).
18. Reminder of the configuration parameters
Here are the port numbers and options to use :
- SMTP : port 25
- SMTP with authentication : port 587 / Check the box "My outgoing server (SMTP) requires authentication"
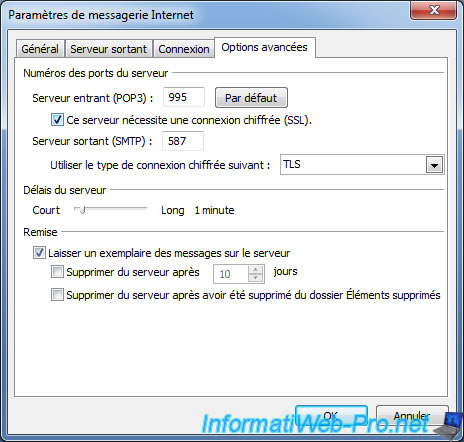
- SMTPS (SMTP secured with TLS) : port 587 / Connection encrypted with TLS
- IMAP : port 143
- IMAPS : port 993
- POP3 : port 110 / Preferably, check the box : "Leave a copy of messages on server".
- POP3S : port 995 / Check the boxes "This server requires an encrypted connection (SSL)" and "Leave a copy ...".
Credentials are identical for the three protocols (POP3, IMAP and SMTP) with and without security.
Of course, it's recommended to use SMTPS, POP3S and IMAPS if possible. If this isn't possible, connect to the webmail using https. Thus, your connection to the server is secured by SSL.
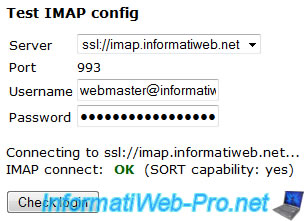
19. Optional : Use IMAPS and SMTPS with RoundCube
This part is optional if the webmail is on the same server as the IMAP server and SMTP server. Nevertheless, it is essential if the webmail is on another server.
To use the IMAPS and SMTPS with RoundCube, restart the RoundCube installation by typing the address: http://webmail.your-domain.net/installer/
In the "IMAP Settings" part, specify the following values:
- default_host : ssl://imap.your-domain.net
- default_port : 993
- username_domain : your-domain.net
Don't use "localhost" as the domain name. Otherwise, the SSL certificate will not be valid. In our case, our SSL certificate is valid for : *.informatiweb-tuto.net
In the "SMTP Settings", specify the following values :
- smtp_server : tls://smtp.your-domain.net
- smtp_port : 587 (or 465 but the standard hope that we always use the 587)
- smtp_user/smtp_pass : Check the box "Use the current IMAP username and password for SMTP authentication".
Here, an overview of SSL and TLS RoundCube tests :

Share this tutorial
To see also
-

Linux 7/21/2017
Debian - Clustering and service balancing (with 2 servers)
-
Linux 3/12/2015
Debian / Ubuntu - Configure a NFS server and a NFS client
-
Linux 9/18/2016
Partition your hard drive with fdisk
-
Linux 1/11/2014
Ubuntu - Install and secure a SSH server
No comment