- VMware
- 23 August 2024 at 07:11 UTC
-

- 1/2

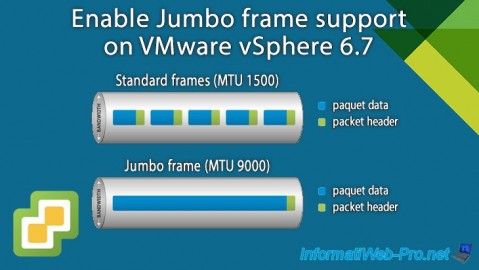
To increase network performance when migrating virtual machines from one VMware ESXi host to another, you can enable Jumbo frame support from the VMware vSphere Client of your VMware vCenter Server (VCSA).
By default, the MTU of network cards and switches is configured at 1500 bytes. Which means that by default, the size of packets sent over the network cannot exceed 1500 bytes.
To reduce the number of packets to send and avoid unnecessarily resending the same headers (such as: source IP address, destination IP address, ...), you can activate support for Jumbo frames.
Which means that you can send packets up to 9000 bytes in size.
- Default MTU
- Configure the virtual hardware of your virtual machines
- Configure the virtual network of your VMware ESXi hypervisor
- Enable Jumbo frame support on Windows (guest OS)
- Network test to verify that Jumbo frame support is correctly enabled
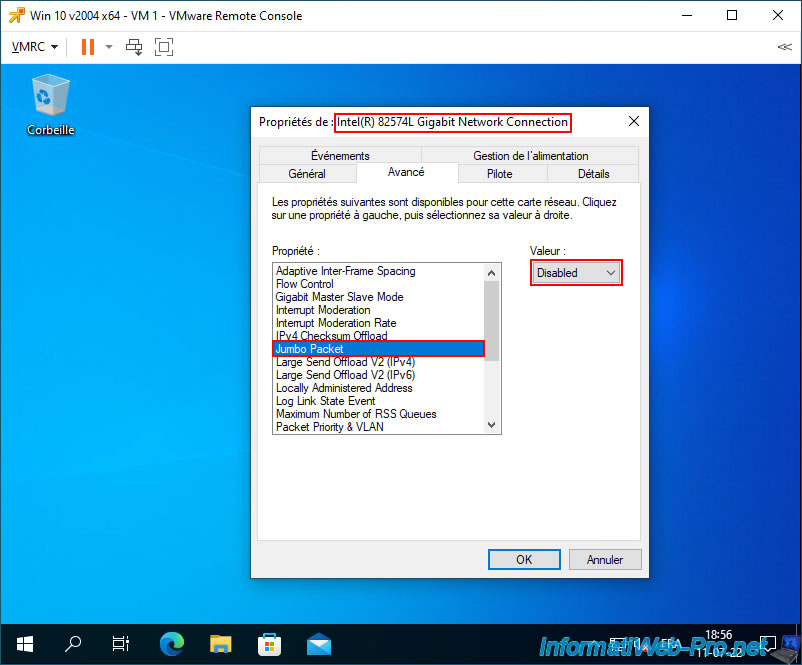
1. Default MTU
If you go to the settings of the virtual network card used by default in Windows, you will notice that support for Jumbo frames (Jumbo Packet) is disabled by default.
Which corresponds to an MTU of 1500 bytes.
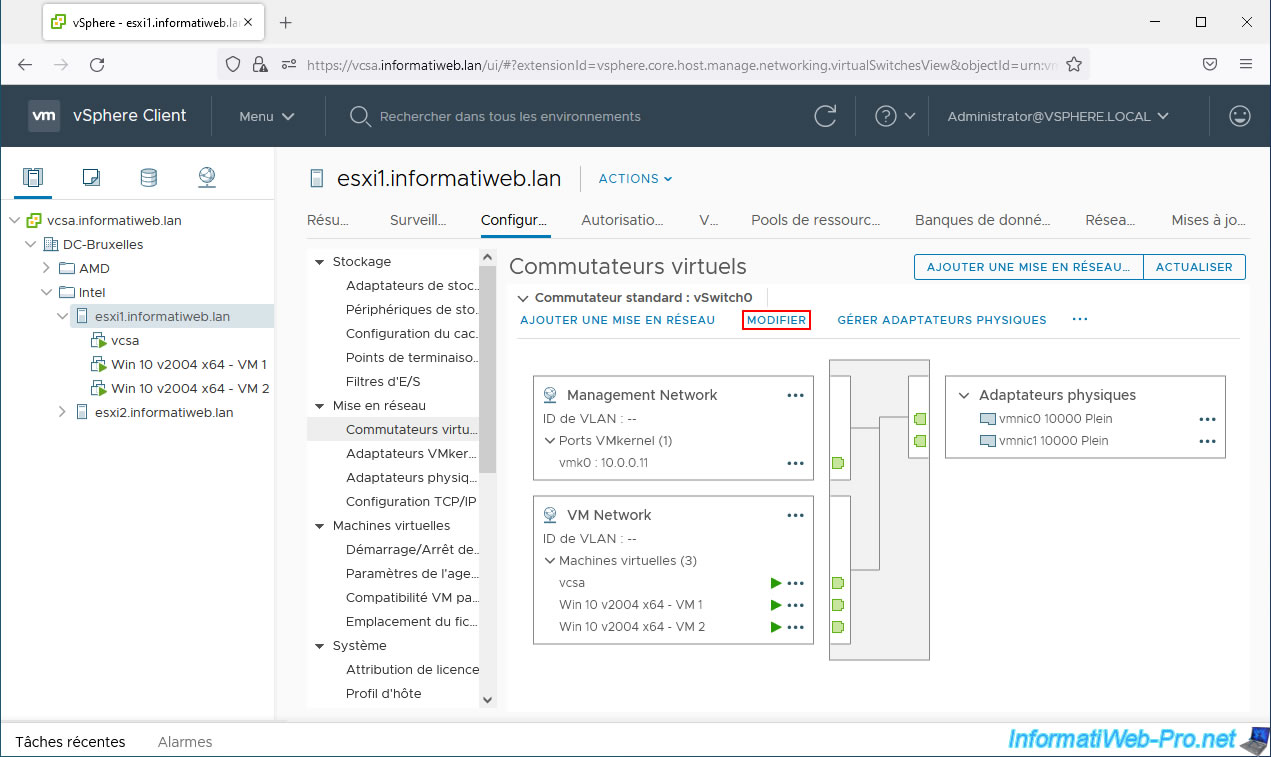
For the virtual switch that this virtual machine is connected to via a port group, you need to select your VMware ESXi host and go to: Configure -> Networking -> Virtual switches.
Next, click the "Edit" link for the desired switch (default: vSwitch0).
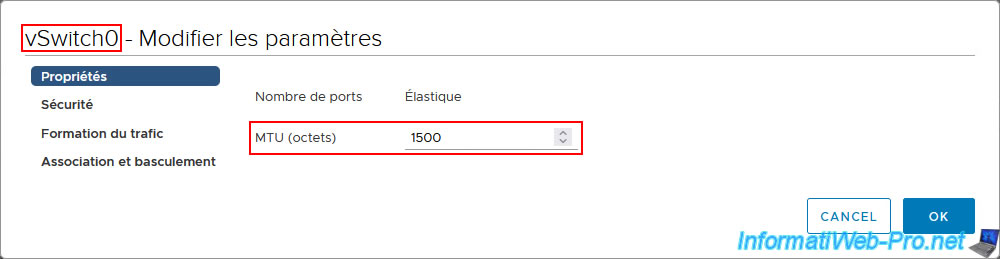
As you can see in its settings, its MTU is 1500 bytes by default.
Which means that Jumbo frame support is disabled by default.
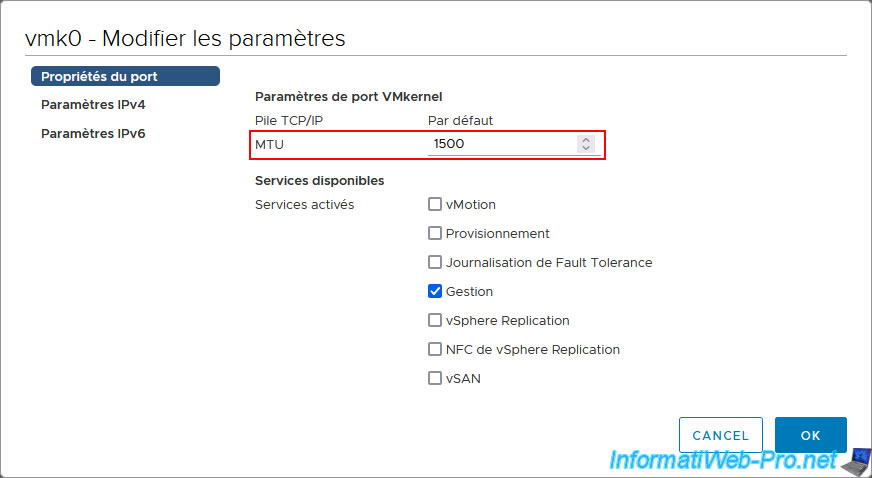
Go to "Configure -> Networking -> VMkernel adapters", select one and click: Edit.
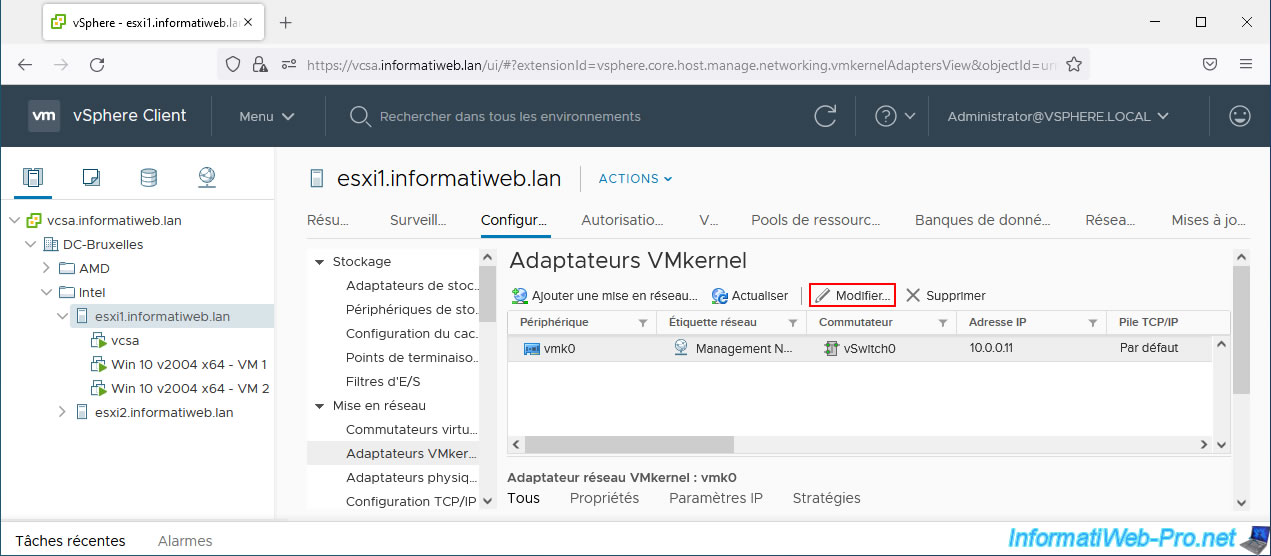
As you can see, an MTU is also defined on these VMkernel adapters.
As before, the default MTU is 1500 bytes, which again means that Jumbo frame support is disabled at the moment.
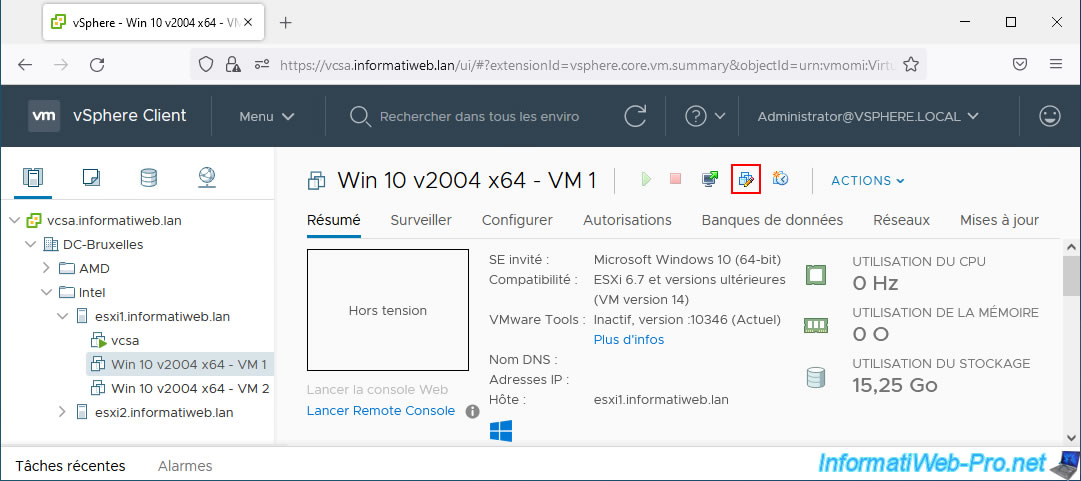
2. Configure the virtual hardware of your virtual machines
To use jumbo frames between your virtual machines, VMware specifies that your virtual machines must use "VMXNET 2 (enhanced)" or "VMXNET 3" virtual network adapters.
To do this, modify the parameters of the virtual machines which must support Jumbo frames.
Warning : the VMXNET 3 network card driver on Windows is only available if VMware Tools is installed.
It is therefore important that the VMware Tools are already installed in your virtual machine before attempting to use this type of virtual network card (or more precisely "paravirtual" in the case of the "VMXNET 3" network card).
Sources :
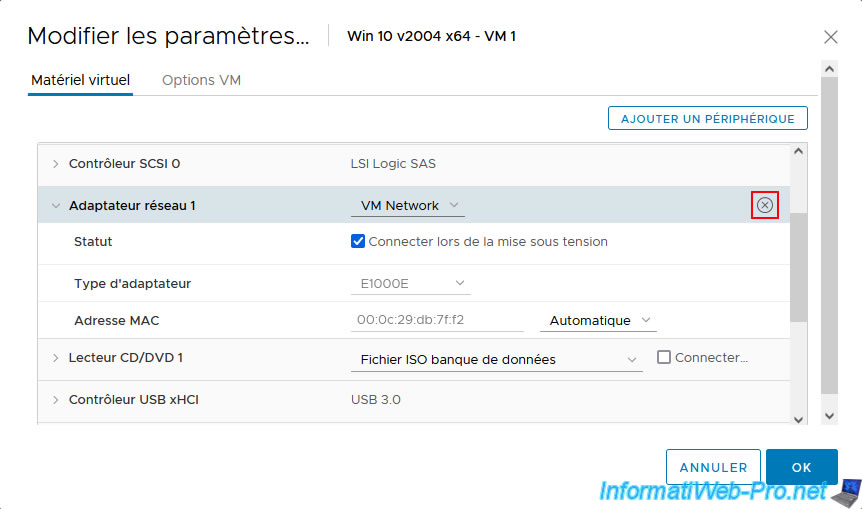
Expand the "Network adapter 1" section to copy the current MAC address of your virtual machine.
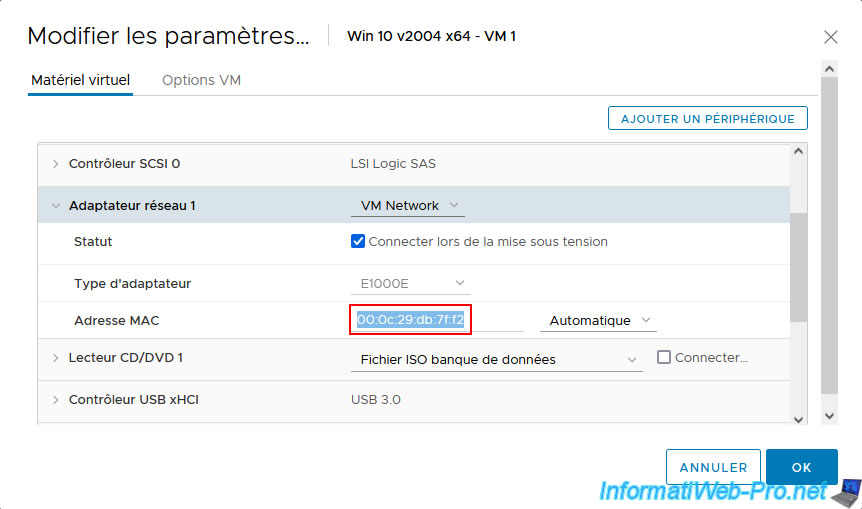
Then, place your mouse to the right of this "Network adapter 1" section and click on the cross that will appear to delete it.
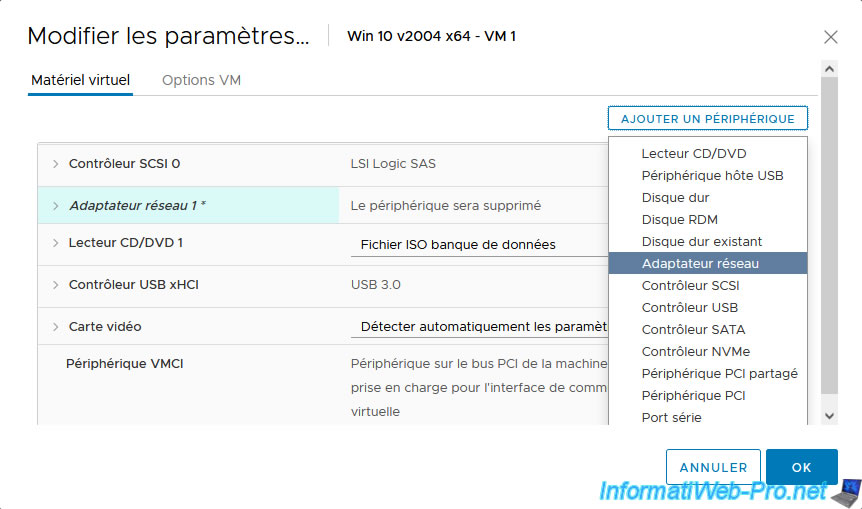
Note: when using the VMware vSphere Client on your VMware vCenter Server (VCSA), you cannot simply change the network adapter type.
Even if the affected virtual machine is turned off.
Click: Add New Device -> Network Adapter.
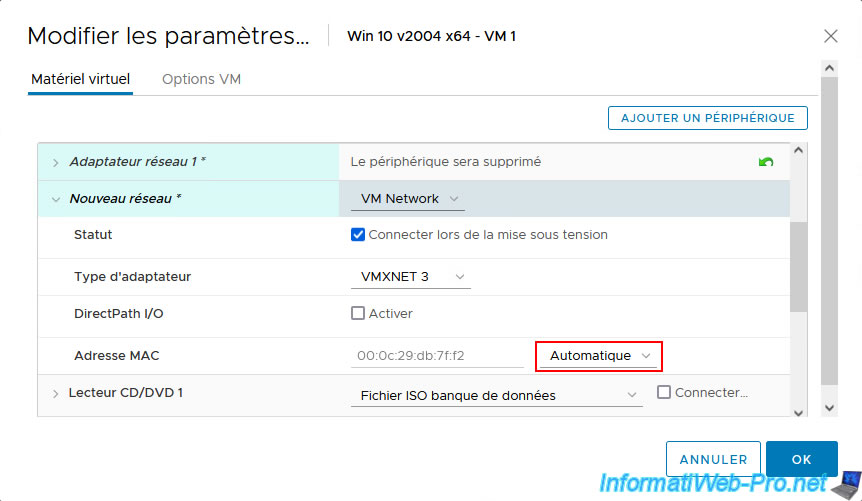
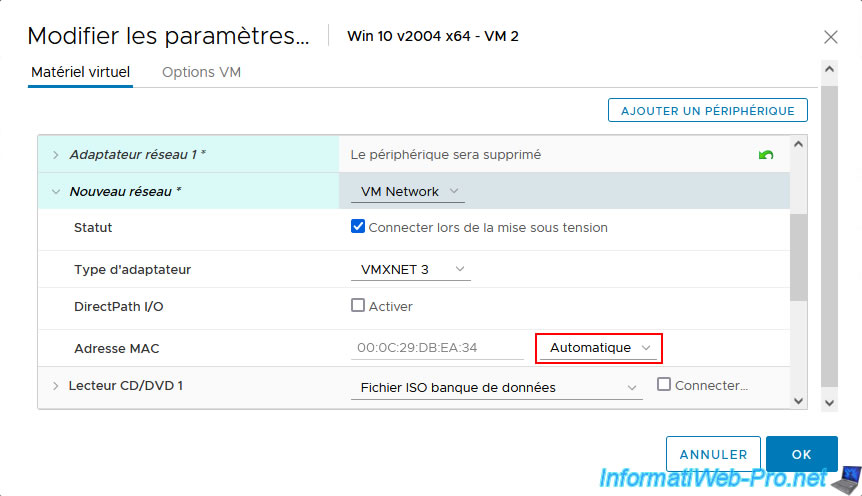
In the "New Network" section that appears:
- select "Adapter Type: VMXNET 3".
- uncheck the "DirectPath I/O" box (which is useless in this case).
- select "Manual" for MAC address and paste the MAC address of your virtual machine copied previously from the deleted network adapter.
Note: when you add a "VMXNET 3" type paravirtual network card, the VMware vSphere Client automatically displays a "DirectPath I/O" box which is checked by default.
As you can check on the "DirectPath IO enabled by default on VMs with VMXNET3" page of the official VMware forum, as well as other places on the Internet, this is due to a bug and this box serves no purpose in this case.
Indeed, "DirectPath I/O" technology normally allows you to pass a physical device to a virtual machine to improve the performance of your virtual machine for this device.
But given that a "VMXNET 3" paravirtual network card is not connected to any physical device, this box is of absolutely no use.
However, it is generally recommended to disable "DirectPath I/O" technology when you do not need it.
Warning: even if you uncheck the "DirectPath I/O" box now, your server may re-enable it at some point for some unknown reason.
Whether this box is checked or not doesn't change anything, but at least you'll know.

Once you have provided the MAC address of your old network adapter, select "Automatic" on the right.
Otherwise, the virtual machine will refuse to start due to a conflict with the MAC addresses reserved by VMware.
Make the same modifications on the 2nd virtual machine (the one that will receive your Jumbo frames) and don't forget to also restore its MAC address to prevent your virtual machine from changing MAC address following the change in network adapter type.
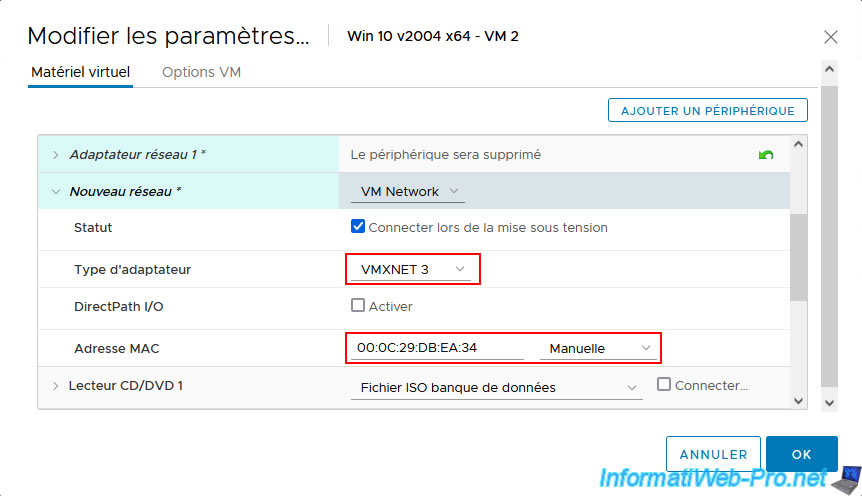
Again, don't forget to reselect the "Automatic" option for the MAC address of your 2nd virtual machine before saving the changes.
Otherwise, the virtual machine will refuse to start due to a conflict of MAC addresses reserved by VMware.
Share this tutorial
To see also
-
VMware 8/21/2024
VMware vSphere 6.7 - Add a VMkernel interface
-
VMware 8/2/2024
VMware vSphere 6.7 - Collect logs with SexiLog
-
VMware 8/9/2024
VMware vSphere 6.7 - Collect logs with VMware Aria Operations for Logs
-
VMware 1/10/2025
VMware vSphere 6.7 - Create a LACP link (LAG)
You must be logged in to post a comment