Use VMware vSphere (6.7) APIs array integration (VAAI)
- VMware
- 27 September 2024 at 11:14 UTC
-

- 2/7

7. Testing the UNMAP primitive
To test the UNMAP primitive in the case of a lab, therefore without having a real storage bay, you will need a free virtual appliance from HPE (HP Enterprise).
Indeed, neither Windows Server nor StarWind Virtual SAN support this UNMAP primitive.
7.1. Download HPE StoreVirtual
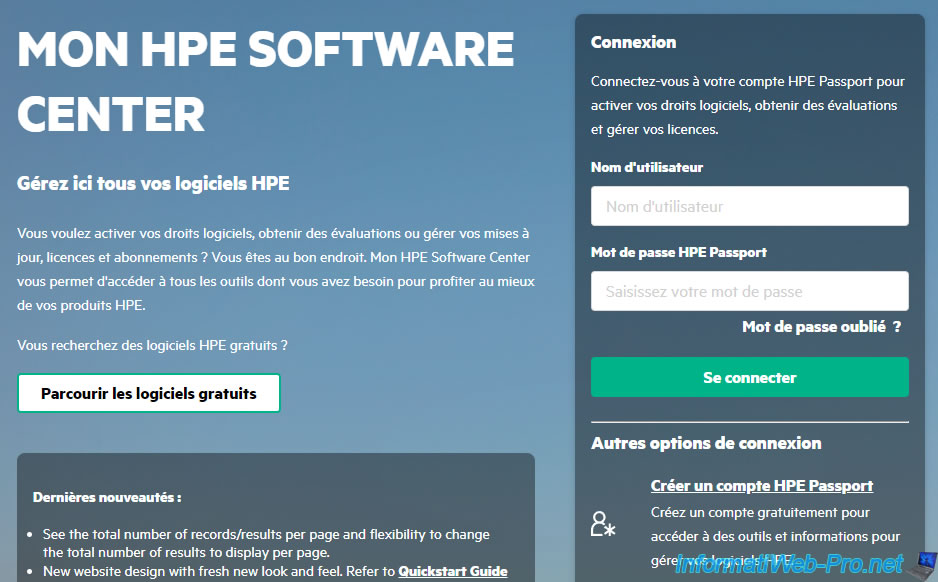
To get started, you will need an account on the HP Enterprise website and to log in there.
If you don't have one, create one for free by clicking the "Create an HPE Passport account" link.
Next, go to the HPE StoreVirtual download page.
On the page below that appears, sort the list by version to download the most recent version.
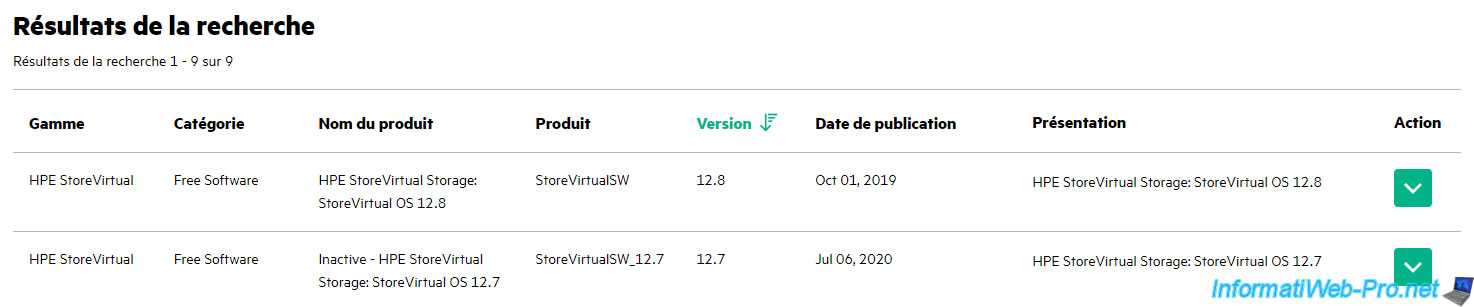
Currently the most recent version is version 12.8.
Click the green button on the right, then click: Get Downloads.
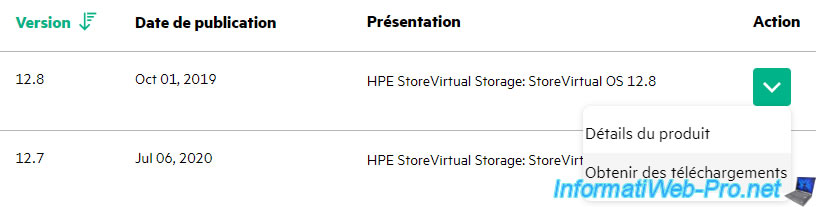
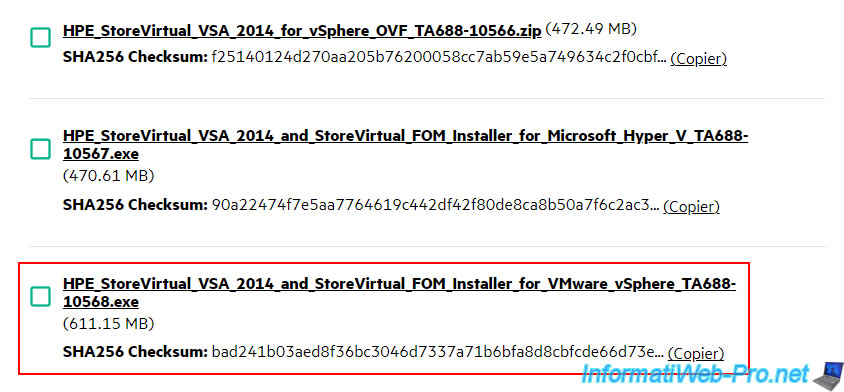
The "HPE StoreVirtual Storage: StoreVirtual OS 12.8" download page appears with a list of files to download.
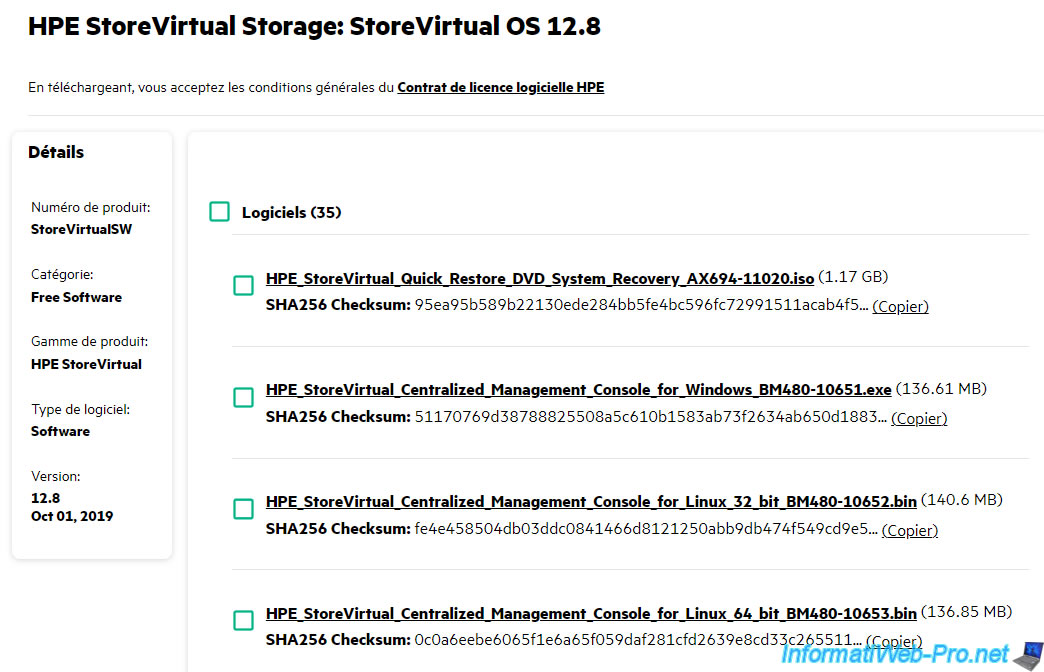
From this list, download the file "HPE_StoreVirtual_VSA_2014_and_StoreVirtual_FOM_Installer_for_VMware_vSphere_TA688-10568.exe".
7.2. Deploy HPE StoreVirtual Storage 12.8
Once the executable file has been downloaded, simply launch it.
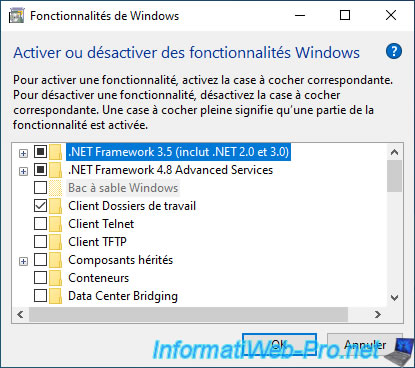
Important : the installer requires .NET Framework 2.0 to work.
So, make sure to enable the ".NET Framework 3.5 (includes .NET 2.0 and 3.0)" feature in Windows before launching it.
Then launch the downloaded file and simply click Unzip.
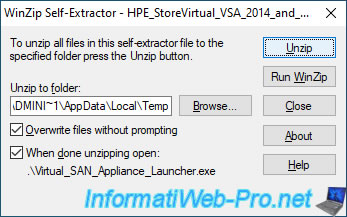
Several files will be unzipped, including "CMC_12.8.00.0102.0_Installer.exe".
Which corresponds to the installation file of the "CMC" console (Centralized Management Console) which will allow you to manage your HPE StoreVirtual Storage server.
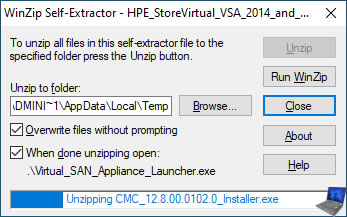
The other unzipped file will be "VSA-disk1.vmdk" which corresponds to the virtual disk of the "HPE StoreVirtual Storage" virtual appliance which will then be deployed on your VMware ESXi host.
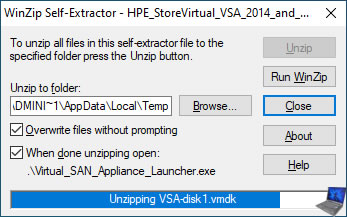
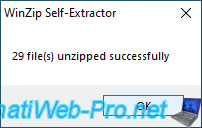
In total, 29 files will be unzipped.
Click OK.
Warning : if the .NET Framework 2.0 is not installed, this error will appear:
Plain Text
ERROR - This installation requires .net 2.0 Framework.
Please install .net 3.5 Framework and then run the installation again.

Press any key to continue.
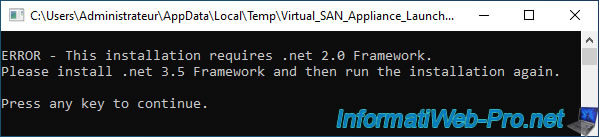
As previously stated, if this error appears, simply enable the Windows feature ".NET Framework 3.5 (includes .NET 2.0 and 3.0)".
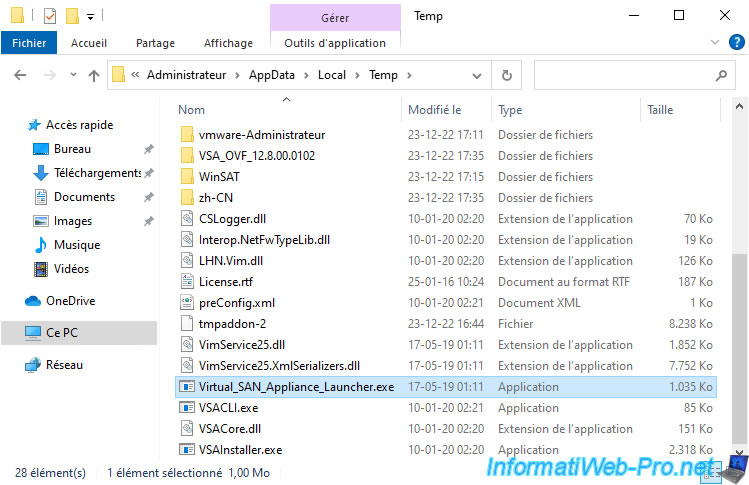
Then, once this Windows feature is enabled, restart the installation by accessing the "%temp%" folder.
Then, by launching the "Virtual_SAN_Appliance_Launcher.exe" file located there.
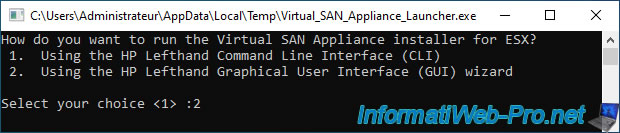
As you can see, you will have the choice between:
- Using the HP Lefthand Command Line Interface (CLI): Start the command line installation.
- Using the HP Lefthand Graphical User Interface (GUI): launch the installation in "graphical interface" mode.
Answer "2" and press Enter.
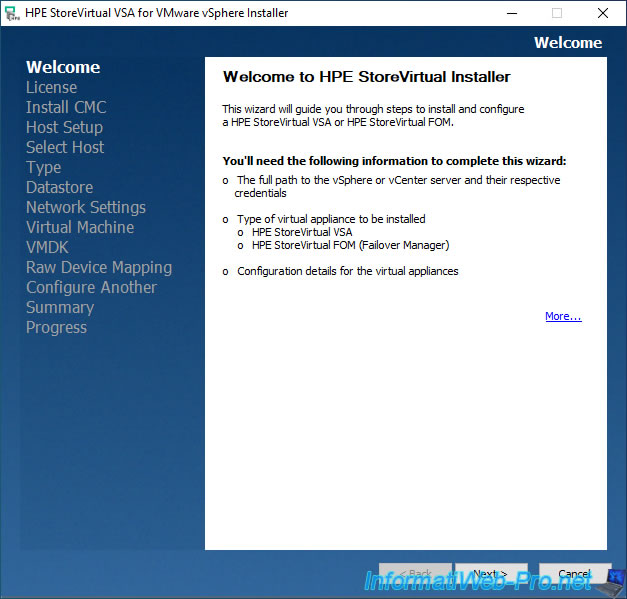
The "HPE StoreVirtual VSA for VMware vSphere Installer" installer appears.
Click Next.
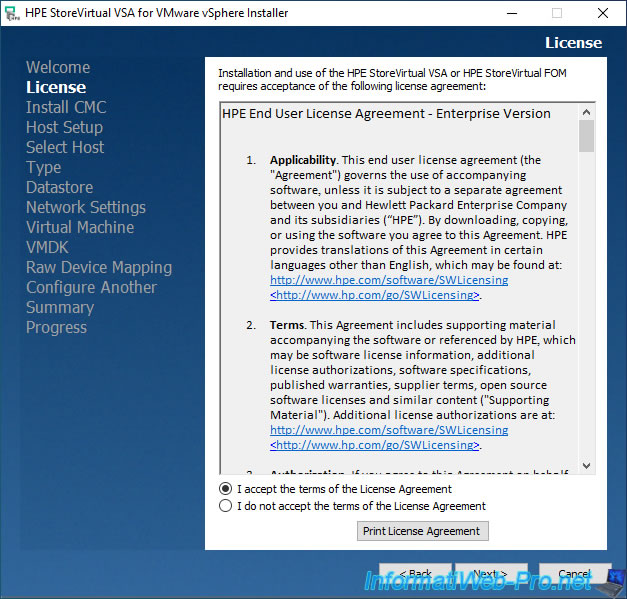
Accept the HPE license agreement.
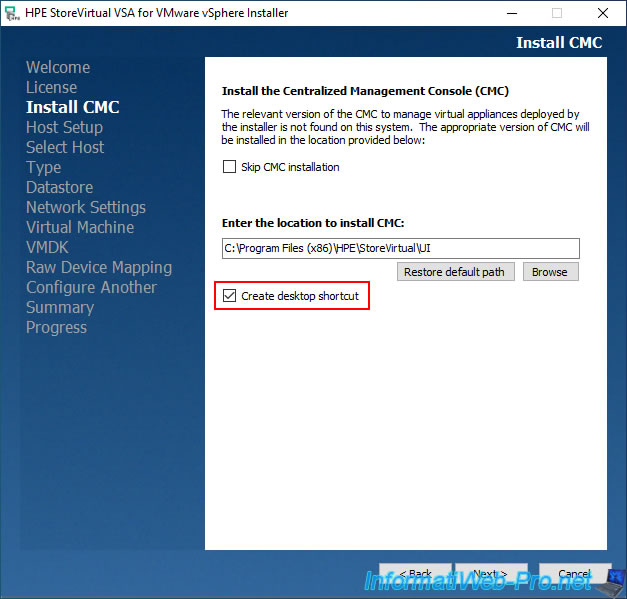
By default, if the "CMC" console is not installed, the installer will install it automatically.
Check the "Create desktop shortcut" box so that a shortcut to this console is automatically created on your desktop.
Note that the installer installs the appropriate version of this console for the version of HPE StoreVirtual VSA that you want to deploy.
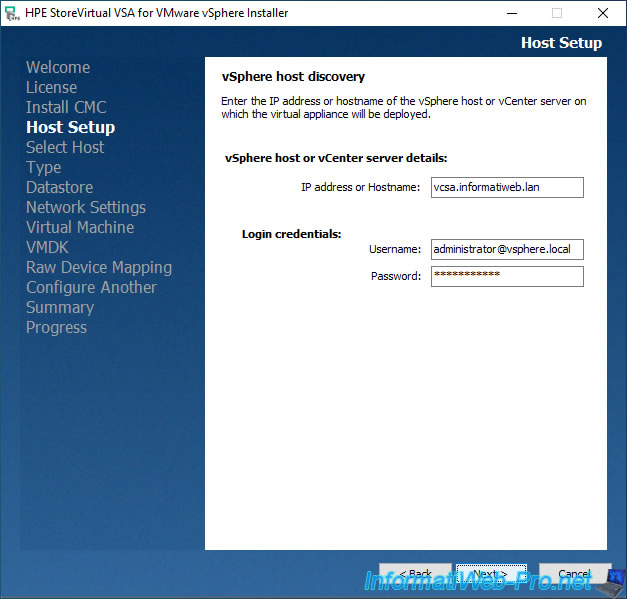
Provide the IP address or domain name of your VMware ESXi host or vCenter Server to which it is linked, as well as the connection information to it (ESXi or vCenter Server).
In our case, we indicated:
- IP address or Hostname : vcsa.informatiweb.lan.
- Username : administrator@vsphere.local
- Password : his password.
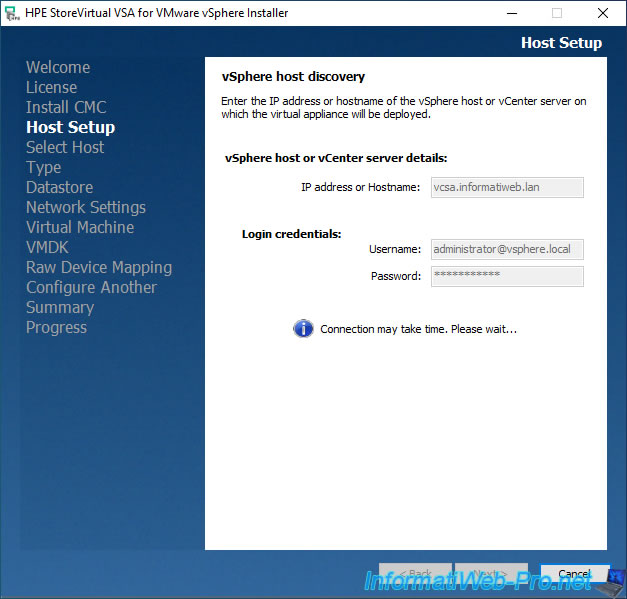
Wait while connecting to your ESXi or vCenter Server.
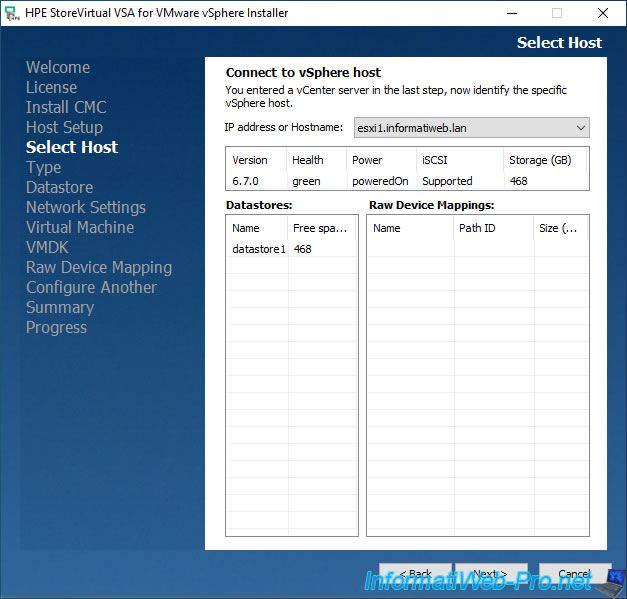
If you specified connection information for a vCenter Server, select the VMware ESXi host where you want to deploy HPE StoreVirtual VSA from the list.
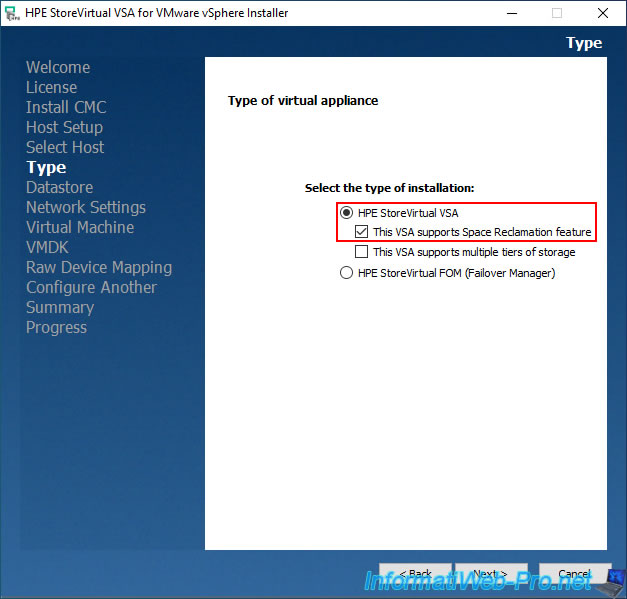
In the "Type of virtual appliance" step, select "HPE StoreVirtual VSA" and check the box "This VSA supports Space Reclamation feature".
Warning : checking this box will not be enough for UNMAP to work.
Indeed, you will also need to enable this feature on your HPE virtual server as you will see later in this tutorial.
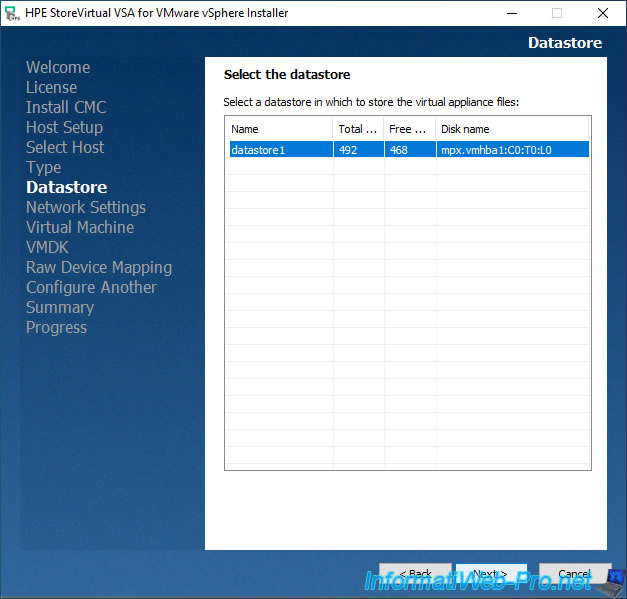
Select the datastore of your VMware ESXi host where you want to store this "HPE StoreVirtual VSA" virtual appliance.
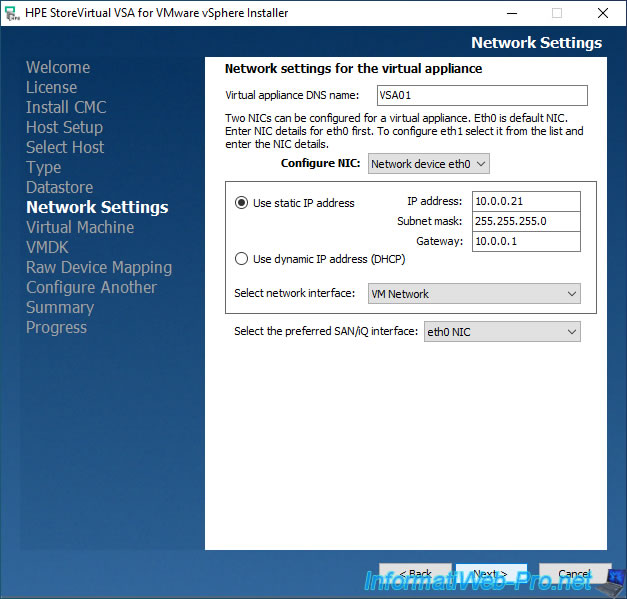
For network configuration, you will notice that 2 network cards can be configured.
However, only one is required and only one can be set as preferred in case you want to use 2.
At this "Network settings for the virtual appliance" step:
- Virtual appliance DNS name: DNS name under which this virtual appliance will appear on the network.
- Configure NIC: Network device eth0. Allows you to configure the network parameters of the "eth0" interface.
- Use static IP address: allows you to define the IP address, subnet mask and default gateway (router) to use.
- Select network interface: Allows you to specify the virtual network to use on your VMware ESXi host.
- Select the preferred SAN/iQ interface: allows you to specify the preferred network interface that will be used (in case you want to use 2).
Default: eth0 NIC.
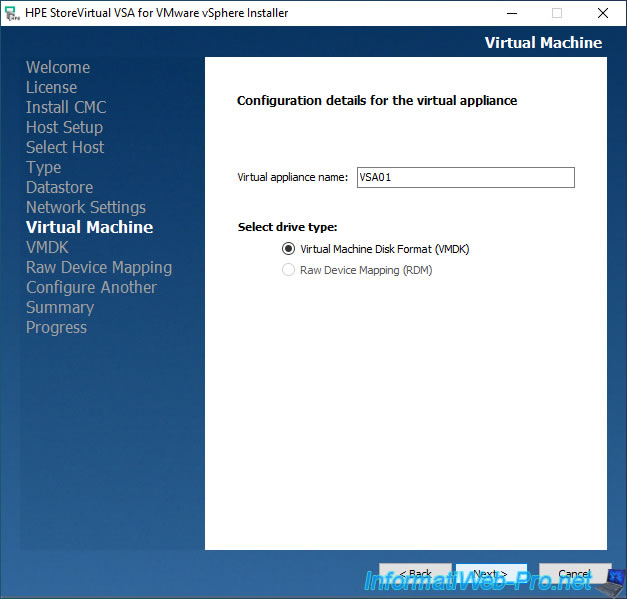
Indicate the name under which the virtual machine will appear on VMware vSphere.
Note that the virtual hard disk will be created in "Virtual Machine Disk Format (VMDK)".
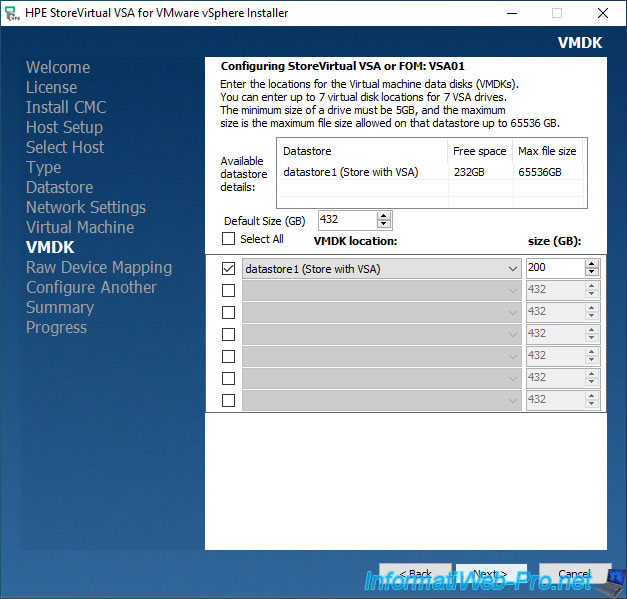
In the "Configuring StoreVirtual VSA or FOM: VSA01" step, you will be able to configure the storage of your HPE virtual server.
In other words, the disks that will be used for storage (iSCSI, for example).
Check the 1st box, select the datastore where you want to create it and indicate its size.
In our case: 200 GB.
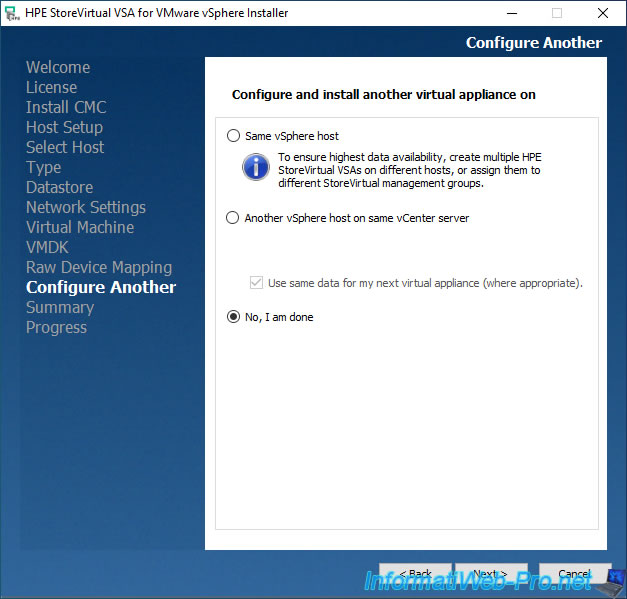
To ensure high availability of this storage server, you can configure a 2nd instance on the same ESXi server or the same vCenter Server.
However, in our case, we will not do this.
So, select "No, I am done" and click Next.
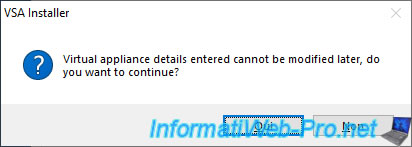
A message appears telling you that the information indicated in the installer cannot be modified.
Click Yes.
Note: you can nevertheless modify them later from the CMC console (but not in a central location as is the case with the installer).
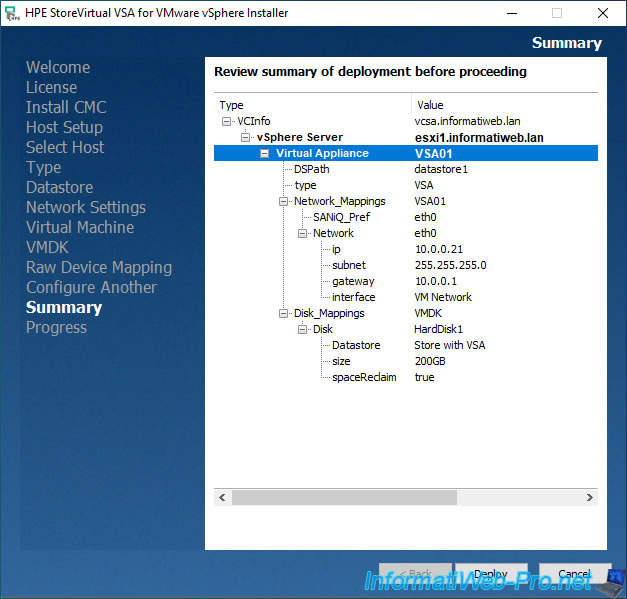
A summary of the HPE StoreVirtual VSA deployment configuration appears.
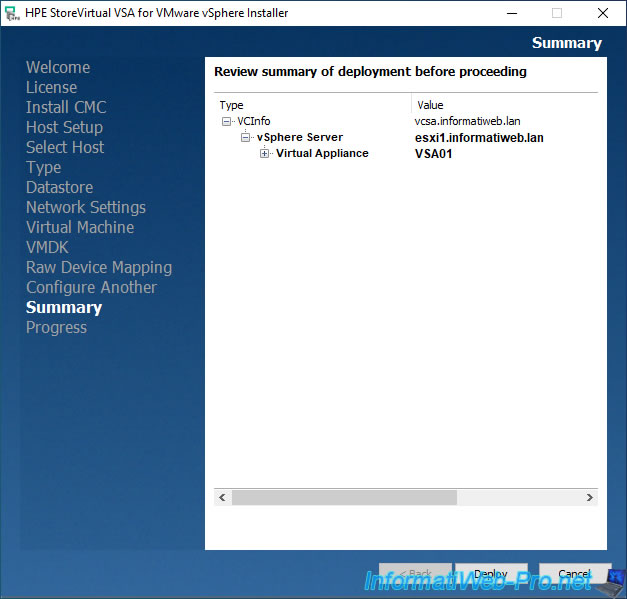
If you deploy all possible nodes, you will also be able to see the network and storage configuration of this virtual appliance.
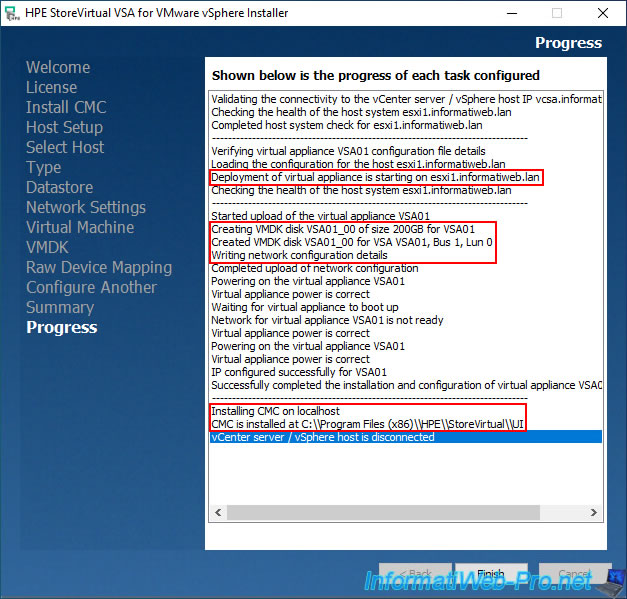
Click Deploy.
Wait while deploying the virtual appliance, configuring its storage and network access, and installing the "CMC" console on your computer.
Once this is completed, the message "vCenter server / vSphere host is disconnected" will appear.
Click Finish.
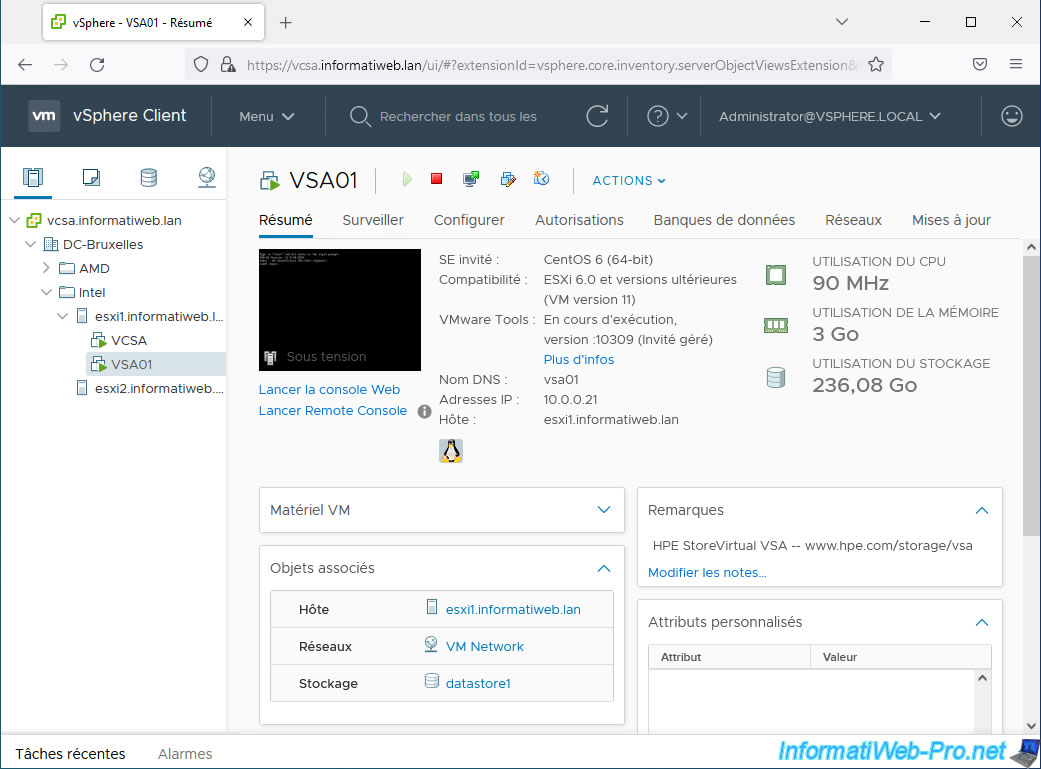
In the VMware vSphere Client, you will see that a new virtual machine named "VSA01" will have appeared.
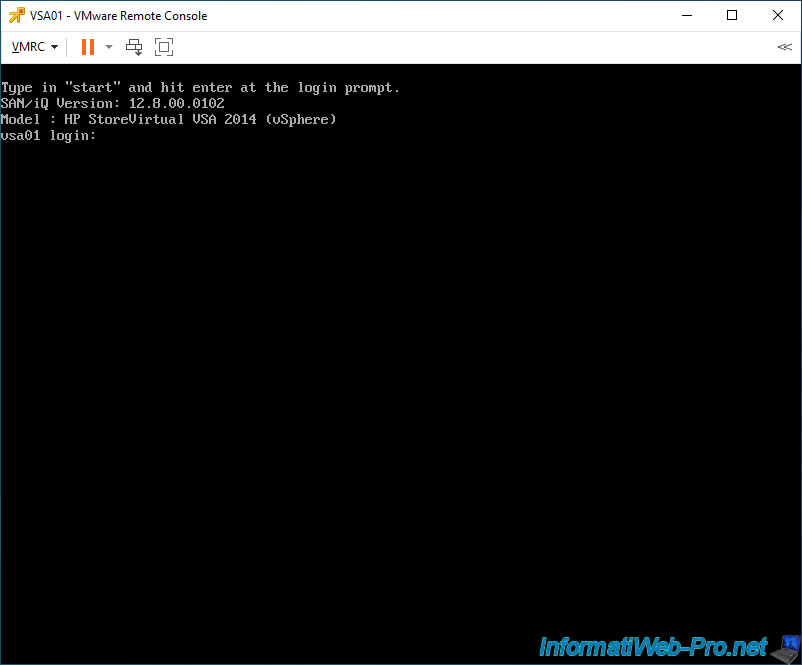
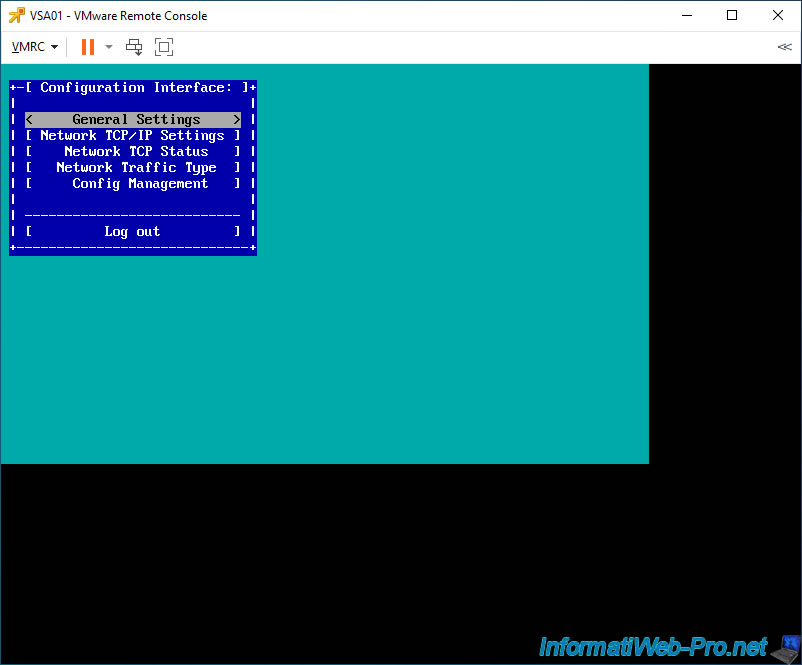
If you open the console of this virtual machine, you will see this appear:
Plain Text
Type in "start" and hit enter at the login prompt.
SAN/iQ Version: 12.8.00.0102
Model : HP StoreVirtual VSA 2014 (vSphere)
vsa01 login:
As indicated in the message displayed there, type "start" and press Enter.
A "Configuration Interface" box will appear with a "Login" option.
Just press Enter.
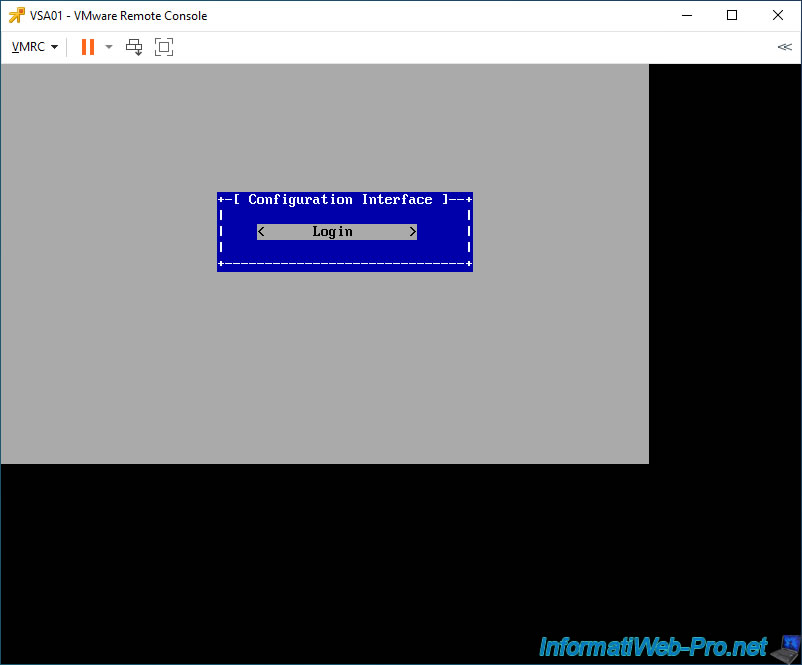
As you can see, you will have access to several options, including the network settings of this VM.
However, we will not use it here, because it will be easier from the CMC console.
Share this tutorial
To see also
-

VMware 5/15/2024
VMware vSphere 6.7 - Add a physical disk to host
-

VMware 9/6/2024
VMware vSphere 6.7 - Configure port binding (iSCSI traffic)
-

VMware 6/13/2024
VMware vSphere 6.7 - Configure Virtual Flash (SSD cache)
-
VMware 12/4/2024
VMware vSphere 6.7 - Create a content library
No comment