Install VMware PowerCli (with or without Internet) to manage your VMware ESXi 7.0 and 6.7 hypervisor from the command line
- VMware
- 06 June 2024 at 18:05 UTC
-

- 2/2

6. Install VMware PowerCLI without Internet (offline) from a zip file
If you need VMware PowerCLI for a computer that doesn't have Internet access and you can't use the method described above, then you will need to download the zip file of the desired version of VMware PowerCLI from the official website of VMware.
To do this, access the "VMware PowerCLI" page, select the desired version and download the proposed "VMware-PowerCLI-xx.x.x-xxxxxxxx.zip" file.
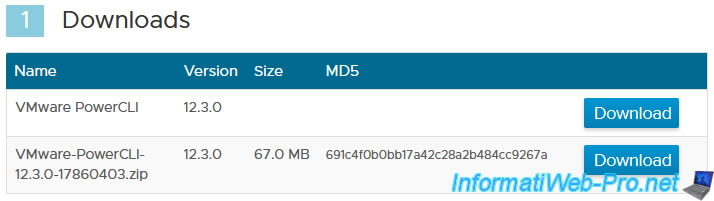
Confirm the download of this zip file.
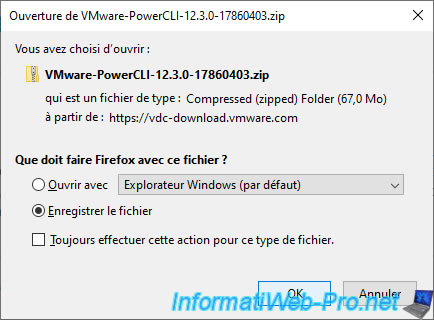
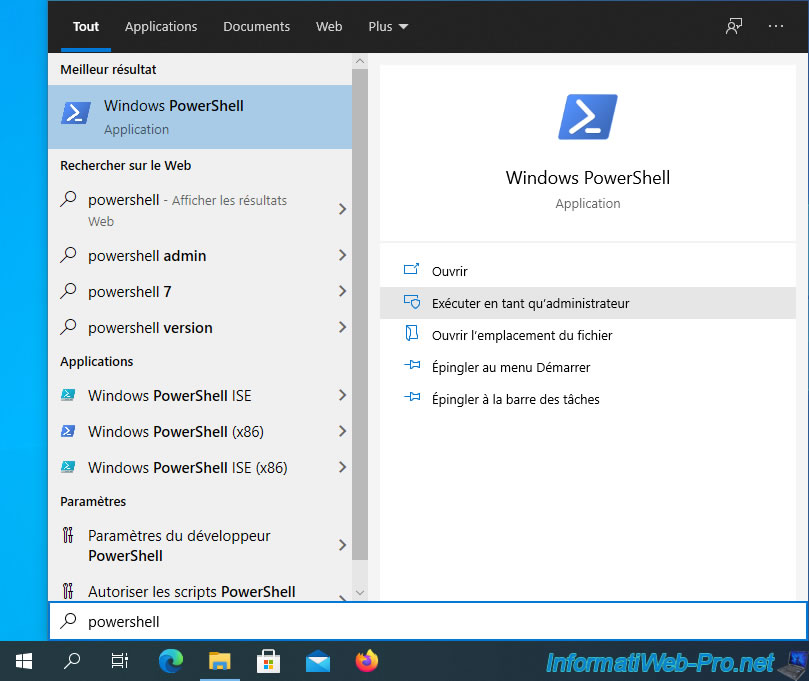
Once the VMware PowerCLI zip file is downloaded, start Windows PowerShell as administrator on the computer that doesn't have Internet access.
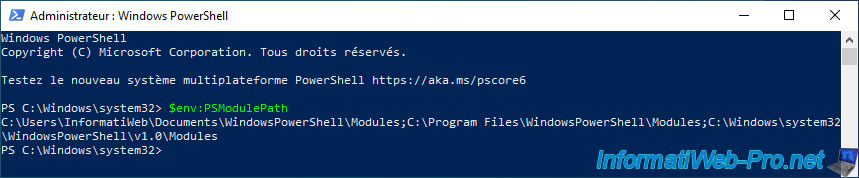
To manually install a module in PowerShell, you need to know which folders it loads modules from.
To find out, just type :
PowerShell
$env:PSModulePath
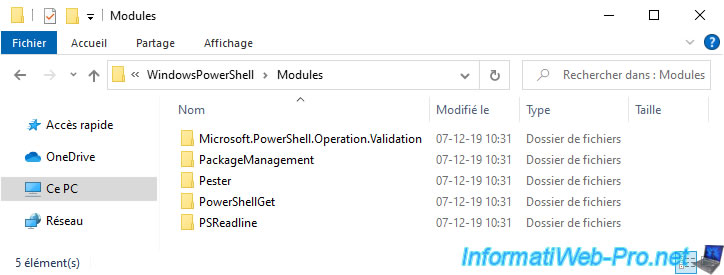
As you can see, by default PowerShell loads modules from :
- a "WindowsPowerShell\Modules" subfolder of the "Documents" folder of the current user
- the "C:\Program Files\WindowsPowerShell\Modules" folder
- the "C:\Windows\System32\WindowsPowerShell\v1.0\Modules" folder
To install the module for the current user only, go to the "WindowsPowerShell\Modules" subfolder present in the "Documents" folder of the current user.
If necessary, create these folders.
Otherwise, go to the "C:\Program Files\WindowsPowerShell\Modules" folder to install the module for all users of the computer / server.
Unzip the previously downloaded "VMware-PowerCLI-xx.x.x-xxxxxxxx.zip" file and copy its content to the desired "Modules" folder.
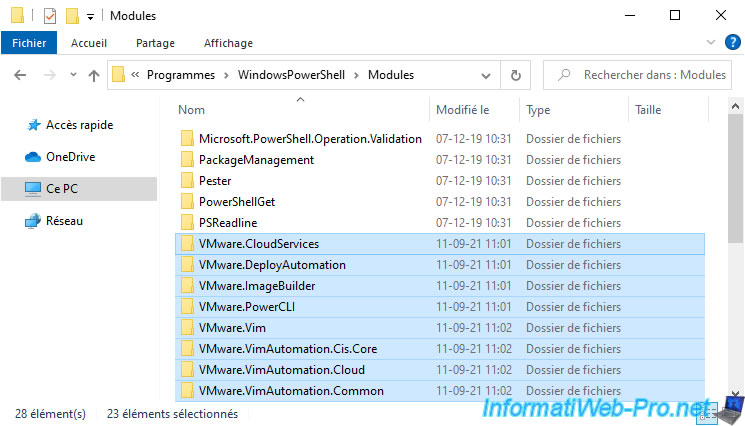
From PowerShell, go to the folder where you pasted all the "VMware.xxxx" folders by typing this command :
Batch
cd C:\Program Files\WindowsPowerShell\Modules
Then, unblock all the files that are there by typing :
PowerShell
Get-ChildItem * -Recurse | Unblock-File
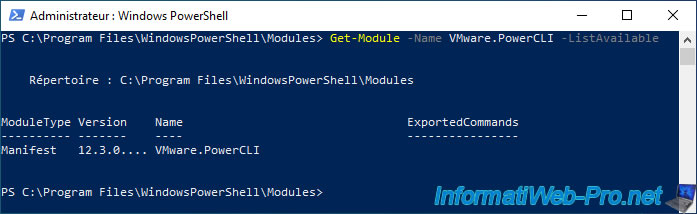
To verify that PowerShell detects this new module, use the command :
PowerShell
Get-Module -Name VMware.PowerCLI -ListAvailable
As you can see, in our case PowerShell found our "VMware.PowerCLI" module in the "C:\Program Files\WindowsPowerShell\Modules" folder.
7. Create desktop shortcut for VMware PowerCLI
Since there is no more installer, the "PowerCLI" shortcut on the desktop is no longer created automatically.
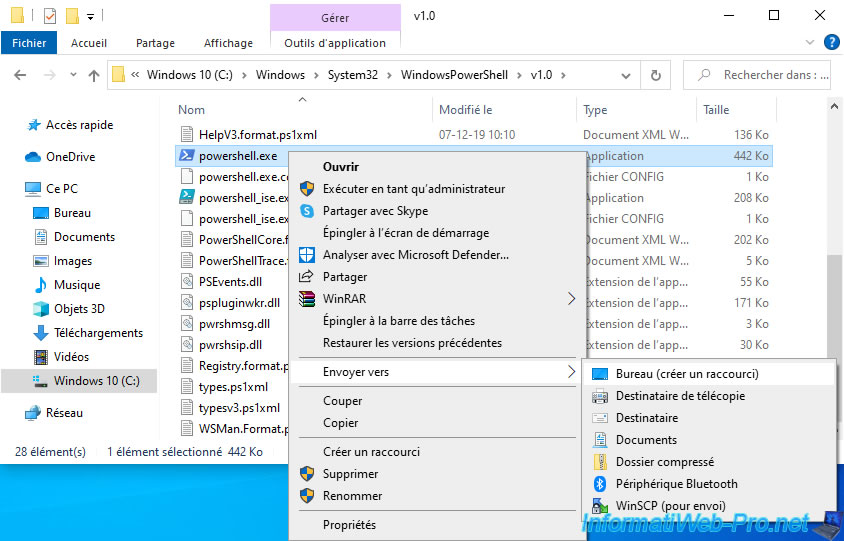
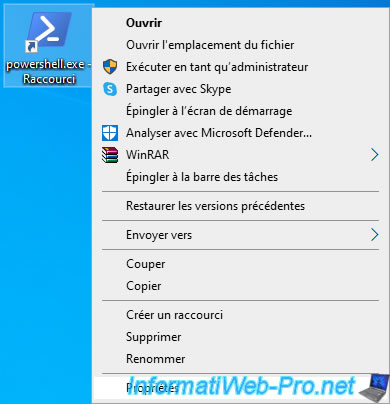
To create it, first create a shortcut to the "powershell.exe" file on your computer.
In our case, WindowsPowerShell is installed in the "C:\Windows\System32\WindowsPowerShell\v1.0" folder.
In this folder, right click "Send to -> Desktop (create shortcut)".
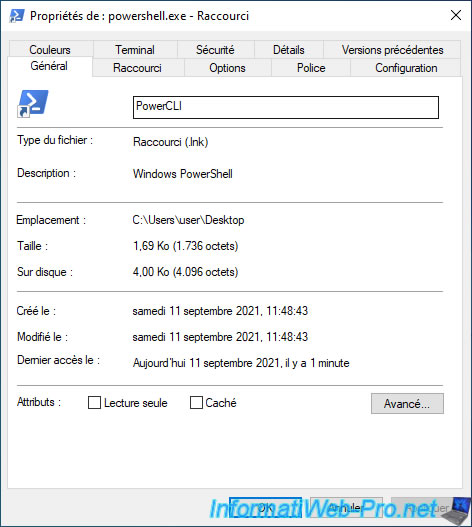
Once the shortcut to powershell has been created on the desktop, right click "Properties" on it to modify it.
In the "General" tab, specify "PowerCLI" in the box to rename this shortcut to "PowerCLI".
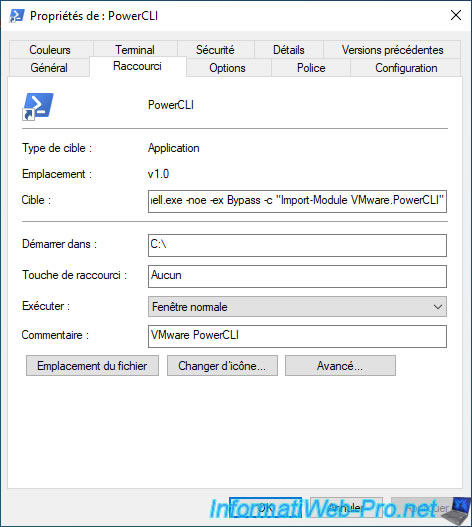
Then, in the "Shortcut" tab, modify these informations :
- Target : add this after the path of the "powershell.exe" file : -noe -c "Import-Module VMware.PowerCLI"
- Start in : C:\
- Comment : VMware PowerCLI
Then, click on OK.
Notes:
- the "-noe" (or "-NoExit") parameter indicates to PowerShell that it should not automatically close the window after the execution of the command given using the "-c" (or "-Command") parameter.
- for more information on PowerShell settings, refer to Microsoft documentation.

Depending on the PowerShell execution policy currently set, you might see an error :
Plain Text
Import-Module: Could not load file ... VMware.VimAutomation.Sdk.psm1, because running scripts is disabled on this system. For more information, see about_Execution_Policies at https//go.microsoft.com/fwlink/?LinkID=135170.
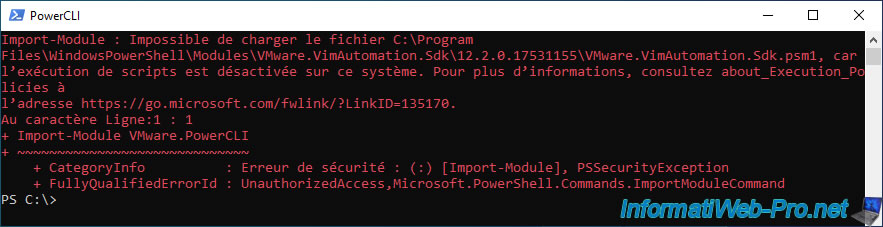
Several execution policies exist, but to disable this blocking, you can add the "-ex Bypass" parameter.
Which gives these parameters for the target : -noe -ex Bypass -c "Import-Module VMware.PowerCLI".
The PowerShell console will therefore be launched by disabling this blocking, but only in this console.
This will therefore not alter the configuration of your computer or server.
Note also that the execution strategy used by default is not the same on a computer running Windows (Restricted) and on a server running Windows Server (RemoteSigned)
Which makes sense.
To know the possible values, refer to the "Set-ExecutionPolicy" page of the official Microsoft documentation.
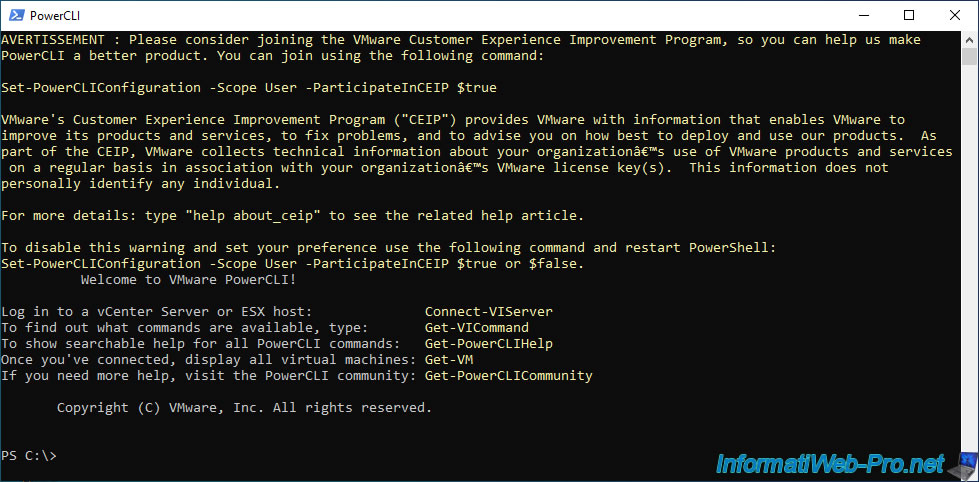
This time, VMware PowerCLI will appear with yellow text.
Wait about ten seconds.
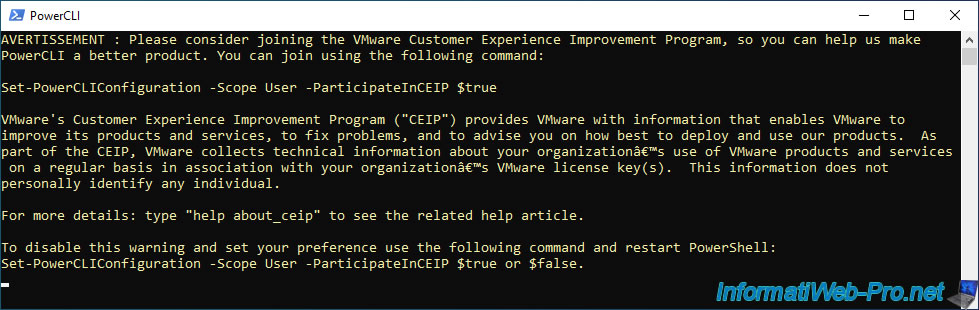
To deactivate it, you just have to join or not the improvement program of this program (CEIP).
To not join it, type this command :
PowerShell
Set-PowerCLIConfiguration -Scope User -ParticipateInCEIP $false
About ten seconds later, the "Welcome to VMware PowerCLI" message will appear with 5 useful PowerCLI commands.
Of which, the 1st "Connect-VIServer" command allows you to connect to a VMware ESXi hypervisor or to a VMware vCenter Server.
Note that the VMware PowerCLI welcome message appears after importing the "VMware.PowerCLI" module.
However, from the moment when the "VMware.PowerCLI" module is located in a "Modules" folder known by PowerShell, PowerShell will be able to automatically load the packages necessary for the execution of the desired PowerCLI commands without you having to run the "Import-Module VMware.PowerCLI" command.
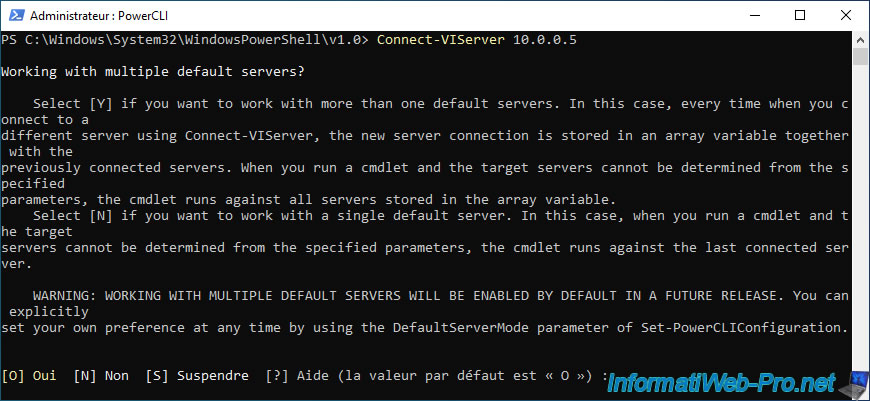
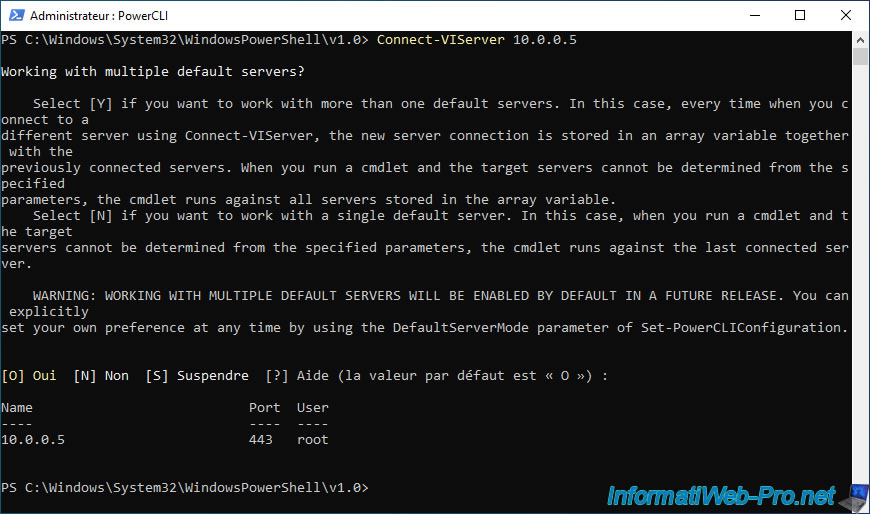
For the example, here is how to connect to your VMware ESXi hypervisor.
Use the "Connect-VIServer" command by specifying its IP address as a parameter.
PowerShell
Connect-VIServer 10.0.0.5

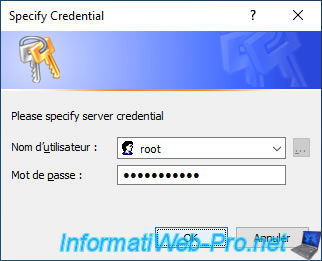
A few seconds later, a small "Specify Credential" login window will appear.
Log in as "root" as you would with the web client (VMware Host Client) or the thick client (VMware vSphere Client).
If your VMware ESXi hypervisor is still using the default self-signed certificate or the certificate is invalid, the connection will fail and you will receive the error below.
Plain Text
Connect-VIServer : 06-06-24 16:53:18    Connect-VIServer                Error: Invalid server certificate.
Use Set-PowerCLIConfiguration to set the value for the InvalidCertificateAction option to Prompt if you'd like to connect once or to add a permanent exception for this server.
Additional Information: Could not establish trust relationship for the SSL/TLS secure channel with authority '10.0.0.5'.

If the above error message appears, use the "InvalidCertificateAction" option to define how PowerCLI should behave when your hypervisor is secured with an invalid (or self-signed) certificate.
Possible values are:
- Unset : default value. So "Fail".
- Fail : do not connect to the hypervisor if the certificate is not valid or self-signed.
- Ignore : ignore certificate problems.
This is useful in the case of a lab where you usually use the self-signed certificate generated by default during the installation of VMware ESXi. - Warn : display a warning, but allow the connection.
- Prompt : ask what to do if the certificate is not valid on the hypervisor you want to connect to.
In case of a VMware ESXi hypervisor used in a lab (or at home), use the "Ignore" value to allow connections ignoring the invalid certificate issue.
Important : in business, you should use a valid certificate from your own certificate authority (created on Windows Server or on Linux) and use the "Prompt" value to avoid connecting to your hypervisor if the certificate is invalid.
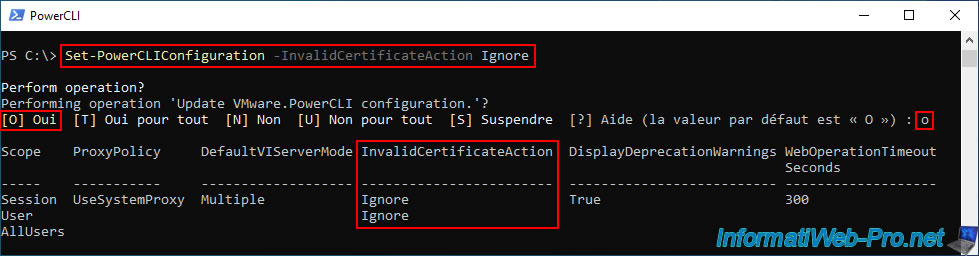
To ignore this certificate issue, use the command below and then answer "O" to allow the update of this configuration option.
Set-PowerCLIConfiguration -InvalidCertificateAction Ignore
Which will display this.
Now, use the "Connect-VIServer" command again and the connection will succeed.
Source : Configure the PowerCLI Response to Untrusted Certificates - VMware Docs.
If the question "Working with multiple default servers?" appears, answer "O".
As you can see, you are connected to your server (in our case : 10.0.0.5) as "root".
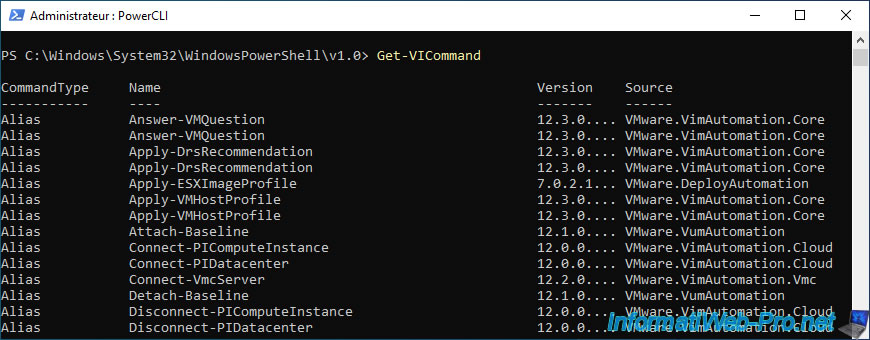
To know all the available commands, just type the command :
PowerShell
Get-VICommand
Share this tutorial
To see also
-
VMware 4/14/2023
VMware ESXi 6.7 - Best practices for creating a VM
-
VMware 2/17/2023
VMware ESXi 6.7 - Configure your virtual machines settings
-
VMware 6/2/2023
VMware ESXi 6.7 - Connect a smart card reader to a VM
-
VMware 10/19/2022
VMware ESXi 6.7 - DirectPath I/O (PCI passthrough)
No comment