- Citrix
- Citrix XenServer
- 21 May 2017 at 14:40 UTC
-

- 1/2

When you use Citrix XenServer virtualization servers, you have the ability to create pools and use high availability (HA) to prevent services from becoming inaccessible.
However, if despite this, your service could not be accessed (for fat breakdown, for example), Citrix will allow you to quickly reconfigure a backup environment using the Disaster Recovery feature.
As you will understand, you will only need Disaster Recovery when it's too late.
This will allow you to minimize the downtime of services hosted on your XenServer servers.
- Prerequisites
- Configuration used
- Enable the Disaster Recovery protection
- Disable shared storage data replication
- Restore virtual machines to the failover environment
- Reactivate shared storage data replication
- Restore virtual machines to the primary environment (failback)
1. Prerequisites
To use Disaster Recovery in the best conditions, you will need :
- a shared storage (accessible through iSCSI, for example) that is also replicated on a 2nd server
- 2 servers pools. The hardware configuration of a pool may be different from the hardware configuration of the other pool, but both pools must have the same version and updates of XenServer.
To create the pools (required) and enable the high availability (if you wish), please refer to our tutorial : XenServer - Pools and high availability (HA)
2. Configuration used
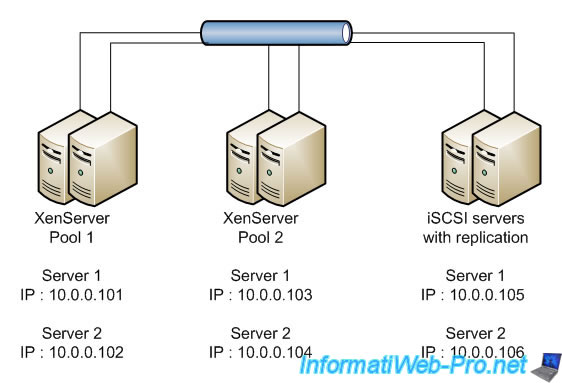
For this tutorial, we will use 2 "StarWind Virtual SAN" iSCSI servers, because StarWind provides a data replication system for their iSCSI servers.
To create these 2 StarWind iSCSI servers, see our tutorial : Windows Server 2012 - Replicate data from multiple iSCSI servers with StarWind Virtual SAN
Then, for XenServer servers pools, we will use 2 pools with 2 XenServer 6.5.0 servers in each pool.
To make this clearer, here is the diagram of the configuration used for this tutorial.
3. Enable the Disaster Recovery protection
To use the Disaster Recovery feature, you must first enable replication of metadata on a shared storage.
As mentioned earlier, we will use 2 StarWind iSCSI servers to replicate data between these 2 iSCSI servers.
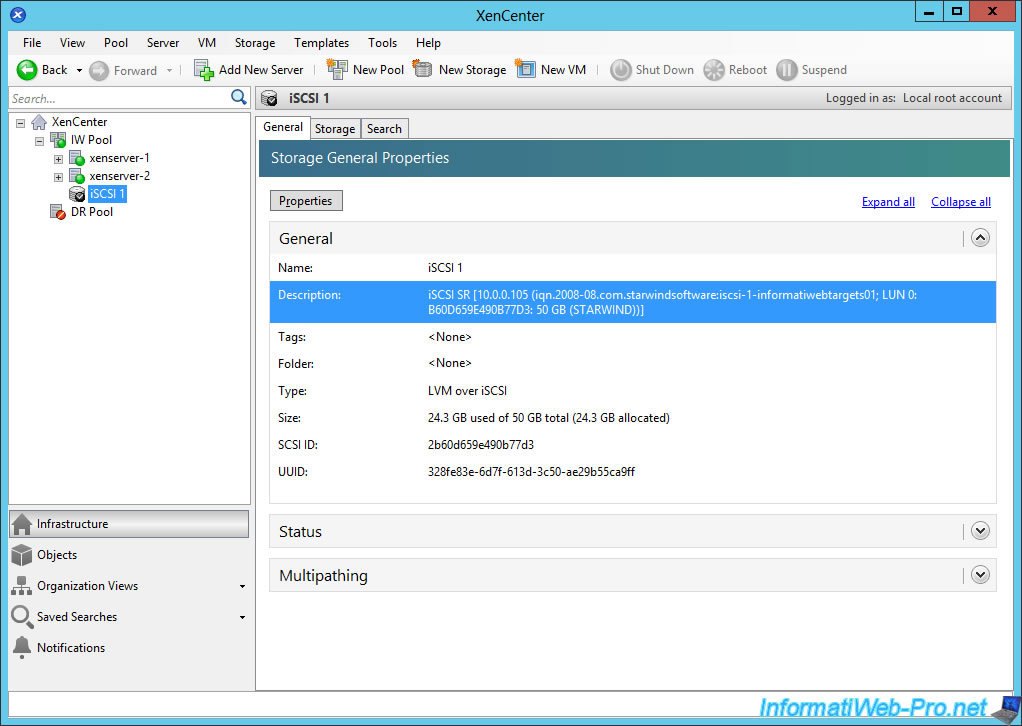
The primary pool is called "IW Pool" and its shared storage is on the 1st iSCSI server.
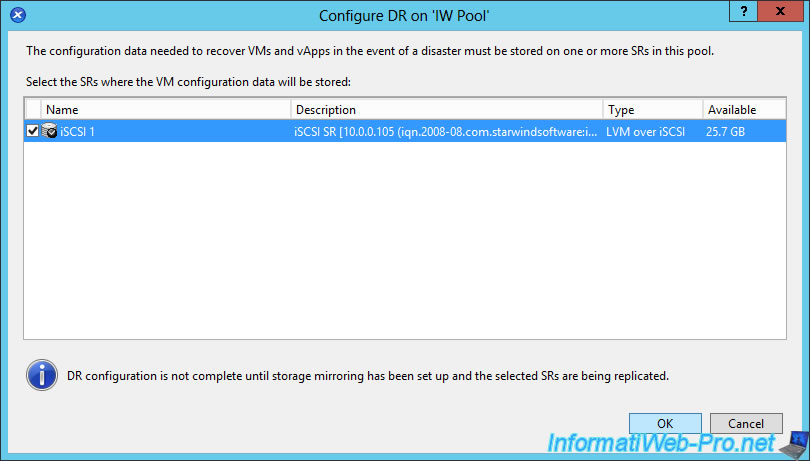
To replicate the metadata on your shared storage, select your primary pool and go to : Disaster Recovery -> Configure.
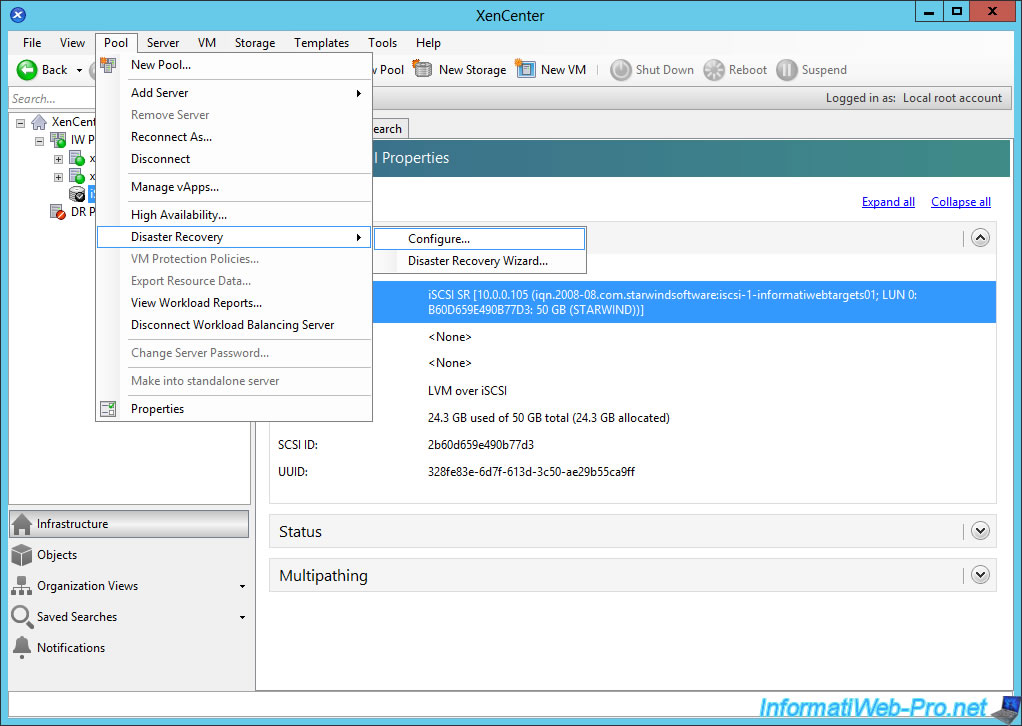
Check the box for the primary iSCSI server and click OK.
Warning : Disaster Recovery automatically backs up only the metadata of your VM. So, their name, UUID, and configuration. It will also save the configuration of vApps.
But, Disaster Recovery will not backup your VM's virtual hard disks.
4. Disable shared storage data replication
When services can no longer be accessed from the primary XenServer environment, you will need to use Disaster Recovery.
However, as you will see later, you will need to disable shared storage data replication before starting the Disaster Recovery failover process.
In our case, this replication is managed by the "StarWind Management Console" program that is installed with the "StarWind Virtual SAN" solution.
Note : for the moment, the 1st iSCSI server is synchronized with the 2nd server. (Synchronization Status: Synchronized)
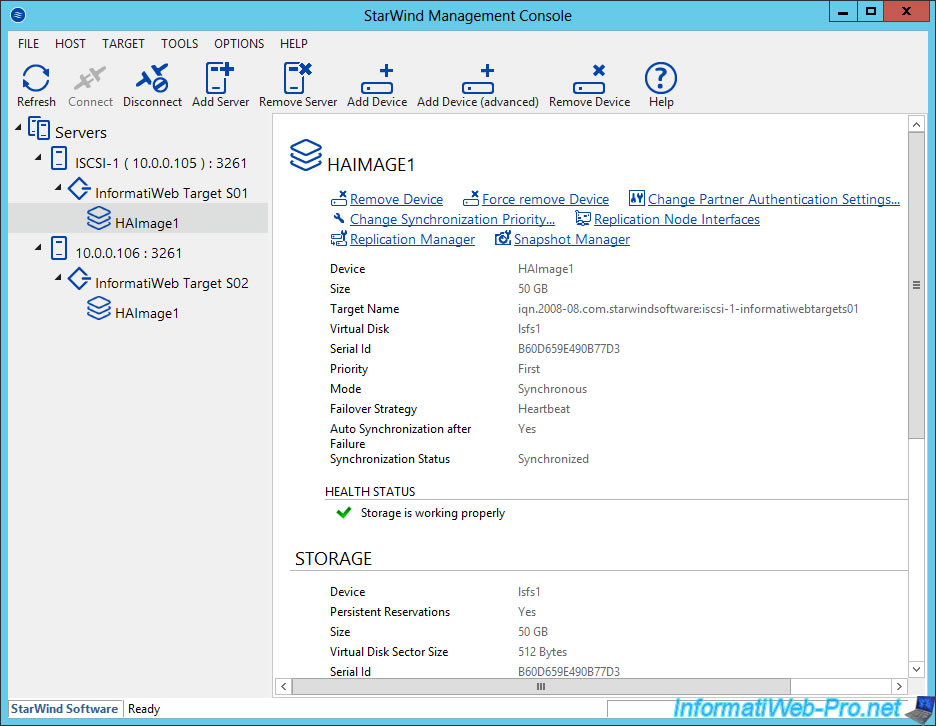
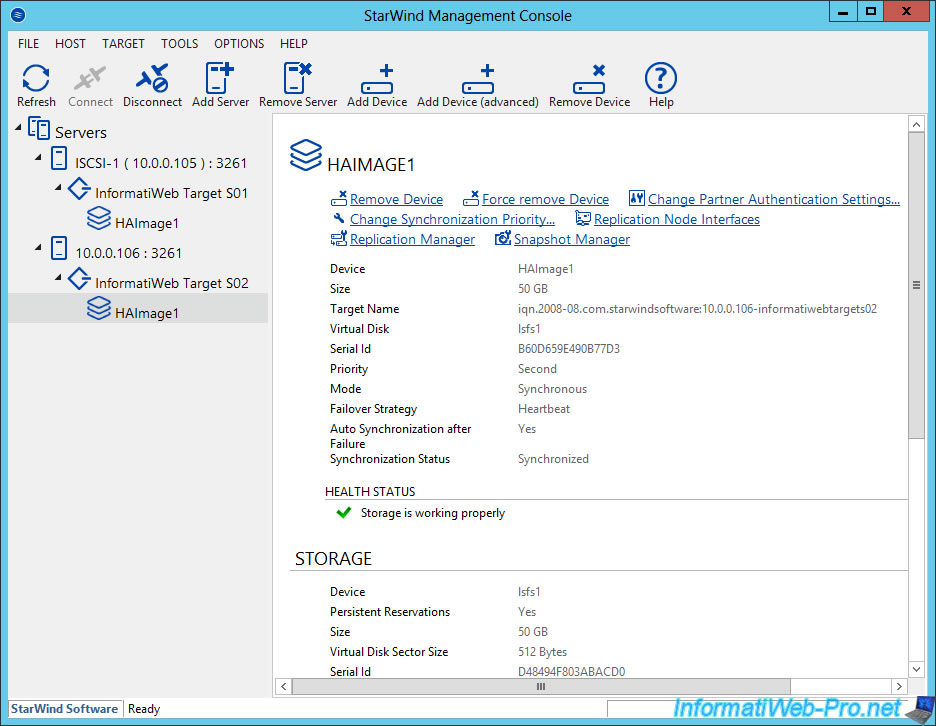
As we will use the "DR" environment (our backup environment), we will disable replication on the 2nd server.
Thus, the data will be accessible only from this 2nd server.
To do this, we select our 2nd iSCSI server and click on "Replication Manager".
We select the replication relationship displayed and click "Remove Replica".

Click Yes to confirm that this replication is stopped.

Now, StarWind warns us that replication is no longer defined.
The 2nd iSCSI server is therefore independent.

Share this tutorial
To see also
-
Citrix 6/21/2017
Citrix XenServer 6.5 - Active Directory authentication
-

Citrix 11/25/2015
Citrix XenServer 6.5 - PCI passthrough
-
Citrix 4/30/2015
Citrix XenServer 6.5 - Secure the connection using SSL (HTTPS)
-
Citrix 5/21/2016
Citrix XenServer 6.5 - VGA passthrough
You must be logged in to post a comment