Configure a multi-site Active Directory infrastructure on Windows Server 2022 and 2016
- Windows Server
- 10 November 2025 at 17:31 UTC
-

- 10/11

12.5. Authorize DHCP servers in the Active Directory infrastructure
12.5.1. Authorize the DHCP server of site 1 (Brussels) in the Active Directory infrastructure
As a reminder, DHCP servers are installed on the same servers as your VPN servers.
We therefore have one DHCP server on the "brux-vpn" server (on site 1 (Brussels)) and another DHCP server on the "paris-vpn" server (on site 2 (Paris)).
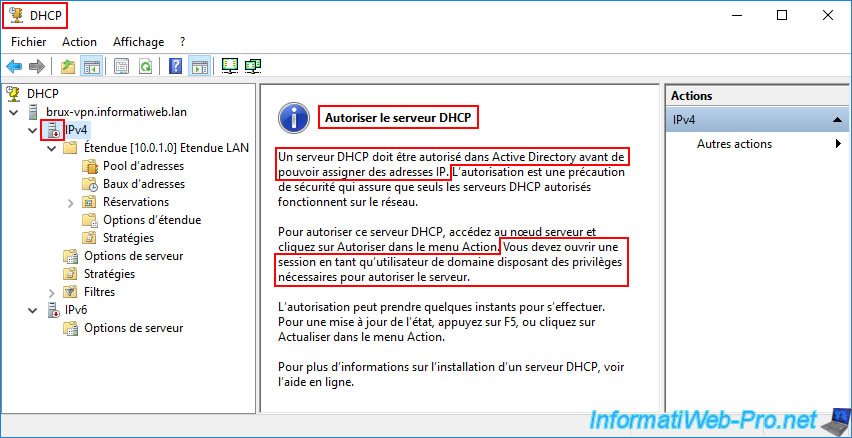
Warning : as you can see by opening the DHCP console on one of your DHCP servers, a DHCP server must be authorized in Active Directory to be able to distribute IP addresses.
In other words, since your VPN servers (where your DHCP servers are also installed) were joined to your Active Directory domain, your DHCP servers have been automatically disabled.
Hence the red icon for the "IPv4" and "IPv6" options and the message regarding the authorization required to work with Active Directory.
Plain Text
A DHCP server must be authorized in Active Directory before it can assign IP addresses. Authorization is a security precaution that ensures that only authorized DHCP servers operate on the network.
Important : you must be logged in with a domain user account for the "Authorize" option to appear.
In other words, if the "Authorize" option does not appear in this DHCP console, it means you are logged in with a local user account or your AD user account does not have the necessary rights to authorize a DHCP server in AD.
Plain Text
You must log in as a domain user with the necessary privileges to authorize the server.
To fix this problem, simply right-click "Allow" on the name of your DHCP server (in our case "brux-vpn.informatiweb.lan").
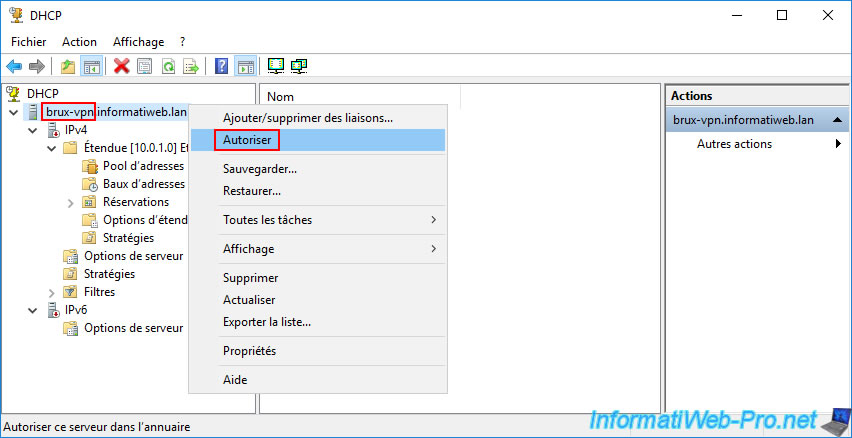
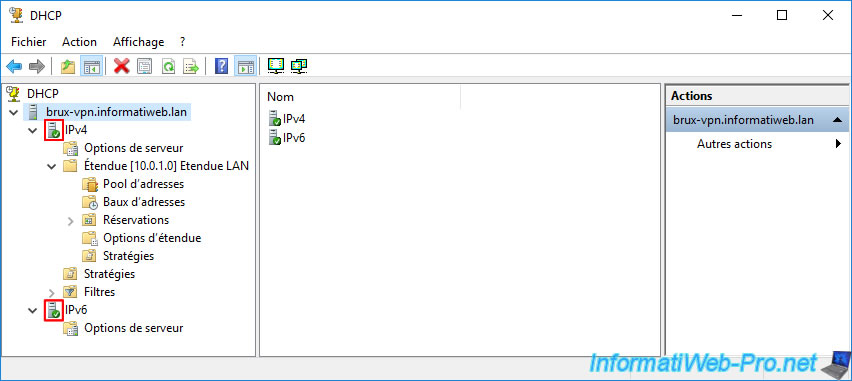
The icons for the "IPv4" and "IPv6" options should turn green.
Note: if this is not the case, refer to the solution explained in the next step of this tutorial.
12.5.2. Authorize the DHCP server of site 2 (Paris) in the Active Directory infrastructure
Similarly, go to the DHCP server at the remote site (Paris) and select the "IPv4" option.
Again, you'll see that this DHCP server is disabled (red icon) and the message "Authorize DHCP server" appears.
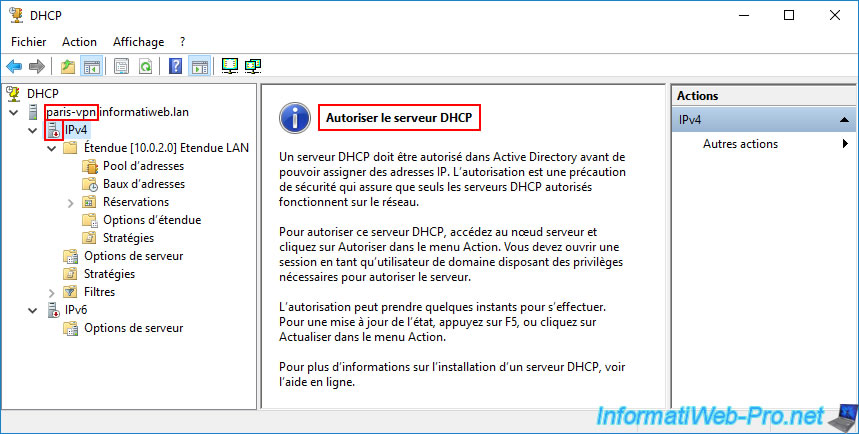
Again, right-click "Allow" on the name of your remote DHCP server (in our case: paris-vpn.informatiweb.lan).

In some cases, this "Authorize" action may not appear to work, and the icons in this DHCP console may remain red.
This means that this DHCP server is still (temporarily) refusing to work because it believes the authorization has not been added to your Active Directory infrastructure.

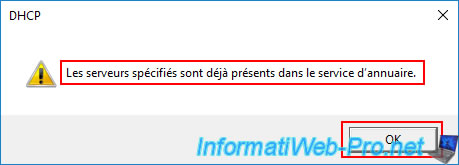
If you try to perform this "Allow" action on this DHCP server again, you will receive the warning below and the icons will remain red.
Plain Text
The specified servers are already present in the directory service.
So this DHCP server can't be authorized in AD because it thinks it's already there.
But the "DHCP" console continues to show your DHCP server as disabled because authorization for it needs to be added to Active Directory.
In short, this is due to the replication delay between your Active Directory domain controllers (as you'll see later in this tutorial).
12.5.3. Force DHCP data replication in a multi-site Active Directory infrastructure
To understand the source of the above strange problem and resolve it quickly, you'll need to use the "Active Directory Sites and Services" console on your Active Directory domain controllers.
The goal is to find out which AD domain controllers have been granted DHCP server permissions.
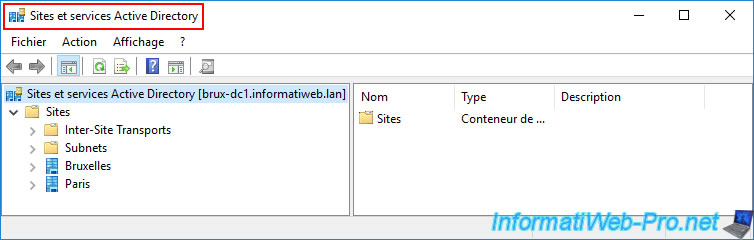
In our case, we opened the "Active Directory Sites and Services" console on our AD domain controller "brux-dc1".
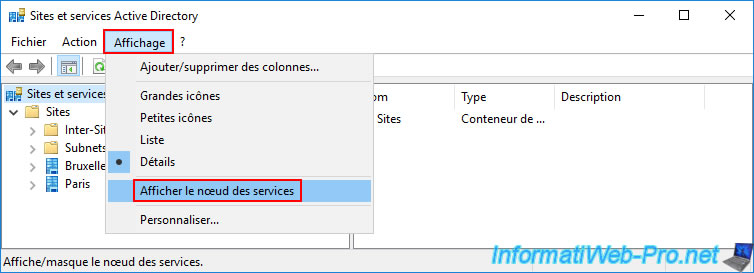
To view AD data regarding the DHCP servers present in your infrastructure, you must first go to the "View -> Show Services Node" menu.
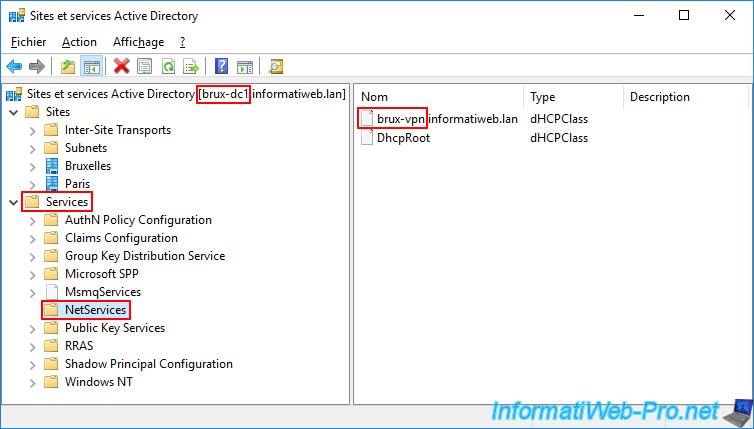
Next, navigate to the "Services -> NetServices" folder and you'll see DHCP data appear.
In our case:
- brux-vpn.informatiweb.lan: this indicates that our DHCP server "brux-vpn.informatiweb.lan" has been authorized in Active Directory.
- DhcpRoot: this object is required to authorize at least one DHCP server in Active Directory.
Sources :
- DHCP server the specified servers are already present in the directory service - Microsoft Q&A
- [MS-DHCPE]: Authorizing a DHCP Server in Active Directory Domain Services | Microsoft Learn
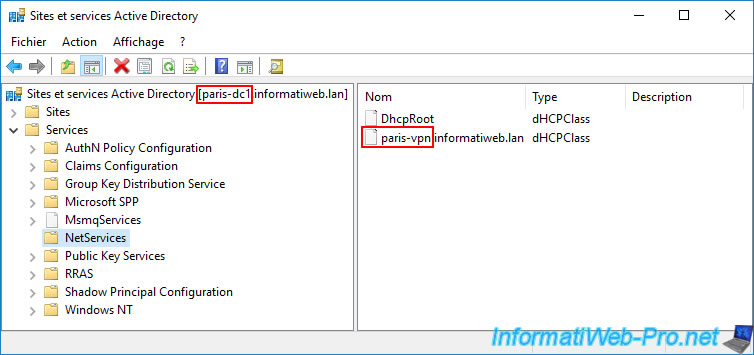
At the same time, if we open the same Active Directory console on our remote domain controller "paris-dc1" at the remote site (Paris), we can see that the objects present are different.
Indeed, we do indeed find the basic "DhcpRoot" file. But we only see the authorization for our "paris-vpn.informatiweb.lan" server at the Paris site.
Note: this is quite logical at first, given that each DHCP server ("brux-vpn" and "paris-vpn" in our case) preferably uses a local AD domain controller (on the same site as them).
Important : this explains why the "DHCP" console of one of your DHCP servers (as is the case for our Paris DHCP server) may indicate that it is disabled and also display a warning about the authorization already stored in AD. Since authorization for your DHCP server is only on some AD domain controllers and not others, this issue may appear temporarily.
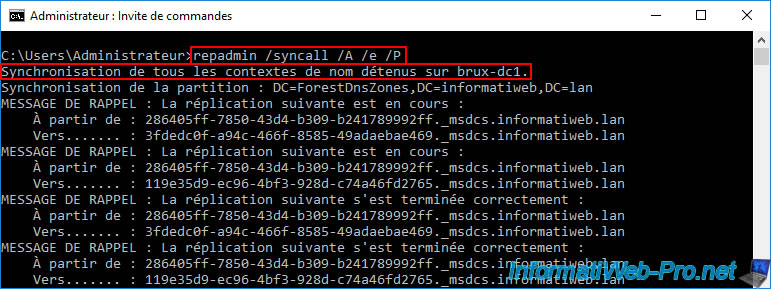
To quickly resolve this issue, use the command below on at least one domain controller that has DHCP permission to replicate to all other AD domain controllers in your Active Directory infrastructure.
Batch
repadmin /syncall /A /e /P
So in our case we ran this command on our AD domain controller "brux-dc1" which has permission for our DHCP server "brux-vpn.informatiweb.lan" (visible via the "Active Directory Sites and Services" console).
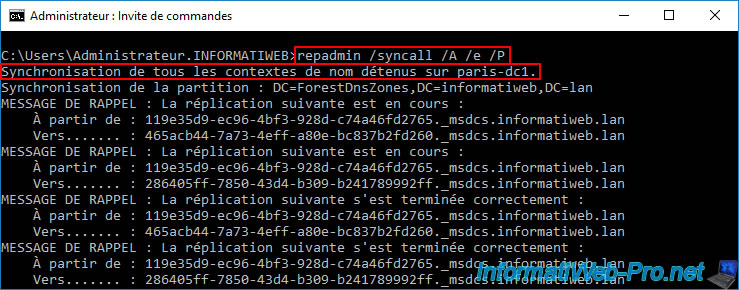
Then, we ran this same command on our remote AD domain controller "paris-dc1" which has permission for our remote DHCP server "paris-vpn.informatiweb.lan" (also visible via the "Active Directory Sites and Services" console).
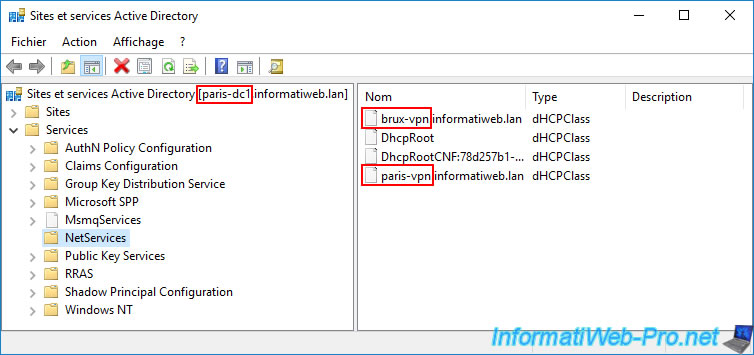
Once these commands are complete, refresh the "Active Directory Sites and Services" console on your domain controllers (or close and reopen this console) and you will see that the DHCP permissions for your two DHCP servers will appear (regardless of which domain controller you open this "Active Directory Sites and Services" console on).
In our case, we can see the following objects:
- brux-vpn.informatiweb.lan: authorization for the DHCP server "brux-vpn.informatiweb.lan".
- DhcpRoot: the base object required to authorize at least one DHCP server in Active Directory.
- DhcpRootCNF:...: probably due to replication of the "DhcpRoot" object replicated from the remote physical site.
- paris-vpn.informatiweb.lan: authorization for the DHCP server "paris-vpn.informatiweb.lan".

12.5.4. Restart the problematic DHCP server for authorization in AD
Now that the permissions for your 2 DHCP servers are on all AD domain controllers in your Active Directory infrastructure, right-click "All Tasks -> Restart" on the DHCP server that remained disabled (despite its permission in the previous AD).
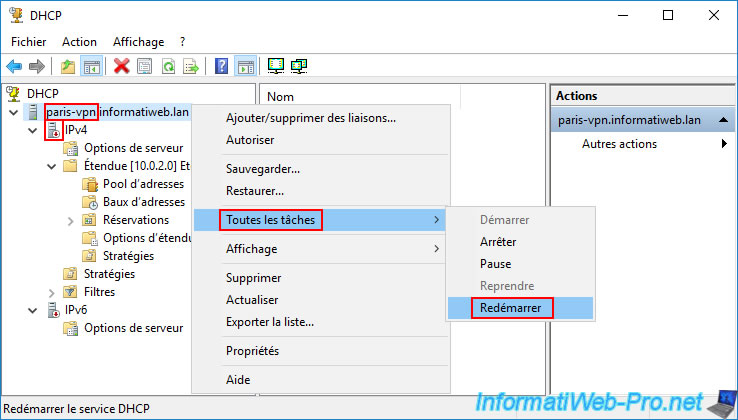
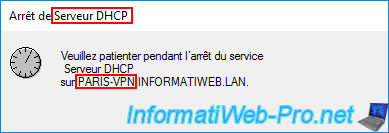
Please wait a little while your DHCP server restarts.
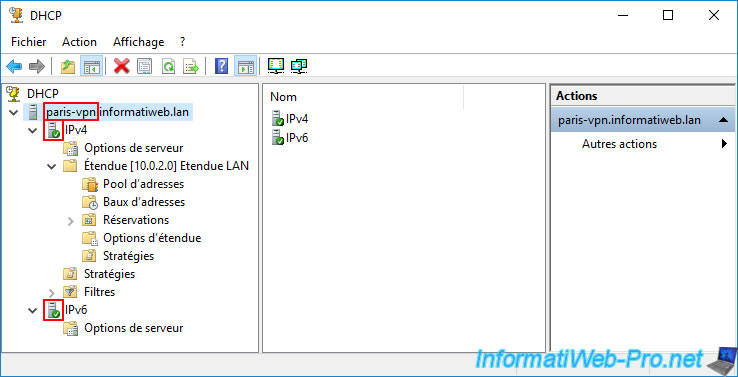
As you can see, the icons for "IPv4" and "IPv6" turn green again.
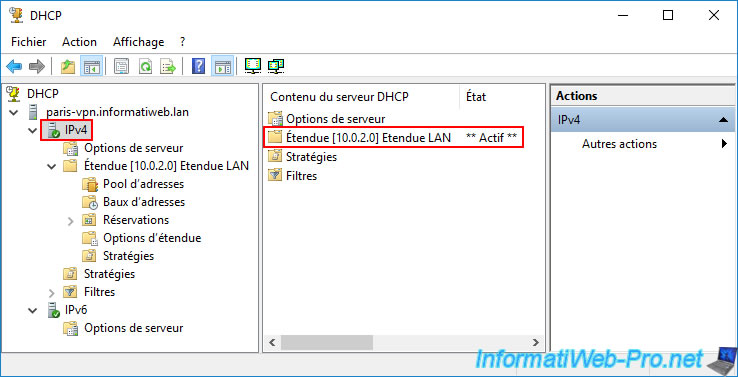
Additionally, if you select the "IPv4" option, you can see that the status of your DHCP scope "LAN Scope" is again "Active".
This confirms that the issue is resolved.
13. Create and link group policy objects (GPOs) to an Active Directory site
Using the Group Policy Management console, you can create and manage Group Policy Objects (GPOs).
However, you usually link them directly to your Active Directory domain or to one or more OUs (Organizational Units).
However, did you know that it's also possible to link a Group Policy Object to a specific Active Directory site (without having to create conditions yourself to try to target the right computers or servers)?
To do this, start by displaying the desired sites in the "Group Policy Management" console.
To do this, right-click "Show Sites" on the "Sites" folder.
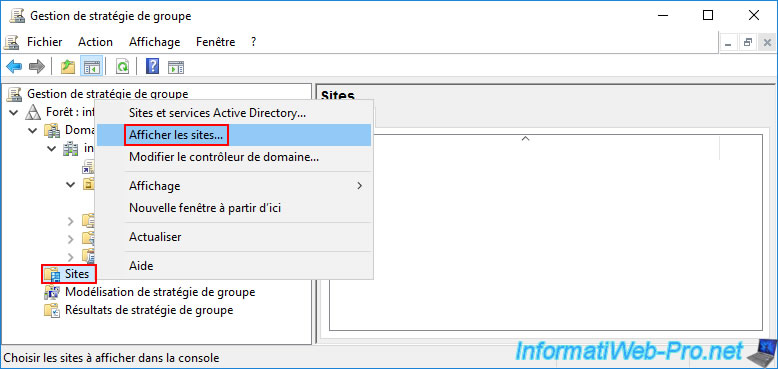
In the "Show Sites" window that appears, check the boxes for the sites you want to appear in the "Group Policy Management" console.
In our case, our physical Active Directory sites:
- Brussels.
- Paris.

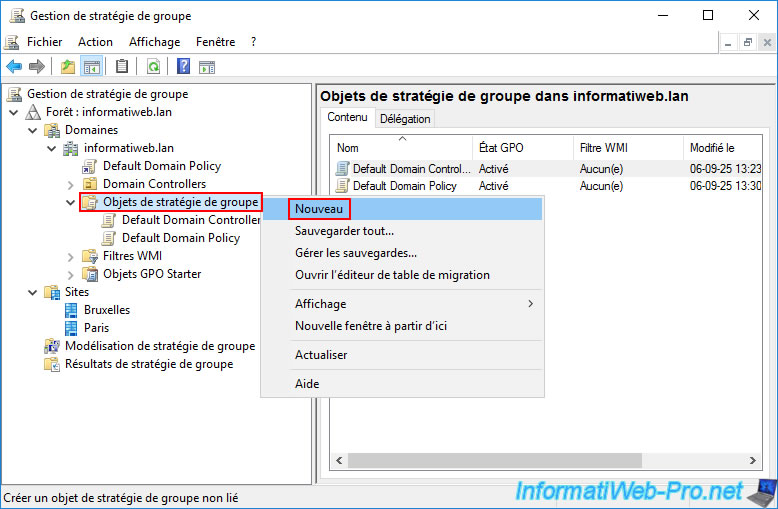
Then, go to the "[your Active Directory domain] -> Group Policy Objects" folder and right-click "New" on the "Group Policy Objects" folder.
The goal is to create a GPO that won't be used at first.
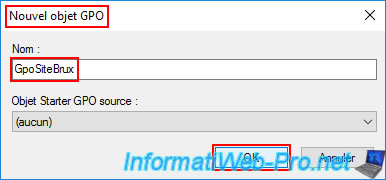
In the small "New GPO" window that appears, type the name you want for this GPO, then click OK.
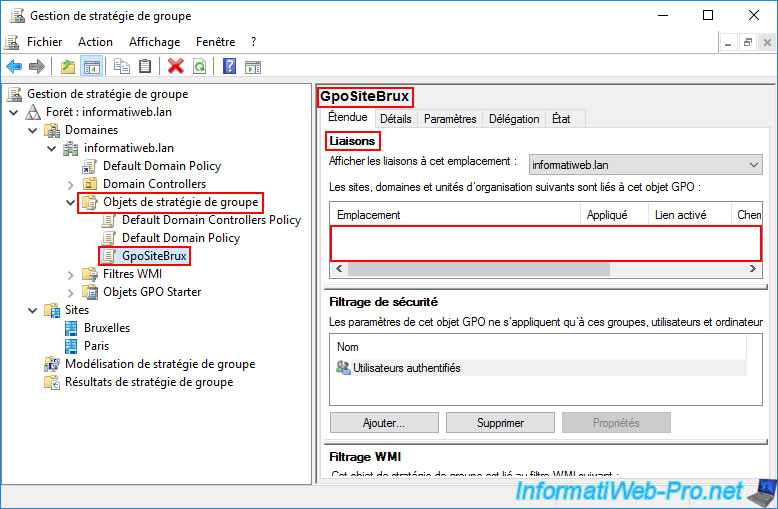
In our case: GpoSiteBrux.
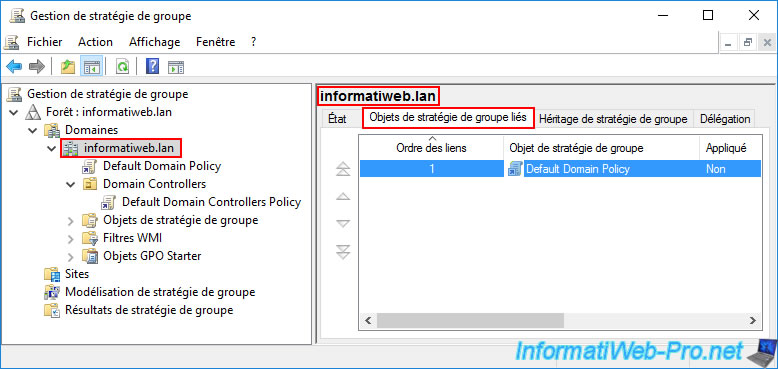
By selecting the GPO you just created, you'll see on the right that there are no links for it.
This means it has been created, but it's not yet used by Active Directory.
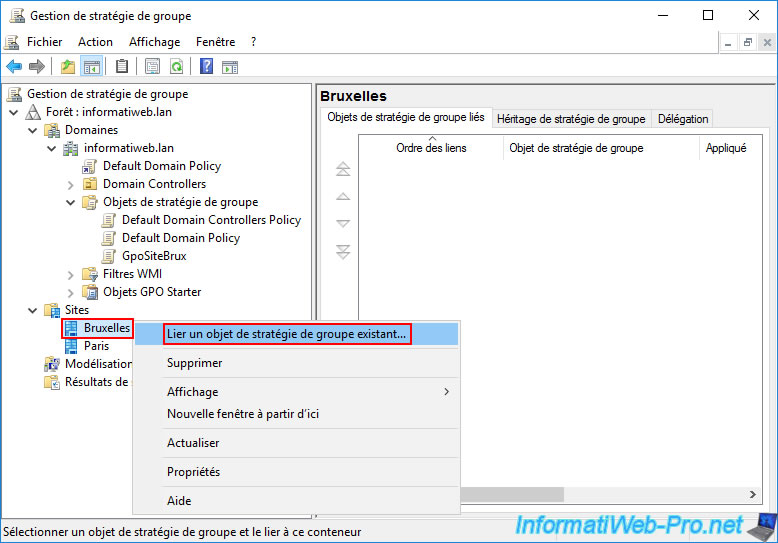
Now, right-click on the desired Active Directory site and click "Link an existing Group Policy Object".
Note: as you can see, you can only link existing Group Policy Objects (GPOs).
There is no option here to create a GPO and link it directly to an Active Directory site (as is the case when right-clicking on your AD domain or a specific OU (Organizational Unit).
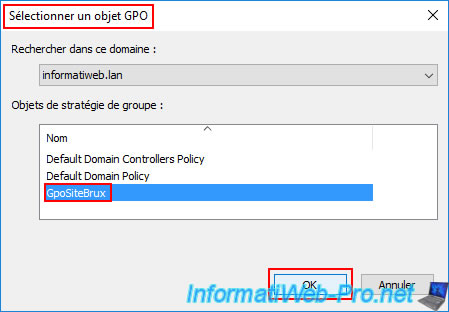
In the "Select a GPO" window that appears, select the Group Policy Object (GPO) created earlier (in our case: GpoSiteBrux) and click OK.
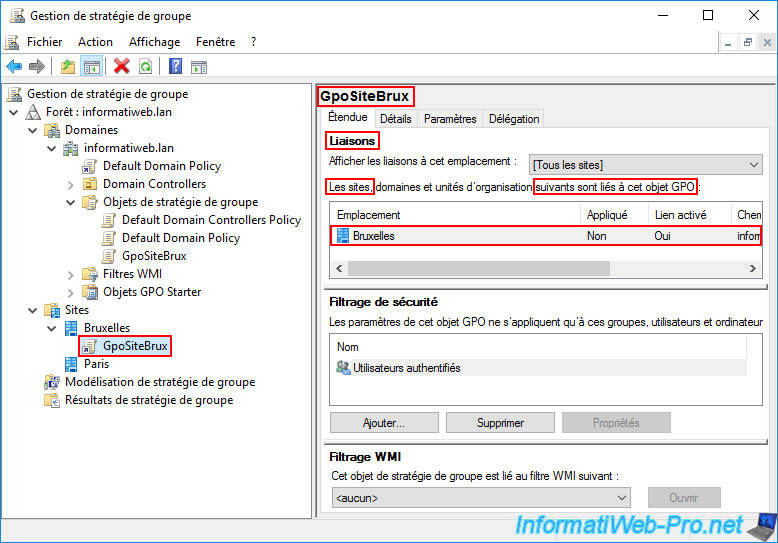
As expected, by selecting this "GpoSiteBrux" GPO, you will see that it is linked to the desired Active Directory site.
Share this tutorial
To see also
-

Windows Server 4/16/2021
Windows Server - AD DS - How Active Directory replication works
-

Windows Server 4/30/2021
Windows Server - AD DS - Overview of Active Directory functional levels
-

Windows Server 4/3/2021
Windows Server - AD DS - The basics of Active Directory
-

Windows Server 5/21/2021
WS 2016 - AD DS - Add a domain controller to an existing AD domain
No comment