Deploy the RDS gateway to provide secure access from the outside on Windows Server 2012 / 2012 R2 / 2016
- Windows Server
- 11 May 2019 at 17:29 UTC
-

- 2/3

5. Configure the gateway
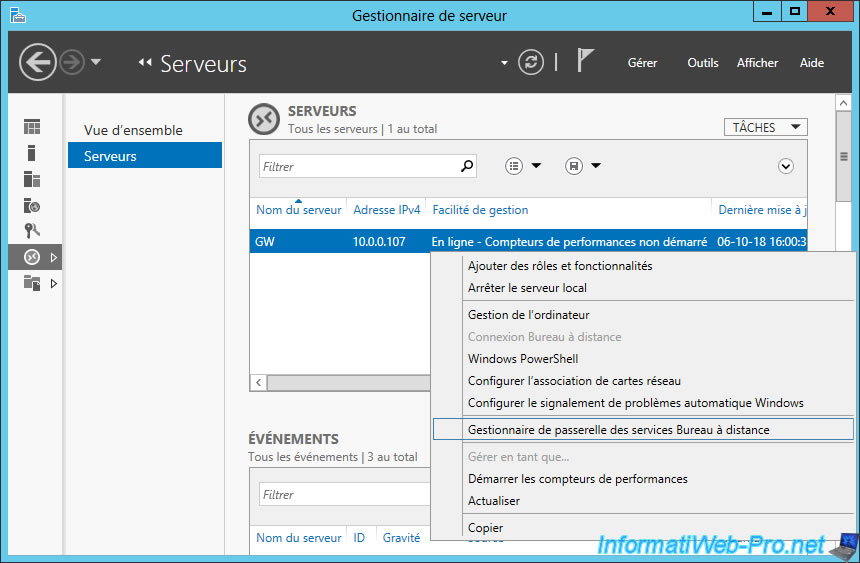
To configure the gateway, go to the "Remote Desktop Services -> Servers" section of the server manager of your RDS gateway server, right-click on the server where you installed the "RD Gateway" and click "RD Gateway Manager".
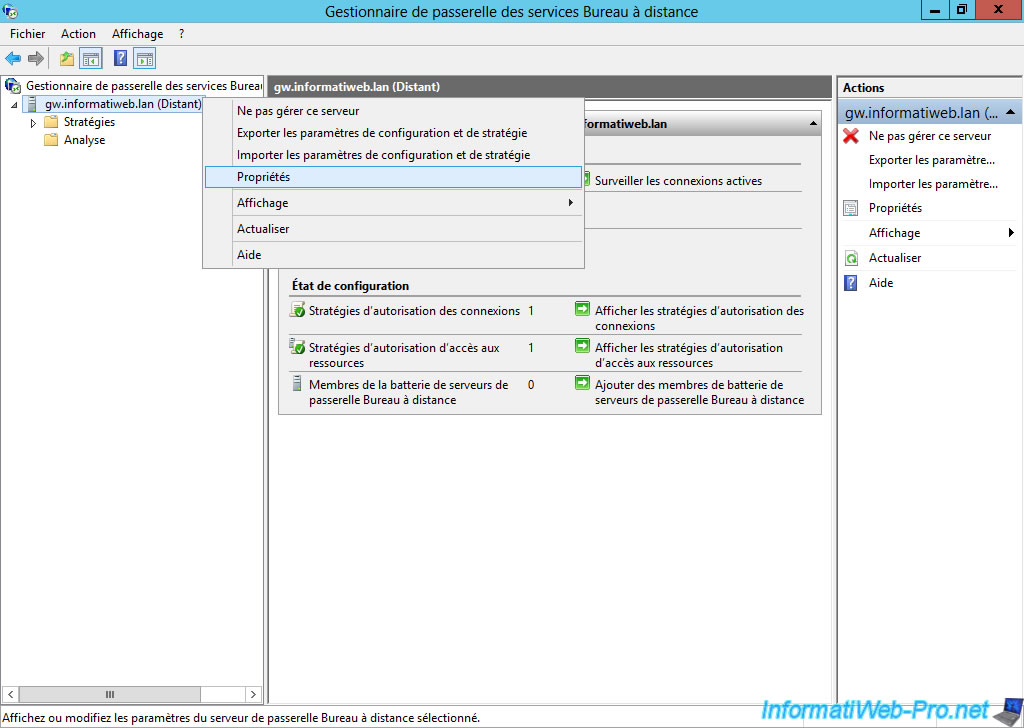
In the "RD Gateway Manager" window that appears, right-click "Properties" on your server.
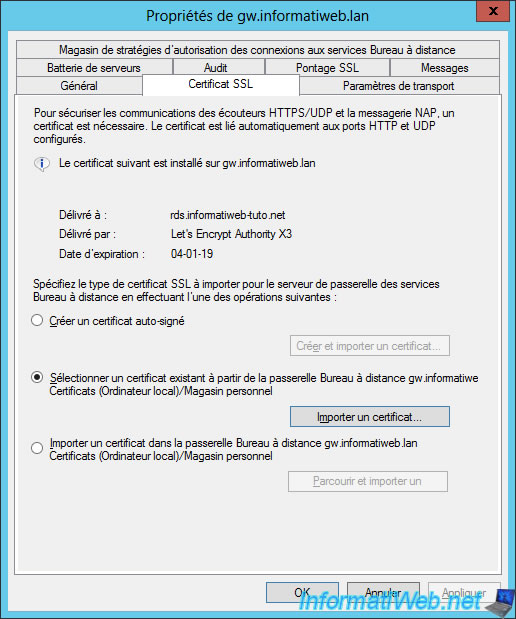
As you can see, the SSL certificate we had previously imported was issued for our "rds.informatiweb-tuto.net" domain by the "Let's Encrypt" certification authority.
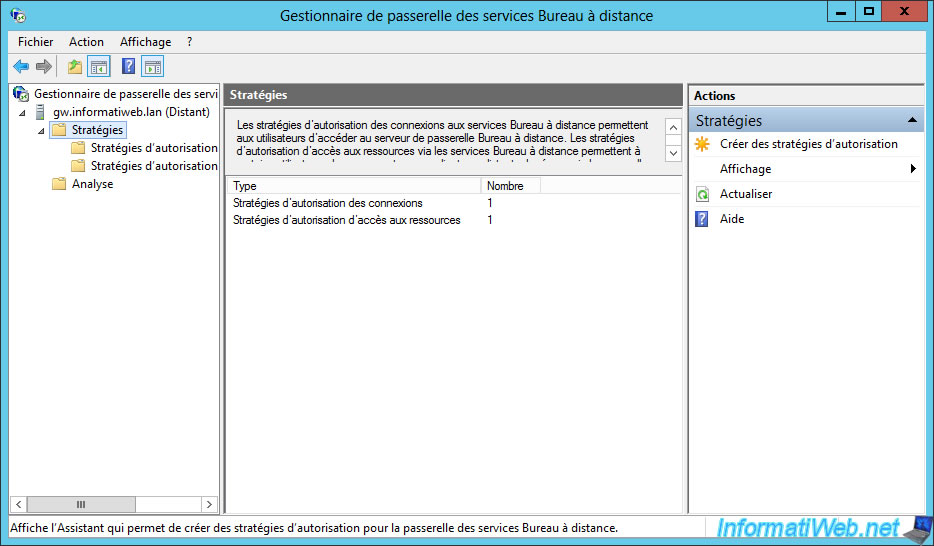
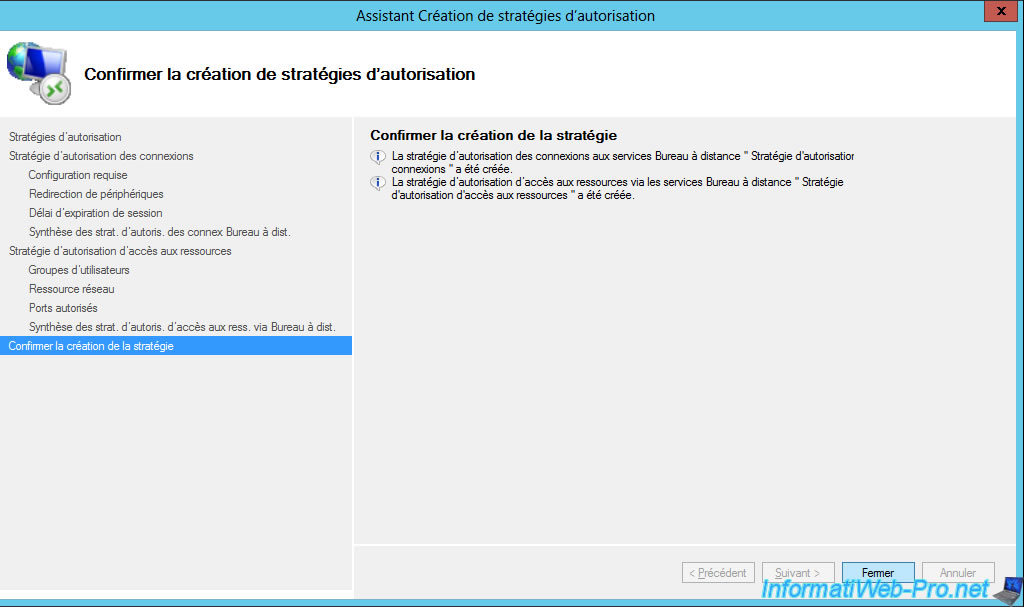
To configure the gateway, select the "Policies" item and click : Create New Authorization Policies.
The Create New Authorization Policies Wizard is displayed.
Select "Create a RD CAP and a RD RAP (recommended)" and click Next.

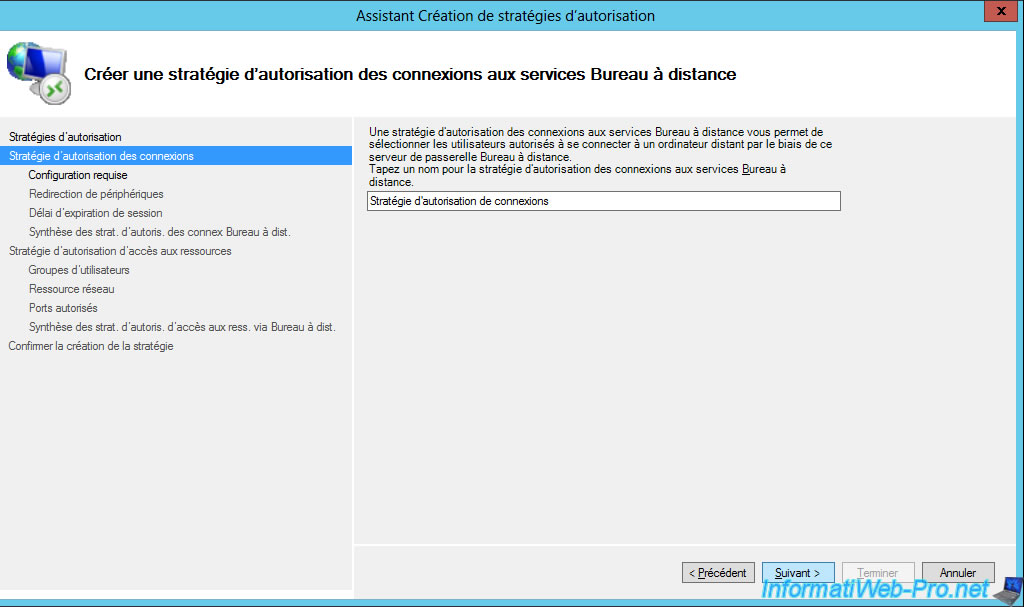
Specify a name for the connection authorization policy (RD CAP).
Choose how users will login : password or smart card.
In most cases, you will probably use this method : Password.
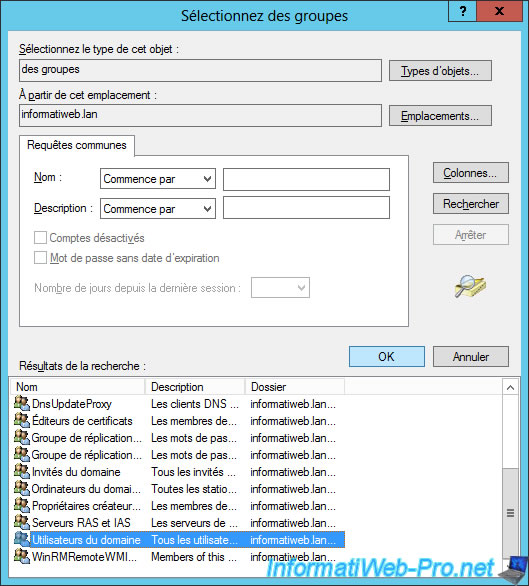
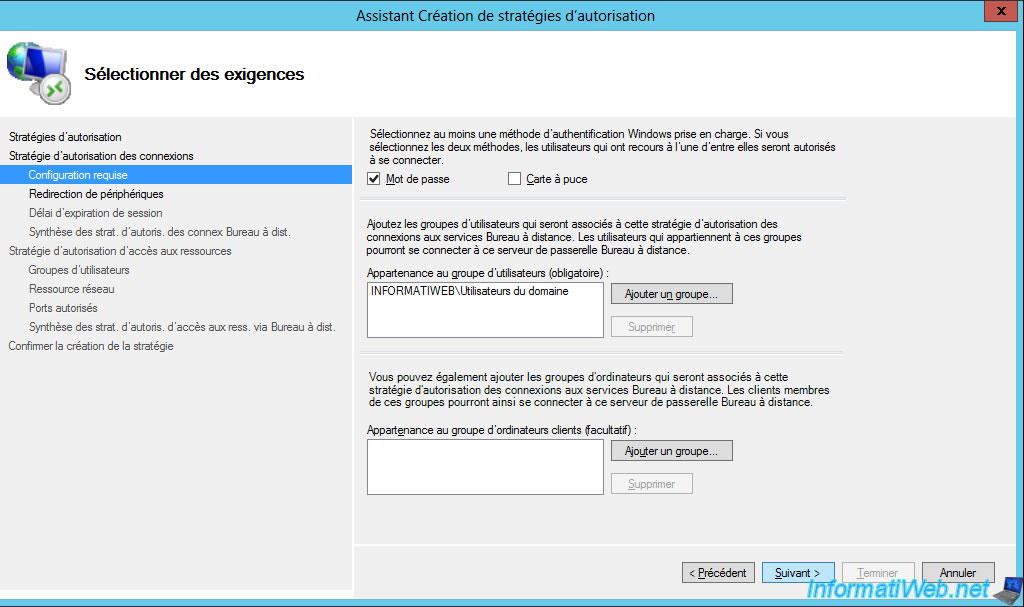
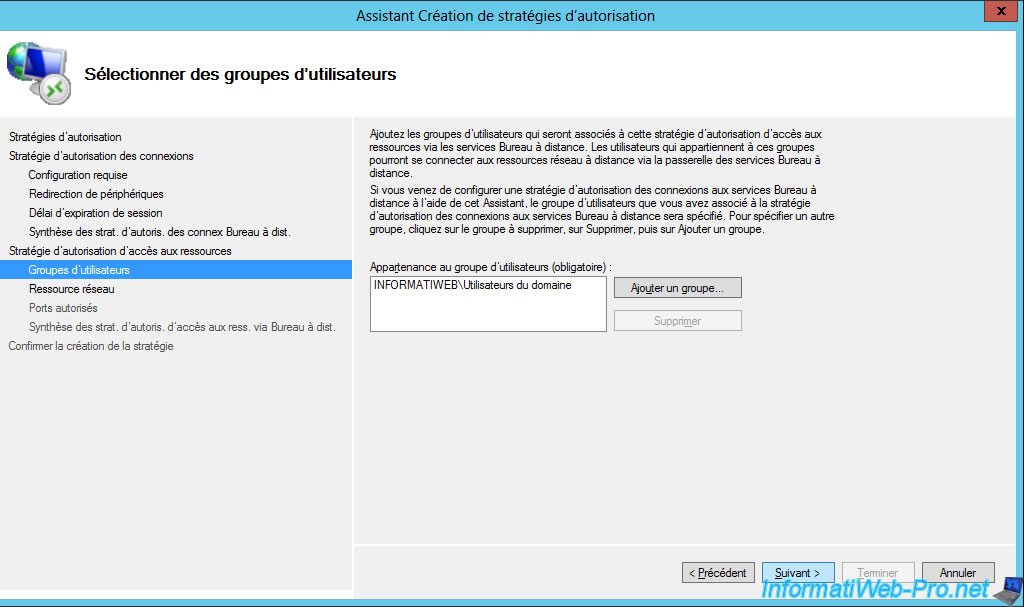
Then, choose which user groups can connect via your RD gateway.
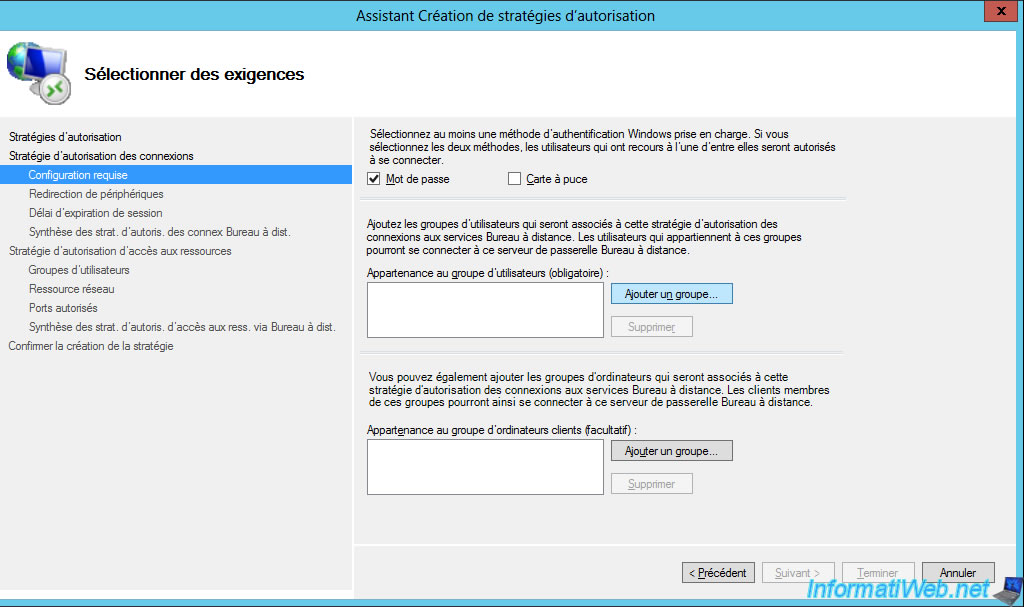
For this tutorial, we will just allow domain users.
Then, if you want, you can restrict access to your gateway to specific client computers.
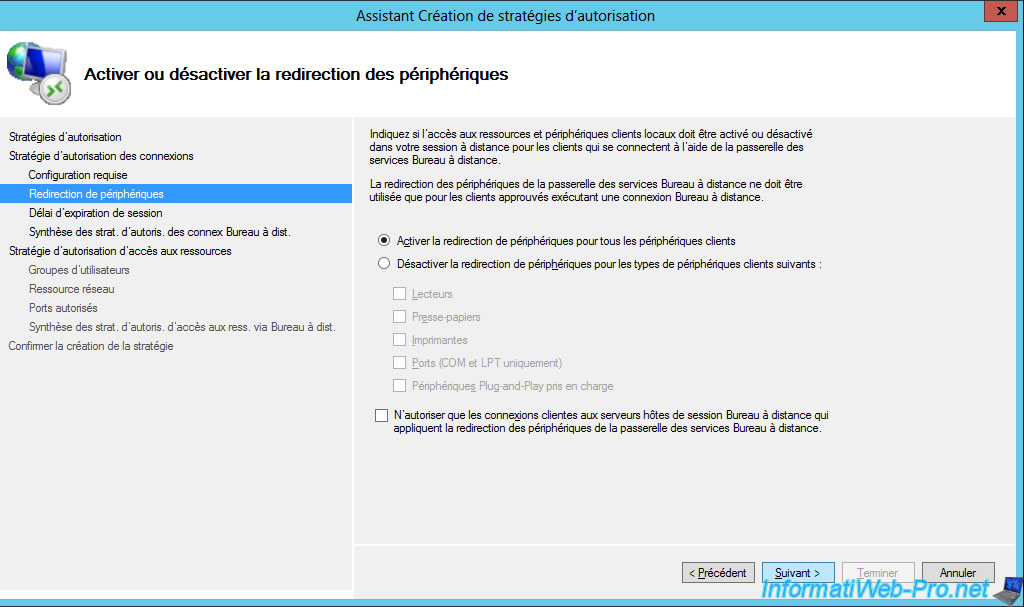
Enable or disable client device redirection to allow your users to access their local devices from RemoteApp programs and/or published desktops running on your RDS server.
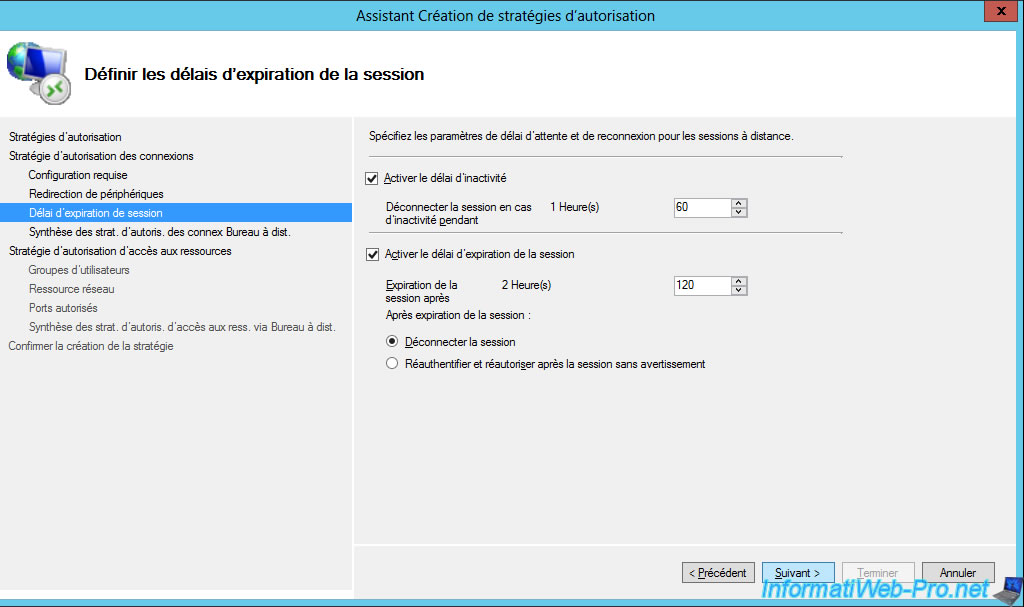
Change the idle and session timeout period if you want.
This avoids leaving sessions open unnecessarily on your server.
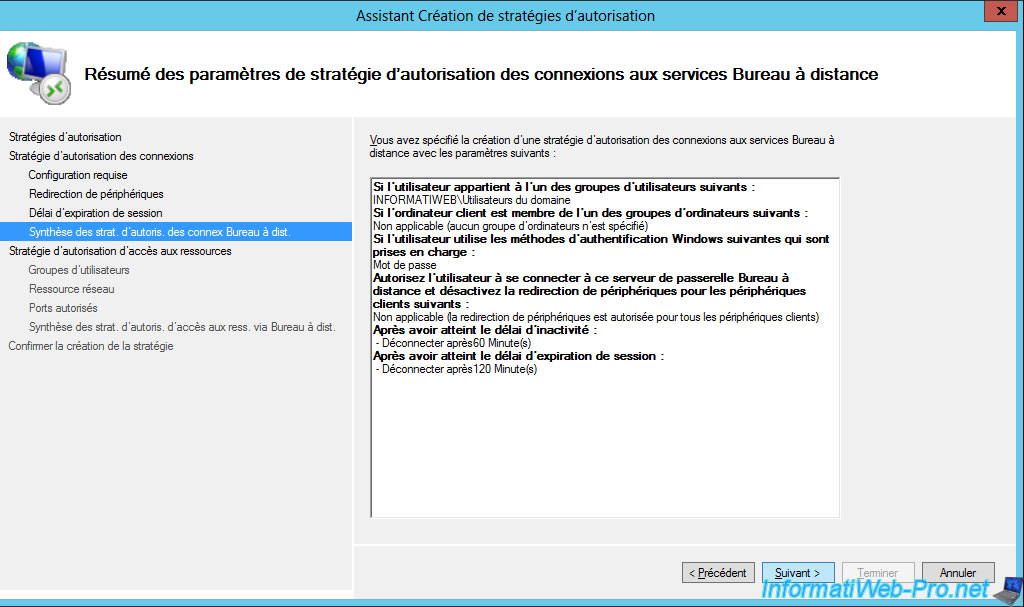
The wizard displays a summary of the configuration of your connection authorization policy (RD CAP).
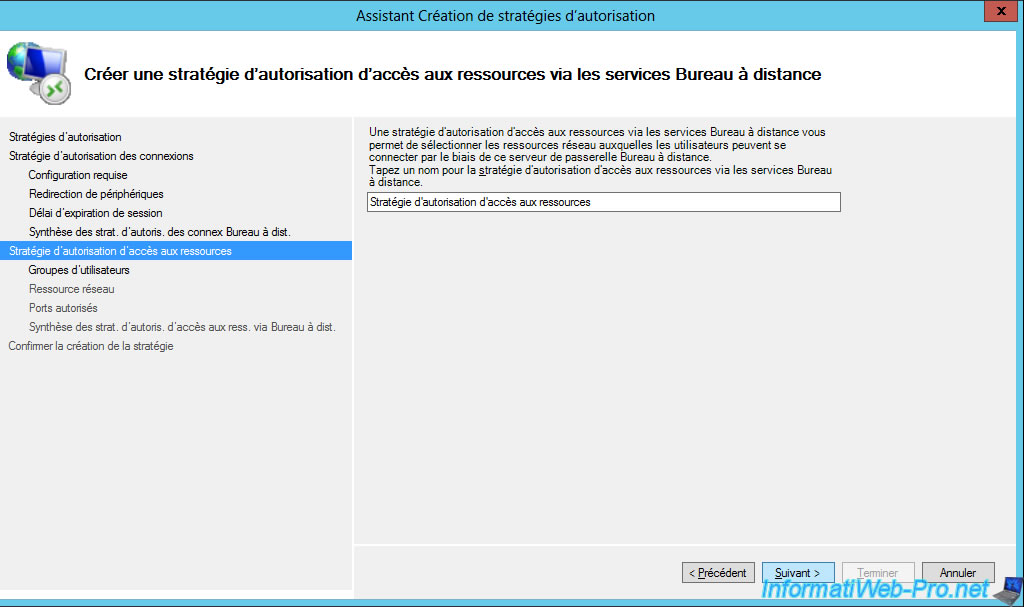
Now, specify a name for the resource authorization policy (RD RAP).
Select the user groups that will be able to access resources through your RD Gateway.
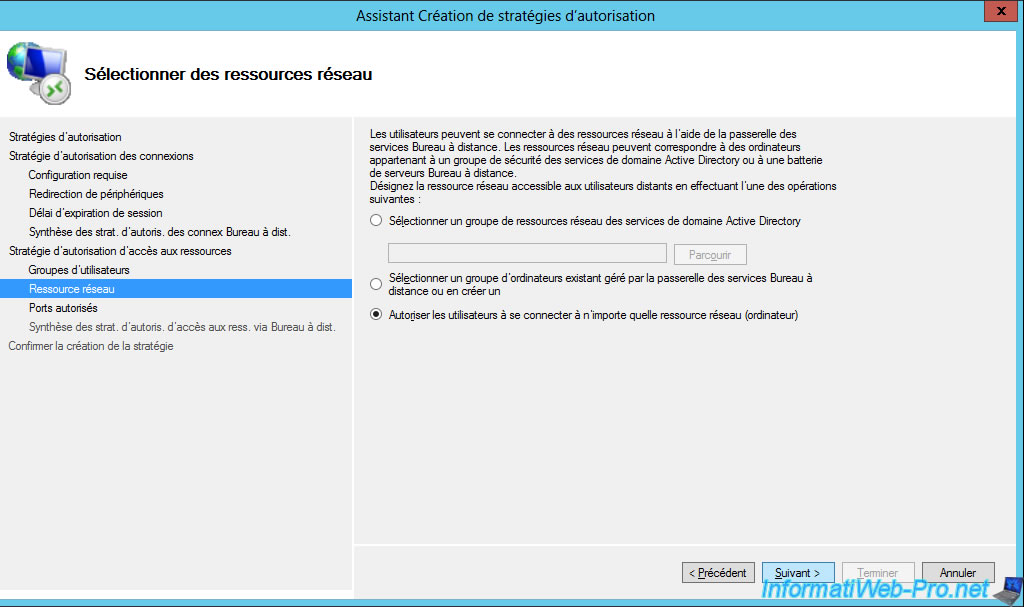
Choose which network resources your users will have access to.
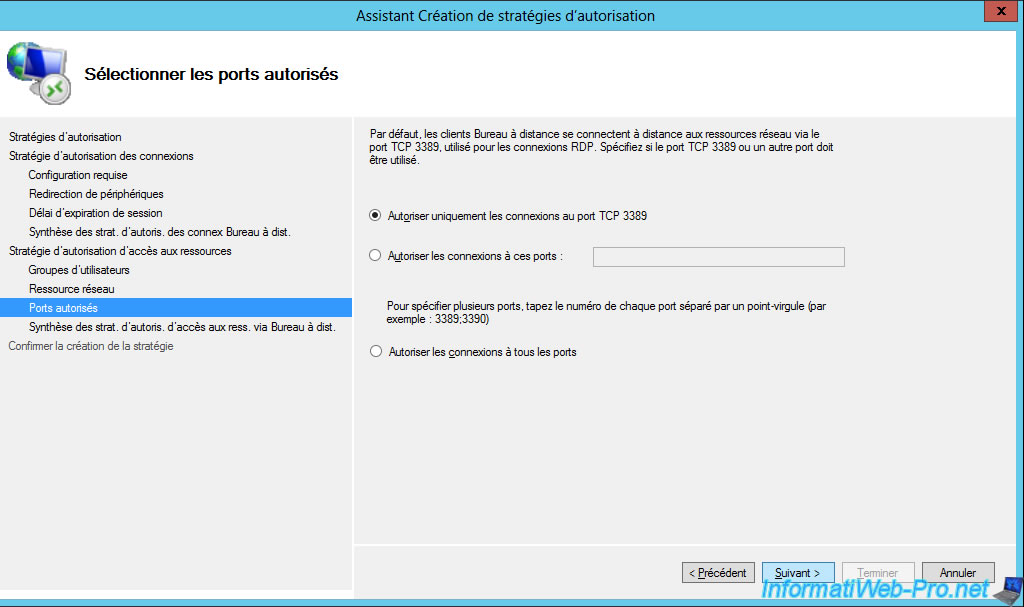
Unless you have changed the RDP port of your local servers, they will use the default TCP port 3389 for RDP.
If you didn't change this setting on your local servers, select the option : Allow only connections to TCP port 3389.
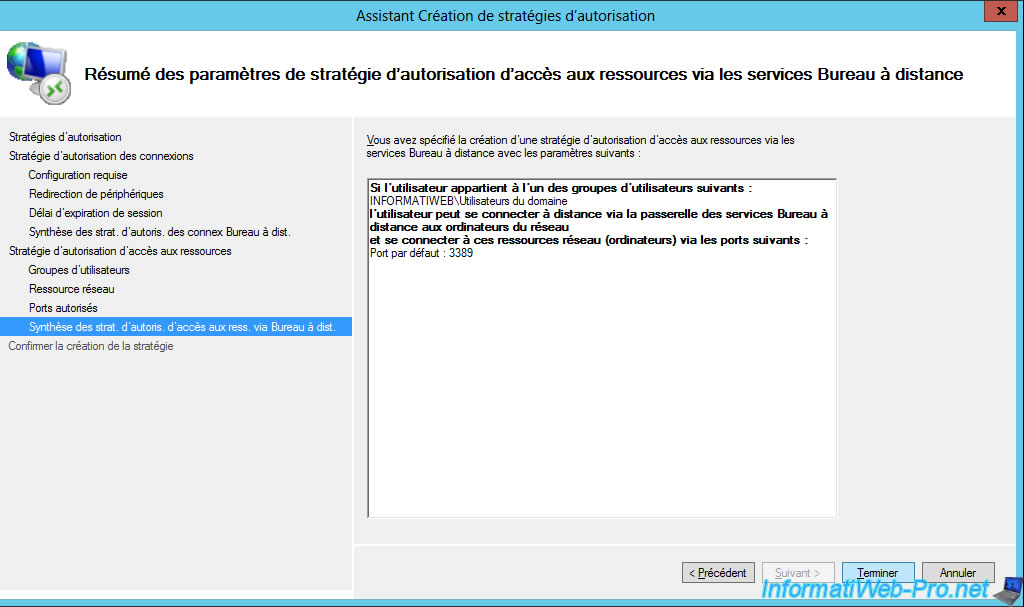
The wizard displays a summary of the configuration of your resource authorization policy (RD RAP) using Remote Desktop Services.
Click Close.
6. Configure the external domain
As you saw earlier, we had to set up an external domain name to access our RDS gateway from the outside.
However, for this to work, you must of course configure the DNS zone of your external domain to point the desired subdomain to the public (external) IP address of your company.
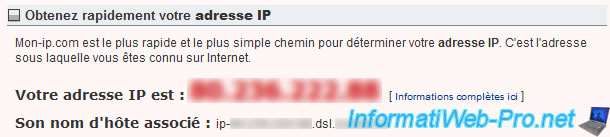
To know the external IP address of your company, go to the "mon-ip.com" site (or another similar site).
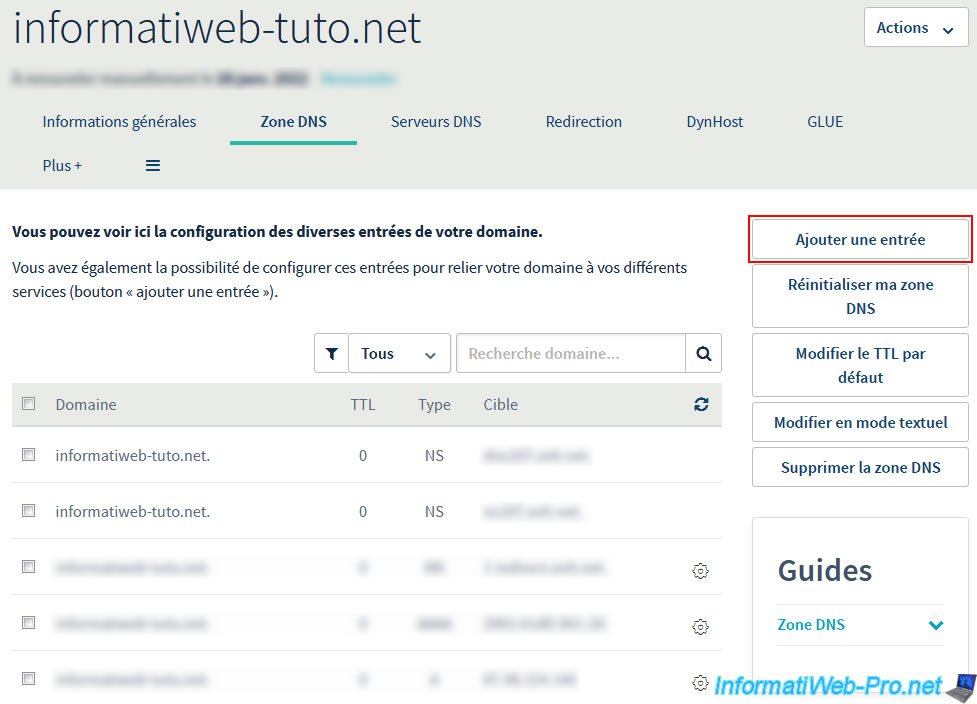
Then, go to the provider where you bought your domain (in our case : OVH) and locate the "DNS Zone" option of your domain.
At OVH, click on the "Add an entry" button on the right.
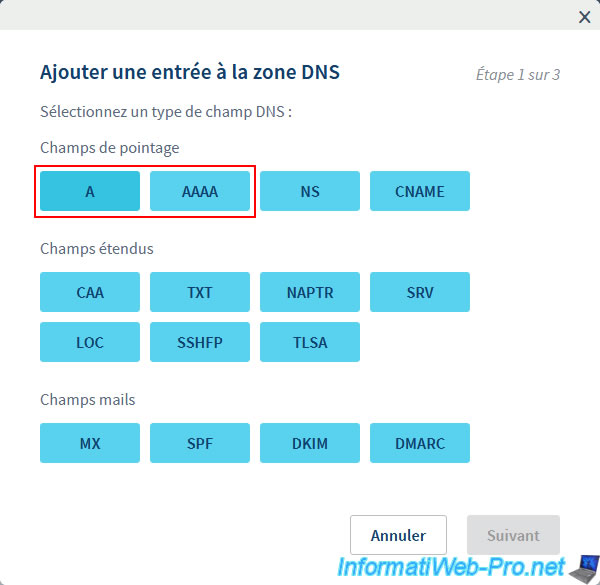
Choose the type of DNS record:
- A : to point the subdomain to an IPv4 address
- AAAA : to point the subdomain to an IPv6 address
Note that if your company has 2 external IP addresses (IPv4 and IPv6), we advise you to create both types of records for compatibility purposes.
In our case, we only have a public IPv4 address, so we will create a type A record.
We create our "rds.informatiweb-tuto.net" subdomain and we specify our public IP address in the "Target" box.
For the TTL, we recommend you put a very low value for your tests. Then, you can put it back to default.
Indeed, if you made a mistake here, the future change will be saved for everyone in a very short time.
Which would not be the case with the default value.
Then, once your configuration is good, restore the default TTL to allow your clients to reconnect a little faster.
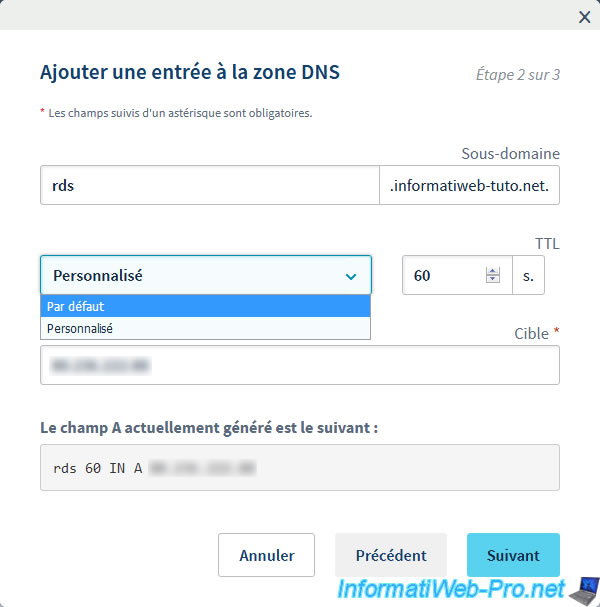
Click Validate.
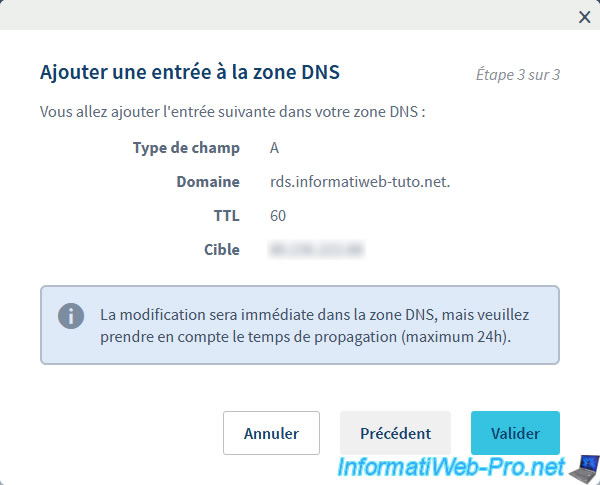
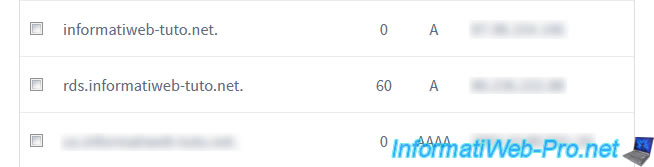
The DNS entry has been added to the DNS zone of your domain.

In the DNS zone, you will find your DNS record with :
- the desired subdomain
- the TTL (lifetime of this record in the cache of DNS servers around the world)
- the DNS record type : A or AAAA
- the IP address on which it points
Share this tutorial
To see also
-
Windows Server 6/7/2019
WS 2012 / 2012 R2 - RDS - Set up HA on your RDS infrastructure
-
Windows Server 3/8/2019
WS 2012 / 2012 R2 / 2016 - RDS - Access RemoteApp via a modern application
-
Windows Server 4/28/2019
WS 2012 / 2012 R2 / 2016 - RDS - Attempt to unblock the session as a user
-

Windows Server 3/16/2019
WS 2012 / 2012 R2 / 2016 - RDS - Change the properties of RemoteApps
No comment