Install and secure a complete mail server (Mail, SMTP, Auth by SASL, IMAP, POP3, webmail, TLS and SSL) on Debian
- Linux
- 25 February 2015 at 15:52 UTC
-

- 3/5
9. Install the Webmail : "RoundCube Webmail"
Now that the mail server is installed and the POP3 and IMAP protocols are installed, it is now possible to retrieve his mails from a remote computer by using a mail client like Thunerbird, Outlook, ... and via webmail.
So we will install Roundcube webmail which is used in the professional world (OVH offers this webmail for some offers).
For security reasons, we will create a "roundcube" user on the Linux machine :
Bash
adduser roundcube
Note : Specify a different password.
As for the "Postfix Admin" script, go this time on the "Roundcube" website that will redirect you to the "Source Forge" website.
Choose the "Stable - Complete" version and click on the "Download" button.

You are now being redirected to the "Source Forge" website. Right-click on "direct link" and click "Copy link location".
You will have that kind of link :
Plain Text
https://downloads.sourceforge.net/project/roundcubemail/roundcubemail/0.9.5/roundcubemail-0.9.5.tar.gz?r=https%3A%2F%2Froundcube.net%2Fdownload%2F&ts=1391350195&use_mirror=netcologne
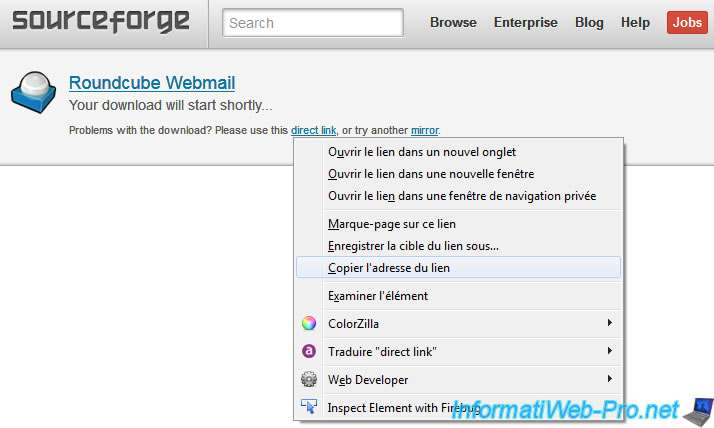
Delete what is behind the ".tar.gz" and then type the following commands :
Move to the root home folder.
Bash
cd ~
Download the latest version of "RoundCube Webmail" for Linux (.tar.gz).
Bash
wget https://downloads.sourceforge.net/project/roundcubemail/roundcubemail/0.9.5/roundcubemail-0.9.5.tar.gz
Unzip the archive that you just downloaded, in roundcube user's folder that you just created.
Bash
tar xzvf roundcubemail-0.9.5.tar.gz -C /home/roundcube/
Move to the "/home/roundcube" folder.
Bash
cd /home/roundcube
Rename the "roundcubemail-x.x.x" folder to "www".
Bash
mv roundcubemail-0.9.5 www
Give rights to the user "roundcube" on the "www" folder (and its contents : -R).
Bash
chown -R roundcube:roundcube www
You can type the command "ls -l" to check that the folder "www" belongs to roundcube.
Bash
ls -l
Now that the script is downloaded, go to phpMyAdmin and create a database "roundcube".
Note : This operation is the same as for Postfix Admin.
Once the database is created, go to the database and click on "Privileges".
Then, click add user and provide the following information :
- Username : roundcube
- Client : localhost (or select Local in the list)
- Password : **** (Click the button generate located below, for safety)
Finally, make sure that the box 'Give all privileges on the database "roundcube"' is selected and click "Execute" at the bottom of the page.
Now that the database and the user associated with this database are created, we will create a new virtualhost "webmail.your-domain.com" to access it through the subdomain "webmail". (And to be like everyone else. It's more ergonomic)
For that, go to the available sites in Apache :
Bash
cd /etc/apache2/sites-available/
Make a copy of the default file.
Bash
cp default webmail
Then, edit that file like this :
Apache
<VirtualHost *:80>
	ServerAdmin webmaster@informatiweb-tuto.net
	ServerName webmail.informatiweb-tuto.net

	DocumentRoot /home/roundcube/www
	<Directory />
		Options FollowSymLinks
		AllowOverride All
	</Directory>
	<Directory /home/roundcube/www/>
       Options Indexes FollowSymLinks MultiViews
       AllowOverride All
       Order allow,deny
       allow from all
	</Directory>

	ErrorLog ${APACHE_LOG_DIR}/error.log

	# Possible values include: debug, info, notice, warn, error, crit,
	# alert, emerg.
	LogLevel warn

    CustomLog ${APACHE_LOG_DIR}/access.log combined

</VirtualHost>
In summary :
- We have removed the alias "/cgi-bin/" and "/doc" because no need it for that subdomain.
- Added a server name (for visitors fall on Roundcube instead of the default site) : ServerName webmail.informatiweb-tuto.net
- We have changed :
1) the email address : ServerAdmin webmaster@your-domain.com
2) the folder where to point this subdomain : DocumentRoot, <Directory /home/roundcube/www />
3) The guidelines "AllowOverride" to "AllowOverride All" so that .htaccess files work.
Then, activate this virtualhost.
Bash
a2ensite webmail
Then, reload the Apache configuration to reflect the changes :
Bash
service apache2 reload
Now that the Virtuahost is configured, we will fill the database "roundcube" (currently empty) by running the script provided in the "SQL" folder of roundcube.
For this, we will use the command line tool of MySQL like this :
Bash
mysql -u roundcube -p roundcube < /home/roundcube/www/SQL/mysql.initial.sql
If you log into phpMyAdmin, you will see that several tables were created in the "roundcube" database.
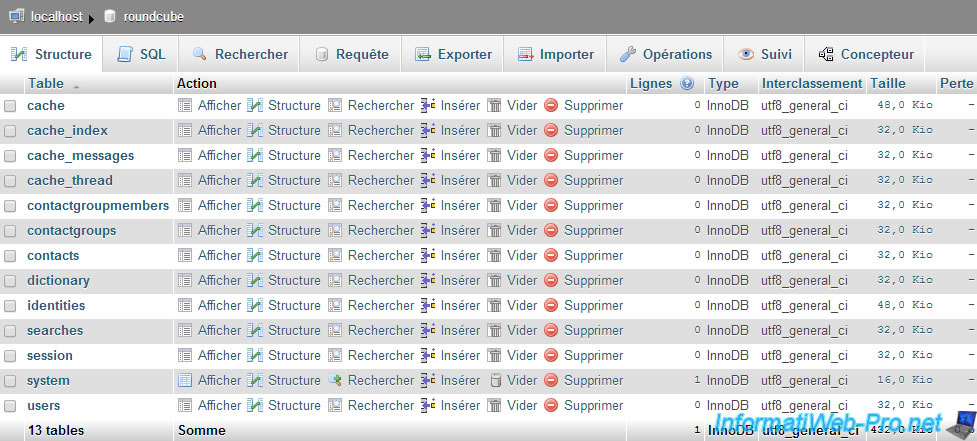
You can now launch the GUI installation by accessing the following address : http://webmail.your-domain.net/installer/
On this page, Roundcube will test your system configuration and tell you whether this configuration is correct or not.
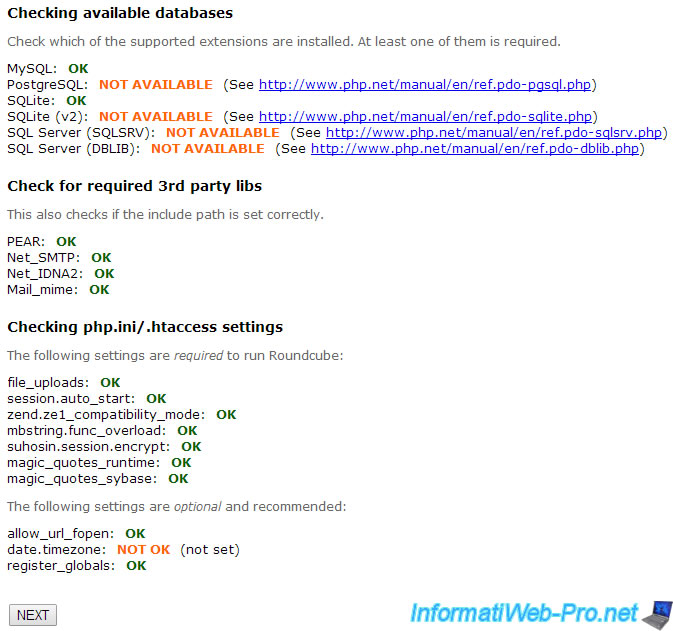
Note : With the 1.1.0 version of RoundCube a "LDAP" PHP extension is optional. To install it, use this command :
PHP
apt-get install php5-ldap
If the variable "date.timezone" is orange, Roundcube recommends that you set this value in the "/etc/php5/apache2/php.ini" file. The values are available on the php.net website.
Bash
vi /etc/php5/apache2/php.ini
Then, reload the apache configuration and refresh the Roundcube installation page (F5).
Bash
service apache2 reload
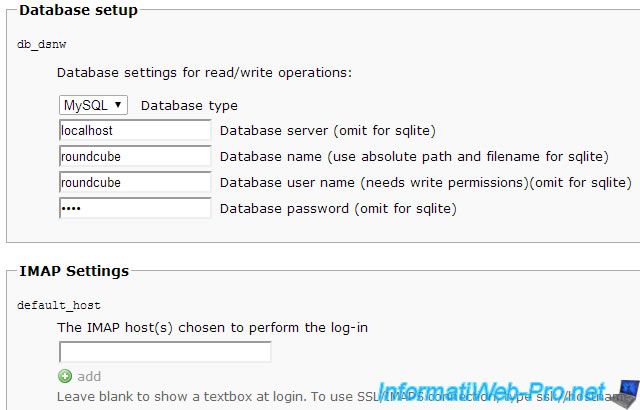
On the next page, mandatory information is information of the database (Database setup) :
- Database type : MySQL
- Database server : localhost
- Database name : roundcube
- Database user name : roundcube
- Database password : password
You can also specify "localhost" as imap server. The box "server" will disappear from the Roundcube login page.
Finally, specify "en_US" as the language in the "Display settings & user prefs".

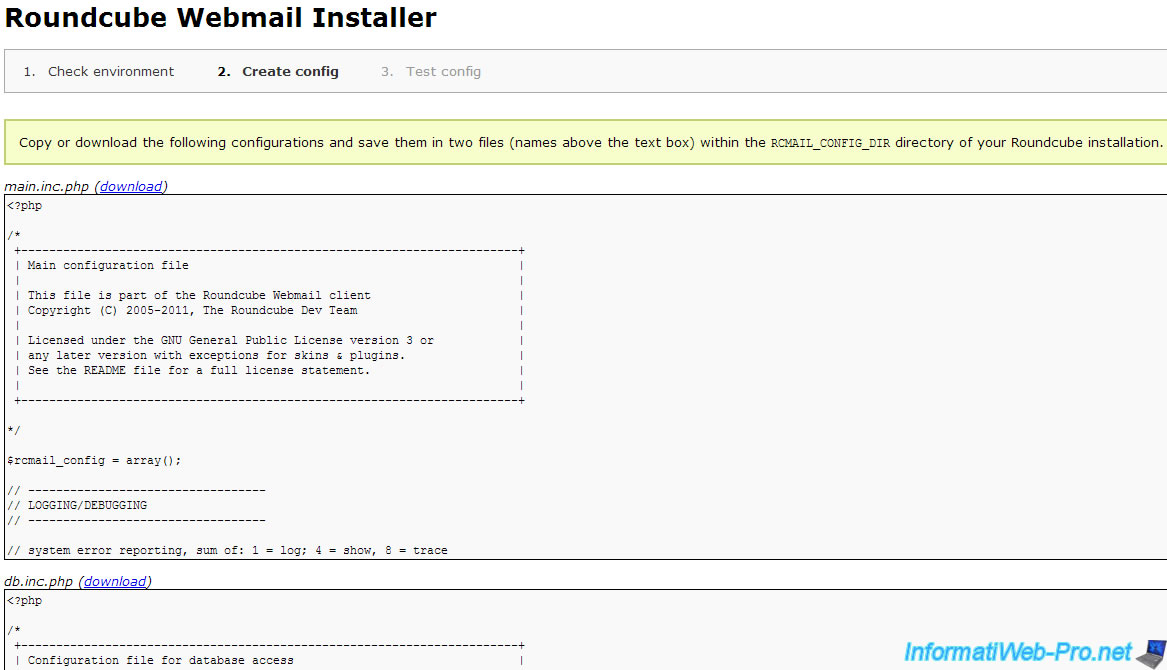
Since the Roundcube script is executed with the apache user "www-data", he doesn't have write permission to the RoundCube folder.
So you have to create the proposed files yourself. These files are created in the "/home/roundcube/www/config" folder.
Bash
cd /home/roundcube/www/config
vi main.inc.php
vi db.inc.php
Once you have created these files, click "Continue".
Now you arrive on a tests page.
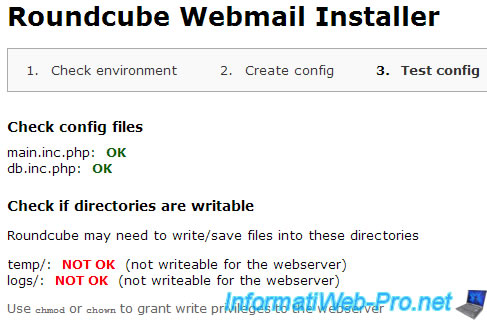
Commencez par régler ces problèmes de droits :

Bash
cd /home/roundcube/www
chown www-data:www-data temp
chown www-data:www-data logs
If all goes well, the messages will become green :

Then, try to send an email using SMTP server.
To do this, first try to send a mail internally : you@your-domain.com to another@your-domain.com.
Then, if it works, try to send mail to an external domain : you@your-domain.com to you@gmail.com
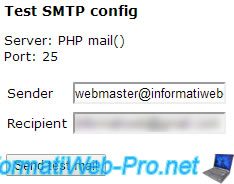
If the sending is successful, the message "send SMTP : OK" will appear.
![]()
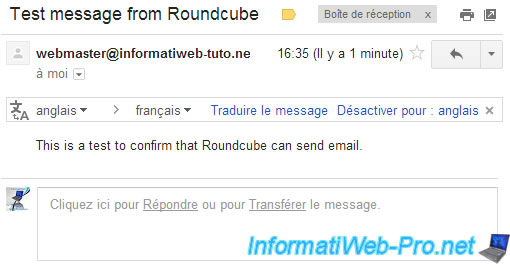
Then, log on your external email address, and check that you have received the email sent by Rouncube.
Note : It's possible that this e-mail arrives in spam since the message is the same for everyone.
Finally, test the retrieval of mails through IMAP :
- Server : localhost (or 127.0.0.1)
- Port : 143 (default port for IMAP)
- Username : you@your-domain.com
- Password : The password for this email address.
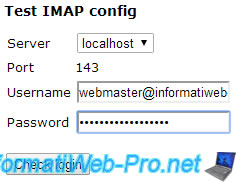
If access to your mailbox is successful via IMAP, the message "IMAP connect: OK (SORT capability: yes)" appears.
![]()
Note : If you get an error "No such file or directory" for IMAP, check the configuration about the "var/spool/vmail" folder.
Then, as recommended by Roundcube, delete the "/home/roundcube/www/installer/" folder.
Bash
rm -R /home/roundcube/www/installer/

Finally, because we use "courier" for the "IMAP" protocol, we will have to modify the "config/defaults.inc.php" file.
If you look in this file, you will find these lines :
Plain Text
// store draft message is this mailbox
// leave blank if draft messages should not be stored
// NOTE: Use folder names with namespace prefix (INBOX. on Courier-IMAP)
Note : The following manipulations avoid you to have the following error : "Server Error: UID COPY: Mailbox does not exist.".
To do this, open the "config/defaults.inc.php" file.
Bash
vi config/defaults.inc.php
And add the prefix "INBOX." for the 4 variables below :
Plain Text
$config['drafts_mbox'] = 'INBOX.Drafts';
$config['junk_mbox'] = 'INBOX.Junk';
$config['sent_mbox'] = 'INBOX.Sent';
$config['trash_mbox'] = 'INBOX.Trash';
Then, write "true" for the "create_default_folders" variable :
Plain Text
$config['create_default_folders'] = true;
If you land on this tutorial due to the error message "Server Error: UID COPY: Mailbox does not exist", modify the above variables, delete all the tables of the "RoundCube" MYSQL database and recreate tables using this command :
Bash
mysql -u roundcube -p roundcube < /home/roundcube/www/SQL/mysql.initial.sql
10. Connect to Roundcube
Return to the root of your domain : http://webmail.your-domain.com/
And connect to your e-mail address. The ending "your-domain.com".
Your email server is now fully operational.
You will also notice that the test mail sent locally via telnet is present in your inbox.
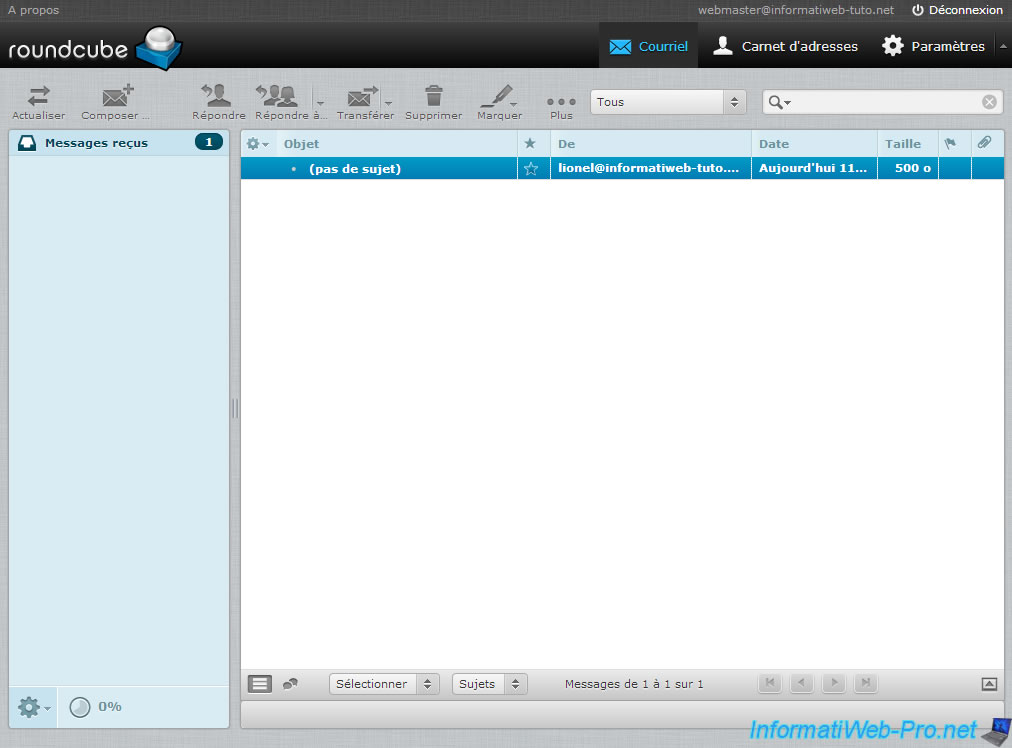
Here are some common things you can do now via Roundcube :
- Send an email : via the "Composer" button
- Managing your Address Book : From the top right icon (a head)
- Respond to an email : Open an e-mail and click : Reply, reply all or forward
- Etc.
Now try to send an e-mail to one or more of your external email addresses and answer them to be sure that the messages correctly pass in 2 directions.
Here is an overview of our outgoing mail test.
Note : As you can see, this message was sent to our gmail address, and then we responded.
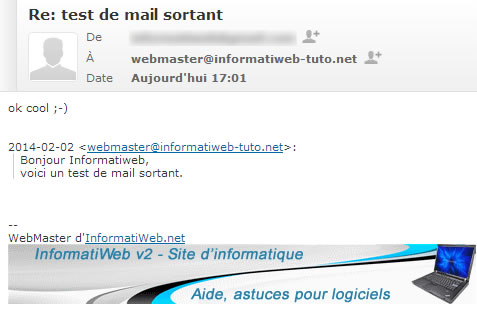
To add the person in the address book, just click on the small icon located next to his email address.
Share this tutorial
To see also
-

Linux 10/11/2016
Debian / Ubuntu - Configure an iSCSI server and an iSCSI client
-
Linux 6/17/2015
Debian / Ubuntu / CentOs - Block DDOS attacks
-
Linux 9/18/2016
Partition your hard drive with fdisk
-

Linux 1/31/2014
Ubuntu - Install a complete web server

No comment