Data replication on 2 servers with clustering and service balancing on Debian
- Linux
- 21 July 2017 at 10:23 UTC
-

- 2/2

5. Heartbeat (Clustering and balancing of services)
5.1. Installation
To install Heartbeat, simply install the "heartbeat" package.
IMPORTANT : As for DRBD, the proposed commands and the files to be created must be executed and created on both servers (unless otherwise stated).
Bash
apt-get install heartbeat
5.2. Configuration
To configure Heartbeat, you will need to create 3 files in the "/etc/ha.d/" folder :
- ha.cf : heartbeat configuration file
- haresources : configuration file for resources
- authkeys : file containing a key that will allow the servers to identify each other.
To begin, create the "ha.cf" file and paste this inside.
Bash
vi /etc/ha.d/ha.cf
Plain Text
# 2 different paths (eth0 and eth1) to allow
# HeartBeat to know if the other server is still accessible.
# - mcast eth0 : IP multicast used through the network interface : eth0
# - bcast eth1 : broadcast packets sent on the eth1 interface (it's better to specify a network interface reserved for Heartbeat, and DRBD if you wish)
mcast eth0 239.0.0.20 694 1 0
bcast eth1

# Delay after which HeartBeat will consider the other server as failing
# Frequency at which HeartBeat will send its "keepalive" packet to the other server
# Etc.
warntime 4
deadtime 5
initdead 15
keepalive 2

# When the primary server becomes available again, HeartBeat revert this server to "Primary"
# if you enable this option (auto_failback on).
# Nevertheless, to avoid causing 2 service interruptions (when the primary server
# goes down, and then when it becomes available again), we recommend that you
# disable this option (auto_failback off).
auto_failback off

# List of cluster servers
node server1
node server2
For more information on the "ha.cf" file, see the official DRBD documentation.
Next, create the "haresources" file.
Bash
vi /etc/ha.d/haresources
And paste this :
Plain Text
server1 IPaddr::10.0.0.30/24/eth0 drbddisk::iw0 Filesystem::/dev/drbd0::/mnt::ext4
Infos :
- server1 : name of the primary server
- 10.0.0.30 : virtual IP to which your users will access to access the active server (server 1 or server 2 if server 1 fails)
- eth0 : specifies the network interface to use.
- iw0 : name of the resource we specified in the file : /etc/drbd.d/drbd0.res
- Filesystem::/dev/drbd0::/mnt::ext4 : the partition provided by DRBD, its mount point, and the file system used on this partition.
And finally, create the file "authkeys" which will contain a key (a password) shared between the 2 servers.
Note : you can replace "my-private-key" by whatever you want, but this value should be the same on both servers.
Bash
vi /etc/ha.d/authkeys
Plain Text
auth 1
1 md5 my-private-key
Change the permissions of this file :
Bash
chmod 600 /etc/ha.d/authkeys
5.3. Starting HeartBeat
To begin, verify that the "/dev/drbd0" partition is not mounted.
To do this, type this command :
Bash
df -h
As you can see, the partition "/ dev / drbd0" doesn't appear in the list.
Plain Text
Sys. fich.                                             Taille Util. Dispo Uti% Monté sur
rootfs                                                    57G  4,9G   49G  10% /
udev                                                      10M     0   10M   0% /dev
tmpfs                                                    396M  644K  395M   1% /run
/dev/disk/by-uuid/3f7e5d0d-62e7-4ec9-a36b-a9f0983644c8    57G  4,9G   49G  10% /
tmpfs                                                    5,0M  4,0K  5,0M   1% /run/lock
tmpfs                                                    1,3G  224K  1,3G   1% /run/shm
Start HeartBeat on the primary server (in our case : server1).
Bash
/etc/init.d/heartbeat start
When you start HeartBeat, you will see this.
This is completely normal. This is not an error, but an information (INFO).
Plain Text
Starting High-Availability services: IPaddr[6171]: INFO:  Resource is stopped
Done.
Wait for a few seconds and type the command again :
Bash
df -h
You should see the "/dev/drbd0" partition mounted on "/mnt".
If this is not the case, wait another minute and then type the command "df -h" again.
If the partition still doesn't appear, verify that your configuration is correct (configuration of DRBD, HeartBeat, and your network interfaces).
Plain Text
Sys. fich.                                             Taille Util. Dispo Uti% Monté sur
rootfs                                                    57G  4,9G   49G  10% /
udev                                                      10M     0   10M   0% /dev
tmpfs                                                    396M  648K  395M   1% /run
/dev/disk/by-uuid/3f7e5d0d-62e7-4ec9-a36b-a9f0983644c8    57G  4,9G   49G  10% /
tmpfs                                                    5,0M  4,0K  5,0M   1% /run/lock
tmpfs                                                    1,3G  372K  1,3G   1% /run/shm
/dev/drbd0                                                79G  184M   75G   1% /mnt
If the "/dev/drbd0" partition appears, then you can also run HeartBeat on the secondary server ("server2" in our case).
Note that an interface "eth0:0" should also appear if you type this command :
Bash
ifconfig
Plain Text
...
eth0:0    Link encap:Ethernet  HWaddr 00:0c:29:49:00:aa
inet adr:10.0.0.30  Bcast:10.0.0.255  Masque:255.255.255.0
UP BROADCAST RUNNING MULTICAST  MTU:1500  Metric:1
...
On the secondary server, type the command :
Bash
/etc/init.d/heartbeat start
Note that the partition will not be mounted on the secondary server because the primary server is still available (not failing).
6. Test of the cluster
For the moment, if you type the "drbd-overview" command on server1, you will see that it is the primary server and the DRBD partition is mounted on "/mnt".
Bash
drbd-overview
Plain Text
0:iw0 Connected Primary/Secondary UpToDate/UpToDate C r----- /mnt ext4 79G 184M 75G 1%
If you type the "watch drbd-overview" command on server 2, you will see that this is the secondary server and the partition is not mounted at this time.
In order for the partition to be mounted on this server, the primary server must be down.
Note : the command below refreshes its display every 2 seconds.
Bash
watch drbd-overview
Plain Text
Every 2,0s: drbd-overview                               Thu Oct 13 21:32:27 2016

  0:iw0  Connected Secondary/Primary UpToDate/UpToDate C r-----
To simulate this failure, simply stop HeartBeat on the main server.
Bash
/etc/init.d/heartbeat stop
So, you'll see that server2 will show you this.
This means that HeartBeat has just switched your secondary server to primary.
And as you can see, HeartBeat has mounted the partition on the secondary server, because the primary server is "failing".
Plain Text
Every 2,0s: drbd-overview                               Thu Oct 13 21:34:06 2016

  0:iw0  Connected Primary/Secondary UpToDate/UpToDate C r----- /mnt ext4 79G 184M 75G 1%
If you restart HeartBeat on server1 (which was the primary server), HeartBeat will switch again your services on server 1 (if the option "auto_failback on" is present in the file "/etc/ha.d/ha.cf").
Note : press CTRL + C to exit the "watch drbd-overview" command.
Share this tutorial
To see also
-

Linux 2/4/2014
Debian / Ubuntu - Install a FTP server
-

Linux 12/20/2014
Debian / Ubuntu - Monitor your server with Monit
-
Linux 10/5/2015
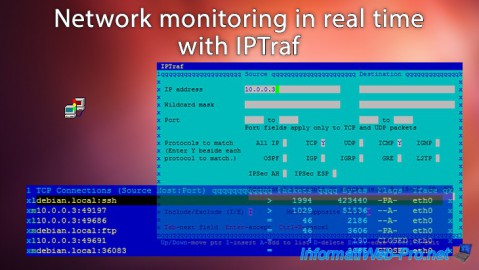
Network monitoring in real time with IPTraf
-

Linux 2/12/2016
OVH - KVM mode
No comment