Pools and high availability (HA) with Citrix XenServer 6.5
- Citrix
- Citrix XenServer
- 27 October 2016 at 10:17 UTC
-

- 5/5
12. Configure HA : High Availability
High availability allows you to configure your server pool in order to get the maximum availability for your various services.
With the HA, when a server is unavailable or down, the impacted virtual machines can be restarted automatically on another server of the pool, if possible.
In addition, you can also manage the boot order of your virtual machines to be able, for example, to launch your local DNS server before other virtual machines that depend on it.
As reported by Citrix, the HA should always be used with :
- the storage that supports multiple paths : multipathed storage (multipathing)
- linked networks (linked NICs) : bonded networking

For the multipathing, we have already enabled it and this is why we finally used an iSCSI storage that supports this technology.
What remains is to configure the "networking bonded".
12.1. Linking networks (NICs) of your XenServer servers
Whether your XenServer servers are members of a pool or not, you will can link your network cards in order to benefit from greater bandwidth and/or for have a fault tolerance.
In this case, Citrix says that linked networks should always be used with the HA and that is why we will put in place.
As indicated in intro of this tutorial, our 2 XenServer servers have 2 network cards each.
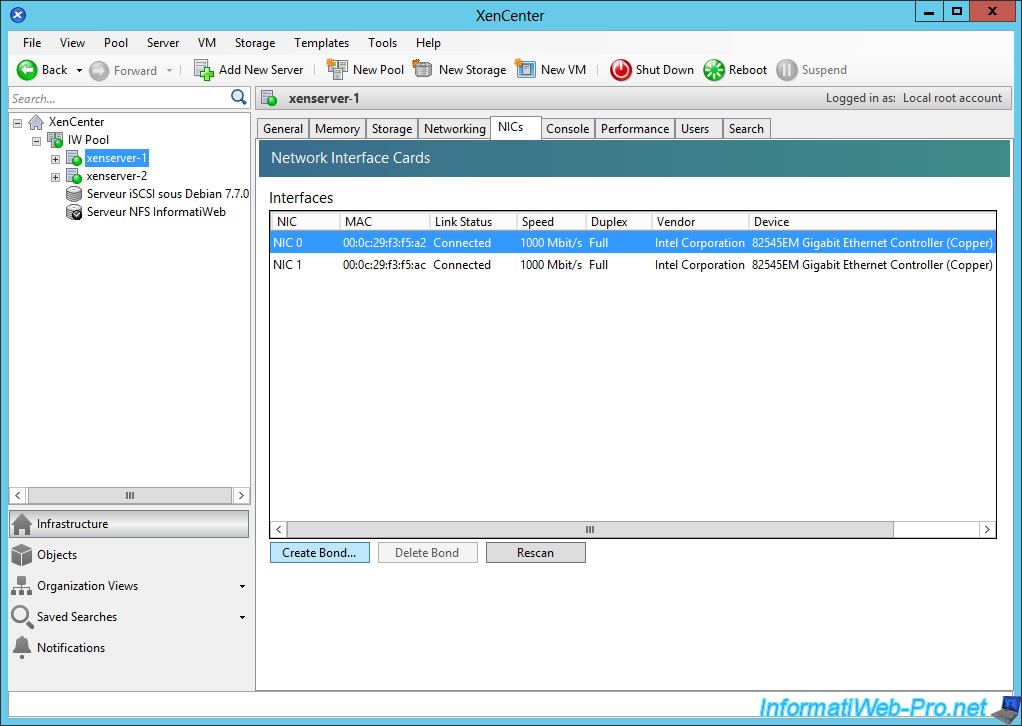
To link networks (and therefore also network cards) of a XenServer server, select it, and then go to the "NICs" tab (which means "network interfaces" or "network cards").
Then, select a network card and click Create Bond.
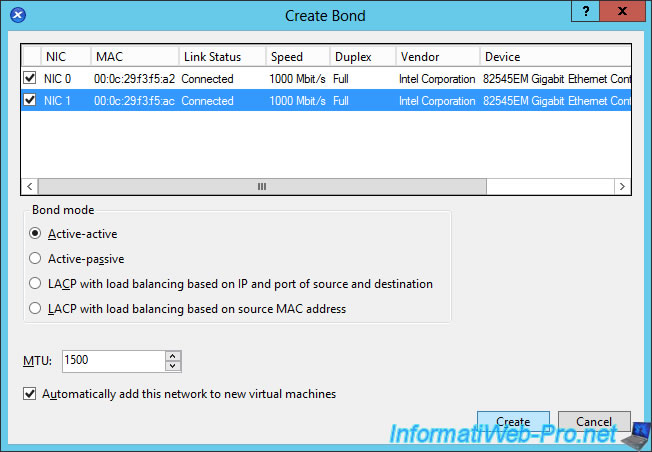
As you can see, XenServer offers 4 types of linked networks :
- Active-active : increase your server bandwidth + fault tolerance. (The two network cards must be connected to the same switch.)
- Active-passive : fault tolerance only (fail-over support) for all modes of traffic. (The two network cards must be connected to the same switch.)
- LACP with load balancing based on IP and port of source and destination
- LACP with load balancing based on source MAC address
Sources :
- Active/Active : XCP NIC Bonding
- Active/Passive : Network Interface Card Bonds in XenServer - Characteristics Active/Passive or Active/Backup
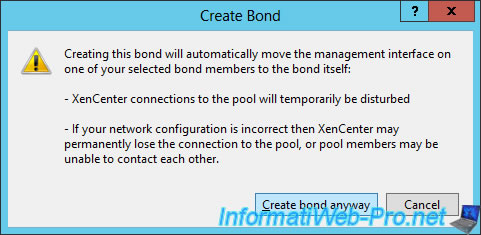
Because that we change network interfaces, connection to your pool will be temporarily unavailable (for a few seconds).
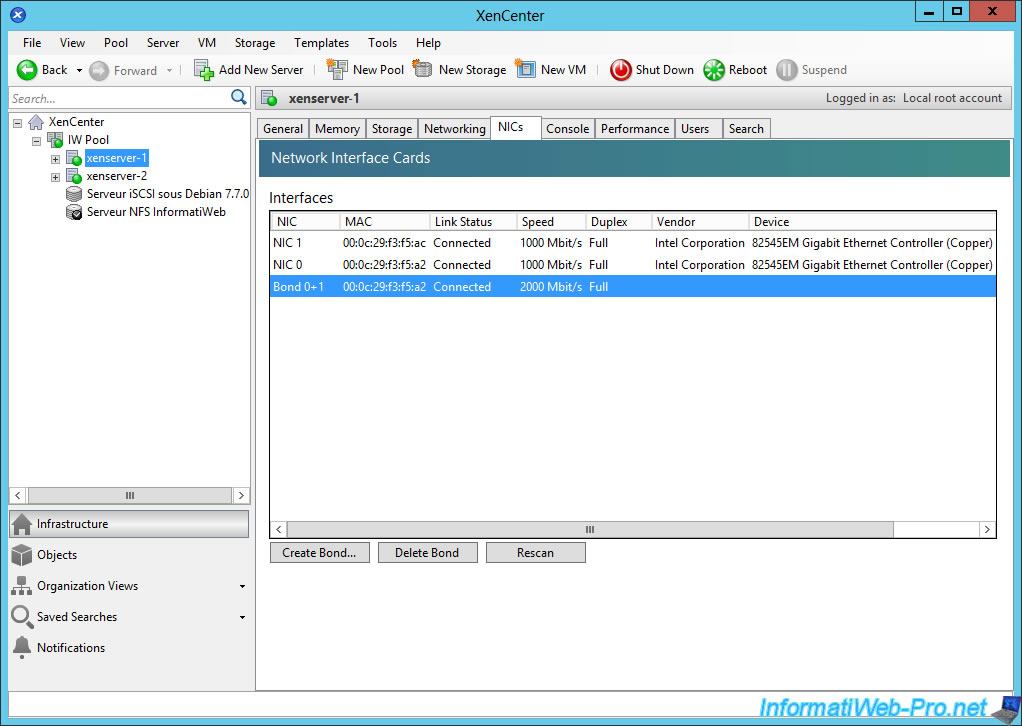
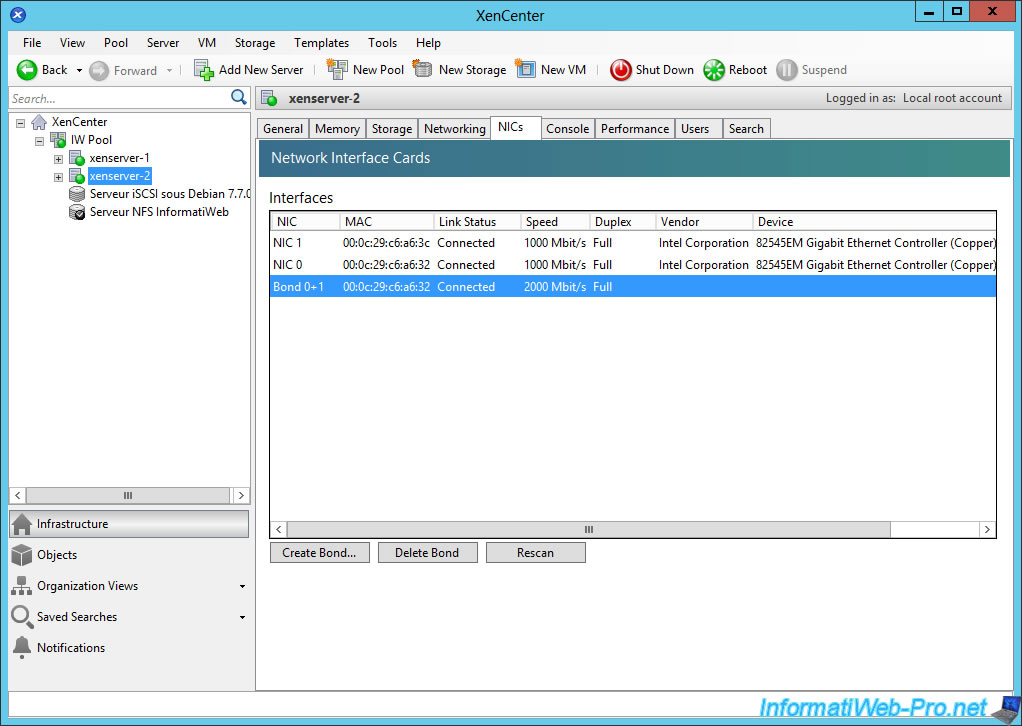
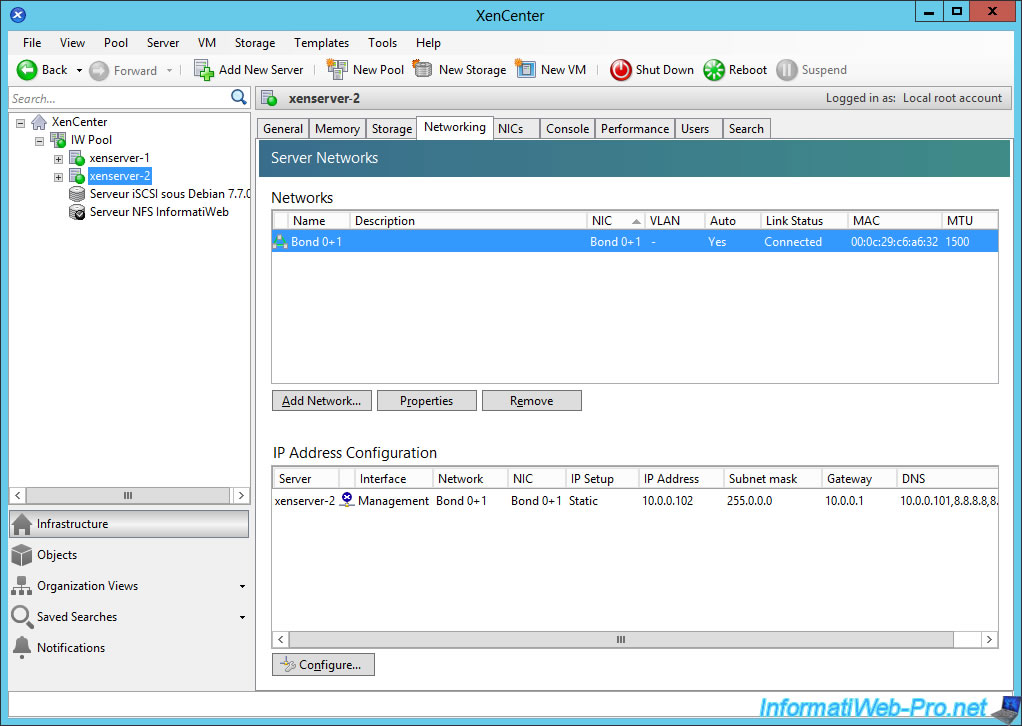
Once created, you will see a Bond x+x in NICs and Networking tabs of your XenServer server.
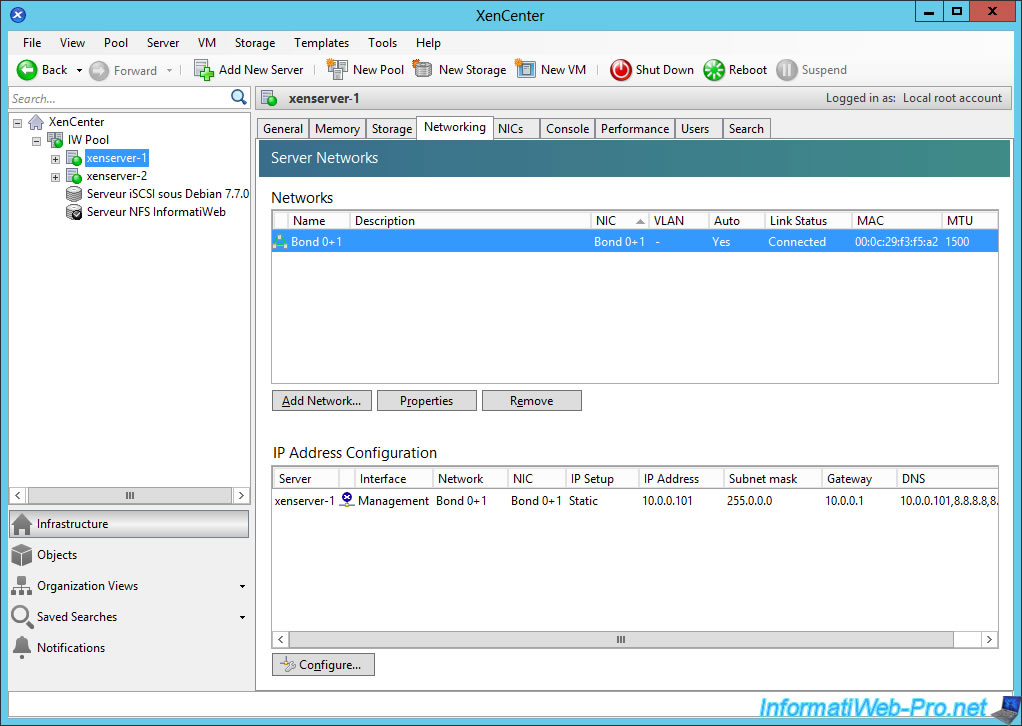
For other servers of the pool, it's possible that the Bond is automatically created after the Bond you have made on a server of the pool.
12.2. VM configuration to be agile
For that your VMs are agile, you must :
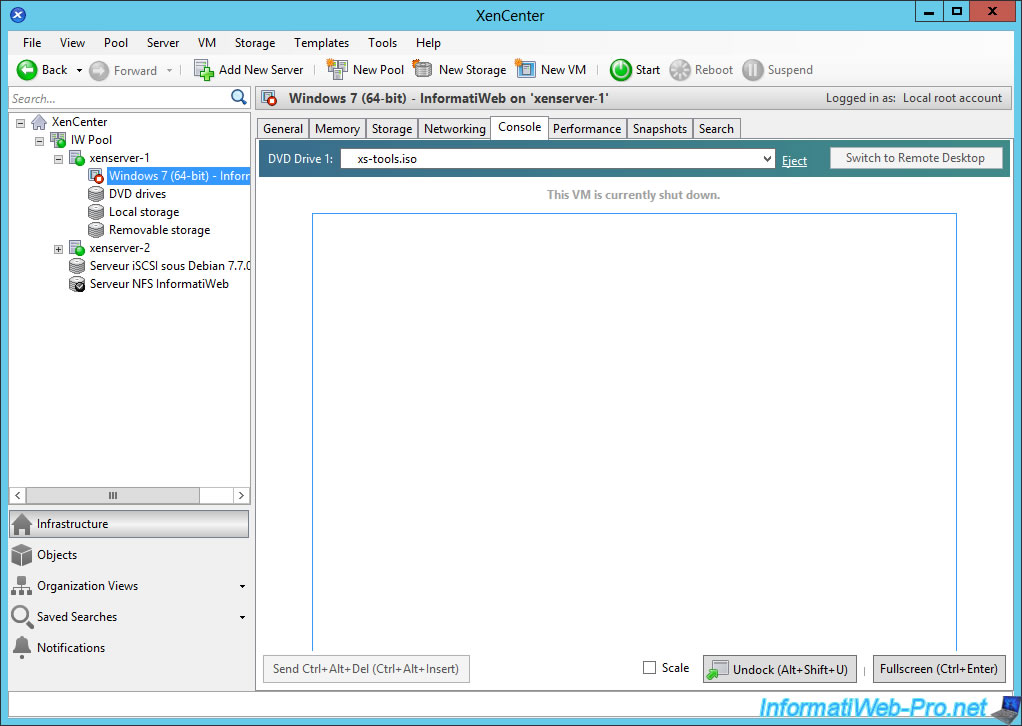
- avoid leaving a CD in the virtual drive of the VM
- use shared networks.
To remove the CD present in the CD drive of the VM (if such is the case), simply select the VM, go to the "Console" tab and click on the "Eject" link.
For shared networks, you just need to use the new network "Bond 0+1" created earlier on our XenServer servers.
Since we created and installed the VM BEFORE linking the networks of our XenServer servers, the VM no longer boots and HA will indicate that the VM is not agile for the reason "The vm is not using a shared network" .
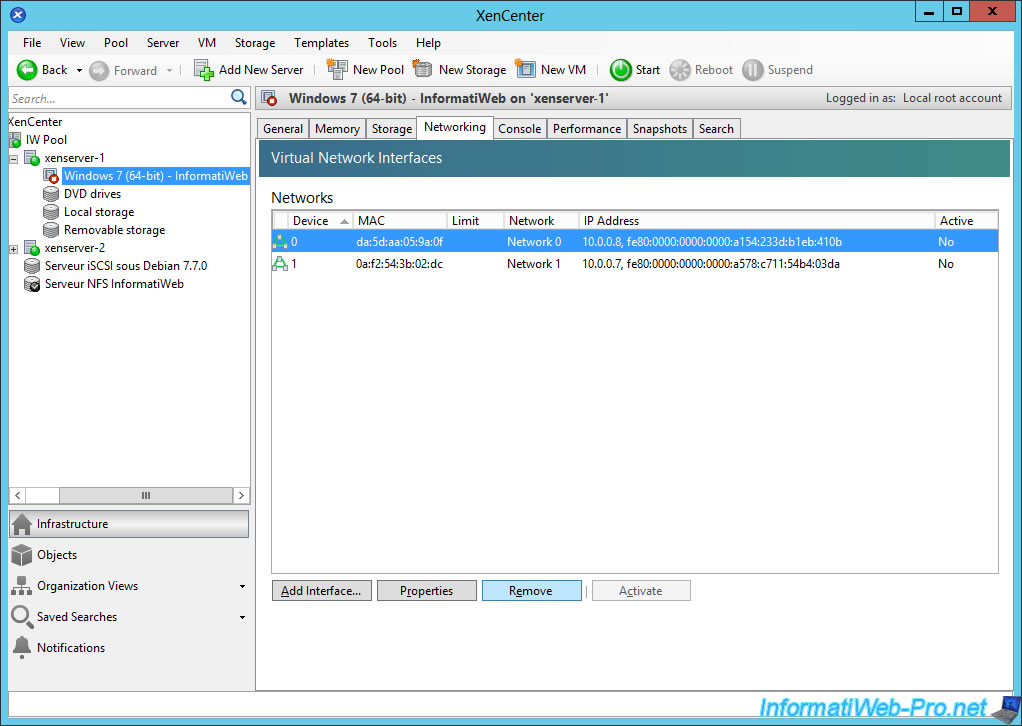
To solve this problem, select the VM previously installed and go to the "Networking" tab of it.
Delete the listed networks.
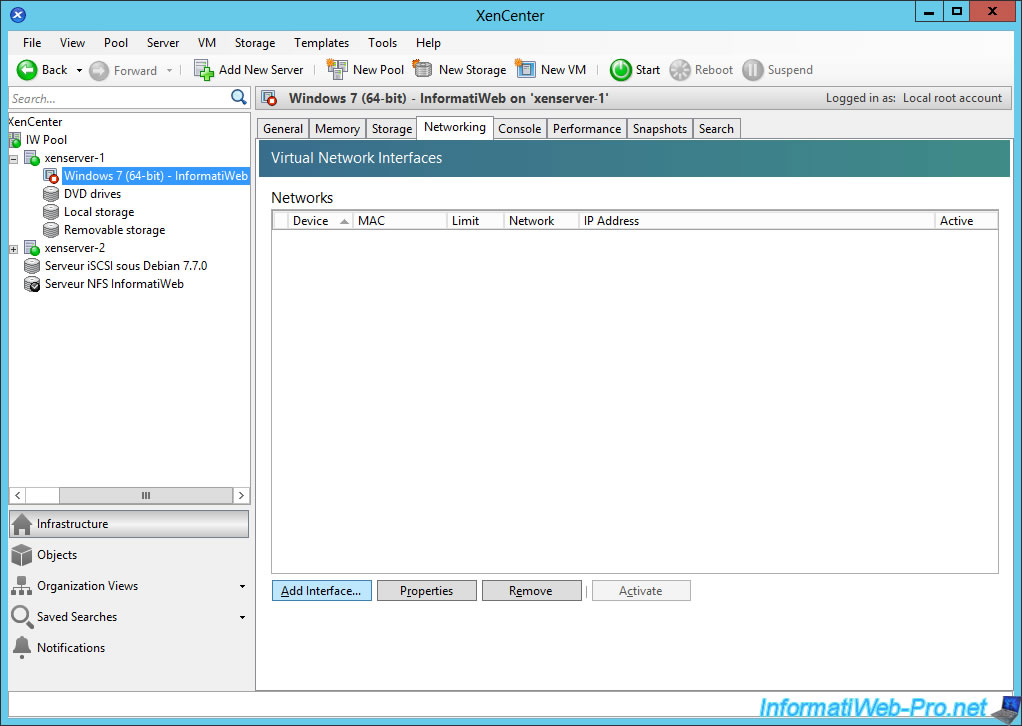
Add a new interface.
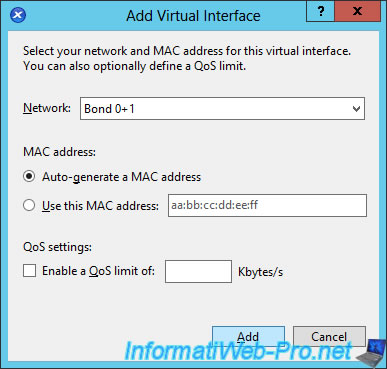
Select the "Bond 0+1" network and click Add.
Note : If you open the list, you will see that the two other networks (Network 0 and 1) no longer exist.
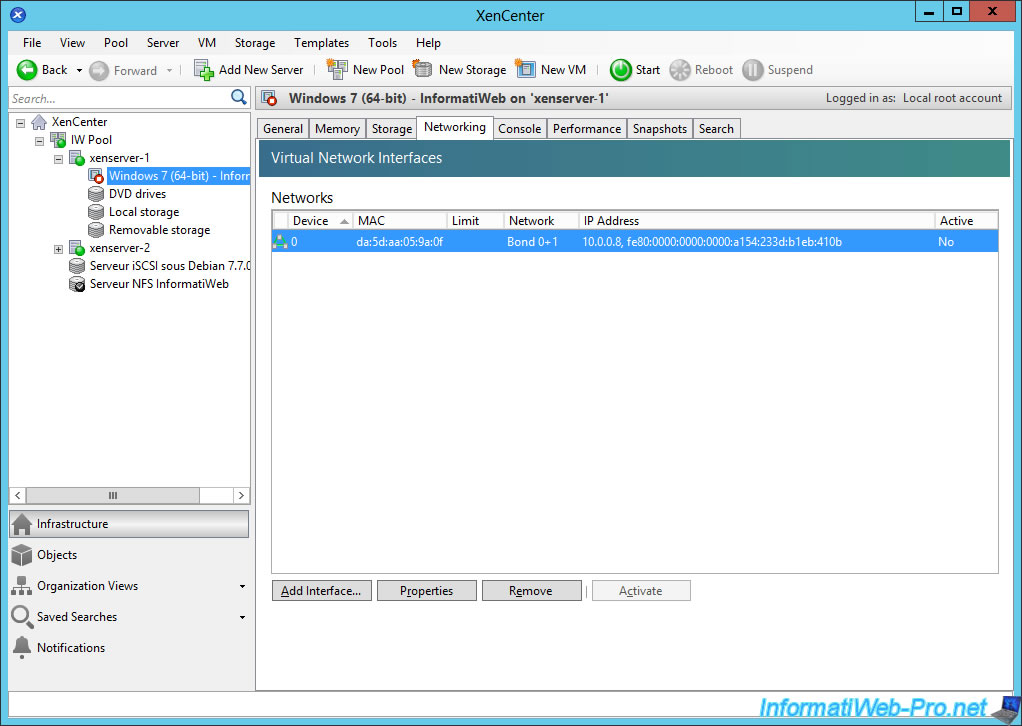
And now, our machine uses the new network of our XenServer server.
Now your VM is agile and can be restarted on any server of the pool.
12.3. Enable HA : High Availability
To enable HA, you must have a shared iSCSI, NFS or Fibre Channel LUN storage of at least 356 MB :
- 4 MB for heartbeat
- 256 for the volume metadata
In our case, we have a shared iSCSI of 80GB on which we have stored files of our virtual machine.
As the prerequisites are already filled, select your pool, go to the "HA" tab and click on : Configure HA.
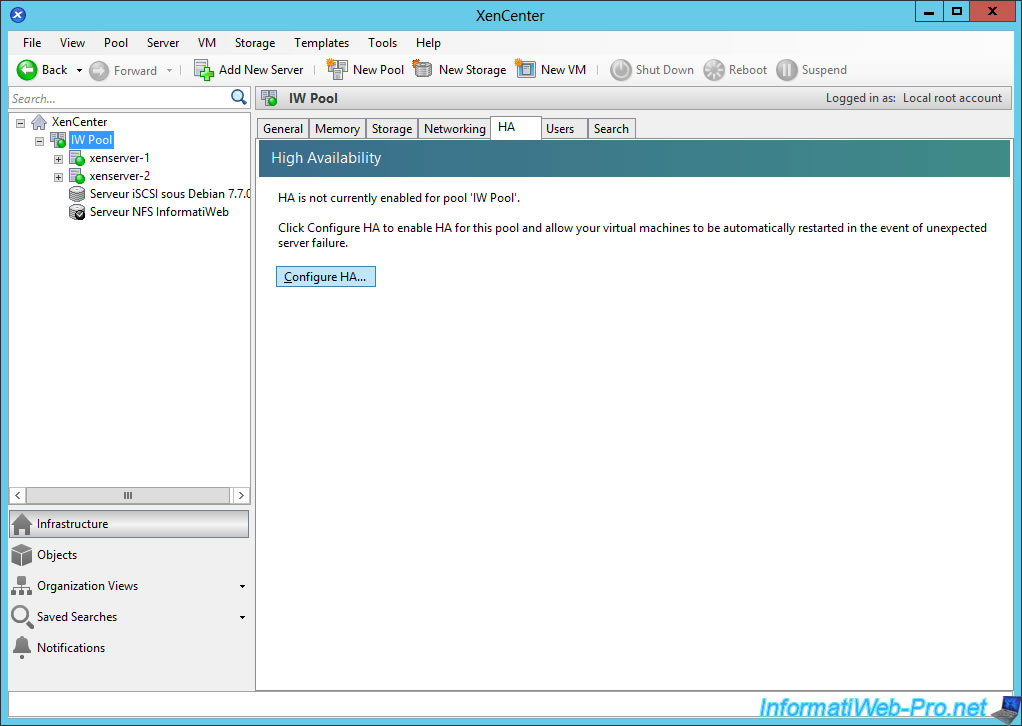
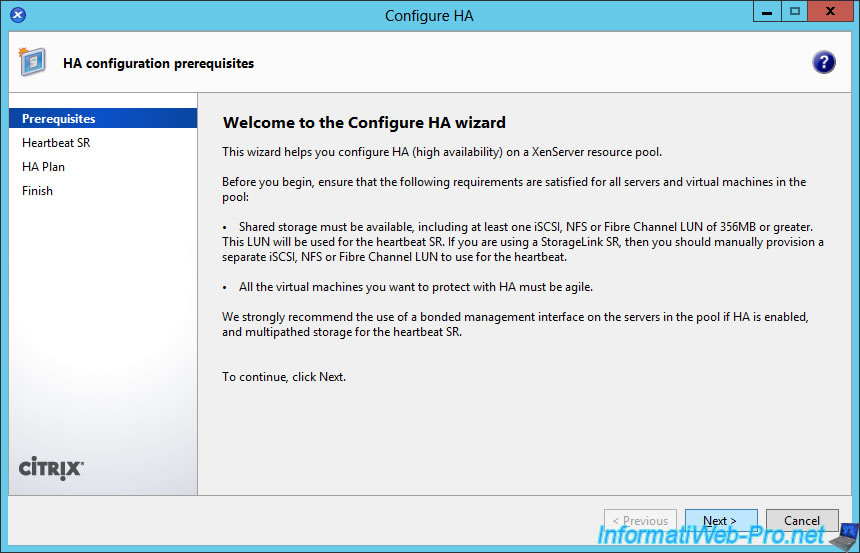
The HA configuration wizard appears.
As you can see, the wizard also reports that your VM must be agile. (Hence the changes made previously.)
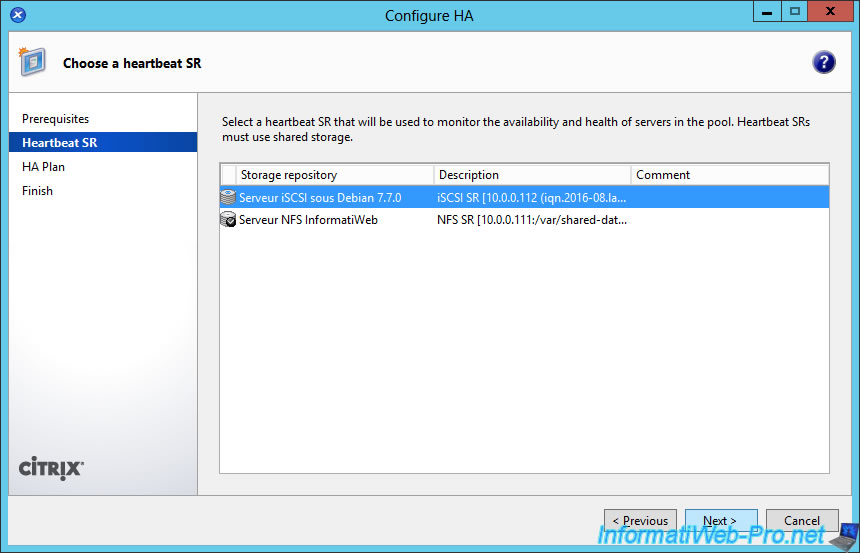
Select the shared storage where you want to store the heartbeat of HA.
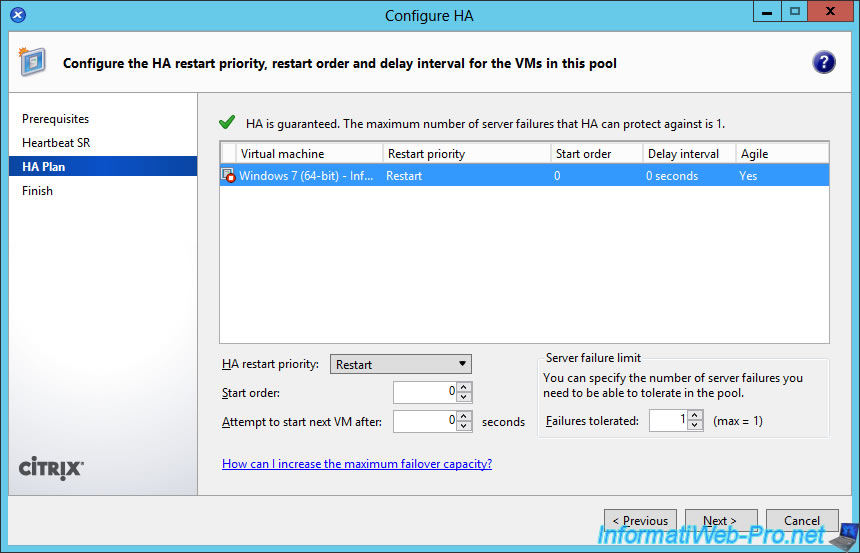
At "HA Plan" step, you can choose what you want to do with each virtual machine :
- If she must be restart
- If it is necessary to restart it (if possible). Others will therefore take precedence over them.
- If she should not be restart.
- In what order restart them. For example : Windows Server servers that dependent on an Active Directory server.
- If you have to wait x seconds (the time that another specific VM starts) before restarting the desired VM.
- The maximum number of servers that can fail. Everything depends on the resources (RAM, ...) of your XenServer servers, the number of virtual machines you have and the number of XenServer servers you have in this pool.

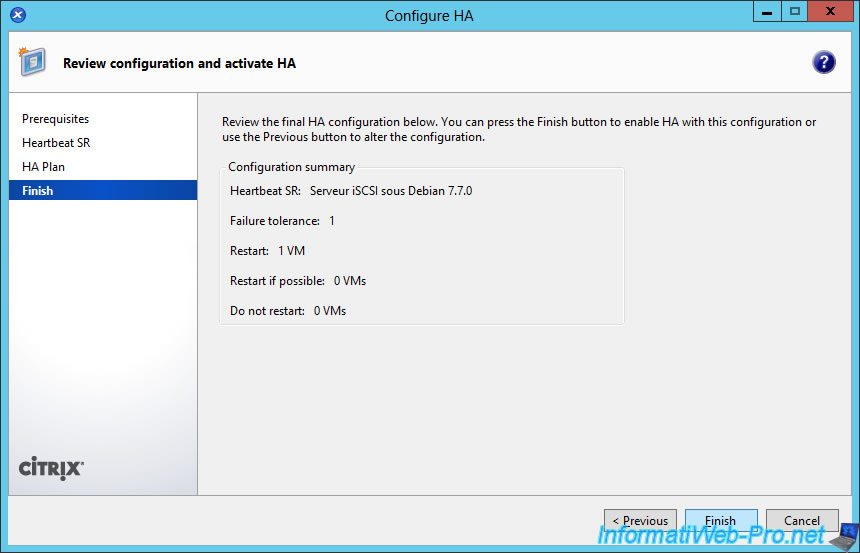
The wizard displays a summary of the configuration.
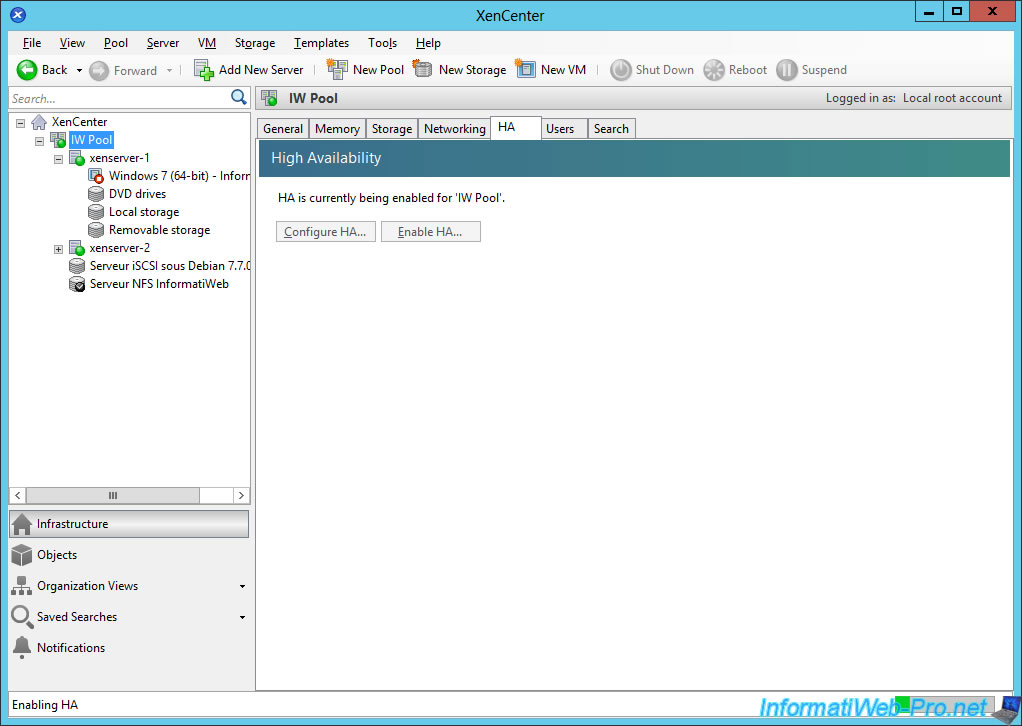
Wait during the activation of the HA.
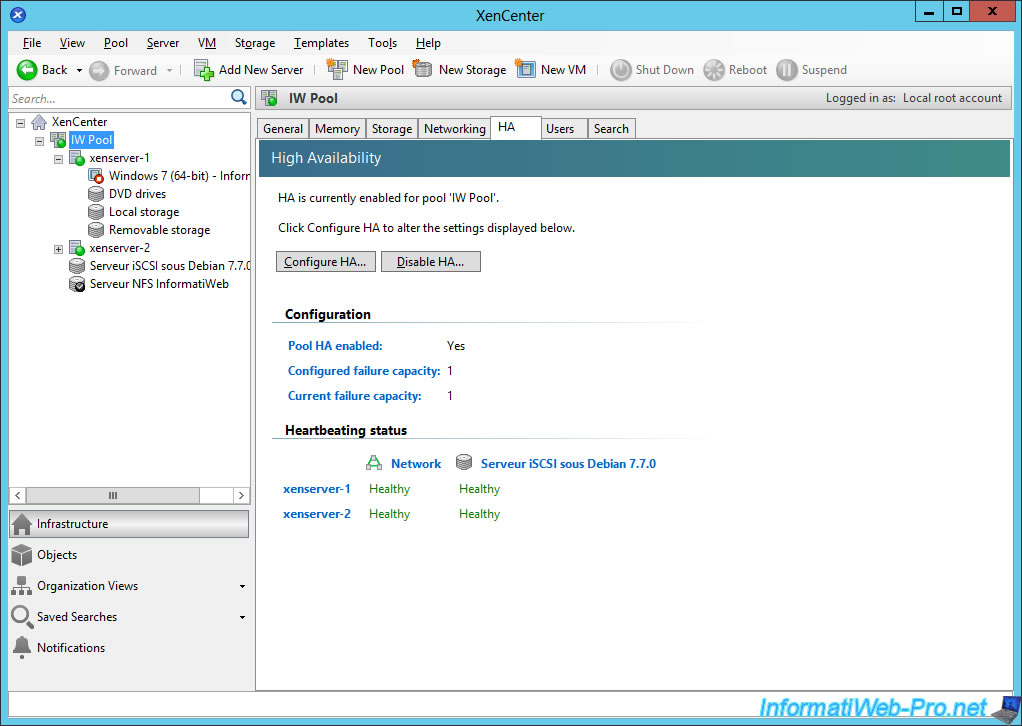
Once enabled, you can view the status of the heartbeat about the network and the connection to the iSCSI server for XenServer servers of your pool.
Note that the status "Error" (or other error) may be displayed during several seconds after the activation of the HA. No worries, wait 30 seconds, and the status will change to Healthy (green).
12.4. Test HA
Start a test VM on a XenServer server of the pool protected by the HA.
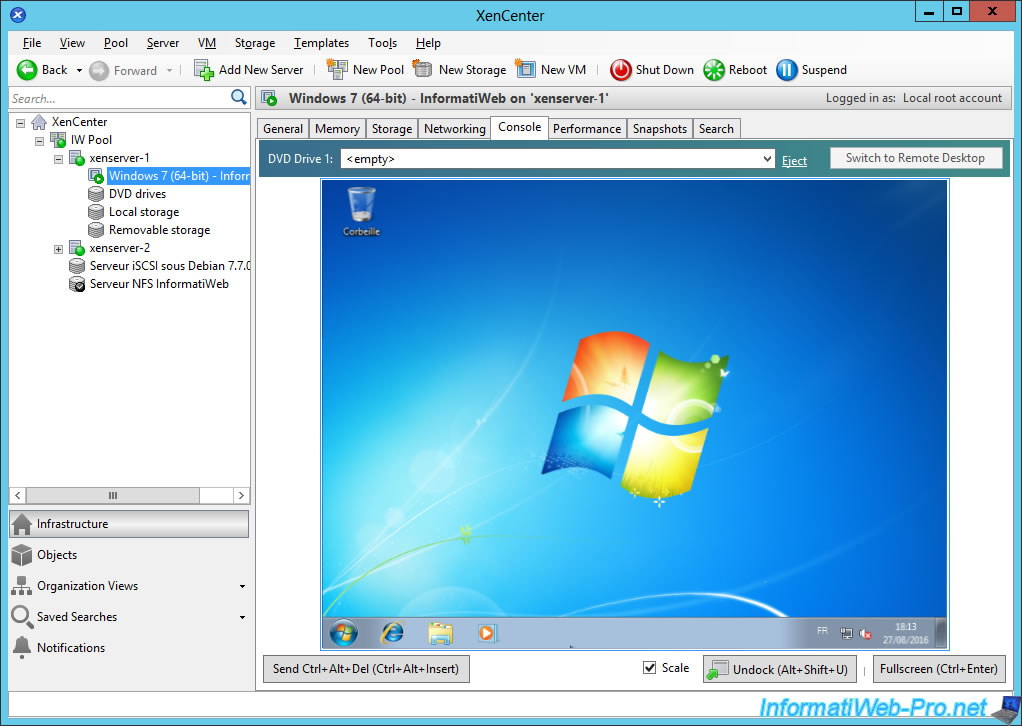
Then, once started, disconnect the network cables of the XenServer server.
Note that this will cause an automatic restart (but not brutal) of the concerned XenServer server.
After 30 seconds or one minute, XenCenter will consider the server as permanently inaccessible or down, and will therefore look a new master server after 60 seconds.
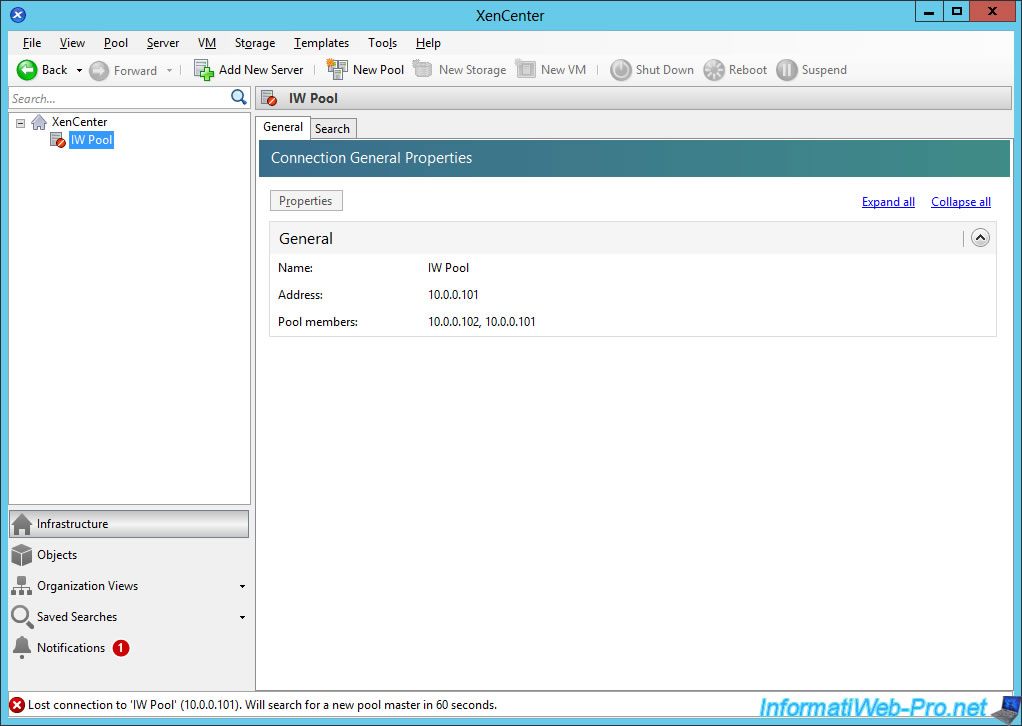
Wait, and XenCenter will automatically reconnect to one of the other XenServer servers of your pool.
Note that the server disconnect from the network will be in "Disabled" status in XenCenter.
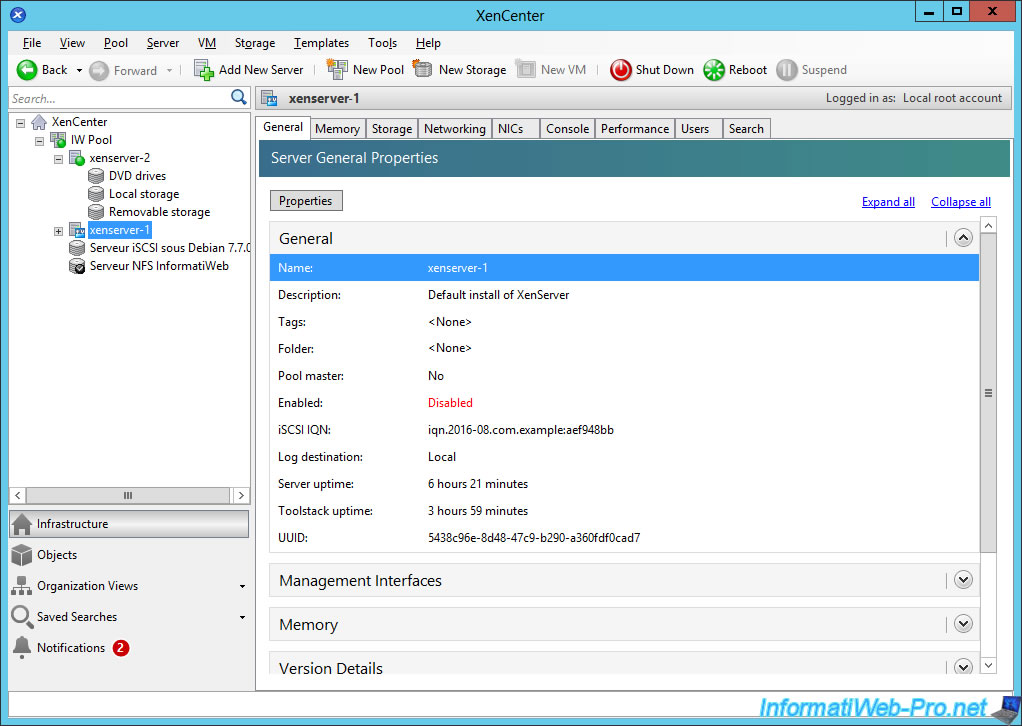
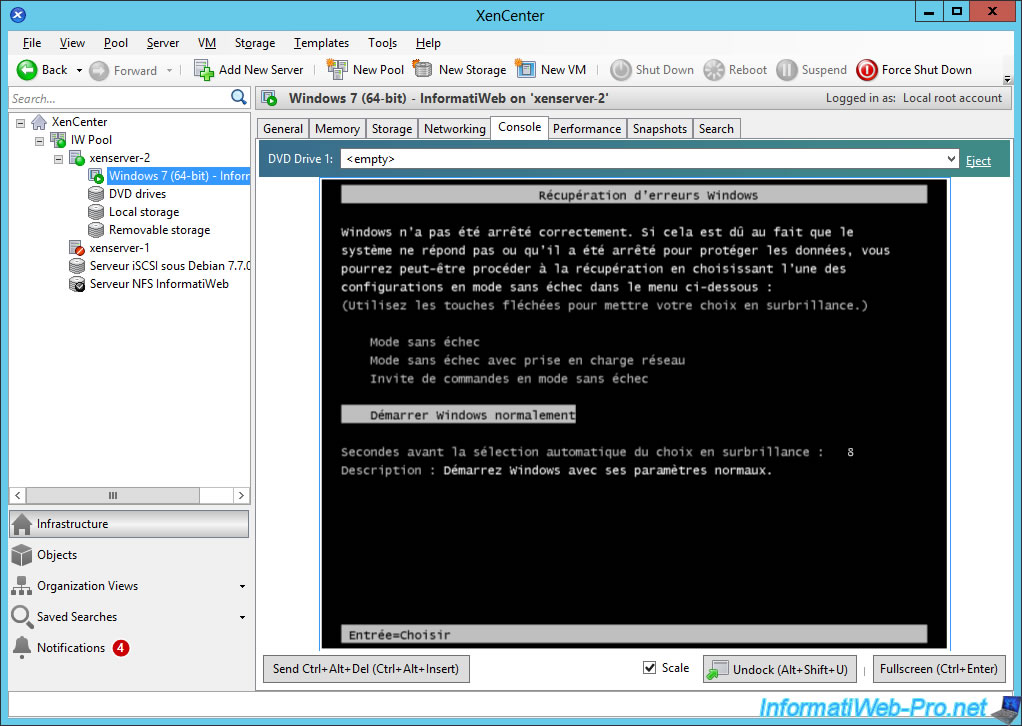
Wait a little longer and you will notice that your VM will appear on one of your other XenServer servers.
And she will start automatically.
Of course, since XenServer is not able to back up the RAM in the network share (NFS or iSCSI), the VM restart, but his shutdown will have been brutal.
Hence the error recovery screen displayed by Windows at restart.
Select "Start Windows normally" and press Enter (but you know it).
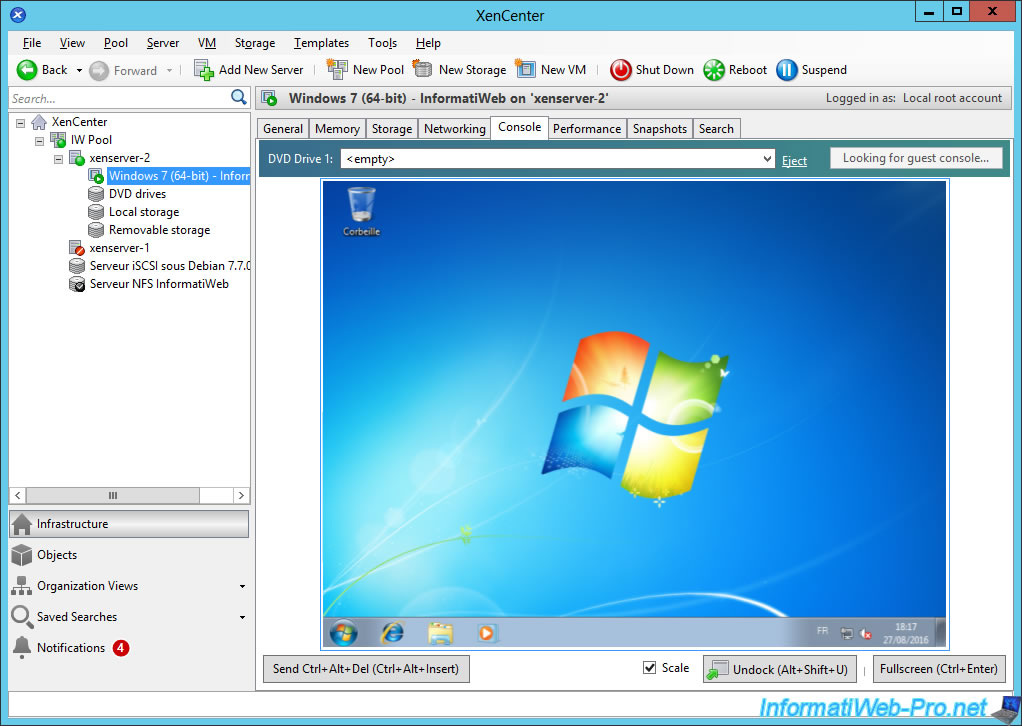
And Windows will finish its startup.
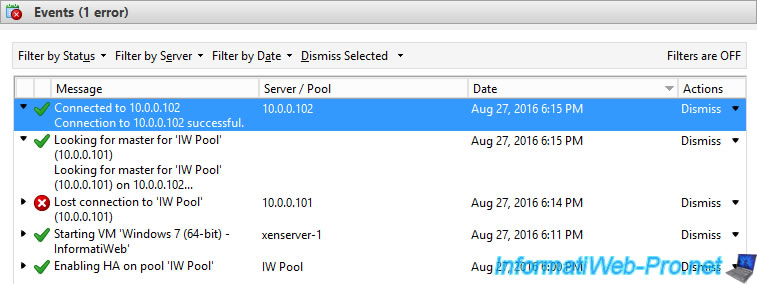
If you look in alerts and events of XenCenter, you will notice several things.
In the events :
- the connection is lost with your servers pool
- He automatically looked for a new master server among those of your pool
- and that he is connected to one of your other servers
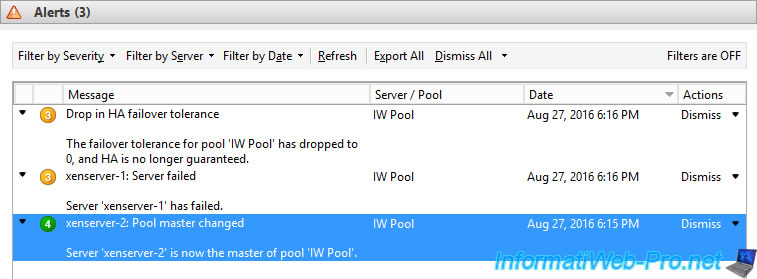
In alerts, you will find that :
- the master server of the pool has changed. (xenserver-2 is the new master server)
- the server 1 is considered down (inaccessible)
- and the fault tolerance has lowered 1 (1 server down) and arrived at 0.
So, at the next unavailable server, services may not be properly insured.
12.5. Disable HA to shutdown your servers
When HA is enabled, you will not be able to place the master server of the pool into maintenance.

If you want to shutdown your servers, for maintenance or because your company is on vacation, you must first disable the HA.
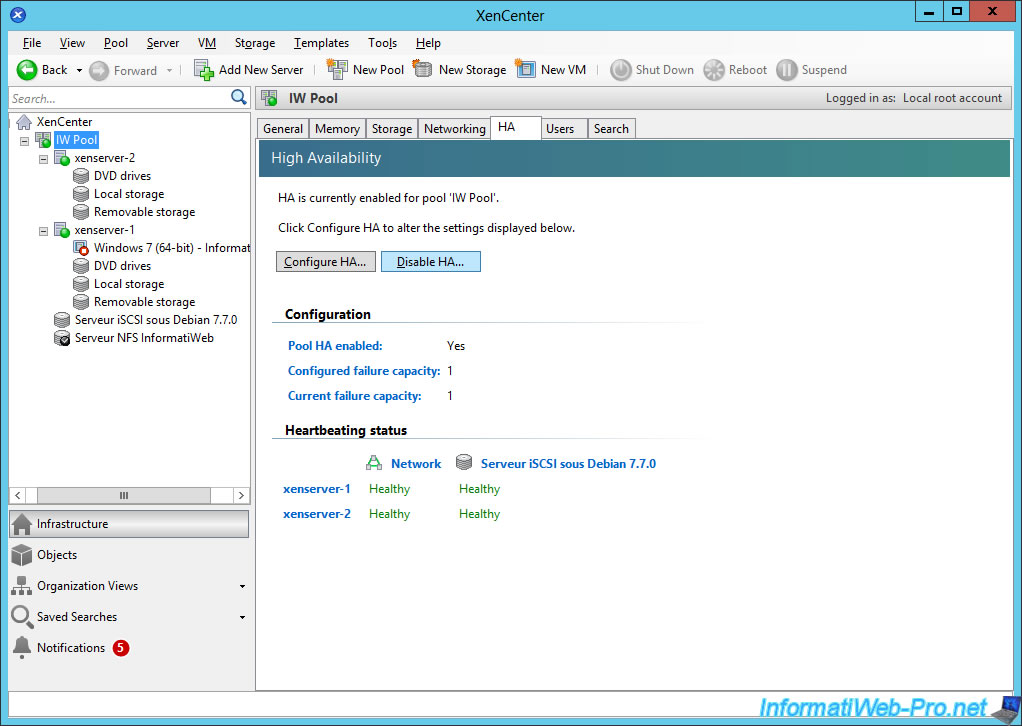
For this, select your pool and go to the HA tab.
Then, click on Disable HA.
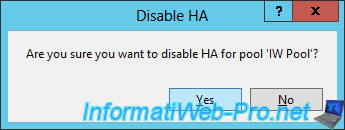
Click Yes.
Once disabled, you can put your XenServer servers into maintenance.
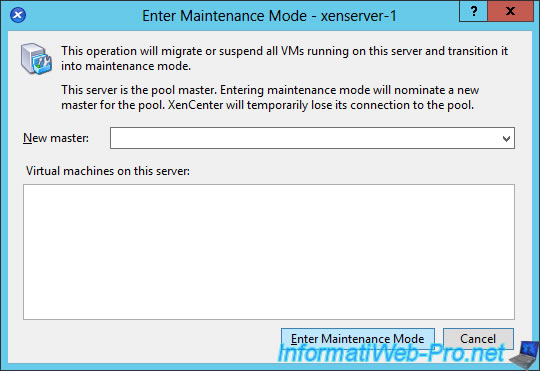
Note that when you want to put the master server of the pool into maintenance, XenCenter will ask you to designate another server of the pool as the new master server.
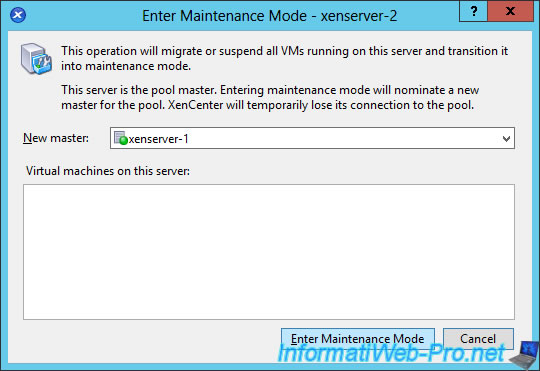
For the last server, just leave the list empty.
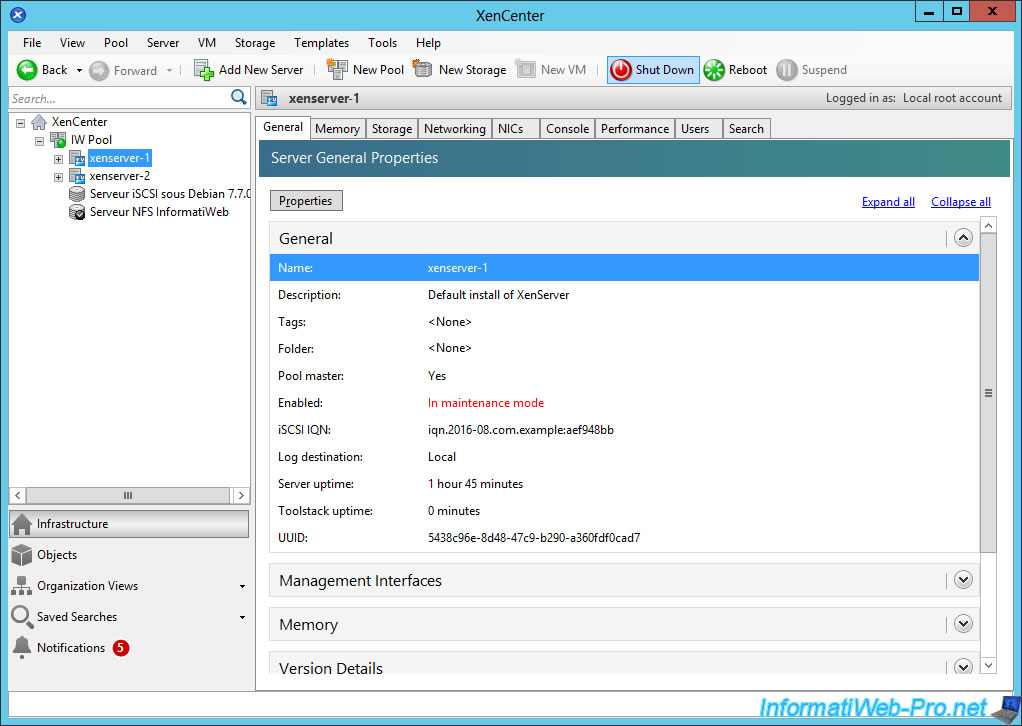
Now, just shutdown servers as usual by clicking Shut Down.
Tip : Finish with the master server (which is also in maintenance) to avoid being disconnected too often.
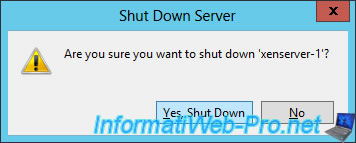
Click on : Yes, Shut Down.
13. Conclusion
In short, with this complete tutorial, you may have :
- create a pool (homogeneous or heterogeneous) of XenServer servers
- optimally manage the fault tolerance (doubled network cards (bonded networking), High Availability (HA), ability to move virtual machines from one server to another, ...).
Share this tutorial
To see also
-

Citrix 11/25/2015
Citrix XenServer 6.5 - PCI passthrough
-
Citrix 4/30/2015
Citrix XenServer 6.5 - Secure the connection using SSL (HTTPS)
-
Citrix 6/13/2017
Citrix XenServer 6.5 - Updating the server
-

Citrix 5/21/2016
Citrix XenServer 6.5 - VGA passthrough

No comment