Deliver desktops by using PVS with Citrix XenDesktop 7.6
- Citrix
- Citrix XenApp / XenDesktop
- 31 May 2015 at 15:13 UTC
-

- 5/5

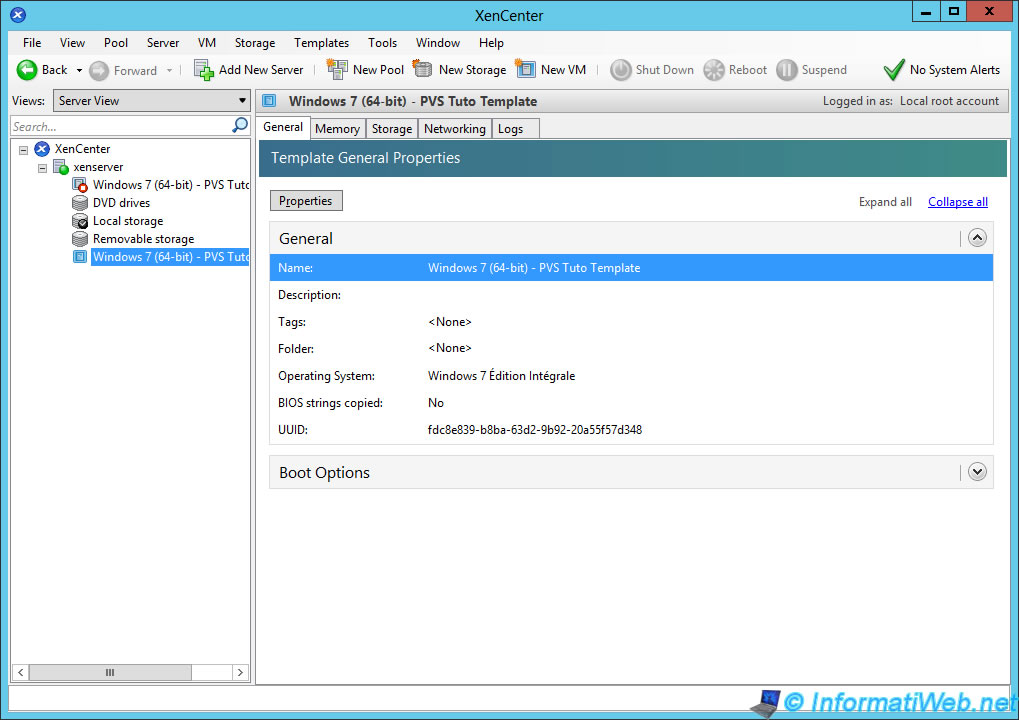
14. Converting the virtual machine to a template
To allow the PVS server to create the catalog of machines in XenDesktop (by using XenDesktop Setup), you must convert the virtual machine into a template.
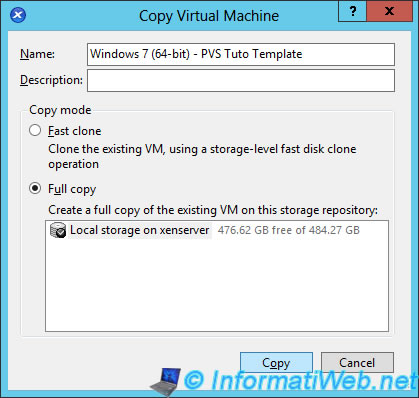
To do this, first make a copy of the virtual machine (for security because the reverse isn't possible).
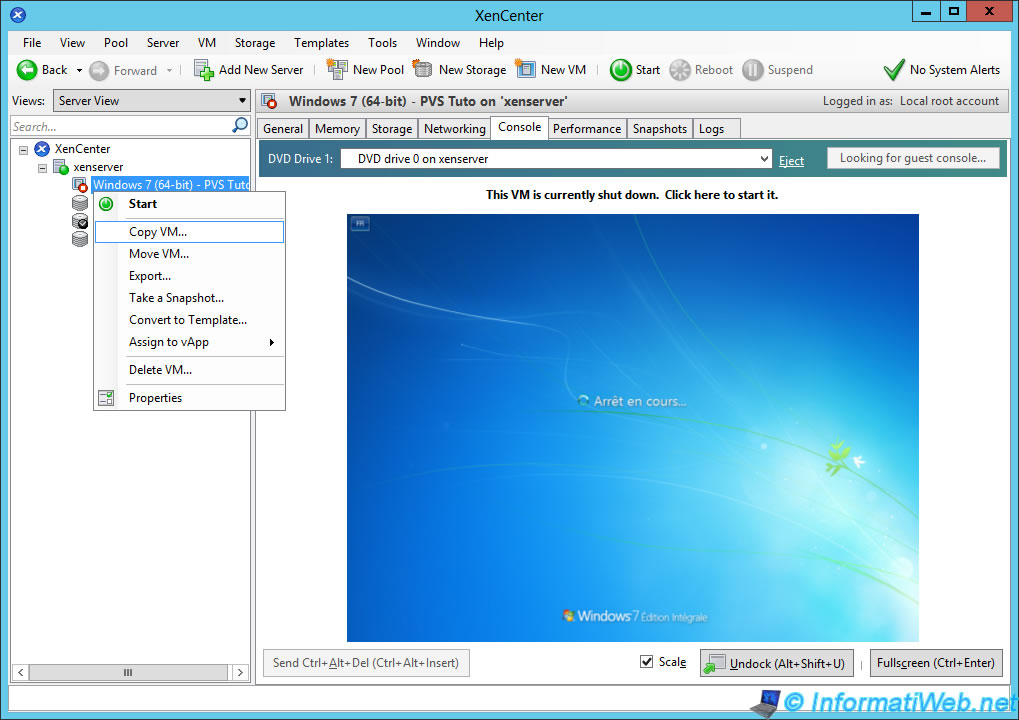
Then, convert the virtual machine into a "template".
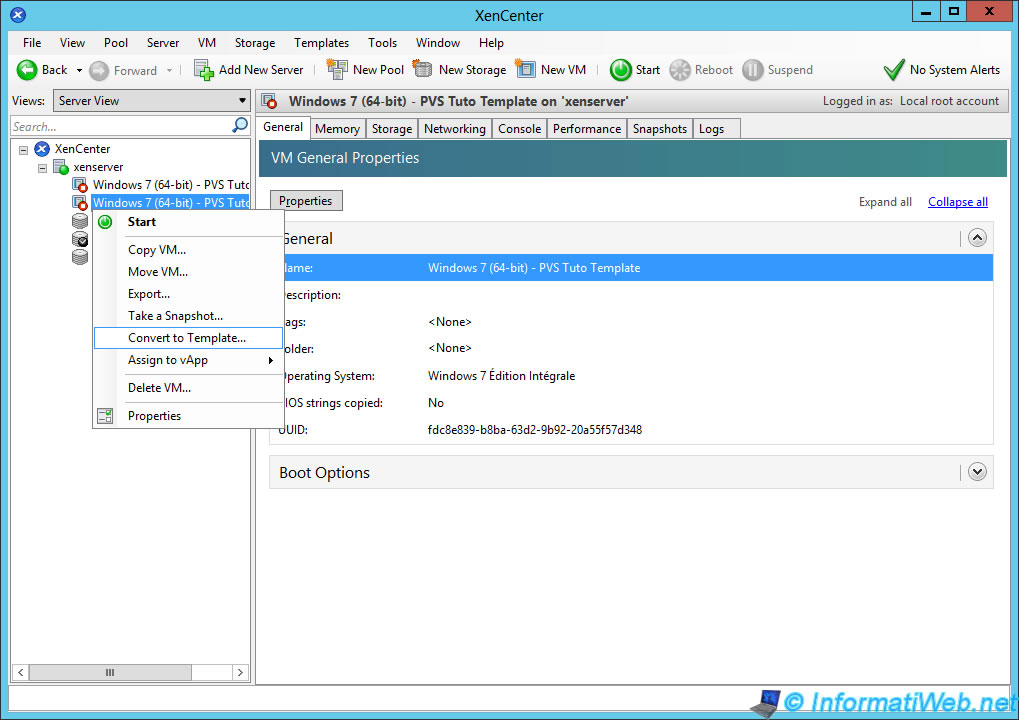
Select the repository where you want to store this "template".
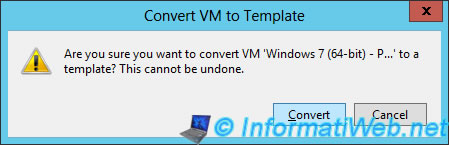
Now, this machine is a template.
15. Creating the machines catalog in XenDesktop using the PVS server console
Before you create virtual machines, you must change the vDisk mode for this vDisk being used as read-only.
To do this, go vDisk Pool, right-click on the vDisk and click on "Properties".
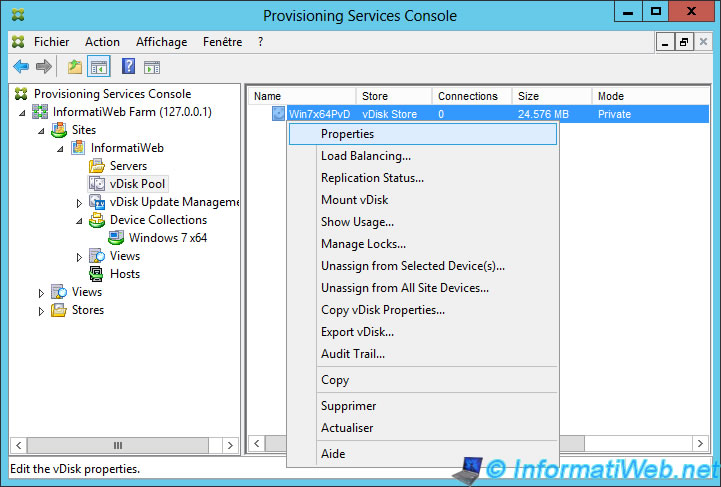
In the properties of the vDisk, select :
- Access mode : Standard Image (multi-device, read-only access)
- Cache type : Cache on device hard drive
Now, this vDisk will be read-only and the write cache will be on the hard disk of the virtual machine.
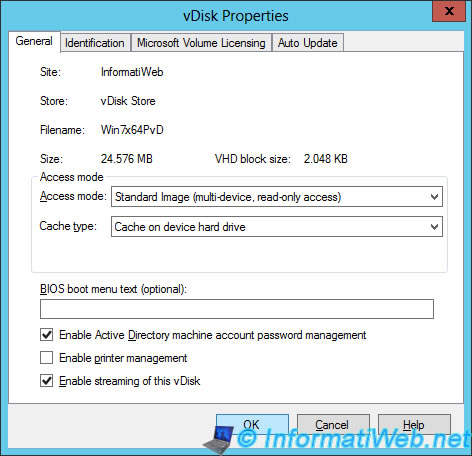
Information about the type of cache :
- With the 7.1 version of PVS, the "Cache on device hard drive" type was the best practice of Citrix and this is the most used for PVS deployments currently because it offers the best balance between cost and performance.
- With the 7.6 vresion of PVS, a new type named "Cache on device RAM with overflow on the Hard Disk" has appeared. For this version, this type of cache is the most used type.
In this tutorial, we use the "Cache on device hard drive" method because it's widely used in enterprises.
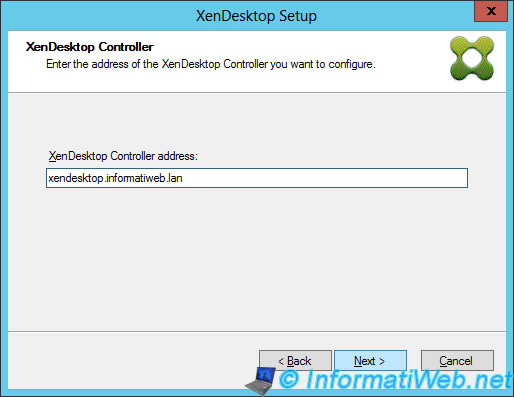
Then, in the PVS server console, right click on the name of your site and click on "XenDesktop Setup Wizard". This window will open.
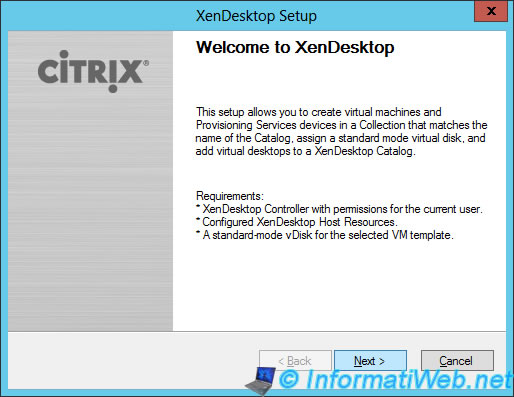
Specify the address of the XenDesktop controller.
Select the resource to use.
In our case, the connection to our XenServer server.
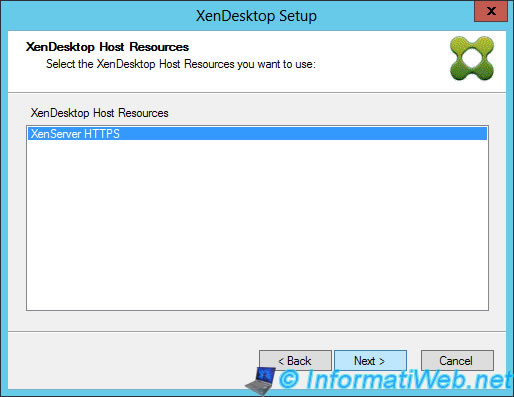
Specify the login credentials for the XenServer server.

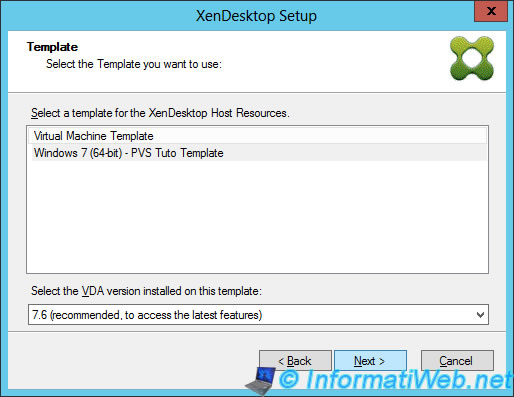
Select the template to use to create the machines in PVS.
Note : In our case, the version of VDA is 7.6.
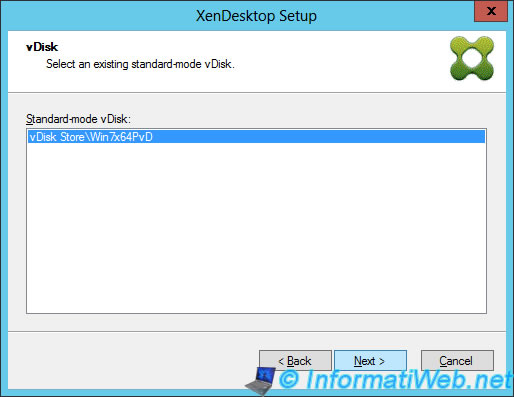
Select the vDisk to use to generate machines, by using PVS.
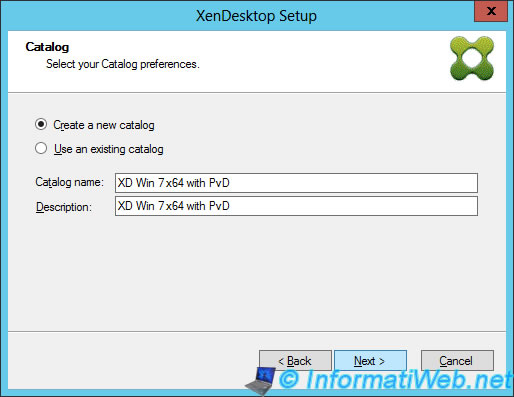
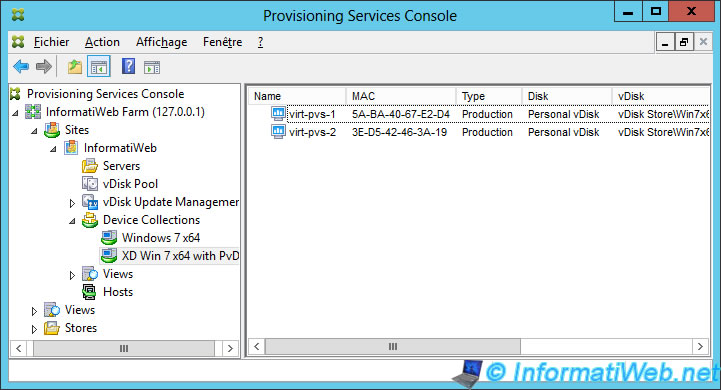
Specify a name for the machine catalog (in XenDesktop) and for the "Device Collection" (in the PVS server).
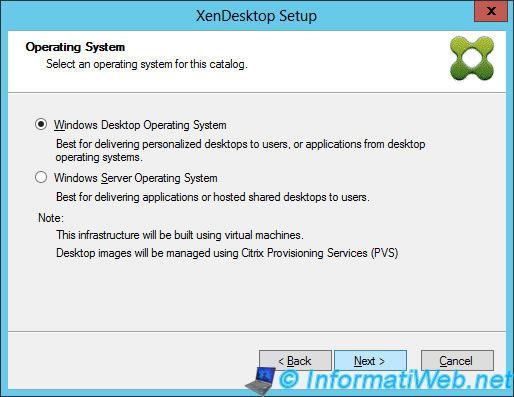
Select "Windows Desktop Operating System" because it's Windows 7.
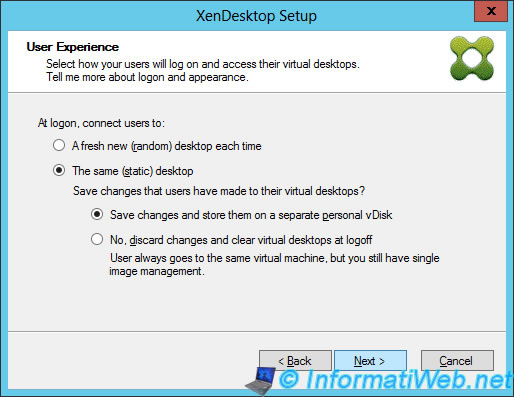
Select "The same (static) desktop" in order to save changes made by the user on his personal disk. (Save changes and store them on a separate personal vDisk)
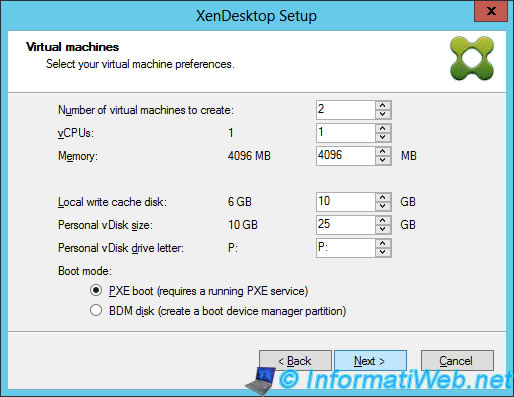
Specify :
- The umber of virtual machines to create from this template.
- vCPUs : The number of virtual processors (CPU) to allocate to these virtual machines.
- Memory : The amount of memory (RAM) to allocate to these virtual machines.
- Local write cache disk : the size of the disk used for the write cache. In our case : 10 GB.
- Personal vDisk size : the size of the user's personal vDisk.
- Personal vDisk drive letter : the letter to assign to the personal disk in these virtual machines
- Boot mode : the startup mode of these virtual machines: in general, you will use the "PXE" mode.
Select "Create new accounts" to create the computer accounts of these new machines in the Active Directory.
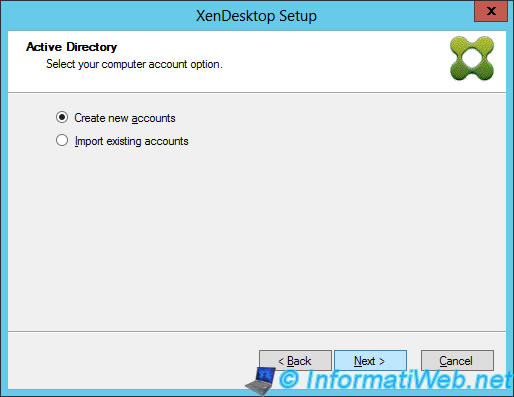
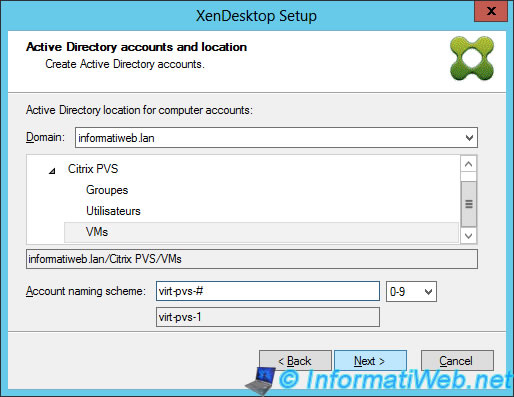
Select "Citrix PVS / VMs" to apply our GPO to theses virtual machines and specify a template for the names of these machines.
Note : The # is a wildcard. If you choose "0-9", it will be replaced by: 1, 2, 3, ...
Click "Finish".
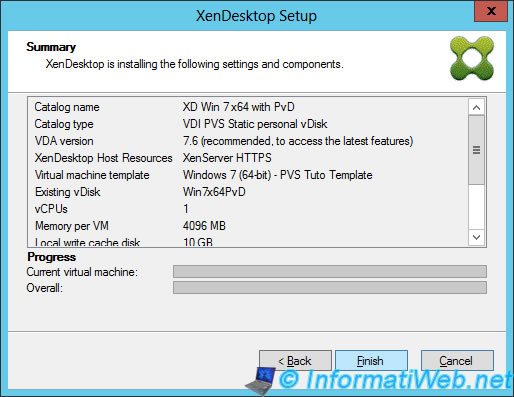
The wizard has :
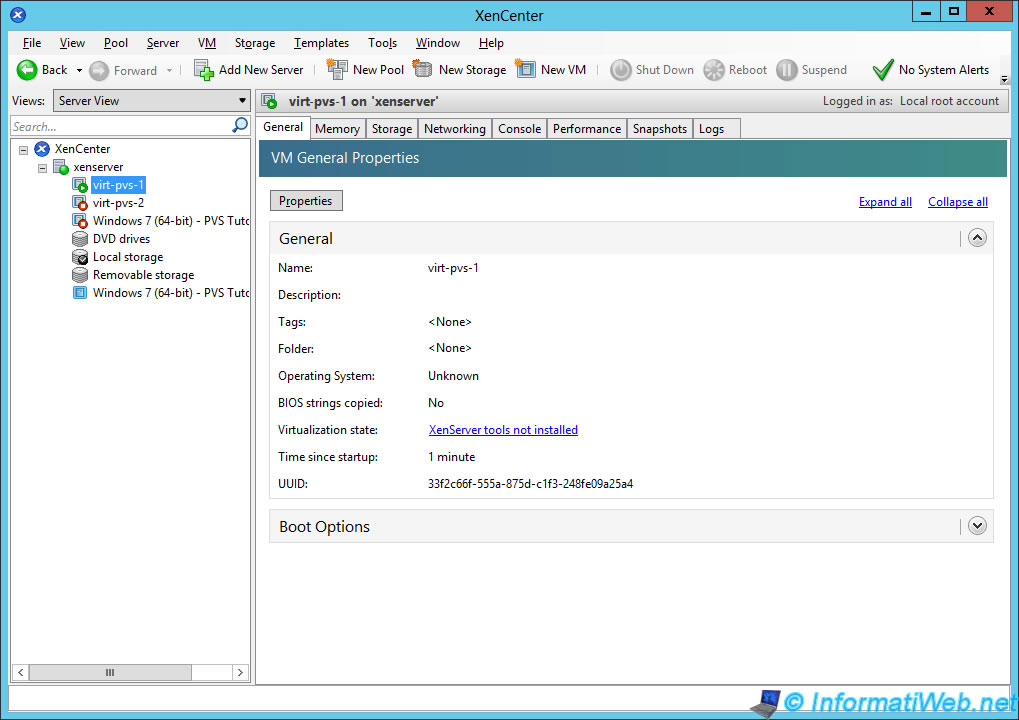
- created virtual machines on the XenServer server
- created the computer accounts of these machines in the Active Directory
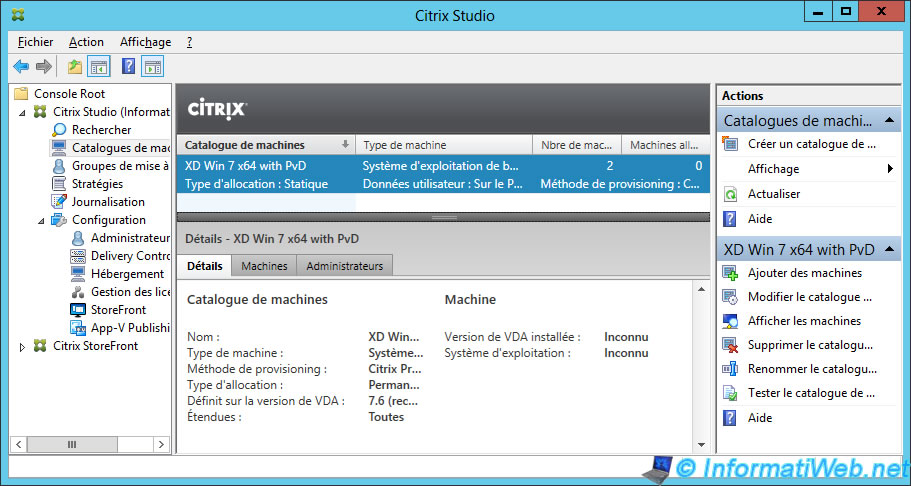
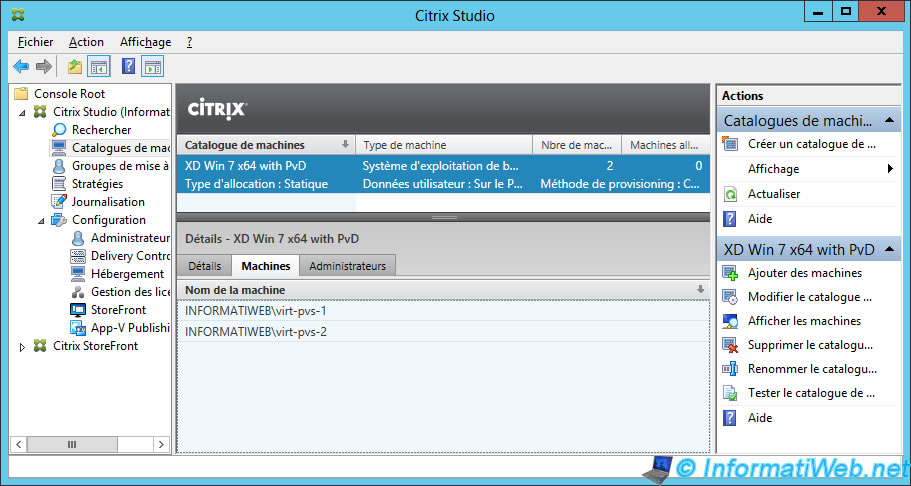
- created a catalog of machines in XenDesktop
- created a "Device Collection" in the PVS server
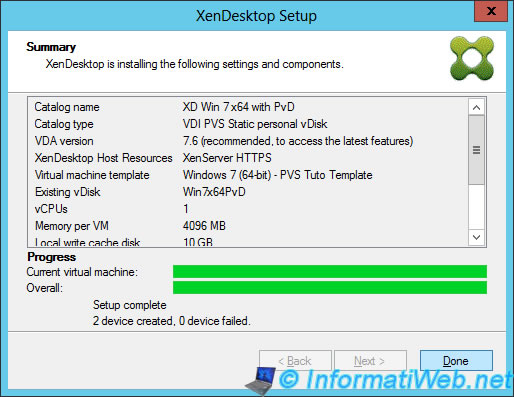
In the PVS console, you will find the new collection "XD Win7 x64 with PvD" that contains the new machines.
Note : Notice that these machines are configured to boot from the personal disk to reflect user changes.
16. Overview of changes made in XenDesktop, XenCenter and the Active Directory
XenDesktop Setup makes changes at several places (and on multiple servers).
It creates the "Computer" accounts in the Active Directory. For these machines are joined to the domain and that users can use them with their user account created in the Active Directory.

A catalog of machines that can be used to create the delivery group (in summary : select users or groups of users who will have access to these machines).
Virtual machines on the XenServer server.
And of course, the collection of "device" on the PVS server.
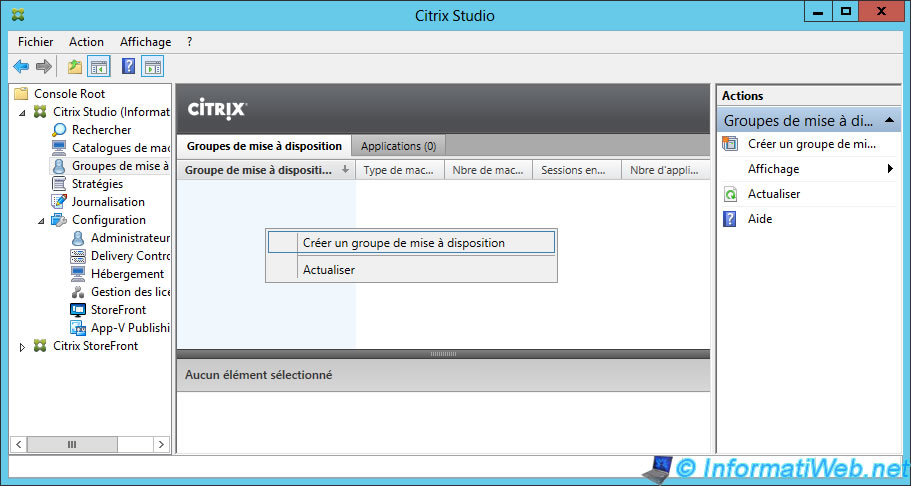
17. Creating a provisioning group for this machines catalog
We arrive towards the end of this tutorial.
Now that XenDesktop, the PVS server and virtual machines are created and configured, we will create a delivery group so that our users can use their virtual desktops.
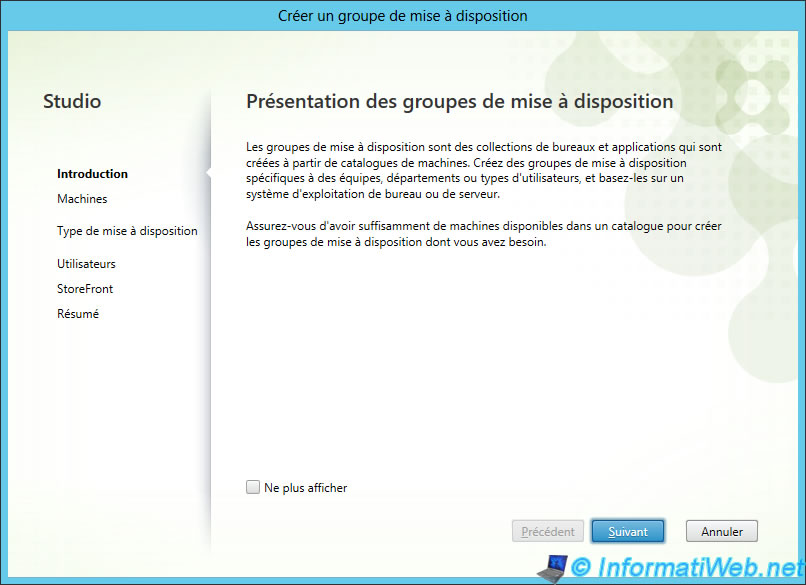
To do this, go to "Citrix Studio -> Delivery group", right click on "Create delivery group".
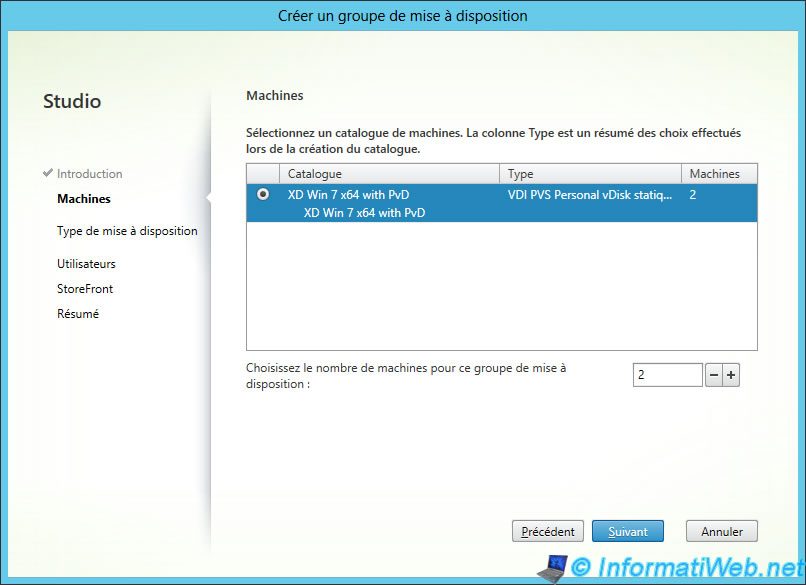
As indicated in this presentation, to delivery groups are desktops and applications collections created from machines catalogs (in our case : the machine catalog was created by XenDesktop Setup).
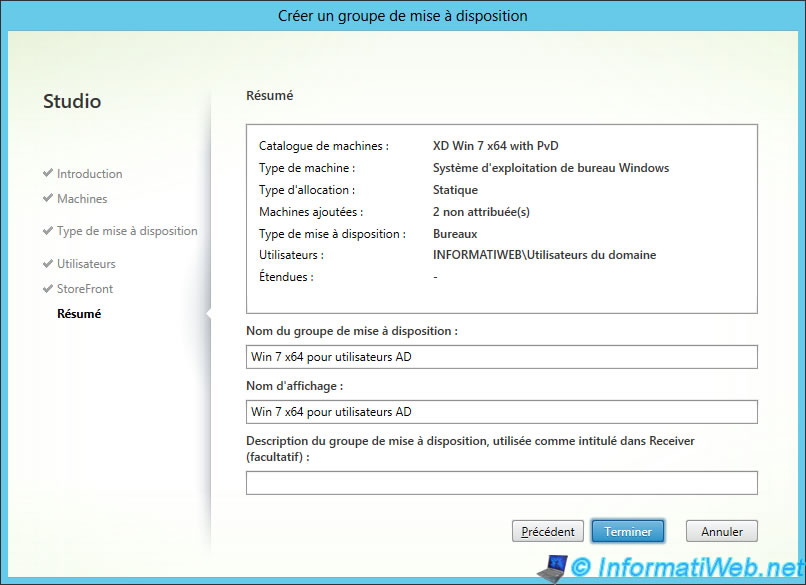
Select the machines catalog and the number of machines to be allocated to this group delivery.
Select "Desktops".

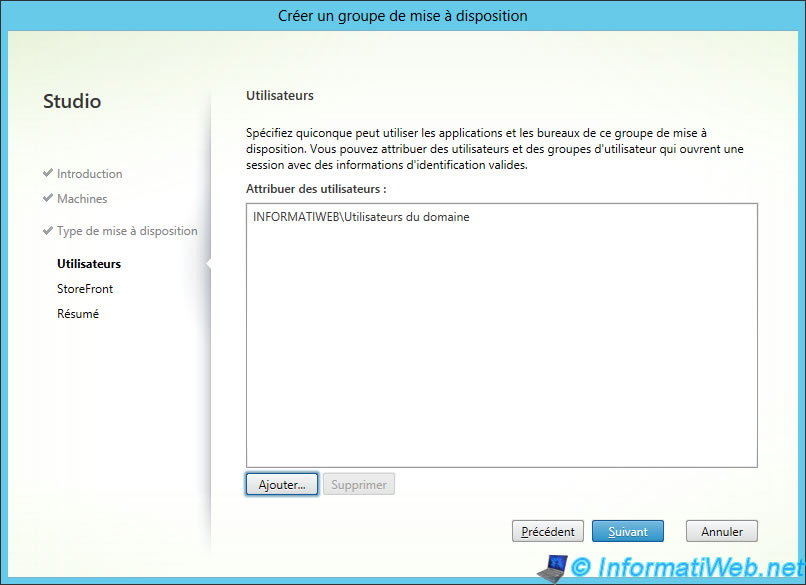
Add users or groups of users who will be allowed to use these virtual desktops.
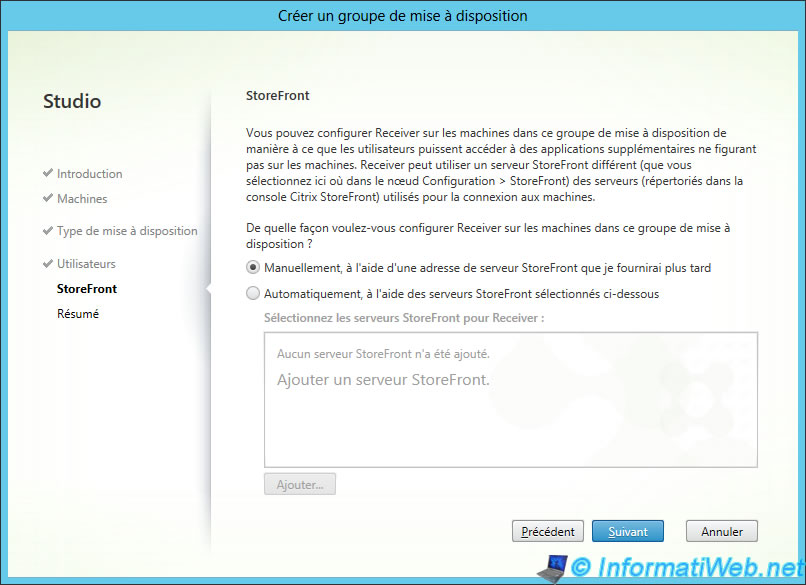
Configure the storefront for the "Citrix Receiver" program present in the virtual machine, if you want.
Enter a name for this group.
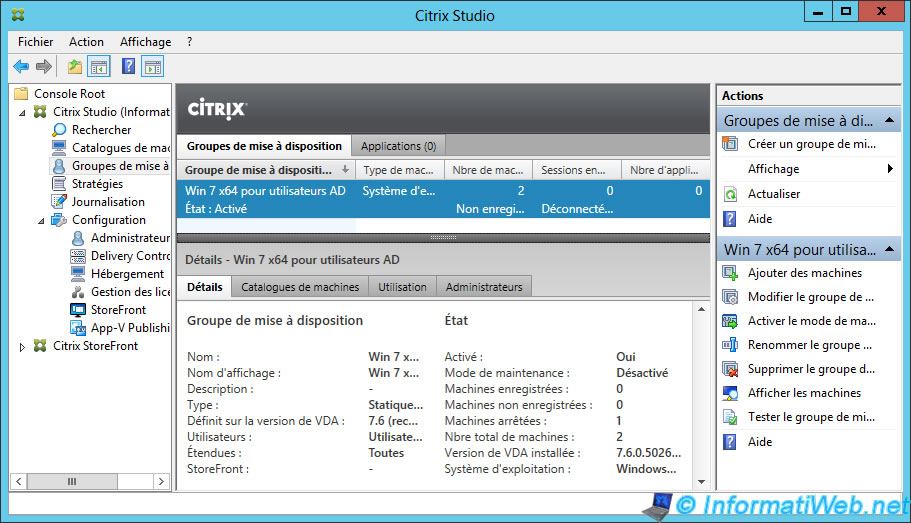
Now, your users will have access to these virtual desktops.
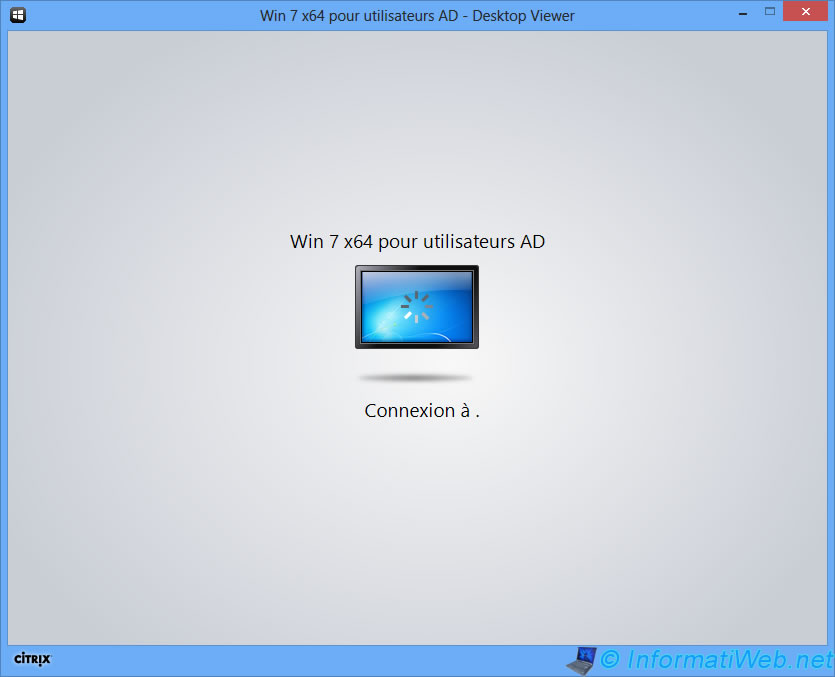
18. Tests virtual desktops through Citrix Receiver
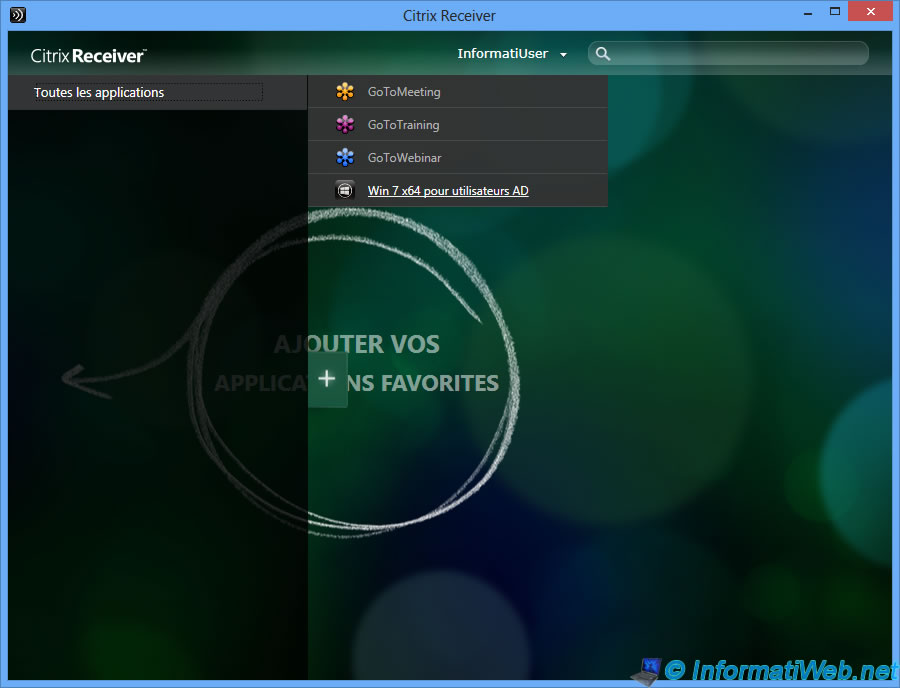
Finally, install Citrix Receiver on a computer with Windows (for example) and log on with an account that you have allowed for these virtual desktops.
Click "+ -> All Applications" and click on the virtual desktop published via XenDesktop.
Then, click the icon that appeared in Citrix Receiver.
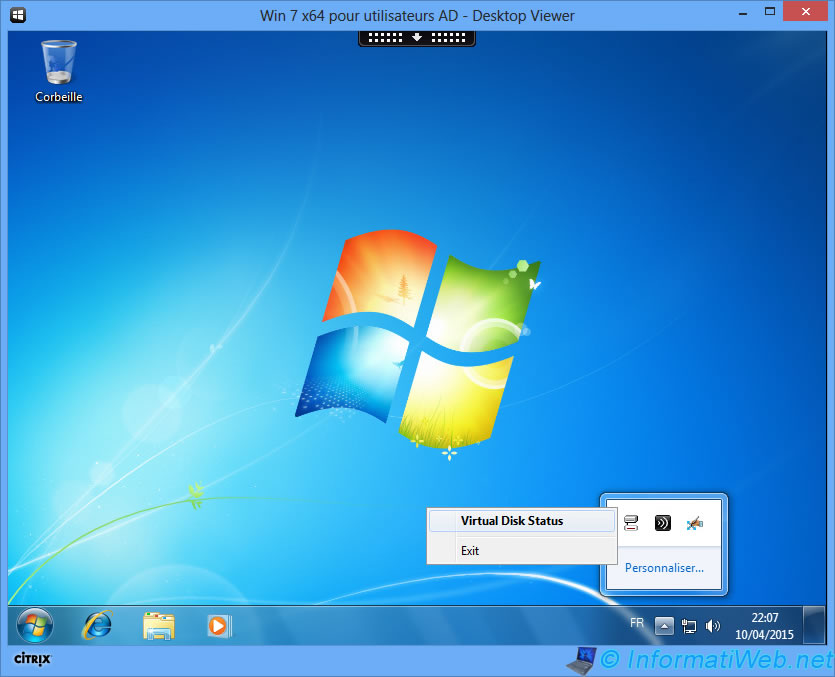
Wait for the boot of the virtual machine and during the opening of your session.
Locate the icon about the vDisk.
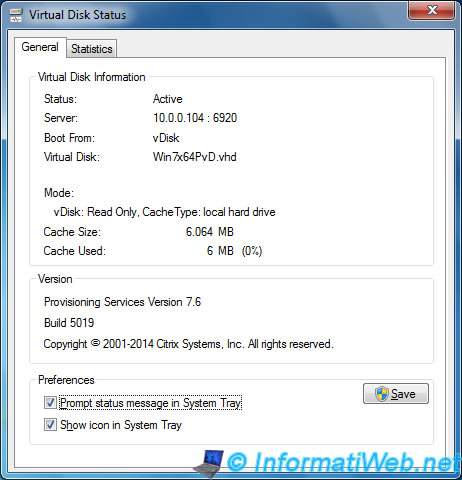
As the vDisk is in "Standard - Read Only" mode :
- the vDisk is : Read Only
- the cache type is : local hard drive (write cache on hard disk of the virtual machine)
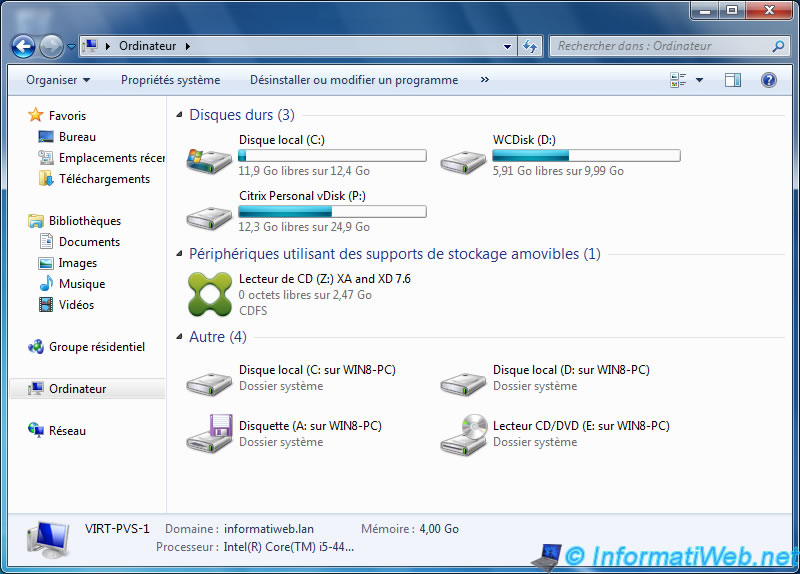
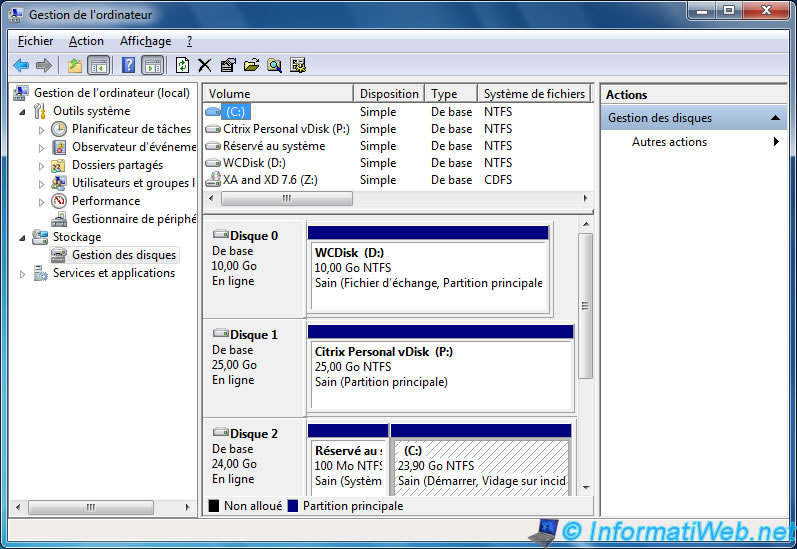
In "Computer" (or workstation with Win XP), you have :
- the C partition : where Windows is installed
- the D partition : the virtual hard disk that serves as a write cache.
- the P partition : the user personal disk (Personal vDisk) to save the changes made by the user. (Ex : user profile, installed programs, ...)
- the CD-ROM drive with the "Z" letter which had been configured on the VM converted into a template. Thus, the write cache received the "D" letter.
- partitions and drives of the physical computer.
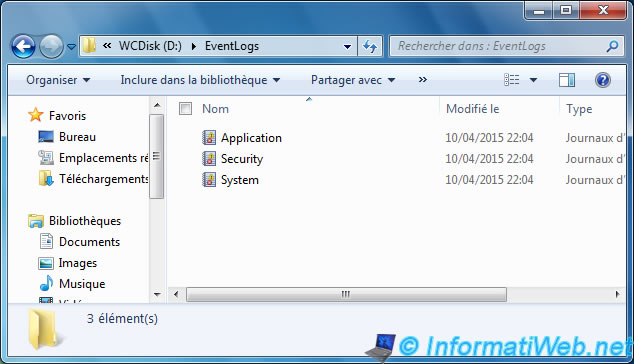
Sur la partition "D", vous trouverez un dossier "EventLogs" avec les journaux "Application", "Security" et "System" de Windows. Notre objet GPO a donc été correctement appliqué sur les machines virtuelles créées via PVS.
On the "D" partition, you will find a "EventLogs" folder with "Application", "Security" and "System" logs of Windows. So, our GPO has been successfully applied to virtual machines created by using PVS.
Because the vDisk is in "Standard - Read Only" mode, Citrix mapped the "write cache" disk and the personal disk on this virtual machine.
Note : The 2 non-partitioned hard drives have disappeared to make way for real drives.
Share this tutorial
To see also
-
Citrix 8/2/2016
Citrix XenApp / XenDesktop 7.6 - Single Sign-On (SSO)
-
Citrix 3/22/2015
Citrix XenApp 7.6 - Applications delivery
-
Citrix 5/13/2015
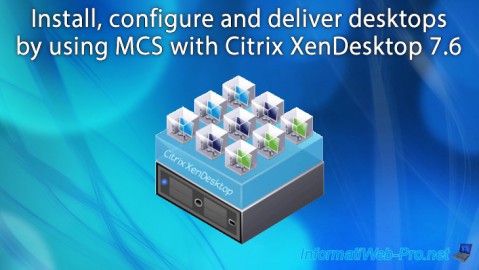
Citrix XenDesktop 7.6 - Deliver desktops by using MCS
-
Citrix 3/27/2016
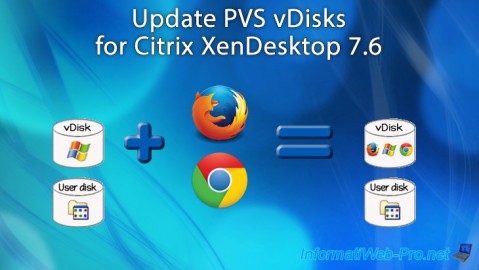
Citrix XenDesktop 7.6 - PVS - vDisks updates
No comment