Installation, configuration and integration of Citrix NetScaler Gateway 11.0 with XenApp/XenDesktop
- Citrix
- Citrix NetScaler Gateway, Citrix XenApp / XenDesktop
- 09 April 2016 at 11:44 UTC
-

- 2/6

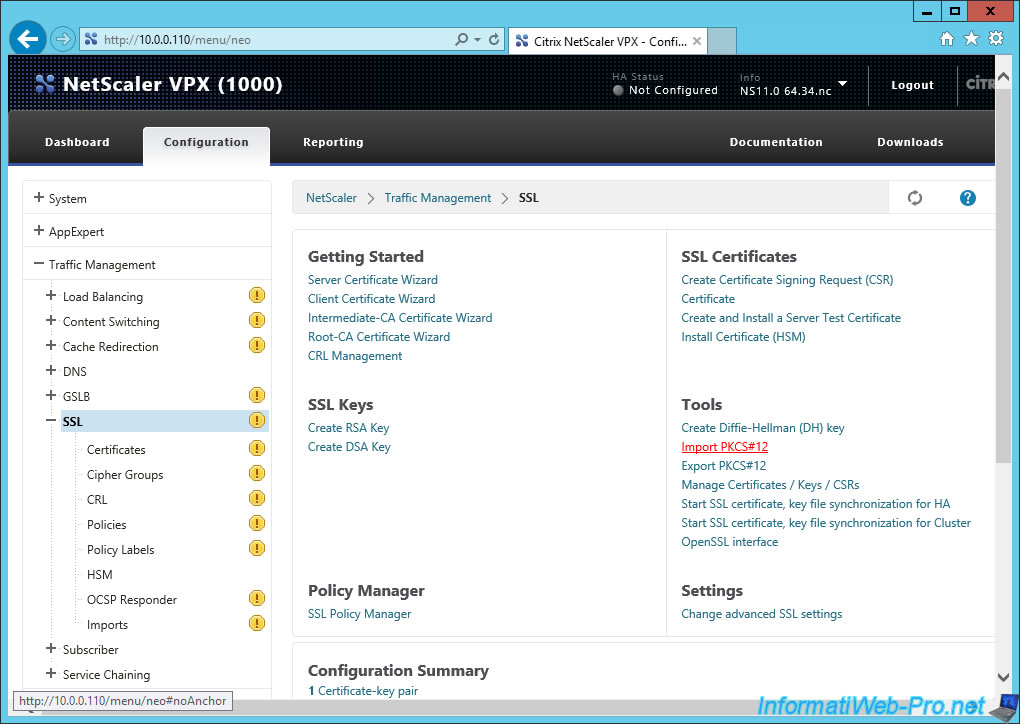
3. Importing the certificate and the private key of your certification authority
To create the certificate of NetScaler server, it's possible to import the certificate and the private key of your certification authority by going to the menu : Traffic Management -> SSL.
Then, click "Import PKCS#12".
To export the certificate and the private key of your CA in PKCS#12 format (or pfx under Windows), refer to the step "Export the root authority certificate" of our tutorial "Windows Server 2012 / 2012 R2 - Create an Enterprise Root Certification Authority (Root CA)".
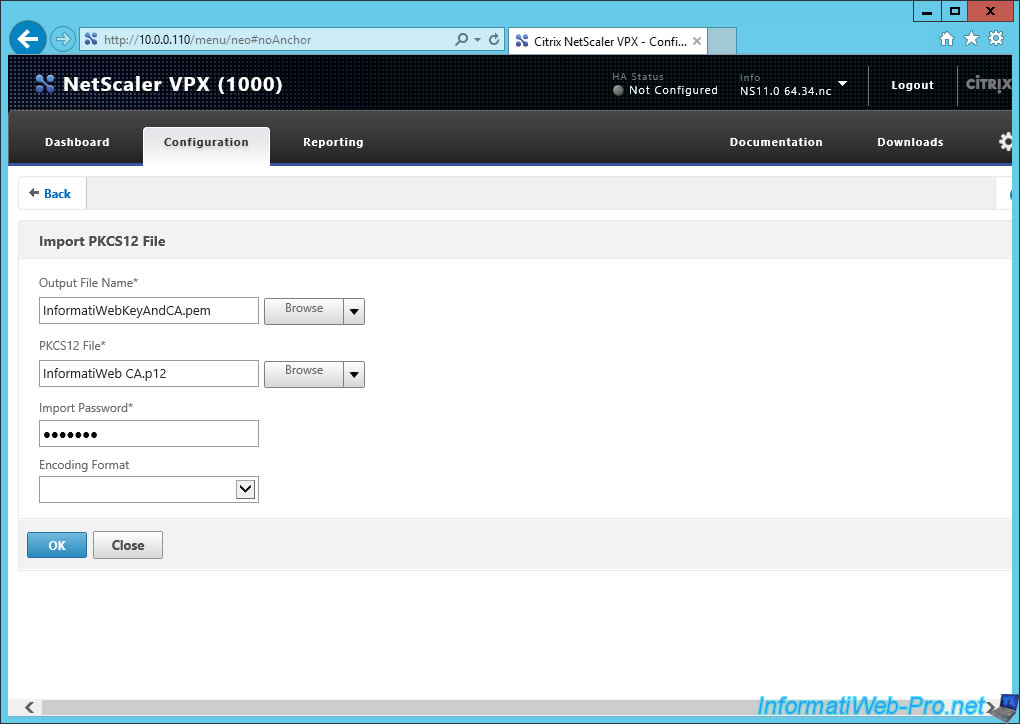
With the "Import PKCS12 File" option, NetScaler will convert your certificate with private key from PKCS#12 format (.p12 or .pfx) to the linux format : PEM.
To import the p12 or pfx file :
- Specify a name with the .pem extension in the "Output File Name" box. Example : InformatiWebKeyAndCA.pem
- click Browse next to the box "PKCS12 File" and select the file ".p12" or ".pfx" exported from your Certification Authority.
- Enter the password specified during export of the certificate and the private key to be able to import it into NetScaler.
Then, click OK.
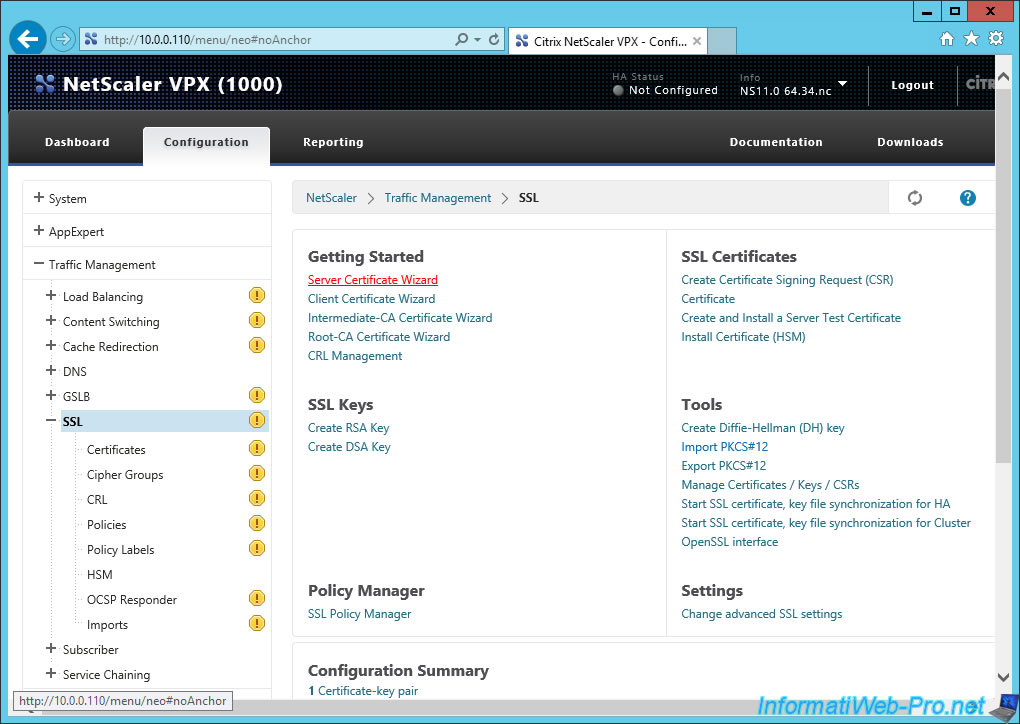
4. Creating the certificate of the NetScaler server
With the certificate and the private key of your CA, you can create the certificate of your NetScaler server.
For that, go again to the "Traffic Management -> SSL" menu and click "Server Certificate Wizard".
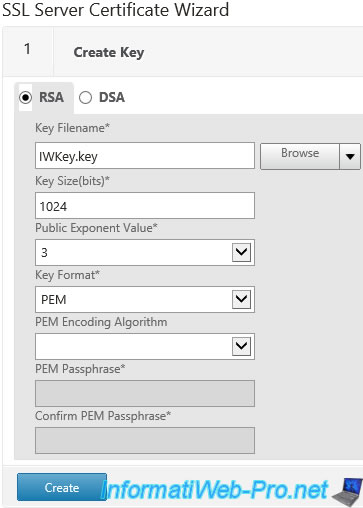
To begin, create the key by specifying that :
- a file name with a ".key" extension
- leave the value 1024 as key size.
Then, click "Create".
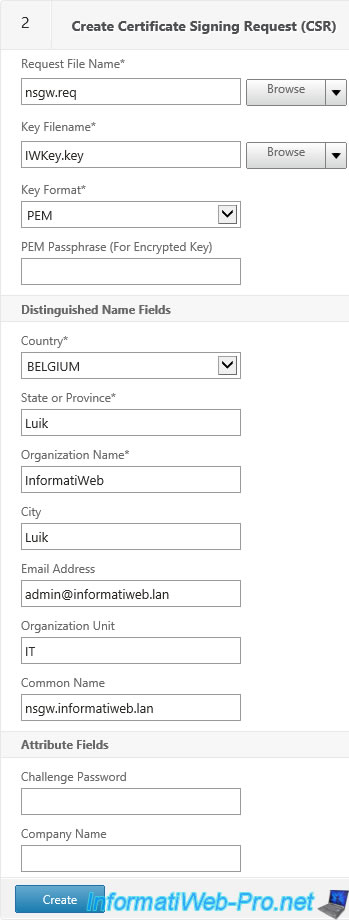
Then, create the certificate signing request like this :
- Request File Name : a file name with the ".req" extension (meaning "request")
- Key Filename : Name of the key file created earlier (it's possible that this value is already specified)
- Key Format : PEM = linux format
For information about the certificate, the most important is the "Common Name", because it's the value that will be verified by the web browser.
In short, for these informations, specify the following :
- Country : select your country in the list
- State or Province : state or province where your company is located
- Organization Name : your company name
- City : city where your company is located
- Email Address : contact email address
- Organization Unit : sector of your company that manages NetScaler. For example : IT.
- Common Name : the domain name to which your users will access to your NetScaler Gateway from outside (or Internet).
- 2 other fields are optional
Click "Create" to create this certificate.
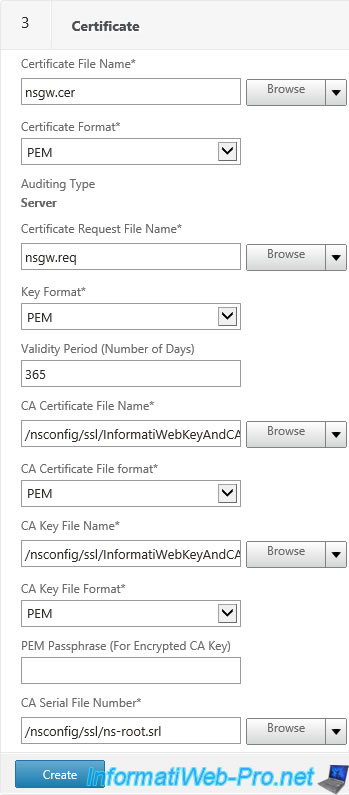
Then, we will create the certificate with the information previously generated.
To create the certificate, specify the following :
- Certificate File Name : a name with a ".cer" extension. This is the file that will be created (in short : the certificate) (without private key).
- Certificat Format : (This value is already indicated by default)
- Certificate Request File Name : the previously created file containing the certificate signing request (CSR)
- Key Format : (This value is already indicated by default)
- Validity Period (Number of Days) : period during which the certificate is valid. Default : 365 days = 1 year
- CA Certificate File Name : the file in which the certificate of your authority is located. So, the file : "InformatiWebKeyAndCA.pem" imported in step 3 of this tutorial.
- CA Certificate File Format : format of the certificate of the certification authority. (CA)
- CA Key File Name : the same file "InformatiWebKeyAndCA.pem", because the certificate and the private key are, in this case, in the same file.
- CA Key File Format : format of the private key of the authority
- PEM Passphrase (For Encrypted CA Key) : password of the private key, if it was encrypted when exporting.
- CA Serial File Number : serial number of the certification authority. It's in the "ns-root.srl" present in the "/nsconfig/ssl" folder of NetScaler.
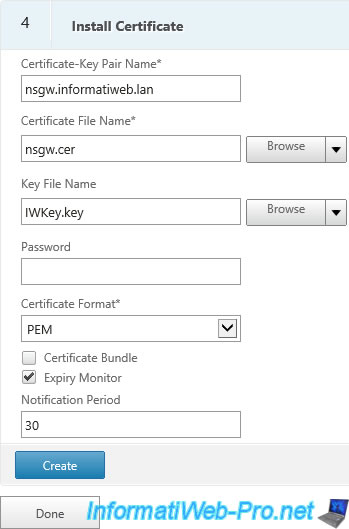
Finally, install the certificate by indicating that :
- Certificate-Key Pair Name : what you want. This is the name that appears in the list of certificates. In our case, we indicated the domain of our NetScaler server.
- Certificate File Name : the certificate created earlier
- Key File Name : the key created earlier
Click on "Create", and then on "Done".
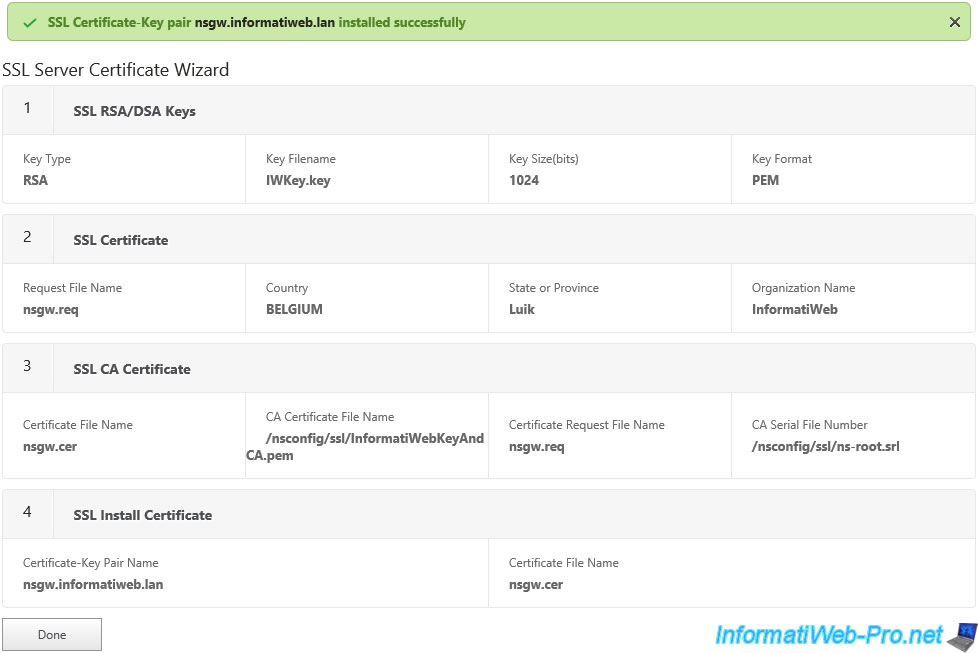
Once installed, you will have a green message "SSL Certificate-Key pair nsgw.informatiweb.lan" installed successfully" that will appear at the top of the page.
And a summary of certificates and created key.
Click "Done".
5. Installing the certificate authority certificate for StoreFront
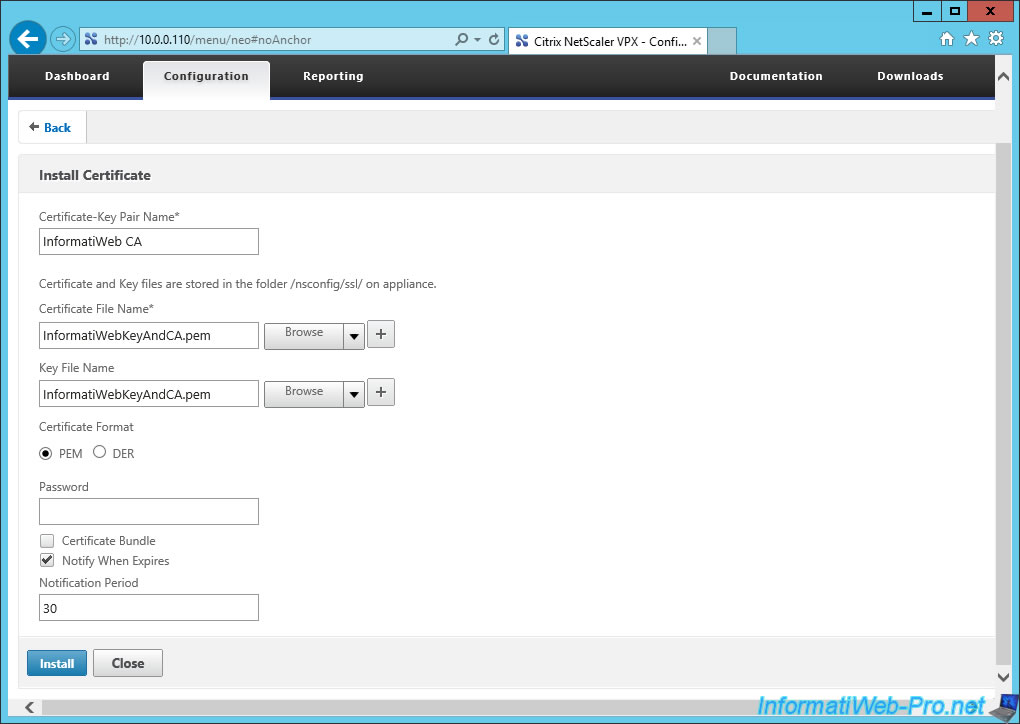
To install the CA certificate (which will be used later for StoreFront), go to "Traffic Management -> SSL -> Certificates" and click "Install".
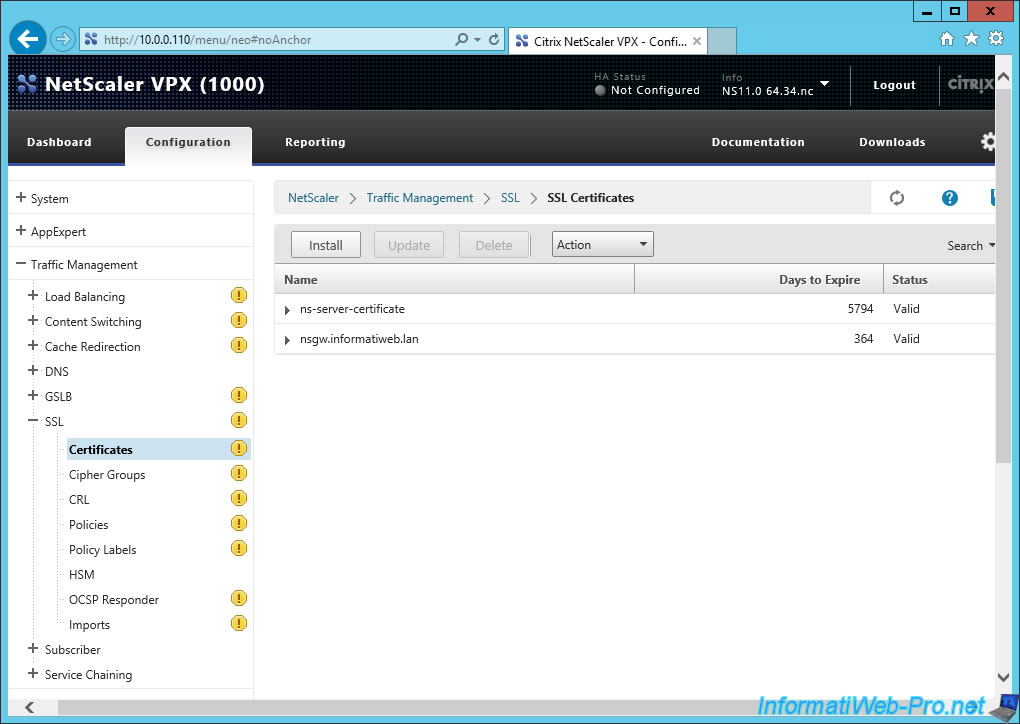
To install the certificate of your certification authority, specify the following :
- Certificate-Key Pair Name : the name of your certification authority (or whatever you want)
- Certificate File Name : file that contains the certificate of your certification authority
- Key File Name : file that contains the private key of your CA. In our case, the certificate and private key are in the same file.
- Certificate Format
Click "Install".
In total, you should have 3 certificates in this list.

Share this tutorial
To see also
-
Citrix 5/14/2016
Citrix XenApp / XenDesktop 7.6 - Load balancing
-
Citrix 3/22/2015
Citrix XenApp 7.6 - Applications delivery
-
Citrix 5/13/2015
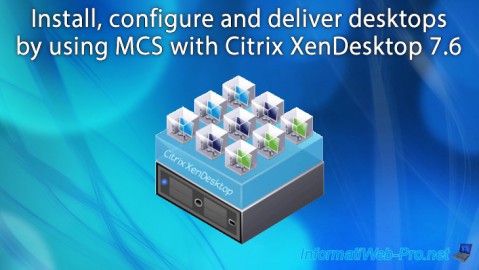
Citrix XenDesktop 7.6 - Deliver desktops by using MCS
-
Citrix 3/27/2016
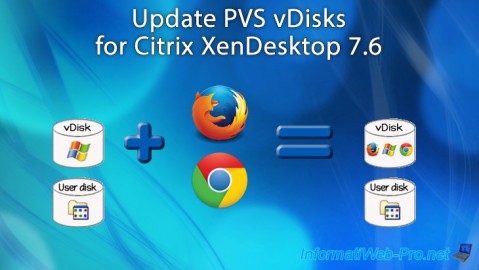
Citrix XenDesktop 7.6 - PVS - vDisks updates
No comment