Configure a multi-site Active Directory infrastructure on Windows Server 2022 and 2016
- Windows Server
- 10 November 2025 at 17:31 UTC
-

- 4/11

9. Add an Active Directory domain controller on site 2 at Paris
Before being able to deploy the domain controller on a remote site ("Paris" in our case), it's important that your remote server ("paris-dc1" in our case) can reach a domain controller of site 1 in Brussels despite that the Paris servers are obviously outside the Brussels network.
For this to be possible, the preferred DNS server of the remote server ("paris-dc1" in our case) must match the LAN IP address of a domain controller at site 1 at Brussels.
In our case, we have indicated the IP address "10.0.1.11" which corresponds to the server "brux-dc1" located on site 1 at Brussels.
Info : after modifying the server network configuration, disable the network card and enable it again for the changes to take effect.
Or restart the server.

Then, make sure the "brussels" demand-dial interface on the Paris VPN server is in "Connected" state.

To avoid problems during the addition of the domain controller and optionally during the regular replications which will be managed by Active Directory, you can right click "Properties" on the demand-dial interface and select "Persistent connection" in the "Options" tab.

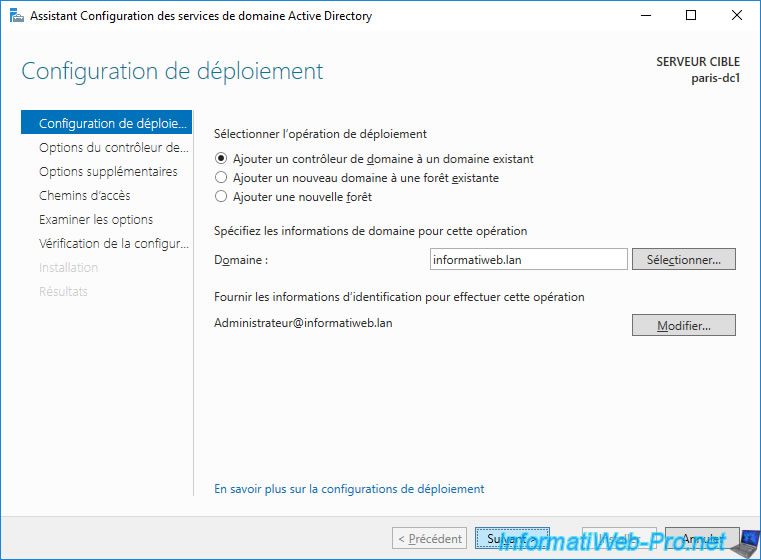
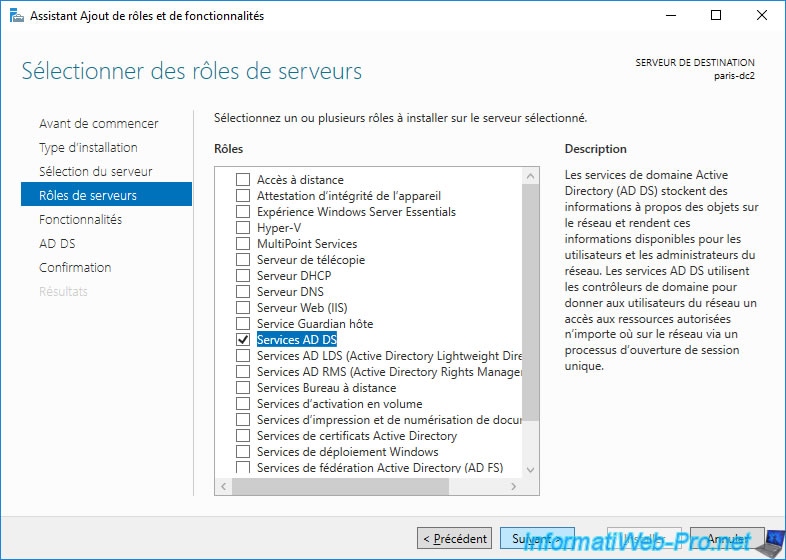
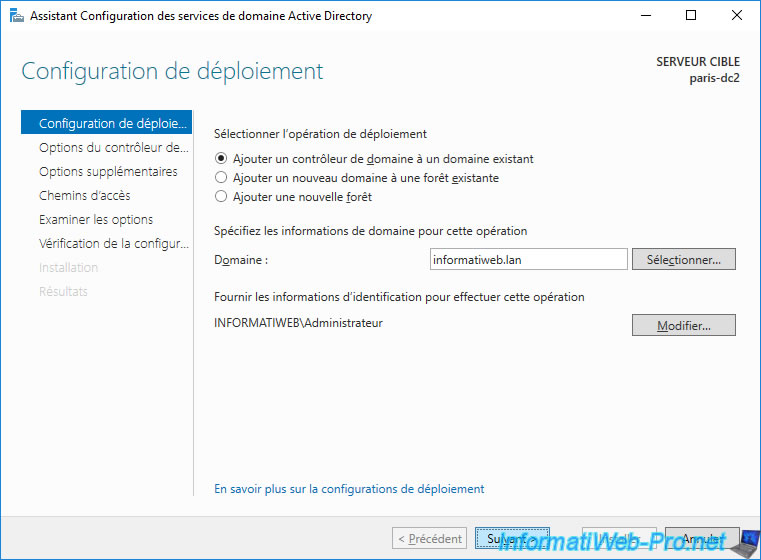
Then, on the "paris-dc1" server that you want to join to the domain created on the 1st Active Directory site, install the Active Directory Domain Services.
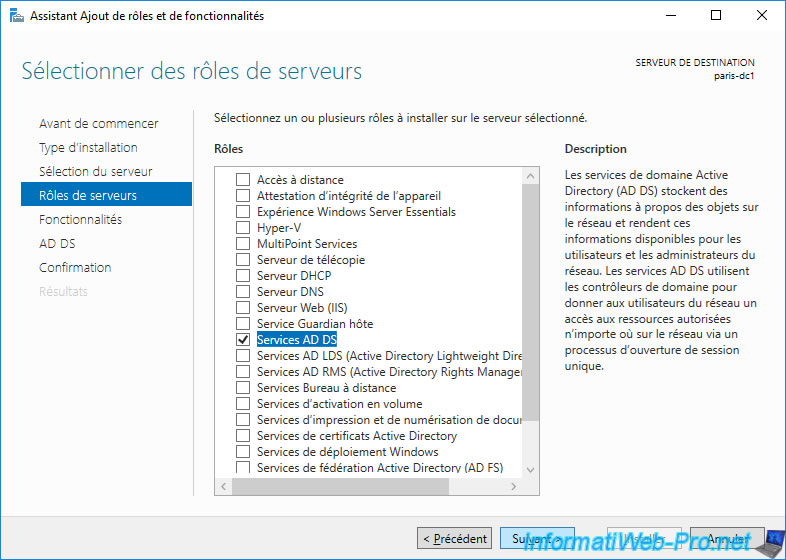
Once the "Active Directory Domain Services" role is installed, click the promotion link displayed, and then select "Add a domain controller to an existing domain" from the wizard that appears.
Then, click on the "Select" button.
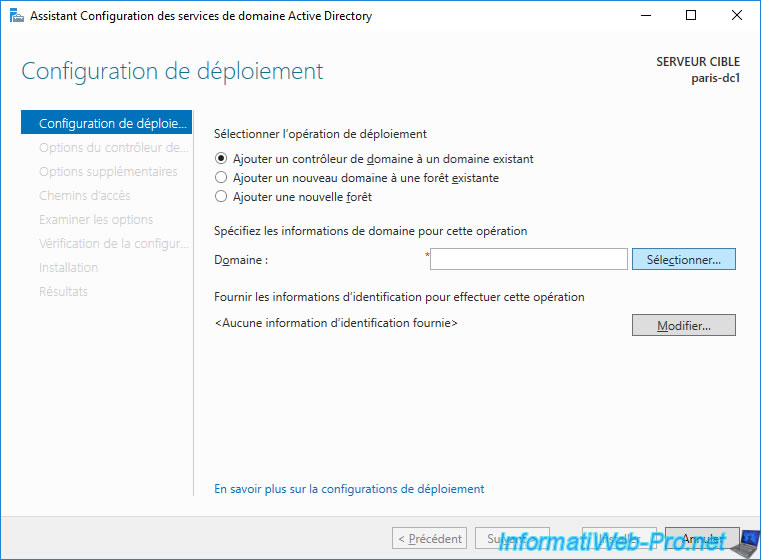
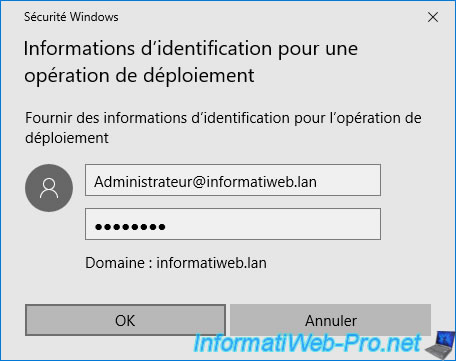
Specify the credentials of an account authorized to join the server to the domain using the "[user name]@[DNS name of the domain to join]" format so that the server can find the IP address associated with the domain name to contact.
If the "The server is not operational" error occurs, ...

... disconnect the demand-dial interface from the Paris VPN server and reconnect it.
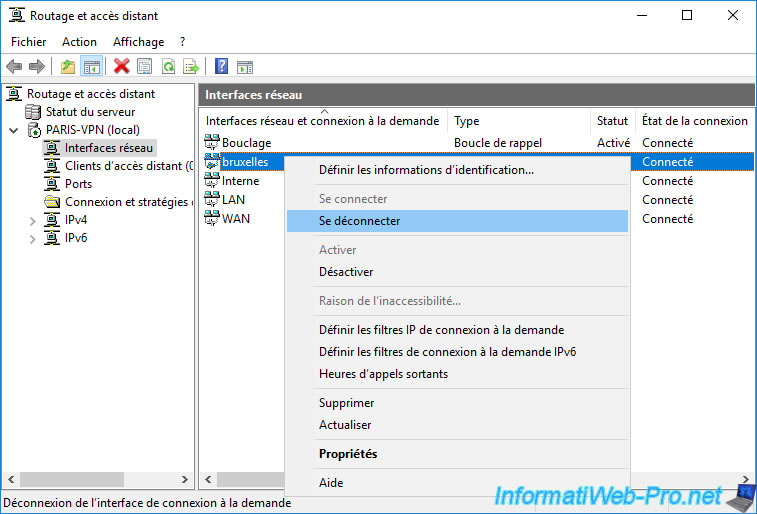
Then, it should work.
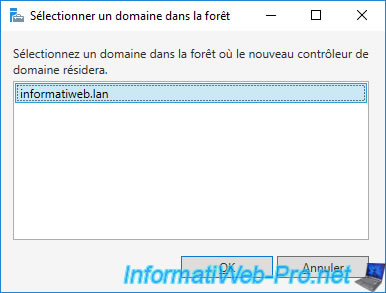
In this case, select the domain that is displayed and click OK.
Click on : Next.
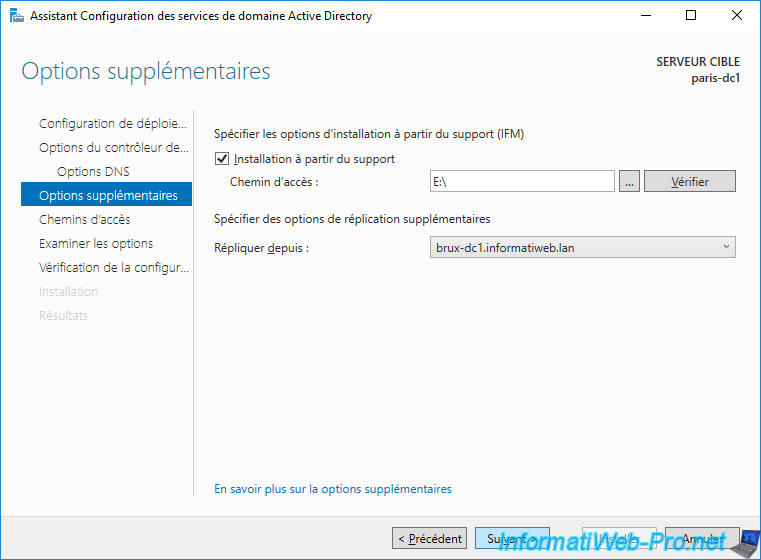
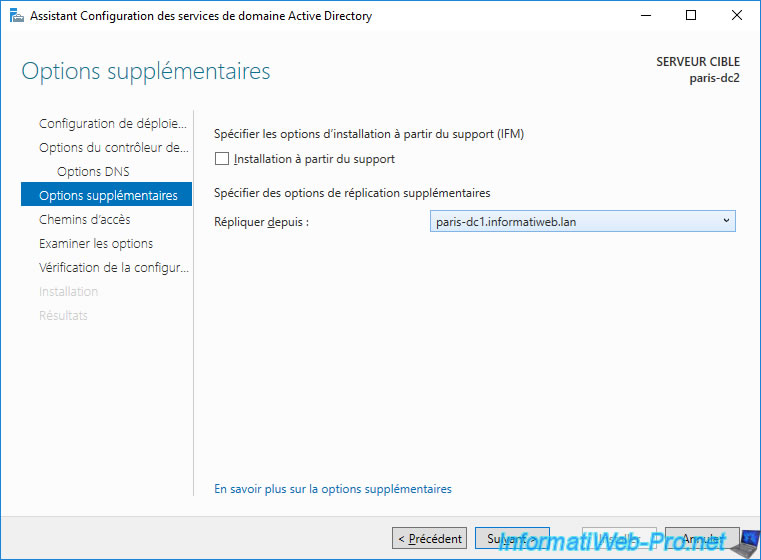
To speed up the deployment of a domain controller at a remote site, it's possible (but optional) to create a copy on an USB key or an external hard drive and then use it on this remote server to deploy the domain controller more quickly.
Future replications will be done over the network, but the initial replication will be done through USB media. This saves your bandwidth and also saves time.
If you are interested, refer to our tutorial "Deploy AD domain controller from IFM media (USB)" to learn how to do it.
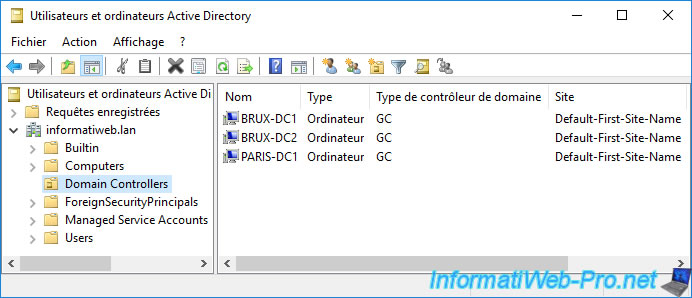
Once the domain controller is deployed, you will see that it will appear in addition to the other 2. Although this new "paris-dc1" domain controller is not physically in the same place as the 2 others.
Change the configuration of this domain controller so that it now uses :
- its own DNS server : 127.0.0.1
- the DNS server of the second domain controller that we are going to deploy at Paris : 10.0.2.12

10. Add a second Active Directory domain controller on site 2 at Paris
To add a second Active Directory domain controller on site 2 in Paris, install Active Directory Domain Services on the "paris-dc2" server.
Once the role is installed, open the promotion wizard and choose "Add a domain controller to an existing domain".
Click on the "Select" button, enter the credentials of an account authorized to join computers to the domain and choose your domain again.
Choose to replicate data from the 1st domain controller at Paris to accelerate the deployment of this one and avoid saturating your WAN bandwidth unnecessarily.
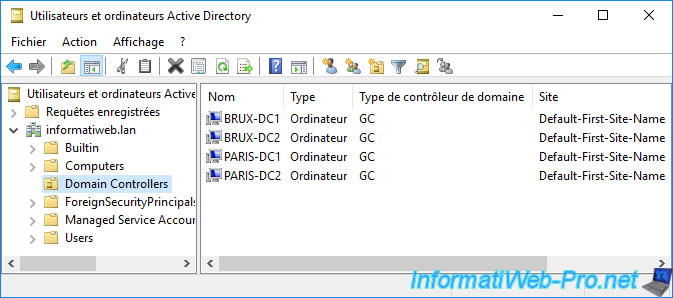
If you open the "Active Directory Users and Computers" console on this server, you will see that we now have 4 domain controllers.
These are obviously physically in different countries, but at the moment Active Directory doesn't know that, because they are all in the same Active Directory site (Default-First-Site-Name) for the moment.
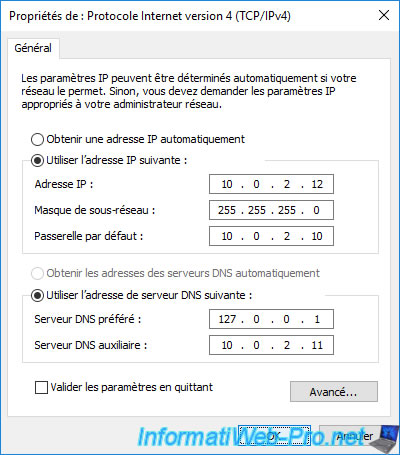
Change the DNS servers of this server to :
- 127.0.0.1 : itself
- 10.0.2.11 : the IP address of the 1st domain controller deployed (paris-dc1) on this site (Paris)
Share this tutorial
To see also
-

Windows Server 4/16/2021
Windows Server - AD DS - How Active Directory replication works
-
Windows Server 4/30/2021
Windows Server - AD DS - Overview of Active Directory functional levels
-
Windows Server 4/3/2021
Windows Server - AD DS - The basics of Active Directory
-

Windows Server 5/21/2021
WS 2016 - AD DS - Add a domain controller to an existing AD domain
No comment