Install and configure Windows Server 2012 in Core mode
- Windows Server
- Core Mode
- 03 April 2017 at 10:06 UTC
-

- 2/4

2. Configure your server in Core mode
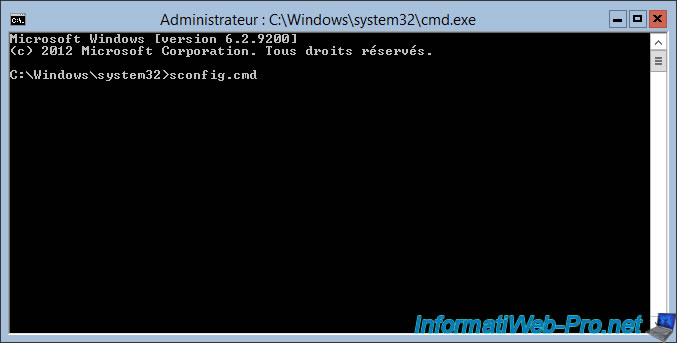
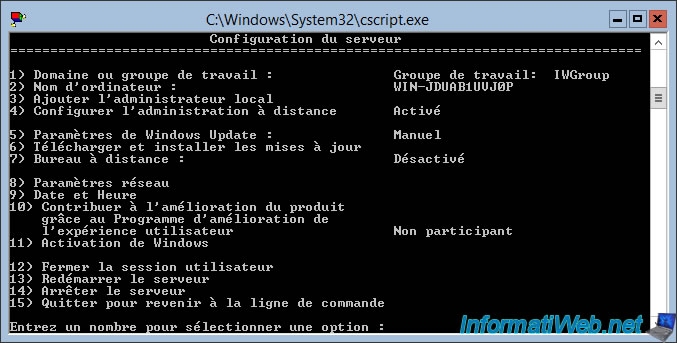
To easily configure your server in Core mode, Microsoft offers the tool : sconfig.cmd
To launch it, simply type "sconfig.cmd" and press Enter.
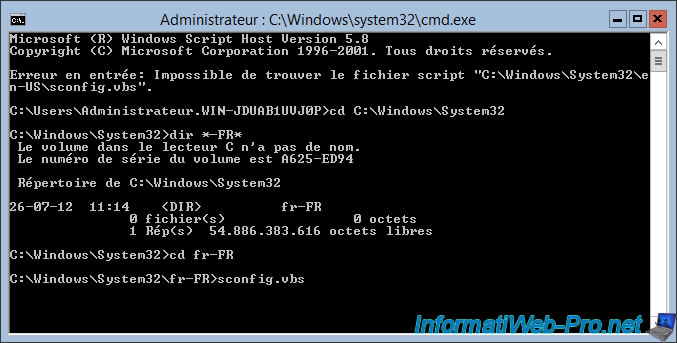
However, if you are install Windows Server in a language other than English (en-US), starting sconfig will be a problem.
To use this tool with a language other than English, you must restart the tool from the correct folder.
To start, we go to the folder : C:\Windows\System32
Then, we look for the folder of our language. In our cas, our language contains the word "-FR".
Windows tells us that there is a folder named "fr-FR" (which corresponds to : French (France)).
We return in by typing : cd fr-FR
Finally, we run the file : sconfig.vbs.
In summary, in our case, we need to run this file : C:\Windows\System32\fr-FR\sconfig.vbs
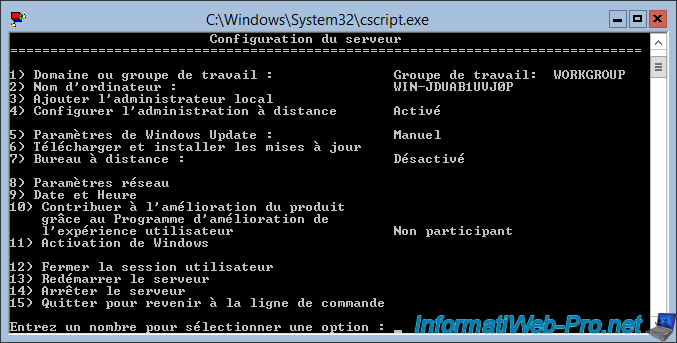
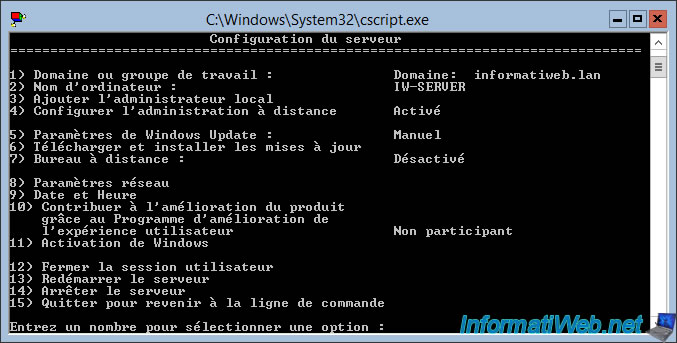
Now, the sconfig tool start correctly in the correct language.
As you can see, this tool will allow you to :
- change the workgroup in which it is located or link it to an existing domain
- change the server name
- add a local administrator (the account will be created and should not exist at this time)
- enable or disable the server's remote administration
- enable or disable Windows Update
- download the Windows Server Core updates
- enable or disable remote desktop
- configure the server's network card (IP address, gateway, DNS, ...)
- change the date and time
- activate Windows
- logout from the server, shut down, or restart the server
2.1. Change the workgroup
To change the workgroup in which your server is located, choose option 1.
Then, type "G" for workgroup, press Enter, and type the name of the new workgroup.

Now your server is part of the new workgroup.
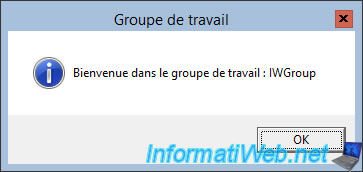
In the sconfig tool, you will also see that your server is in the new workgroup.
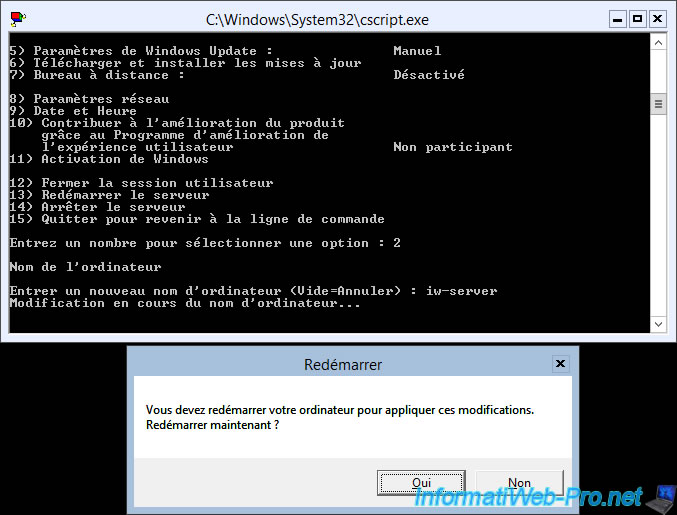
2.2. Change the name of the server
In production, it's very important that each server has a smart name.
To change the server name, choose option 2 and enter the new name.
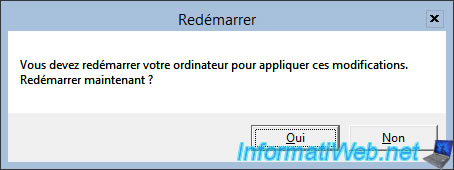
Then, click Yes to restart the server and save the changes.
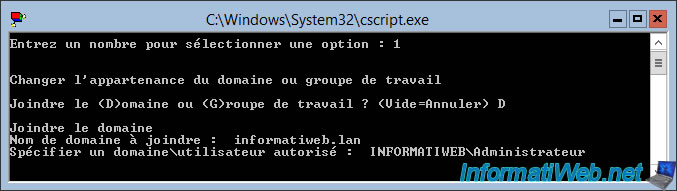
2.3. Join your Core server to a domain
To join your Core server to a domain, it's strongly recommended that you first change the server name. To do this, use option 2 as explained above.
Now, select option 1 and type "D" for domain.
Then, type the name of your domain, and then specify the name of a user who has the right to join a machine to your domain.
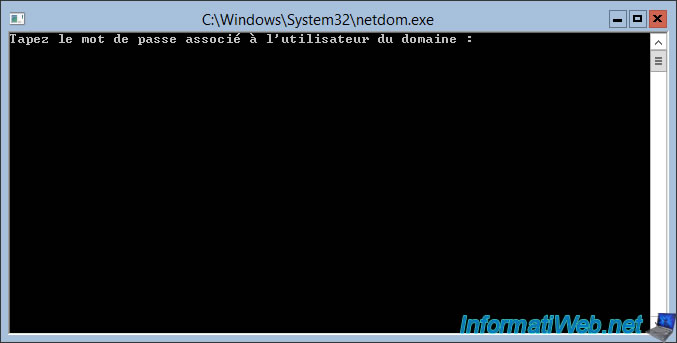
Type the password of the account used.
As we have already changed the server name, we click No.

And we restart the server by clicking Yes.
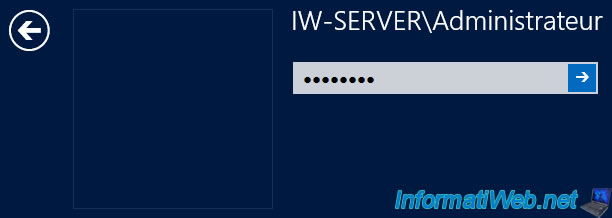
At the login screen, you will see that the username is prefixed with the name of your server.
This happens from the moment your server joins a domain.
Specify the local administrator's password.
As you can see, our server is now in the "informatiweb.lan" domain.
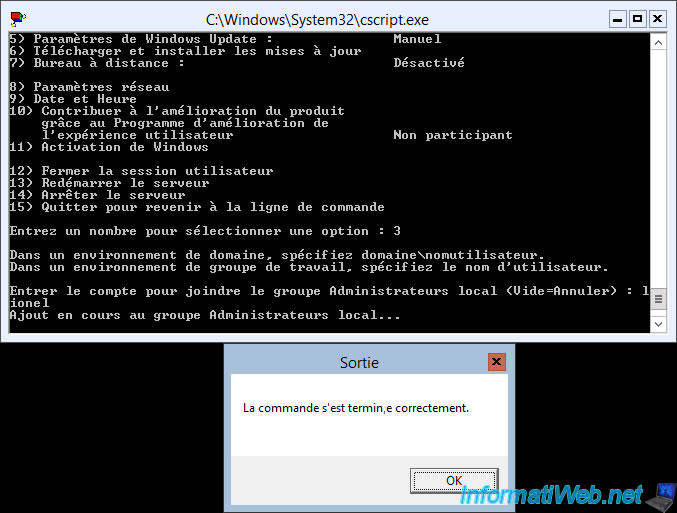
2.4. Add a local administrator
To add a local administrator, choose option 3 and specify the name of the user you want to create and add it to the "Administrators" group of the local server.

Then, type 2 times the password to be set for this user.
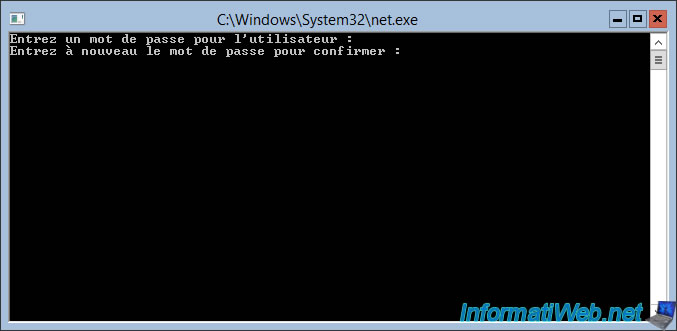
The account will be created and added to the local Administrators group.
2.5. Configure remote administration
Choose option 1 or 2 to enable or disable remote administration of this server.
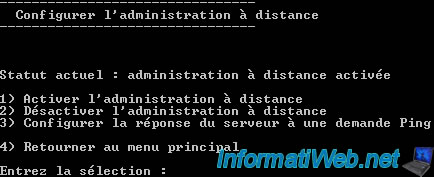
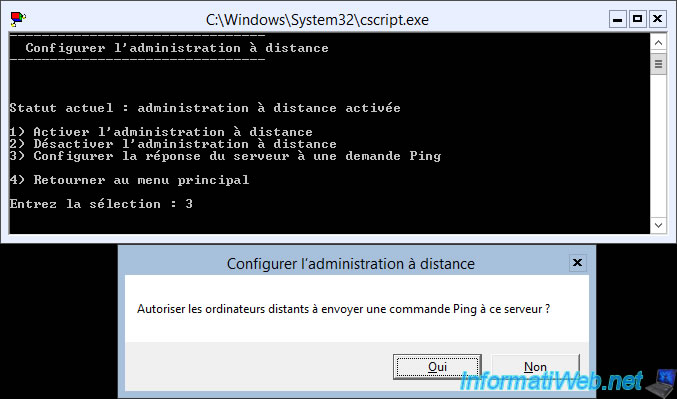
To allow or deny the server from ping, choose option 3 and answer Yes (allow) or No (reject) to the asked question.
In a test environment, it may be useful to allow the server to respond to ping.
But if your server is accessible from the outside, it's recommended to disable this option.
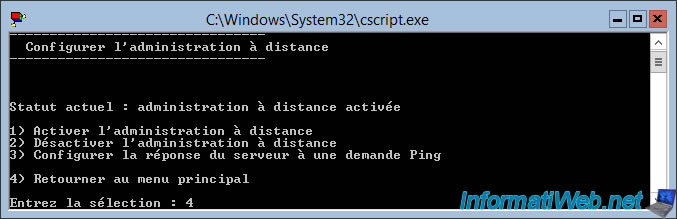
To return to the main menu, choose the option 4.
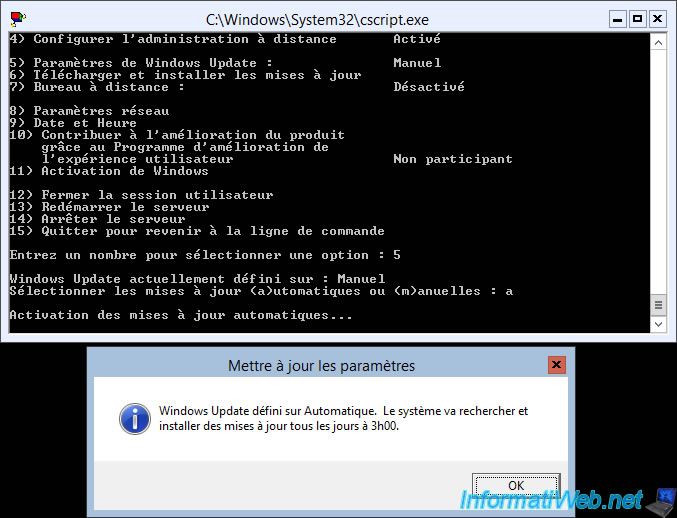
2.6. Enable or Disable Windows Update
To update your server, you have 2 possibilities :
- enable Windows Update
- check for updates manually
To enable Windows Update :
- choose option 5
- Type "a" to install the updates automatically
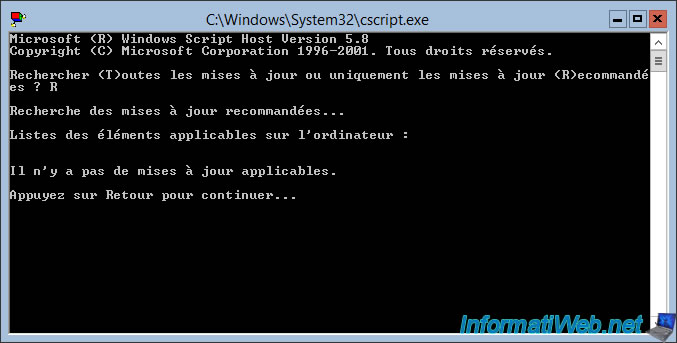
2.7. Check for updates manually
To check for updates manually, choose option 6.
Then, type "T" to search for all updates or "R" to search only for recommended updates.
Since there are fewer updates for the Core version of Windows Server, there may be little or no updates available at this time.
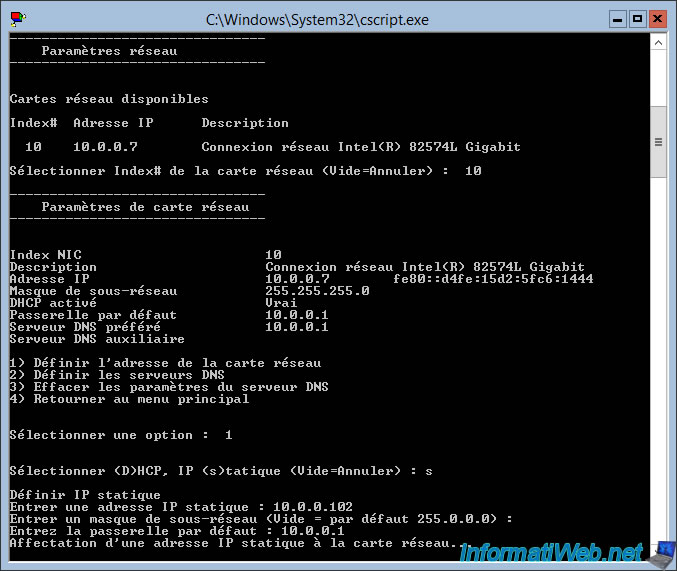
2.8. Configure the server's network adapter
To configure the server's network adapter, choose option 8.
Windows will display the network settings with the list of available network adapters.
In our case, our network card has ID 10.
To change the parameters of our network card, we type : 10.
Then, Windows Server will offer you to :
- set the Network Adapter Address : this is the IP address of the server, the subnet mask, and the IP address of the gateway (router) to use.
- set DNS Servers : these are the DNS servers that your server will use to resolve domain names to IP addresses. If you have an Active Directory server on your network, specify its IP address as the preferred (primary) DNS server.
- Clear DNS Server Settings
- Return to Main Menu
To begin, we will set a static IP address to our server.
To do this, we use the option 1, then we type "s" for static.
Then, we specify :
- a static IP address. For example : 10.0.0.102
- a subnet mask : by default, the subnet mask will be class A (as our IP address above). We press Enter to leave the default value.
- the IP address of our router for the default gateway to use.
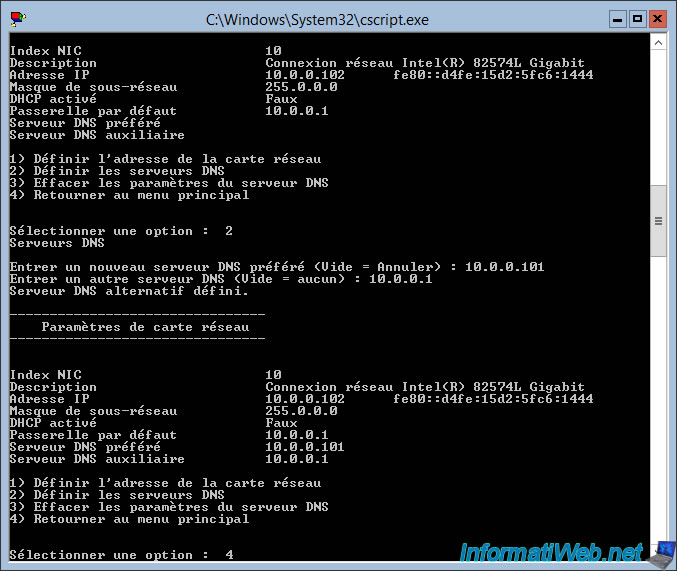
Then, we will use 2 DNS servers.
To do this, we choose option 2 and specify the IP address of our Active Directory server as the preferred DNS server.
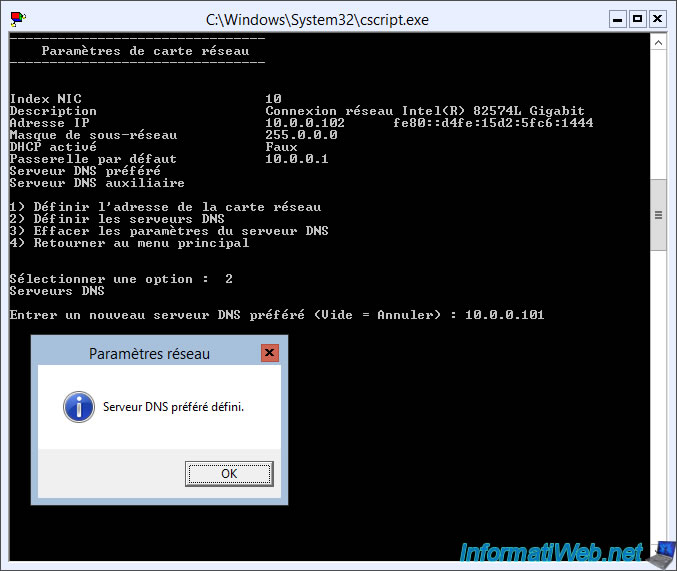
For the alternate (or secondary) DNS server, we will use the one in our router.
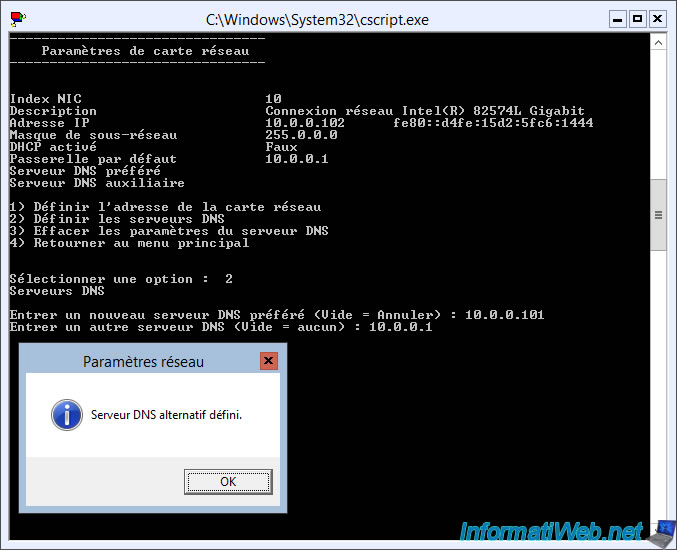
Finally, type 4 to return to the main menu.
Share this tutorial
To see also
-
Windows Server 11/16/2018
WS 2012 / 2012 R2 - Manage multiple Core servers remotely
-
Windows Server 11/23/2018
WS 2012 / 2012 R2 - Manage multiple Core servers remotely (Workgroup)
No comment